
Free STS - Improved version. Perfect parts list.


Free STS - Improved version. Perfect parts list.
Well, I did the STS mod today using a bolt and did not like the final version. I originally posted my results in the Free STS post, but decided this was worthy of a new post due to finding the perfect parts to make a perfect STS for less than $2 dollars.
So being bored on this wet Sunday evening, I went to Lowe's and found the exact part I needed for a DIYer STS.
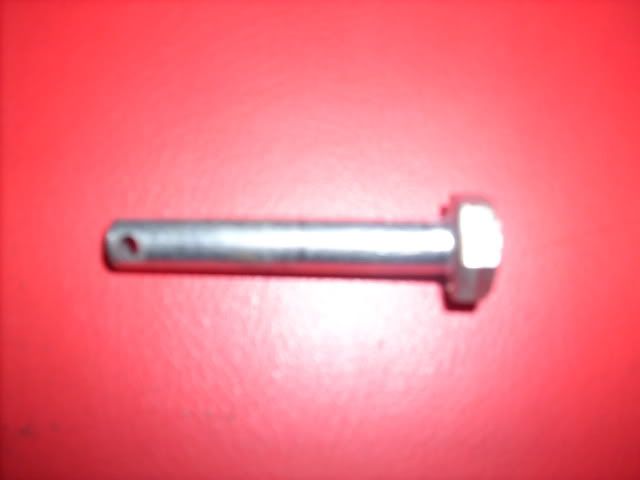
My original STS was done by drilling a 5/16 hole through the shifter arm and then cutting off the threaded part of a long 5/16 bolt and drilling a small hole for the cotter pin. It was a OK job, but I noticed the bolt allowed for a lil too much play with the shifter cable. Not pleased.
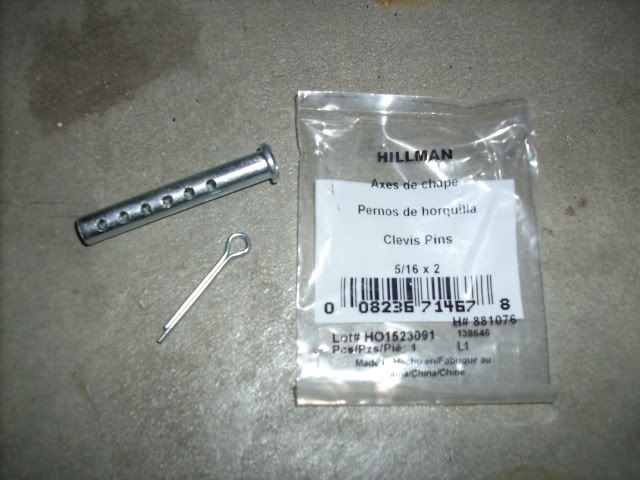
I picked this up from Lowe's. It is a 5/16x2 Clevis Pin. Just a slight bit bigger in diameter than the bolt and a perfect match to the factory shifter cable connector. Perfect match!
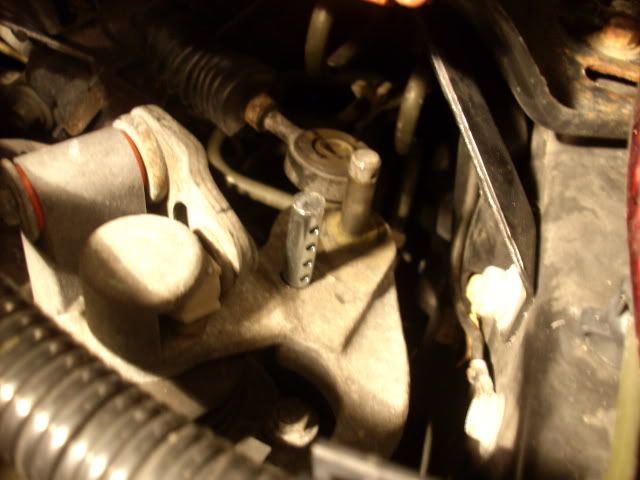
Here is the Clevis Pin installed from below. I had to tap it in place from under the car due to a very tight fit from surrounding items. Look at how it is the same exact height as the factory pin.
Here is the final install with factory pin in place. I originally was gonna use a cotter pin but decided to use the factory one instead. Easier to remove if needed.
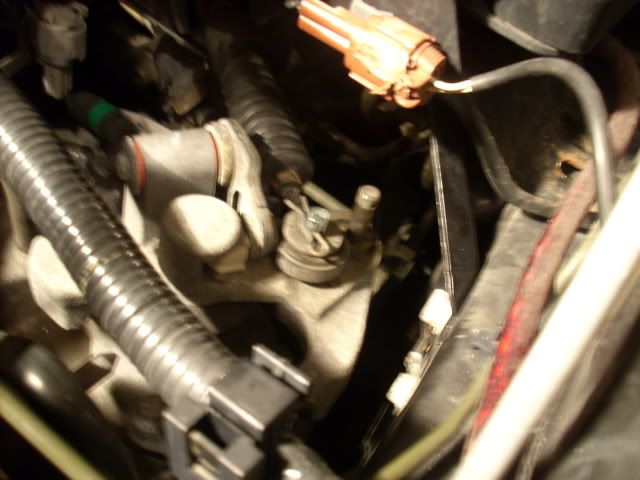
Only recommendation, which I am gonna do right now. Add another washer to take up the slack from the Clevis Pin moving up and down. Other than that...
...enjoy!
So being bored on this wet Sunday evening, I went to Lowe's and found the exact part I needed for a DIYer STS.
My original STS was done by drilling a 5/16 hole through the shifter arm and then cutting off the threaded part of a long 5/16 bolt and drilling a small hole for the cotter pin. It was a OK job, but I noticed the bolt allowed for a lil too much play with the shifter cable. Not pleased.
I picked this up from Lowe's. It is a 5/16x2 Clevis Pin. Just a slight bit bigger in diameter than the bolt and a perfect match to the factory shifter cable connector. Perfect match!
Here is the Clevis Pin installed from below. I had to tap it in place from under the car due to a very tight fit from surrounding items. Look at how it is the same exact height as the factory pin.
Here is the final install with factory pin in place. I originally was gonna use a cotter pin but decided to use the factory one instead. Easier to remove if needed.
Only recommendation, which I am gonna do right now. Add another washer to take up the slack from the Clevis Pin moving up and down. Other than that...
...enjoy!
Last edited by nismopc; Apr 20, 2009 at 09:30 AM.
5/16 bolt and/or 8mm bolt is not the correct diameter which allows for slack on the shifter cable. Atleast that was what I found out when I did it with the bolt first. It still allowed for unwanted movement which I would assume can cause sloppy shifting.
Plus no need to try and tap(thread) the drilled hole. Just push it in, attach cable, attach pin.
Plus no need to try and tap(thread) the drilled hole. Just push it in, attach cable, attach pin.
Last edited by nismopc; Apr 20, 2009 at 09:31 AM.


edited my post just for you...


Just looking into this mod (i have woken up since my earlier dumbass post)....
Heres the link to the part on the lowe's website.
http://www.lowes.com/lowes/lkn?actio...076&lpage=none
Although I havent done it yet, this has to be the best bang for the buck mod out there at $1.51.
Thanks for sharing the info nismopc. I was a little hesitant to do this because of the drilling part way and tapping the hole, etc. I will definitely do this now.
Thanks guys. I would recommend that you drill the hole a slight hair closer to the OEM pin as possible. This would alleviate having the issue of having to tap it in from the bottom. Super tight under there. You should be able to just slide it in at that point if measured properly.
Thanks guys. I would recommend that you drill the hole a slight hair closer to the OEM pin as possible. This would alleviate having the issue of having to tap it in from the bottom. Super tight under there. You should be able to just slide it in at that point if measured properly.


Member
Joined: Aug 2002
Posts: 251
The pin size mentioned on the Lowe's site (0.3125") is exactly 5/16". We can expect the not threaded pin to get loose after a while.
Last edited by boris; Apr 20, 2009 at 11:27 PM.
That is why I recommended tapping it on the clutch plate and drilling a small hole up top for the retainer clip. This way the bolt is always stationary and a lot more secure.
Is there another adhesive or another method (weld, solder, etc.) that could be used to secure it in the hole?
To address the pin getting loose after a while, do you guys think putting a bit of J.B. weld on the bottom of the pin (the part that will contact the plate)before putting it through the hole?
Is there another adhesive or another method (weld, solder, etc.) that could be used to secure it in the hole?
Is there another adhesive or another method (weld, solder, etc.) that could be used to secure it in the hole?
Read the prvious thread and reference http://forums.maxima.org/5th-generat...ree-sts-3.html (Post #107). No need for J.B. weld or anything other than tapping a new hole (similar to the original mod) and drilling small hole through the bolt (took me about an hour).

Last edited by rroderiques77; Apr 21, 2009 at 10:30 AM.
I was thinking in terms of avoiding tapping the hole (for those of use who do not have a tapping kit) and avoid drilling a hole through the 5/16" pin.
The pin here works perfectly (for $1.51 to boot) without all that extra work. I'm just trying to work out a possible problem that someone brought up.
Also, post #3 in this thread said that the 5/16" bolt is a bit small and allows for some play, where the clevis pin doesnt.
Last edited by vball_max; Apr 21, 2009 at 09:41 AM.
There is NO need for any type of threadlock or locktite. Look at the pictures. The Clevis Pin already has said holes and the pin is strong enough to hold. There is no play and I would almost guarantee there will be no play in the future either. Reason why I went with the Clevis Pin over the bolt. It is a true 5/16 diameter where the bolt is slightly smaller than that.
I was originally responding to boris' post #15. He seemed to think that the pin would come loose in the plate because it isnt threaded.
Also, the adhesive would keep the pin from moving up and down, like you stated at the end of the original post. You could do that instead of adding a washer.
It was just a thought.....I'll probably use it if I do this mod. It cant hurt.
Also, the adhesive would keep the pin from moving up and down, like you stated at the end of the original post. You could do that instead of adding a washer.
It was just a thought.....I'll probably use it if I do this mod. It cant hurt.
Has anyone figured out how much shorter the shift throw is? It might be kinda of hard to do, but I was curious. Also, has anyone with this mod shortened their shift lever also?


i know this is an old thread, but i kinda wanted to bump it so some of the new members can see it.
I did what was mentioned above (today), and it works like a charm, i was thinking to myself that i go thru gears relitively quick for how long they were. Well after doing this mod, those shifts seemed like i was granny shifting.
anyways BUMP for a badass helpful thread!
I did what was mentioned above (today), and it works like a charm, i was thinking to myself that i go thru gears relitively quick for how long they were. Well after doing this mod, those shifts seemed like i was granny shifting.
anyways BUMP for a badass helpful thread!

Well, the length of the throw is "adjustable", meaning that where you drill the hole will dictate how much shorter the throws are. You can go extremely short throws or barely shorter than stock. I have mine set up so its just a bit shorter than the shifters on the z/g (this is from memory, so I cant guarantee that).
Yes. I think there are threads around here somewhere. I did this a while back and its great. Cut a piece of the lever out and an equal length piece of the lockout sleeve. Had the shaft welded and used plastic weld on the sleeve. Acts just like stock except I got a little plastic weld on the shaft and now it sticks when you pull up the lockout
Yes. I think there are threads around here somewhere. I did this a while back and its great. Cut a piece of the lever out and an equal length piece of the lockout sleeve. Had the shaft welded and used plastic weld on the sleeve. Acts just like stock except I got a little plastic weld on the shaft and now it sticks when you pull up the lockout


thanks man.
i just got a 5 speed about 2 weeks ago.
dont know where to start. BUT that 18 wheeler long throwing shifter is a pita.
so ill be looking for this in a few days on a day off. will update!
i just got a 5 speed about 2 weeks ago.
dont know where to start. BUT that 18 wheeler long throwing shifter is a pita.
so ill be looking for this in a few days on a day off. will update!