
5th Gen: What did you do to your 5th Gen today?


Haven't been too active on the org lately, so here's an update of the last month. Switched from 3pc to 5pc spacers, an amature ssim by yours truly, 4" intake, NX Proton kit (currently on a 75 shot), and some other minor support mods for nitrous. Also did a home brew bumper plug job today as well. THIS IS VERY PIC HEAVY, I APOLOGIZE IN ADVANCE. What's the saying around here? Worthless without pics?


Junior Member
Joined: Nov 2009
Posts: 35
From: North Jersey, NJ
My resonator and muffler developed a sizable hole due to the insane northeast winters. Picked up a walker resonator and Quietflow SS muffler from advance. The old bolts were super rusted so I took it to a shop to cut them out. When I picked up the car I found the resonator was not installed, but instead the shopped welded in a glass pack because the pipe was still good. I was kinda pissed but the car feels great. Sound it essentially stock but somehow it just feels smoother, even under acceleration. Everything totaled to just $175. Quite happy now 😀


Over the weekend, replaced front sway bar bushings with ES units from Autozone. Significant improvement! Feels like I just installed an upgraded bar! Much flatter in corners! Should have done this cheap maintenance item a year ago.
Installed Racingline FSTB and changed out ignition key ring light bulb.
http://s90.photobucket.com/user/Jaso...fd9c1.jpg.html
http://s90.photobucket.com/user/Jaso...50e49.jpg.html
http://s90.photobucket.com/user/Jaso...fd9c1.jpg.html
http://s90.photobucket.com/user/Jaso...50e49.jpg.html
Installed Progress rear sway bar in a 2 Stella Artois time frame and washed the max up
http://forums.maxima.org/picture.php...ictureid=39748
http://forums.maxima.org/picture.php...ictureid=39747
http://forums.maxima.org/picture.php...ictureid=39746
http://forums.maxima.org/picture.php...ictureid=39744
and washed the max uphttp://forums.maxima.org/picture.php...ictureid=39748
http://forums.maxima.org/picture.php...ictureid=39747
http://forums.maxima.org/picture.php...ictureid=39746
http://forums.maxima.org/picture.php...ictureid=39744
on my 5.5 i swapped out my cloth seats for some frost gray heated seats wired them up and they're lovely also installed a heated steering wheel and everything next is to wire that up as well


Junior Member
Joined: Oct 2012
Posts: 26
Installed Progress rear sway bar in a 2 Stella Artois time frame and washed the max up http://forums.maxima.org/picture.php...ictureid=39748 http://forums.maxima.org/picture.php...ictureid=39747 http://forums.maxima.org/picture.php...ictureid=39746 http://forums.maxima.org/picture.php...ictureid=39744
and washed the max up http://forums.maxima.org/picture.php...ictureid=39748 http://forums.maxima.org/picture.php...ictureid=39747 http://forums.maxima.org/picture.php...ictureid=39746 http://forums.maxima.org/picture.php...ictureid=39744

Senior Member
Joined: May 2013
Posts: 1,440
From: Snakeden Branch, VA
Drove the Max properly. 
All of a sudden, a weak/frustrated youngster in uniform presented himself only to deliver sex and music to my ears:
"I was going 50, you were pulling away from me like I was standing still!"
All of a sudden, a weak/frustrated youngster in uniform presented himself only to deliver sex and music to my ears:
"I was going 50, you were pulling away from me like I was standing still!"


Front/Rear 04 valve covers/gaskets.
Oil Cooler O ring.
Metal/Rubber hoses that goes to the Oil Cooler.
New Lower Control Arms with Energy Suspension Bushings. Moog Sway Bar Endlinks. Energy Suspension Sway Bar Bushings.
Energy Suspension Subframe Bushings.
Moog Outer Tie Rods.
Oil Cooler O ring.
Metal/Rubber hoses that goes to the Oil Cooler.
New Lower Control Arms with Energy Suspension Bushings. Moog Sway Bar Endlinks. Energy Suspension Sway Bar Bushings.
Energy Suspension Subframe Bushings.
Moog Outer Tie Rods.

Joined: Apr 2014
Posts: 16
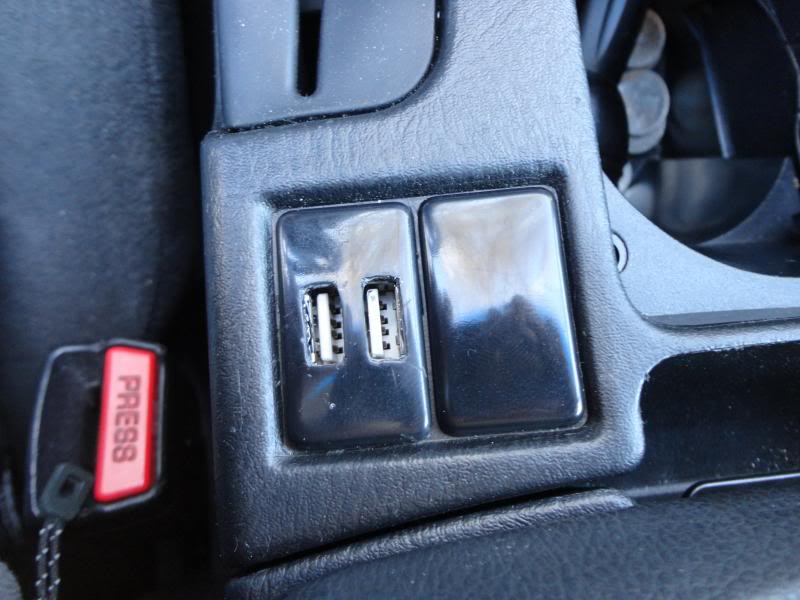
USB Charging Port
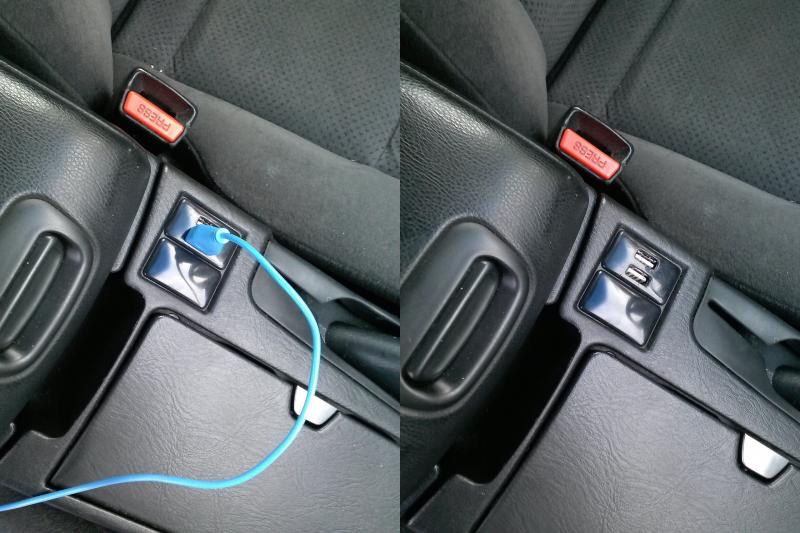
USB Charge port, not perfect but functional and great feature for the 2 bucks worth of material. Next ill be adding AUX in the blank space next to it. No more wires hanging from the radio.
Last edited by pl4life52; Apr 25, 2014 at 09:51 PM.

Attachment 5729
USB Charge port, not perfect but functional and great feature for the 2 bucks worth of material. Next ill be adding AUX in the blank space next to it. No more wires hanging from the radio.
USB Charge port, not perfect but functional and great feature for the 2 bucks worth of material. Next ill be adding AUX in the blank space next to it. No more wires hanging from the radio.
Definitely something I would be interested in doing with mine.
Joined: Apr 2014
Posts: 16
Very Simple to do.
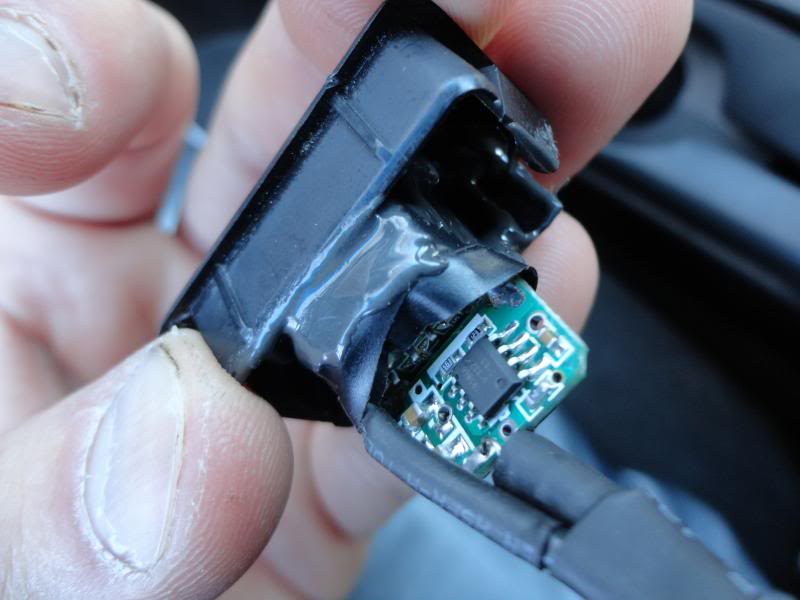
I ordered (2) 2 usb cigarette lighter plug ins. I ordered them from china because I was in no rush to do this $3 for two:
http://www.ebay.com/itm/221359009430...84.m1439.l2649
I burned one out hooking it up the wrong way") . Exact reason why I ordered two lol.
. Exact reason why I ordered two lol.
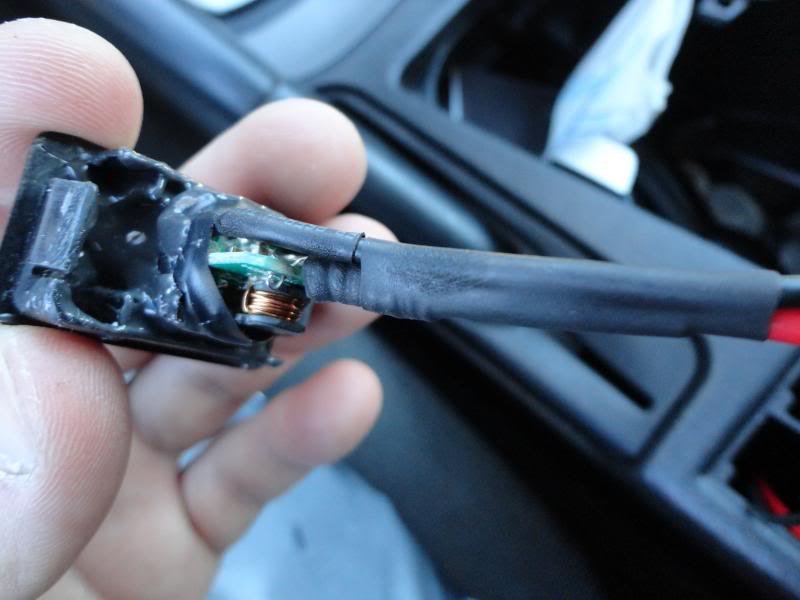
I then took a part the ordered cigarette plug in and took the usb plugs(guts) out and turned it upside down on the blank spots from the arm rest to draw out correct measurements.
Made markings trying to center as best as I can ( mine are a little off center), I left the middle slit in the blank spots because it looks cleaner then just a big hole ( my opinion)
Once I drew out the two rectangles I used a dremel tool to make the holes and tried cleaning it up as best as I could with the tools I had.
Once holes were made I wet sanded and buffed it (that's why its shiny)
I then put electrical tape around the aluminum part of the usb plug in so glue wouldn't get into ports. I then plugged in two usb devices to hold it in place, turned it upside down and started putting jb weld all around it.
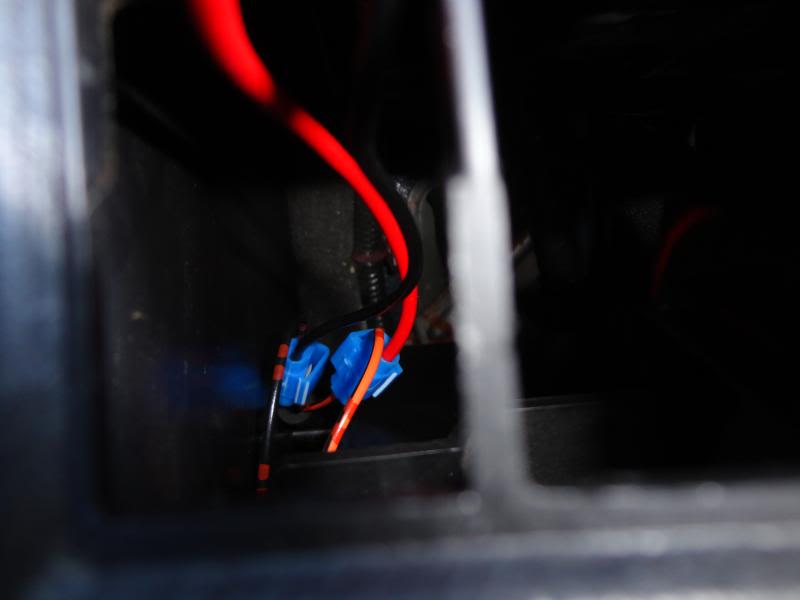
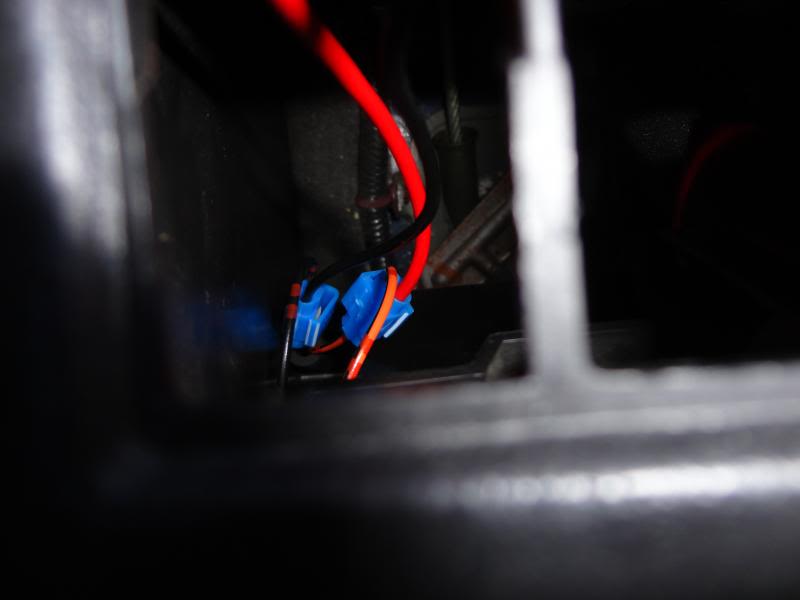
While waiting for glue to settle/semi dry (took about 20 mins) I took apart center console and tapped into the rear cigarette lighter wires for power. Make sure you put the wires through the hole before you tap them in I had to undo it like three times because I kept trying to rush it lol.
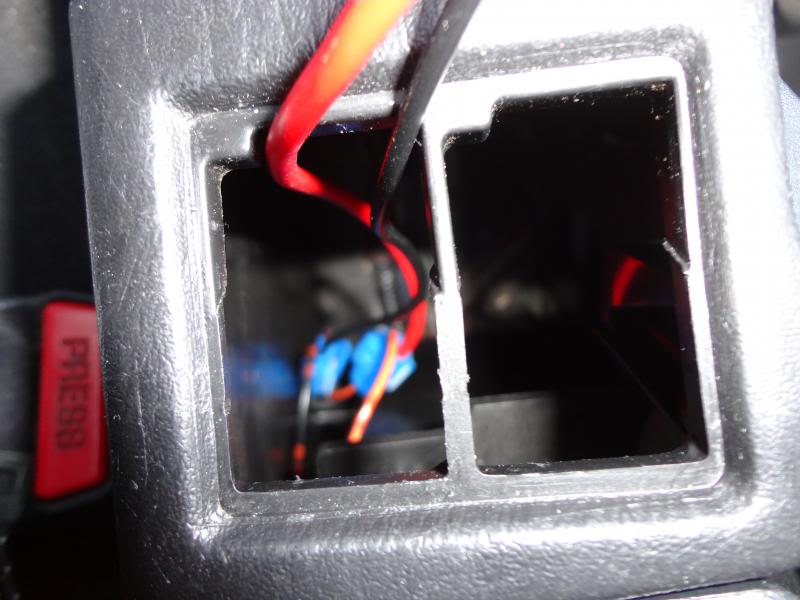
I popped the blank and usb back into the middle console and screwed it all back together.
Probably like an hour job if your taking your time. Took me a little longer because it was my first time taking the center console out and had to resolderer wires onto the second usb port.
Quick and painless
If you have any questions let me know and ill help you out. Glad you like it.
I ordered (2) 2 usb cigarette lighter plug ins. I ordered them from china because I was in no rush to do this $3 for two:
http://www.ebay.com/itm/221359009430...84.m1439.l2649
I burned one out hooking it up the wrong way
. Exact reason why I ordered two lol. I then took a part the ordered cigarette plug in and took the usb plugs(guts) out and turned it upside down on the blank spots from the arm rest to draw out correct measurements.
Made markings trying to center as best as I can ( mine are a little off center), I left the middle slit in the blank spots because it looks cleaner then just a big hole ( my opinion)
Once I drew out the two rectangles I used a dremel tool to make the holes and tried cleaning it up as best as I could with the tools I had.
Once holes were made I wet sanded and buffed it (that's why its shiny)
I then put electrical tape around the aluminum part of the usb plug in so glue wouldn't get into ports. I then plugged in two usb devices to hold it in place, turned it upside down and started putting jb weld all around it.
While waiting for glue to settle/semi dry (took about 20 mins) I took apart center console and tapped into the rear cigarette lighter wires for power. Make sure you put the wires through the hole before you tap them in I had to undo it like three times because I kept trying to rush it lol.
I popped the blank and usb back into the middle console and screwed it all back together.
Probably like an hour job if your taking your time. Took me a little longer because it was my first time taking the center console out and had to resolderer wires onto the second usb port.
Quick and painless
If you have any questions let me know and ill help you out. Glad you like it.

Decided to fix my snapped overdrive wires from when I tried attaching an anniversary edition shifter to my SE. **they do not work for the record. They use different 'shims' on top of the metal rod the shifter sits on. I was scared to cut mine off so I went to a junkyard and cut it off there... well the metal rods are different thicknesses.. so technically you could grind it til its thin enough to fit... but I didnt want to mess with such an important part on my own car so I just left the stock one on.
While I had the center console out I completed my led conversion by putting a blue led in the shift indicator
While I had the center console out I completed my led conversion by putting a blue led in the shift indicator

Senior Member
Joined: May 2010
Posts: 333
From: El Barrio N.Y.C
Attachment 5729
USB Charge port, not perfect but functional and great feature for the 2 bucks worth of material. Next ill be adding AUX in the blank space next to it. No more wires hanging from the radio.
USB Charge port, not perfect but functional and great feature for the 2 bucks worth of material. Next ill be adding AUX in the blank space next to it. No more wires hanging from the radio.
Very Simple to do.
I ordered (2) 2 usb cigarette lighter plug ins. I ordered them from china because I was in no rush to do this $3 for two:
http://www.ebay.com/itm/221359009430...84.m1439.l2649
I burned one out hooking it up the wrong way. Exact reason why I ordered two lol.
I then took a part the ordered cigarette plug in and took the usb plugs(guts) out and turned it upside down on the blank spots from the arm rest to draw out correct measurements.
Made markings trying to center as best as I can ( mine are a little off center), I left the middle slit in the blank spots because it looks cleaner then just a big hole ( my opinion)
Once I drew out the two rectangles I used a dremel tool to make the holes and tried cleaning it up as best as I could with the tools I had.
Once holes were made I wet sanded and buffed it (that's why its shiny)
I then put electrical tape around the aluminum part of the usb plug in so glue wouldn't get into ports. I then plugged in two usb devices to hold it in place, turned it upside down and started putting jb weld all around it.
While waiting for glue to settle/semi dry (took about 20 mins) I took apart center console and tapped into the rear cigarette lighter wires for power. Make sure you put the wires through the hole before you tap them in I had to undo it like three times because I kept trying to rush it lol.
I popped the blank and usb back into the middle console and screwed it all back together.
Probably like an hour job if your taking your time. Took me a little longer because it was my first time taking the center console out and had to resolderer wires onto the second usb port.
Quick and painless
If you have any questions let me know and ill help you out. Glad you like it.
I ordered (2) 2 usb cigarette lighter plug ins. I ordered them from china because I was in no rush to do this $3 for two:
http://www.ebay.com/itm/221359009430...84.m1439.l2649
I burned one out hooking it up the wrong way
. Exact reason why I ordered two lol. I then took a part the ordered cigarette plug in and took the usb plugs(guts) out and turned it upside down on the blank spots from the arm rest to draw out correct measurements.
Made markings trying to center as best as I can ( mine are a little off center), I left the middle slit in the blank spots because it looks cleaner then just a big hole ( my opinion)
Once I drew out the two rectangles I used a dremel tool to make the holes and tried cleaning it up as best as I could with the tools I had.
Once holes were made I wet sanded and buffed it (that's why its shiny)
I then put electrical tape around the aluminum part of the usb plug in so glue wouldn't get into ports. I then plugged in two usb devices to hold it in place, turned it upside down and started putting jb weld all around it.
While waiting for glue to settle/semi dry (took about 20 mins) I took apart center console and tapped into the rear cigarette lighter wires for power. Make sure you put the wires through the hole before you tap them in I had to undo it like three times because I kept trying to rush it lol.
I popped the blank and usb back into the middle console and screwed it all back together.
Probably like an hour job if your taking your time. Took me a little longer because it was my first time taking the center console out and had to resolderer wires onto the second usb port.
Quick and painless
If you have any questions let me know and ill help you out. Glad you like it.
Joined: Apr 2014
Posts: 16
Sorry guys I didnt take any pix while doing this. Hopefully the photos before will help you guys out. There are only two wires in the center console which are for back seat cig plug, just tap into those. I used the blue clips which you insert one wire and then the end of the new one and it creates a connection.


Senior Member
Joined: May 2013
Posts: 1,440
From: Snakeden Branch, VA
Replaced both axles, finally got it lowered on H&R's with KYB-GR2's, and replaced catback section with Megan Racing OE-RS. Shimmied the Megan under the cross-member so it doesn't hit.
Took all day but just went for a drive and it was a beautiful thing.
Pics if anyone interested
Took all day but just went for a drive and it was a beautiful thing.
Pics if anyone interested