
Help sealing tail lights


Thread Starter
Member
Joined: Nov 2006
Posts: 219
Help sealing tail lights
I need to reseal my taillights (water intrusion). I'd like to use black rtv silicone sealant/adhesive. Can I just put a thick layer of this over the original gummy type seal already in place? Would the RTV still cure on top of the original stuff?
Would I be better off removing that gummy seal from the factory? Any tips on getting it off?
Would I be better off removing that gummy seal from the factory? Any tips on getting it off?

I would personally take the old off as best you can. Try a razor blade. I had some leaks after I half assed a tail swap. Ended up removing and cleaning old stuff off and resealing. All good ever since.


^^good suggestion. Iv used this in the past years.
http://www.ebay.com/itm/Black-777-Bu...item2a1fdf27b8
http://www.ebay.com/itm/Black-777-Bu...item2a1fdf27b8
I prefer the tape:
http://www.theretrofitsource.com/acc...bber-glue.html
Can be purchased from home improvement stores as well.
http://www.theretrofitsource.com/acc...bber-glue.html
Can be purchased from home improvement stores as well.


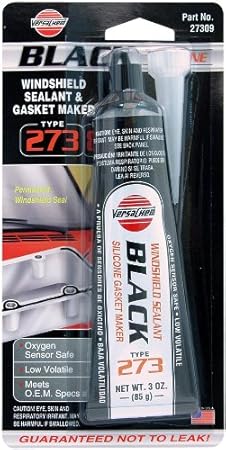
I use a windshield sealant of what ever brand I can get. This it the last one I used and it worked great. It is a little bit thinner than silicone and does not dry into a glue like silicone.
http://www.amazon.com/Versachem-2730.../dp/B0002KLBI8
You need to put on at least a 1/4" bead. Despite what others have said, I have never cleaned off the old sealer if it was the factory type.
http://www.amazon.com/Versachem-2730.../dp/B0002KLBI8
You need to put on at least a 1/4" bead. Despite what others have said, I have never cleaned off the old sealer if it was the factory type.

I just reused the factory gunk. If you kick out the lens evenly (yes, get in the trunk and use your foot lol) and it doesn't come apart weird (making it stringy and uneven all over), then you can reuse all of it or close to it. On one light I didn't need to add anything. On the other I just added some RTV in the gaps.
Of course, do this in the summer heat or heat it up, first.
Of course, do this in the summer heat or heat it up, first.
Last edited by Child_uv_KoRn; Aug 14, 2014 at 10:44 PM.
Thread Starter
Member
Joined: Nov 2006
Posts: 219
This job...
I estimate about 2-3 hours to remove ALL the factory gunk. I'm not taking any chances. Next job is sound deadening so I need this trunk to stay dry.
Here are some tips for anybody else doing this:
1. Use a plastic knife to scoop as much of the factory goo off as possible. A metal screwdriver is probably fine for the tail lights, but it will scratch the paint off the body. And in my case there was gunk on both the taillights and body of the car. AWESOME!!!
2. Get a stiff bristle tooth brush, coat it in some baby oil, and scrub at the rest of the junk. Wipe the brush on a rag to clean it between scrubbings.
3. Use paper towels to wipe away the liquid mess left by step 2.
4. Finish up with some degreaser before applying the new sealant. I chose a product called CRL 777 Butyl Rubber. I plan on laying it on THICK.
5. DO NOT forget to seal around the 4 bolt holes holding each light in. The factory rubber washers were deteriorated so I removed them.
Next up... Putting in my new trunk weather stripping. I really love this car. Test drove a newer accord, optima, sonata, and G37. Still not willing to part with my AE.
Thread Starter
Member
Joined: Nov 2006
Posts: 219
I just reused the factory gunk. If you kick out the lens evenly (yes, get in the trunk and use your foot lol) and it doesn't come apart weird (making it stringy and uneven all over), then you can reuse all of it or close to it. On one light I didn't need to add anything. On the other I just added some RTV in the gaps.
Of course, do this in the summer heat or heat it up, first.
Of course, do this in the summer heat or heat it up, first.

Thread
Thread Starter
Forum
Replies
Last Post
ballerchris510
3rd Generation Maxima (1989-1994)
9
Sep 10, 2015 09:35 PM
Maxima30
5th Generation Maxima (2000-2003)
2
Sep 7, 2015 06:13 PM
JoshG
4th Generation Maxima (1995-1999)
17
Sep 5, 2015 10:10 PM