
Aftermarket Door Lock Actuator Retrofit.


Thread Starter
Member
Joined: Dec 2010
Posts: 139
Aftermarket Door Lock Actuator Retrofit.
From what I've read, Nissan door lock actuators aren't the most reliable things in the world. This may be seen as a "hack job" to a few, since there is a little bit of hacking you have to do. But as these cars get older, I'm less inclined to spend big bucks and don't want to deal with annoyances if i can avoid it. My front passenger lock would electronically unlock but only make a clank noise when I attempted to electronically lock. I was tired of leaning over to lock the door manually every time I left my car so I did this.
Heres the write up. This won't include every step in exact detail but you'll be able to work it out as you do it.
Step 1: Remove the door panel. Extremely simple, there's instructions out there if you need to learn how. Just be careful with the trim ring around the handle.
Step 2: Peel back some of the moisture barrier starting from the upper rear corner. Remove the rear bolt of the metal protruding handle and loosen the front bolt so it swivels down and you can peel back more of the barrier. You'll only need to peel about half of it off of the rear of the door. I use a razor blade to cut the goo as I'm peeling so it comes off cleaner and less stringy.
Step 3: Get the actuator and mount it to the included rail. Then attach the rail to the bolt as shown in the picture. I had to expand the slot in the rail ever so slightly to fit the bolt for the door.
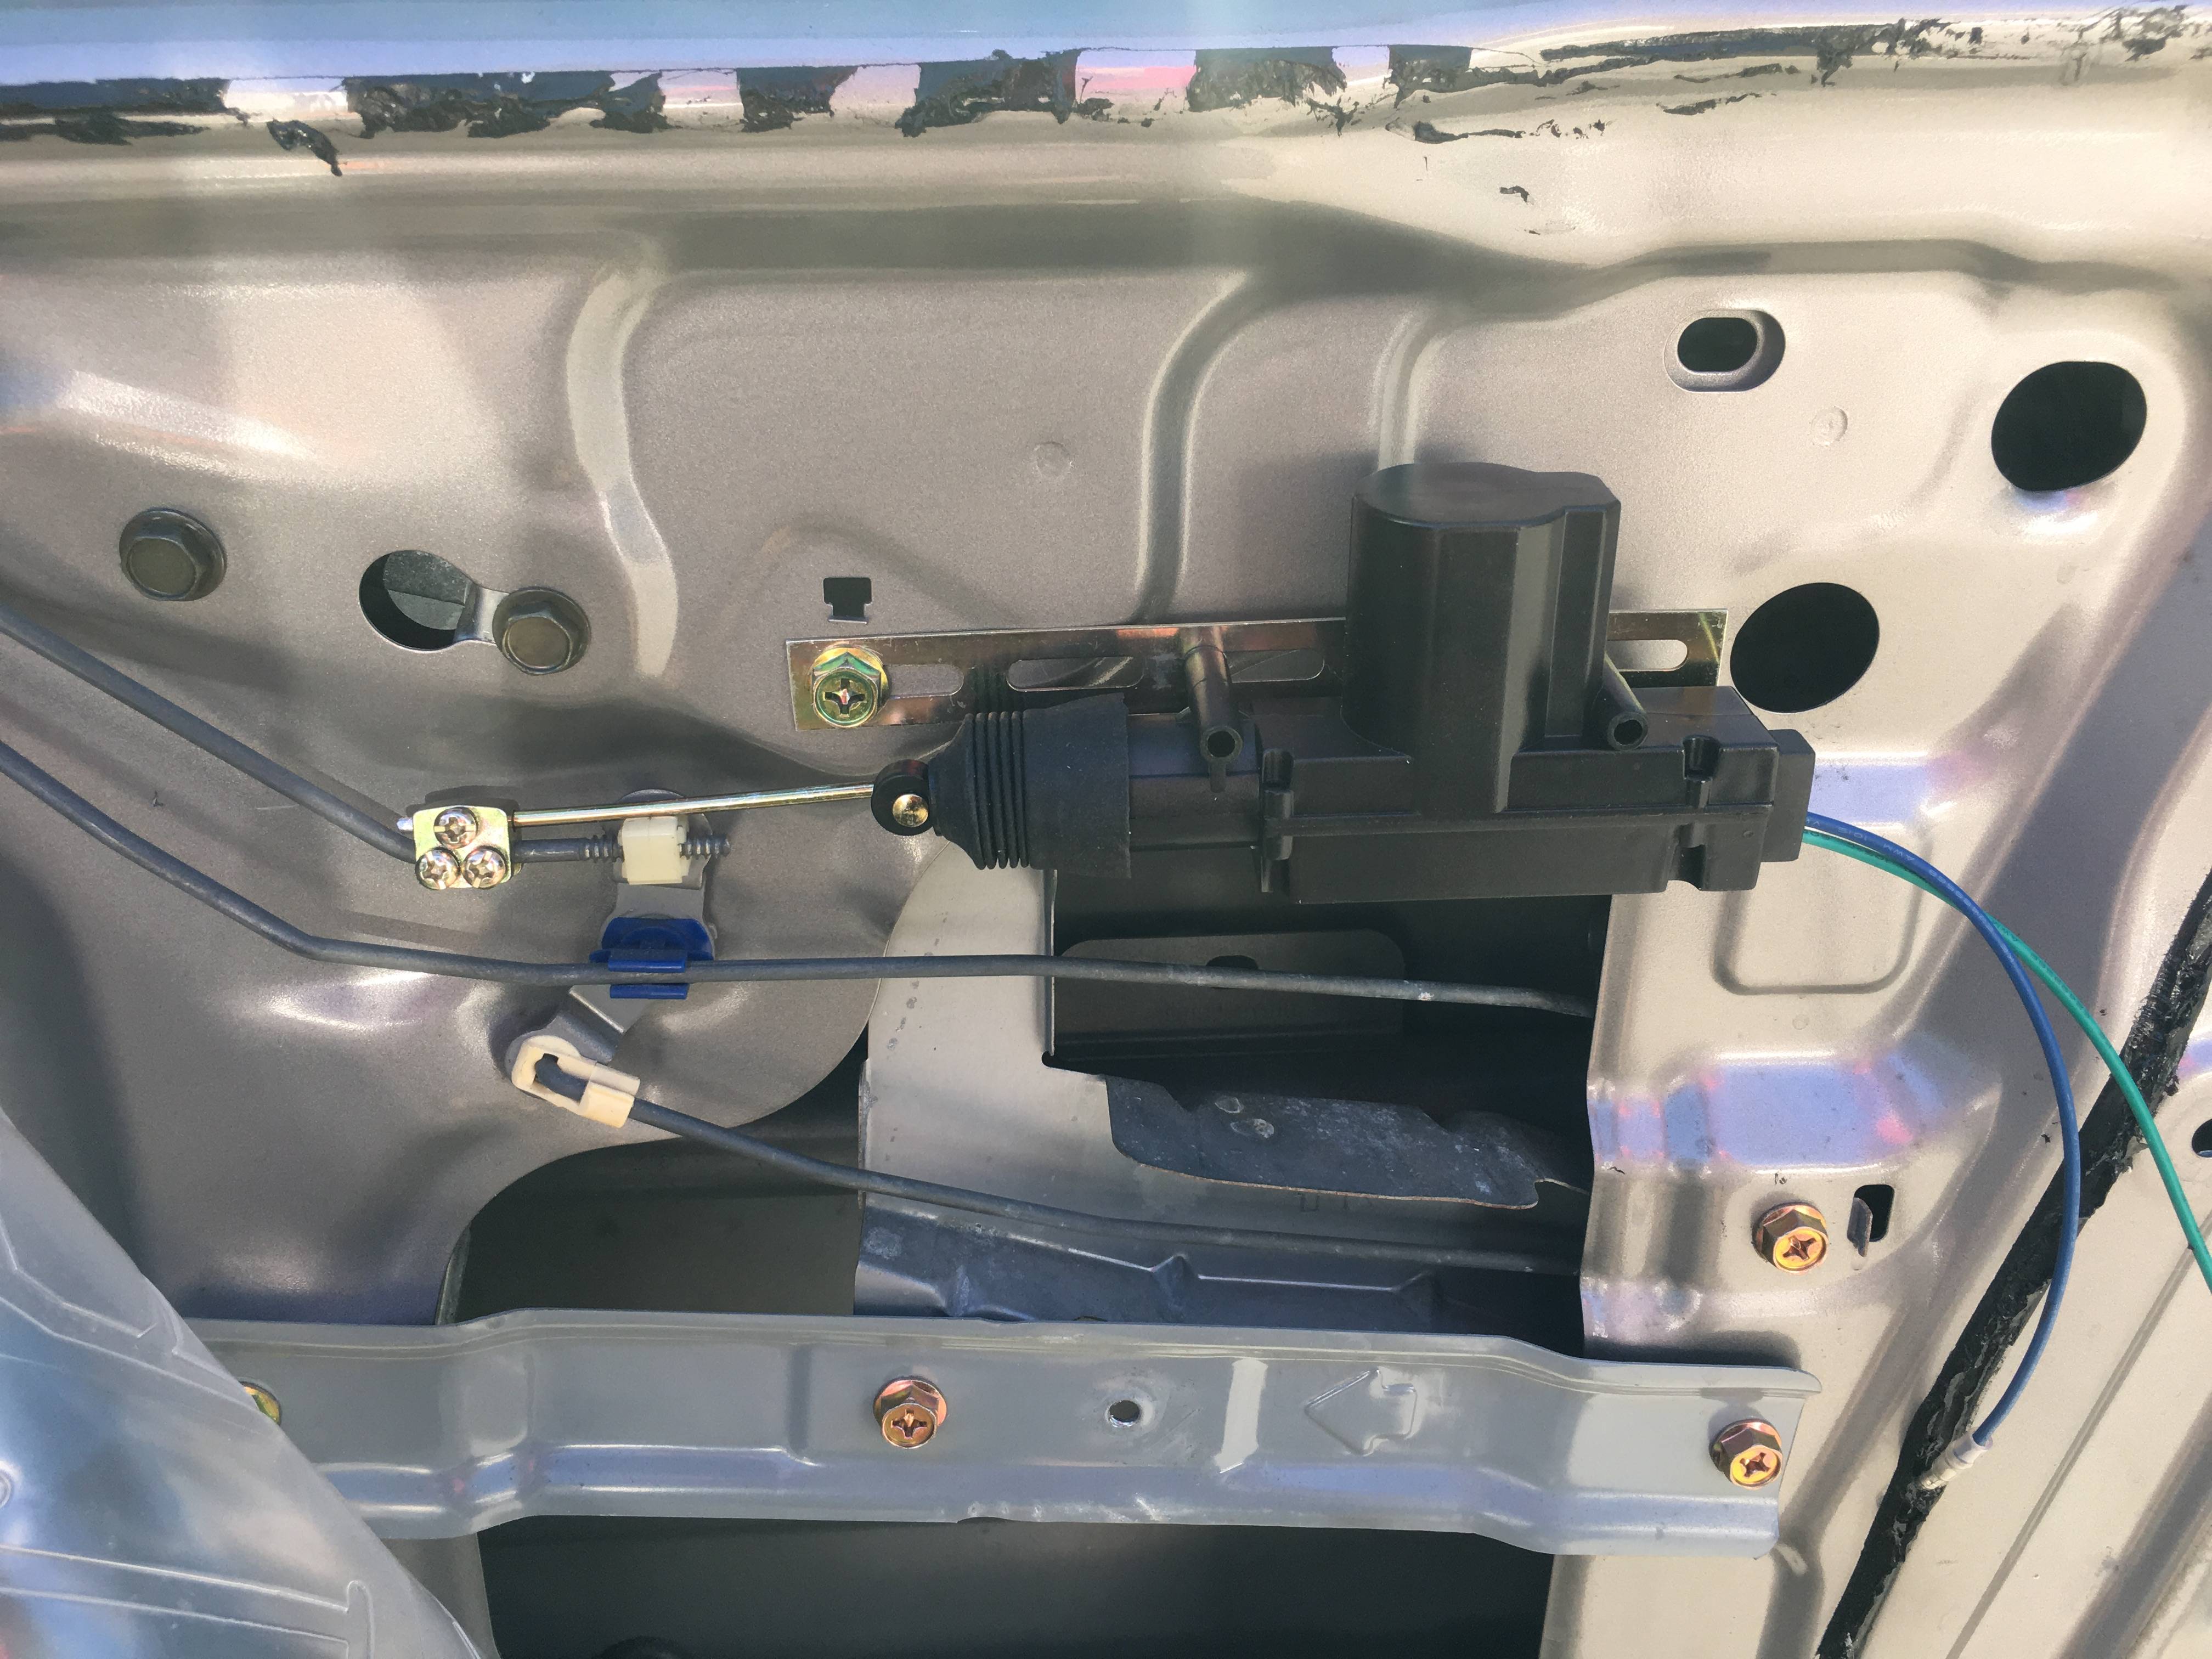
As you can see I also already cut the new actuator rod and attached it to the original locking rod. You can eyeball it, measure twice and cut once. Make sure it will fully reach to lock and unlock. You're already halfway there.
Step 4: This is probably the trickiest part. You have to unplug the original actuator to use the wires. You can also simply cut them and splice in your new actuator but I always like to do things cleanly and reversible.
rn3YvDg.jpg]
Here is after I removed the clip. Use a right angle pick and go in through the hole for the panel clip. I used the front camera of my phone and had it act as a mirror so I could see what I was doing. The release tab is facing the rear of the car and it's extremely tedious using the pick to depress it. Here's a picture I snapped of the connector.
The blue door panel clip was left behind when I took that picture. You put the pick into that hole. I managed to jam the pick into the plug just enough to depress the tab and then I could pull the connector down and out. If you don't have the patience then simply cut the wires.
Step 5: Since I didn't want to cut the wires, I removed them from the plastic connector. You pull a little orange piece out of the front of it and then you can release the wires from the plastic connector. It also happened to be that after I broke off the end of the bullet connector from the new actuator wires, that they fit snugly inside the wires coming from the door harness.
I don't have pictures of this but put simply, make the connection between the wires in the door and the wires of the actuator.
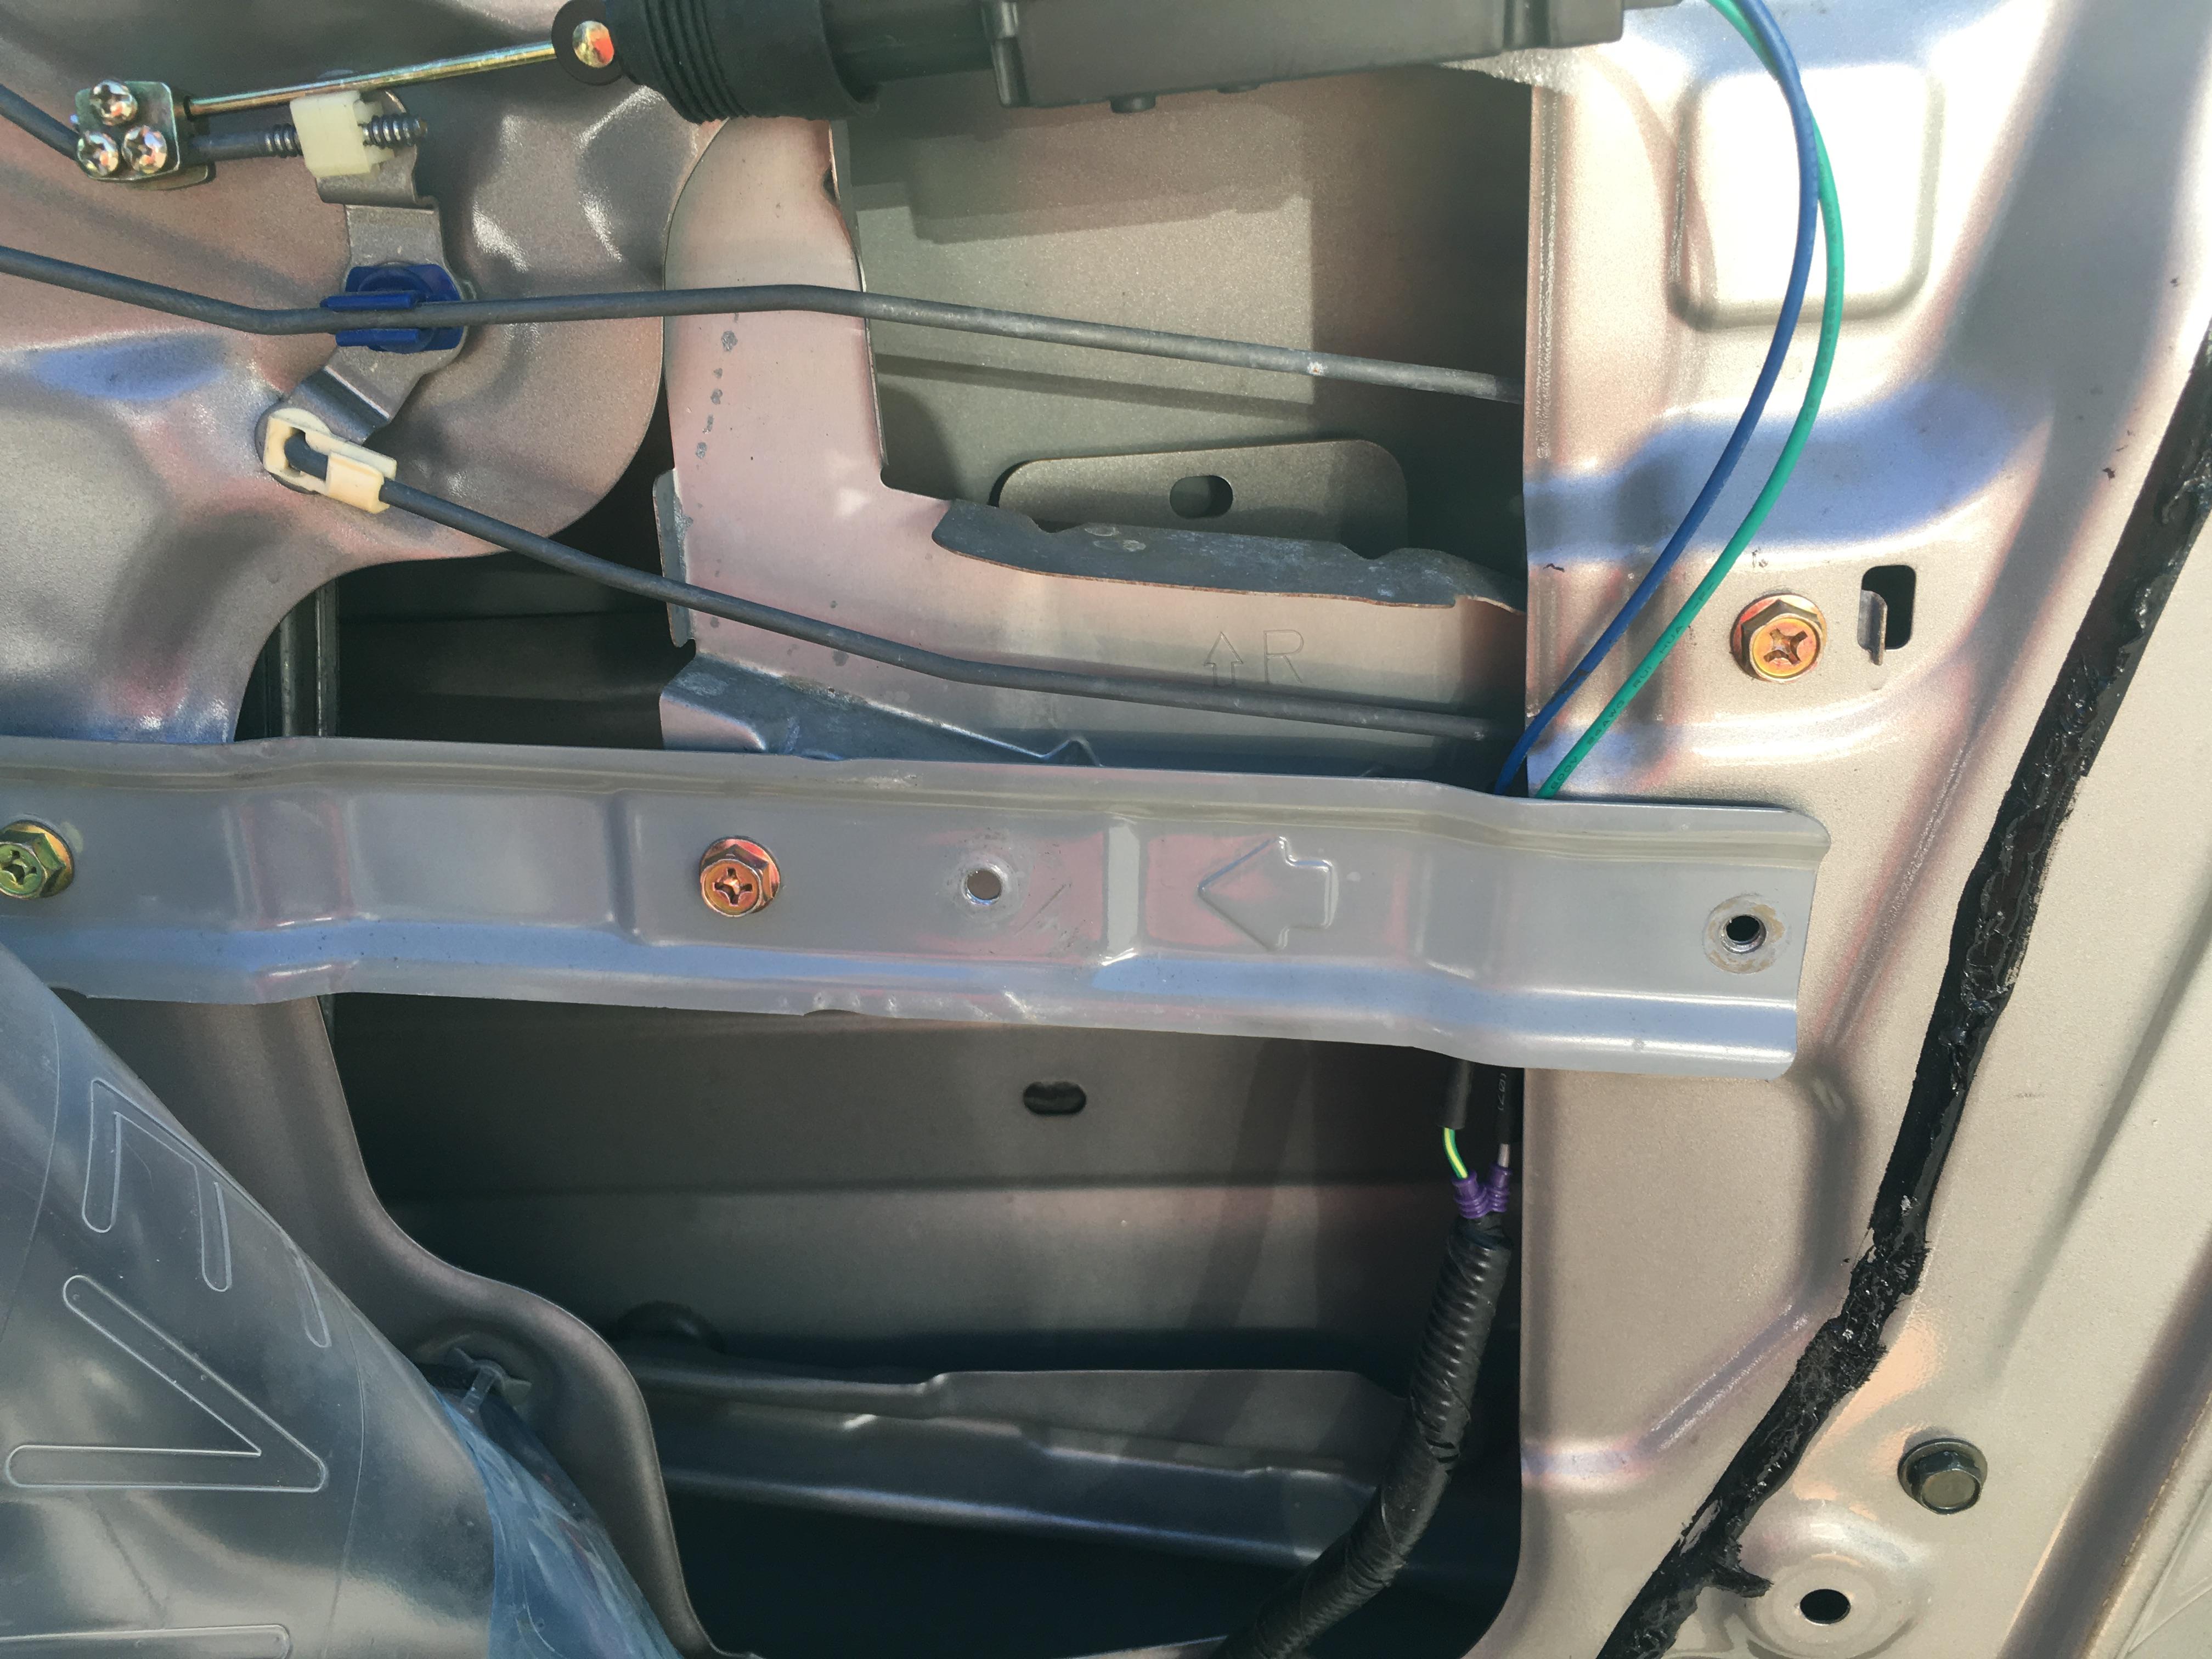
My wires ended up needing to be attached green to gray and blue to green. Plug the window switch back into the harness and test the lock. Once I got the polarity correct I put some heatshrink over the connectors. I removed one bolt from the inner door and tucked the wires behind the metal panel.
Now is also a good time to move the window up and down to make sure nothing touches. It shouldn't but it's always good to make sure.
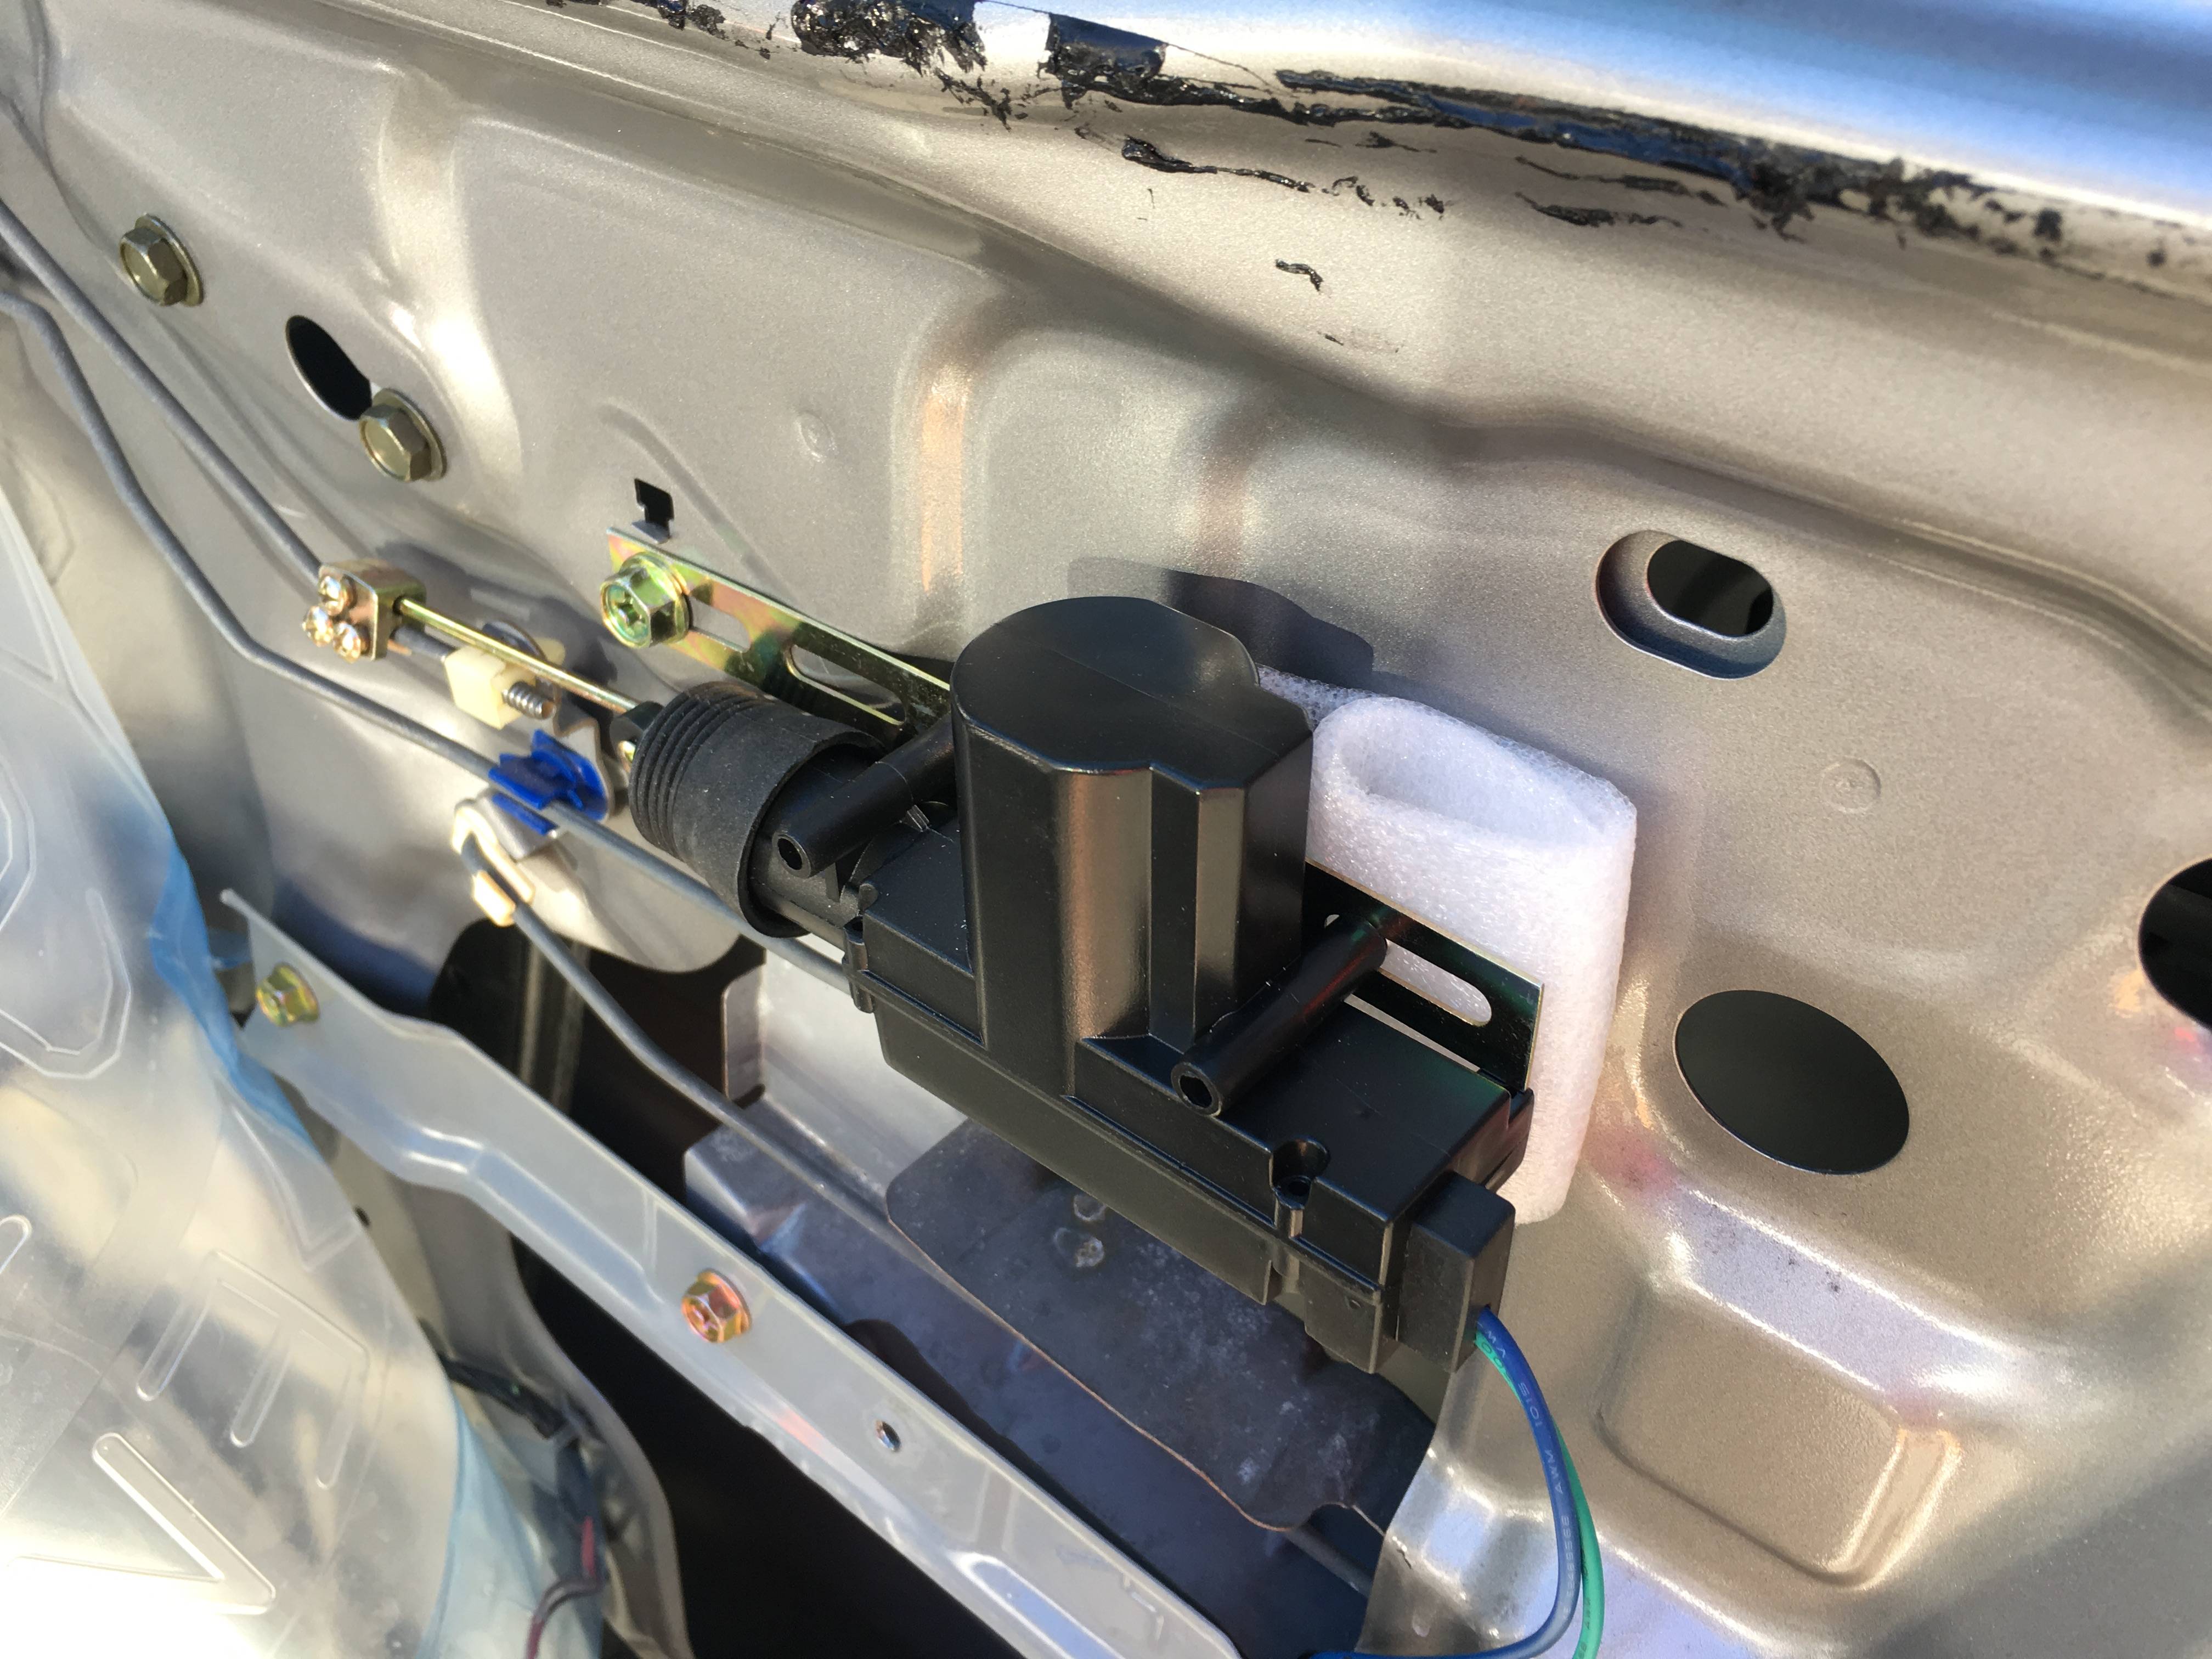
Step 6: I was testing the lock actuator and it worked great but I noticed it would slap the metal inner door since it was only mounted on one bolt and the torque would push it inward. I solved this by taping some foam it was shipped with in between the space. This may not be necessary and may contribute to clearance issues when you hang the panel back on but this is how I did it. A thinner piece of foam should be fine.
Step 7: Now you hack. Literally. Where the new actuator is now mounted, Nissan put some dense foam on the door panel in that area to make it more solid and block some noise. You have to remove some of this to make room and even then it will still touch slightly.
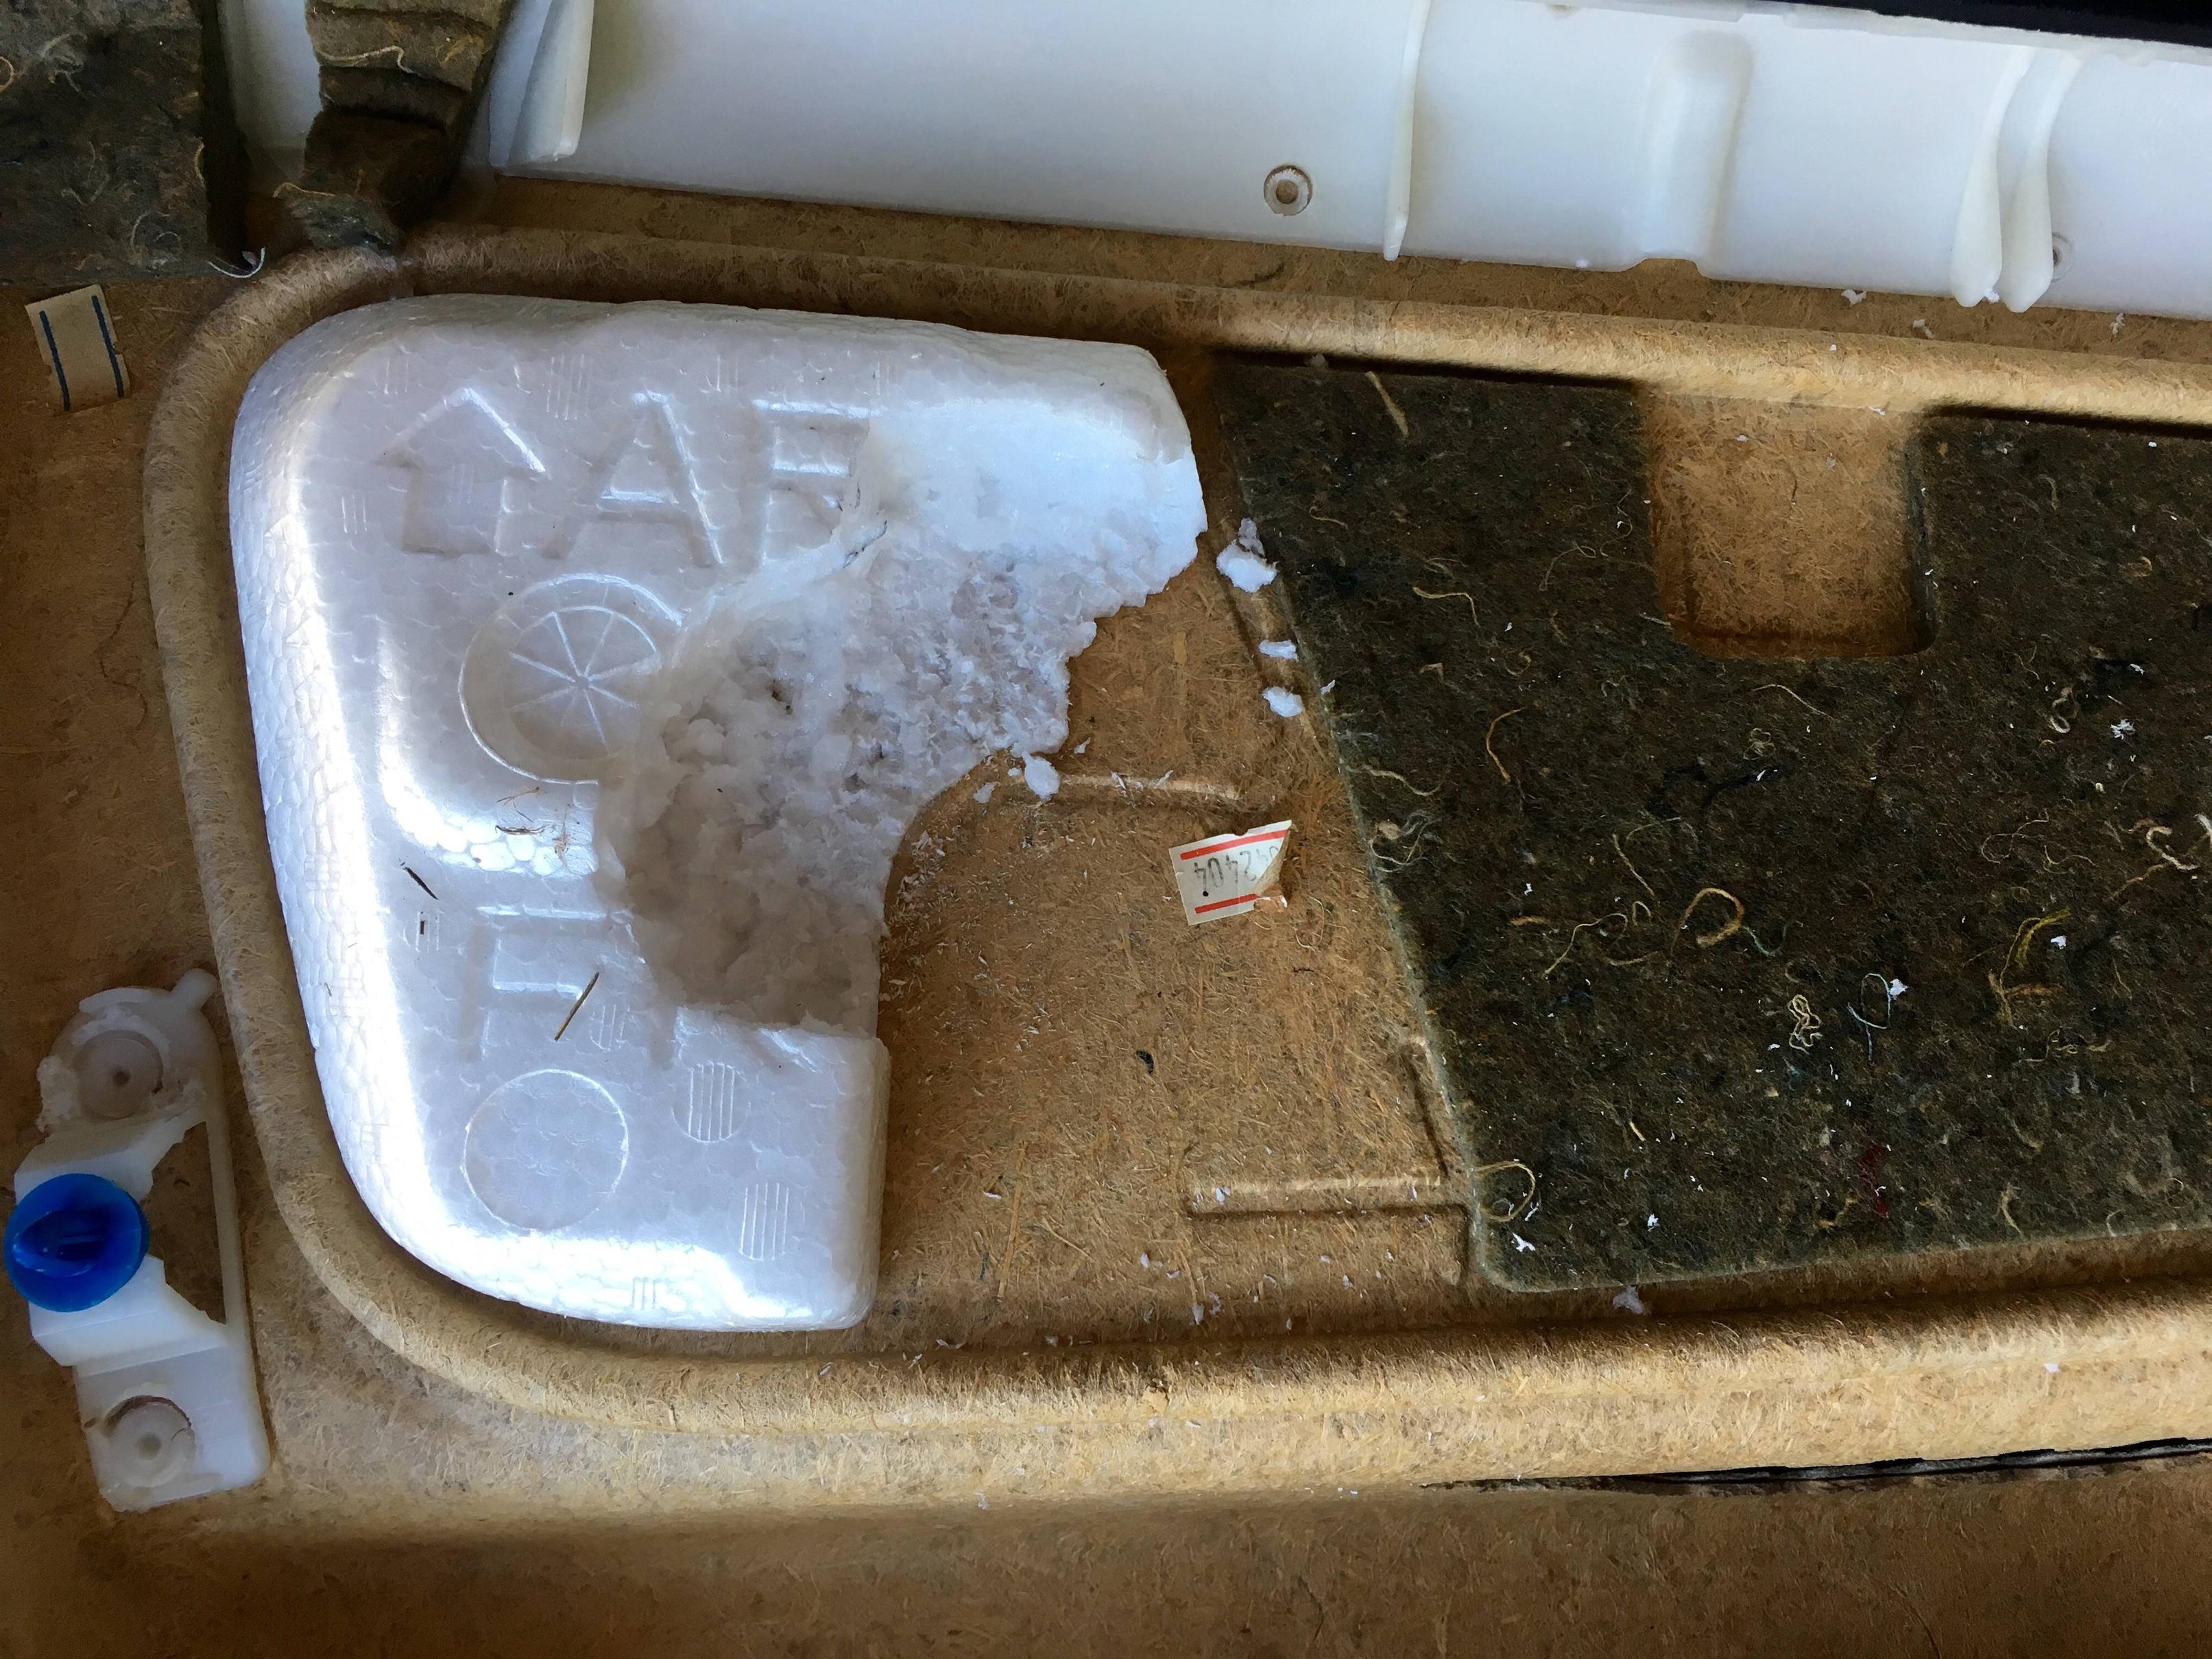
This is how much I had to remove to get it to fit. You could rip the whole foam block off but if Nissan put it there then I wanted to keep as much there as possible. Gently hang the door panel back in place and test fit to see if anything is touching. It won't sit completely flush as before but it is pretty close and for me this was good enough.
Step 8: Push the panel clips back into place and check it still works fine. Put the bolts back in and enjoy your working door lock again.
The two main reasons I went with aftermarket was because the original part is somewhat expensive and the process to replace it involves removing the glass. I didn't want to risk scratching my tint or screwing up the window regulator. My maxima is only my winter car so this is the route I went. I hope it helps someone out who simply wants their door locks to work again.
Heres the write up. This won't include every step in exact detail but you'll be able to work it out as you do it.
Step 1: Remove the door panel. Extremely simple, there's instructions out there if you need to learn how. Just be careful with the trim ring around the handle.
Step 2: Peel back some of the moisture barrier starting from the upper rear corner. Remove the rear bolt of the metal protruding handle and loosen the front bolt so it swivels down and you can peel back more of the barrier. You'll only need to peel about half of it off of the rear of the door. I use a razor blade to cut the goo as I'm peeling so it comes off cleaner and less stringy.
Step 3: Get the actuator and mount it to the included rail. Then attach the rail to the bolt as shown in the picture. I had to expand the slot in the rail ever so slightly to fit the bolt for the door.
As you can see I also already cut the new actuator rod and attached it to the original locking rod. You can eyeball it, measure twice and cut once. Make sure it will fully reach to lock and unlock. You're already halfway there.
Step 4: This is probably the trickiest part. You have to unplug the original actuator to use the wires. You can also simply cut them and splice in your new actuator but I always like to do things cleanly and reversible.
rn3YvDg.jpg]
Here is after I removed the clip. Use a right angle pick and go in through the hole for the panel clip. I used the front camera of my phone and had it act as a mirror so I could see what I was doing. The release tab is facing the rear of the car and it's extremely tedious using the pick to depress it. Here's a picture I snapped of the connector.
The blue door panel clip was left behind when I took that picture. You put the pick into that hole. I managed to jam the pick into the plug just enough to depress the tab and then I could pull the connector down and out. If you don't have the patience then simply cut the wires.
Step 5: Since I didn't want to cut the wires, I removed them from the plastic connector. You pull a little orange piece out of the front of it and then you can release the wires from the plastic connector. It also happened to be that after I broke off the end of the bullet connector from the new actuator wires, that they fit snugly inside the wires coming from the door harness.
I don't have pictures of this but put simply, make the connection between the wires in the door and the wires of the actuator.
My wires ended up needing to be attached green to gray and blue to green. Plug the window switch back into the harness and test the lock. Once I got the polarity correct I put some heatshrink over the connectors. I removed one bolt from the inner door and tucked the wires behind the metal panel.
Now is also a good time to move the window up and down to make sure nothing touches. It shouldn't but it's always good to make sure.
Step 6: I was testing the lock actuator and it worked great but I noticed it would slap the metal inner door since it was only mounted on one bolt and the torque would push it inward. I solved this by taping some foam it was shipped with in between the space. This may not be necessary and may contribute to clearance issues when you hang the panel back on but this is how I did it. A thinner piece of foam should be fine.
Step 7: Now you hack. Literally. Where the new actuator is now mounted, Nissan put some dense foam on the door panel in that area to make it more solid and block some noise. You have to remove some of this to make room and even then it will still touch slightly.
This is how much I had to remove to get it to fit. You could rip the whole foam block off but if Nissan put it there then I wanted to keep as much there as possible. Gently hang the door panel back in place and test fit to see if anything is touching. It won't sit completely flush as before but it is pretty close and for me this was good enough.
Step 8: Push the panel clips back into place and check it still works fine. Put the bolts back in and enjoy your working door lock again.
The two main reasons I went with aftermarket was because the original part is somewhat expensive and the process to replace it involves removing the glass. I didn't want to risk scratching my tint or screwing up the window regulator. My maxima is only my winter car so this is the route I went. I hope it helps someone out who simply wants their door locks to work again.


![rn3YvDg.jpg]](https://maxima.org/forums/attachments/5th-generation-maxima-2000-2003/59649d1683051132-aftermarket-door-lock-actuator-retrofit-rn3yvdg.jpg)
Thanks for the write up! Just recently started having the exact same issue on the drivers door of my 02 max. Power locks work to unlock it but when trying to lock it just a loud snap, I have to manually lock the door.