
6.5 Gen Xenon Projector Retrofit How-To


Thread Starter
Member
Joined: Jan 2007
Posts: 82
6.5 Gen Xenon Projector Retrofit How-To
I have had some people ask me for pictures of how I put the e55 bi-xenon projectors into my halogen housings. I haven't been able to until this morning when I had to take one of them apart because of some condensation. I'm not very good at how-to's but maybe the pictures will help explain a little better. Just to be clear, I did this on my 2007 Maxima. I'm sure that the older 6th gen's would basically be the same but I am not certain.
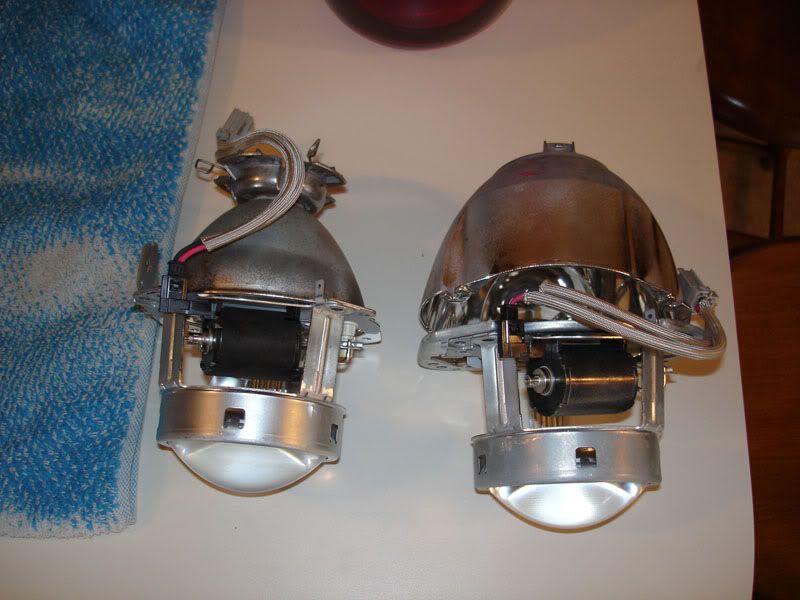
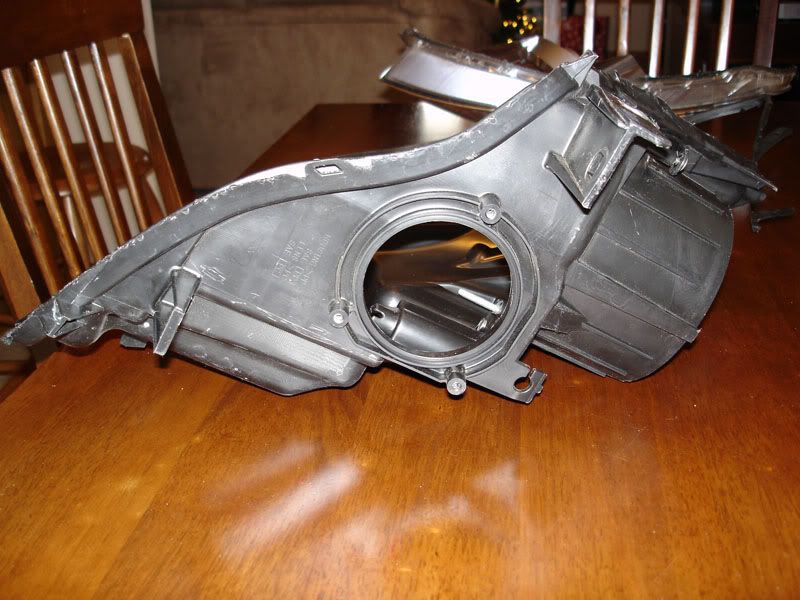
Step 1 - Follow the instructions for baking your headlight open. You have to seperate the lens from the rest of the headlight because the halogen projector is huge and won't come out any other way. Here is a comparison picture of the 2 projectors. e55 bi-xenon on the left, halogen on the right.
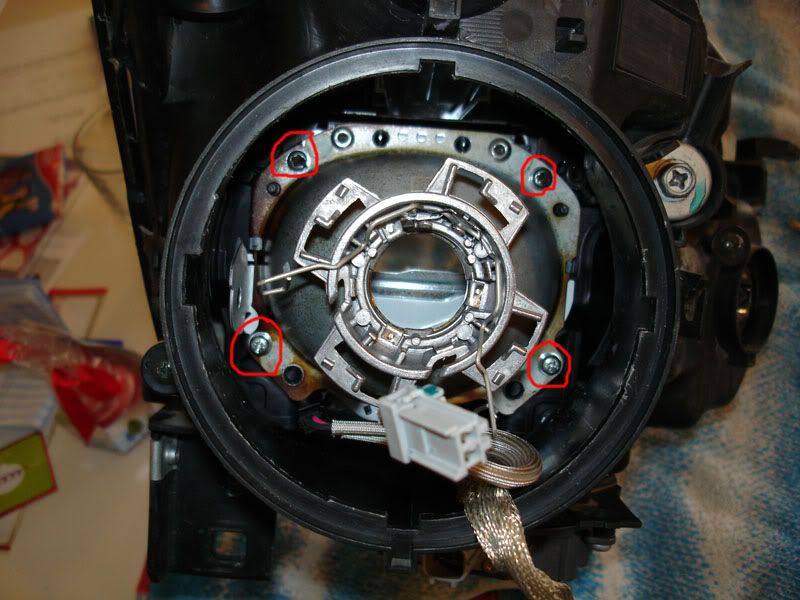
Step 2 - Once the assembly and the lens have been seperated, you need to remove the 4 silver screws holding the halogen projector in. This picture is of the bi-xenon projector but the screws are in the exact same location. They are removed from the backside of the headlight.
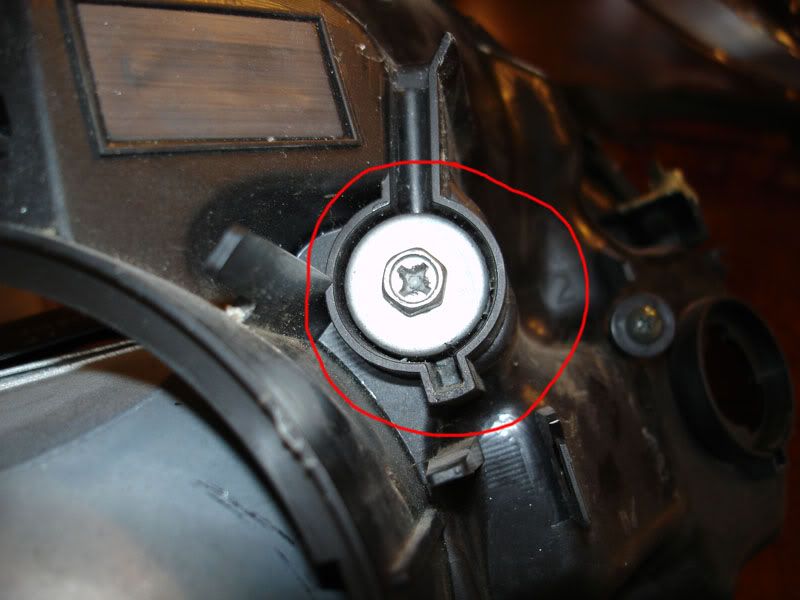
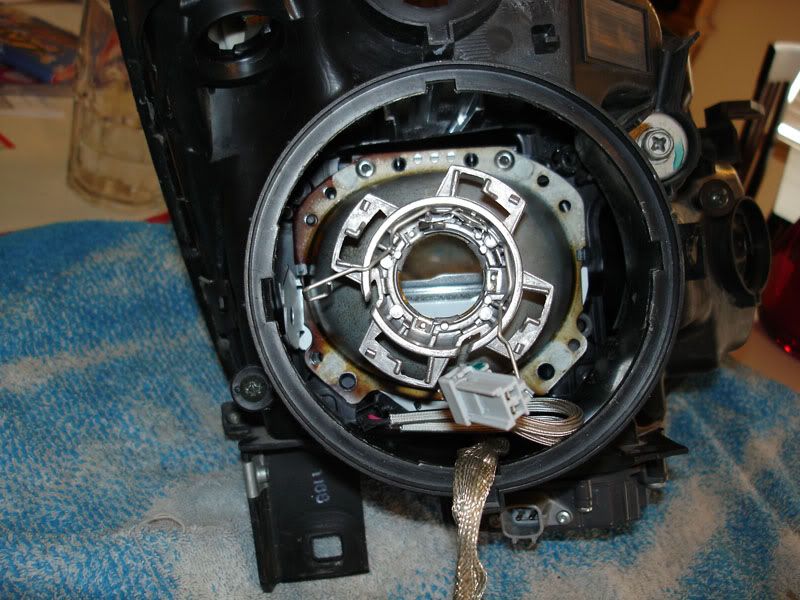
Step 3 - Using a phillips head screw driver, turn the adjustment **** to the left until it is completely unscrewed from the bracket that holds the projector in place.
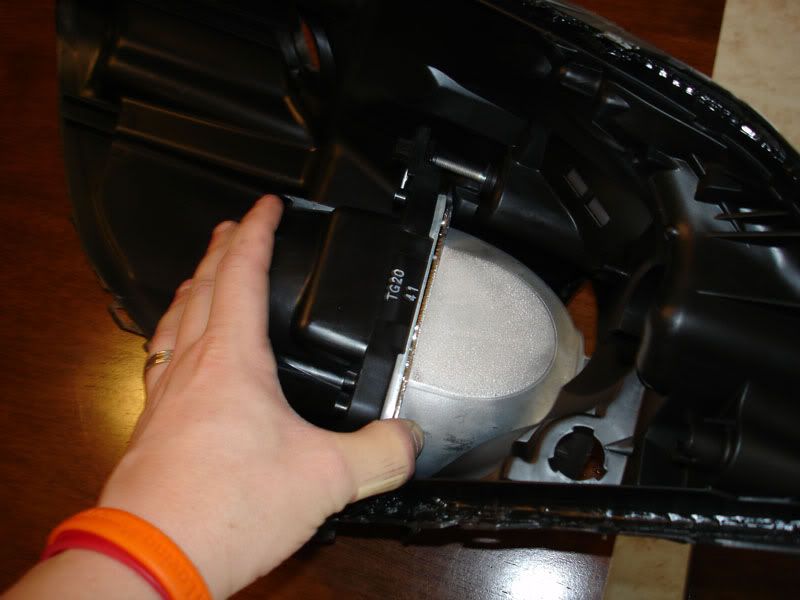
Step 4 - With the adjustment screw completely loosened, the bracket is able to be leaned forward giving you enough room to lift the halogen projector out.
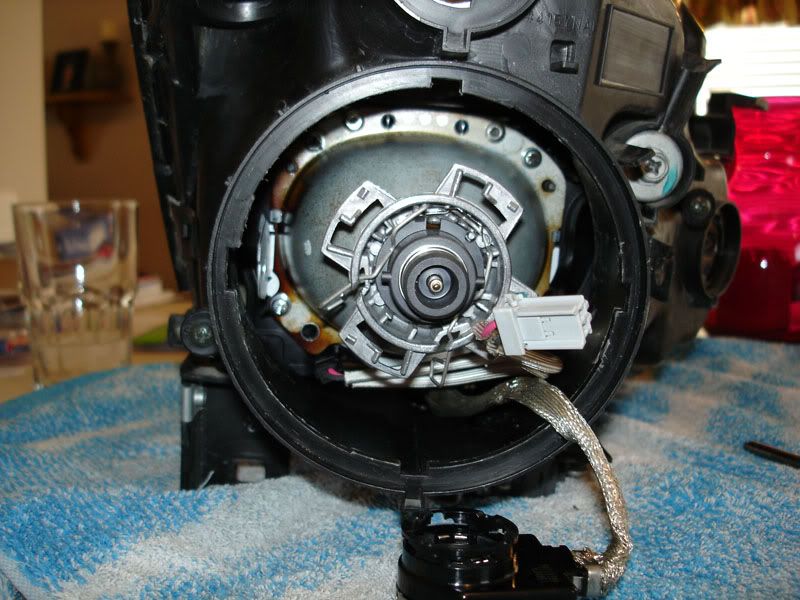
Step 5 - Now that the halogen projector is out, you can put the bracket back in place and tighten the adjustment screw so it is held securely.
Step 6 - This step is only necessary if you are using the OEM Matsu****a ballasts. Cut a hole on the bottom side of the headlight assembly where the ballast mounts to so the wires can be ran.
Step 1 - Follow the instructions for baking your headlight open. You have to seperate the lens from the rest of the headlight because the halogen projector is huge and won't come out any other way. Here is a comparison picture of the 2 projectors. e55 bi-xenon on the left, halogen on the right.
Step 2 - Once the assembly and the lens have been seperated, you need to remove the 4 silver screws holding the halogen projector in. This picture is of the bi-xenon projector but the screws are in the exact same location. They are removed from the backside of the headlight.
Step 3 - Using a phillips head screw driver, turn the adjustment **** to the left until it is completely unscrewed from the bracket that holds the projector in place.
Step 4 - With the adjustment screw completely loosened, the bracket is able to be leaned forward giving you enough room to lift the halogen projector out.
Step 5 - Now that the halogen projector is out, you can put the bracket back in place and tighten the adjustment screw so it is held securely.
Step 6 - This step is only necessary if you are using the OEM Matsu****a ballasts. Cut a hole on the bottom side of the headlight assembly where the ballast mounts to so the wires can be ran.
Thread Starter
Member
Joined: Jan 2007
Posts: 82
continued...
Step 7 - Make sure any plastic shavings are cleaned out of the assembly and put the lens back on following the headlight baking instructions.
Step 8 - (This is for OEM ballast intall) Run the ignitor wire through the back of the housing and down through the hole you made at the bottom of the headlight.
Step 9 - Connect the ignitor to the ballast and then screw the ballast into place.

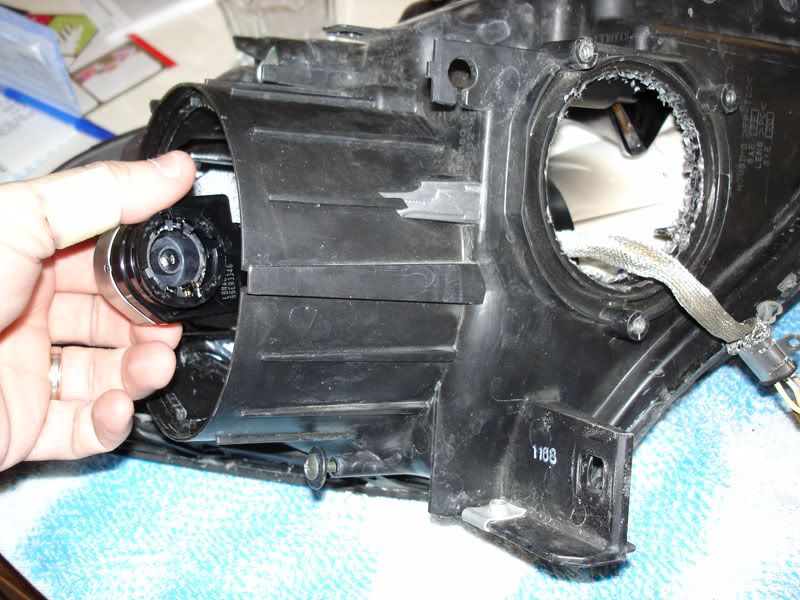
Step 10 - Now it's time to put the e55 bi-xenon projector into place. It goes in through the opening on the back of the assembly very easily.
Step 11 - Screw the projector to the mounting bracket using the same holes and screws from the halogen projector.
Step 12 - Install the d2s bulb, hook up the bi-xenon solenoid wire, reinstall the dust cover, install the rest of the bulbs and put the wiring harness back in place.
Do the same for the other side and you will have much more reliable and better lighting than just throwing in a HID kit into your halogen projectors. Hope this was some help to you all.
Step 8 - (This is for OEM ballast intall) Run the ignitor wire through the back of the housing and down through the hole you made at the bottom of the headlight.
Step 9 - Connect the ignitor to the ballast and then screw the ballast into place.
Step 10 - Now it's time to put the e55 bi-xenon projector into place. It goes in through the opening on the back of the assembly very easily.
Step 11 - Screw the projector to the mounting bracket using the same holes and screws from the halogen projector.
Step 12 - Install the d2s bulb, hook up the bi-xenon solenoid wire, reinstall the dust cover, install the rest of the bulbs and put the wiring harness back in place.
Do the same for the other side and you will have much more reliable and better lighting than just throwing in a HID kit into your halogen projectors. Hope this was some help to you all.


Senior Member
Joined: Apr 2006
Posts: 966
From: Houston, TX
I'm so glad you posted this... I just got my projectors, ballasts and bulbs in today.. what a great and thoughtful gift.... Mewwy Kwimmus to me!!!
I was looking at the lights this morning and was like I dont know how I'm gonna do this, I'm glad I came to the forums.. I'll post pics later!
ONE QUESTION: How do you bake the headlights? I wasnt aware you had to do that.
C L BEANS!
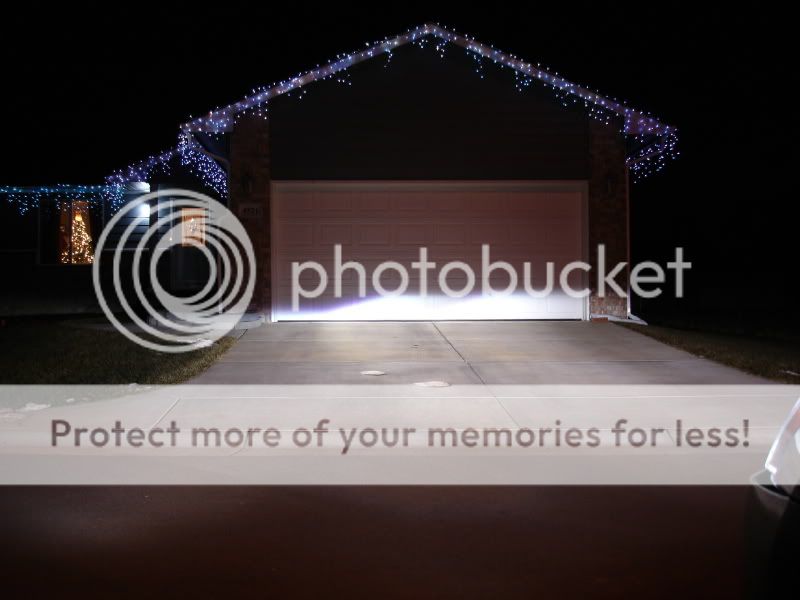
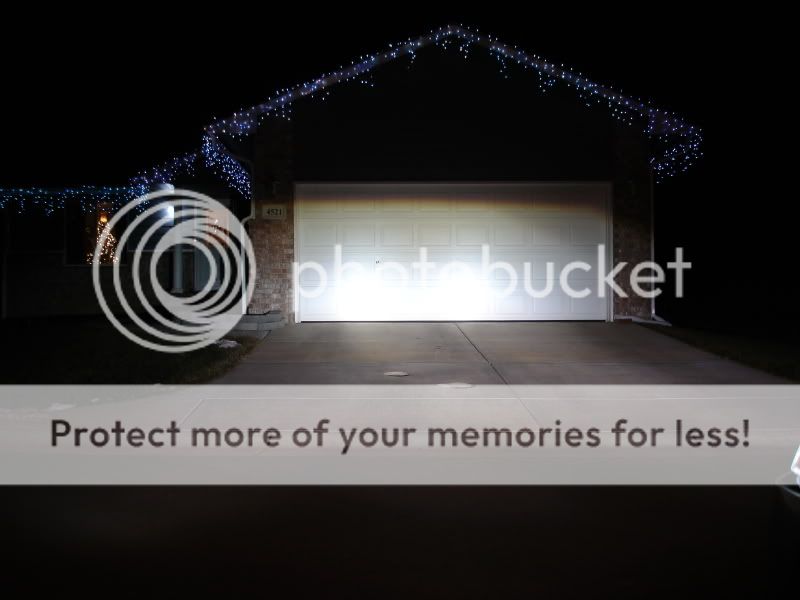
I LOVE THE LED LIGHTS ON THE HOUSE... AMAZING WHAT TECHNOLOGY IS COMING TO.... LOL
Mewwy Kwimmus to me!!!I was looking at the lights this morning and was like I dont know how I'm gonna do this, I'm glad I came to the forums.. I'll post pics later!
ONE QUESTION: How do you bake the headlights? I wasnt aware you had to do that.
C
L BEANS!I LOVE THE LED LIGHTS ON THE HOUSE... AMAZING WHAT TECHNOLOGY IS COMING TO.... LOL
Last edited by Propa Teknique; Dec 24, 2008 at 04:13 PM.

Thread Starter
Member
Joined: Jan 2007
Posts: 82
Remove all the bulbs and wiring harness from your headlight assembly. There are also 2 small screws holding the lens on to the rest of the assembly that need to be taken out. Heat your oven up to 250 degrees. Place the headlight in the oven on a cookie sheet with the lens not touching anything. Bake for 10 minutes then take it out of the oven. It's going to be warm, slide a small flat head screw driver in between the lens and the headlight shell to get it started and then just pull the lens off. To reseal it, put the lens back into place and set the whole thing back in the oven at 250 degrees for a few minutes. Take it back out and apply pressure all around so the lens gets good and sealed again.
Thread Starter
Member
Joined: Jan 2007
Posts: 82
Thanks. It's probably the easiest retro that you can do. What I'm working on now probably isn't going to be so easy. I'm going to try to retro some Acura TL projectors in so it should be interesting to see how much work is involved with that.
Senior Member
Joined: Apr 2006
Posts: 966
From: Houston, TX
That seems like it would be super difficult to do... They dont look the same at all. If you can pull that off will you keep the Acura lights on your Max?
Thread Starter
Member
Joined: Jan 2007
Posts: 82
Did you get the e55's in your headlights yet?
Senior Member
Joined: Apr 2006
Posts: 966
From: Houston, TX
Nope... I'm gonna do this today if it doesnt rain... Supposed to be getting some severe weather... hopefully it doesnt last long. I got my switchbacks, fogs, and Clear Sidemarkers to put it... So I have a big job ahead of me... I'll post pics when done though... thanks for all your help!! This How-To is wonderful!
YU RCK!
Y
U RCK!
Thread Starter
Member
Joined: Jan 2007
Posts: 82
They are roughly the same size. Mounting holes and placement of the bi-xenon solenoid are different. Would just have to fabricate a way to mount it to the original mounting bracket and bust out the dremel to cut away at it to get the solenoid in there. Probably wouldn't be that much work but I'm going to hold off on doing it for a while. I can see well enough at night as is and I'm not sure how long I'm going to keep the car.

i thought the TSX's were a better projector for the money.. well the best is the S2000 ones.. i would do a retro into the headlight with the TSX's because they're smaller and would have a better chance of fitting...
Senior Member
Joined: Apr 2006
Posts: 966
From: Houston, TX
Problem or Screw-Up
Okay, so today I finally Retrofitted the Xenon Projectors onto my Max. Being a first-timer I started at 8:30 a.m and finished at 6:35 p.m this evening. It wasnt hard, but the fact that I never had taken of the bumper, grille, lights, etc. made me more cautious to doing so.
Anyway, I finished and everything was put back in place (with the exception of a few nuts/bolts which I did for a reason) and I tested the lights before I was completely done. Now as you all know it get dark early so it was black outside. I turned on the lights, and only the Switchbacks came on! I immediately started tracing back my steps to see what I maybe had done wrong. To the contrary I followed the directions to a tee.
I then concluded that the bulbs were simply burnt out... but both at the same time? It could be possible, though. Another reason was because I noticed that on the ballast there was a connection that was not connected to anything at all. In the above How-To there was no mention of it so I dont know what it is for. Can anyone help me?
you need ignitor .. the pigtail that is needed to give power to the bulb
http://cgi.ebay.com/ebaymotors/_Car-...1%7C240%3A1318
hope this helps
http://cgi.ebay.com/ebaymotors/_Car-...1%7C240%3A1318
hope this helps


Thread Starter
Member
Joined: Jan 2007
Posts: 82
Propa: After about an hour of searching online I found what you need.
Matsu****a Gen 3 12v input
Sorry for leaving that part out. Most of the ballasts come with the harness still in tact so I just kind of forgot about it.
Matsu****a Gen 3 12v input
Sorry for leaving that part out. Most of the ballasts come with the harness still in tact so I just kind of forgot about it.
Senior Member
Joined: Apr 2006
Posts: 966
From: Houston, TX
Whoa... I was panicking!!! Thanks guys!!! I"m gonna get those overnighted. I know one part connects to the wire but where do the other part of the wires connect to? Do they need to be spliced into something?
Senior Member
Joined: Apr 2006
Posts: 966
From: Houston, TX
Another thing, there was an additional input that I disconnected from the original halogen light. It was in the dust cover where the Headlight Bulb is. I didnt know what to do with that connection so I just stuck it back in the dust cover and closed it. That connector is white but the pigtail you showed me was gray... do you think that would work if I connected the white pigtail from the halogen connector to the ignitor?? I think I would have to cut another hole somewhere to pull the connector out to connect to the ignitor. If that works it would at least save me buying another pigtail. Do you think this would work??
Thread Starter
Member
Joined: Jan 2007
Posts: 82
Another thing, there was an additional input that I disconnected from the original halogen light. It was in the dust cover where the Headlight Bulb is. I didnt know what to do with that connection so I just stuck it back in the dust cover and closed it. That connector is white but the pigtail you showed me was gray... do you think that would work if I connected the white pigtail from the halogen connector to the ignitor?? I think I would have to cut another hole somewhere to pull the connector out to connect to the ignitor. If that works it would at least save me buying another pigtail. Do you think this would work??
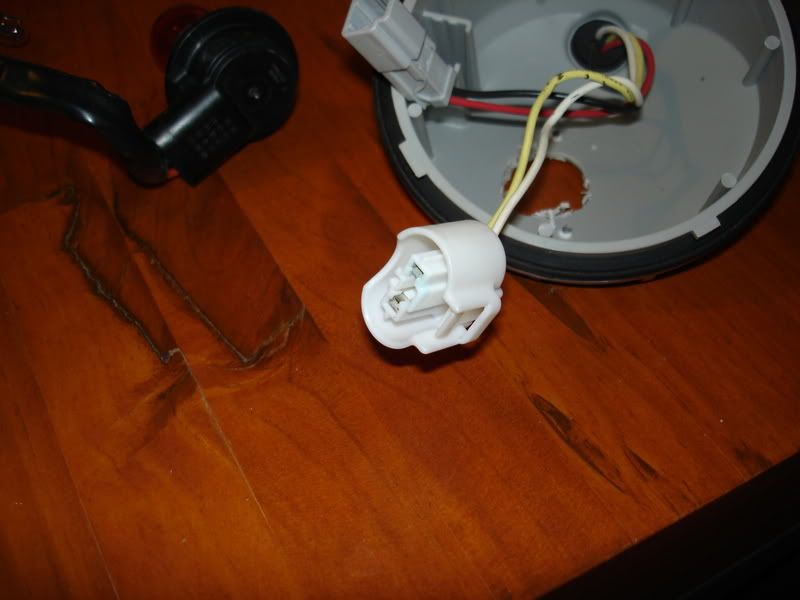
If so, you need to cut the connector off and splice the 12v input pigtail into those wires. Then the 12v input pigtail connects to your ballast. That's what will power the ballasts when you turn the lights on.
Thread Starter
Member
Joined: Jan 2007
Posts: 82
Not hard. Just cut the connector off and throw off to the side because you don't need it anymore. Now take the 2 wires that it used to be connected to and strip some of the insulation off to expose the wires, strip some insulation off the bare ends of the 12v pigtail that you are going to get and then just twist the positive to the positive and negative to the negative. If you can solder those wires together that would be best but I would imagine twisting them and then use electrical tape to cover them would probably be ok. Theoretically you could get some spade connectors for the 12v input and connect them to the bare wire and just plug them into the existing 9012 plug. I've never tried that so I don't know how well that would work though. You already did the hard part which was to get the projectors into the housing the rest is nothing.

Senior Member
Joined: Apr 2006
Posts: 966
From: Houston, TX
Basically, you will need:
--e55 Bi-Xenon Projector Housings (2)
--12v Pigtail Ballast (Matsu****a) (2)
--Nissan Maxima HID Ballast (2)
--4300K or Higher D2S HID Bulbs (2) (Some come with the ballast)
--Mounting screws
--Electrical Tape
-- Wire Splicer
--Screwdriver
--Some type of razor or cutter to cut a portion of the plastic housing of the headlight
I got everything I needed from Ebay and it was under 200.00. Good Luck!


Junior Member
Joined: May 2008
Posts: 9
From: New York
i have a question i have a 2005 maxima...i would like to do this upgrade.. the diffrence lookds amazing.. so basically i take the old projector out install the new e55 projector connect my hid kit to the lights and batta bing batta bomm finished???

Senior Member
Joined: Apr 2006
Posts: 966
From: Houston, TX
It's really easy. I did it and had never even so much as touched my headlights, but I was able to take them apart and do this mod without any trouble. It's much better than those tacky kits though that people use to get their lights HID "like". Trust me you will love the look and you can see much better. The e55 projector lenses online on eBay were really cheap I think I spent 200.00 total on everything.

Junior Member
Joined: Jun 2005
Posts: 92
From: North Jersey
I plan on ordering everything for this Mod this weekend. In terms of converting from the 9012 Halogen to the Xenon Kit, what wire harness is compatible with this size bulb? Will 9005 work out?
Also, I've been looking through ebay for some e55 Bi-Xenon Projector Housings, Some look as though they don't have a clip on the back of them for securing the bulb into place. Should I steer clear from these? How does this work?
Also, I've been looking through ebay for some e55 Bi-Xenon Projector Housings, Some look as though they don't have a clip on the back of them for securing the bulb into place. Should I steer clear from these? How does this work?