
Kicks in the works...pics and rambling of course

Thread Starter
Back from Hibernation

Joined: Mar 2004
Posts: 1,100
Kicks in the works...pics and rambling of course
Where we left off I was cutting metal, stressing over the trunk opener thing. With the trunk opener behind me, I thought I'd get back to the front of the car for a little, and start on some kicks.
Where we left off, I cut some metal. Not much, not structural, just a little of that metal that covers the cavity behind the kickpanel. If you read through that thread, you read me talking about how much room there is back there.

So now you have some room, well into the kickpanel. Folks, as you're gonna see, you can drop the 6.5-7 of your choice so far back there after this trimming, it's not even funny. Dampen the back, maybe some modeling clay, open up the cavity to the panel under it, put some polyfill in there, and you're good to go. Like most of this stuff, it's easy, but it's work. One day of playing with fiberglass as practice will get ya ready to do something like this. Get some glass and play with it..it's fun!
Anyway, with metal removed, I tried to think of the simplest way to get a good connection, kick to car.... It's also gotta be solid because it will be used to stretch the kick shape around later. I didn't like the prospect of laying glass, vertical and flat, up under my dash. Been there, done that, sounds messy and like an ineffective nightmare waiting to happen.
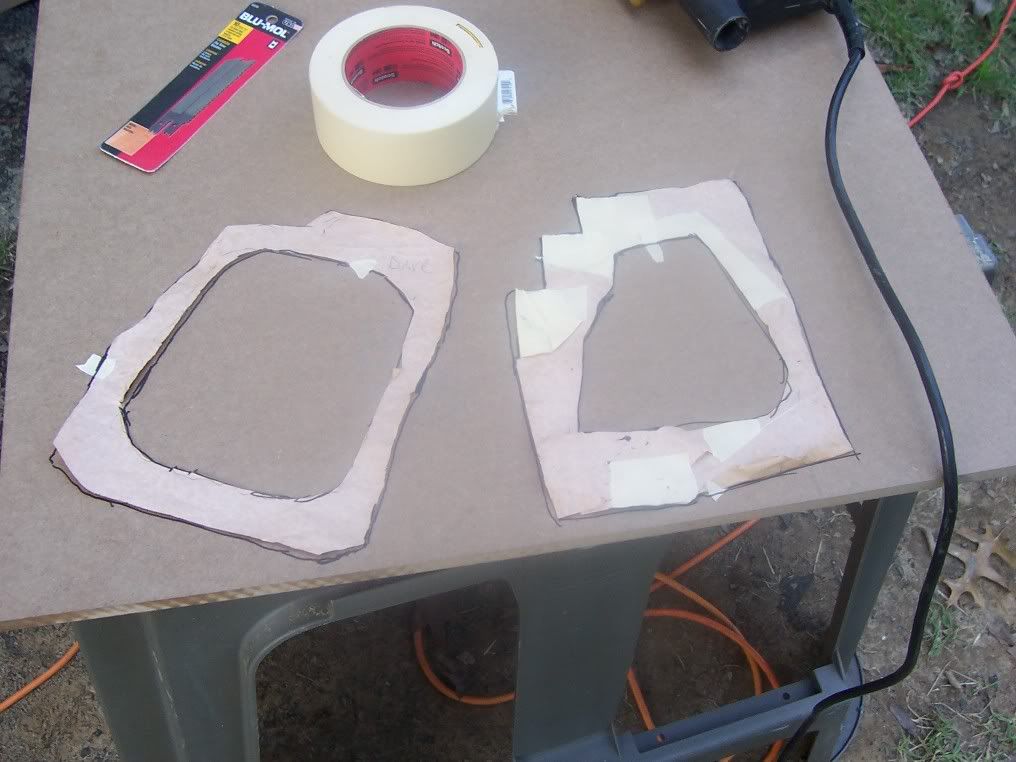
All about keeping it simple, I made ghetto "kick mount baffles" to fit out of 1/2 mdf. Traced with paper, cut the wood, and trim to fit.
Where we left off, I cut some metal. Not much, not structural, just a little of that metal that covers the cavity behind the kickpanel. If you read through that thread, you read me talking about how much room there is back there.
So now you have some room, well into the kickpanel. Folks, as you're gonna see, you can drop the 6.5-7 of your choice so far back there after this trimming, it's not even funny. Dampen the back, maybe some modeling clay, open up the cavity to the panel under it, put some polyfill in there, and you're good to go. Like most of this stuff, it's easy, but it's work. One day of playing with fiberglass as practice will get ya ready to do something like this. Get some glass and play with it..it's fun!
Anyway, with metal removed, I tried to think of the simplest way to get a good connection, kick to car.... It's also gotta be solid because it will be used to stretch the kick shape around later. I didn't like the prospect of laying glass, vertical and flat, up under my dash. Been there, done that, sounds messy and like an ineffective nightmare waiting to happen.
All about keeping it simple, I made ghetto "kick mount baffles" to fit out of 1/2 mdf. Traced with paper, cut the wood, and trim to fit.

Thread Starter
Back from Hibernation
Joined: Mar 2004
Posts: 1,100
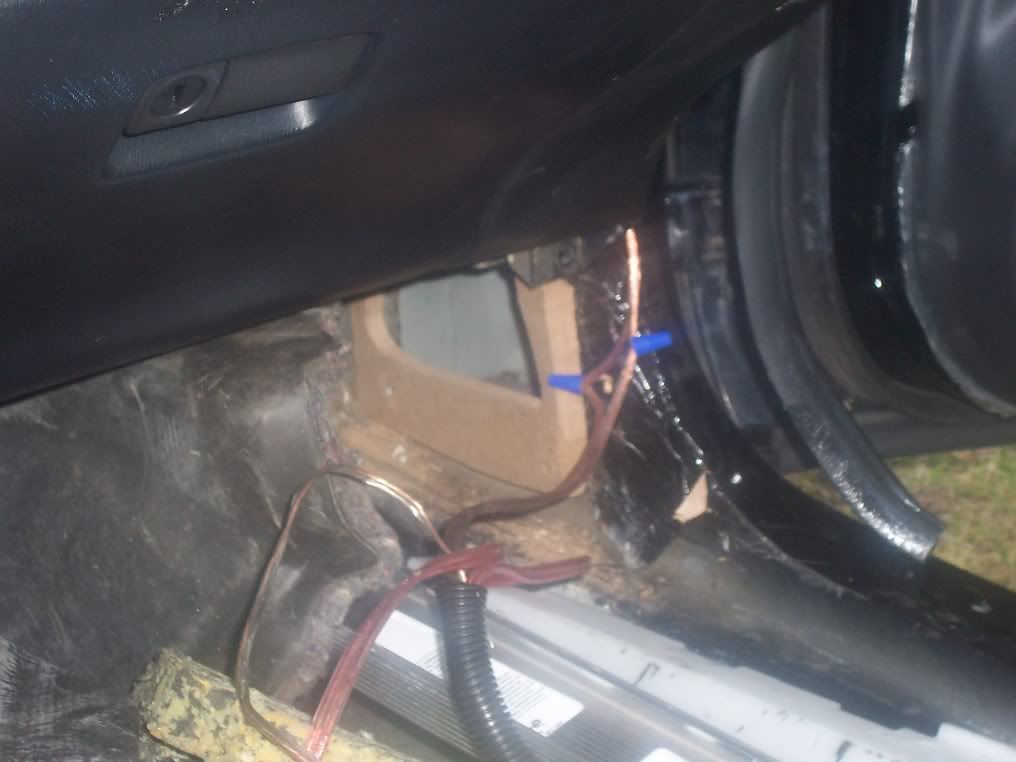
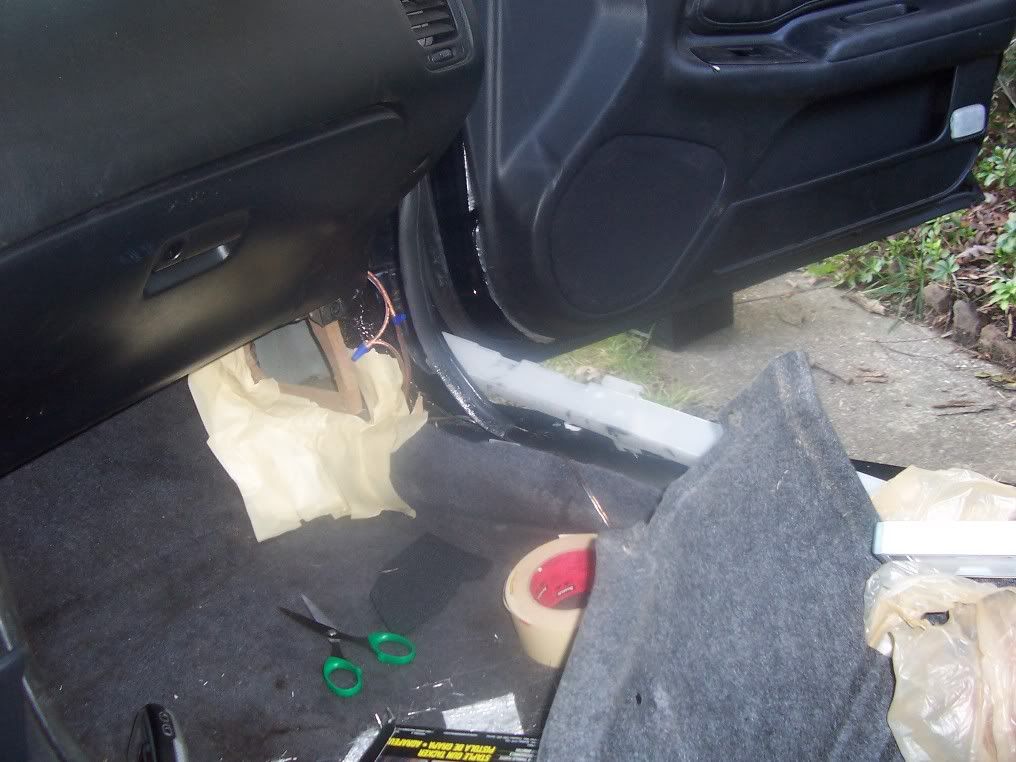
Tape off area that will need a glassing. This is the first spot where you have to stop, and spend an important 10 minutes thinking about how this thing's gonna turn out. Will carpet be under it? cut out completely? In other words, when it's all said and done, hows this kick gonna mesh with the area around it.
Tape off the area that will be behind the kick. Remember now, you have that big azzed hole to sink a speaker into. Theres no need for these kicks to be big at all.......
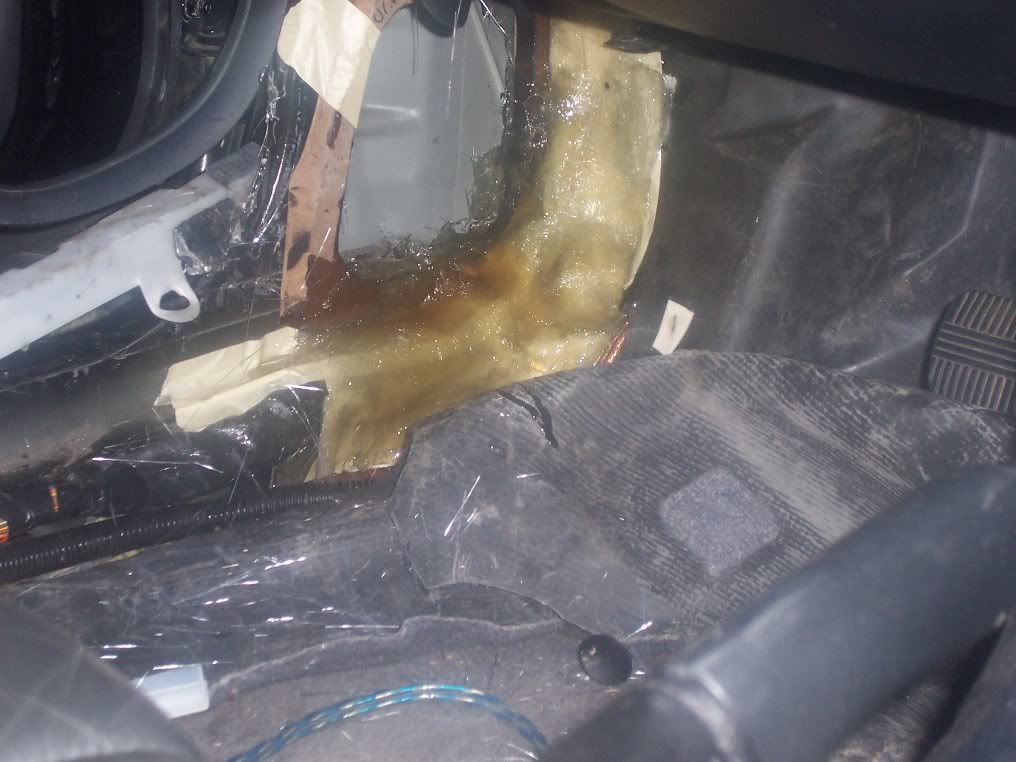
Then glass away. let cure
Tape off the area that will be behind the kick. Remember now, you have that big azzed hole to sink a speaker into. Theres no need for these kicks to be big at all.......
Then glass away. let cure
Thread Starter
Back from Hibernation
Joined: Mar 2004
Posts: 1,100
By the way, the glass will adhere to the MDF VERY WELL if you just make sure to glass them together. You don't even have to sand/rough it up like you would have to a plastic trim panel. The bonded together well enough that, in this case, having the MDF to yank on helped me get these kicks out once they cured 
A lil trimming of some unnesseary areas and you have your"rear mold" complete. You should be able to see how now, we should be able to connect the final product to the car, by driving a screw or two through the wood and the glass, right into the metal of the car with the kick properly set. Unfortunately, that's a little ways off.
Here's the back mold out after a little trimming

Now here's the part that pisses me off, because the kicks I'm making, the stereo diesign (to me) that I'm doing is not ideal. I'm using ribbons, which are huge (esp. for a tweeter) both diameter wise and depth wise. This is going to make the kicks bigger than they'd have to be. Here is me trying to cram the ribbons and mids into that little hole.
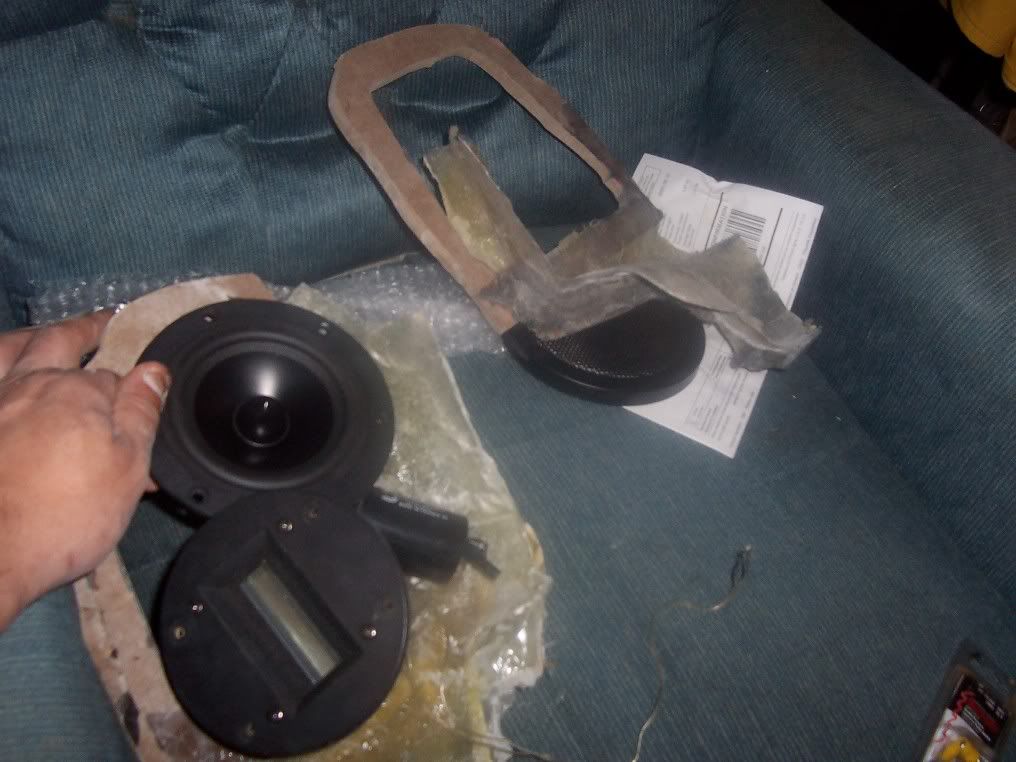
Note: as you look at this, think of how easy it would be to drop a 6.5 midrange WAY back in there. I should ditch the ribbons and just get a normal tweeter. Remember, you have like 3 or more inches behind there after trimming that metal.
A lil trimming of some unnesseary areas and you have your"rear mold" complete. You should be able to see how now, we should be able to connect the final product to the car, by driving a screw or two through the wood and the glass, right into the metal of the car with the kick properly set. Unfortunately, that's a little ways off.
Here's the back mold out after a little trimming
Now here's the part that pisses me off, because the kicks I'm making, the stereo diesign (to me) that I'm doing is not ideal. I'm using ribbons, which are huge (esp. for a tweeter) both diameter wise and depth wise. This is going to make the kicks bigger than they'd have to be. Here is me trying to cram the ribbons and mids into that little hole.
Note: as you look at this, think of how easy it would be to drop a 6.5 midrange WAY back in there. I should ditch the ribbons and just get a normal tweeter. Remember, you have like 3 or more inches behind there after trimming that metal.

Thread Starter
Back from Hibernation
Joined: Mar 2004
Posts: 1,100
I have some wires that had to be moved out of the way...nothing big, from my memory. I would have done that last summer and don't remember....All that stuf can be moved. Sometimes its a PITA, but it can be moved....

Thread Starter
Back from Hibernation
Joined: Mar 2004
Posts: 1,100
What wrong with butt connectors? That was the quickest and most effective way to play with phasing of the midbasses when mounted in the doors and my old Eclipse didn't have phase control. Otherwise back to the amp, a PITA change.
You think you caoud have heard the difference in my last install? Think they're unsafe/gonna come apart?
Gimme a break, dude
You think you caoud have heard the difference in my last install? Think they're unsafe/gonna come apart?
Gimme a break, dude
Nothing is wrong with butt connectors, that's what I'm suggesting. Those twist caps, yes, while allowing for quick phase changes, make the wire come to a tee-pee point, and butt connectors just allow for the wire to continue to be straight, which is easier when trying to conceal, etc.
It was just a suggestion to help you out, although I'm sure you knew that butts are a little more secure than twist caps.
It was just a suggestion to help you out, although I'm sure you knew that butts are a little more secure than twist caps.

Thread Starter
Back from Hibernation
Joined: Mar 2004
Posts: 1,100
Ahh I thought you were calling them butt connectors. I've never had one of the screw things get away from me when using the right size. those have been going 2 years strong, 2 installs, and lotsa phasing. Butt connecters are fine, but when I use them, I feel the need to heat shriink, and I have lost butt connections to bad crimp. Call it my bad user error fine, but hasn't happened to me with da twistys, which are jsut plain and simple. they hid easily when install is done. I have no knowledge of IASCA having a problem w/ using them?
They work with me fine. Thanks for the 'advice' though.
Oh, and put a lil electric tape around the butt/wire jsut right, and I'd put em against the butts any day. Maybe for another topic. If possible, I'd like this one to stay on kicks, as I haven't found another 4 gen kick "tutorial" on this site, I think It's be nice to have one that focuses on it...so if anyone has questions on the kicks/concerns about the kicks...les do it.
Thread Starter
Back from Hibernation
Joined: Mar 2004
Posts: 1,100
I think that answer to that important question are speaker and application dependant.. The 5 I'm using, even though it'll only be playing down to 200 hz. likes a lotta air. If you look at the first pic of the metal cutting, you'll see a stock 3/4 inch hole that leads intot he cavity that goes down and bends into the cavity that is just under your doors. So, I'll put a few more holes in there or make it just one big one....
I remember someone else was trying to get exactly .3 of airspace in kicks, and though I don't know it they followed through with it, if you're looking for small airspace like that, I think you could come close to finding it.
A great kickpane car, is again, the morel of the story! The option to open to freeair will often be an easy kickpanel answer...or of course small sealed.

Thread Starter
Back from Hibernation
Joined: Mar 2004
Posts: 1,100
It sure would be nice to trim off the excess area...I guess you could get some off. There is a BIG magnet back there though....
Man I wanna switch to horns and 6.5's..or just a small conventional tweet. The kicks would be small and sexy. That'll be a sure thing for next summer.
Man I wanna switch to horns and 6.5's..or just a small conventional tweet. The kicks would be small and sexy. That'll be a sure thing for next summer.


Thread Starter
Back from Hibernation
Joined: Mar 2004
Posts: 1,100
Danny if they were CD1 pro's or cd2 mylars, I'd be proposing a trade now.
The max seems liek a great horn and kick car...and of course w/ plenty of room for big midbass in the doors. Course I'm a horn guy at heart, ya know.
I love the sound of the ribbons too, but my problem going along with the size is how they stand out and draw attention to them, instead of the "apparent" soundstage. At the ECA meet, and when everyone gets in my car, they stare at them. I'm going to try to find a way to wrap them in grille cloth so they don't bling so much.
Originally Posted by BBOYSTEVIE
.......
A great kickpane car, is again, the morel of the story! The option to open to freeair will often be an easy kickpanel answer...or of course small sealed.
A great kickpane car, is again, the morel of the story! The option to open to freeair will often be an easy kickpanel answer...or of course small sealed.

Thread Starter
Back from Hibernation
Joined: Mar 2004
Posts: 1,100
heheh, i noticed after i typed that too I'm totally in car audio mode, not teacher mode. And I go back to work tomorrow. Gotta start thinking about more important MORALS and get my mind off speakers
I'm totally in car audio mode, not teacher mode. And I go back to work tomorrow. Gotta start thinking about more important MORALS and get my mind off speakers


Thread
Thread Starter
Forum
Replies
Last Post
mclasser
5th Generation Maxima (2000-2003)
1
Sep 24, 2015 11:57 PM