
Trunk rebuild worklog pics...beginning

Thread Starter
Back from Hibernation

Joined: Mar 2004
Posts: 1,100
Trunk rebuild worklog pics...beginning
Should be pretty much done in about a week, assuming the last bit of speaker wire I just ordered comes in early in the week......Only so much I can do without that as some of it is going to become "part of" the fiberglass enclosure....
I'm a slow worker, and I'm trying to "do it right" this time. We'll see how it turns out!
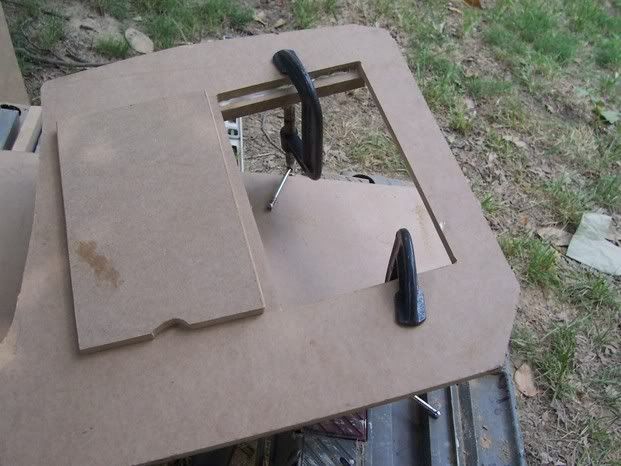
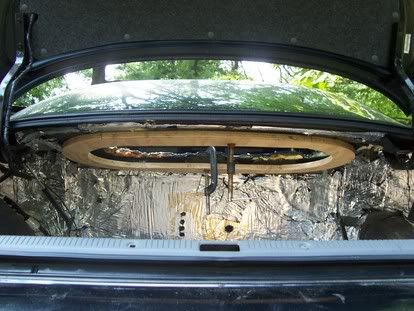
Getting off my old rear deck took FOREVER. Finally got it off and "opened it up" just a lil more. Nothing structural was cut. The "tub" will be mounted to the structural metal under the deck....
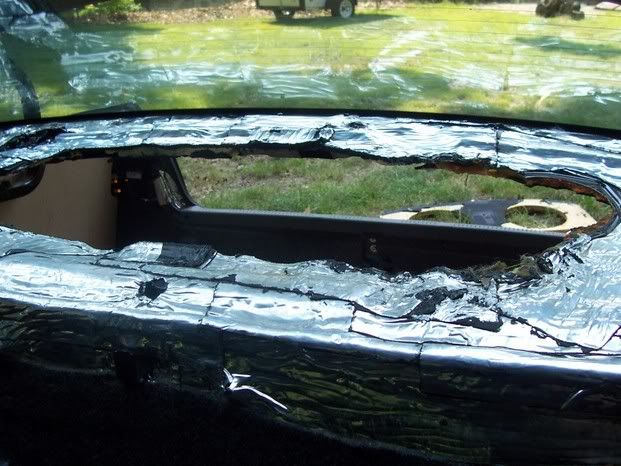
Used paper to get approxomate measurements of the "rear wall"...Note...there is a wall behind this that will be totally sealed for the IB install. This one will be the back wall you can see. Amps will be mounted to this wall....well kinda sorta
I'm a slow worker, and I'm trying to "do it right" this time. We'll see how it turns out!
Getting off my old rear deck took FOREVER. Finally got it off and "opened it up" just a lil more. Nothing structural was cut. The "tub" will be mounted to the structural metal under the deck....
Used paper to get approxomate measurements of the "rear wall"...Note...there is a wall behind this that will be totally sealed for the IB install. This one will be the back wall you can see. Amps will be mounted to this wall....well kinda sorta
Thread Starter
Back from Hibernation
Joined: Mar 2004
Posts: 1,100
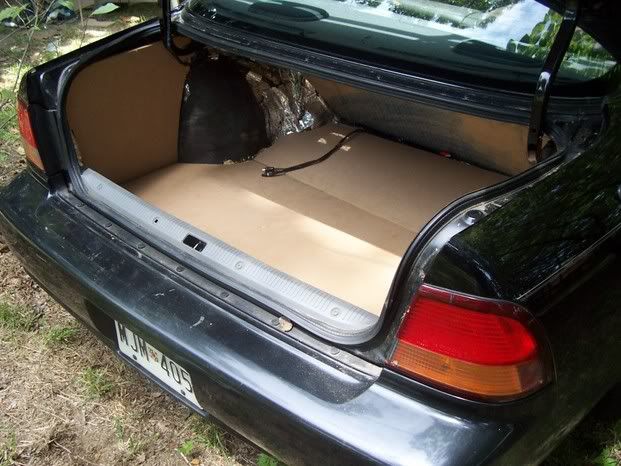
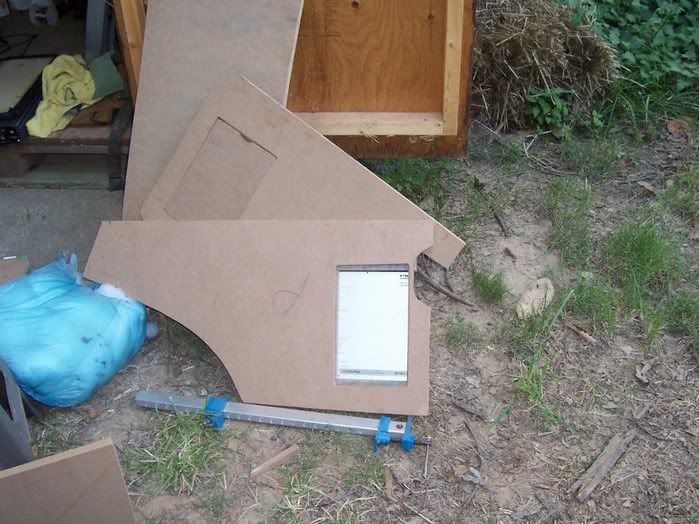
Used the same method to basically measure out and make a new floor (will fold up for full spare tire access, and side walls. The whole trunk will get a whole new recarpet when it's all said and done.
Making holes for the passenger side wall where H701 processor will be hidden. Drivers side wall will have a similar opening, leading to the empty tire well so I can hide cocaine or something like that in there.
Making holes for the passenger side wall where H701 processor will be hidden. Drivers side wall will have a similar opening, leading to the empty tire well so I can hide cocaine or something like that in there.
Thread Starter
Back from Hibernation
Joined: Mar 2004
Posts: 1,100
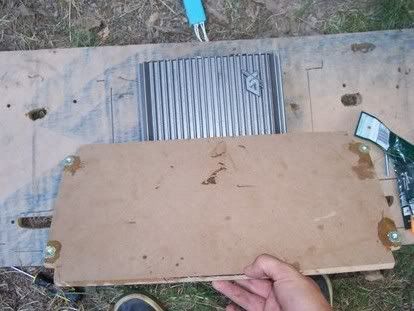
For this install, everything is getting mounted on T-nuts for easy maintenence and remounting. Supposedely if I compete I can get a point or two for this, and I don't have to worry about the wood stripping.
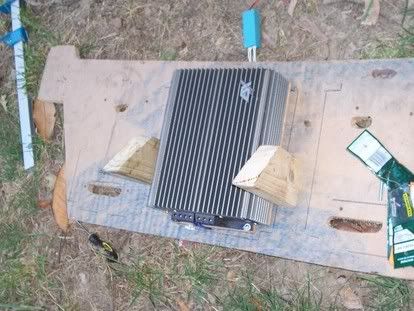
Here's the wood that the actual amps will be mounted on. Simply traced the footprint of the amps and cut. Got the idea from Don and somebody else on another forum. They'll be attached to the back wall, but will have a gap between them and the wall with yellow cold cathodes to add a little flare and highlight the yellowness of the subs. Lotsa yellow wire will be used as well.....
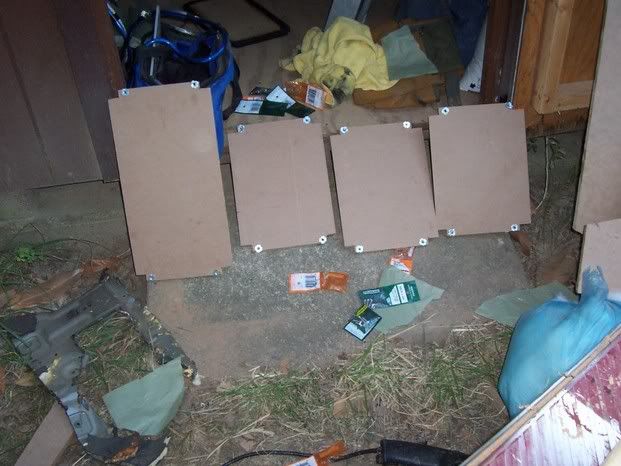
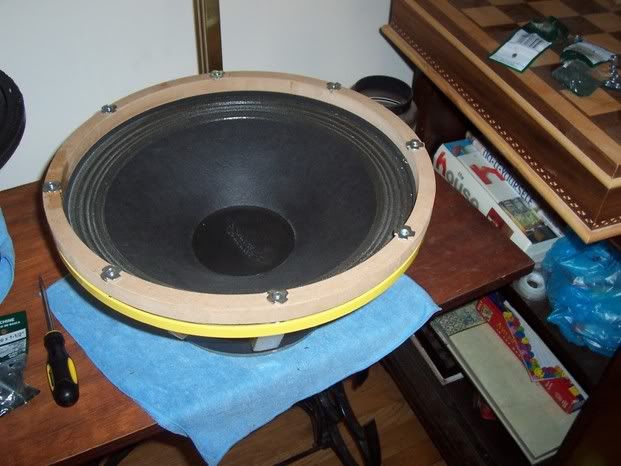
Baffles for the 15's, also with T-nuts for easy maintence and hopefully a point in a comp....
This is all for now. I'll update as stuff gets done.
Here's the wood that the actual amps will be mounted on. Simply traced the footprint of the amps and cut. Got the idea from Don and somebody else on another forum. They'll be attached to the back wall, but will have a gap between them and the wall with yellow cold cathodes to add a little flare and highlight the yellowness of the subs. Lotsa yellow wire will be used as well.....
Baffles for the 15's, also with T-nuts for easy maintence and hopefully a point in a comp....
This is all for now. I'll update as stuff gets done.


 15s in the back deck are gonna be niiice. Definitely make sure we get more pics and updates!


Thread Starter
Back from Hibernation
Joined: Mar 2004
Posts: 1,100
What do you mean? Are you talking about front stage?
As for the trunk 15's in the rear deck, same 4 amps I've been running in a nicer looking amp rack. Matching yellow lights behind the amps yada yada yada....
Front stage will have the same speakers I've been using, but (hopefully) in new locations. The ID horns, the Audax PR170MO midranges, and the IDQ 8s. Hoping to get the IDQ 8's in the kicks where the audax's used to be and the audax's more on axis on the floor/firewall. If I can scoop up the money now (or if not later like this coming spring) I wanna put the Audax's through the firewall, but I need money to pay someone to do some welding for that.
Lemme know if you have more questions or if theres something specifically you don't understand.
Others: thx for the kind words. I HOPE I don't let ya down with the final results. I've been known to slack off or mess up from time to time or end up with systems that sound good but don't look "finished" cosmetically. Hoping to get er done right. We shall see.
OK..quick home depot run then back to work for me!!!!!!


Thread Starter
Back from Hibernation
Joined: Mar 2004
Posts: 1,100
Thanks man! You're right I should have. Of all the stuff I've done so far, the floor is actually the thing I'm least happy with. Going to have to do stuff to balance it out or maybe redo it. If so, I might take a better look at what you did and bite off it....
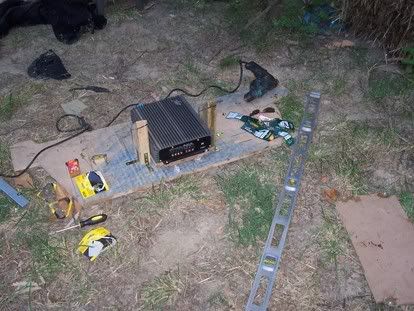
Today I was a little lazy but still got some done. Not much, but it's gotta be fun for me as this is a hobby.....If it's not fun I QUIT.
Today was rear deck day....I'm not the best at imagining how a mold is going to turn out with fiberglass, but I knew I wanted the deck that will be used relatively roundish. Soooo...Made a mostly oval rear deck from a piece of Birch I had left over from last year, did some measuring, cut her out, and put up on the rear deck for initial fitting and drilling holes through as many structural spots and corresponding wood as I coudl reach....(Marked the holes in the rear deck with blue painters tape. Makes it much easier to refit and find exact positioning, and will make it a quicker mount when it comes time for the final mounting. But thats a ways away....
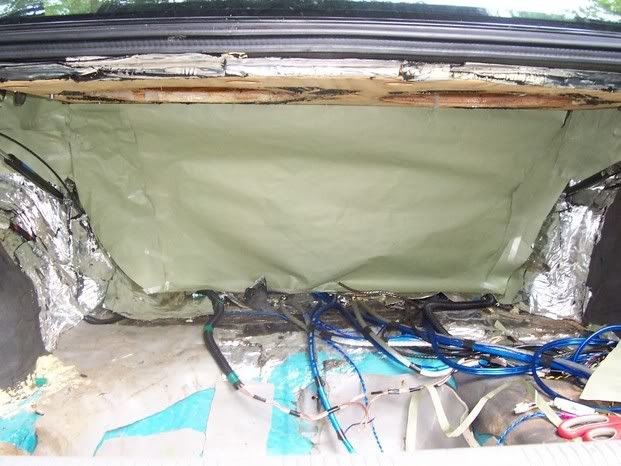
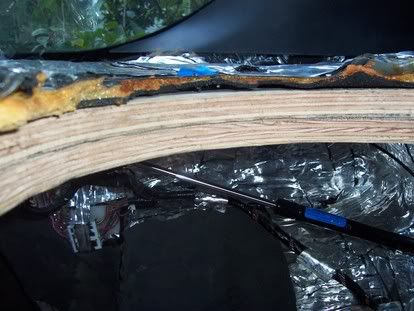
Becasue the rear deck is two layer, there's huge gaps on the sides. Exactly 3/4" gap between the structural metal that I'm attaching the deck to and the thin metal rear deck that you actually see (how convenient). Some airspace can be blocked off with dampening or expanding foam, but these gaps are just too big. Here's a pic of the side of the deck with it not filled in.

Today I was a little lazy but still got some done. Not much, but it's gotta be fun for me as this is a hobby.....If it's not fun I QUIT.
Today was rear deck day....I'm not the best at imagining how a mold is going to turn out with fiberglass, but I knew I wanted the deck that will be used relatively roundish. Soooo...Made a mostly oval rear deck from a piece of Birch I had left over from last year, did some measuring, cut her out, and put up on the rear deck for initial fitting and drilling holes through as many structural spots and corresponding wood as I coudl reach....(Marked the holes in the rear deck with blue painters tape. Makes it much easier to refit and find exact positioning, and will make it a quicker mount when it comes time for the final mounting. But thats a ways away....
Becasue the rear deck is two layer, there's huge gaps on the sides. Exactly 3/4" gap between the structural metal that I'm attaching the deck to and the thin metal rear deck that you actually see (how convenient). Some airspace can be blocked off with dampening or expanding foam, but these gaps are just too big. Here's a pic of the side of the deck with it not filled in.


Thread Starter
Back from Hibernation
Joined: Mar 2004
Posts: 1,100
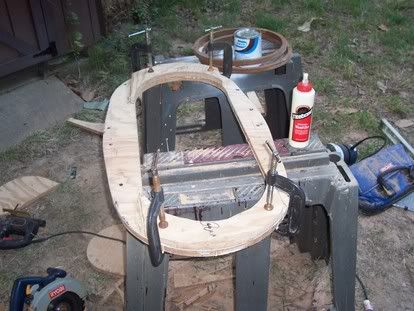
Glued the crescent shape ends to the wood deck. She's about ready to go!.
Thats about it for today. I waterproofed the MDF baffles (with Deft, as you can see in the previous pic) and epoxied all the t-nuts from yesterday into place so they don't go anywhere (not pic worthy) at the recommendation of a mentor who knows more than I.
Tomorrow should look like some more progress. I should be able to have amp rack mostly ready for mounting and the exciting part, fleece/fiberglass the 15" baffles onto the wood rear deck, coming up with the shape that sub enclosure tub will have.
Knytex (STRONG AZZ fiberglass mat) should be here tomorrow or the next day, final wires that I need before buildup better be here by the end of the week.
Thread Starter
Back from Hibernation
Joined: Mar 2004
Posts: 1,100
I could prolly use your superior fiberglass skills tomorrow metal!
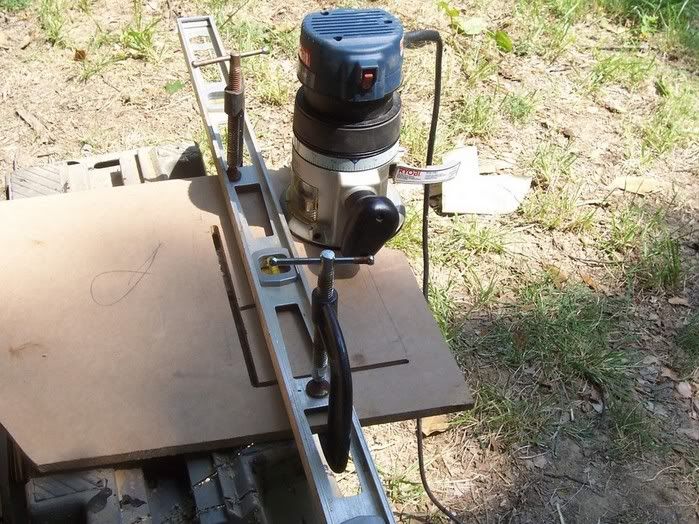
Hey, I don't even have an air compressor! What you see is just router, circular, and jigsaw (well...sander too). Every man needs a good router
Hey, I don't even have an air compressor! What you see is just router, circular, and jigsaw (well...sander too). Every man needs a good router
Originally Posted by BBOYSTEVIE
What do you mean? Are you talking about front stage?
when i left man, you were just finishing up the kickpanels, i come back and youve cut the whole rear deck out. I coulda sworn you went with two idqs in the rear and you were still looking for the 8s last i was on here. Looks like its coming along good though.
As for the trunk 15's in the rear deck, same 4 amps I've been running in a nicer looking amp rack. Matching yellow lights behind the amps yada yada yada....I missed the amp selection
Front stage will have the same speakers I've been using, but (hopefully) in new locations. The ID horns, the Audax PR170MO midranges, and the IDQ 8s. Hoping to get the IDQ 8's in the kicks where the audax's used to be and the audax's more on axis on the floor/firewall. If I can scoop up the money now (or if not later like this coming spring) I wanna put the Audax's through the firewall, but I need money to pay someone to do some welding for that.
Lemme know if you have more questions or if theres something specifically you don't understand.
Others: thx for the kind words. I HOPE I don't let ya down with the final results. I've been known to slack off or mess up from time to time or end up with systems that sound good but don't look "finished" cosmetically. Hoping to get er done right. We shall see.
OK..quick home depot run then back to work for me!!!!!!

Thread Starter
Back from Hibernation
Joined: Mar 2004
Posts: 1,100
3 ESX Q 175.2's and an ESX Q120.4.. Old school Zed Audio stuff. Dont' have any money for new amps comprable to it. I've had the IDQ 8's for a while, and have been running IDMAX's on the rear deck for awhile. If you're able to get around to all of my photobucket page, you'll see like the last 4setups I've run lol.The DLS comps, Seas mids with ribbons, 3 way with ribbons and Dayton Ref's in kicks and 8" Peerless XLS's in the doors, then horns, 7'mids in kicks, IDQ 8's in doors. Ahhh memories....I've had the IDMAX 12's on the rear deck for about ayear now though. Before that had one sealed....
The hot hot hot weather, combined with stuff I had problems with, combined with Mosquiotos chomping on my legs has slowed me up. Two days ago I just had to call it quits and get some AC. Yesterday I spent a ton of time trying to get the baffles to line up symetrically. I got them as close as I could, epoxied them in place, then they fell. Can't express the frustration....I don't know why, but I can't get these things lined up perfectly to save my life, and unfortunately I thinnk it's gonna show much more when the subs are hanging there at slightly different angles. Anyway, here's the best I could do...
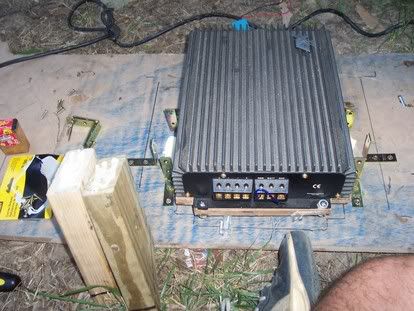
First the easy stuff with the amp rack
Traced out where I want amps to sit..
Drilled hoes through amp mounts and the acutal amp rack, then made larger holes to the actual amp rack where wires will have to go though. I did this behind where the amps will sit so hopefully it will seem like wires are just "appearing" from under the amps, where the light's are coming from.
The hot hot hot weather, combined with stuff I had problems with, combined with Mosquiotos chomping on my legs has slowed me up. Two days ago I just had to call it quits and get some AC. Yesterday I spent a ton of time trying to get the baffles to line up symetrically. I got them as close as I could, epoxied them in place, then they fell. Can't express the frustration....I don't know why, but I can't get these things lined up perfectly to save my life, and unfortunately I thinnk it's gonna show much more when the subs are hanging there at slightly different angles. Anyway, here's the best I could do...
First the easy stuff with the amp rack
Traced out where I want amps to sit..
Drilled hoes through amp mounts and the acutal amp rack, then made larger holes to the actual amp rack where wires will have to go though. I did this behind where the amps will sit so hopefully it will seem like wires are just "appearing" from under the amps, where the light's are coming from.
Thread Starter
Back from Hibernation
Joined: Mar 2004
Posts: 1,100
Now the parts that's been pissing me off...getting baffles for the 15's into place symmetrically, and getting them to stay there solid.
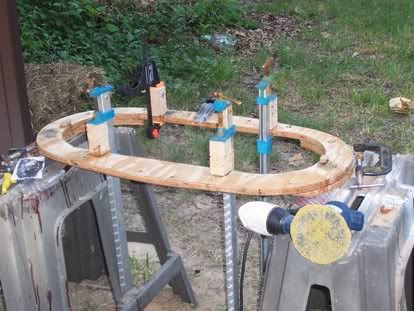
Used little 2 x 4 peices and a lil MDF to try to get them even..

This is as even as I could get them.
Used little 2 x 4 peices and a lil MDF to try to get them even..
This is as even as I could get them.
Thread Starter
Back from Hibernation
Joined: Mar 2004
Posts: 1,100
After trying epoxy, then wood glue, I decided to get to business...I used epoxy, wood glue and fiberglassed that crap into place. Every time the stuff came undone, it seemed tougher for me to get it lined up evenly. I can't get accross the frustration this combined with 100 degree temps and the mosquito population caused me.
Baffles glassed into place...
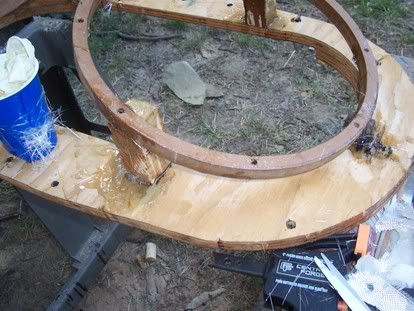
Now for the fun and easy part......molding it up....
Baffles glassed into place...
Now for the fun and easy part......molding it up....
Thread Starter
Back from Hibernation
Joined: Mar 2004
Posts: 1,100
Stretched fleece real tight around the baffle rings and stapled fleece to the "rear deck" wood part all around ever CM or so, so fleece would keep it's shape well....
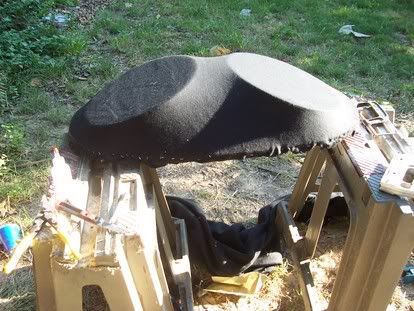
Resin'ed up the fleece, inside and out...let it cure, cut out the holes for the 15's, so now we can begine to see what this thing should look like when done. From here just gotta give it structrual integrity with glass/knytex and a nice finish. Right now I'm thinking black vinyl since I have some laying around and I've never done it before.
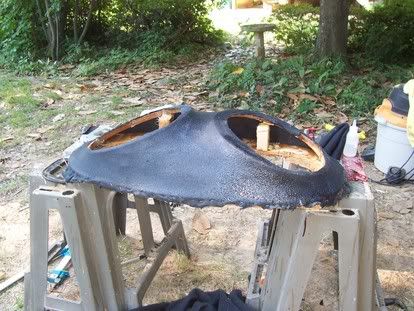
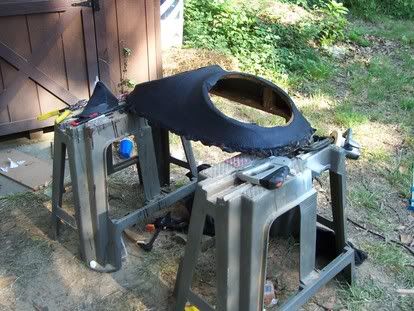
Resin'ed up the fleece, inside and out...let it cure, cut out the holes for the 15's, so now we can begine to see what this thing should look like when done. From here just gotta give it structrual integrity with glass/knytex and a nice finish. Right now I'm thinking black vinyl since I have some laying around and I've never done it before.
Thread Starter
Back from Hibernation
Joined: Mar 2004
Posts: 1,100
Originally Posted by nismos14
So the subs will be firing down into the trunk? I'm not able to visualize the whole project. It's looking really nice though. Kill them mosquiters!
My last post might help you visualize it. The subs will be hanging from this thing (I kinda call it a "tub), which will be hanging from my rear deck. So in my trunk you will see the yellow baskets and magnets (almost as if it was a sealed enclosure with inverted magnets).
I'm considering making a "cool view" if you were to look from the back seat through the rear deck down onto the cones of the woofers, but at this point, that sounds like a lot more work.
Yeah I kill the mosquitoes...I catch them biting me, smack them, and end up with my blood (from their bellies) all over my F ING leg.


Thread Starter
Back from Hibernation
Joined: Mar 2004
Posts: 1,100
All about da birch!
I should be able to get away with 2-3 layers, because I'm using knytex which is super strong mat. If I were using normal mat like you buy at Home Depot, it would take much more..
Here's a link to the knytex...http://www.uscomposites.com/specialty.html the stuff at the top...
I get all my glass and resin (I used their #435 standard layup resin) from here (highly recomend em), or if I'm in a hurry, at a local boat shop, but they don't have knytex...they do have roving though but that doesn't do well with curves.....
Thread Starter
Back from Hibernation
Joined: Mar 2004
Posts: 1,100
Exactly....the "tub" as you see it will be turned upside down compared to how it is in it's current pics, mounted to the underside of the rear deck, and the subs will be kinda like my 12's are in the pic under my name <-------, hanging there, but angled away from each other. Amps mounted on the wall behind it with yellow lights behind em.
Thread Starter
Back from Hibernation
Joined: Mar 2004
Posts: 1,100
Ok...mold is made for the sub tub. Not going to reinforce it until I get in the speaker wire that I'm going to run "through" it (in the backside that you won't really see). That, I find out, will be Monday or Tuesday cause the one place that had the yellow speaker wire I want is taking it's time....sooooo
turning my attention back to the amp rack...test fit time, and time to figure out how to mount fourth amp in front so it doesn't look too stupid...
Pic of the back of the amp rack...example of how wires will run through it. Only wire shown is from the cold cathodes, just an example...
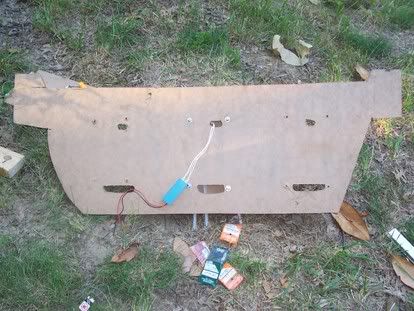 holes on top for RCA's, holes on bottom for power/ground/remote/and speaker wires
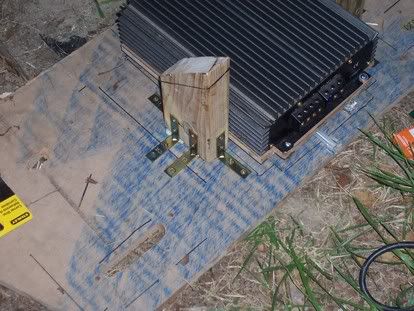
Pic of how I'm "raising" the amps a little under an inch to fit the cold cathodes "behind" the amps, and will have the wiring appearing from behind too....Appropriate sized coupling nuts (same size as screw and t-nuts used) allow me to raise the amps with NO wiggle at all. Cathodes will be better mounted, of course....
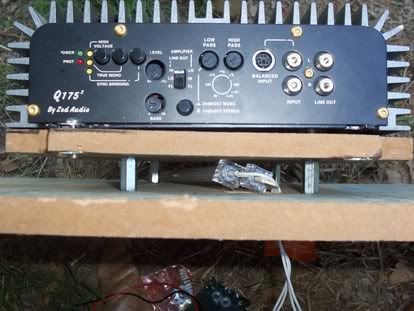
This is a total bite off of Don's idea when he mounted my big 4 channel amp before. He used 2x4's to raise it up off the other amps. I'm doing essentially this, just mounting it at an angle and am going to take measures to mount it so hopefully there's no wiggle. Got a point deducted at SVR because the top amp could move a little, so I'm going to glue it, then I'm gonna screw it,then finally I'm gonna use L brackets to secure it
Pic of 2x4's that will be used to raise 4 channel amp in front of others
About the angle the 4 channel amp will lay over other amps, with lights behind it of course...
All of this will be carpeted in black, of course, but everythings gotta be in order before that happens....
OK gonna go fasten and glue those 2x4's, make a few holes for the 4 channel wiring, and let it dry overnight....then it should be ready for carpeting and final mounting of the wood that will hold the amps!
turning my attention back to the amp rack...test fit time, and time to figure out how to mount fourth amp in front so it doesn't look too stupid...
Pic of the back of the amp rack...example of how wires will run through it. Only wire shown is from the cold cathodes, just an example...
holes on top for RCA's, holes on bottom for power/ground/remote/and speaker wiresPic of how I'm "raising" the amps a little under an inch to fit the cold cathodes "behind" the amps, and will have the wiring appearing from behind too....Appropriate sized coupling nuts (same size as screw and t-nuts used) allow me to raise the amps with NO wiggle at all. Cathodes will be better mounted, of course....
This is a total bite off of Don's idea when he mounted my big 4 channel amp before. He used 2x4's to raise it up off the other amps. I'm doing essentially this, just mounting it at an angle and am going to take measures to mount it so hopefully there's no wiggle. Got a point deducted at SVR because the top amp could move a little, so I'm going to glue it, then I'm gonna screw it,then finally I'm gonna use L brackets to secure it
Pic of 2x4's that will be used to raise 4 channel amp in front of others
About the angle the 4 channel amp will lay over other amps, with lights behind it of course...
All of this will be carpeted in black, of course, but everythings gotta be in order before that happens....
OK gonna go fasten and glue those 2x4's, make a few holes for the 4 channel wiring, and let it dry overnight....then it should be ready for carpeting and final mounting of the wood that will hold the amps!

Thread Starter
Back from Hibernation
Joined: Mar 2004
Posts: 1,100
I'll rout out holes for the speaker/power/RCA wires for the four channel tomorrow. I'm getting eaten alive out there. Where does one get this deet spray????
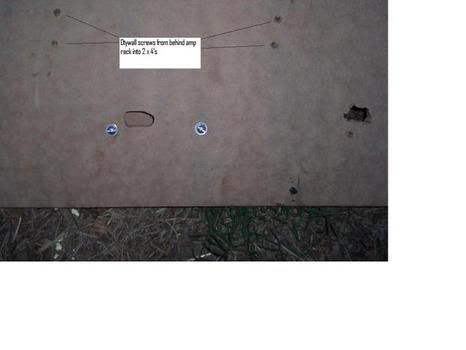
I know these pics here are boring, but oh well. Like I said I was gonna, I used L brackets, glued, then used drywall screws from behind to make sure these lifts aren't going anywhere. Without the glue dry, they are in there SOLID...no wigglage
L brackets being put in place first
Glue-age
Put 2 x 4's back in place with glue there, and fasten the rest of the L bracket to the 2 x 4
More reinforcement....drywall screws through amp rack into 2 x 4's
Thread Starter
Back from Hibernation
Joined: Mar 2004
Posts: 1,100
More work on the amp rack today, and, eh...I'm not the best carpeter and I think I'm going to have to see about lifting up the amp more, as there's just not enough room for the light to really get out  Not even sure if I have more room without redoing the whole amp rack, which aint happening...
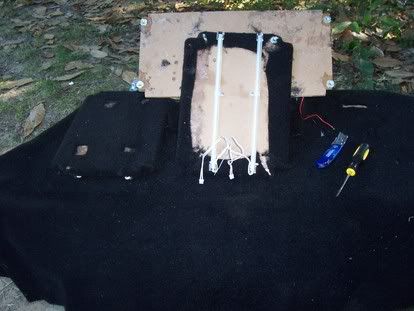
Carpeted wood where amps will mount. The holes in the carpet that you see there shouldn't appear once the amps are mounted. In the previous pic you can see one mounted and the other with cold cathodes mounted. Like I said, woulda turned out much better if I could have lifted them up more so more light could make it out. I couldn't mount cathodes all the way on the sides because my amps aren't long enough.
I actually wired them all up pretty neat, which I can take a pic of tomorrow. I was hurrying and anxious to check finish up and light em up as it was getting dark.
Next, here it is all capreted up. Again, theose holes won't be seen. Amps will be on top of them...You should be able to make out how the top amp is angled
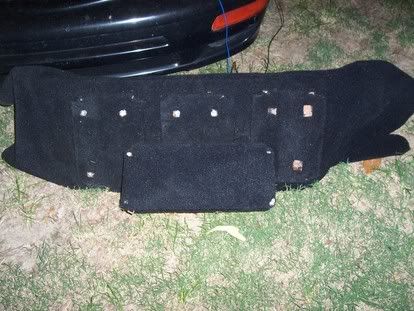
Now the dissapointing pic. You can see the lights under where the top amp will be real well, but the others, I think, don't have enough room to really shine. I'll see how much room I have tomorrow....One way or another, it'll still be neat and clean (for me, at least), just not light up as much as I wanted.
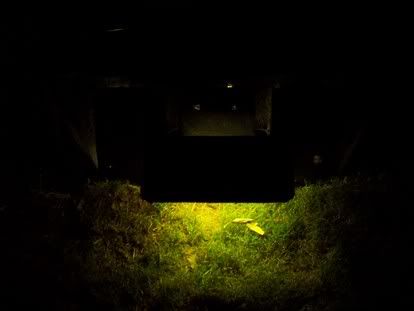
Not even sure if I have more room without redoing the whole amp rack, which aint happening...Carpeted wood where amps will mount. The holes in the carpet that you see there shouldn't appear once the amps are mounted. In the previous pic you can see one mounted and the other with cold cathodes mounted. Like I said, woulda turned out much better if I could have lifted them up more so more light could make it out. I couldn't mount cathodes all the way on the sides because my amps aren't long enough.
I actually wired them all up pretty neat, which I can take a pic of tomorrow. I was hurrying and anxious to check finish up and light em up as it was getting dark.
Next, here it is all capreted up. Again, theose holes won't be seen. Amps will be on top of them...You should be able to make out how the top amp is angled
Now the dissapointing pic. You can see the lights under where the top amp will be real well, but the others, I think, don't have enough room to really shine. I'll see how much room I have tomorrow....One way or another, it'll still be neat and clean (for me, at least), just not light up as much as I wanted.