TunerMax's Progress Thread

TunerMax's Progress Thread
Well it's been suggested to start a progress thread. I'd been thinking about it but never bothered. Seeing as I have about 15+ Customization projects on the go at any given time, it makes sense to start this up.
However, I have no idea where to begin
So I'll just fire off some links to relevent threads and DIY's I've done for some of these past/ongoing mods first, then I'll picture ***** the crap outta this thread.
http://forums.maxima.org/5th-generat...rsion-diy.html
http://forums.maxima.org/5th-generat...g-mod-diy.html
http://forums.maxima.org/5th-generat...ep-please.html
http://forums.maxima.org/5th-generat...drls-done.html
http://forums.maxima.org/5th-generat...guide-diy.html
http://forums.maxima.org/5th-generat...ome-turns.html
http://forums.maxima.org/5th-generat...as-please.html
http://forums.maxima.org/5th-generat...gentlemen.html
http://forums.maxima.org/5th-generat...tailights.html
Update:
http://forums.maxima.org/5th-generat...max-style.html
http://forums.maxima.org/5th-generat...s-process.html
Business Card:

Update 2011/09And here's the link to the new 5.5's progress thread > http://forums.maxima.org/members-rid...-titanium.html
Ok, picture time, seeing as this IS a progress thread, I'll start with the two relevant Nissans I had before this one (I've had a LOT more cars, I'm not posting them though don't worry)
Update, found some more pics of the old '97, was due for a drop before The foreign Ford driver decided to pull out in front of me (within a week of my CF hood and Aerocatch install of course):

My FIRST LED job:

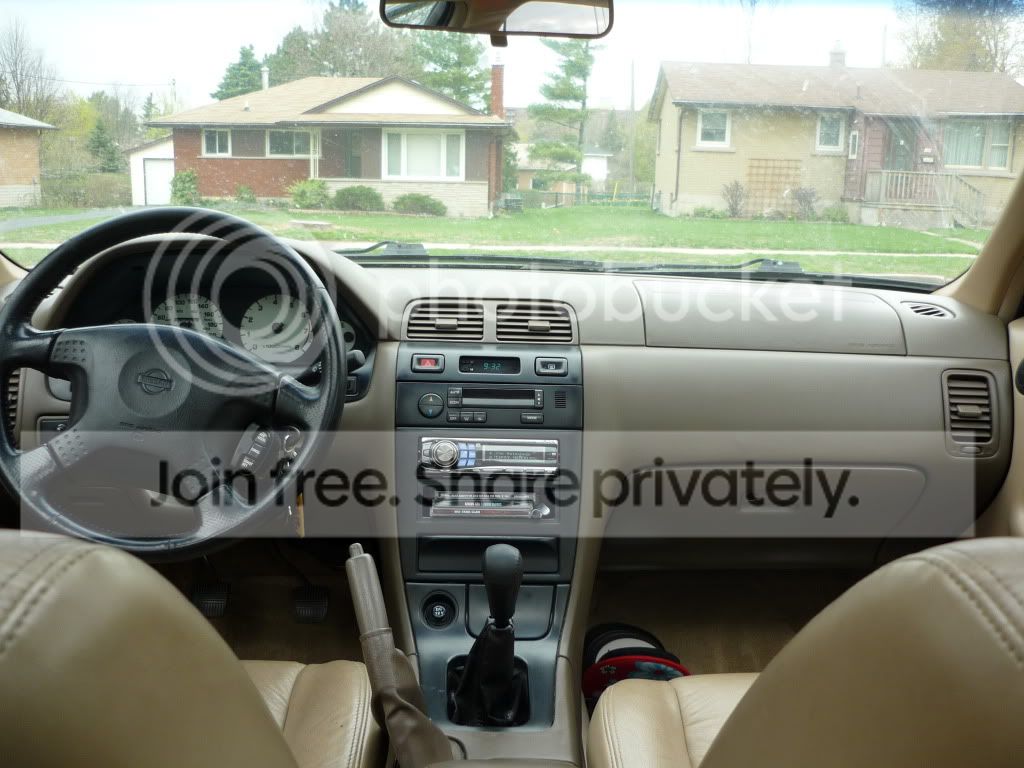
I miss this interior, I like it so much better than the tan 5th gen interior:

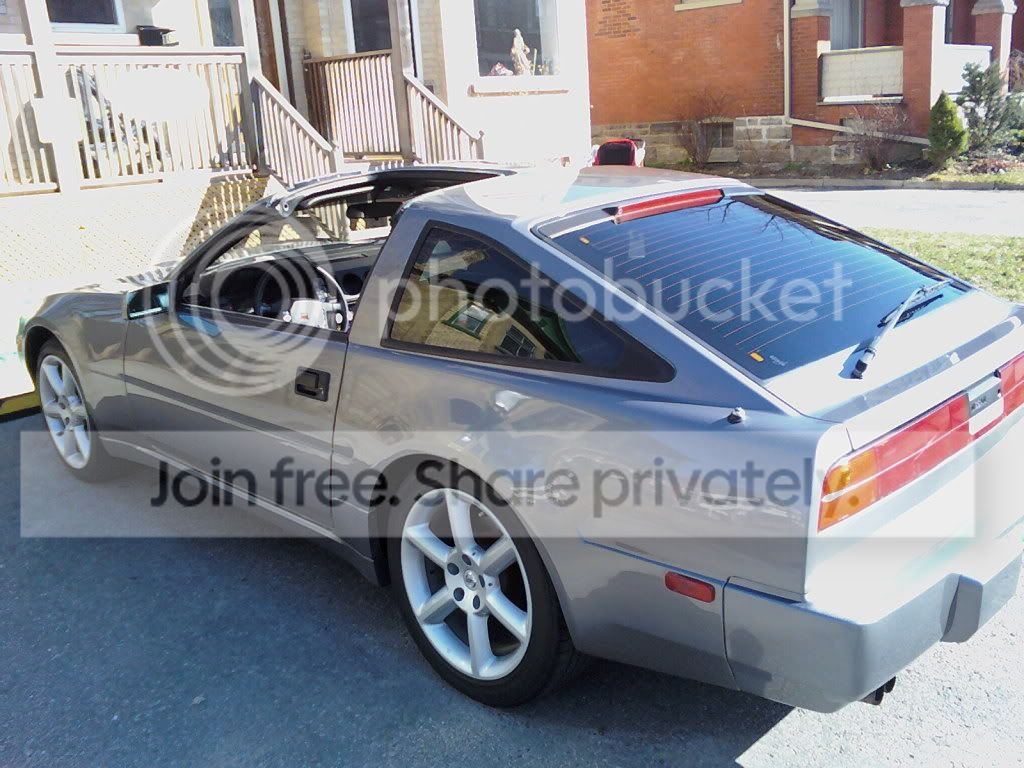
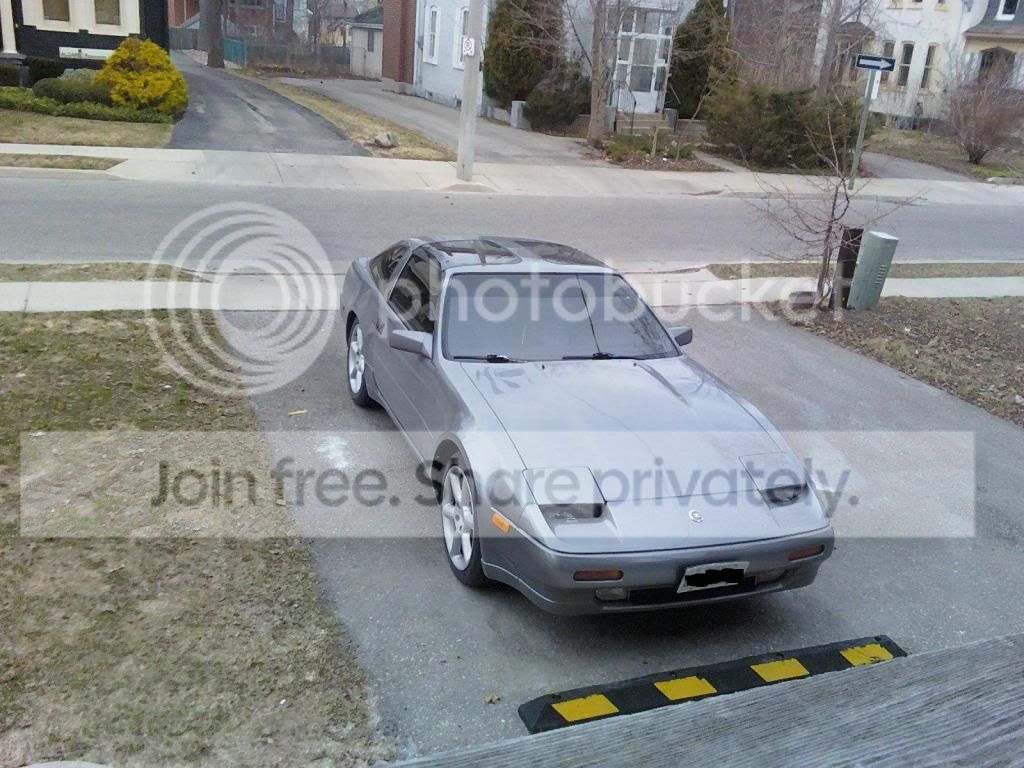
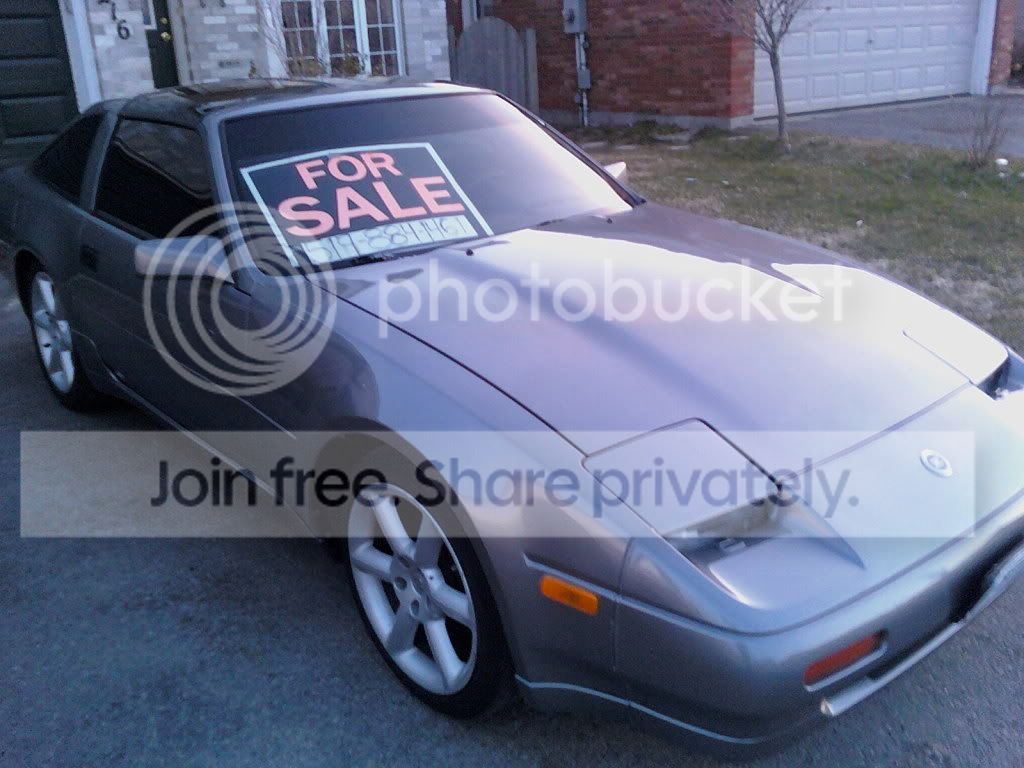
And Just cause I miss it, I am gonna post the 1987 300ZX Turbo I bought shortly before the '97 was wrote off:

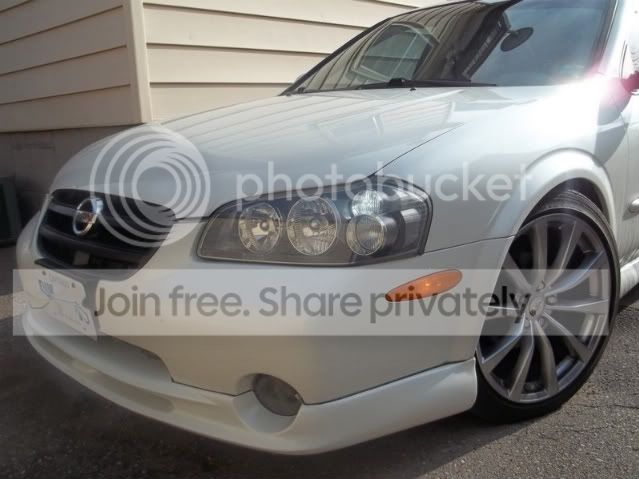
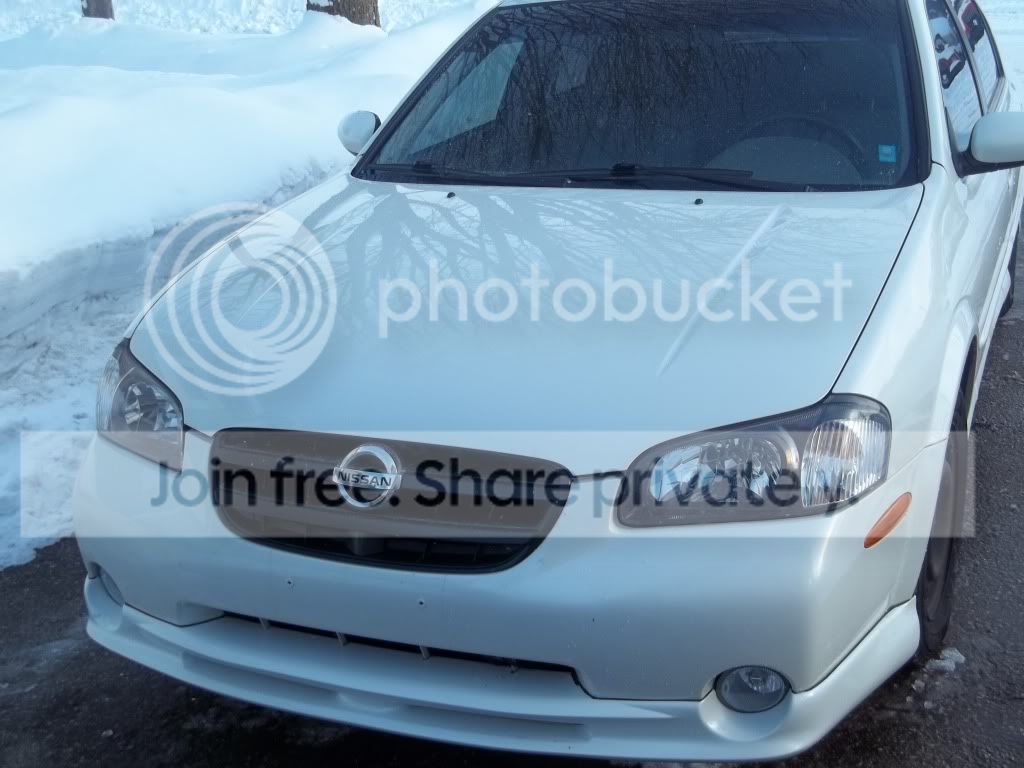
Now, onto the 2001 AE Maxima that you guys know:
Here's what I started with (pretty nice start),
-88,000Km (56xxx Miles roughly)
-Auto
-Stillen lip kit
-Street Scenes Chrome grill
-The rest was bone stock.


However, I have no idea where to begin
So I'll just fire off some links to relevent threads and DIY's I've done for some of these past/ongoing mods first, then I'll picture ***** the crap outta this thread.
http://forums.maxima.org/5th-generat...rsion-diy.html
http://forums.maxima.org/5th-generat...g-mod-diy.html
http://forums.maxima.org/5th-generat...ep-please.html
http://forums.maxima.org/5th-generat...drls-done.html
http://forums.maxima.org/5th-generat...guide-diy.html
http://forums.maxima.org/5th-generat...ome-turns.html
http://forums.maxima.org/5th-generat...as-please.html
http://forums.maxima.org/5th-generat...gentlemen.html
http://forums.maxima.org/5th-generat...tailights.html
Update:
http://forums.maxima.org/5th-generat...max-style.html
http://forums.maxima.org/5th-generat...s-process.html
Business Card:
Update 2011/09And here's the link to the new 5.5's progress thread > http://forums.maxima.org/members-rid...-titanium.html
Ok, picture time, seeing as this IS a progress thread, I'll start with the two relevant Nissans I had before this one (I've had a LOT more cars, I'm not posting them though don't worry)
Update, found some more pics of the old '97, was due for a drop before The foreign Ford driver decided to pull out in front of me (within a week of my CF hood and Aerocatch install of course):
My FIRST LED job:
I miss this interior, I like it so much better than the tan 5th gen interior:
And Just cause I miss it, I am gonna post the 1987 300ZX Turbo I bought shortly before the '97 was wrote off:
Now, onto the 2001 AE Maxima that you guys know:
Here's what I started with (pretty nice start),
-88,000Km (56xxx Miles roughly)
-Auto
-Stillen lip kit
-Street Scenes Chrome grill
-The rest was bone stock.
Last edited by TunerMaxima3000; Sep 17, 2011 at 07:35 AM.
IIRC, other than a crapload of maintenance and cleaning, my first modification was a pretty large one.
Enter: Grill Project:
The Plan: Get rid of the Bulgy, blingy Chrome SS grille on the front of my car. I tried for months to like this grill.
I considered painting, Black Chrome, etc, etc.
I even tried dressing it up with a NISMO badge to distract me from it's bulgyness.
In the end, it lost the battle.
SS Grill removed:
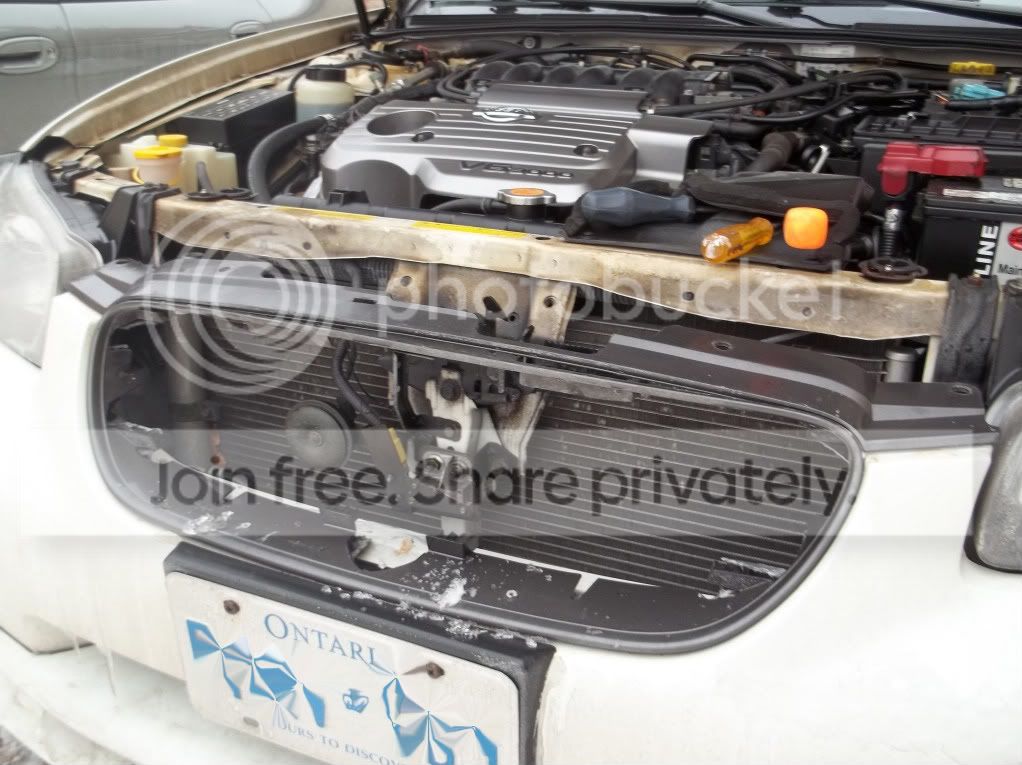
So, I started my research, what I wanted to do was install a stock grill. I found that the 2000/2001 grill was PART of the bumper.
The only removable stock grill was the 2002/2003. I was obviously disappointed, but I couldn't let this stop me.
So I researched more. I asked questions. I found that there had been quite a few people try to install the 5.5 grill, all on record had failed. I then was linked to WhoDatBuul's job, he managed to pull it off. He did it differently to be sure, and used an aftermarket CF grill, he also wouldn't tell anyone how/what he did.
Again, I was discouraged, but there was light shining through on this idea just enough. So...
Measurements, with Insert/Surround piece removed:


I bought the 5.5 grill, sink or swim.
Measurements:

A bunch of epoxy and fitting later:
Oh and there's a DIY I made for that too ~ in the links. Many many more pics if you are interested.
Enter: Grill Project:
The Plan: Get rid of the Bulgy, blingy Chrome SS grille on the front of my car. I tried for months to like this grill.
I considered painting, Black Chrome, etc, etc.
I even tried dressing it up with a NISMO badge to distract me from it's bulgyness.
In the end, it lost the battle.
SS Grill removed:
So, I started my research, what I wanted to do was install a stock grill. I found that the 2000/2001 grill was PART of the bumper.
The only removable stock grill was the 2002/2003. I was obviously disappointed, but I couldn't let this stop me.
So I researched more. I asked questions. I found that there had been quite a few people try to install the 5.5 grill, all on record had failed. I then was linked to WhoDatBuul's job, he managed to pull it off. He did it differently to be sure, and used an aftermarket CF grill, he also wouldn't tell anyone how/what he did.
Again, I was discouraged, but there was light shining through on this idea just enough. So...
Measurements, with Insert/Surround piece removed:
I bought the 5.5 grill, sink or swim.
Measurements:
A bunch of epoxy and fitting later:
Oh and there's a DIY I made for that too ~ in the links. Many many more pics if you are interested.
Last edited by TunerMaxima3000; Mar 17, 2011 at 08:41 PM.


Thanks for the compliments, I'm definitely a picky SOB, and for the next 8 weeks, I'll have some time to be  Then I have to go back to work AND take care of my son by myself. I'm kind of hoping to get the bulk of my mods out of the way before then.... Hope those Teins get here soon
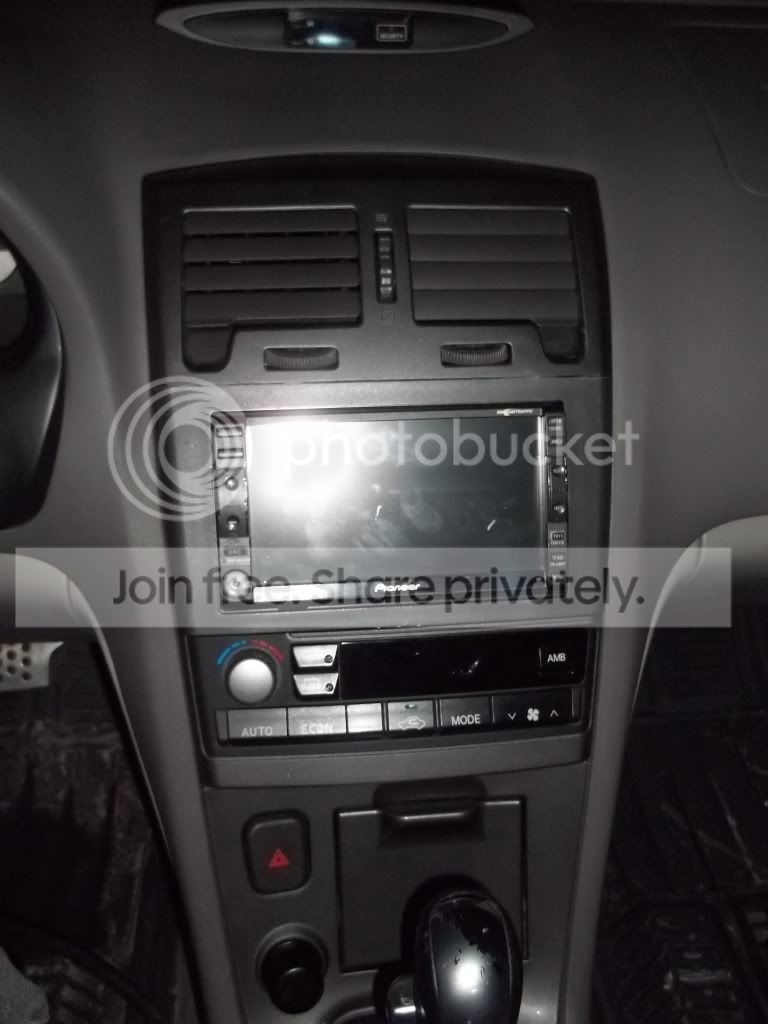
Ok, hmmm, next quick notable mods:
- Avic D2 Install, heat gun and super glue to temporarily correct the cheap Double Din kit.
Plans in place to revise this even more.
I was thinking of doing CF wrap and making it one piece, or epoxying it and making it one piece... then I'd have to paint it, and it's hard to paint match.... A mod for later down the road once I get more picky about the bland interior.
The interior is a tough thing to do properly, because it's a very high build quality OEM. I don't want to add ANYTHING that doesn't match OEM quality or better.

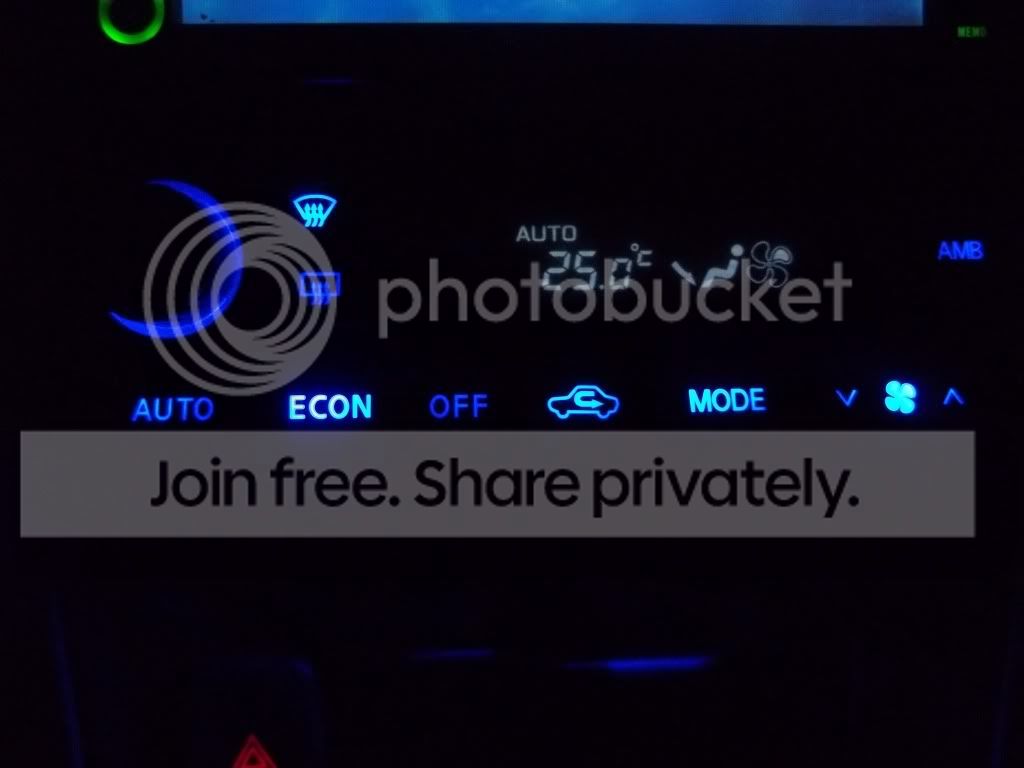
Then, hmm, White clock and ACC:

Then I have to go back to work AND take care of my son by myself. I'm kind of hoping to get the bulk of my mods out of the way before then.... Hope those Teins get here soon Ok, hmmm, next quick notable mods:
- Avic D2 Install, heat gun and super glue to temporarily correct the cheap Double Din kit.
Plans in place to revise this even more.
I was thinking of doing CF wrap and making it one piece, or epoxying it and making it one piece... then I'd have to paint it, and it's hard to paint match.... A mod for later down the road once I get more picky about the bland interior.
The interior is a tough thing to do properly, because it's a very high build quality OEM. I don't want to add ANYTHING that doesn't match OEM quality or better.
Then, hmm, White clock and ACC:
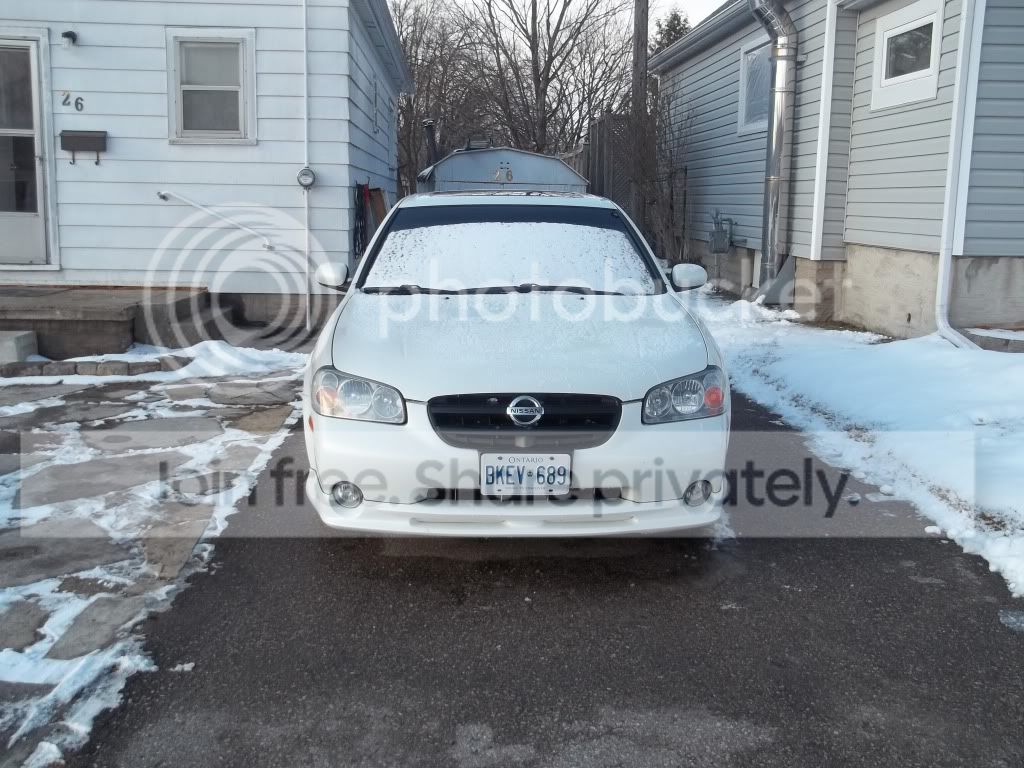
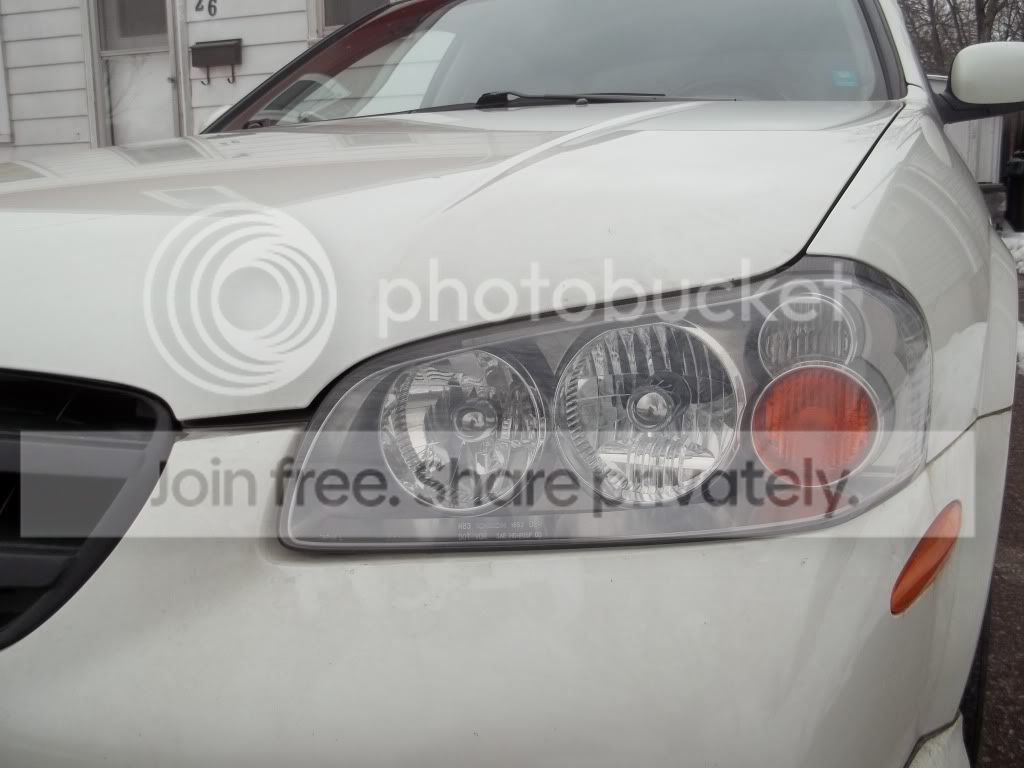
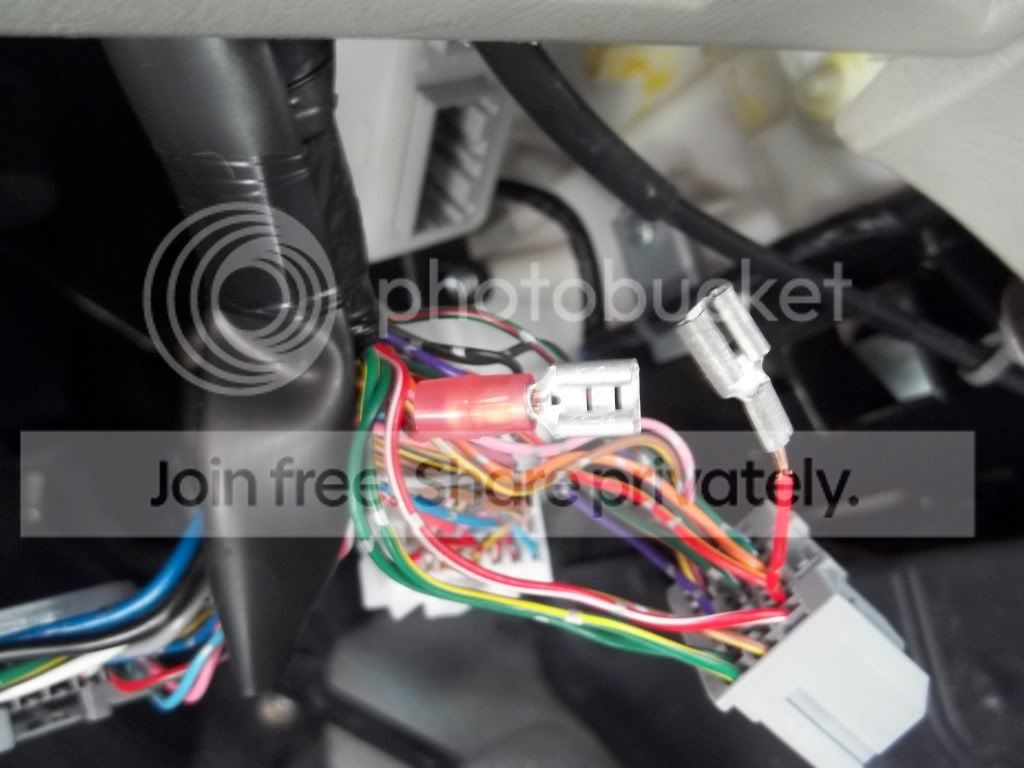
Then, I started to play with the 5.5 headlights in between other ideas/projects.
I searched around a bunch to try and find a good guide for install. All I found was the hideous mess of yellow wires and scotch locks that exists in the Stickies.
So after spending a good hour or more searching, I said, this is dumb, I can make my own bloody hook up guide, or just figure it out in an hour or two.
So I did And I made the Hook-Up Guide for you guys, see link above. I'll be installing the 5.5 front end on my friend car Sunday, so expect the Completed DIY to get attatched to the Hook-Up Guide soon. Hopefully that can replace the sticky shenanigans that currently exists for the swap.
Anyways, back to the project. Most guys would have just installed them and been done with it. Well if you haven't learnt by now, that's just not good enough for me.
The fitment wasn't good enough. Most guys correct this by ignoring it, or taking trick angle pictures so you don't see it. Well, I mod my car for myself more than I do for anyone else, so that wasn't acceptable.
Here's a couple shots of the poor fit:
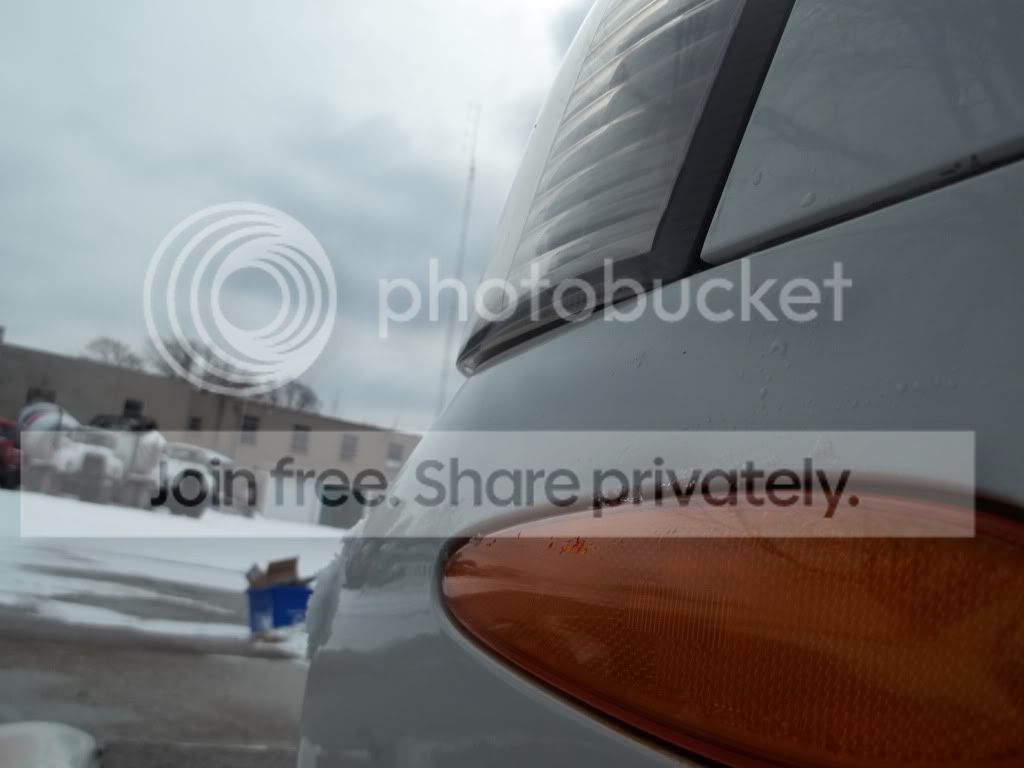


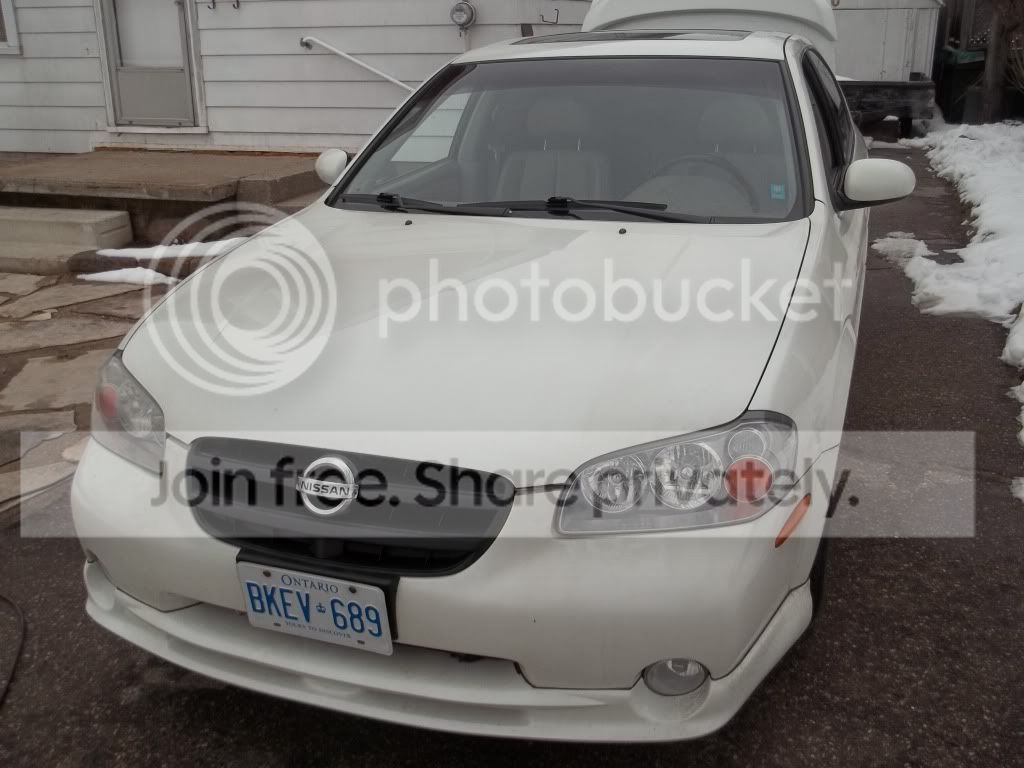
So, I modified the mounting a bit. I still have to tinker with it once MY 5.5 lights get picked up, blacked out and installed.


And Voila, much, much better:


I searched around a bunch to try and find a good guide for install. All I found was the hideous mess of yellow wires and scotch locks that exists in the Stickies.
So after spending a good hour or more searching, I said, this is dumb, I can make my own bloody hook up guide, or just figure it out in an hour or two.
So I did
And I made the Hook-Up Guide for you guys, see link above. I'll be installing the 5.5 front end on my friend car Sunday, so expect the Completed DIY to get attatched to the Hook-Up Guide soon. Hopefully that can replace the sticky shenanigans that currently exists for the swap.Anyways, back to the project. Most guys would have just installed them and been done with it. Well if you haven't learnt by now, that's just not good enough for me.
The fitment wasn't good enough. Most guys correct this by ignoring it, or taking trick angle pictures so you don't see it. Well, I mod my car for myself more than I do for anyone else, so that wasn't acceptable.
Here's a couple shots of the poor fit:
So, I modified the mounting a bit. I still have to tinker with it once MY 5.5 lights get picked up, blacked out and installed.
And Voila, much, much better:
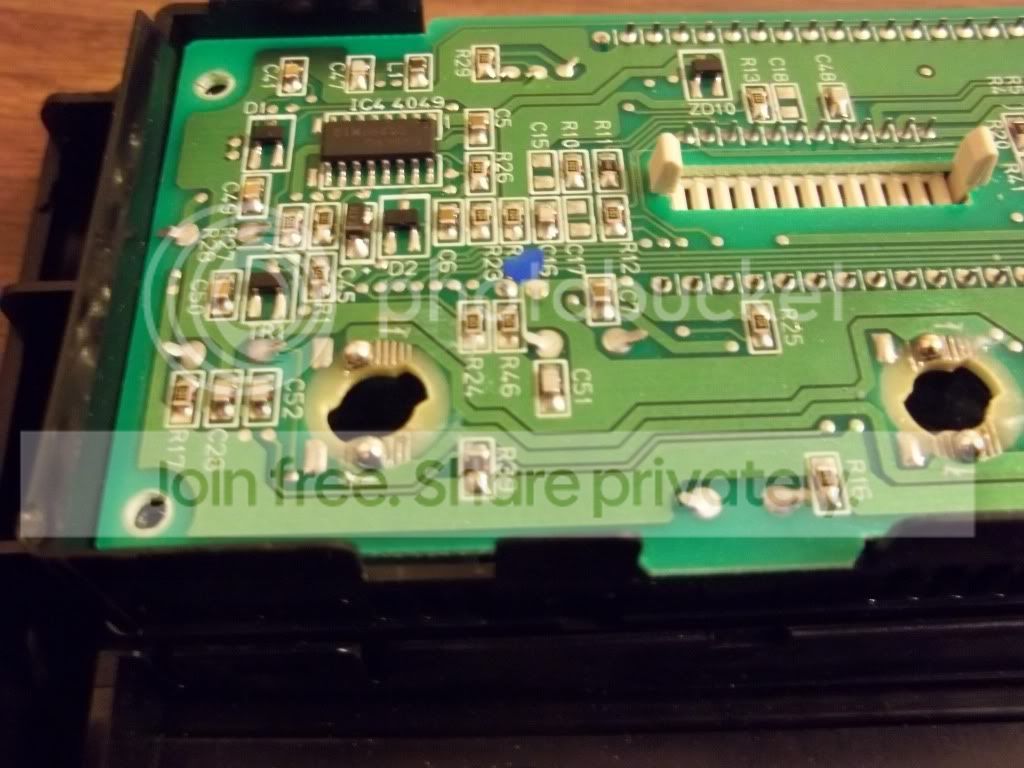
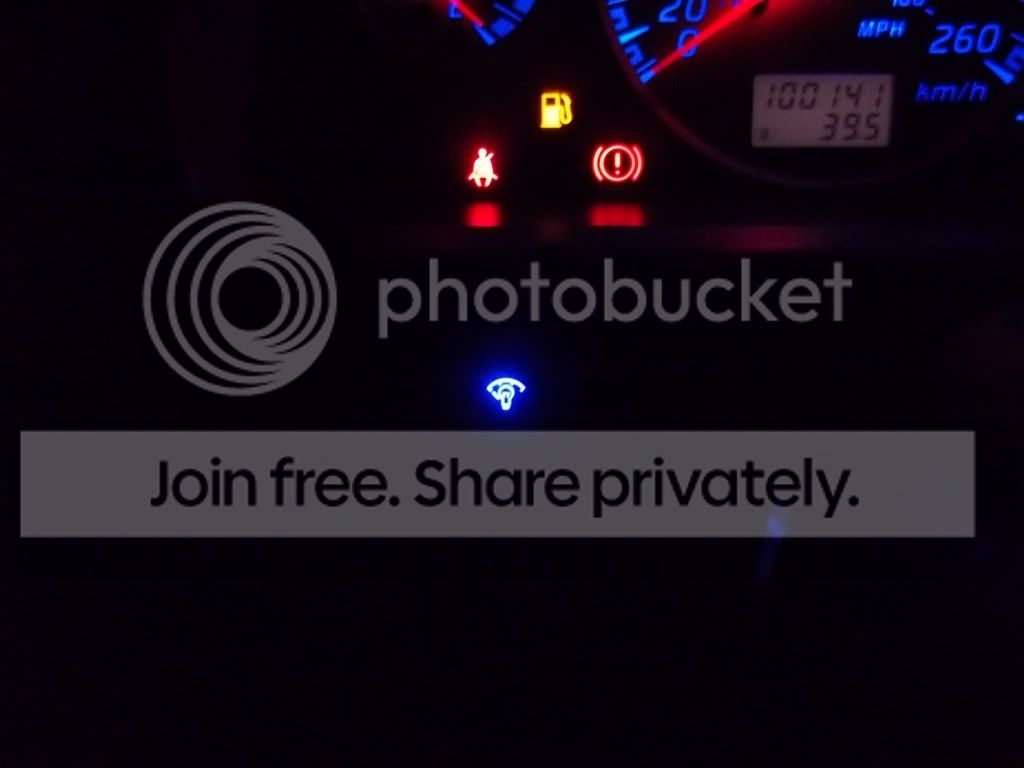
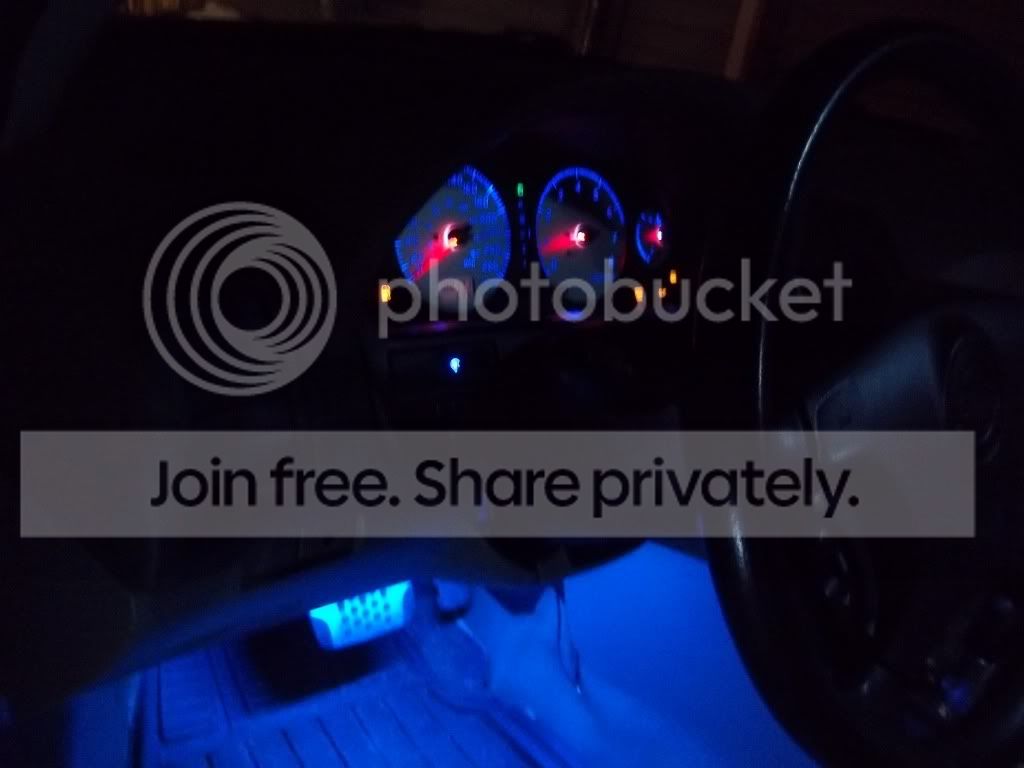
And, this is jumping out of order, but I just finished it tonight and wanted to post as I go. I'm doing the LED mods right now, just finished up the ACC.
I'm not super happy with it, I may get in some different LED's, or install them differently to try and get rid of the hot-spotting. It's not bad really, but it's evident, and I'm picky
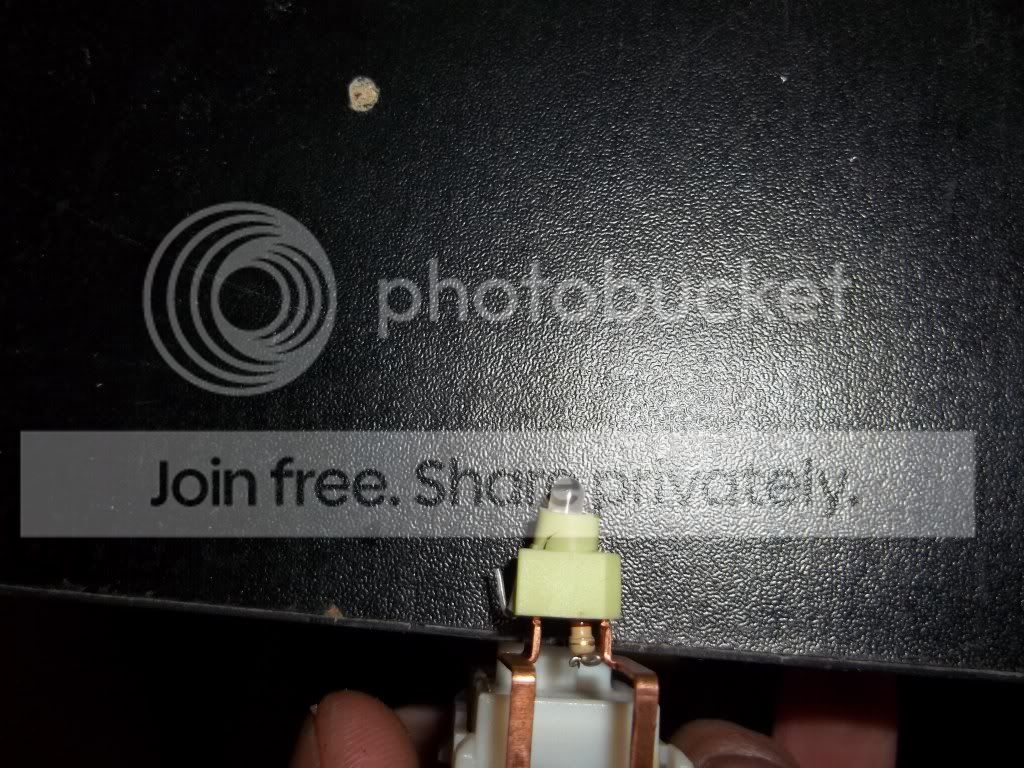
Prepping the Circuit board, tinned and 'puddled' (that's my term for installing a blotch of solder on the place I want to attatch to, I know it's not the proper term, but I don't know what the proper term is, so deal):
Installed LED:
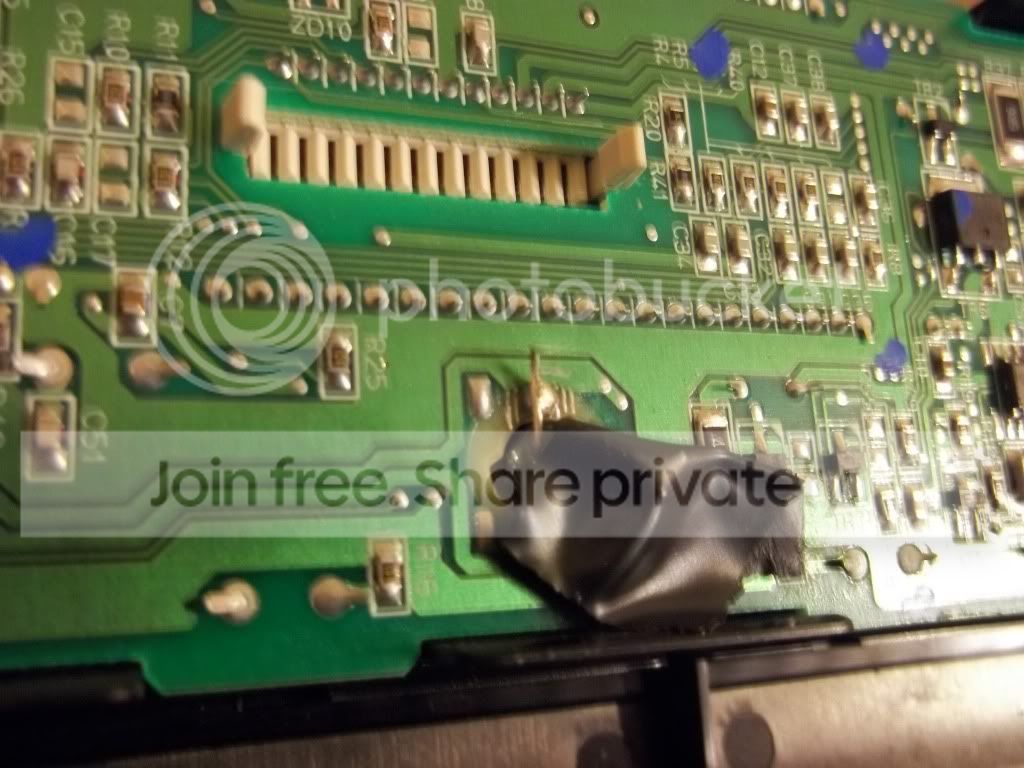

Put a wide-angle T5 in the bottom for now, may install more later:

Installed:

I'm not super happy with it, I may get in some different LED's, or install them differently to try and get rid of the hot-spotting. It's not bad really, but it's evident, and I'm picky
Prepping the Circuit board, tinned and 'puddled' (that's my term for installing a blotch of solder on the place I want to attatch to, I know it's not the proper term, but I don't know what the proper term is, so deal
):Installed LED:
Put a wide-angle T5 in the bottom for now, may install more later:
Installed:
Last edited by TunerMaxima3000; Apr 6, 2011 at 08:06 PM.


If I do anything with it, which I likely will:
I have the 5mm Blue in there now, with just the tip sanded a bit. I tried aiming them, didn't make a difference really.
I have diffused Blue, Flat top Blue, 5mm Blue and 3mm Blue.
I also think I have a few Blue tinted 194's somewhere, I may need to buy them though, I will likely try those first, then if they don't look good (they should),
I'll try the diffused LED, then the flat top.
If none of them work well by themselves, I'll try installing a array of 3mm's that will do a 90 degree turn in opening.
If that doesn't work, I will buy some wide angle LEDs.
I'm pretty sure blue tinted 194's will work perfect for the ACC though, simple swap out.
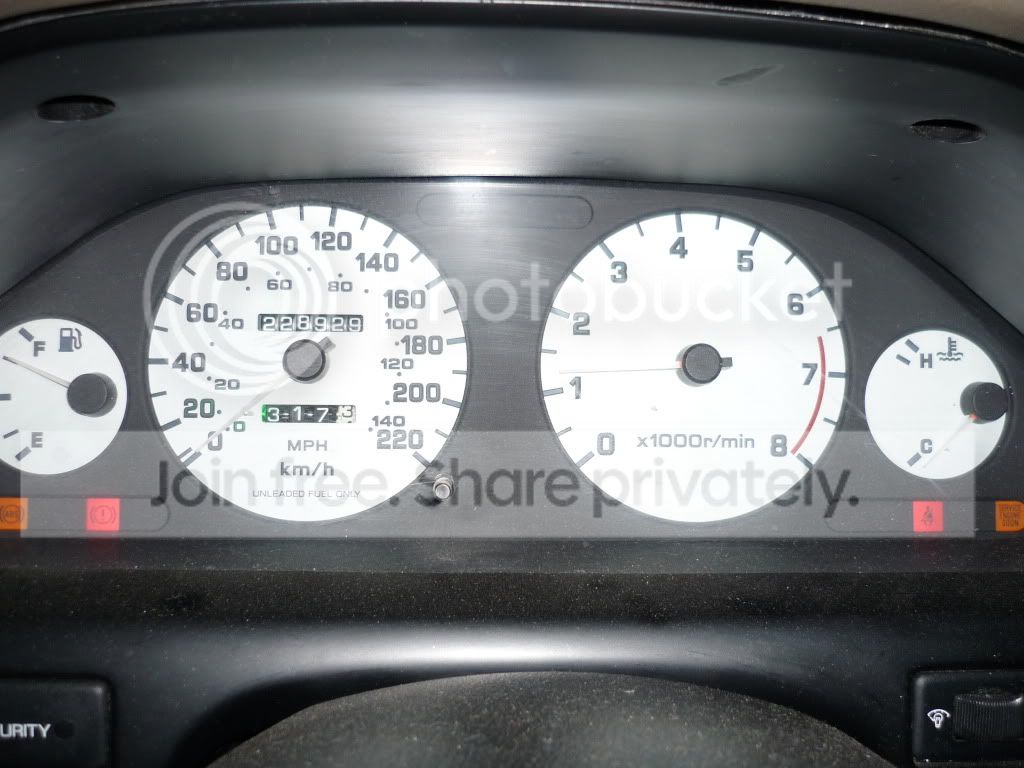
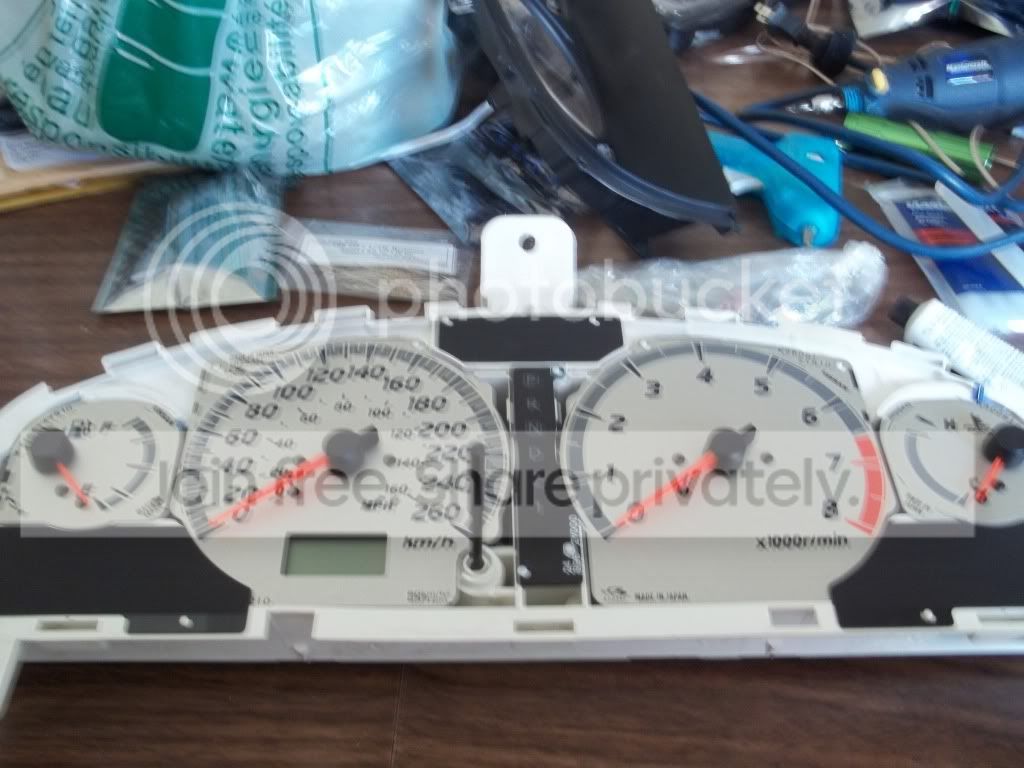
LED GAUGES
In process.
I had read on here that you can sand down the orange colouring on the needles.... maybe that's for a different year/model. Mine seem to be completely orange, not just a strip on the bottom.
Anyways, that messes up my initial plan. So I was wondering if the 4th Gen SE needles may fit, I know they are sandable. I'm going to try the wreckers see if I can check it out.
Here's my old 4th Gen SE Gauges after I installed the LEDs and sanded needles:

Dissassembly process, pic of needles:
I also thought I may like that the orange stays on... I always found it difficult to read my speed during the daytime with my old 4th Gen setup.
I'm pretty sure at night you wouldn't even see the orange on the needles once I illuminate them with the Blue LEDs.
I'll test that out tonight hopefully. Pics to come.
I had read on here that you can sand down the orange colouring on the needles.... maybe that's for a different year/model. Mine seem to be completely orange, not just a strip on the bottom.
Anyways, that messes up my initial plan. So I was wondering if the 4th Gen SE needles may fit, I know they are sandable. I'm going to try the wreckers see if I can check it out.
Here's my old 4th Gen SE Gauges after I installed the LEDs and sanded needles:
Dissassembly process, pic of needles:
I also thought I may like that the orange stays on... I always found it difficult to read my speed during the daytime with my old 4th Gen setup.
I'm pretty sure at night you wouldn't even see the orange on the needles once I illuminate them with the Blue LEDs.
I'll test that out tonight hopefully. Pics to come.
Last edited by TunerMaxima3000; Apr 1, 2011 at 09:17 AM.
And YOU would notice that John
 .
.I'm a mechanic, they have to get snipped constantly. I guess they do make nail cutters for that though.
Ok what did I do next...
Installed some SMD boards in the MAP lights, Dome lights, and Doors.


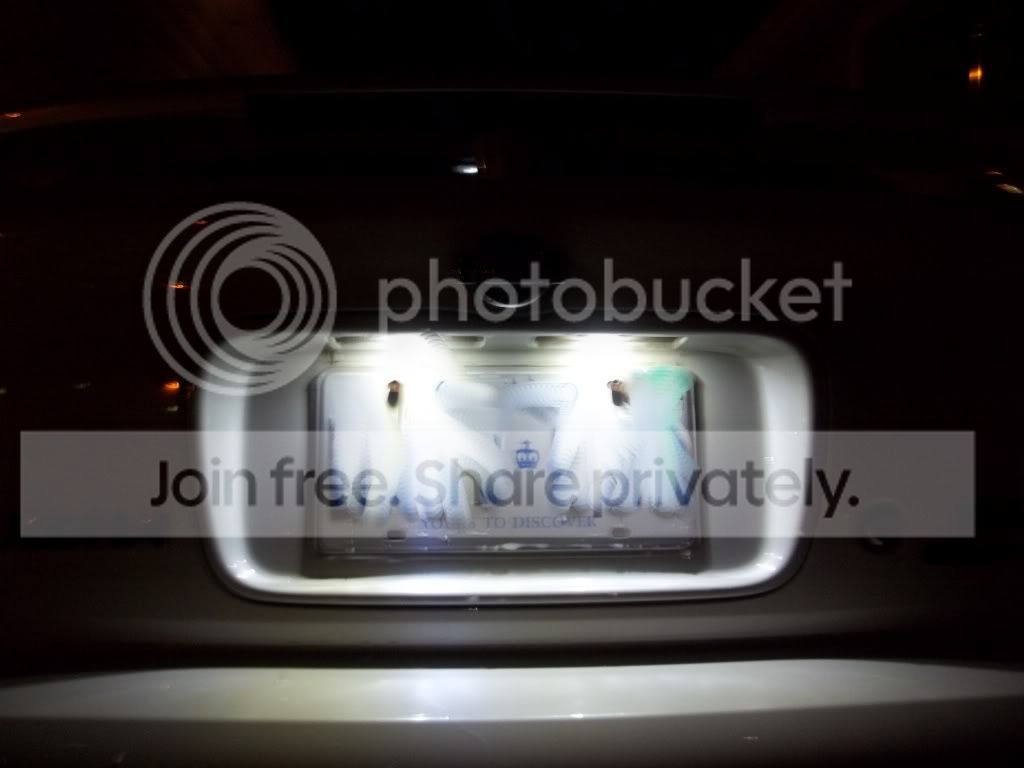
Licence Light LED's round 1:
Wired in underhood light:


^ That's getting redone, once my Neon tubes get here. So I'll leave the rest of this post for those pics when it happens.
Installed some SMD boards in the MAP lights, Dome lights, and Doors.
Licence Light LED's round 1:
Wired in underhood light:
^ That's getting redone, once my Neon tubes get here. So I'll leave the rest of this post for those pics when it happens.
Last edited by TunerMaxima3000; Mar 18, 2011 at 07:49 PM.
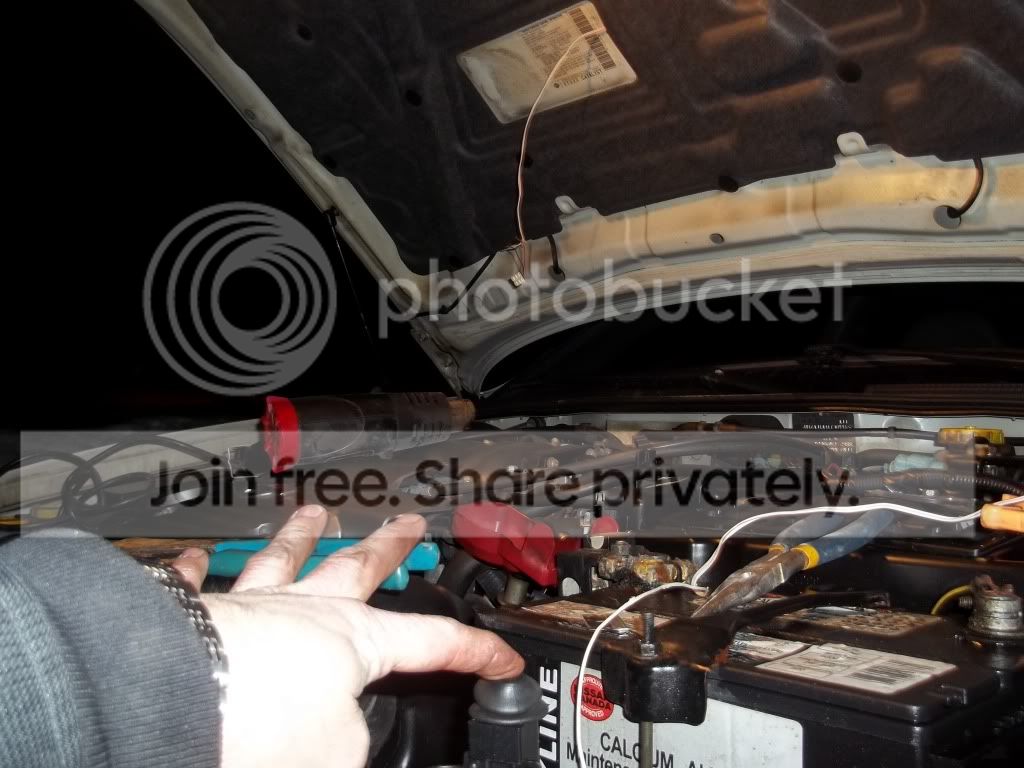
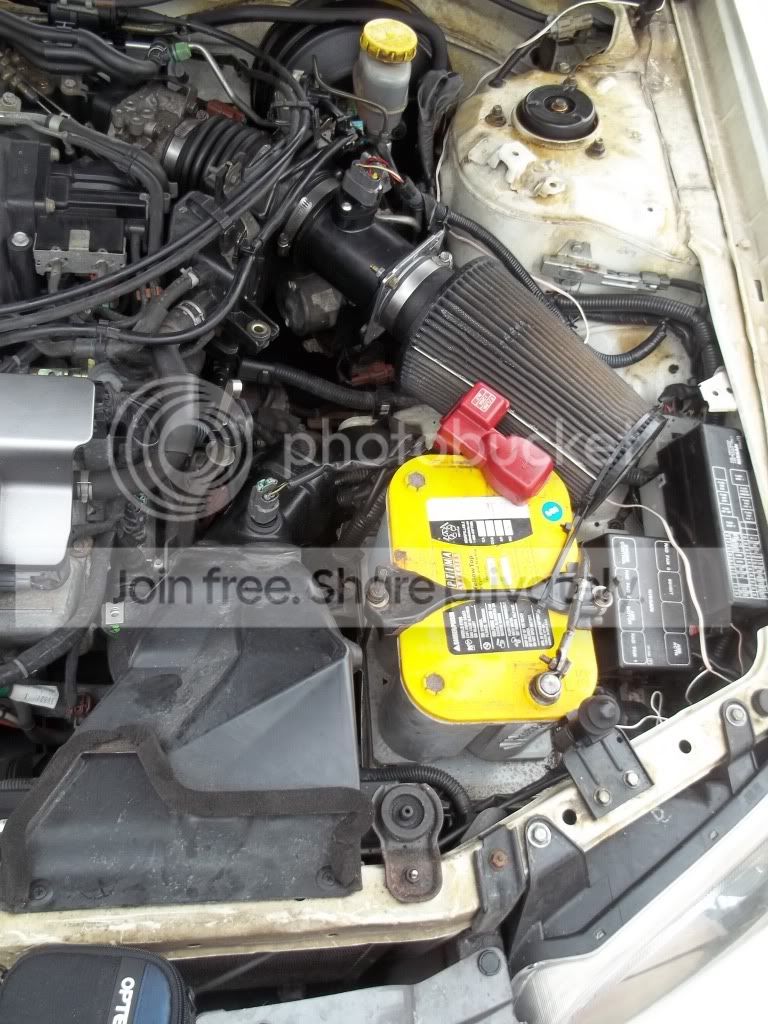
CAI
Now, Intake work. This is ongoing.
Temporary set up, with relocated battery:
With a lot of help From Sparks03Max, a whack of research, and a bunch of measuring, I decided the best set-up for my purposes on the DE-K was a long, 3" True CAI.
Rough Projected Layout:


Rest Bookmarked until I get parts.
Temporary set up, with relocated battery:
With a lot of help From Sparks03Max, a whack of research, and a bunch of measuring, I decided the best set-up for my purposes on the DE-K was a long, 3" True CAI.
Rough Projected Layout:
Rest Bookmarked until I get parts.
Last edited by TunerMaxima3000; Mar 18, 2011 at 08:01 PM.
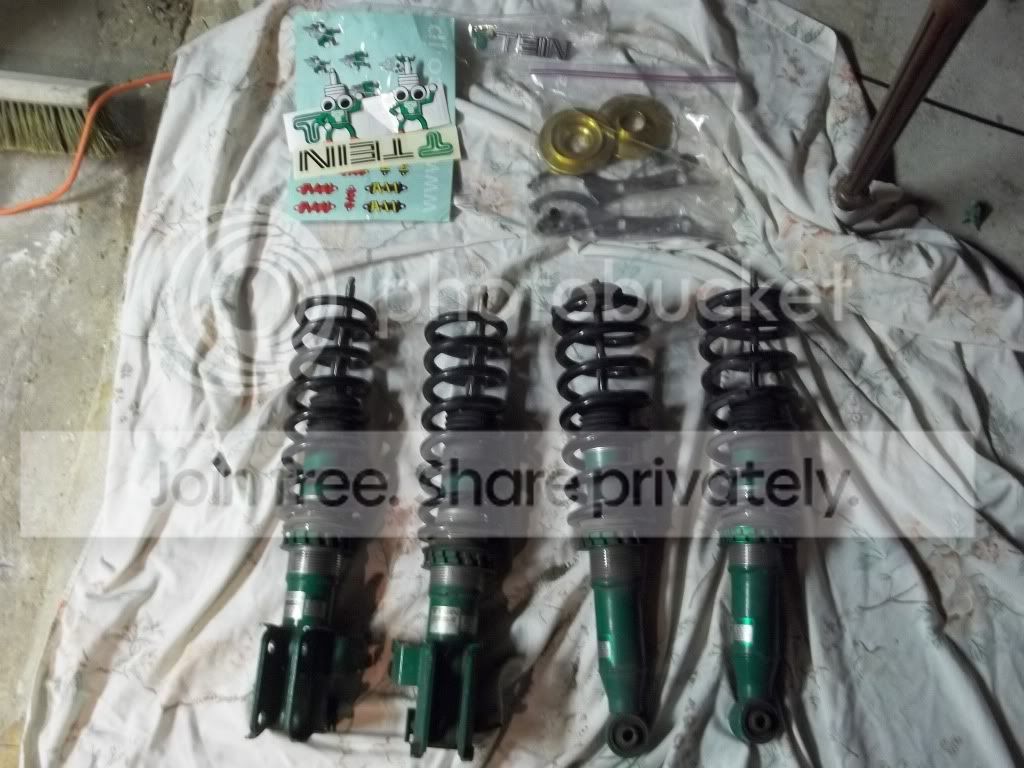
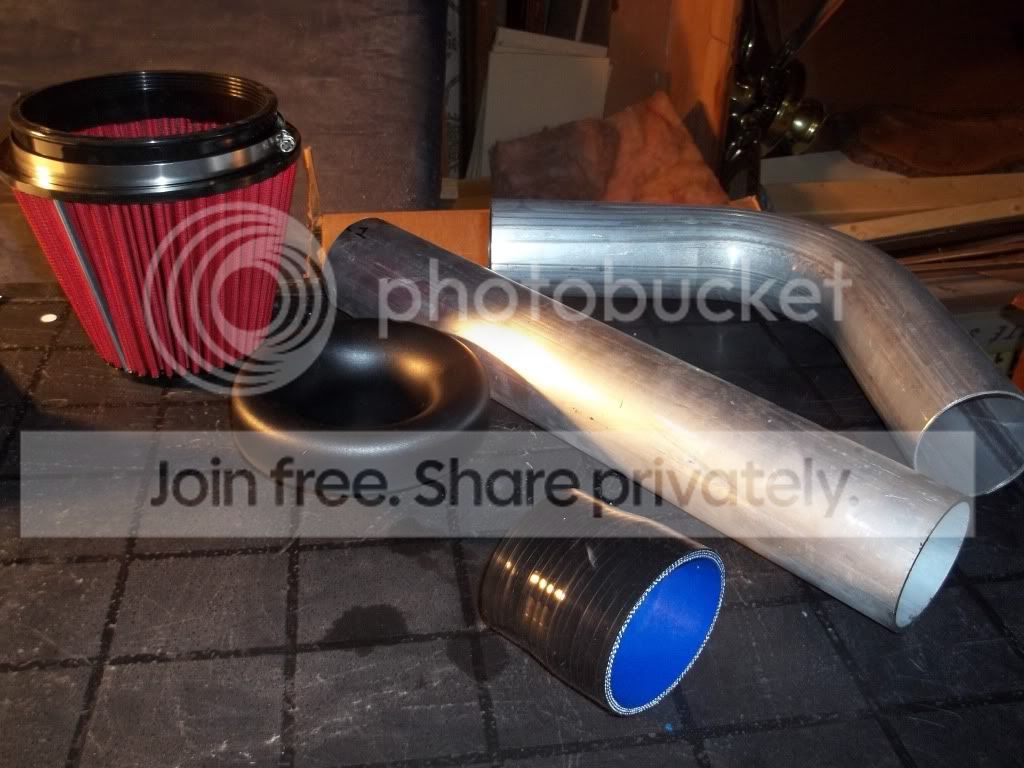
Bookmarked x3
Pic of all Parts except silicone hose for couplers, picking that up when I go to work to do the job, waiting for time to do it. On hold.

~~~~~~~~~~~~~~~
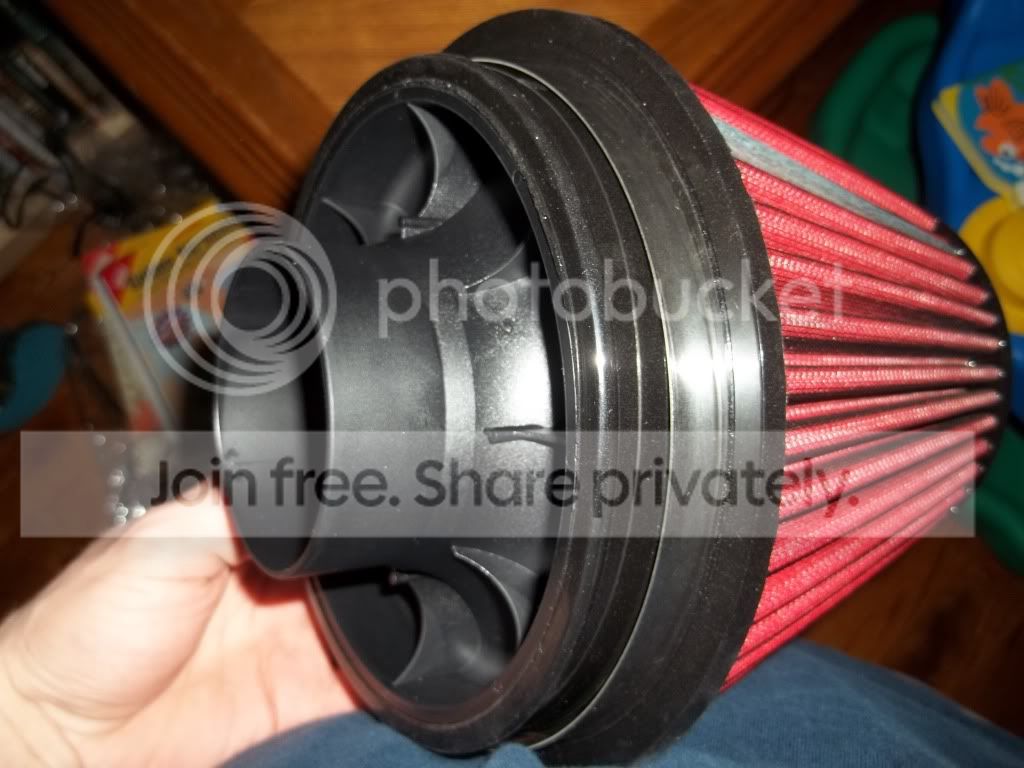
EDIT 04/27/2011: Temporary Velocity stack and Filter installed, almost back to work! Should get a chance to do the CAI in the next month or two if nothing else comes up


And I have to say, I"m going to miss the sound when I do the CAI....
Video has some weird noise interfering, maybe the wind? Dunno.
Pic of all Parts except silicone hose for couplers, picking that up when I go to work to do the job, waiting for time to do it. On hold.
~~~~~~~~~~~~~~~
EDIT 04/27/2011: Temporary Velocity stack and Filter installed, almost back to work! Should get a chance to do the CAI in the next month or two if nothing else comes up
And I have to say, I"m going to miss the sound when I do the CAI....
Video has some weird noise interfering, maybe the wind? Dunno.
Last edited by TunerMaxima3000; Apr 27, 2011 at 08:26 PM.
HID fogs were next:


Then I figured out how to wire the MAP light to come on with the dome light without any more than a relay.
That Write up is in the OP too.
Heres a couple pics.


Swapped in some 15 SMD LEDs into the Headlight Marker light positions:

Then I ordered in some Red Vinyl for my tailights. I cut them myself, they turned out great. Left side needs to be re-done, and I'm going to try some wiring changes as well as a light smoke tint on the reverse light circle.


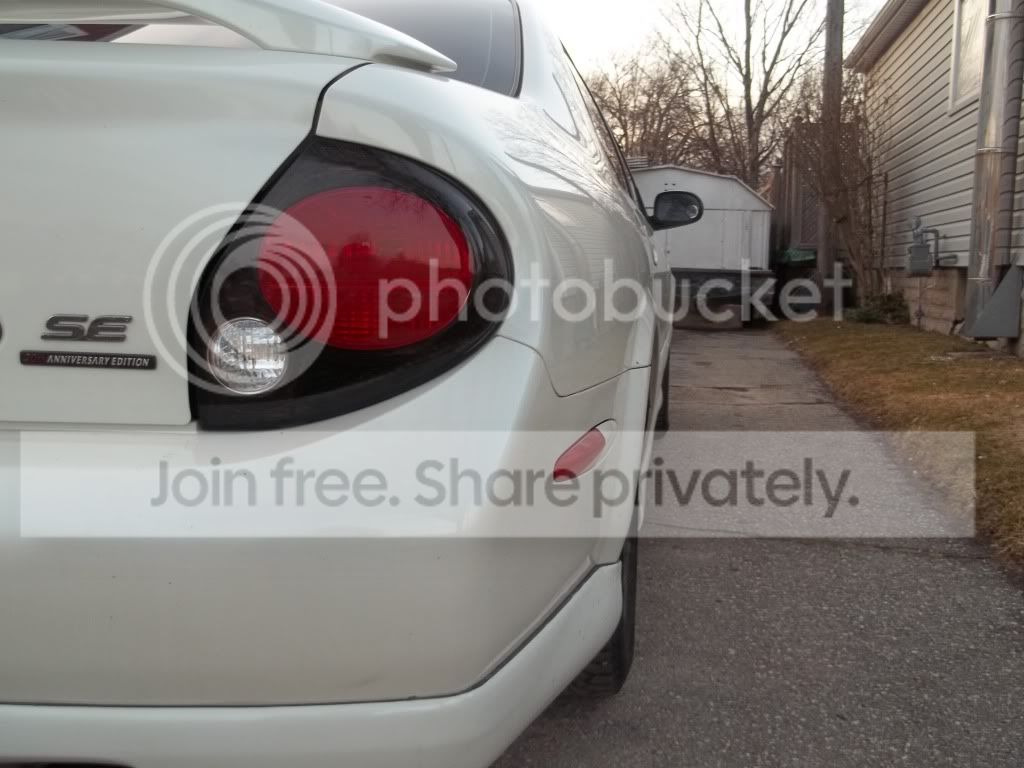
And put a light smoke tint on the fogs:


Then I figured out how to wire the MAP light to come on with the dome light without any more than a relay.
That Write up is in the OP too.
Heres a couple pics.
Swapped in some 15 SMD LEDs into the Headlight Marker light positions:
Then I ordered in some Red Vinyl for my tailights. I cut them myself, they turned out great. Left side needs to be re-done, and I'm going to try some wiring changes as well as a light smoke tint on the reverse light circle.
And put a light smoke tint on the fogs:
Last edited by TunerMaxima3000; Mar 18, 2011 at 08:18 PM.
I haven't taken the Speedometer or Tach out yet. If I have to pull the needles, I'm not sure if I need to calibrate the Tach, hope not, cause I have no idea how to on the 2000/2001, the DIY process doesn't work on them in my experience.
I think I'll have to mark them in order to reinstall in the same location, it's a pain but it's do-able.
And Slim, those Rims are looking fly as all birds man, very nice! My Tein's should get shipped Sunday, the payment went through.
I think I'll have to mark them in order to reinstall in the same location, it's a pain but it's do-able.
And Slim, those Rims are looking fly as all birds man, very nice! My Tein's should get shipped Sunday, the payment went through.
Last edited by TunerMaxima3000; Apr 1, 2011 at 09:08 AM.
Couple snaps of the LED install in the Temp Gauge
I got the Temp gauge done, but I bought the wrong sized hot glue sticks, so I'm stuck until I can go out later. Looking forward to night time tests regarding needles and 3mm LED brightness, I've never used the 3mm's.
I'll post updates tonight.> Done
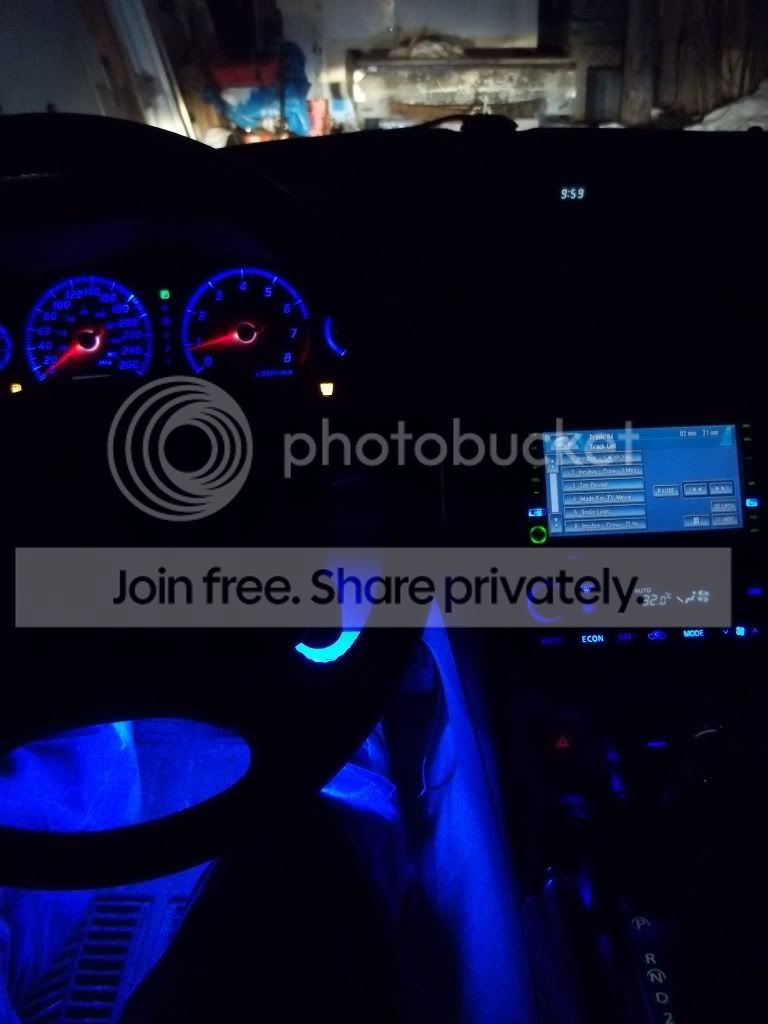
Here's a Nightime shot, just the Temp Gauge done:

It's not what I planned, but it looks good.
It's subtle, which I like. I'm disappointed that they didn't shine any blue through the needle hardly at all, there must be a red/orange tint inside the base of the needle as well as on the needle itself.
This means I'm likely going to do some junkyard hunting and cross my fingers that the 4th gen needles are the same size.
I'll post updates tonight.> Done
Here's a Nightime shot, just the Temp Gauge done:
It's not what I planned, but it looks good.
It's subtle, which I like. I'm disappointed that they didn't shine any blue through the needle hardly at all, there must be a red/orange tint inside the base of the needle as well as on the needle itself.
This means I'm likely going to do some junkyard hunting and cross my fingers that the 4th gen needles are the same size.
Last edited by TunerMaxima3000; Apr 1, 2011 at 09:16 AM.

Senior Member
Joined: Apr 2004
Posts: 1,861
From: Atlanta
^ Coloured Transparent film.
Updated Gauge shot (still working on it, just took a quick picture for now):

I installed the Reverse light LED's today:
FLASH ON:

Flash OFF:


Just reverse lights:

And I got one window switch done. My time for working on my car is getting short with this business :P
LED installed in holder:
Before:

After:

Flash ON:

And sorry for the Dead links, Photobucket is giving me a hard time, I'll clean it up soon.
Updated Gauge shot (still working on it, just took a quick picture for now):
I installed the Reverse light LED's today:
FLASH ON:
Flash OFF:
Just reverse lights:
And I got one window switch done. My time for working on my car is getting short with this business :P
LED installed in holder:
Before:
After:
Flash ON:
And sorry for the Dead links, Photobucket is giving me a hard time, I'll clean it up soon.
Last edited by TunerMaxima3000; Apr 1, 2011 at 09:10 AM.

All my LED services are available to you guys at a 10% discounted rate. I'm still running start up pricing, so take advantage now! I'm booking up fairly quickly.
Here's a link to my ad:
http://forums.maxima.org/general-max...rk-gauges.html
Thanks for the compliments. My car hasn't been getting as much attention since I started this business LOL. I'm hoping to stock all gauge types so I have a spare for locals if necessary, as well as some different gauges for you guys to look at.
Window Switches, Dimmer Switch
Dimmer Before:

Dimmer After:
Heated Seat Switches Before:


Process:

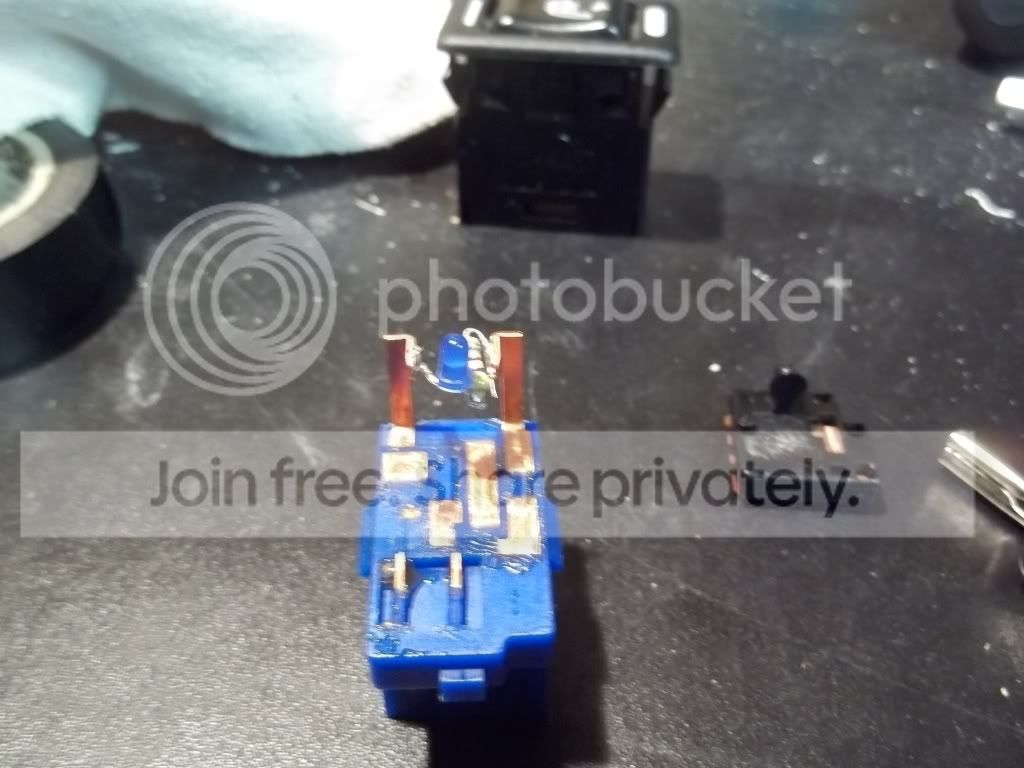
After:


I'm impatiently waiting for a LED restock. I can't do any more right now.
Dimmer After:
Heated Seat Switches Before:
Process:
After:
I'm impatiently waiting for a LED restock. I can't do any more right now.


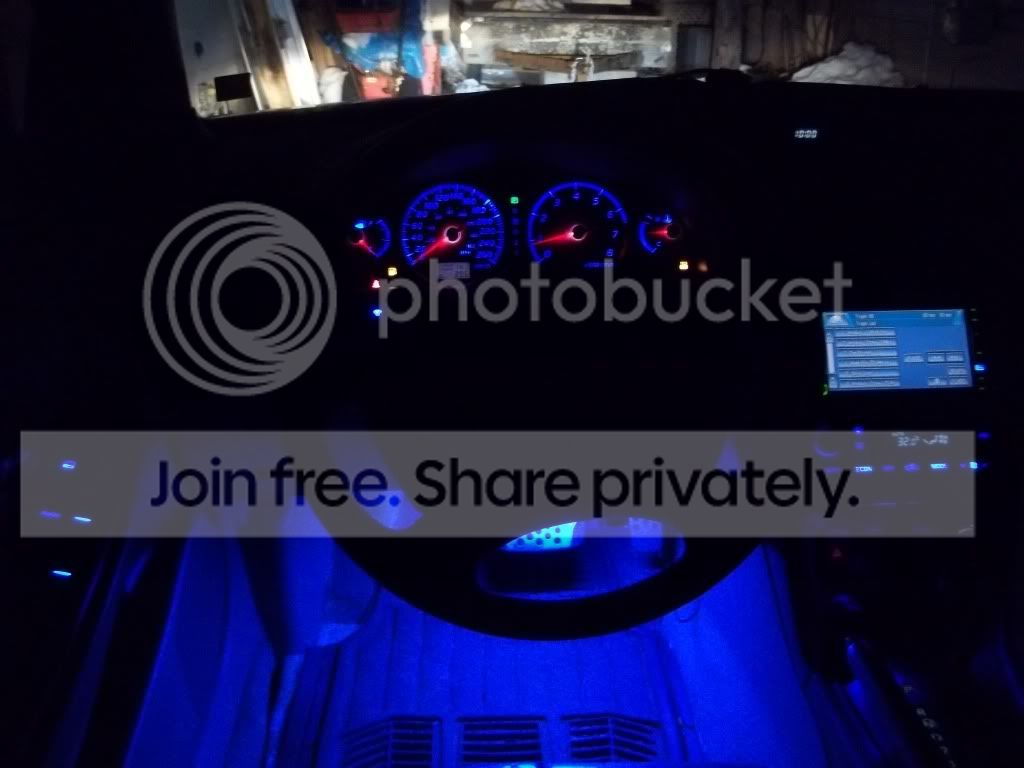
FootWell Lighting
I need to replace the Passenger Front Neon, the connection on the inside is loose, so it works when it wants. I have another one coming. You'll notice that side wasn't working for these pics.
I'm also installing a Potentiometer, but I'm waiting on more 3mm LEDs so I can back-light the Potentiometer ****. It will control/dim the Footwell lighting, as well as some of the other lighting I plan to install. This way I can control the ADDED lighting separate from the upgraded stock lighting. I'll post all that when I get the LED's in and get a chance to complete the install.
Front:

Rear:

Random's up front:

I'm also installing a Potentiometer, but I'm waiting on more 3mm LEDs so I can back-light the Potentiometer ****. It will control/dim the Footwell lighting, as well as some of the other lighting I plan to install. This way I can control the ADDED lighting separate from the upgraded stock lighting. I'll post all that when I get the LED's in and get a chance to complete the install.
Front:
Rear:
Random's up front:
UnderHood Lighting
Holding this slot more than anything, but I'll post the pics of my new temporary set up
I received one of the neons broken, didn't notice until I finished install. Here are the pictures anyways, it worked out pretty much as I planned, very bright, can't wait to get the other neon in so I can 'even' it out.
They are wired in to illuminate when the hood opens only.
Hood popped:

Hood Open:


Pictures suck, I'm going to get my friend who has a professional camera to come by and do a photoshoot once I complete all my lighting mods.
The actual illumination from just one of the neons is pretty amazing, brighter than I expected, and lights up the engine bay extremely well. That last picture makes it look like the engine bay is barely lit up for some reason...
I received one of the neons broken, didn't notice until I finished install. Here are the pictures anyways, it worked out pretty much as I planned, very bright, can't wait to get the other neon in so I can 'even' it out.
They are wired in to illuminate when the hood opens only.
Hood popped:
Hood Open:
Pictures suck, I'm going to get my friend who has a professional camera to come by and do a photoshoot once I complete all my lighting mods.
The actual illumination from just one of the neons is pretty amazing, brighter than I expected, and lights up the engine bay extremely well. That last picture makes it look like the engine bay is barely lit up for some reason...
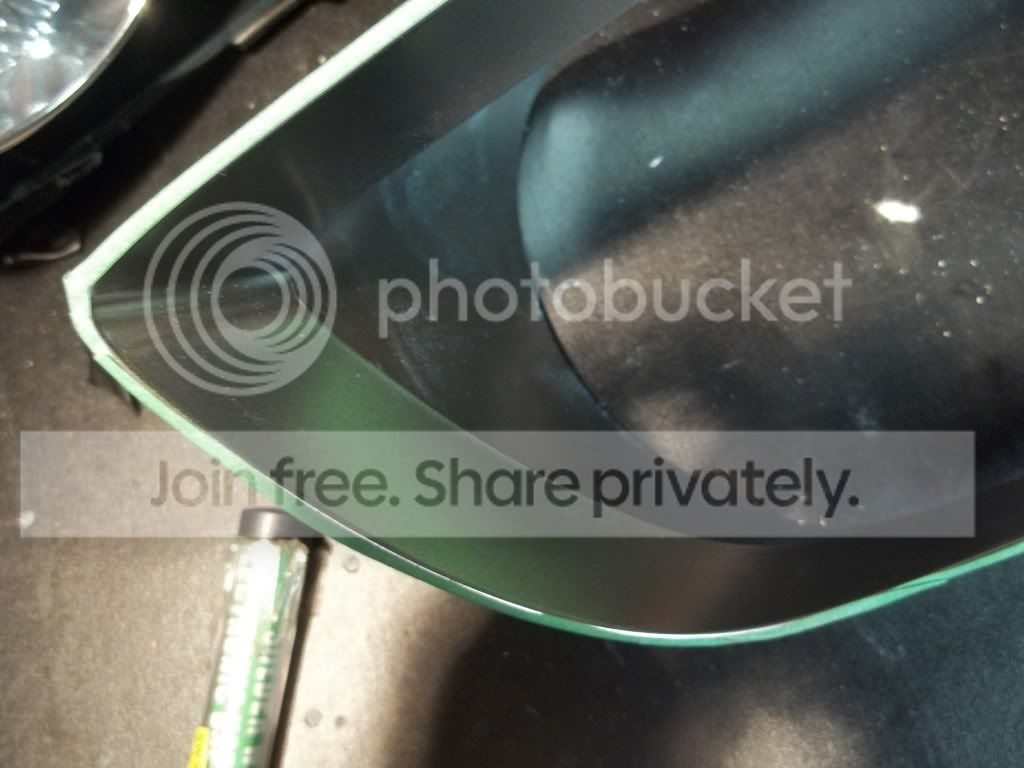
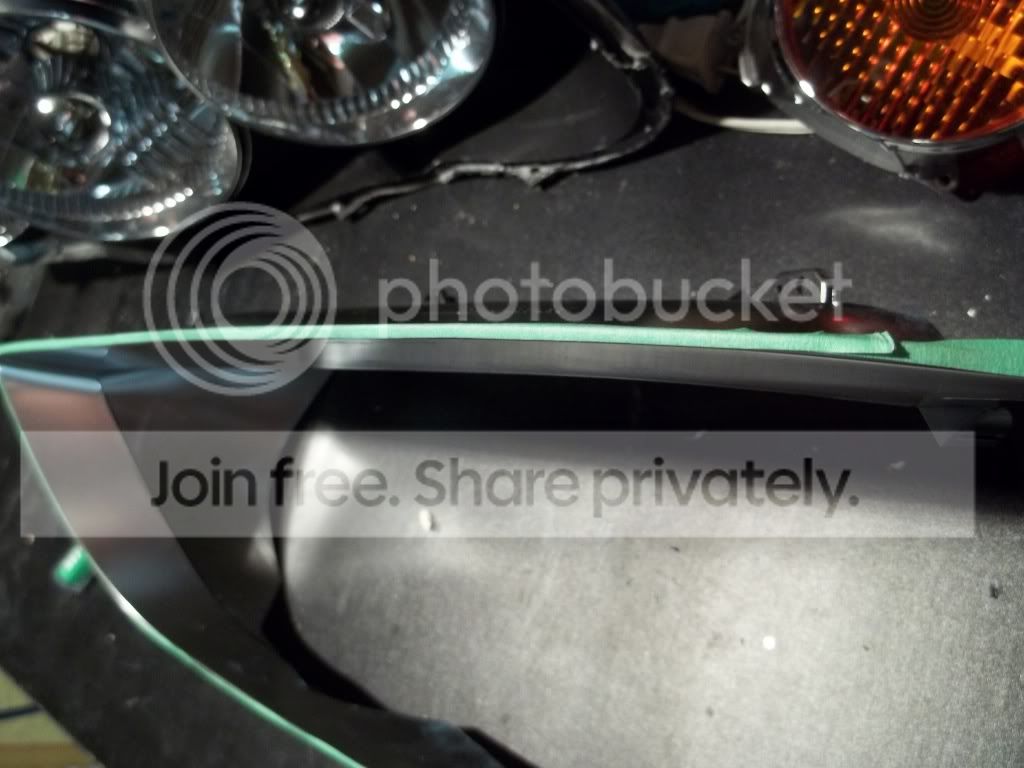
5.5 Headlight Painting, etc.
So I decided to try a few things differently when going about this modification. Most guys just black everything out, some save the chrome rings.
Me? I have to do everything the tedious, and hard way just to be different.
Disassembly:

Stock appearance check:

Decided to paint only the `v` portion of the main pods


I thought about leaving it like this, but decided against it, I made my decision to black out a few other portions, here`s the fancy taping:


Me? I have to do everything the tedious, and hard way just to be different.
Disassembly:
Stock appearance check:
Decided to paint only the `v` portion of the main pods
I thought about leaving it like this, but decided against it, I made my decision to black out a few other portions, here`s the fancy taping:
Last edited by TunerMaxima3000; Mar 31, 2011 at 08:08 PM.
5.5 Headlight Paint, etc
And ready for paint:

First Primer Coat:

Rest - Bookmarked for now, need to get some good coats on. I should have bought Gloss Black too.... I may have to re-do it depending on how it turns out, but I`m going to try and stick it out with the Satin black, we will see what happens.
First Primer Coat:
Rest - Bookmarked for now, need to get some good coats on. I should have bought Gloss Black too.... I may have to re-do it depending on how it turns out, but I`m going to try and stick it out with the Satin black, we will see what happens.