My Massive I30 Revival and Build Thread
 12-09-2017, 08:39 AM
#401

The fed 95 has the whole EVAP system under the hood.
It is not tied to any sensor or the ECU for that matter at all. Under certain conditions the EVAP solonoid (green thing) is told to open and close. ECU isn't linked.
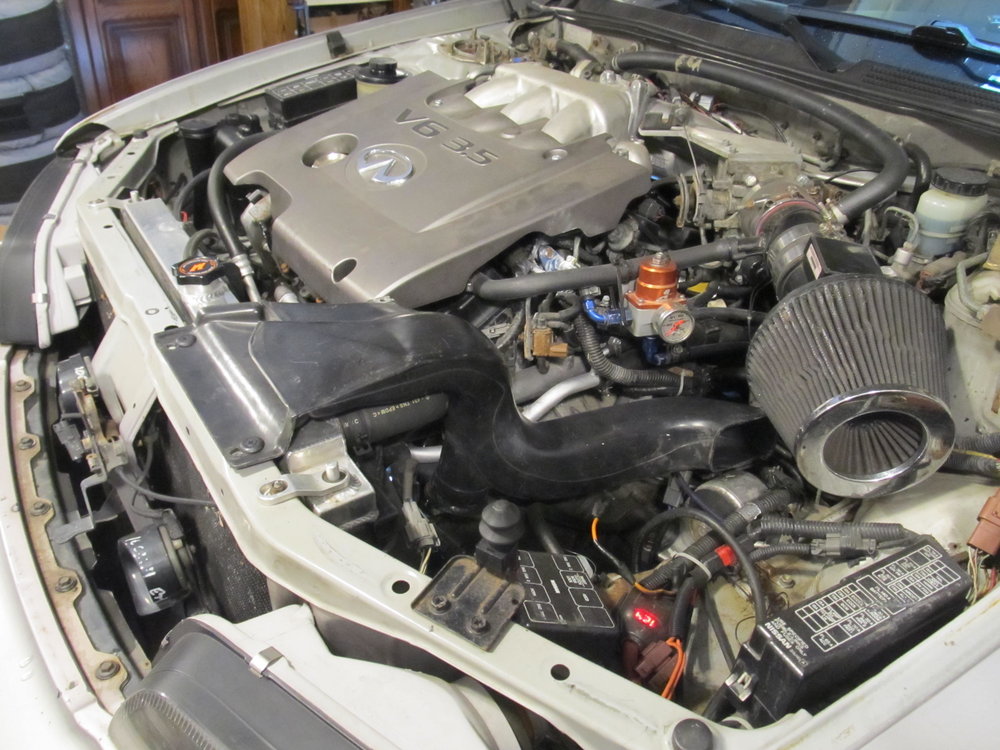
To tell in the junk yard,look for this under the hood. The EVAP canister is near the strut tower driver side.
This is the car to get the ECU off.
And vipervadim i want that ECU back How high have you revved it to?
It is not tied to any sensor or the ECU for that matter at all. Under certain conditions the EVAP solonoid (green thing) is told to open and close. ECU isn't linked.
To tell in the junk yard,look for this under the hood. The EVAP canister is near the strut tower driver side.
This is the car to get the ECU off.
And vipervadim i want that ECU back
How high have you revved it to? 12-12-2017, 10:02 AM
#402
You'll have to forgive my lack of updates, the switch over from Photobucket to a new platform has not been smooth, but I think I'm getting the hang of it.
After about five years of use, one of my FX-R projectors from The Retrofit Source failed. My DS projector's reflective coating inside the housing started to peel, which destroyed my beam pattern and output:
Good PS headlight:
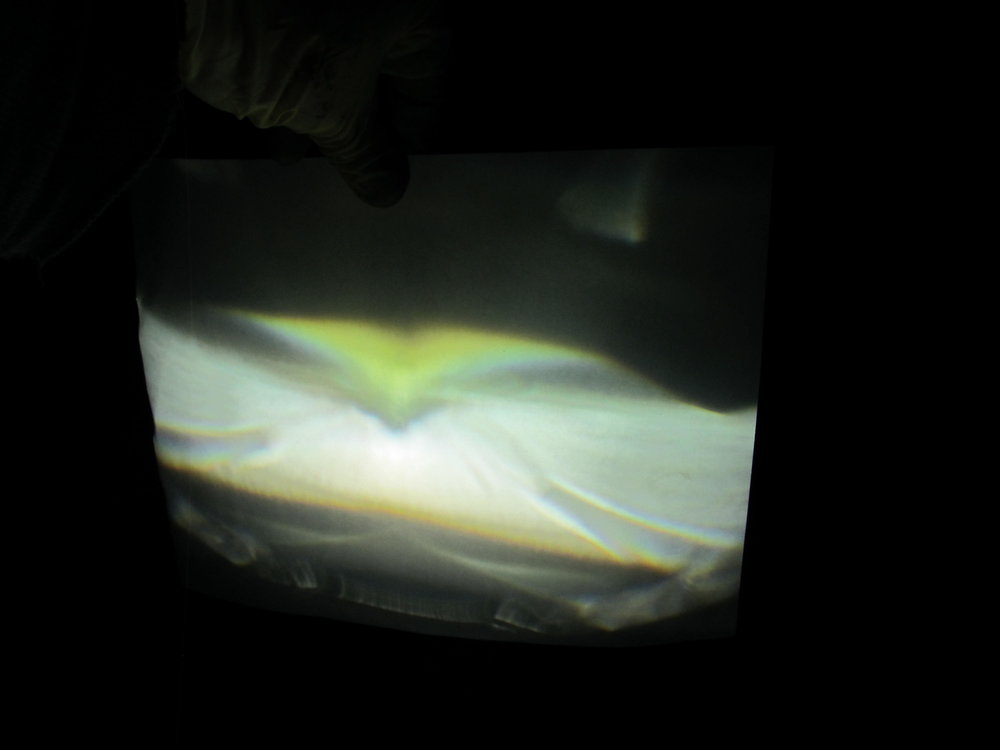
Bad DS headlight:
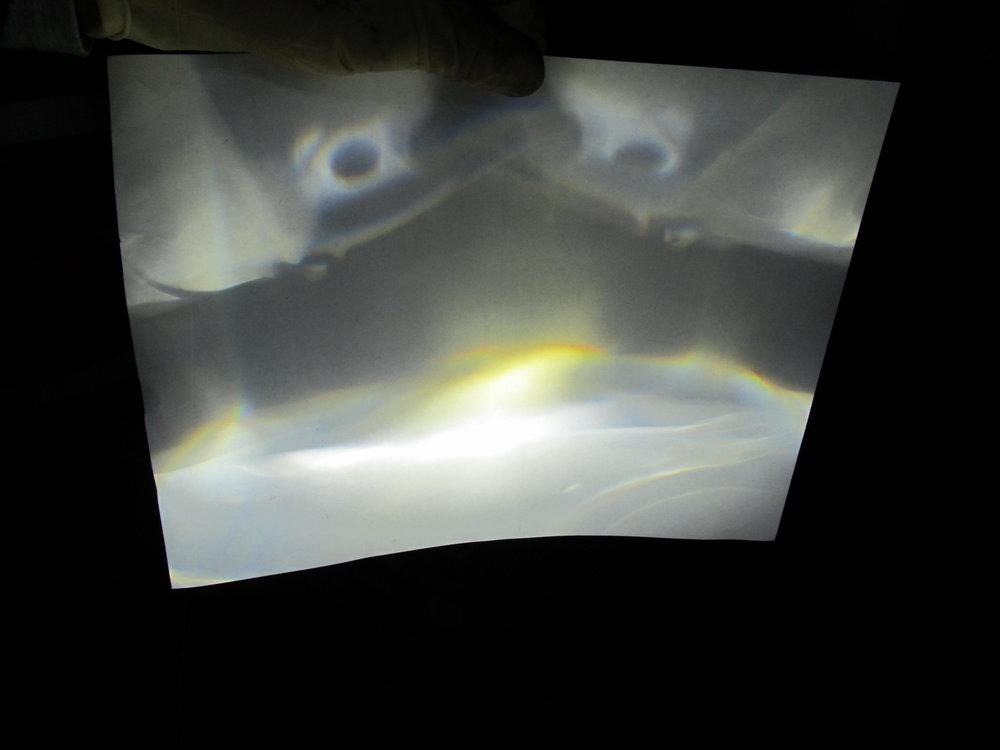
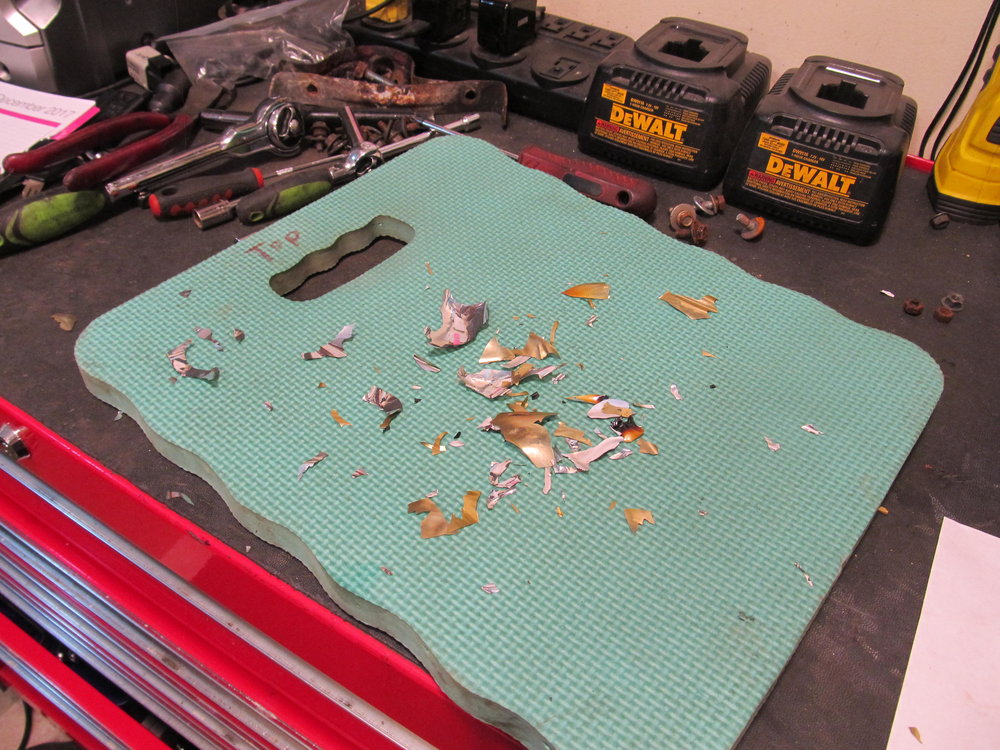
After rubbing my finger around inside the DS housing, this is what came out:
And with that, it's time for new projectors! It sounds like TRS is willing to cut me a deal on some new ones, so I'm hoping I can get the new 3" version to fit. I'll also be doing some headlight restoration since my lenses are getting cloudy. I'm considering doing the sanding and polishing myself and then having a body shop spray on a few coats of clear to keep things protected.
I was under the car and noticed some of my red Toyota antifreeze on my header, so I looked up and found an apparent leak on the rear freeze/drain (?) plug under the rear manifold:
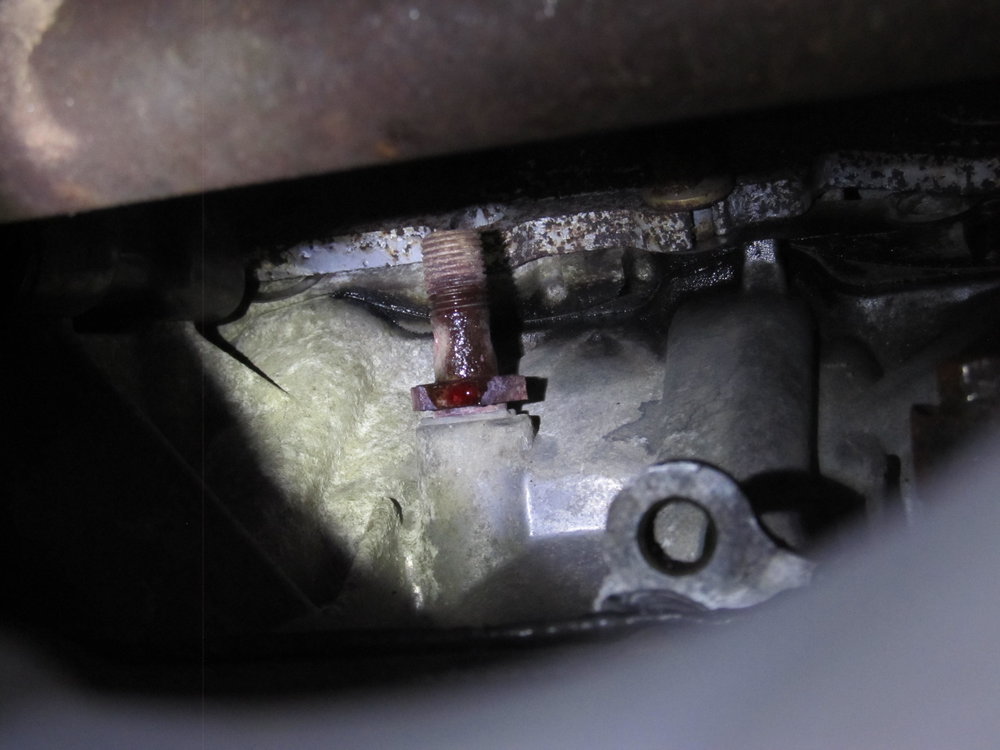
It almost looks like the leak is coming out of the threads, as opposed to the base of whatever that piece is, which doesn't really make any sense. Do you guys think I should just try to tighten it up a bit, or will I need to drain the system and install a new washer/crush gasket?
After about five years of use, one of my FX-R projectors from The Retrofit Source failed. My DS projector's reflective coating inside the housing started to peel, which destroyed my beam pattern and output:
Good PS headlight:
Bad DS headlight:
After rubbing my finger around inside the DS housing, this is what came out:
And with that, it's time for new projectors! It sounds like TRS is willing to cut me a deal on some new ones, so I'm hoping I can get the new 3" version to fit. I'll also be doing some headlight restoration since my lenses are getting cloudy. I'm considering doing the sanding and polishing myself and then having a body shop spray on a few coats of clear to keep things protected.
I was under the car and noticed some of my red Toyota antifreeze on my header, so I looked up and found an apparent leak on the rear freeze/drain (?) plug under the rear manifold:
It almost looks like the leak is coming out of the threads, as opposed to the base of whatever that piece is, which doesn't really make any sense. Do you guys think I should just try to tighten it up a bit, or will I need to drain the system and install a new washer/crush gasket?
 12-13-2017, 09:30 AM
#405
I've got some more updates, and they are going to be a little out of order, but no matter.
In an effort to get the car to run as well as it can and get through MD emissions, I decided to replace the PCV valve since it seems they are a common failure point on these motors. In reading about doing the job, most people with the 3.5 mentioned that you have to remove your upper IM to get to it. Maybe that's true in a 5.5th gen car, but in my car I had the job done in about ten minutes since I could just reach down and touch the PCV valve. Once I got the old one out it seemed to work fine, but I installed the new one anyways since they're so cheap. I also installed new line and some hose clamps, since the old line was held one with a single plastic zip tie.
Over the last few months I've noticed that the motor made some worrying rattling noises upon startup that would disappear after a few seconds of running. I was concerned that it might be rod bearings or worn out lifters, but it turns out it was just nasty oil consumption that led to low oil levels. Seems I've burned about 1.5 quarts in 2,000 miles of driving. Not the end of the world, and apparently par for the course on older 3.5 motors, but still not fun. Thankfully I've been babying the car since it's on the stock non-Nistune ECU while I try to get it through emissions, so hopefully it didn't wear things too badly.
As mentioned earlier, for the first time in 14 years the car decided to throw P0420 and P0430 cat codes, which obviously would keep me from passing emissions inspection. I haven't had a cat on the car in 14 years, and I couldn't figure out why the code was just now showing up. Over the course of this year I replaced all three O2 sensors, but the code kept coming back. Then one day I noticed my exhaust got a little louder, and it got even louder the next day. Turns out the seam for my old Magnaflow resonator in my Budget b-pipe had split, causing a huge leak and making the car pretty much undriveable. I debated ordering a new one and having it welded in, but I knew a local member was selling an exhaust, so I checked in on that. It's supposedly has a 5 year old OEM Nissan cat, 3 week old b-pipe with resonator, and a Cattman muffler of unknown age. He said it might be a Gen 3 muffler, but I have no way of confirming that. My guess is that it's 10 years old, but aside from a giant dent in the back, it's actually in good shape.
Here's my old one on the left and new on the right:
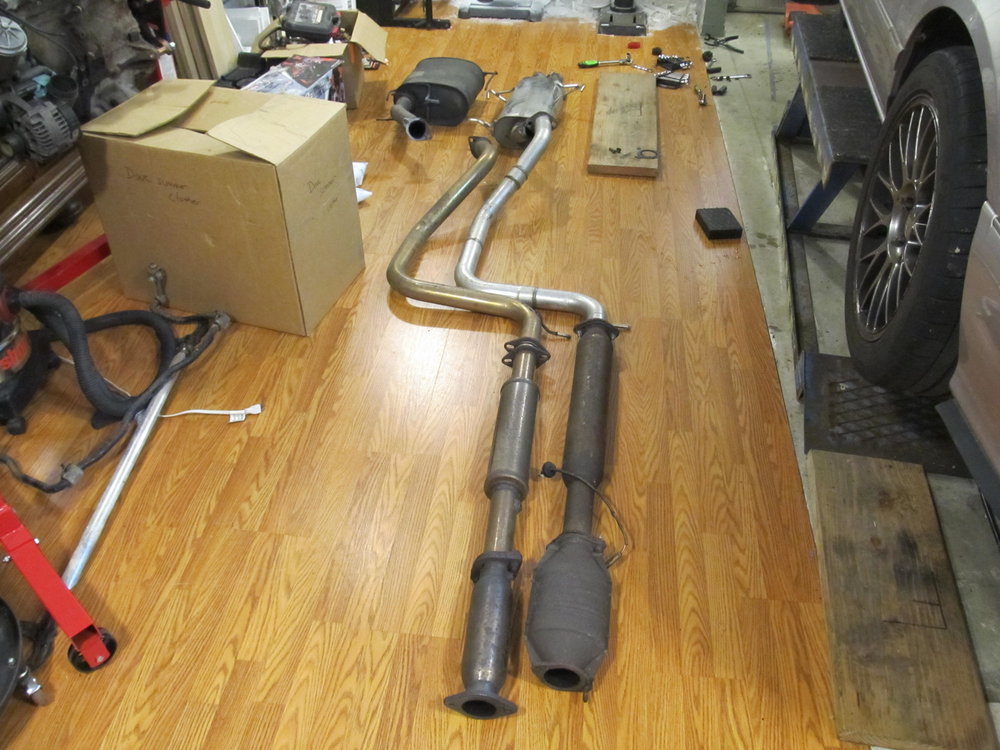
New cat on top, old resonated test pipe below
New larger resonator on top, old smaller resonator below
And the old G35 sedan muffler compared to the Cattman
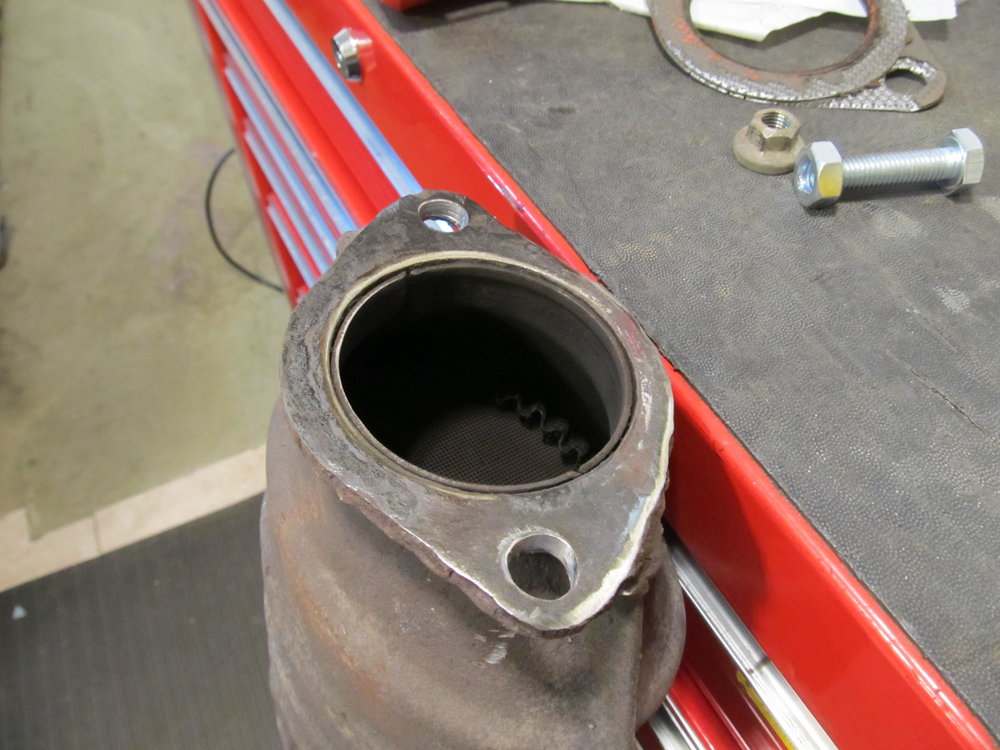
I started having doubts that the cat was only 5 years old when I saw one of the front mounting studs:
After a little work with a cutoff wheel, some drill bits, and then my flap wheel, I got it cleaned up and ready for all new hardware:
I must say that this new setup is pretty awesome! The G35 muffler always rattled when you pulled away from a stop if you didn't give it much revs, which always bugged the crap out of me. The new setup doesn't do that one bit, the tone is great with no rasp, and it doesn't drone on the highway. If anything, I think overall it's quieter than the old setup, and I like the sound/tone even more! I'm guessing a lot of that comes from the addition of a cat, but I'm sure the muffler has something to do with it as well.
Unfortunately, after some driving with the new setup, my CEL came back with the cat codes, so I'm wondering if this cat is really still functioning. I started looking around for O2 sensor spacers/spark plug anti-foulers, but they are all either M18 or M14, and for some reason my post-O2 is freaking M12. I searched high and low all over the internet and could not find a single spacer that would work with M12 threads, so I had to give up on that idea. I then settled upon doing some shady wiring tricks with that rear O2 sensor, but haven't gotten around to it yet. To make a long story short, I got a monetary exemption from my MD emissions, so I've got 18 months to really figure out what's going on with the cat and EGR codes.
More to come!
In an effort to get the car to run as well as it can and get through MD emissions, I decided to replace the PCV valve since it seems they are a common failure point on these motors. In reading about doing the job, most people with the 3.5 mentioned that you have to remove your upper IM to get to it. Maybe that's true in a 5.5th gen car, but in my car I had the job done in about ten minutes since I could just reach down and touch the PCV valve. Once I got the old one out it seemed to work fine, but I installed the new one anyways since they're so cheap. I also installed new line and some hose clamps, since the old line was held one with a single plastic zip tie.
Over the last few months I've noticed that the motor made some worrying rattling noises upon startup that would disappear after a few seconds of running. I was concerned that it might be rod bearings or worn out lifters, but it turns out it was just nasty oil consumption that led to low oil levels. Seems I've burned about 1.5 quarts in 2,000 miles of driving. Not the end of the world, and apparently par for the course on older 3.5 motors, but still not fun. Thankfully I've been babying the car since it's on the stock non-Nistune ECU while I try to get it through emissions, so hopefully it didn't wear things too badly.
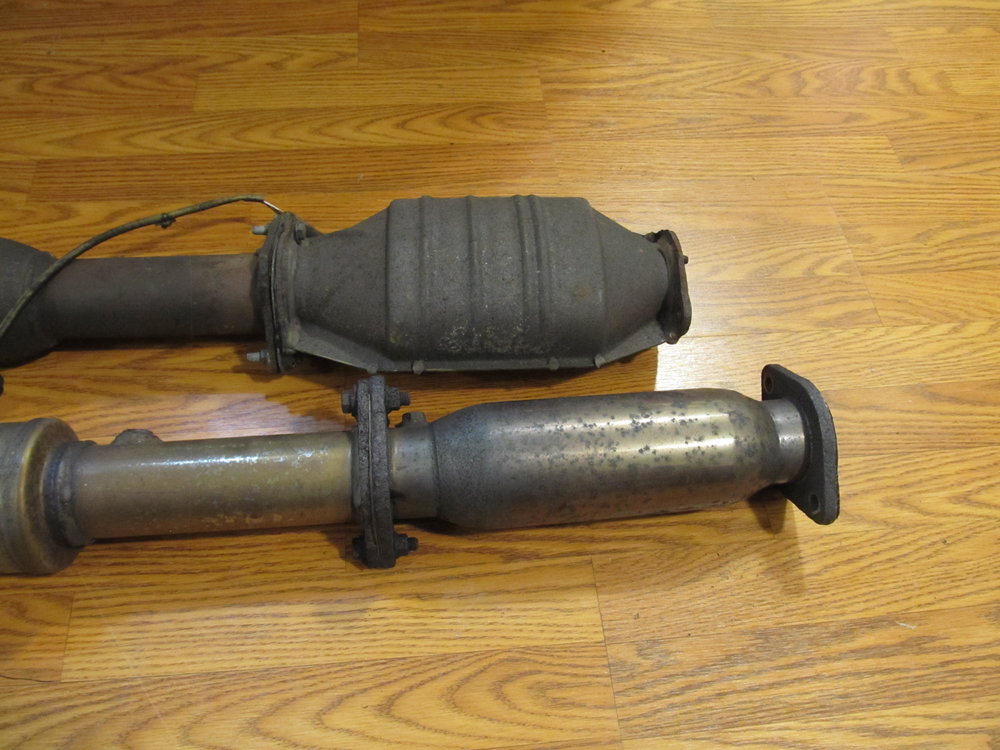
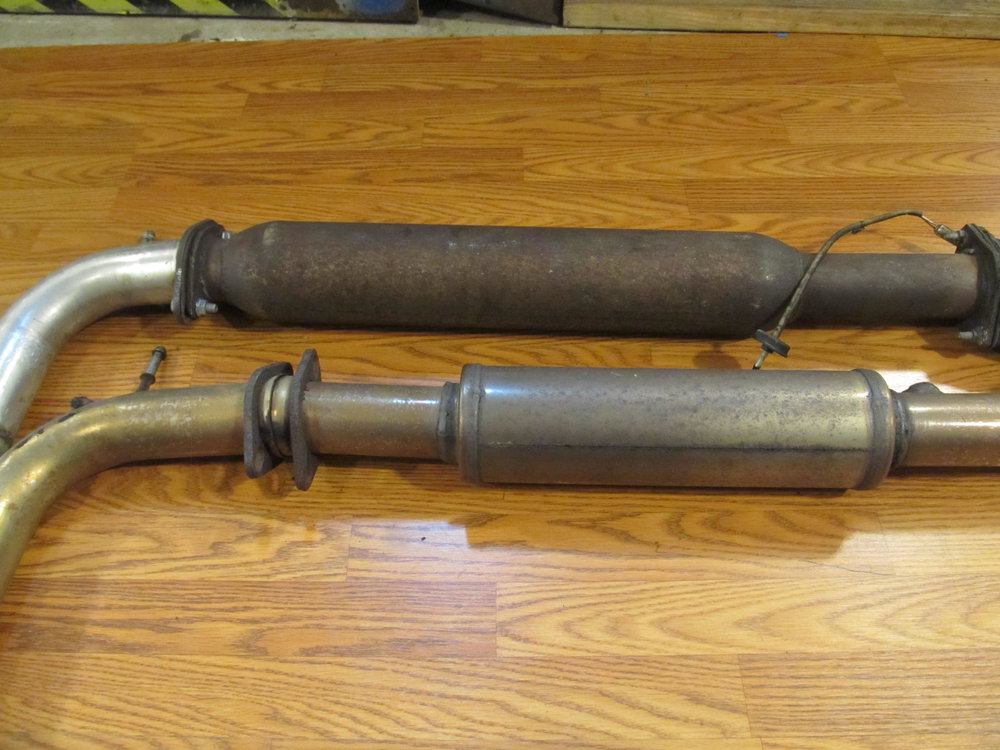
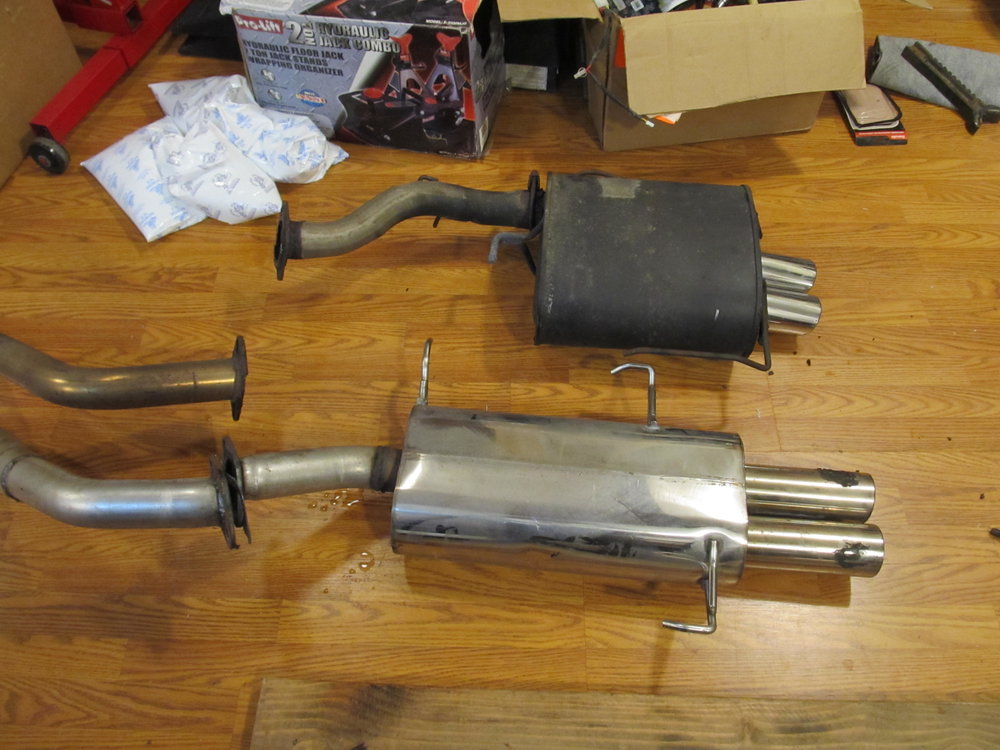
As mentioned earlier, for the first time in 14 years the car decided to throw P0420 and P0430 cat codes, which obviously would keep me from passing emissions inspection. I haven't had a cat on the car in 14 years, and I couldn't figure out why the code was just now showing up. Over the course of this year I replaced all three O2 sensors, but the code kept coming back. Then one day I noticed my exhaust got a little louder, and it got even louder the next day. Turns out the seam for my old Magnaflow resonator in my Budget b-pipe had split, causing a huge leak and making the car pretty much undriveable. I debated ordering a new one and having it welded in, but I knew a local member was selling an exhaust, so I checked in on that. It's supposedly has a 5 year old OEM Nissan cat, 3 week old b-pipe with resonator, and a Cattman muffler of unknown age. He said it might be a Gen 3 muffler, but I have no way of confirming that. My guess is that it's 10 years old, but aside from a giant dent in the back, it's actually in good shape.
Here's my old one on the left and new on the right:
New cat on top, old resonated test pipe below
New larger resonator on top, old smaller resonator below
And the old G35 sedan muffler compared to the Cattman
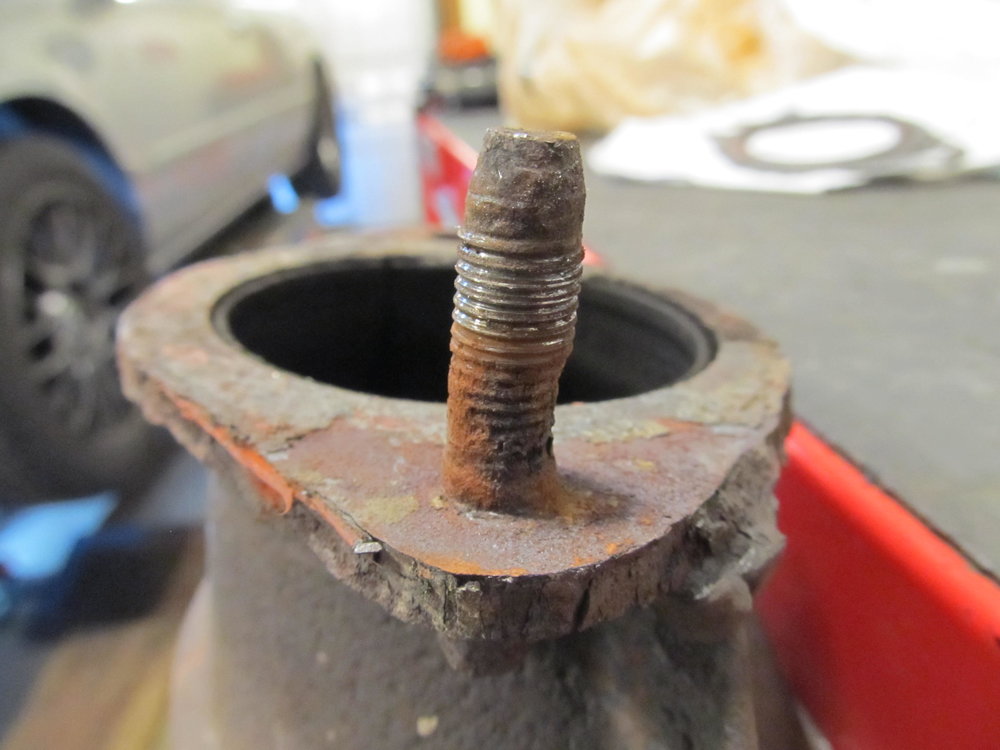
I started having doubts that the cat was only 5 years old when I saw one of the front mounting studs:
After a little work with a cutoff wheel, some drill bits, and then my flap wheel, I got it cleaned up and ready for all new hardware:
I must say that this new setup is pretty awesome! The G35 muffler always rattled when you pulled away from a stop if you didn't give it much revs, which always bugged the crap out of me. The new setup doesn't do that one bit, the tone is great with no rasp, and it doesn't drone on the highway. If anything, I think overall it's quieter than the old setup, and I like the sound/tone even more! I'm guessing a lot of that comes from the addition of a cat, but I'm sure the muffler has something to do with it as well.
Unfortunately, after some driving with the new setup, my CEL came back with the cat codes, so I'm wondering if this cat is really still functioning. I started looking around for O2 sensor spacers/spark plug anti-foulers, but they are all either M18 or M14, and for some reason my post-O2 is freaking M12. I searched high and low all over the internet and could not find a single spacer that would work with M12 threads, so I had to give up on that idea. I then settled upon doing some shady wiring tricks with that rear O2 sensor, but haven't gotten around to it yet. To make a long story short, I got a monetary exemption from my MD emissions, so I've got 18 months to really figure out what's going on with the cat and EGR codes.
More to come!
12-13-2017, 05:06 PM
#406

I'm not sure if it would be too long or you could bend it but they make m12 compression tester extensions for DOHC engines. If you try to source one, make sure it's m12 on the female end too.
Edit - These also may work. As long as it's m12x1.5 and it's deep enough 2 of these together would probably work similar to a defouler. https://www.mcmaster.com/#4936k154
Edit - These also may work. As long as it's m12x1.5 and it's deep enough 2 of these together would probably work similar to a defouler. https://www.mcmaster.com/#4936k154
Last edited by 95naSTA; 12-13-2017 at 05:19 PM.
12-14-2017, 01:34 PM
#407
I'm not sure if it would be too long or you could bend it but they make m12 compression tester extensions for DOHC engines. If you try to source one, make sure it's m12 on the female end too.
Edit - These also may work. As long as it's m12x1.5 and it's deep enough 2 of these together would probably work similar to a defouler. https://www.mcmaster.com/#4936k154
Edit - These also may work. As long as it's m12x1.5 and it's deep enough 2 of these together would probably work similar to a defouler. https://www.mcmaster.com/#4936k154
12-14-2017, 01:50 PM
#408
Like I said earlier, these posts are going to be a little out of order due to my extreme laziness and procrastination.
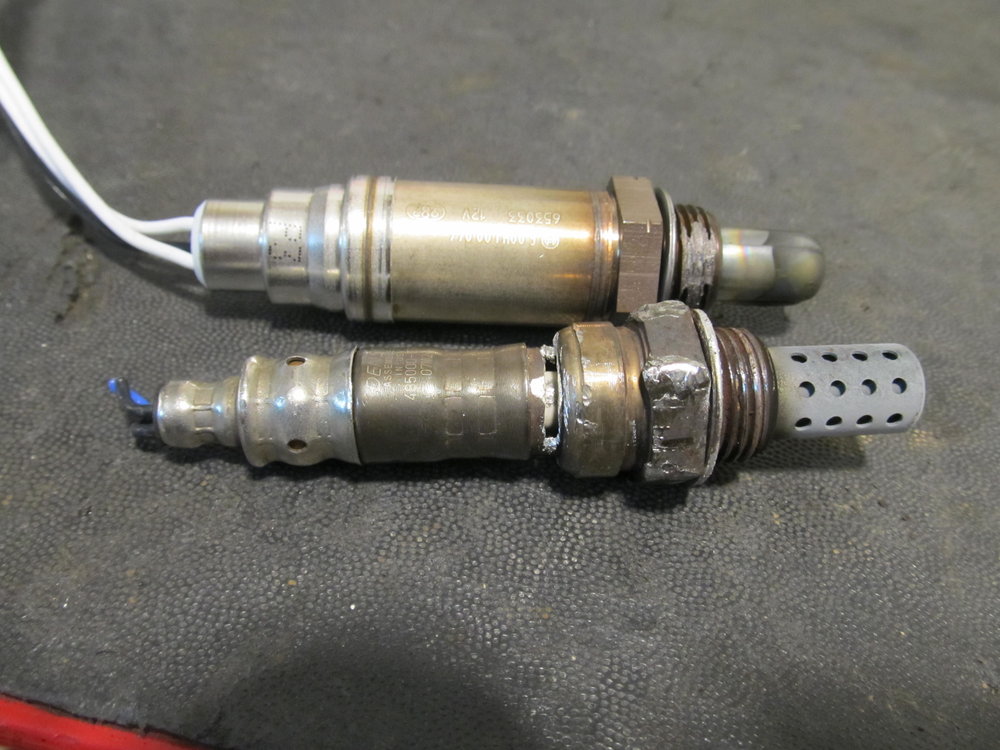
So, back a few months ago when I was still early in the process of diagnosing my P0420 and P0430 codes, I decided to replace my rear header O2 sensor and the post-cat O2 sensor. I had already installed a new one in the front header back in the spring, so that was good to go already.
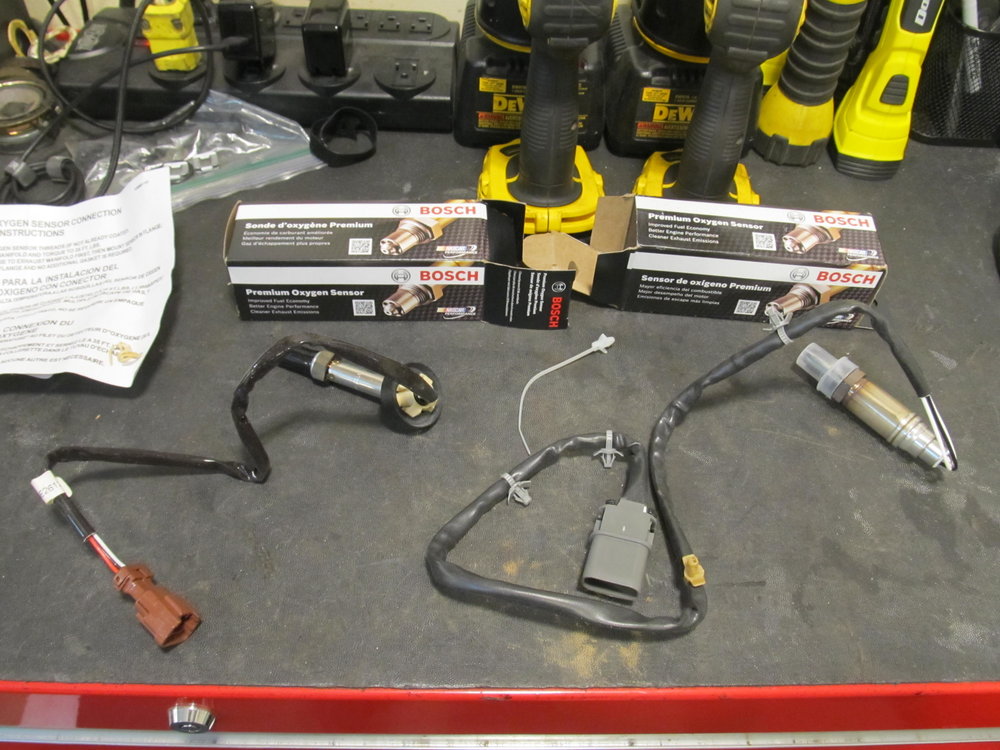
The post-cat O2 was a breeze, but the one in the rear header was a real PITA. I must have been trying to get it out for 2-3 hours due to the edges being rounded off. If my memory serves me correctly, I think I was finally able to get a socket over it and get it out with that.
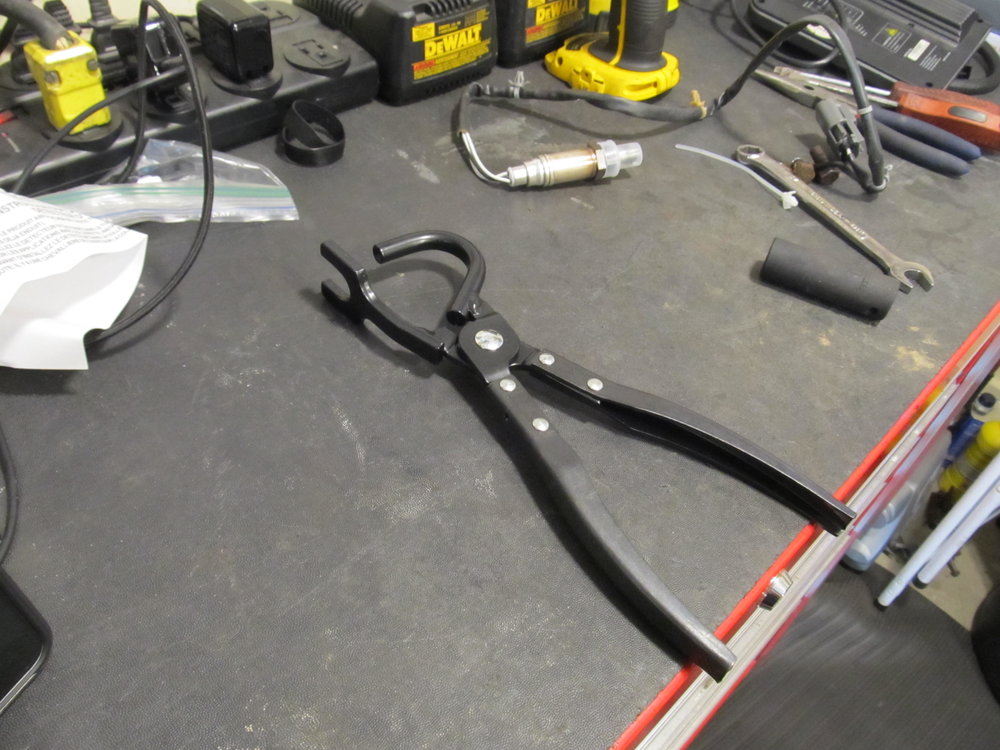
I would like to point out that my exhaust hanger removal tool is a godsend and everybody should have one:
My hood struts, which are only like three years old, couldn't support the weight of my underhood light, so new ones were installed:

I also reinstalled my giant "cold air" tube doohickey. Because why not?
And installed a new OEM gas cap, since I read in a thread that it cured one person's EGR code, and for like $15, why not?

Then the glued failed on my dash pod thingy, so I ripped it all out and hot glued that sucker back together. Good as new now!
So, back a few months ago when I was still early in the process of diagnosing my P0420 and P0430 codes, I decided to replace my rear header O2 sensor and the post-cat O2 sensor. I had already installed a new one in the front header back in the spring, so that was good to go already.
The post-cat O2 was a breeze, but the one in the rear header was a real PITA. I must have been trying to get it out for 2-3 hours due to the edges being rounded off. If my memory serves me correctly, I think I was finally able to get a socket over it and get it out with that.
I would like to point out that my exhaust hanger removal tool is a godsend and everybody should have one:
My hood struts, which are only like three years old, couldn't support the weight of my underhood light, so new ones were installed:
I also reinstalled my giant "cold air" tube doohickey. Because why not?
And installed a new OEM gas cap, since I read in a thread that it cured one person's EGR code, and for like $15, why not?
Then the glued failed on my dash pod thingy, so I ripped it all out and hot glued that sucker back together. Good as new now!
 12-15-2017, 10:06 AM
#410
Ok, we're getting closer to being caught up here, bear with me!
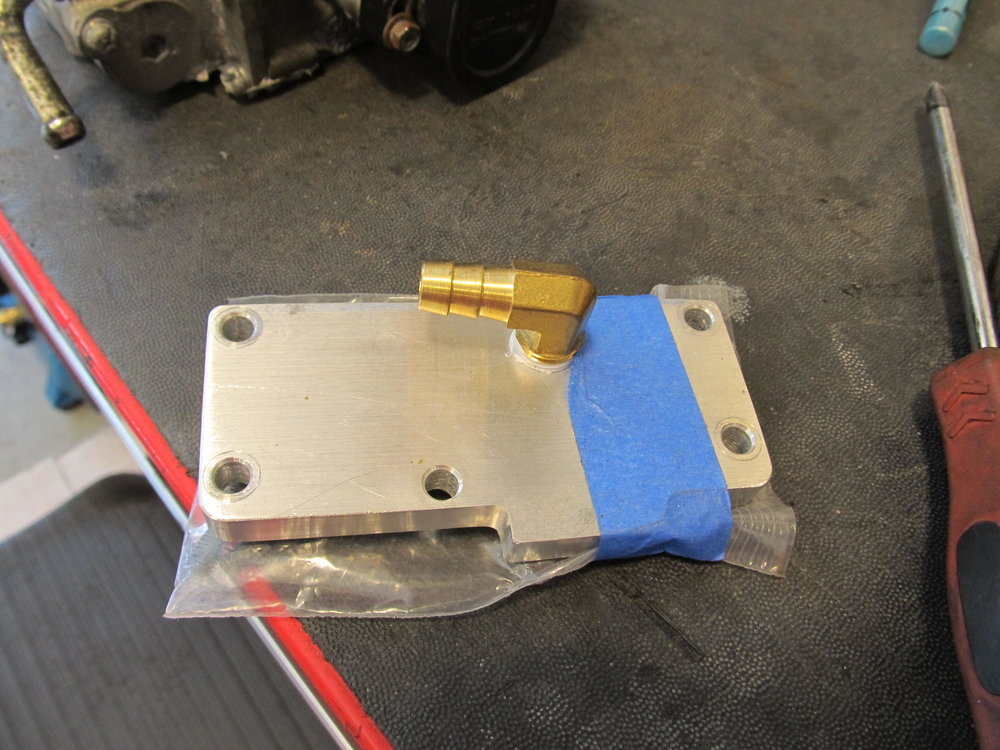
So in an effort to get rid of my P0400 EGR code, I decided to start with the simple/common problems, notably the notoriously clogged EGR tube. To get better access, I had to remove the PFTB. This gave me a good opportunity to finally install the PFTB IACV block off plate that .org member sicivic89 made a few years ago. At one point I was using the PFTB IACV, but I think when I swapped from the DEK motor to the 3.5 I went back to using the 4th gen IACV. This left the PFTB IACV just sitting on the bottom of the TB, and when I went to get the Nistune setup, the tuner mentioned that it was leaving a small gap open at all times, which caused my idle to be around 1000 rpm. He said if I removed it, my idle would settle down. So with that all in mind, I removed the two coolant hoses going to the TB, and installed a new single hose in a loop, bypassing the TB entirely from coolant. The IACV BOP went on without a hitch:
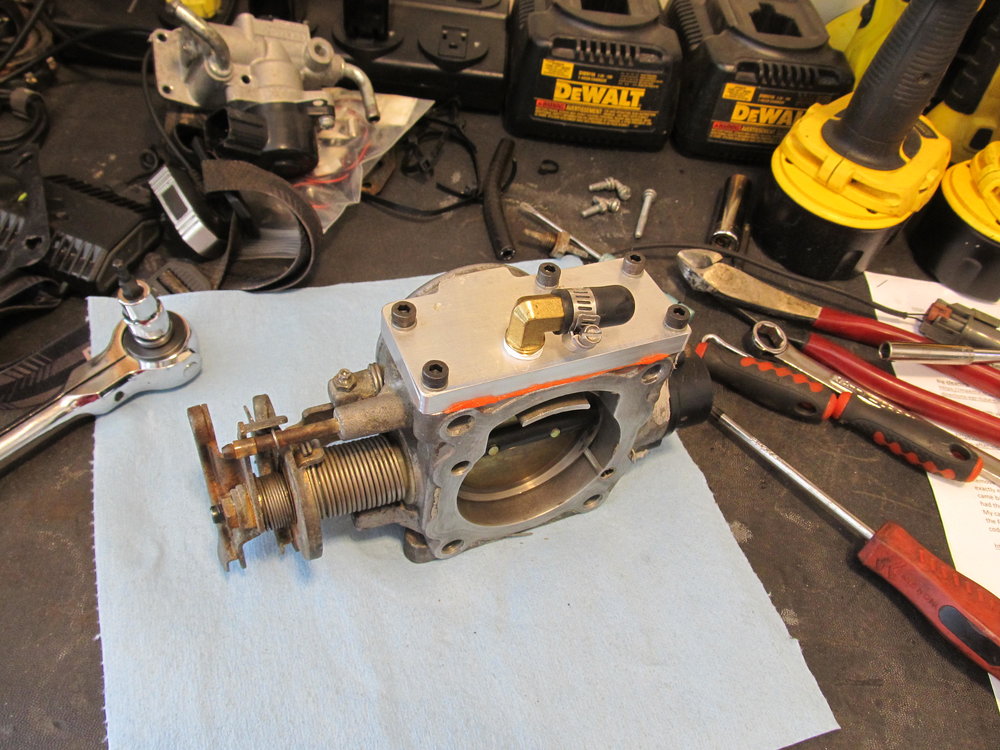
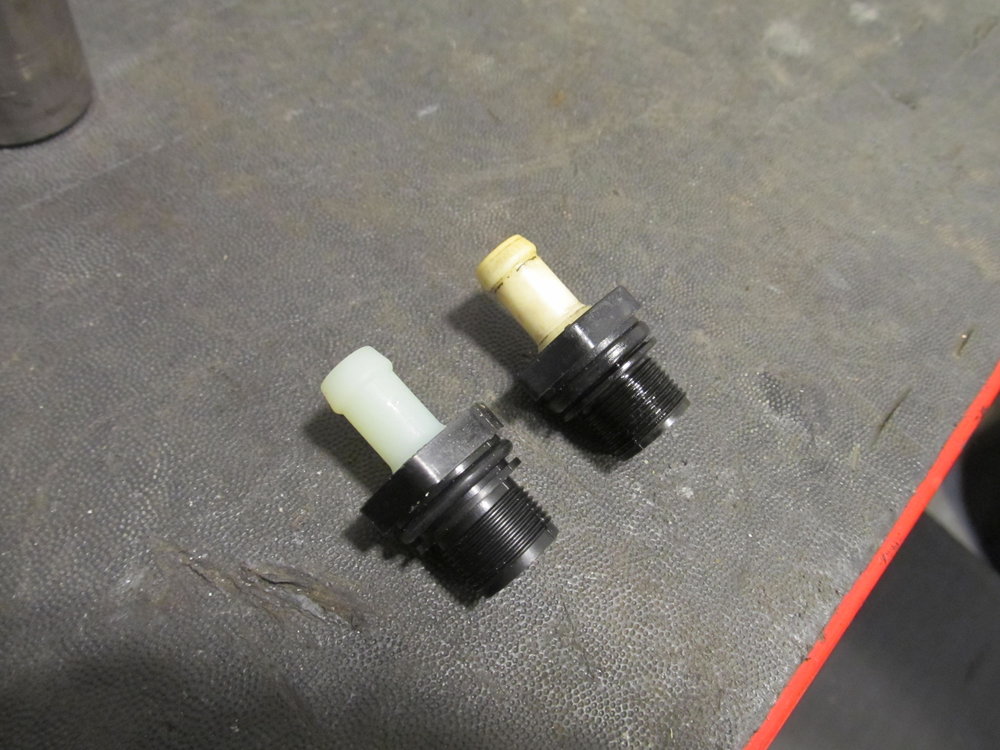
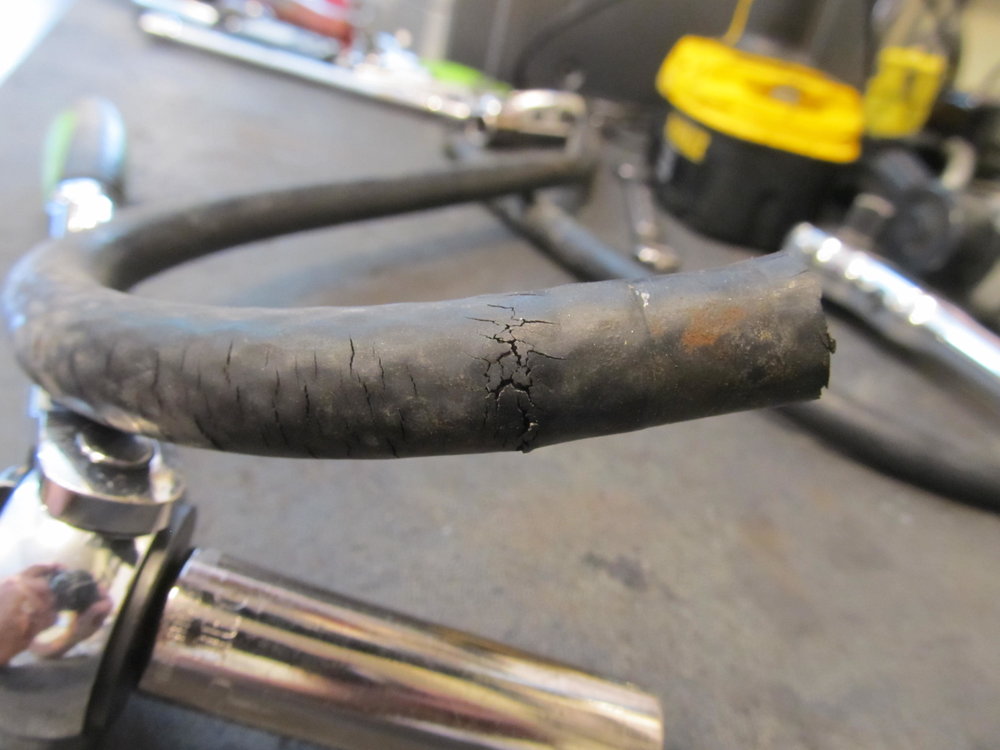
And I'm glad I took a close look at the coolant hoses going to the TB, they had seen better days:
I didn't take a pic of the coolant bypass loop, but it's just a hose, nothing fancy.
Anyways, on to the EGR. As mentioned before, I blocked off the EGR 2-3 years ago after getting the 3.5 running, and as far as I knew it never threw a code for it. I was under the impression that as long as the temp sensor was getting a good reading, it wouldn't throw the code. Well, either that's wrong, or there's something wrong with my EGR system that I can't track down, because this P0400 won't go away!
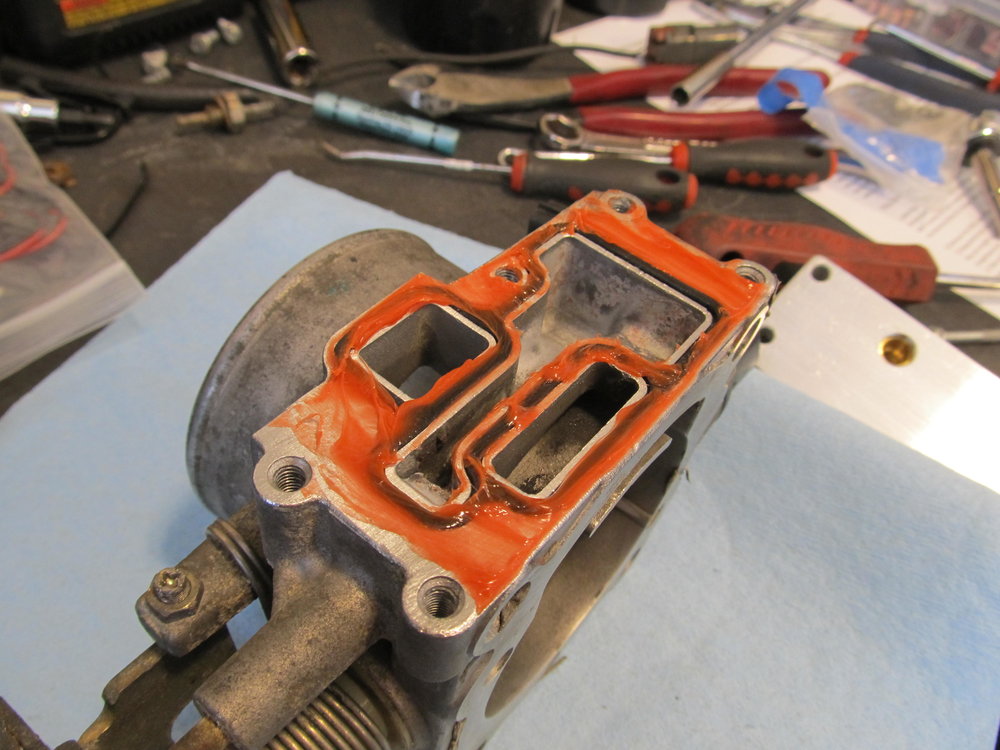
So I got busy cleaning my dirty but not entirely clogged EGR tube. You can see the blocked off portion on the left:
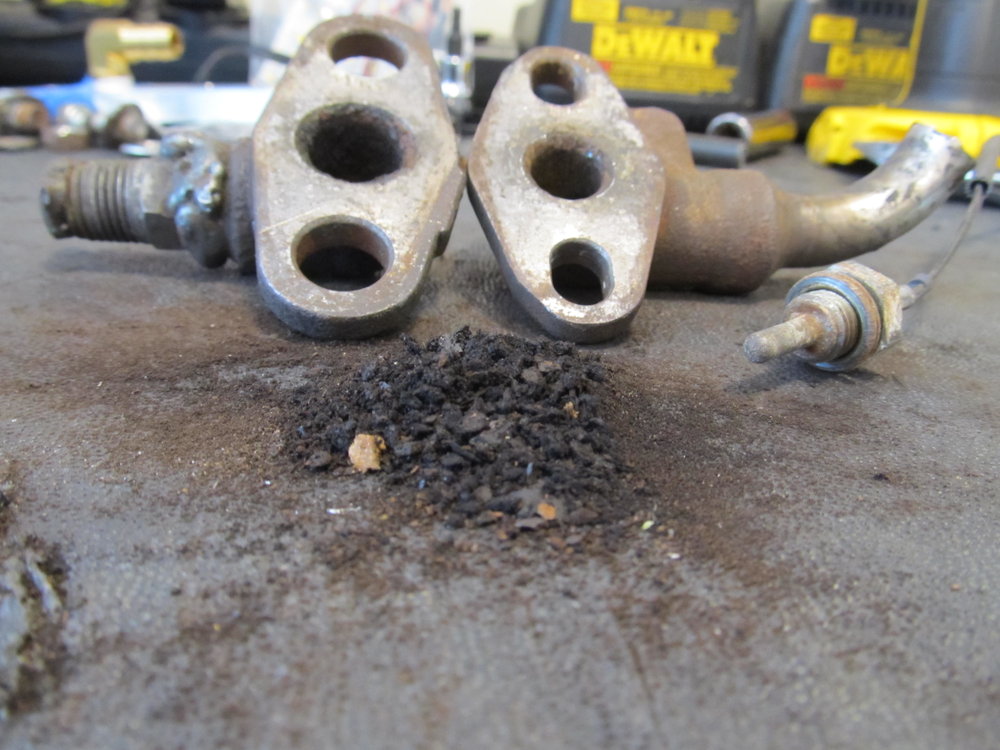
I got everything nice and clean...


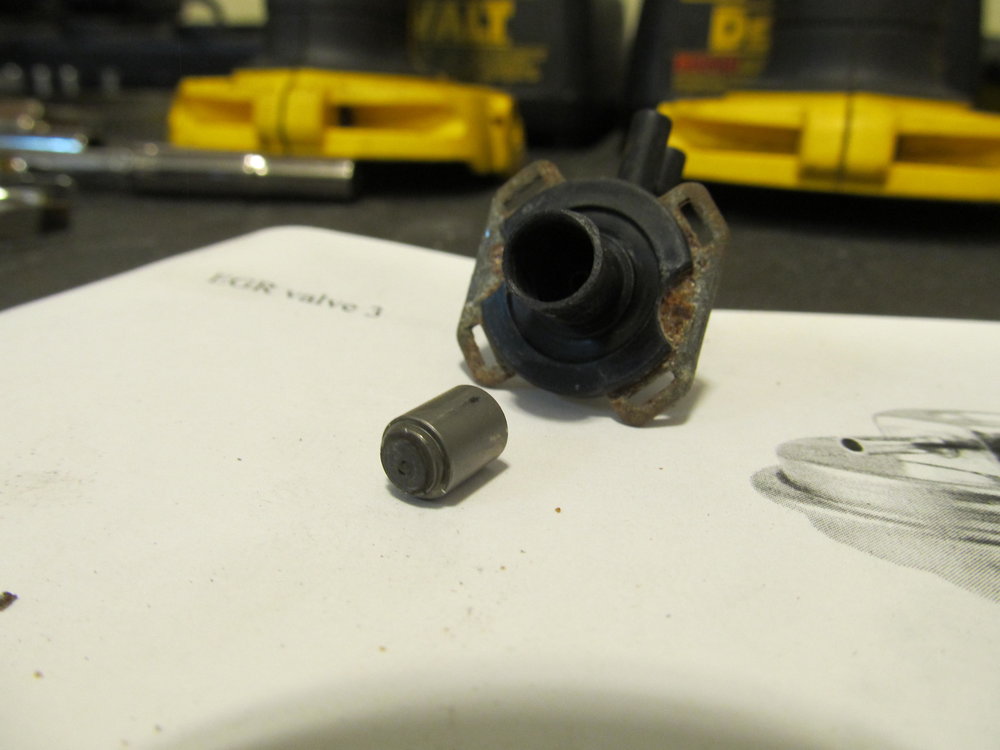
I let everything sit in Evaporust overnight, but I didn't do any prep work to them so they didn't turn out as well as they could have:
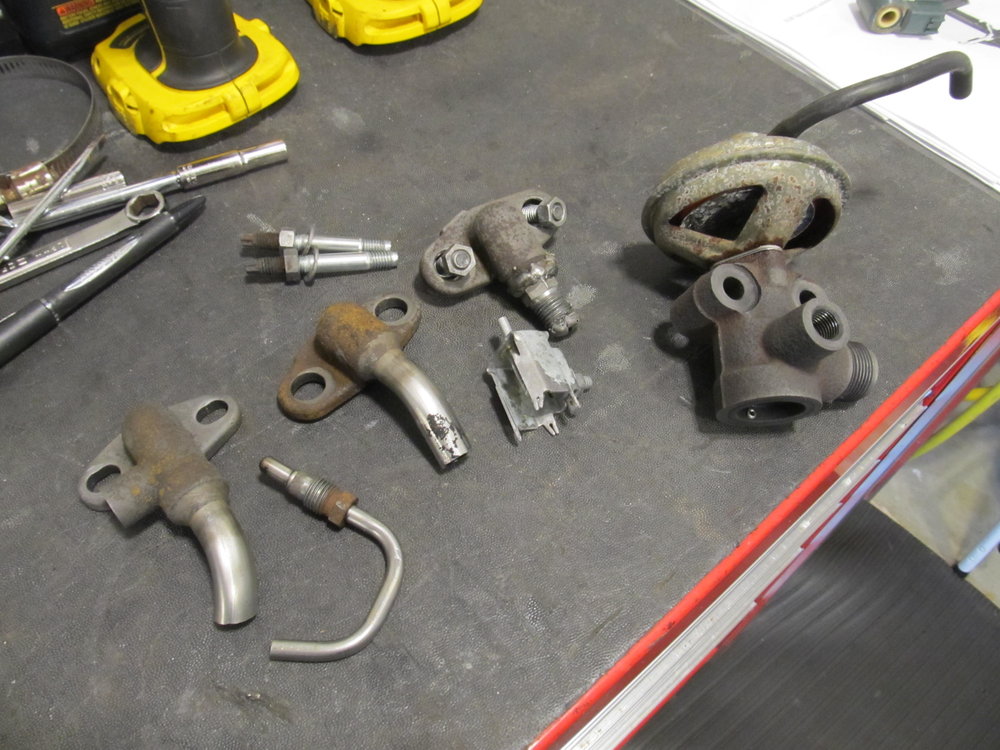
The little metal plunger inside the control solenoid wasn't moving freely so I cleaned it very thoroughly and now it moves nice and smoothly!
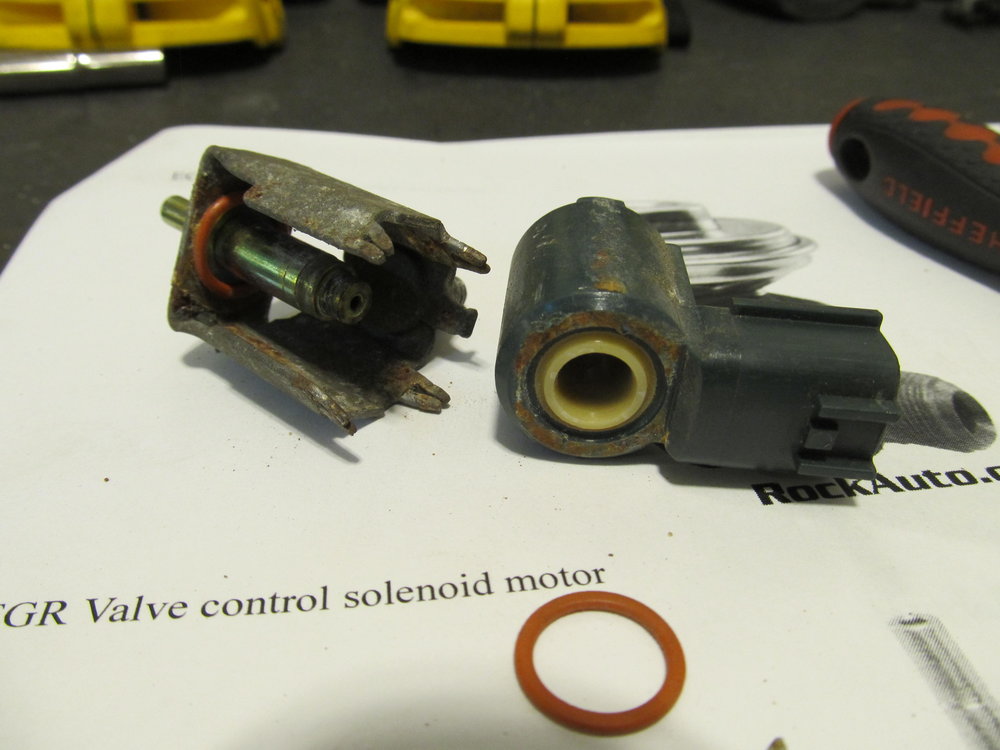
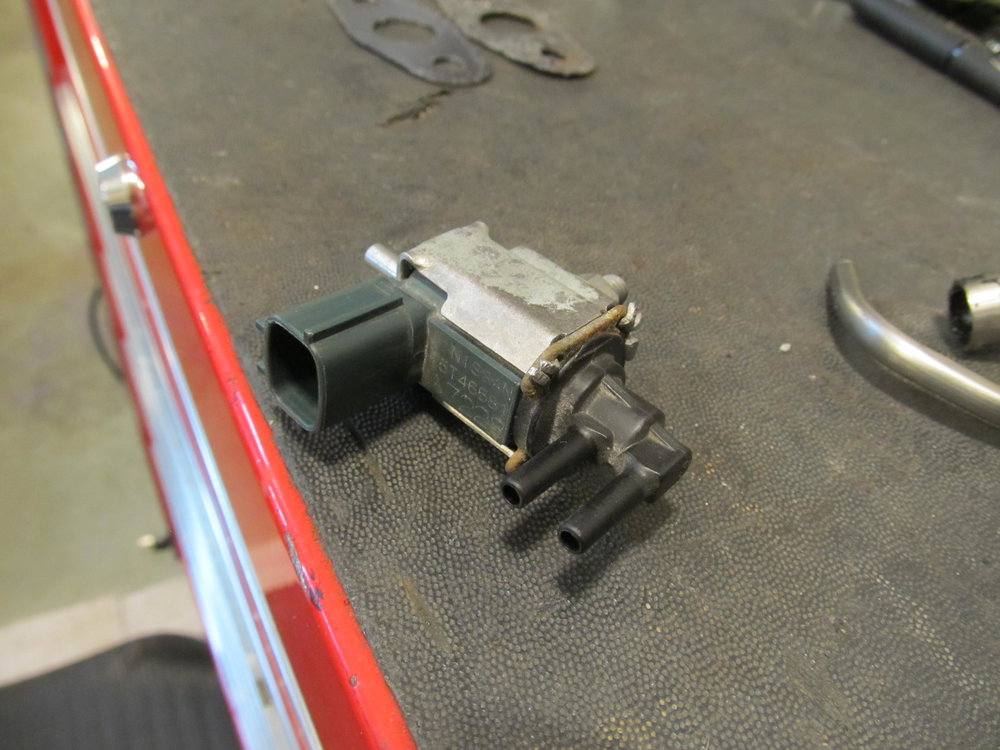
I tested the resistance of the EGR temp sensor in boiling water on the stove and it was fine. I tested the resistance of the EGR control valve solenoid and it is good. And yet, after all of this, I'm still getting the P0400 EGR code. Do I really need to unblock the EGR and let it dump back into the intake to get this code to go away, or could something else be wrong?
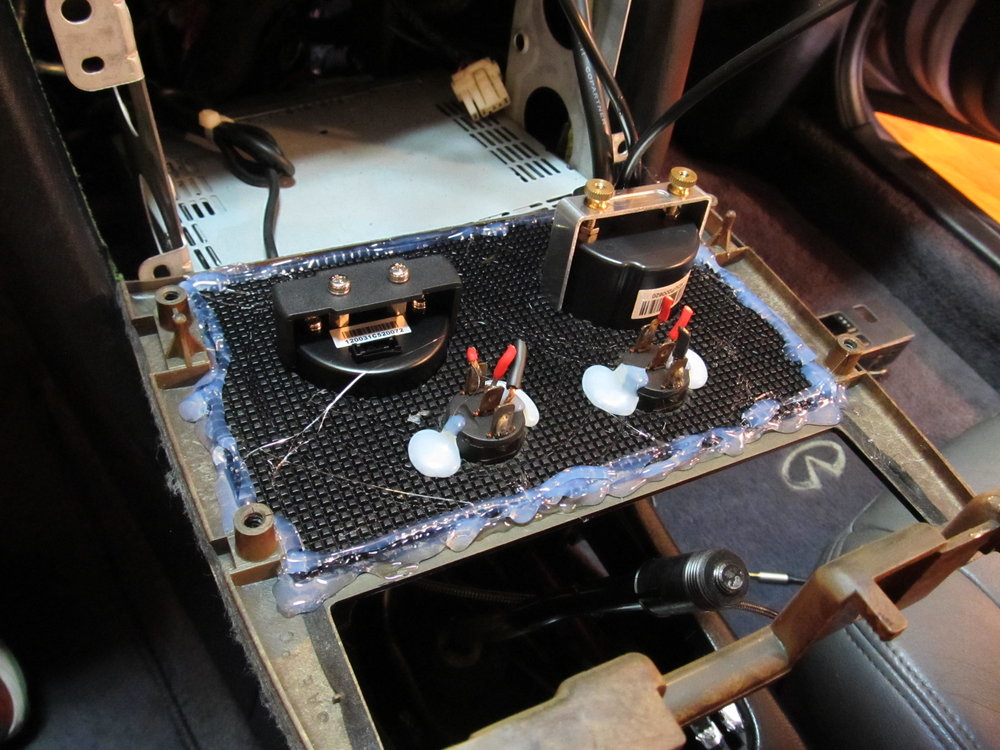
Moving on to the inside of the car, I needed to figure out why my horn wasn't working. I tore apart the original "ball bearing inside a pen shell" mechanism that transferred the signal from the horn to the car because I figured it had just disintegrated over the last 6-7 years. I replaced the spring with a longer/stronger one, and instead of just twisting the wire to the spring, I did my best to solder them together. It certainly seemed to be a stronger connection than before.
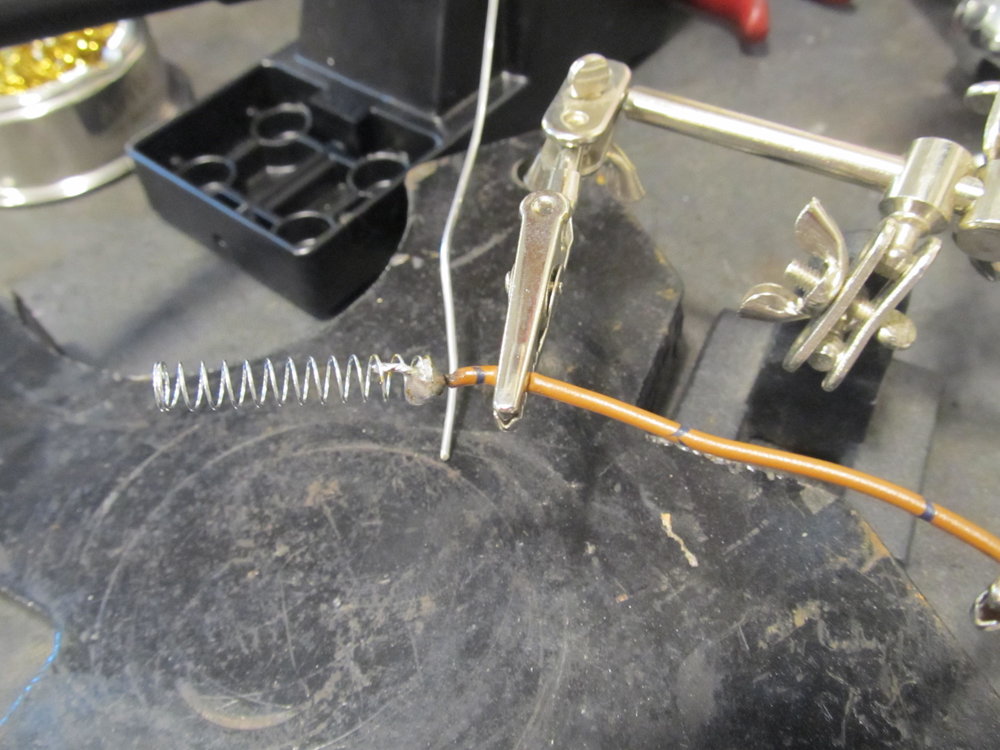
End result:
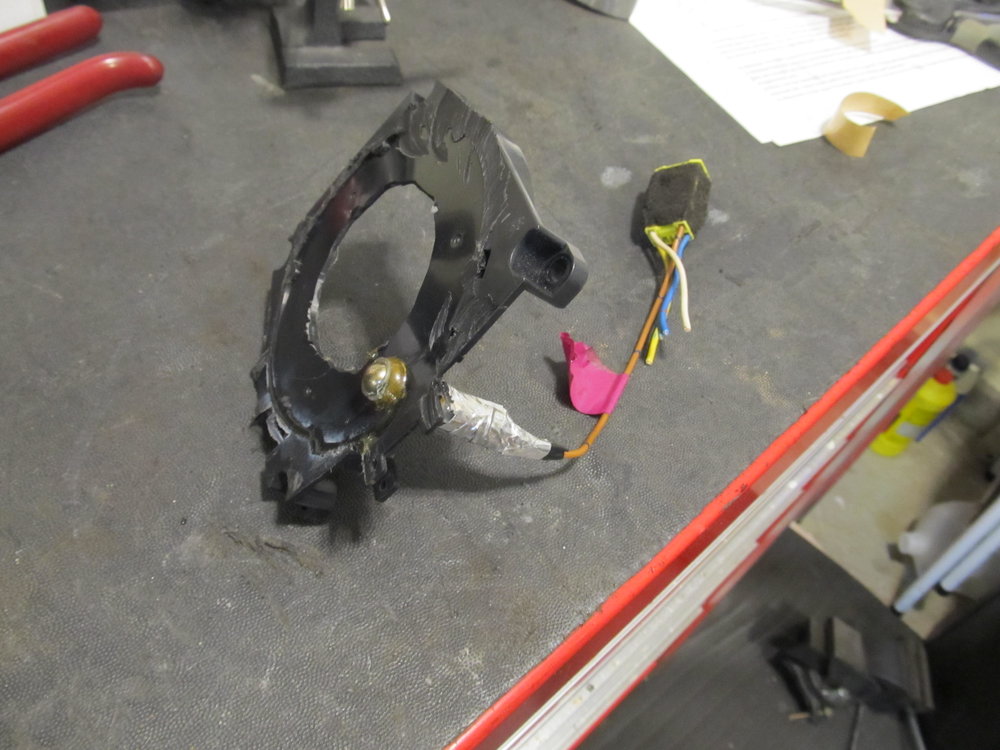
So it goes: wire from car->soldered to pen spring->pressing up against ball bearing, which rubs against the brass ring on the back of the steering wheel adapter. Yes, it actually works! Well, not yet it didn't. After all that, the damn thing still didn't work. WTF? Well, all of that was probably for nothing, because I eventually found a blown out 5a fuse in place of the horn's original 15a fuse. I've got no idea why that was in there, but a new 15a fuse solved the problem, and I finally had a working horn again. How sweet the sound!
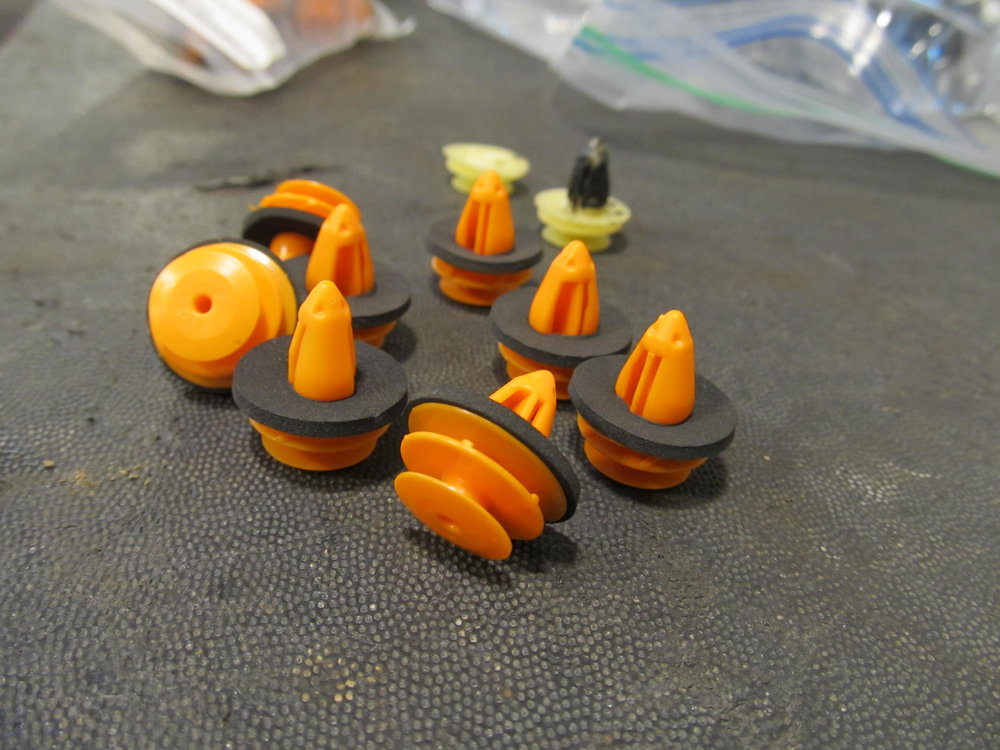
I then tried to tackle some annoying door rattles. I've had my door panels off so many times over the years, and I'm usually not very careful about getting all the clips back in correctly, so many were broken or missing at this point. On top of that, most of my foam door blocks had fallen out, allowing the panel to flex and vibrate more than they should. So first, I bought some new door clips that came with a bit of insulation in an effort to stop vibrations:
Old:
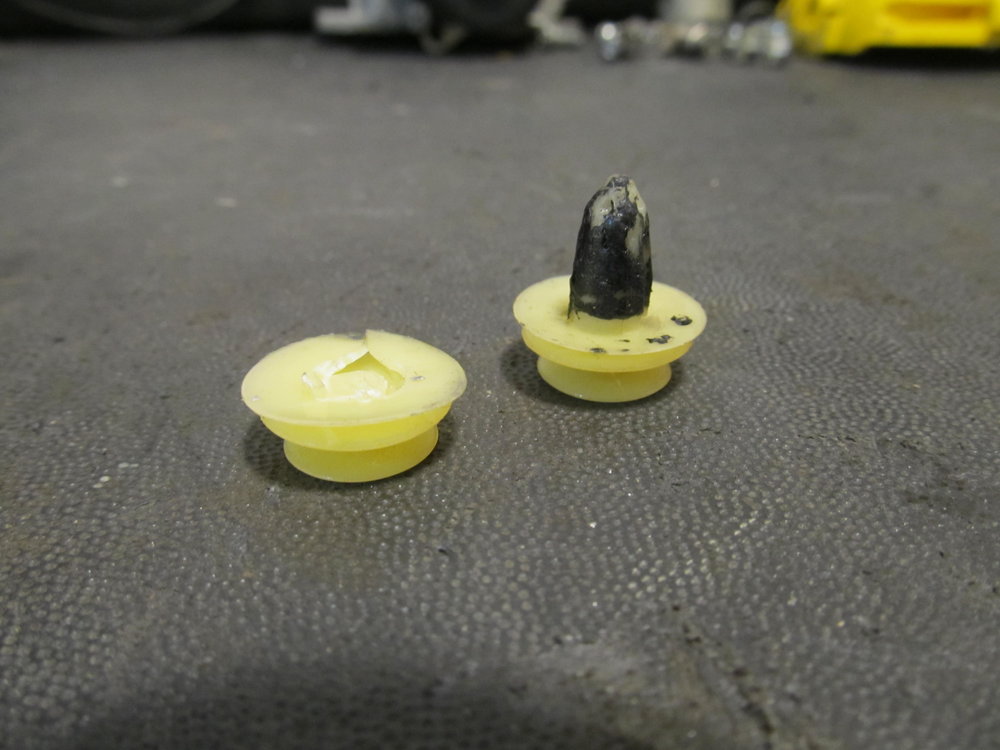
New:
And I super glued the door blocks back to their original locations:


The doors aren't perfect, but I haven't noticed as much buzzing as before, so I'm going to call this a success.
I then replaced my super crappy shifter boot ring that did almost nothing in terms of keeping the boot secured to the console. The clothes hanger was a noble and cheap attempt at a solution, but only a real shifter boot ring will really do the trick:
So in an effort to get rid of my P0400 EGR code, I decided to start with the simple/common problems, notably the notoriously clogged EGR tube. To get better access, I had to remove the PFTB. This gave me a good opportunity to finally install the PFTB IACV block off plate that .org member sicivic89 made a few years ago. At one point I was using the PFTB IACV, but I think when I swapped from the DEK motor to the 3.5 I went back to using the 4th gen IACV. This left the PFTB IACV just sitting on the bottom of the TB, and when I went to get the Nistune setup, the tuner mentioned that it was leaving a small gap open at all times, which caused my idle to be around 1000 rpm. He said if I removed it, my idle would settle down. So with that all in mind, I removed the two coolant hoses going to the TB, and installed a new single hose in a loop, bypassing the TB entirely from coolant. The IACV BOP went on without a hitch:
And I'm glad I took a close look at the coolant hoses going to the TB, they had seen better days:
I didn't take a pic of the coolant bypass loop, but it's just a hose, nothing fancy.
Anyways, on to the EGR. As mentioned before, I blocked off the EGR 2-3 years ago after getting the 3.5 running, and as far as I knew it never threw a code for it. I was under the impression that as long as the temp sensor was getting a good reading, it wouldn't throw the code. Well, either that's wrong, or there's something wrong with my EGR system that I can't track down, because this P0400 won't go away!
So I got busy cleaning my dirty but not entirely clogged EGR tube. You can see the blocked off portion on the left:
I got everything nice and clean...
I let everything sit in Evaporust overnight, but I didn't do any prep work to them so they didn't turn out as well as they could have:
The little metal plunger inside the control solenoid wasn't moving freely so I cleaned it very thoroughly and now it moves nice and smoothly!
I tested the resistance of the EGR temp sensor in boiling water on the stove and it was fine. I tested the resistance of the EGR control valve solenoid and it is good. And yet, after all of this, I'm still getting the P0400 EGR code. Do I really need to unblock the EGR and let it dump back into the intake to get this code to go away, or could something else be wrong?
Moving on to the inside of the car, I needed to figure out why my horn wasn't working. I tore apart the original "ball bearing inside a pen shell" mechanism that transferred the signal from the horn to the car because I figured it had just disintegrated over the last 6-7 years. I replaced the spring with a longer/stronger one, and instead of just twisting the wire to the spring, I did my best to solder them together. It certainly seemed to be a stronger connection than before.
End result:
So it goes: wire from car->soldered to pen spring->pressing up against ball bearing, which rubs against the brass ring on the back of the steering wheel adapter. Yes, it actually works! Well, not yet it didn't. After all that, the damn thing still didn't work. WTF? Well, all of that was probably for nothing, because I eventually found a blown out 5a fuse in place of the horn's original 15a fuse. I've got no idea why that was in there, but a new 15a fuse solved the problem, and I finally had a working horn again. How sweet the sound!
I then tried to tackle some annoying door rattles. I've had my door panels off so many times over the years, and I'm usually not very careful about getting all the clips back in correctly, so many were broken or missing at this point. On top of that, most of my foam door blocks had fallen out, allowing the panel to flex and vibrate more than they should. So first, I bought some new door clips that came with a bit of insulation in an effort to stop vibrations:
Old:
New:
And I super glued the door blocks back to their original locations:
The doors aren't perfect, but I haven't noticed as much buzzing as before, so I'm going to call this a success.
I then replaced my super crappy shifter boot ring that did almost nothing in terms of keeping the boot secured to the console. The clothes hanger was a noble and cheap attempt at a solution, but only a real shifter boot ring will really do the trick:
Last edited by 95maxrider; 12-15-2017 at 10:22 AM.
12-15-2017, 10:06 AM
#411
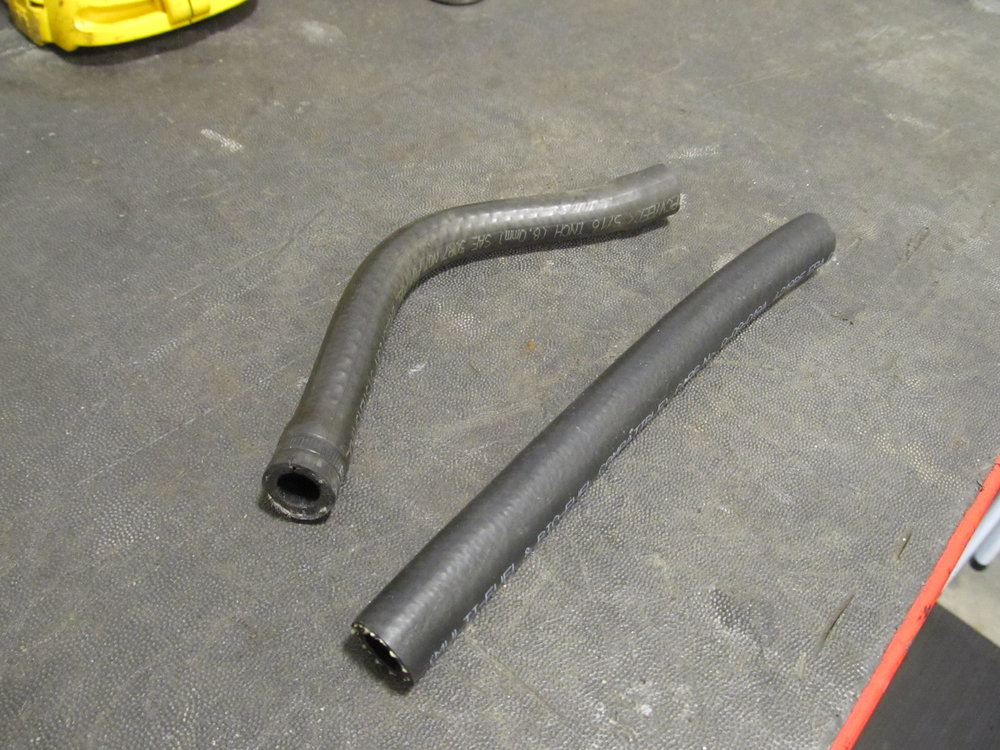
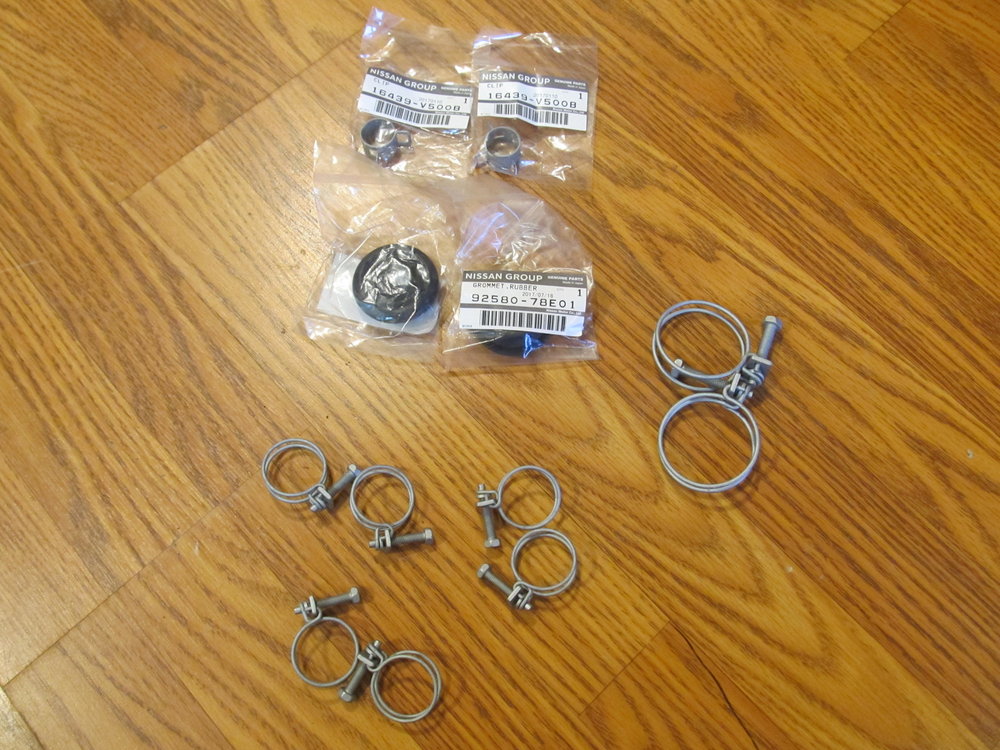
Unfortunately, when I was trying to install the coolant bypass loop, I had to move the larger coolant hoses around, and that must have made them unhappy, because when I went for a test drive I noticed one of them had spring a pinhole leak. I guess that's what happens when you move 20 year old hoses around! So rather than replace just replace the one hose (these are the ones snaking around the back of the motor going to the heater core), I decided to replace them all since they were probably all original. New OEM Nissan hoses and hose clamps to the rescue!
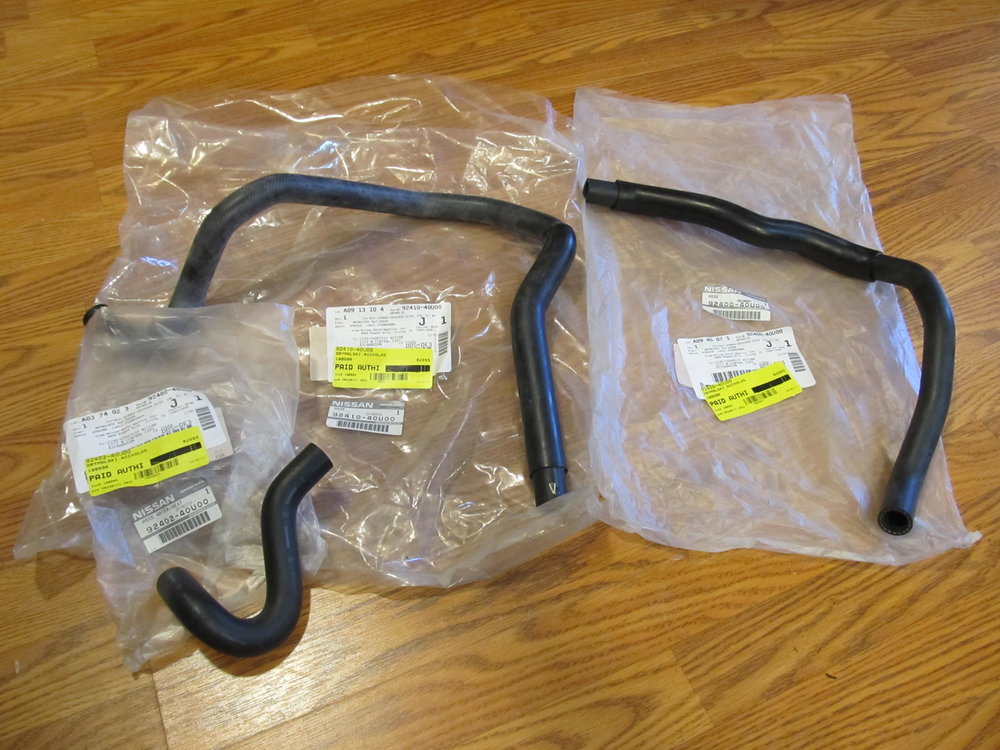
Old ones off:

I was very happy to have new hose clamps, as a few really didn't want to come off and probably would have broken something had I tried to reuse them.
While I was in there, I wanted to see what some Purple Power would do to my dirty firewall. Lots. It does lots!
And with that, I think I'm pretty much caught up. Now I just need to figure out what to do about the coolant leak on the back of the motor that appears to be coming from a drain plug...and figure out the EGR and cat codes.....and re-do my projector retrofit........and replace the axles and control arms................
Old ones off:
I was very happy to have new hose clamps, as a few really didn't want to come off and probably would have broken something had I tried to reuse them.
While I was in there, I wanted to see what some Purple Power would do to my dirty firewall. Lots. It does lots!
And with that, I think I'm pretty much caught up. Now I just need to figure out what to do about the coolant leak on the back of the motor that appears to be coming from a drain plug...and figure out the EGR and cat codes.....and re-do my projector retrofit........and replace the axles and control arms................
Last edited by 95maxrider; 12-15-2017 at 10:25 AM.
12-16-2017, 02:45 AM
#412
It is funny I go to great lengths to fix door rattles too. Then I have to remember i've stiffened the hell out of the car and now all those plastic clips are getting the full force of bumps. Rattles are going to happen, but I still try and make the car silent. LOL
12-16-2017, 04:44 AM
#413
It is funny I go to great lengths to fix door rattles too. Then I have to remember i've stiffened the hell out of the car and now all those plastic clips are getting the full force of bumps. Rattles are going to happen, but I still try and make the car silent. LOL
 01-14-2018, 02:59 PM
#414
Alright, I need some help with this car now too!
The car has been sitting in the garage for about a month now while I try to keep it off the salted roads. Ever since I deleted the Pathfinder IACV from the bottom of the Pathfinder TB back in September, I've been having problems with cold starts, and I can't help but wonder if the removal of the coolant lines from the TB is causing the problem. Everything I've read says that removing coolant hoses from the TB won't cause problems, but my symptoms make me wonder. Now when it's cold, the car will crank and start, then immediately die. The only way to keep it running is by holding the revs up. After 30 seconds or so it can usually stay running. To me, that kind of sounds like the TB is stuck closed or something, but then again, how could some otherwise very cold coolant prevent that from happening?
To make matters worse, I drove the car around a bit yesterday and today after the salt got washed away and was greeted by a worrying rattling noise coming from the engine. It's faint at idle, but gets louder as it revs. My oil is topped off, and it doesn't quite sound like the noise it made when it was low on oil. I don't know how this car managed to develop an engine problem while sitting on a trickle charger in a garage, but there you have it.
I just installed a new battery, as my old one tested bad. But then when they retested it out of the car it tested fine. WTF? Anyways, it's back on the trickle charger to make sure the new battery is topped off. I'll drive it tomorrow and pray that my engine rattle was somehow due to a dying battery. At least that potential coolant leak on the back of block doesn't appear do be leaking right now, so that's something.
I gotta say I'm getting pretty fed up with my two cars right now. I feel like I work on them all weekend fixing one thing only to be greeted with a new problem as soon as I pull it out of the garage. I would think that at some point I could catch up on all that needs to be done, but I feel like I'm losing the fight, and that really saps my desire to keep at it. Money is tight due to my wife's job shutting down unexpected 5 months ago, so I can't really drop them off at a shop and pay for a professional diagnosis. Her 2001 Escape has been requiring a lot of work over the last 6 months, and my M3 needs work too. I'm getting depressed thinking about all the problems that are coming up that I can't seem to solve.
01-15-2018, 12:20 PM
#416
So I've done some reading on the subject, and my understanding is that coolant going to the TB is only useful after the car is running and the coolant is hot. Because really, how could cold coolant keep the TB from icing over when the car isn't running? It's there to keep the TB from sticking open when driving, not to keep it from freezing when parked. Of course, I could be wrong about all that, so please correct me if I'm mistaken!
In my reading, I think I came across the cold/hard start problem/solution: the coolant temp sensor for the ECU (not the gauge). They are notorious for causing symptoms exactly like mine on a wide variety of cars. Here's a thread on the org discussing it. I'm going to order a new one from Nissan and cross my fingers.
And some very good news: the new battery got rid of the weird rattling noise coming from my engine, hooray!
Now I'm off to go replace spark plugs, PCV valve, and coolant temp sensor for the 3rd gen. The work never ends!
01-15-2018, 07:15 PM
#417
Newbie - Just Registered

Join Date: Oct 2015
Posts: 8
IACVs control the engine's idle.... do you have a secondary one?
the engine needs more air to idle at the same rpm when it's cold.
but you're right, the coolant part of throttle bodies are dumb and should be removed
the engine needs more air to idle at the same rpm when it's cold.
but you're right, the coolant part of throttle bodies are dumb and should be removed
01-16-2018, 04:20 AM
#418
Senior Member

Join Date: Jul 2001
Location: state of confusion
Posts: 1,341
EFI is not necessarily immune to icing.
https://www.hemmings.com/magazine/hc...g/3747511.html
Ice forming in the TB would have to include the idle air passage.
Maybe I should dig out my aftermarket multiport EFI system documentation, as it had an idle air passage with an IAC motor and there were small-diameter coolant lines connected to the TB assembly. When the thermostat is closed, the coolant that is circulating around in the engine warms up faster than the coolant as a whole does when it opens.
Norm
https://www.hemmings.com/magazine/hc...g/3747511.html
Originally Posted by hemmings
When port fuel injection became the norm, many engines still ran heated coolant between the throttle plate and the plenum of the intake manifold to eliminate the possibility of any ice forming in the throttle body. Though there was no fuel present and no venturi, the ice would nevertheless form from the moisture in the air due to the effect of the increased speed of the air as it went past a mostly closed throttle plate.
Maybe I should dig out my aftermarket multiport EFI system documentation, as it had an idle air passage with an IAC motor and there were small-diameter coolant lines connected to the TB assembly. When the thermostat is closed, the coolant that is circulating around in the engine warms up faster than the coolant as a whole does when it opens.
Norm
01-16-2018, 06:19 AM
#419
Norm- Your quote seems to confirm what I was saying before; heating up the TB with coolant is for when the car is moving and the coolant has heat it in. I don't see how it would affect a cold, not running car.
And of course, like clockwork, one of my rear calipers was locked up this morning. Time for my bi-annual rear caliper replacement, woo hoo!
Can anyone explain why the rear calipers on these cars are so susceptible to locking up when it's cold out? By locking up, I mean I had the e-brake engaged overnight, and in the morning it won't release on one side (maybe both). My understanding is that this isn't something that can be fixed by servicing the caliper, it's just best to replace them. Is this actually correct? Like I said, fix one thing, another thing immediately breaks!
01-16-2018, 01:12 PM
#420
Newbie - Just Registered
Join Date: Oct 2015
Posts: 8
01-16-2018, 01:19 PM
#421
Sorry, after the 3.5 swap the car had two IACVs: the stock one and the one on the bottom of the PF TB. I was using the PF IACV before the swap, but went back to the stock one after the 3.5 swap, but left the PF IACV attached since I didn't have a block off plate yet. So I finally removed the unused PF IACV after sitting on the BOP for a few years am now only have the stock IACV in there and running. At no point were both being used together.
01-17-2018, 08:16 AM
#422

My brother is using the PFTB IACV and has cold start issues even with a brand new one. He's thinking about blocking it off and running the stock set up again.
01-17-2018, 08:33 AM
#423
It's tough to say at this point. It's been years since the PF IACV was up and running, so my memory is a little faded. I don't remember ever having cold start problems with it though. IIRC, my idle was steady, except every 20 seconds or so it would quickly fluctuate and recover. It never stalled, or gave me trouble starting, it was just a weird quirk. With the stock IACV I believe that's gone. If his cold start problems are like mine where he needs to keep his foot on the gas for 30 seconds, it may well be his coolant temp sensor. I'll report back on that when my new one arrives later this week.
01-21-2018, 06:55 AM
#424
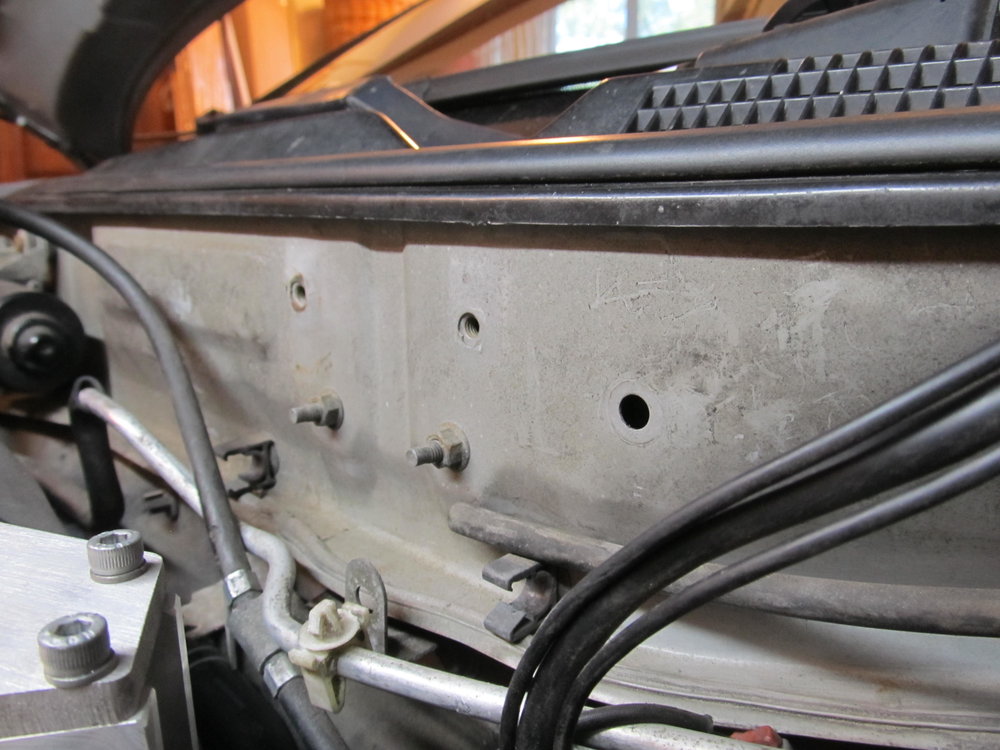
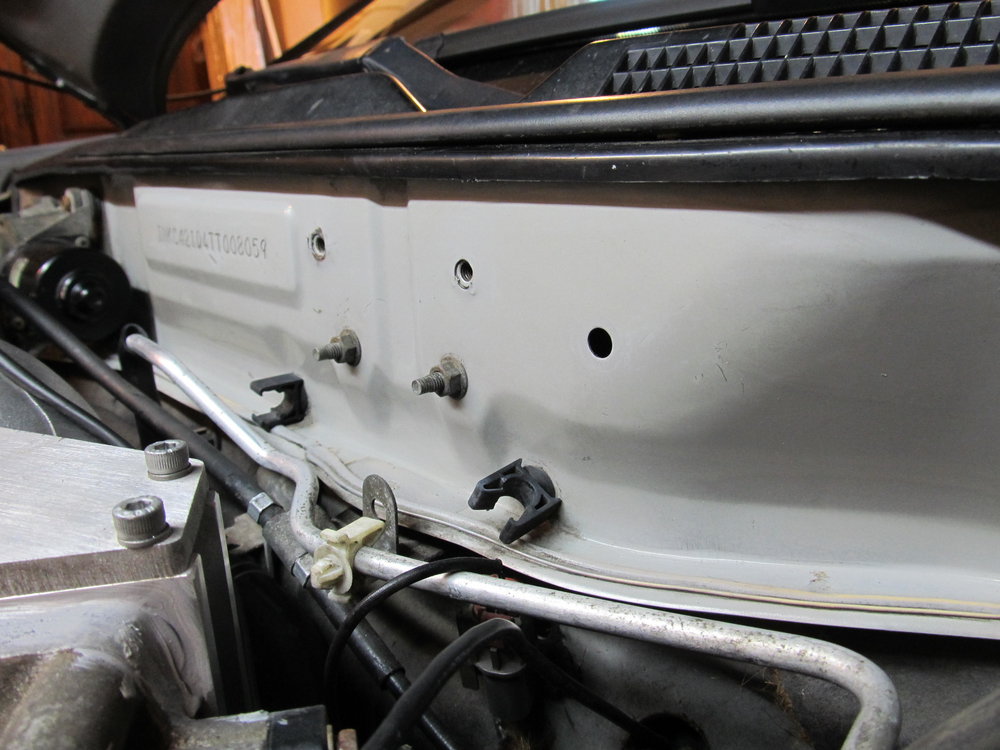
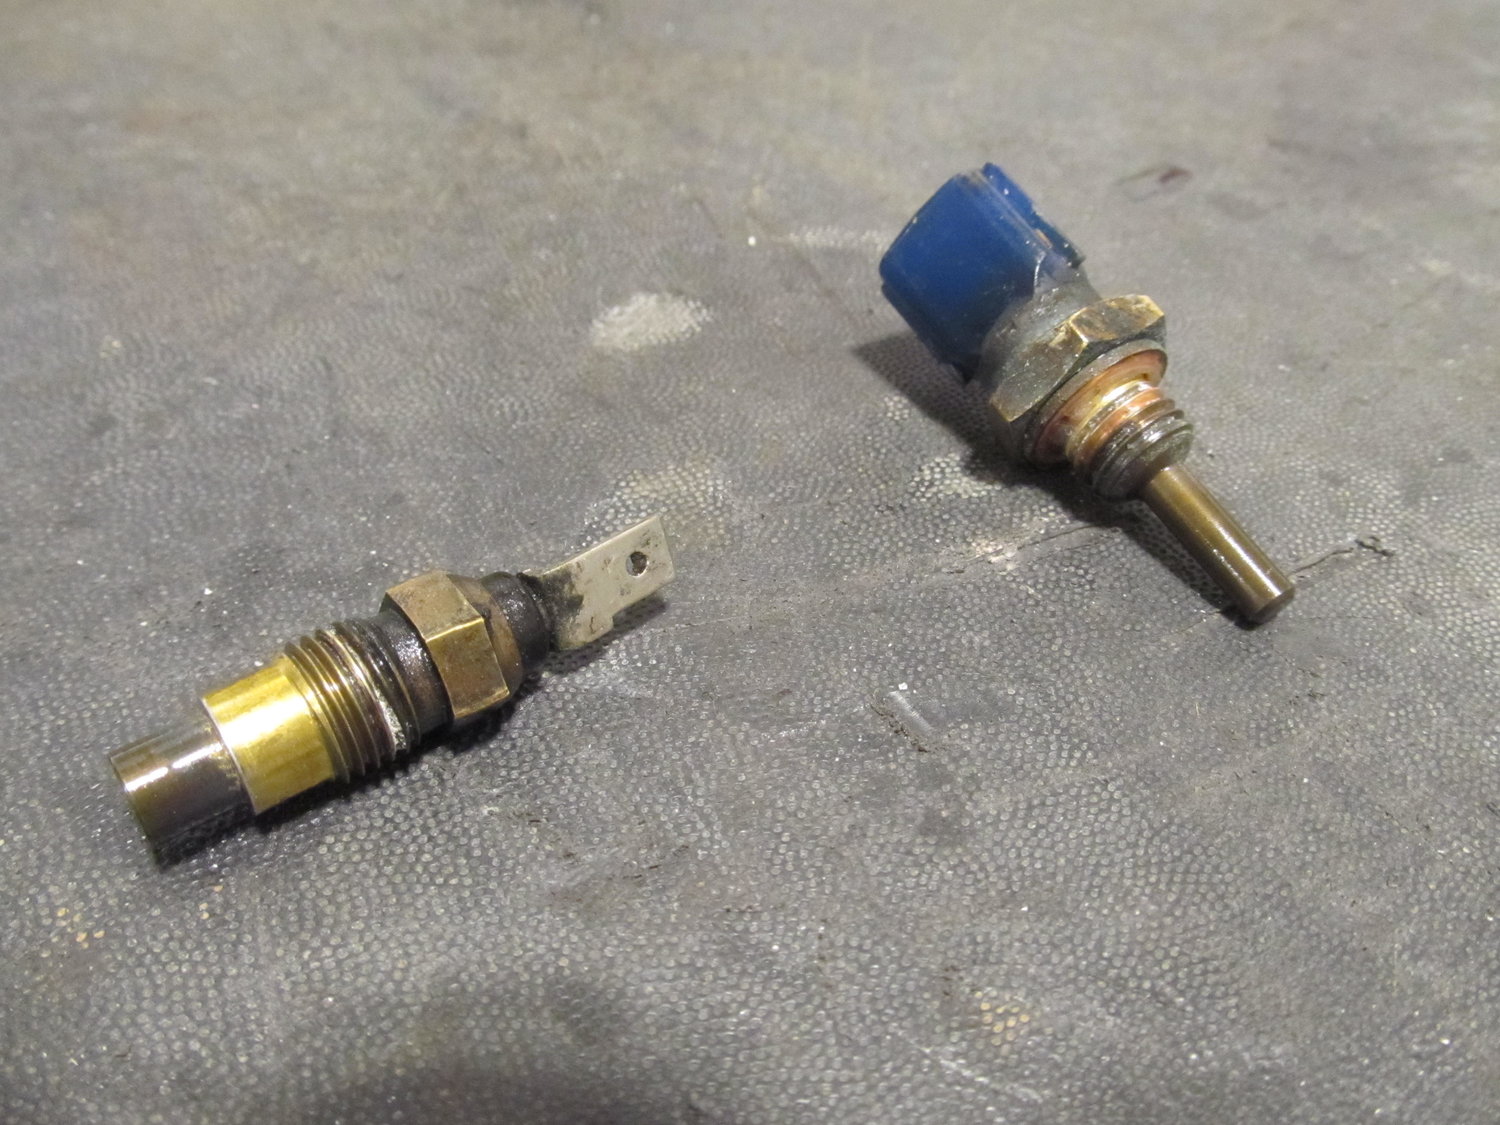
Well, crap. I had very high hopes for the new coolant temp sensors, but it doesn't look like they made a difference. I bought new sensors (one for the gauge, one for the ECU) from Nissan:

The sensor for the gauge (the smaller one) that I pulled out of the car had its electrical connector loose, which may have been the cause of my erratic temp gauge on one day about two months ago. The new sensor's tab was nice and tight.
Unfortunately when I just went outside to try and start the car for the first time after installing the new sensors, it still stalls out if I don't keep my foot on the gas Back to the drawing board...
The sensor for the gauge (the smaller one) that I pulled out of the car had its electrical connector loose, which may have been the cause of my erratic temp gauge on one day about two months ago. The new sensor's tab was nice and tight.
Unfortunately when I just went outside to try and start the car for the first time after installing the new sensors, it still stalls out if I don't keep my foot on the gas
Back to the drawing board...
02-12-2018, 10:16 AM
#425
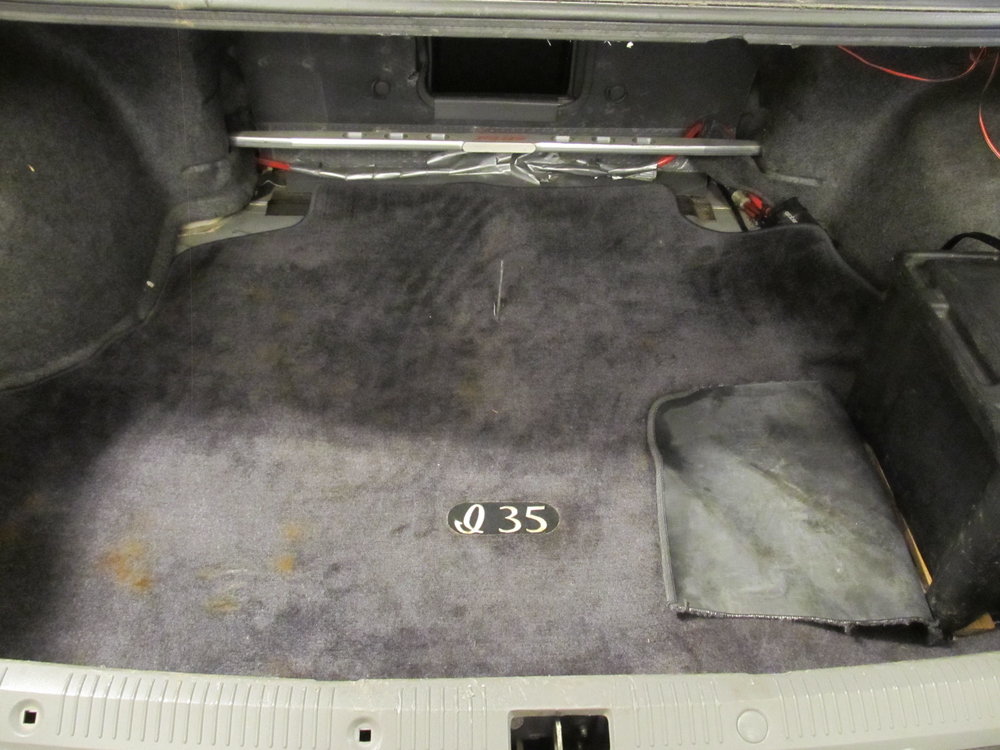
I snagged a pretty nice I35 trunk mat when I was at the junkyard a while back and replaced the nasty old original "recycled fiber" mat that I had thoroughly soiled with transmission fluid and other foul things over the years. This new one is so fancy!
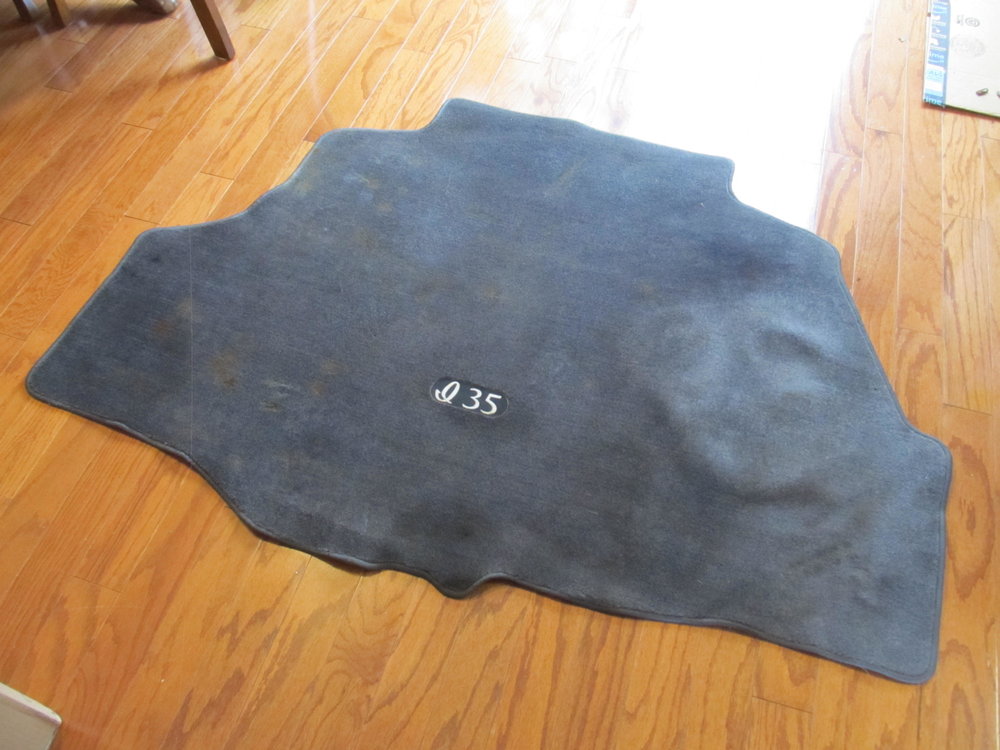
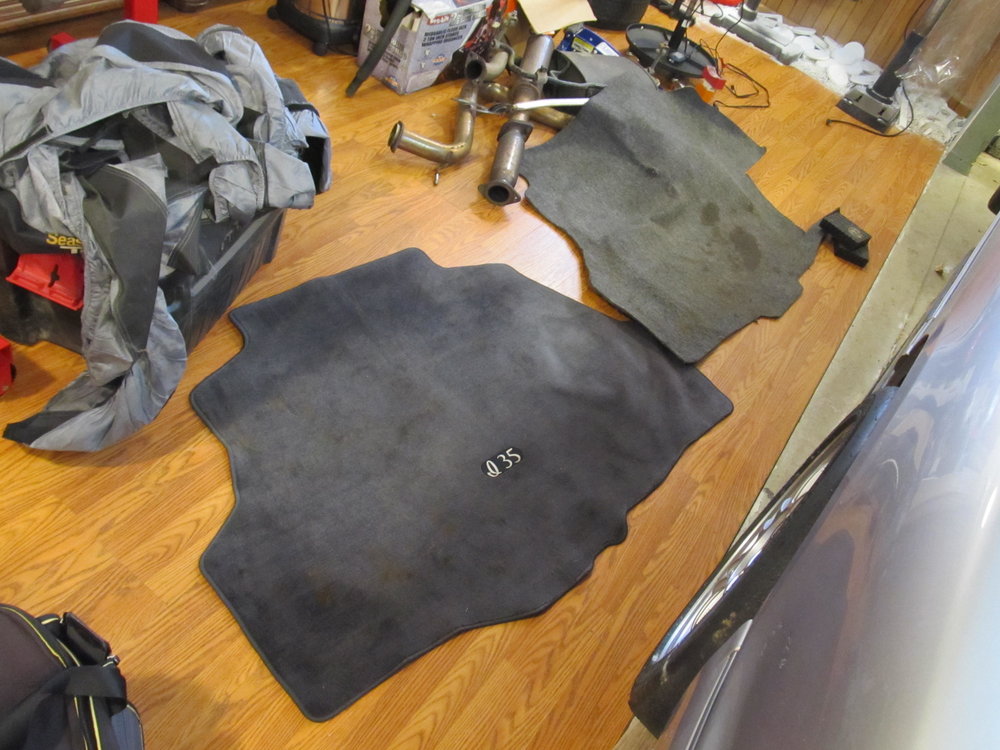
I had to make some cuts to make room for the battery box, and since this is from a 5th gen, fitment is far from perfect, but all that uncovered space in the back won't really be seen when the trunk is full.

I'll eventually trim the flap off....
==========================================
Oh, one more junkyard pickup to install: the plastic ECU covers down by your feet! I haven't had covers down there in probably 15 years, and I got tired of always seeing my ECU and wiring mess.

My covers had been lost somewhere along the way, but there were plenty at the junkyard, so I picked them up. They attach to the metal cage/frame for the ECU.
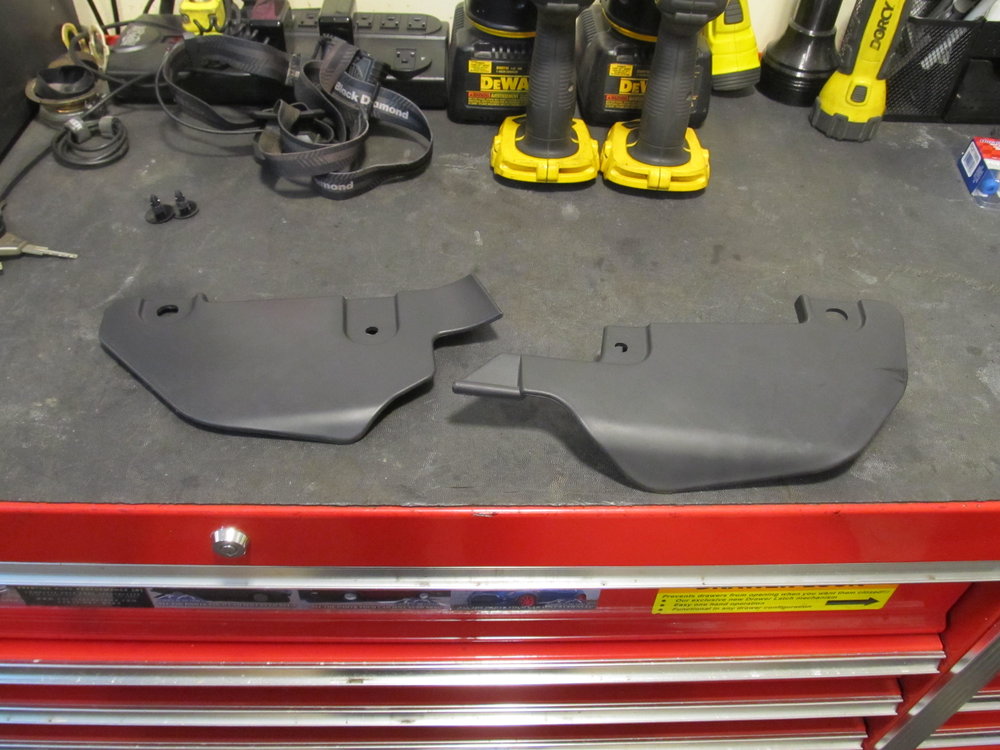
Suffice to say that I had a difficult time getting the cage/frame to fit back under the dash, and was very close to giving up. How hard could it be to slide it back down in there? Way harder than it should have been. It didn't help that I was trying to install it upside down for a while until I went back and looked at some pics I had taken at the junkyard and saw the proper orientation. Finally, it and the ECU were in there, and I could reattach the plastic bits. Oh it's so nice!

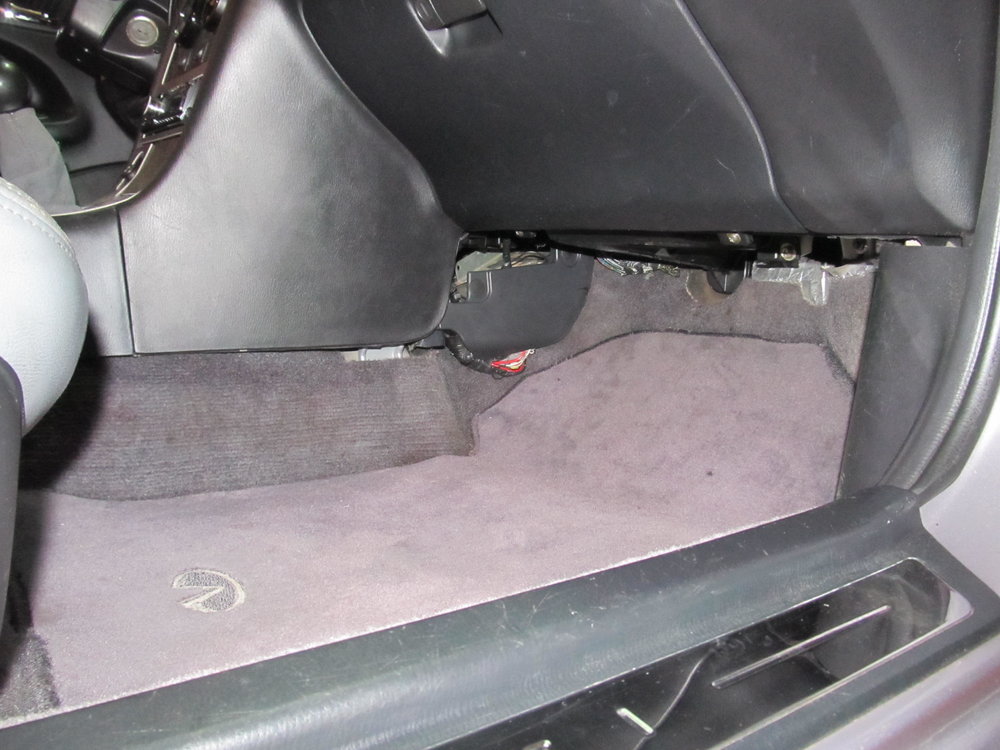
Okay, so the routing of some of the wires isn't perfect, but it's good enough for now. This thing is really coming together!
=======================================
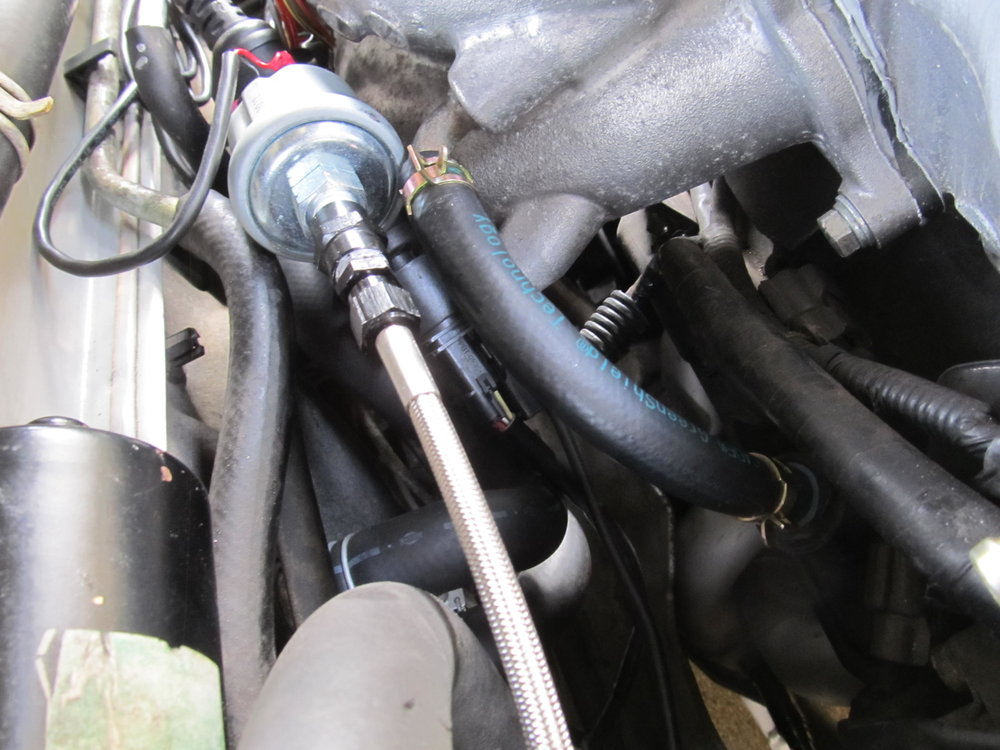
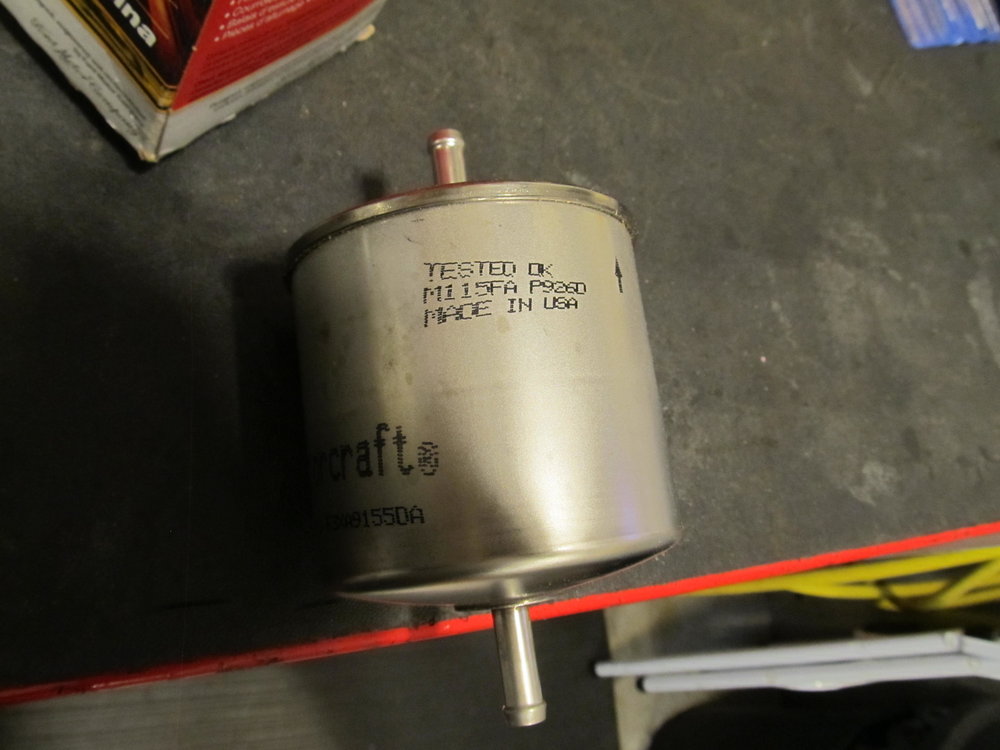
In the ongoing effort to try and fix my cold start problem, I decided to install a new fuel filter. I had read a thread or two on here where people mentioned that a new fuel filter fixed their exact same starting problems, and since I had a new one just sitting here waiting to be installed, I figured I might as well give it a try. I run a 300zx filter on my car since it's twice as big as the stock one, and chose a Motorcraft one since I've had good luck with where they manufacture products (my wife has a 2001 Escape).
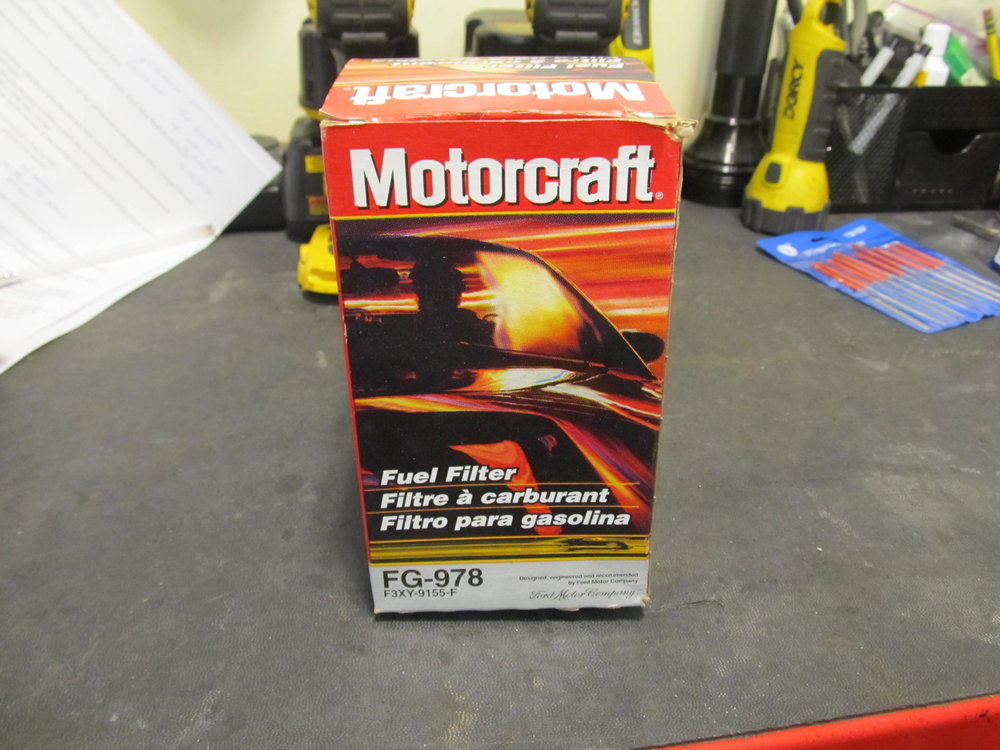
The Motorcraft fuel filter I just installed in the 3rd gen was made in Japan, but this one was made in the US. I'm cool with that!
The fuel line hose clamps on the car were of the screw on variety, and due to the tight space it sits, they were a real pain to access and remove. I replaced them with regular ones that I can access easier with an extension:

After I installed it we had a warm stretch of weather where I was unable to really test the cold starting of the car, but things cooled back down again and I've successfully started the car with temps around freezing without having the hold down the throttle, so I'm tentatively calling this a successful repair! Now who wants to hazard a guess as to how a fuel filter would make the car difficult to start in the cold, but not have any trouble running at WOT? Because I've got nothing.....
I had to make some cuts to make room for the battery box, and since this is from a 5th gen, fitment is far from perfect, but all that uncovered space in the back won't really be seen when the trunk is full.
I'll eventually trim the flap off....
==========================================
Oh, one more junkyard pickup to install: the plastic ECU covers down by your feet! I haven't had covers down there in probably 15 years, and I got tired of always seeing my ECU and wiring mess.
My covers had been lost somewhere along the way, but there were plenty at the junkyard, so I picked them up. They attach to the metal cage/frame for the ECU.
Suffice to say that I had a difficult time getting the cage/frame to fit back under the dash, and was very close to giving up. How hard could it be to slide it back down in there? Way harder than it should have been. It didn't help that I was trying to install it upside down for a while until I went back and looked at some pics I had taken at the junkyard and saw the proper orientation. Finally, it and the ECU were in there, and I could reattach the plastic bits. Oh it's so nice!
Okay, so the routing of some of the wires isn't perfect, but it's good enough for now. This thing is really coming together!
=======================================
In the ongoing effort to try and fix my cold start problem, I decided to install a new fuel filter. I had read a thread or two on here where people mentioned that a new fuel filter fixed their exact same starting problems, and since I had a new one just sitting here waiting to be installed, I figured I might as well give it a try. I run a 300zx filter on my car since it's twice as big as the stock one, and chose a Motorcraft one since I've had good luck with where they manufacture products (my wife has a 2001 Escape).
The Motorcraft fuel filter I just installed in the 3rd gen was made in Japan, but this one was made in the US. I'm cool with that!
The fuel line hose clamps on the car were of the screw on variety, and due to the tight space it sits, they were a real pain to access and remove. I replaced them with regular ones that I can access easier with an extension:
After I installed it we had a warm stretch of weather where I was unable to really test the cold starting of the car, but things cooled back down again and I've successfully started the car with temps around freezing without having the hold down the throttle, so I'm tentatively calling this a successful repair! Now who wants to hazard a guess as to how a fuel filter would make the car difficult to start in the cold, but not have any trouble running at WOT? Because I've got nothing.....
02-12-2018, 10:19 AM
#426
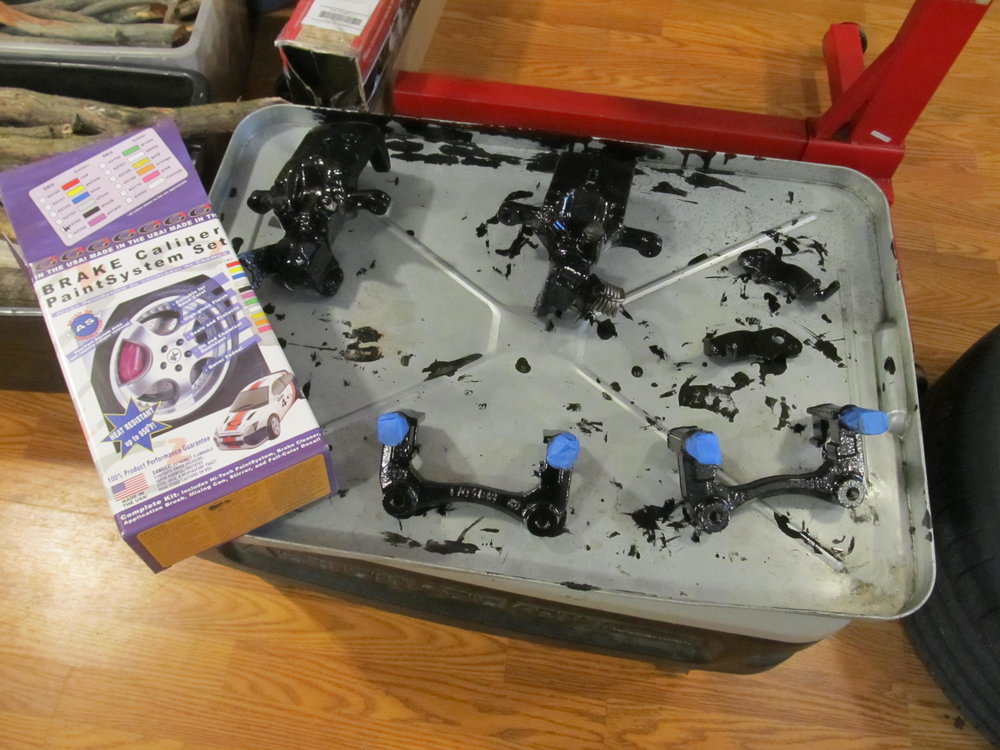
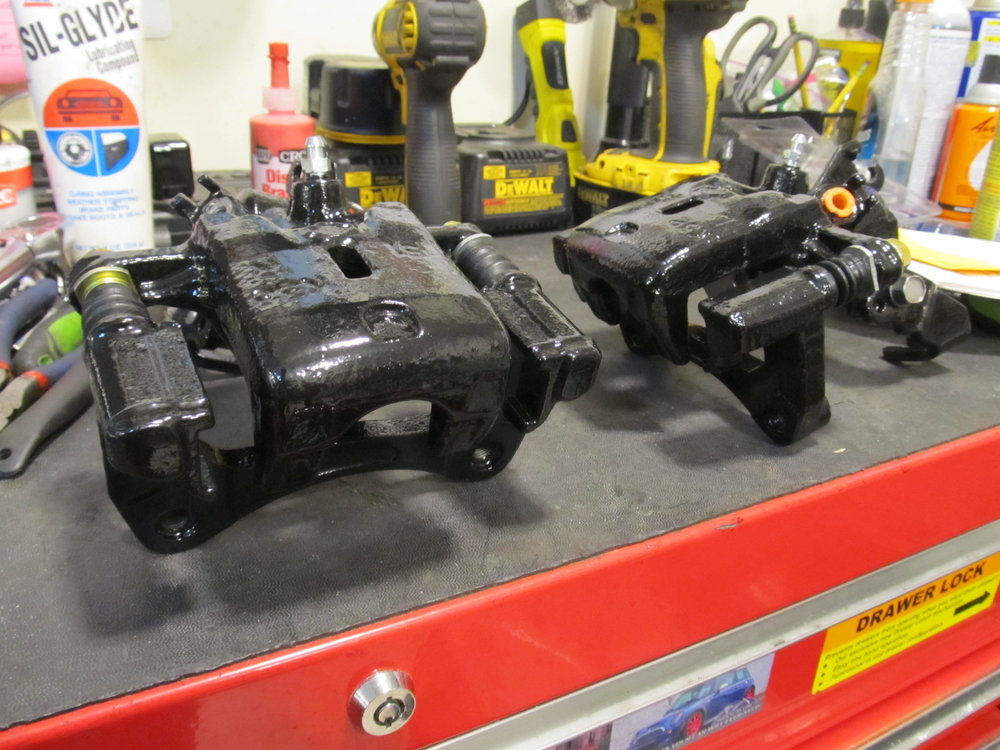
So there I was, all happy that my car could now start in the cold. Well, I went to take it to work one cold morning, only to encounter my old friend, Mr. Stuck Rear Caliper, courtesy of my e-brake. I feel like rear calipers only last a few years on this car, and eventually the e-brake portion of the calipers seizes, leaving me with a useless car until it warms up or I replace the caliper. My rear calipers were overdue for painting, since they had developed a healthy rust coating, so I decided to just replace both and be done with it all.
They were not pretty:
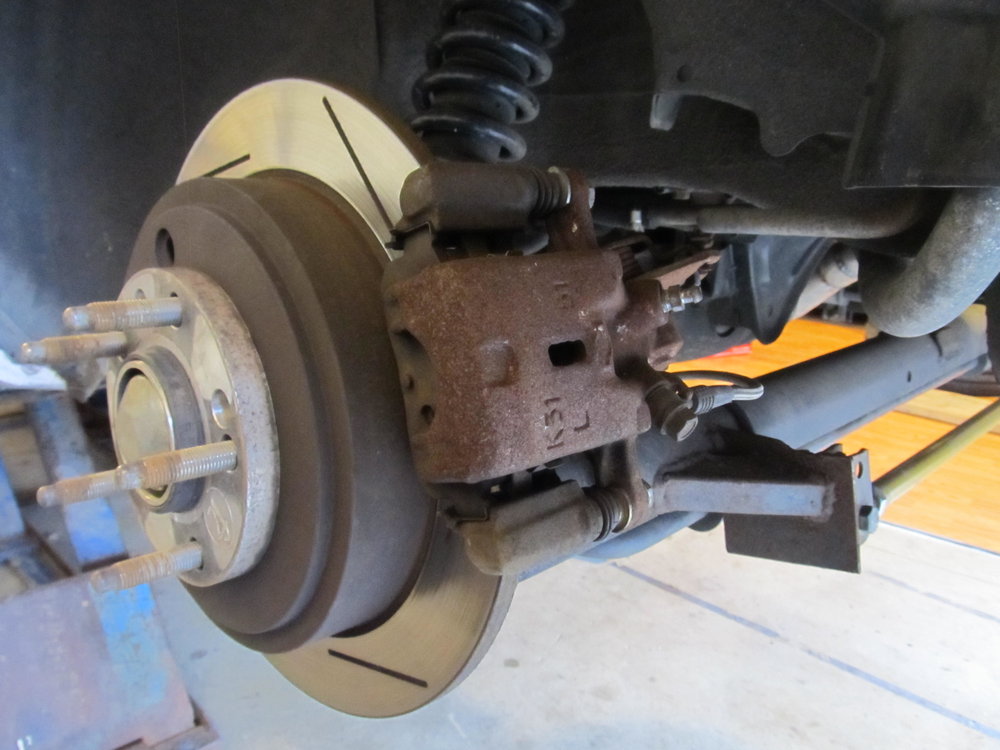
But the new ones sure were!

The pads and rotors were still in great shape, so I didn't have to replace them. I had this caliper paint sitting in my cabinet for a few years, so even though it was past its "expiration date" I decided to use it. It was nice 2-part stuff that you had to mix up and brush on, so I'm hoping it's tough and stays put for a few years.
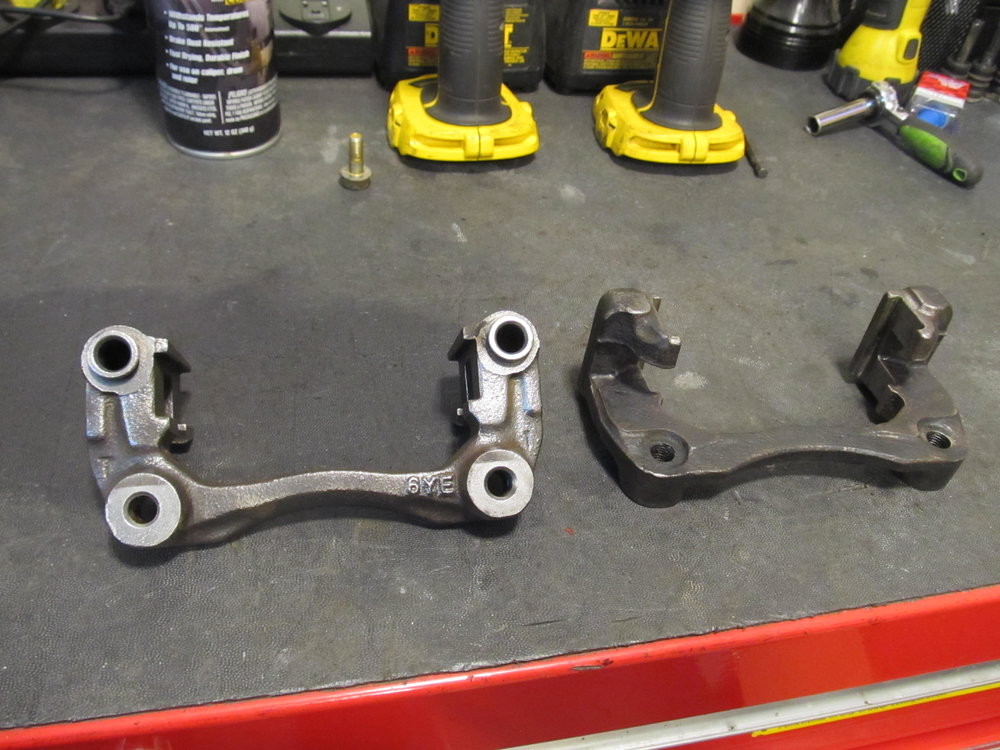
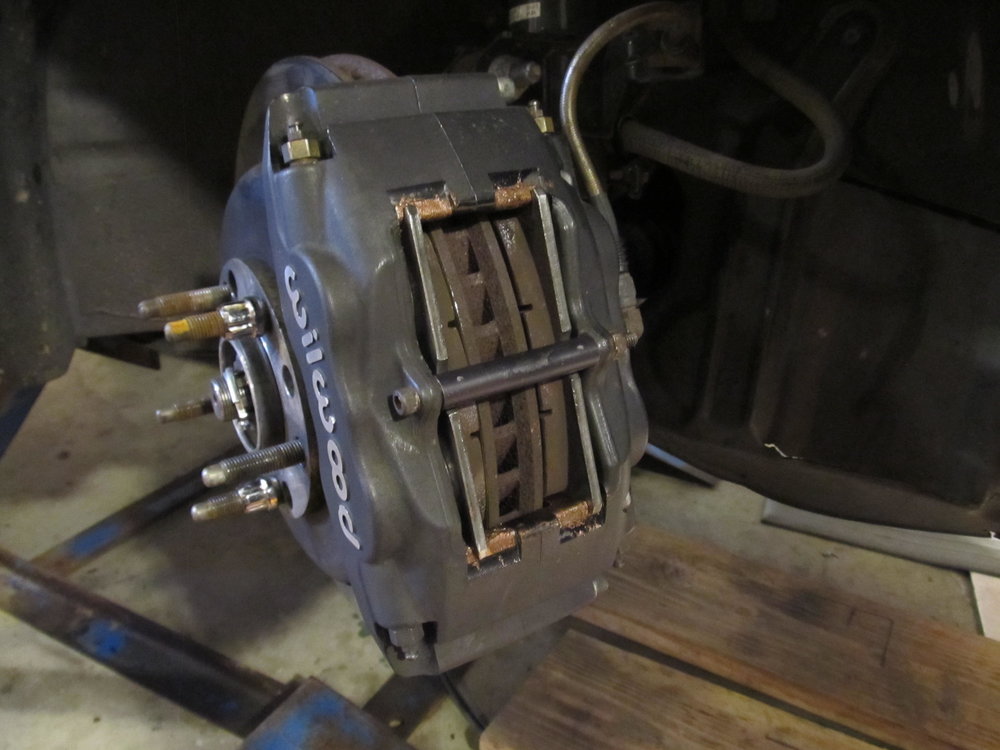
Unfortunately, when I installed them, something didn't seem right.....

Yeah, the caliper is too high up and 1/3 of the pad was hanging off the top of the rotor!
It turns out that the new caliper brackets were roughly 80mm tall, while the ones that were on my car were only 70mm tall, which obviously caused the caliper to sit too high off the rotor. I went back to the store, and the other ones they had in stock were also 80mm tall. I do have the Fast Brakes rear BBK, but all that is are larger Accord rotors and a bracket to space out the caliper. I'm pretty sure that the caliper brackets on my car are the original size, but the fact that all the other ones in the store were 80mm makes me question everything. Either way, if you're replacing rear calipers, make sure the brackets match what you pulled off the car! Naturally, I was quite unhappy about this, since I would now have to clean up and paint my old brackets, and my mixed up paint had hardened and was useless. Thankfully, they gave me a discount on some generic black caliper spray paint and I got to work.

First up, I wire wheeled the old brackets
Then they sat in Evaporust over night to really remove any remaining rust....
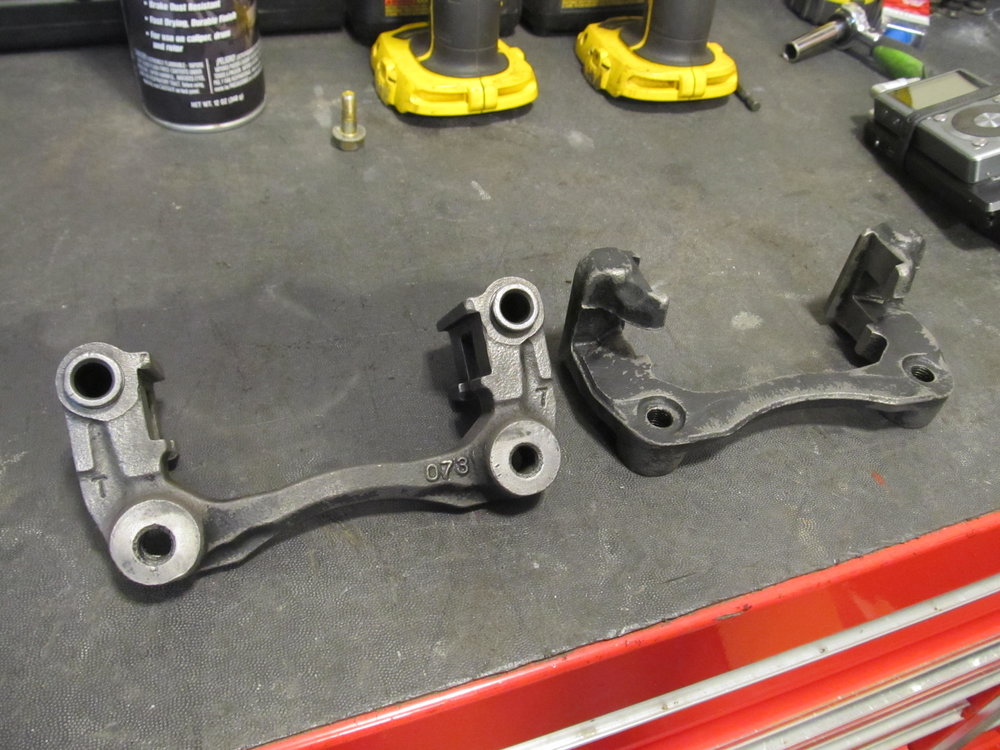
And were finally painted:
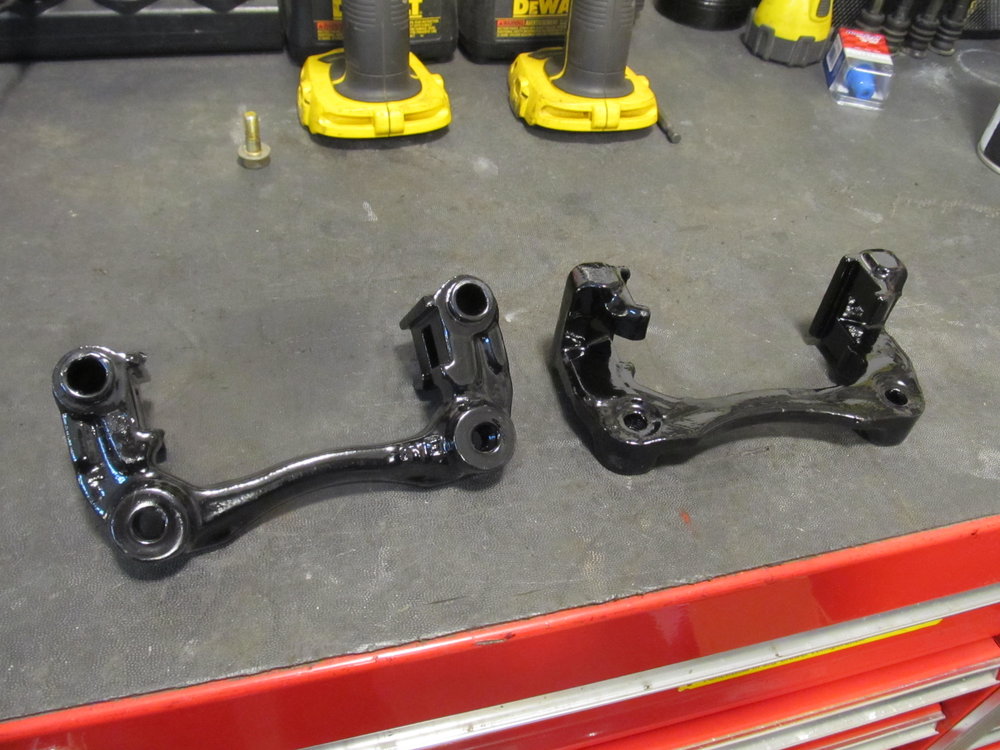
And just like that, my rear calipers fit and actually worked in freezing temperatures. Huzzah!

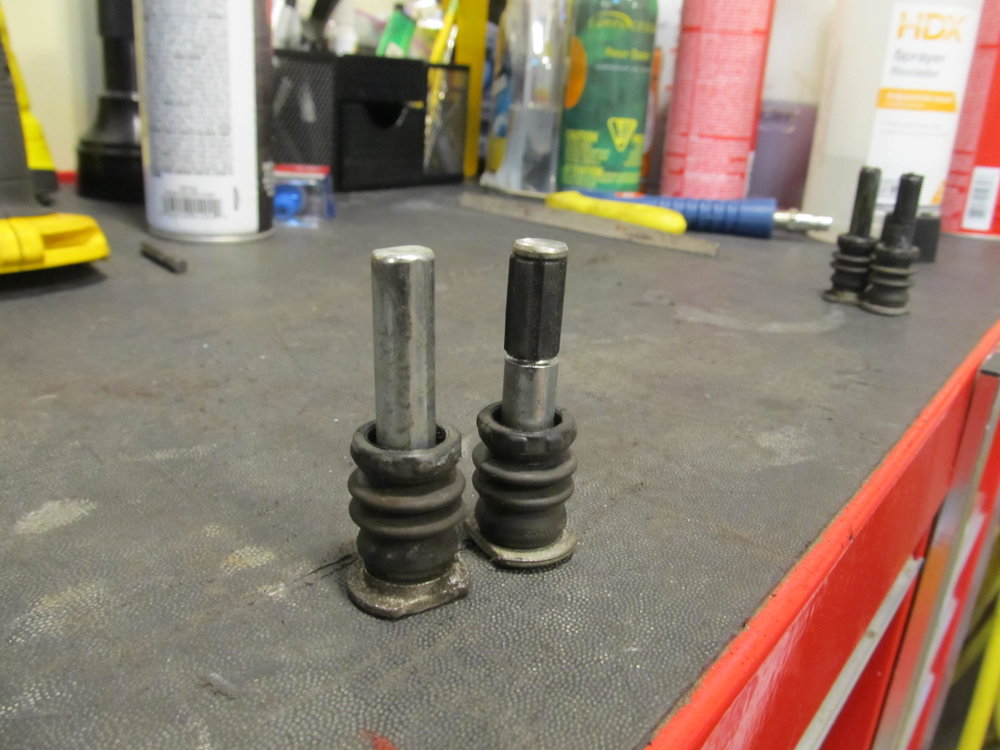
I noticed something interesting, and was hoping someone could explain it to me. On both my old rear calipers and the new ones, the pins on each side were different. One was solid metal, and the other had this plastic/rubber sleeve on it. What is the rationale for doing it this way?
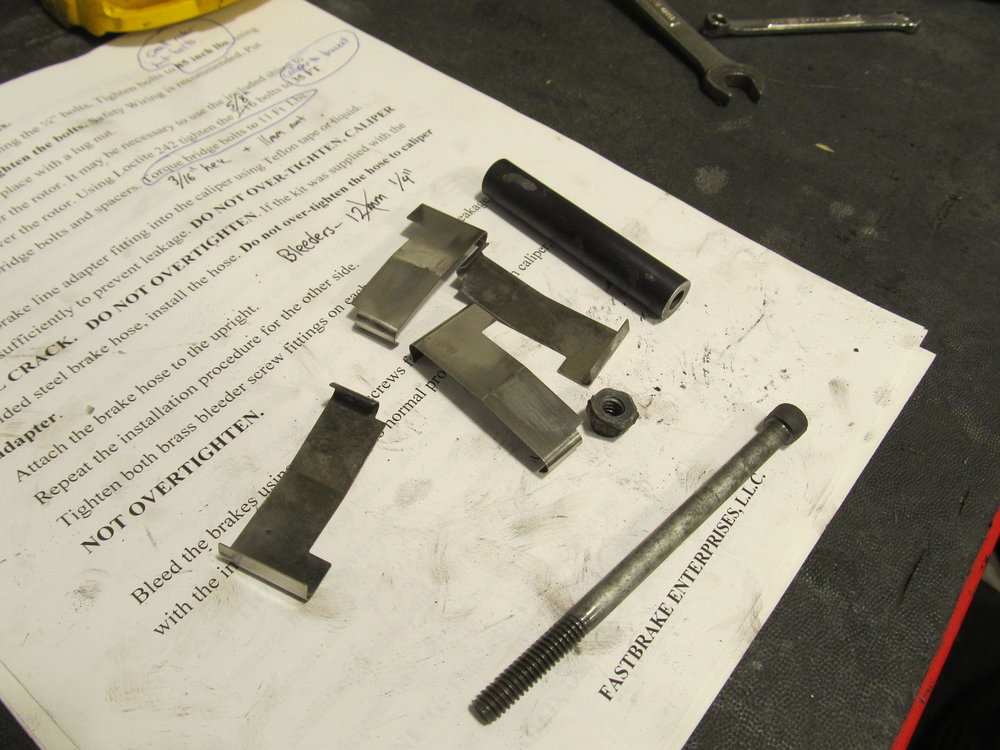
While I was in there, I figured I should probably service my Wilwoods up front. Again, the pads and rotors were fine, so I was just cleaning and lubing. I cleaned the shims:

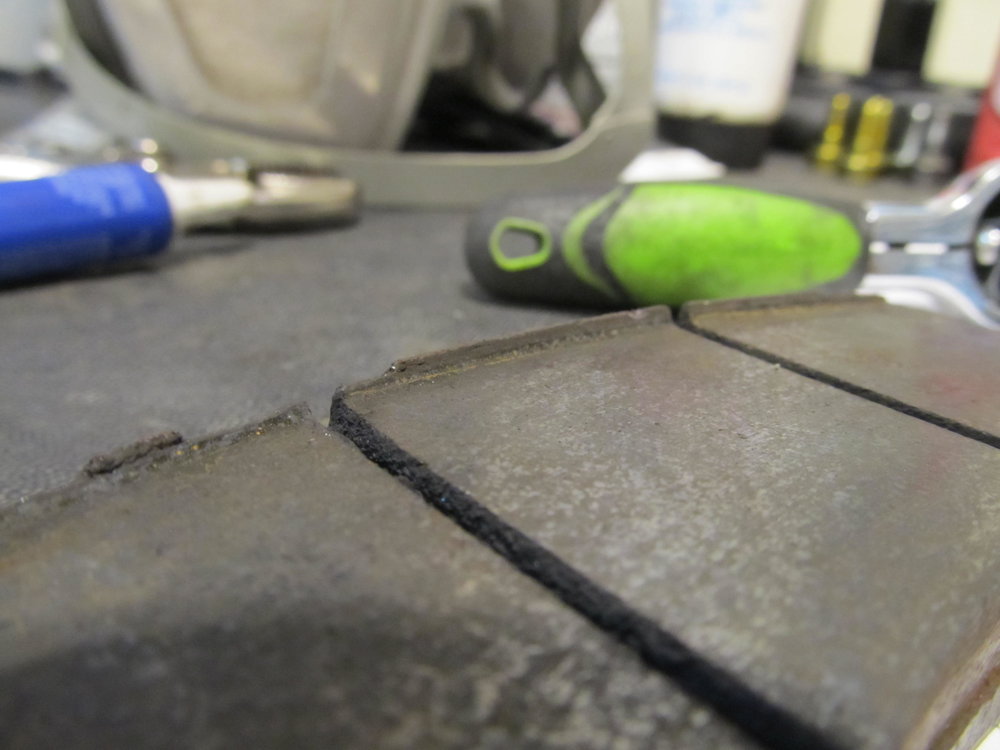
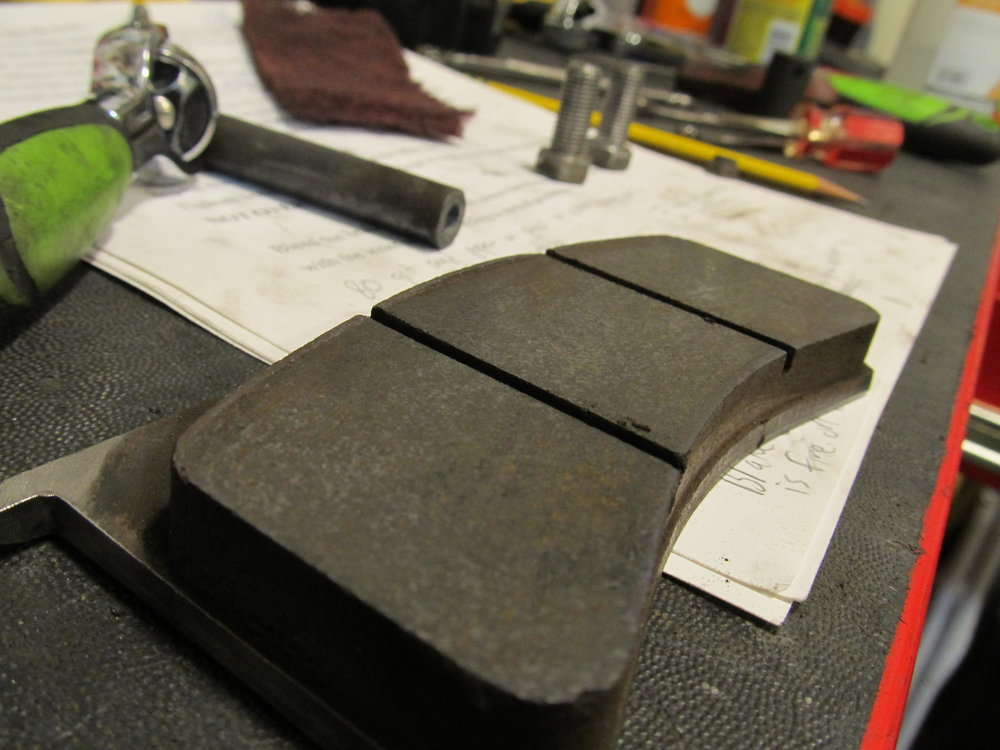
I ground off the little lip that was forming at the top of each pad in an effort to get rid of some light squealing a light pedal pressure:
Here are my available products, although I didn't use all of them:
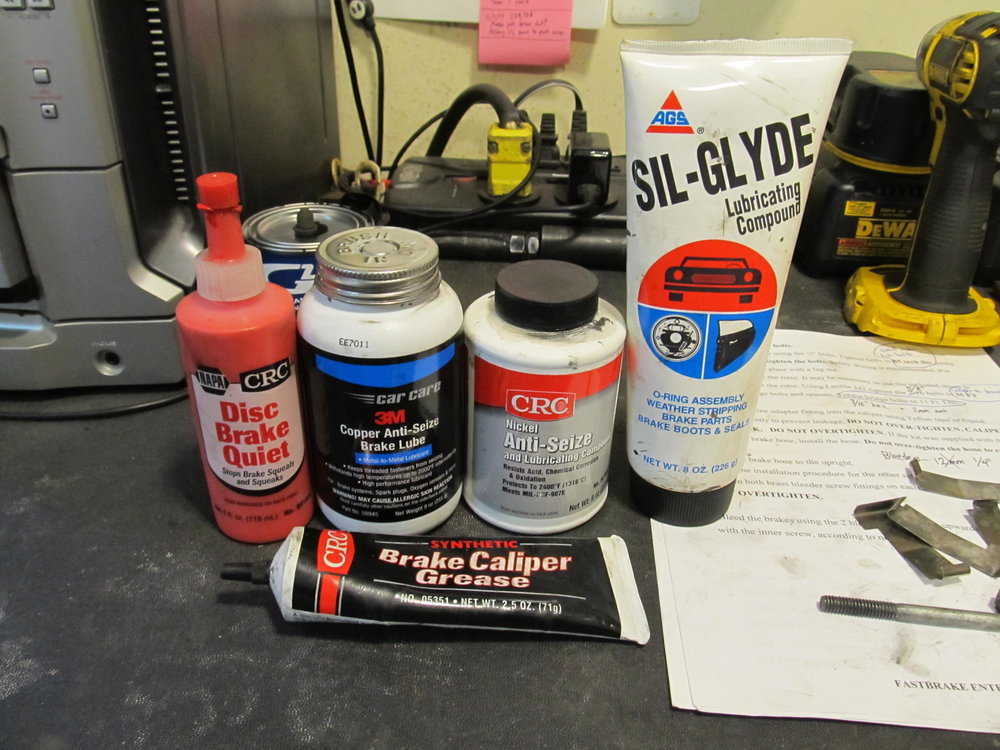
According to Wilwood, they don't recommend using the red anti-squeal stuff on the back of the pads, so I just lubed the shims with the copper anti-seize and put it back together.
I also cleaned off the calipers with some soapy water and my plastic "wire wheel" attachment for my drill. It got a ton off, but they still don't look brand new. Oh well, at least they work.
I was overdue for new fluid, so in went some DOT 4 ATE gold fluid, replacing the blue stuff that had been in the car. Remember the blue stuff??? That how old my fluid was...
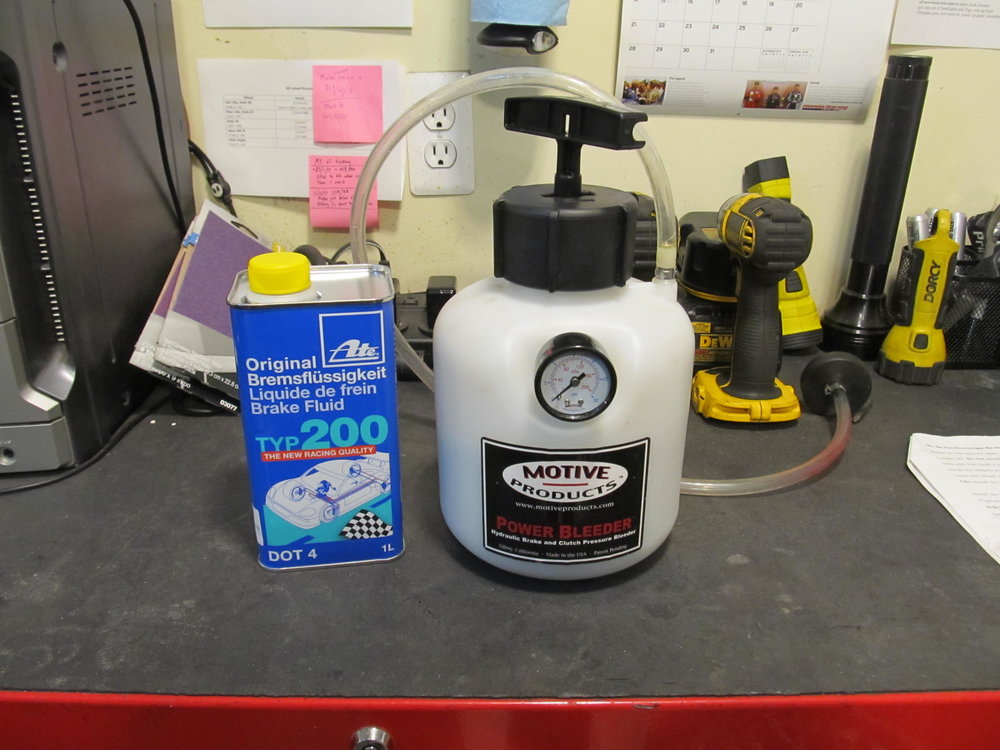
Also on the recommendation of Wilwood, I lightly sanded all the rotors with 80 grit sandpaper, and rebedded the pads in an effort to get rid of the squealing. So far so good, but I haven't put many miles on them yet. Oh, and all bleeders got new rubber caps to keep them nice and clean!
They were not pretty:
But the new ones sure were!
The pads and rotors were still in great shape, so I didn't have to replace them. I had this caliper paint sitting in my cabinet for a few years, so even though it was past its "expiration date" I decided to use it. It was nice 2-part stuff that you had to mix up and brush on, so I'm hoping it's tough and stays put for a few years.
Unfortunately, when I installed them, something didn't seem right.....
Yeah, the caliper is too high up and 1/3 of the pad was hanging off the top of the rotor!
It turns out that the new caliper brackets were roughly 80mm tall, while the ones that were on my car were only 70mm tall, which obviously caused the caliper to sit too high off the rotor. I went back to the store, and the other ones they had in stock were also 80mm tall. I do have the Fast Brakes rear BBK, but all that is are larger Accord rotors and a bracket to space out the caliper. I'm pretty sure that the caliper brackets on my car are the original size, but the fact that all the other ones in the store were 80mm makes me question everything. Either way, if you're replacing rear calipers, make sure the brackets match what you pulled off the car! Naturally, I was quite unhappy about this, since I would now have to clean up and paint my old brackets, and my mixed up paint had hardened and was useless. Thankfully, they gave me a discount on some generic black caliper spray paint and I got to work.
First up, I wire wheeled the old brackets
Then they sat in Evaporust over night to really remove any remaining rust....
And were finally painted:
And just like that, my rear calipers fit and actually worked in freezing temperatures. Huzzah!
I noticed something interesting, and was hoping someone could explain it to me. On both my old rear calipers and the new ones, the pins on each side were different. One was solid metal, and the other had this plastic/rubber sleeve on it. What is the rationale for doing it this way?
While I was in there, I figured I should probably service my Wilwoods up front. Again, the pads and rotors were fine, so I was just cleaning and lubing. I cleaned the shims:
I ground off the little lip that was forming at the top of each pad in an effort to get rid of some light squealing a light pedal pressure:
Here are my available products, although I didn't use all of them:
According to Wilwood, they don't recommend using the red anti-squeal stuff on the back of the pads, so I just lubed the shims with the copper anti-seize and put it back together.
I also cleaned off the calipers with some soapy water and my plastic "wire wheel" attachment for my drill. It got a ton off, but they still don't look brand new. Oh well, at least they work.
I was overdue for new fluid, so in went some DOT 4 ATE gold fluid, replacing the blue stuff that had been in the car. Remember the blue stuff??? That how old my fluid was...
Also on the recommendation of Wilwood, I lightly sanded all the rotors with 80 grit sandpaper, and rebedded the pads in an effort to get rid of the squealing. So far so good, but I haven't put many miles on them yet. Oh, and all bleeders got new rubber caps to keep them nice and clean!
Last edited by 95maxrider; 02-12-2018 at 10:23 AM.
02-12-2018, 12:52 PM
#427
I've successfully started the car with temps around freezing without having the hold down the throttle, so I'm tentatively calling this a successful repair! Now who wants to hazard a guess as to how a fuel filter would make the car difficult to start in the cold, but not have any trouble running at WOT? Because I've got nothing.....
03-11-2018, 10:10 AM
#429
I just got done installing new axles, control arms, bushings, and trans fluid! Unfortunately, when I went to start the car, it immediately stalled out like it was doing before I replaced the fuel filter, so apparently that DIDN'T actually fix my problem. I don't understand how it was fine for over a month in freezing temps, and then today, when it's 45* out, it failed to start. Again, if I kept the revs up at 1500 rpm for 30 seconds, it idled fine after that. WTF is up with this thing?
03-12-2018, 09:02 AM
#430
He's going to ditch the IACV in the PFTB and go back to a stock IACV with the appropriate adapters.
03-12-2018, 09:11 AM
#431
Damn. Let me know what he finds out. What exactly are his symptoms, same as mine? I'm running the 4th gen IACV too, so I'm going to clean it and the MAF out and see what happens. Probably also do a smoke/vacuum test.
03-12-2018, 11:42 AM
#432
Same symptoms. We've been trying to sort it out since it first started getting cold but nothing has helped. He has to hold the throttle for 30 seconds in order for it to hold steady. His idle is a little rough too but I think he has a fuel pressure issue as well (no AFPR).
03-12-2018, 01:19 PM
#433
Okay, so I think we're all in agreement that a bad coolant temp sensor can make the car hard to start when it's cold. I was wondering....what would happen if you tried to start/run a car with no coolant? Glossing over the obvious overheating issues, would the car actually run with no coolant to give the coolant temp sensor a reading?
03-13-2018, 08:05 AM
#434
Newbie - Just Registered
Join Date: Oct 2015
Posts: 8
Okay, so I think we're all in agreement that a bad coolant temp sensor can make the car hard to start when it's cold. I was wondering....what would happen if you tried to start/run a car with no coolant? Glossing over the obvious overheating issues, would the car actually run with no coolant to give the coolant temp sensor a reading?
Clean out your idle valve really well or try replacing it with a junkyard one and see if it makes a difference
03-13-2018, 08:28 AM
#435
Yes, it'll measure the temperature of the air inside the coolant passage. It won't run well... because that air might not be anywhere near the same temperature as the coolant would be.
Clean out your idle valve really well or try replacing it with a junkyard one and see if it makes a difference
Clean out your idle valve really well or try replacing it with a junkyard one and see if it makes a difference

 Hope to have one of mine on the road soon.
 ") 03-13-2018, 01:22 PM
03-13-2018, 01:22 PM
#437
03-13-2018, 03:12 PM
#438
03-17-2018, 07:24 AM
#439
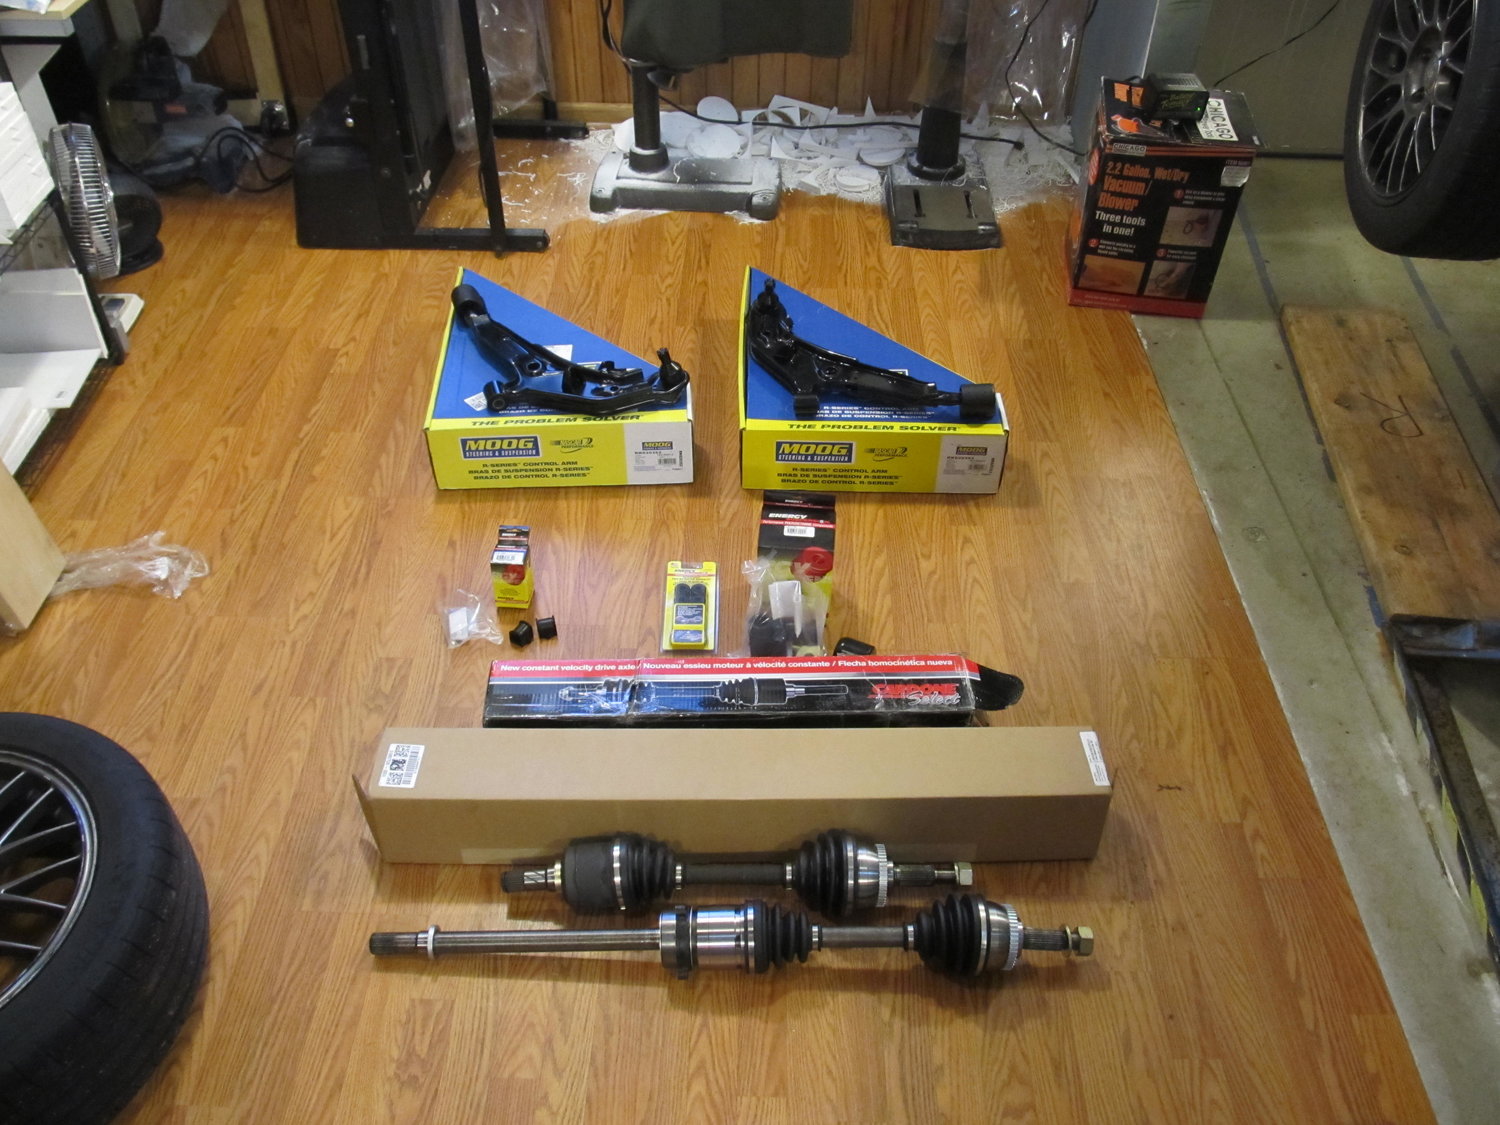
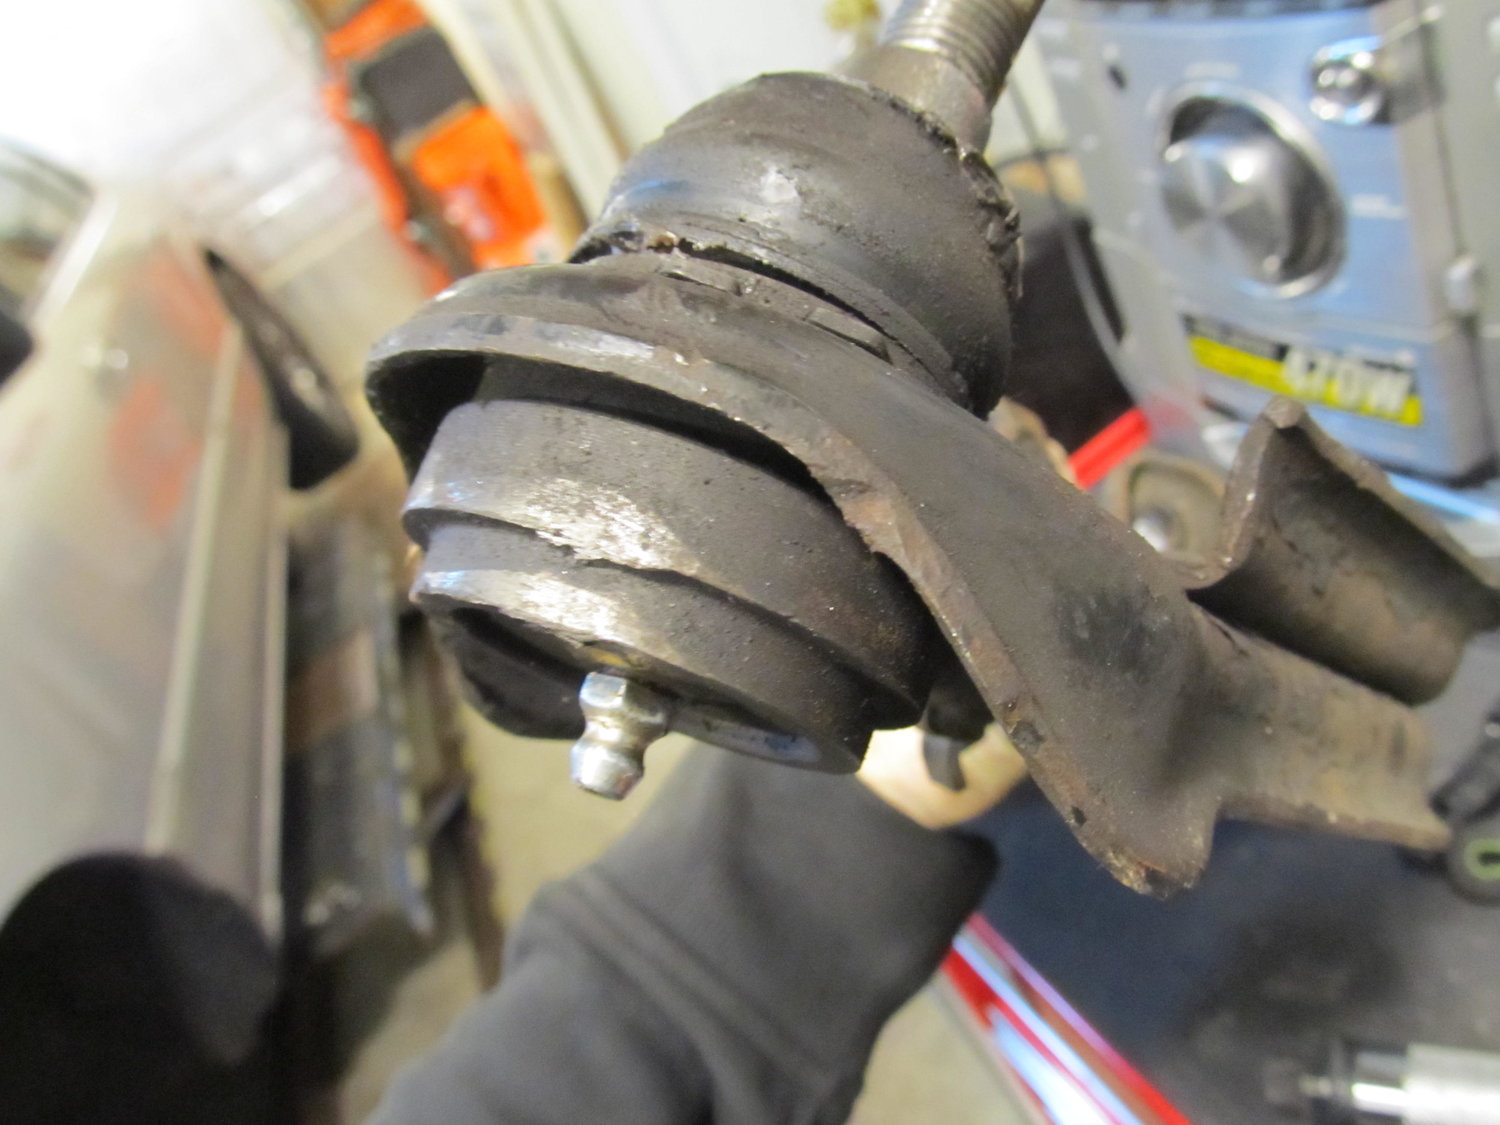
I had been putting off replacing my axles for about a year, since replacing them requires undoing my camber bolts, which necessitates an alignment afterwards. With no other pressing projects on my list, I decided to finally take care of this project. One of the axle boots on the DS axle had failed, and I could see the other three boots weren't far behind, so I replaced both axles with Cardone units. I also decided to replace my control arms since my original ones were starting to rust a bit, and I couldn't be sure they hadn't been bent when I hit that speed bump at 40 mph a few years back. I tried to go with the Moog Problem Solver control arms, since they come with supposedly higher quality and greasable ball joints, but when I went to place my order, they were out of stock everywhere. Turns out Moog discontinued them, and only had the cheaper R-line available. However, a Moog rep told me that Moog didn't actually make either of them, they were both subbed out, which made me feel slightly better about ordering the cheaper ones. And since the control arms were coming off, I wanted to install all new poly ES bushings in the control arm, sway bar bushings, and end links.
First step was to press out the control arm bushings. I tried my ball joint press, but I couldn't keep it lined up straight...
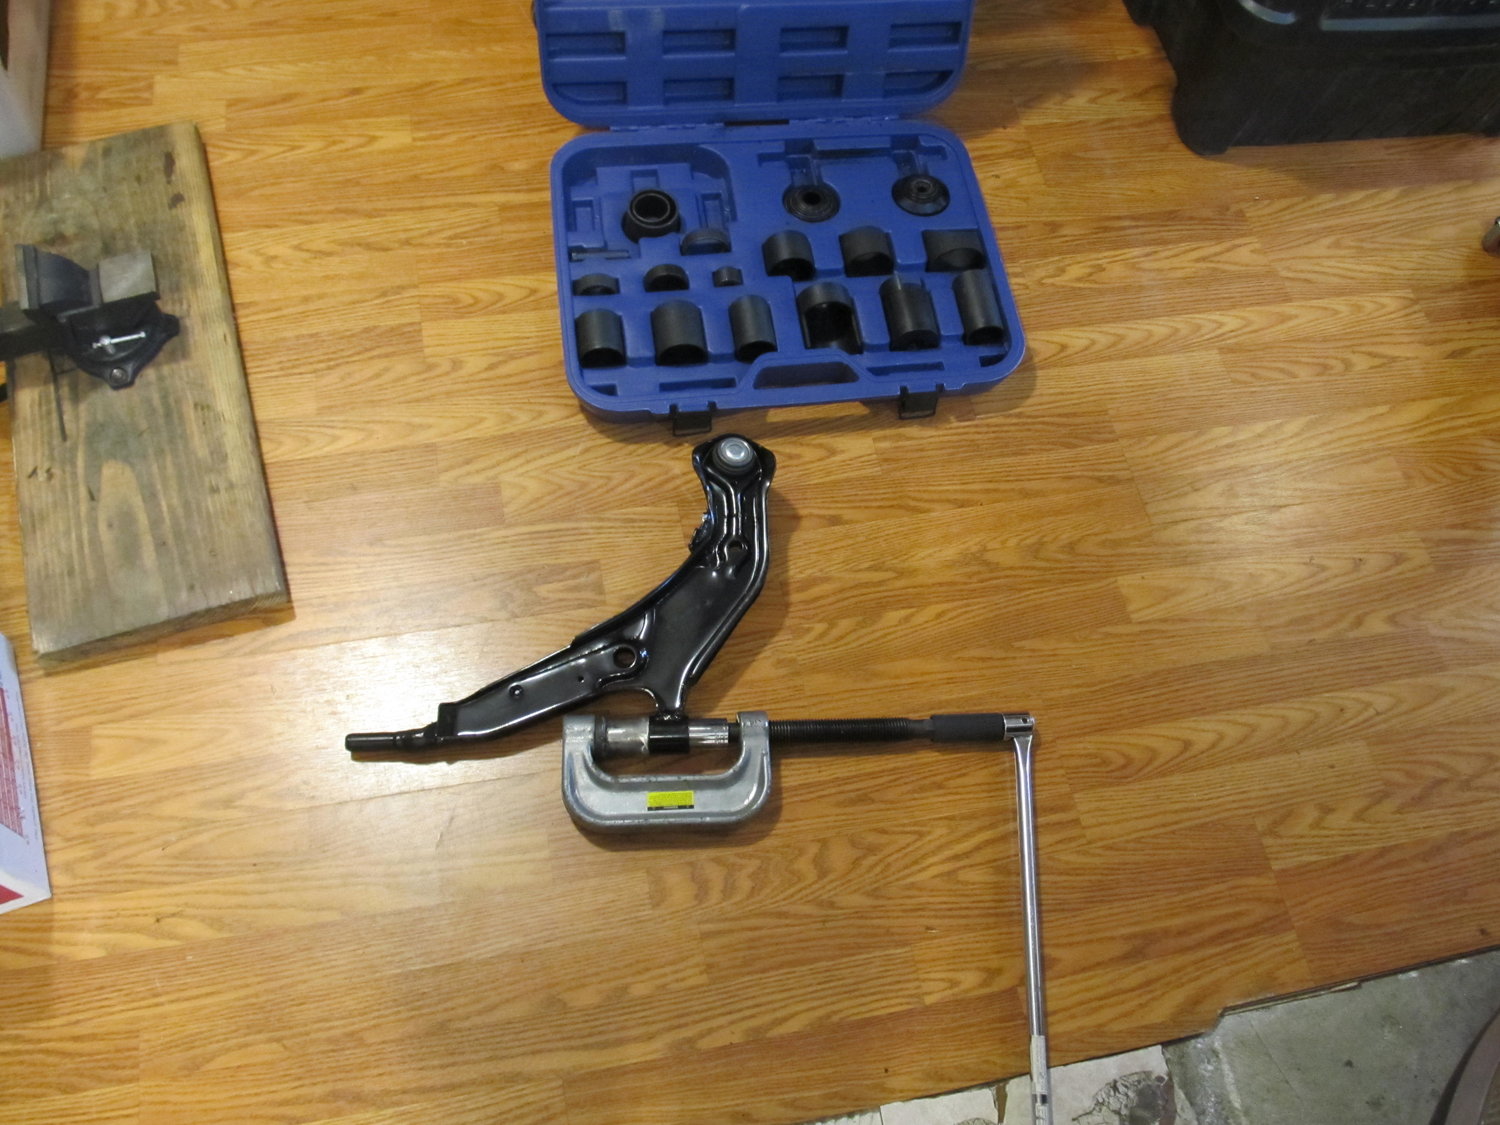
So I had to set up the shop press. Thankfully, the process was a breeze!
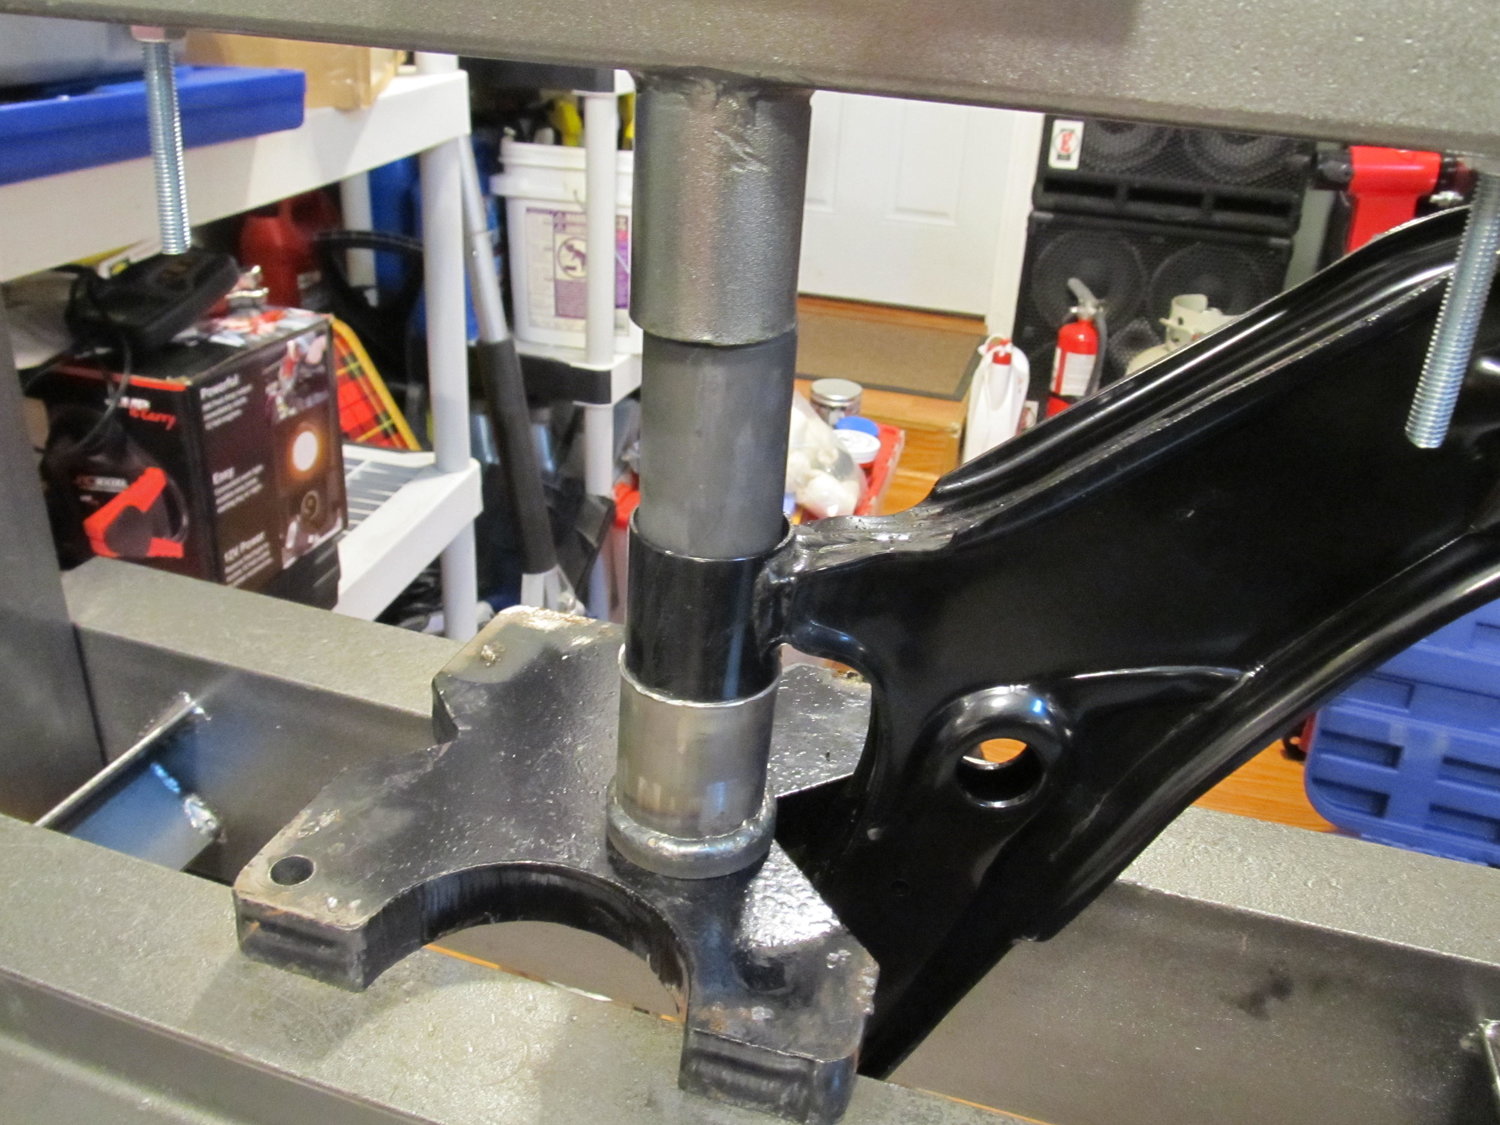
Bushings out! No thanks to the ball joint tool....

I was a little concerned about the construction of the new control arms before they arrived, but thankfully I had nothing to worry about. These Moogs had roughly double the amount of welds than the OEM pieces!

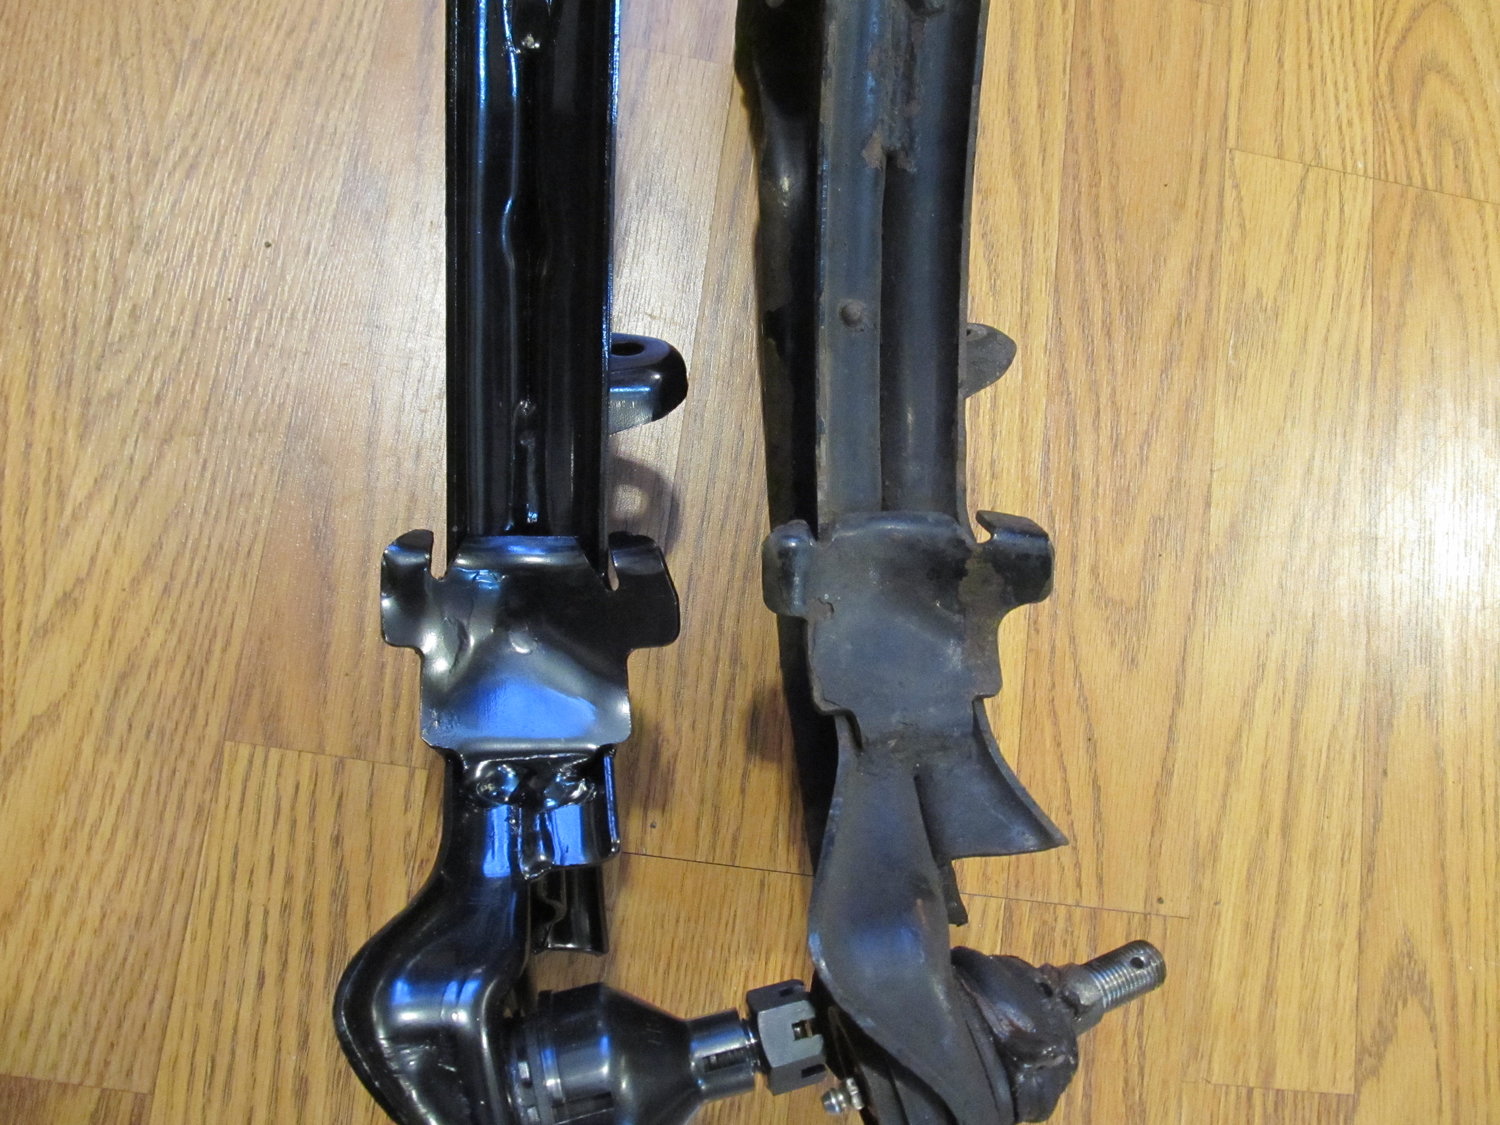
The welds also appeared to be of higher quality:
This is what my Amsoil trans fluid looked like after one year and some 3,000 miles. Yuck! Time for new fluid.....sigh.

So driving around for a year with a torn axle boot will cause grease to reach the tiniest crevices of your vehicle. Cleaning it all up took a few hours.....
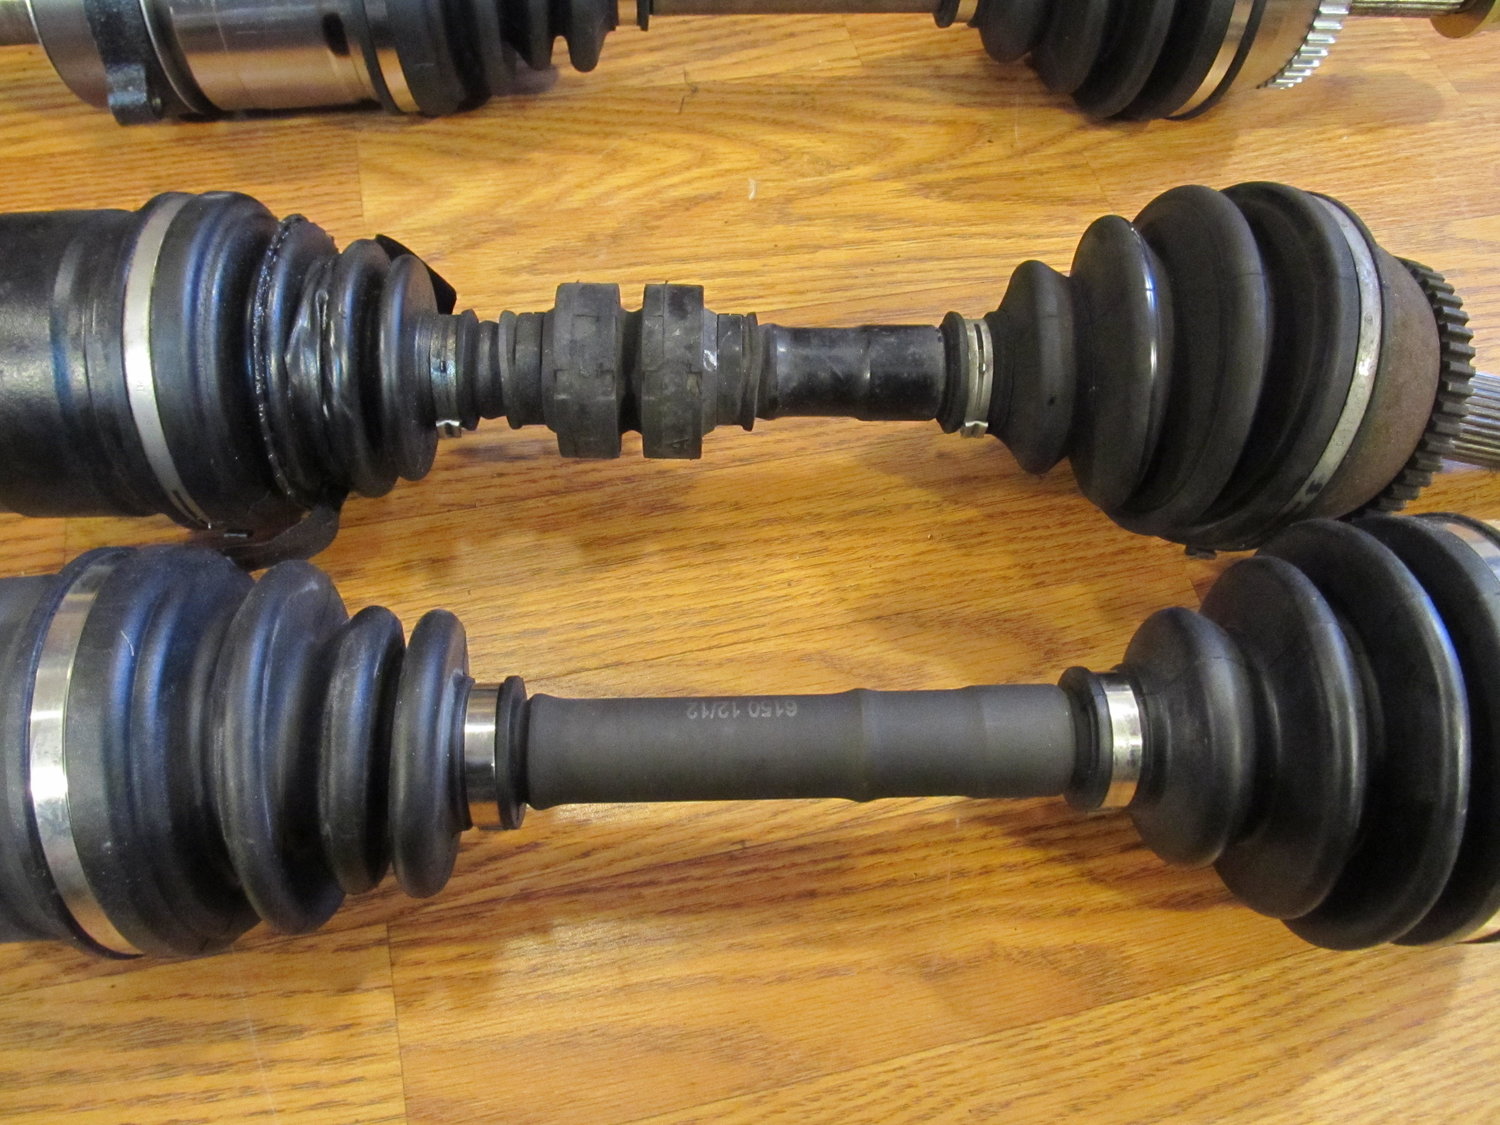
New axles are purdy

The culprit, with its weird things on the shaft:
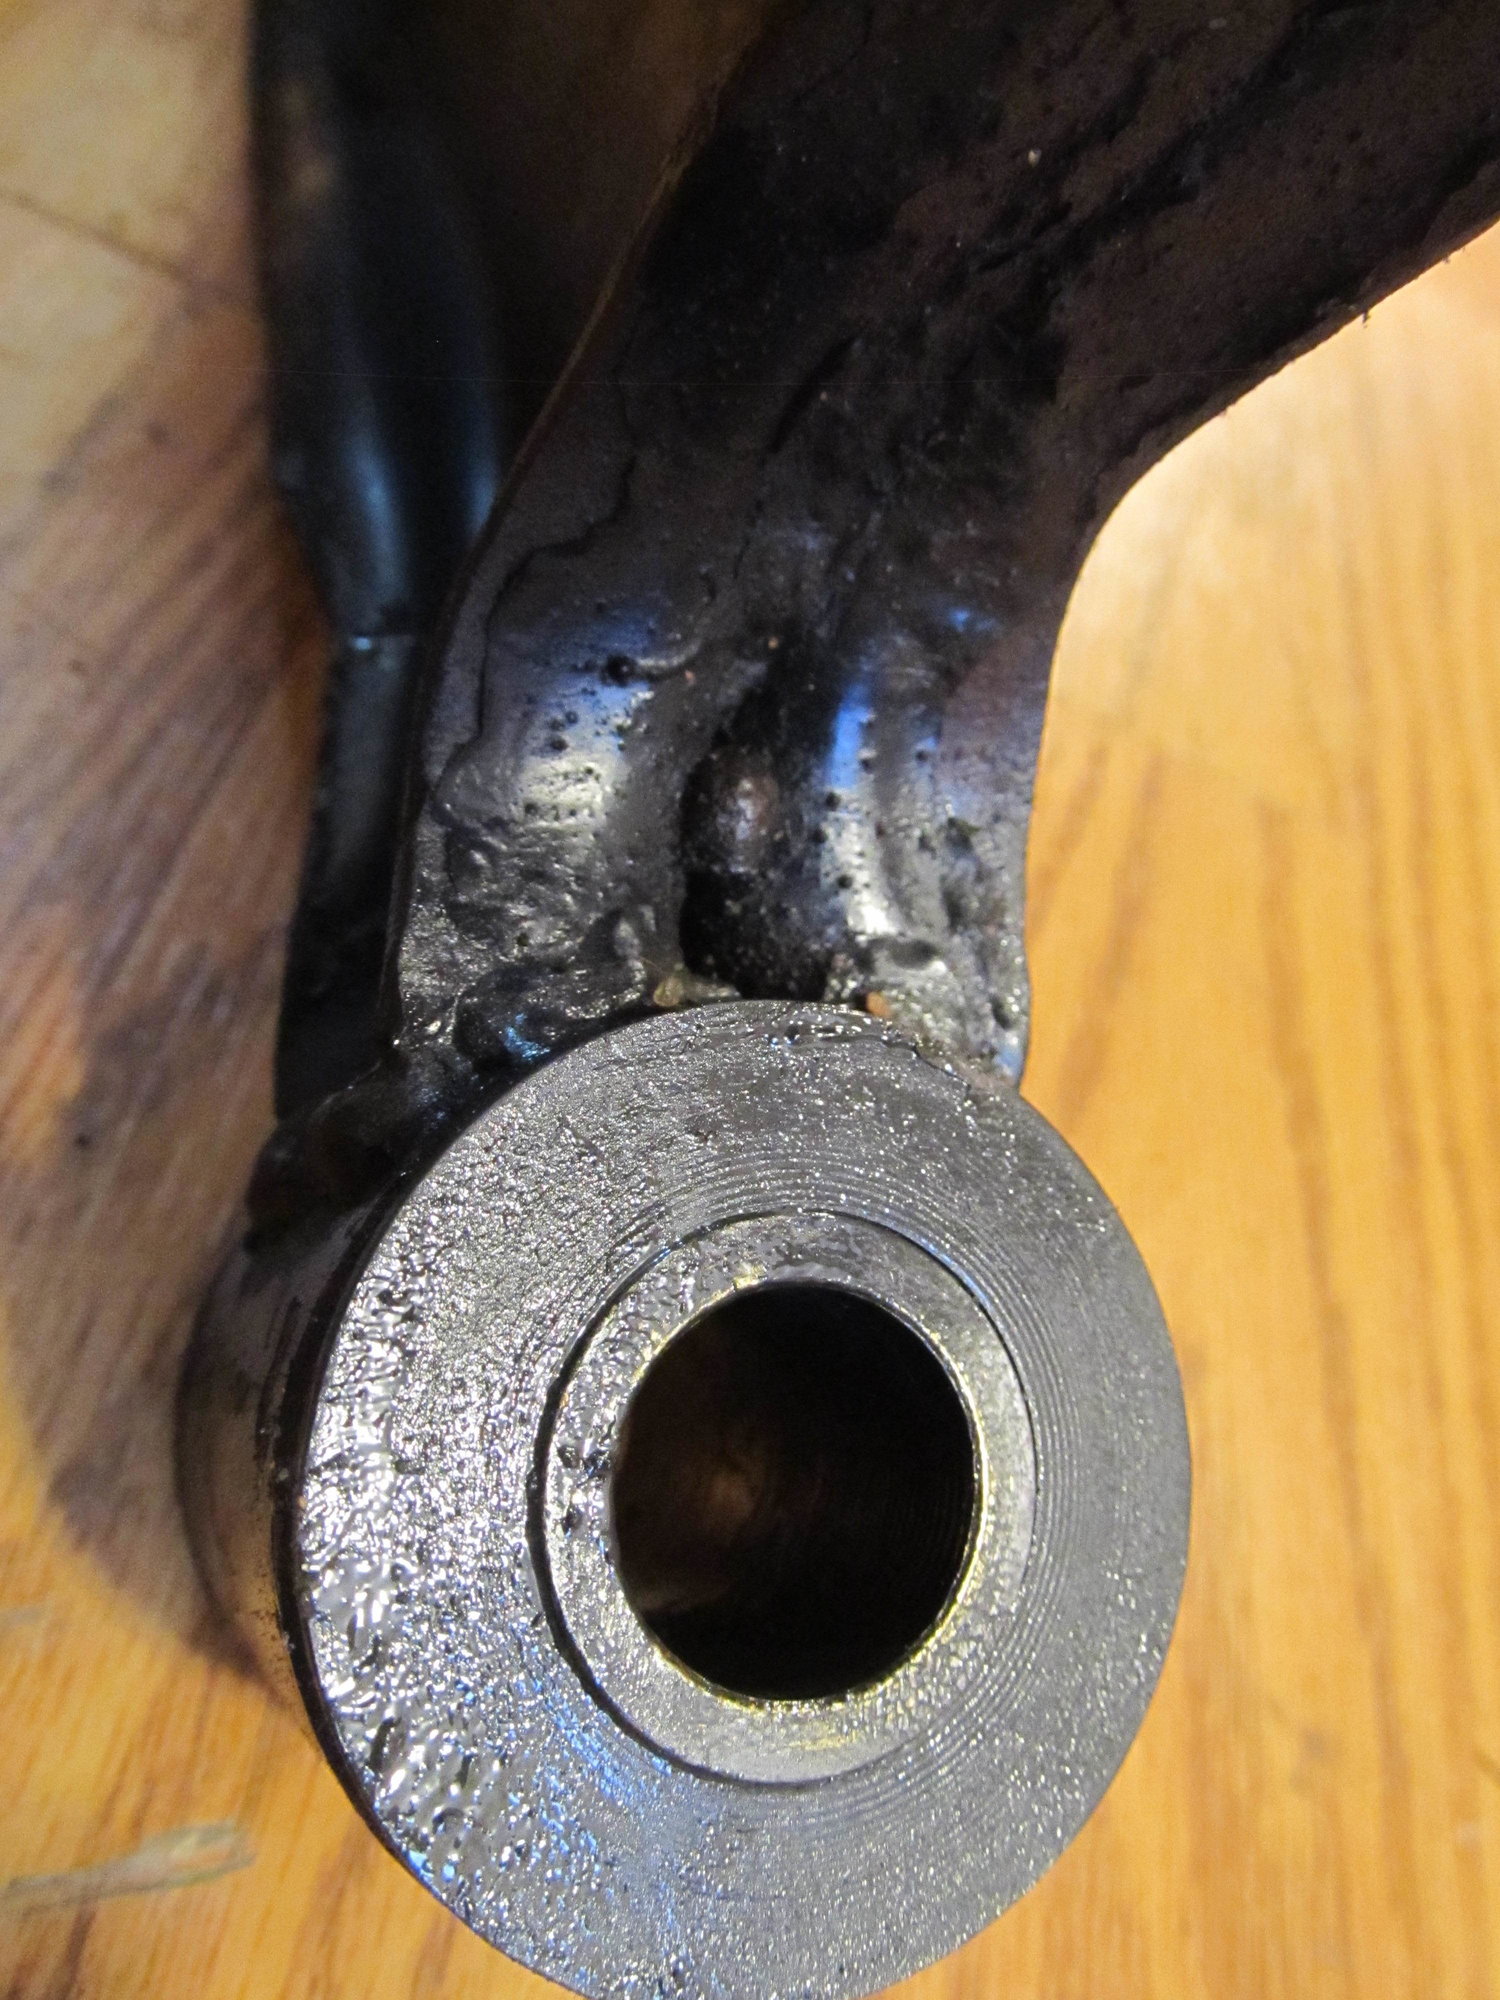
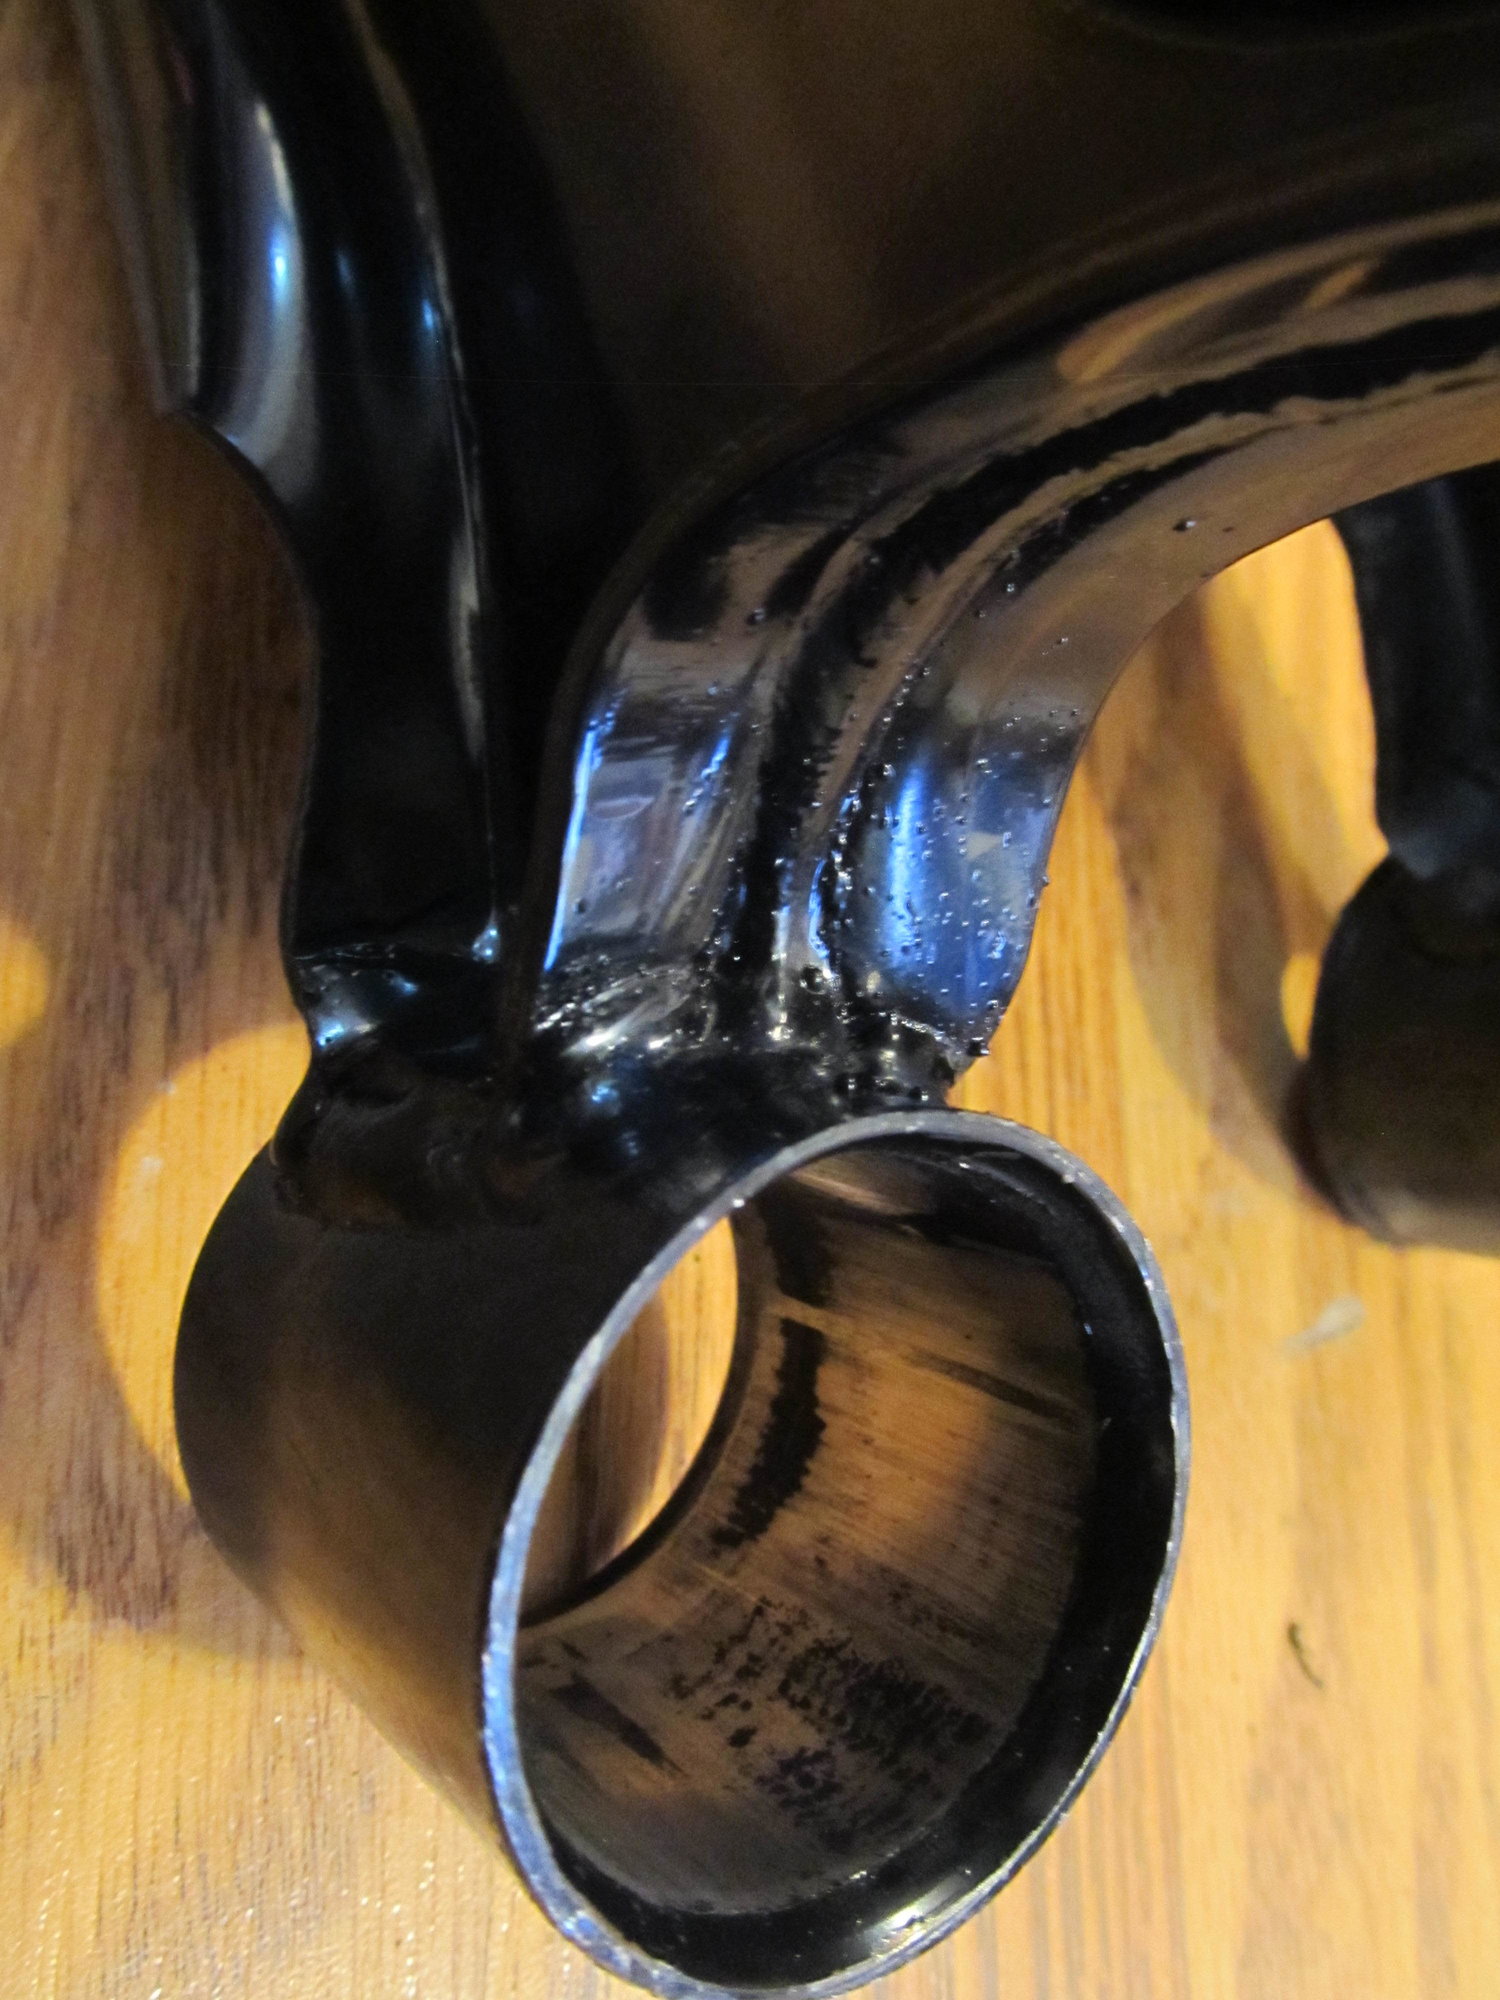
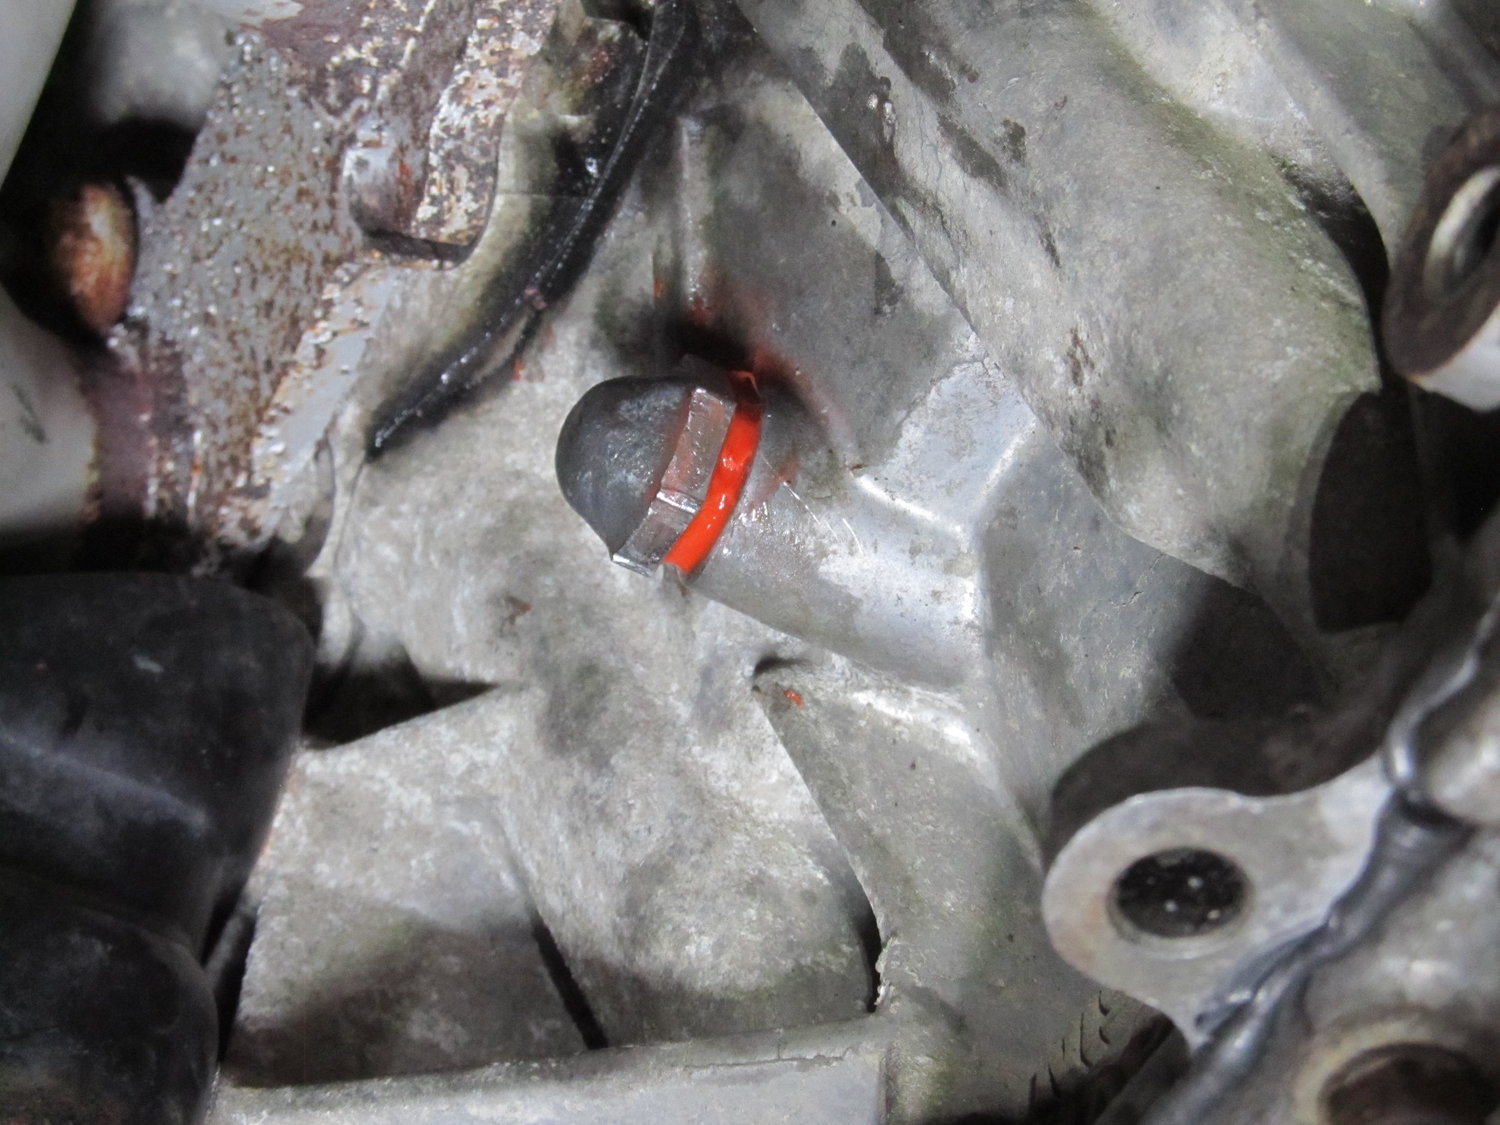
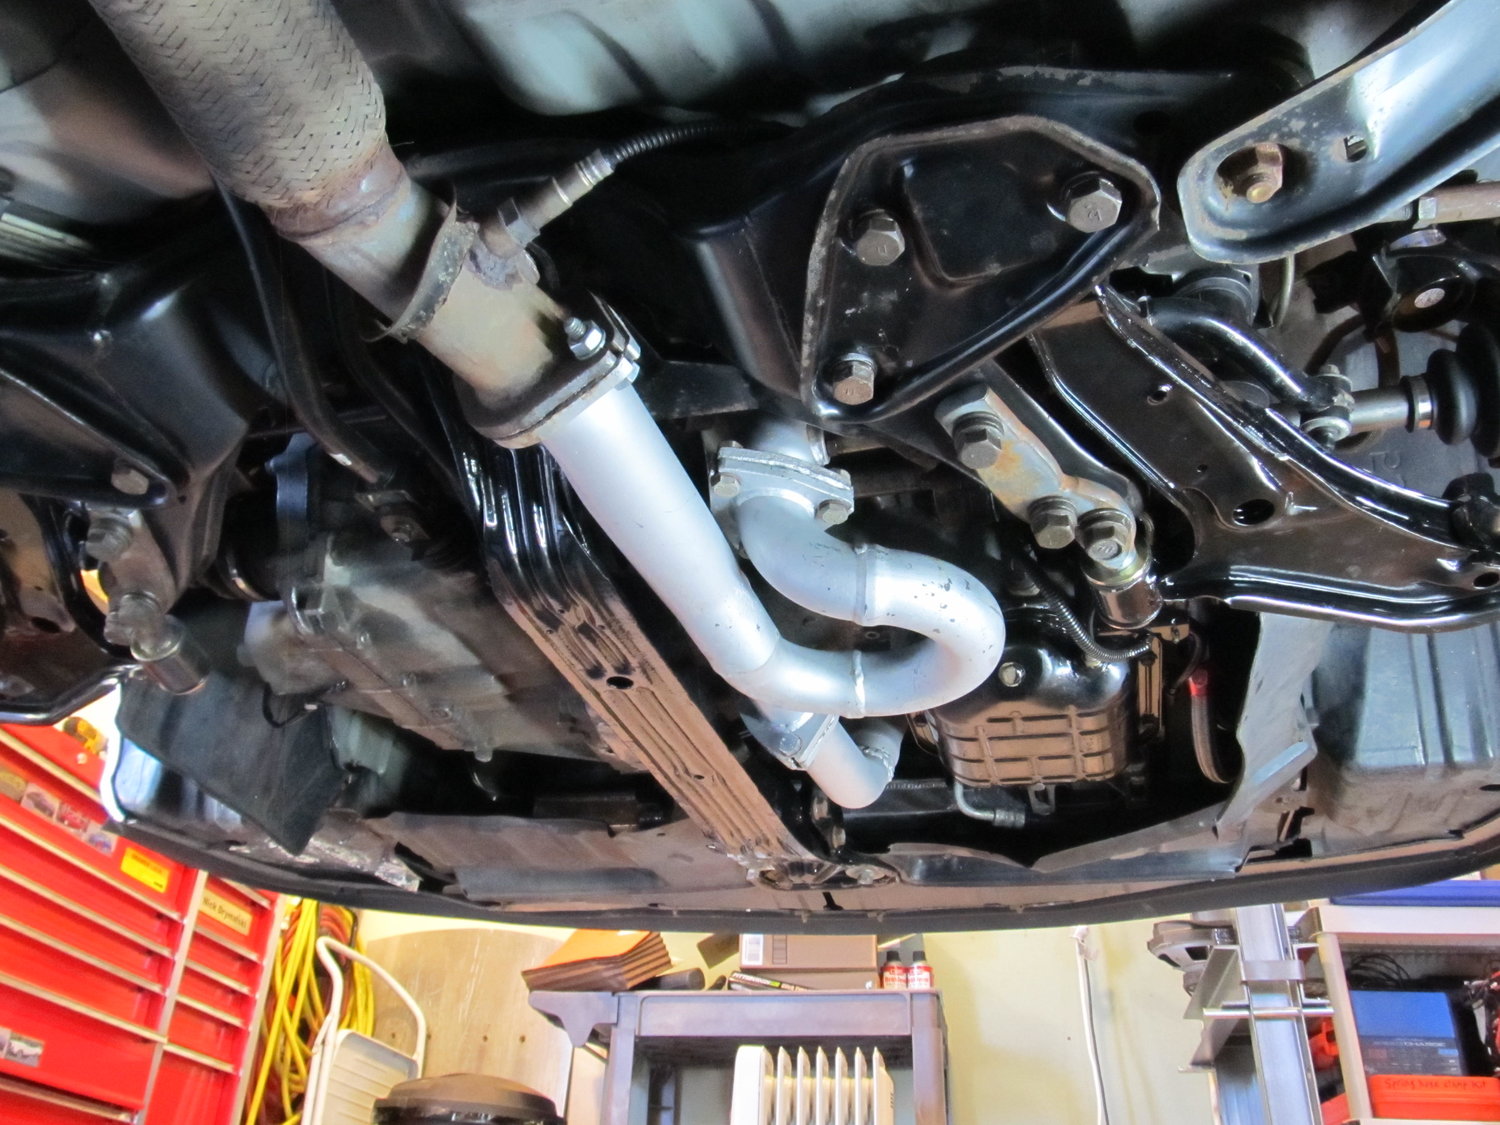
With the axles out, I had better access to the coolant drain plug on the back of the motor that had been slowly dripping. It was tough to tell with it in the car, but it appeared as if the coolant was leaking out through the middle/center of the bolt, and not from the threads. This, of course, didn't make any sense. It wasn't dripping down the block, it was dripping off the end of the bolt. WTF? Well, it all made sense when I finally got the bolt out:
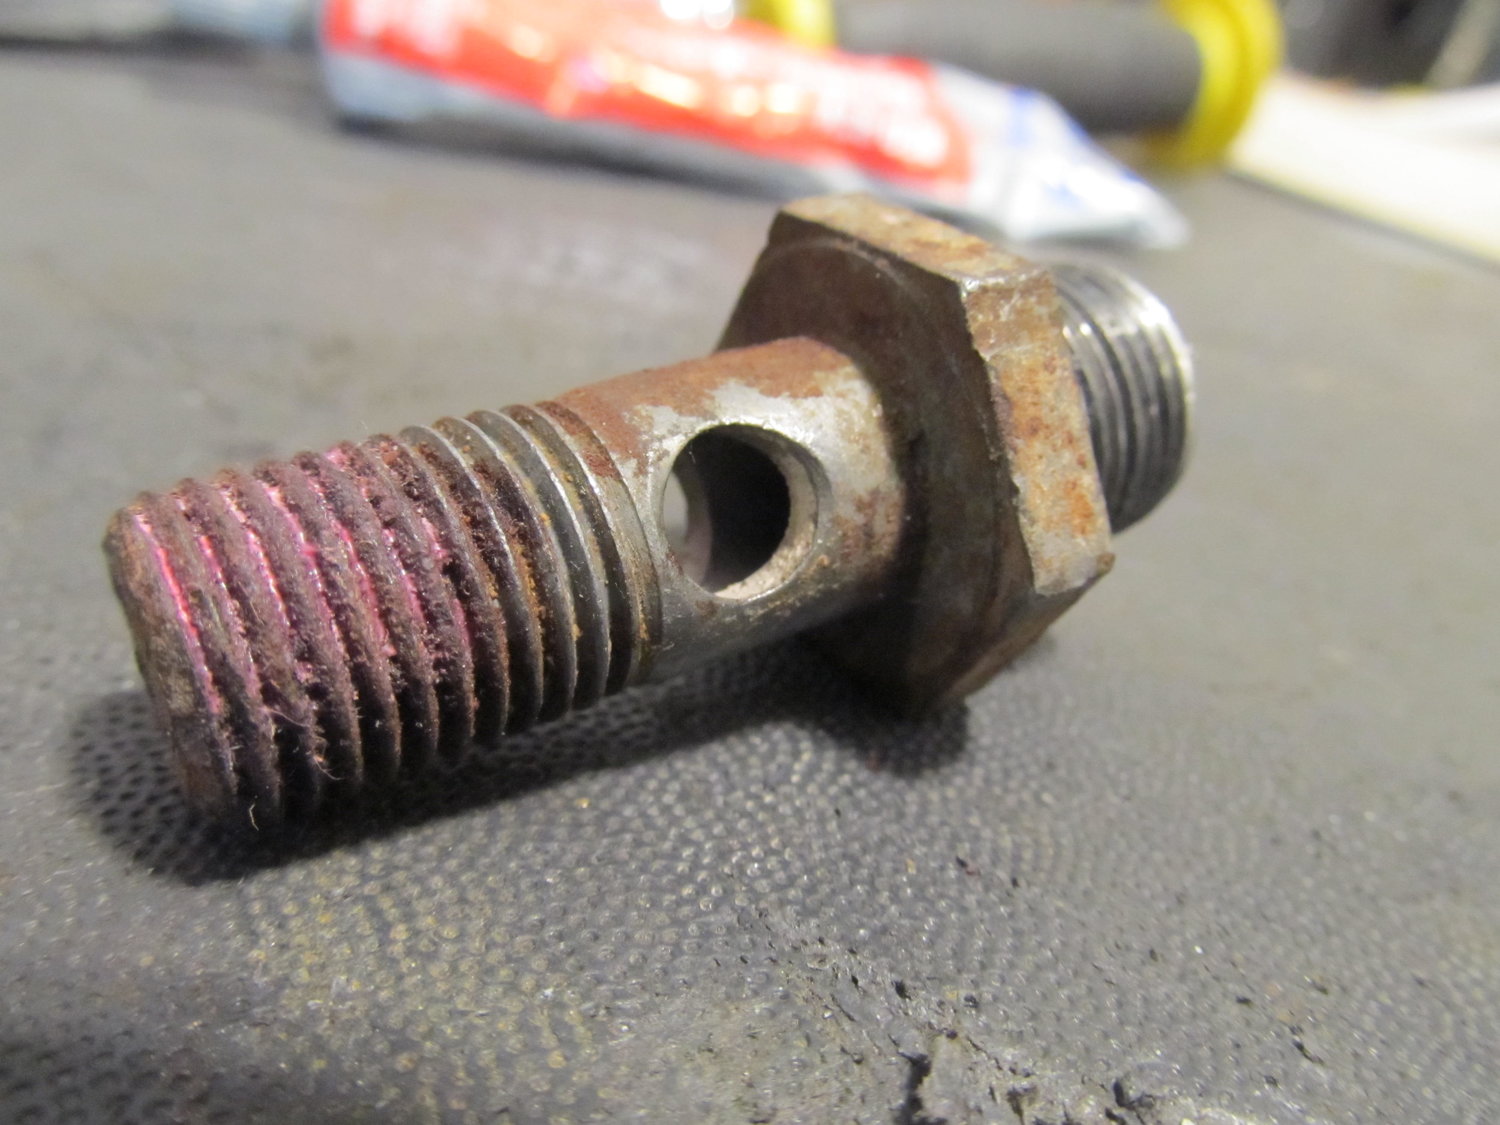
It's a damn banjo bolt that someone had welded shut, and the weld had started to fail, allowing coolant to seep through the center.
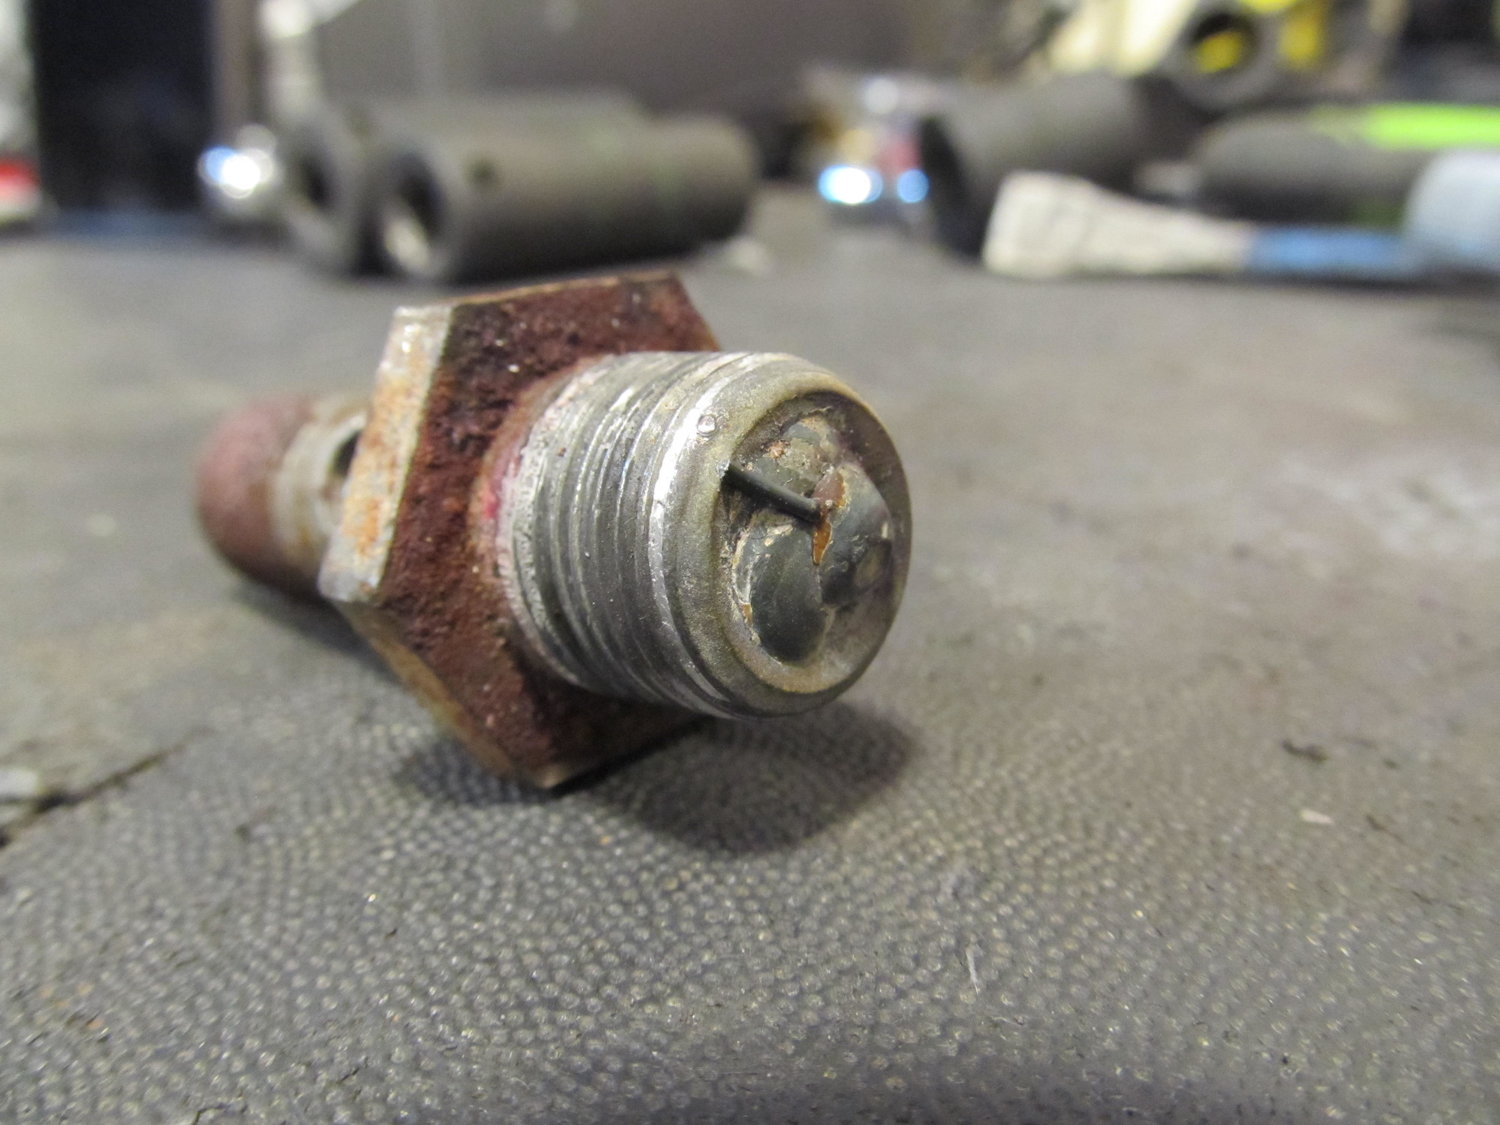
Unfortunately, I couldn't match the thread pitch to ANYTHING. It seemed like it was some weird M17x1.25 or something stupid like that. So, rather than simply replace the banjo bolt with a normal one, I had to improvise and reuse the banjo bolt. I settled on using QuikSteel to seal it all up. I cut off the end of it so I could get a short socket over it, since I had to use a wrench to remove it due to the height requiring a tall socket, which didn't fit beneath the header.
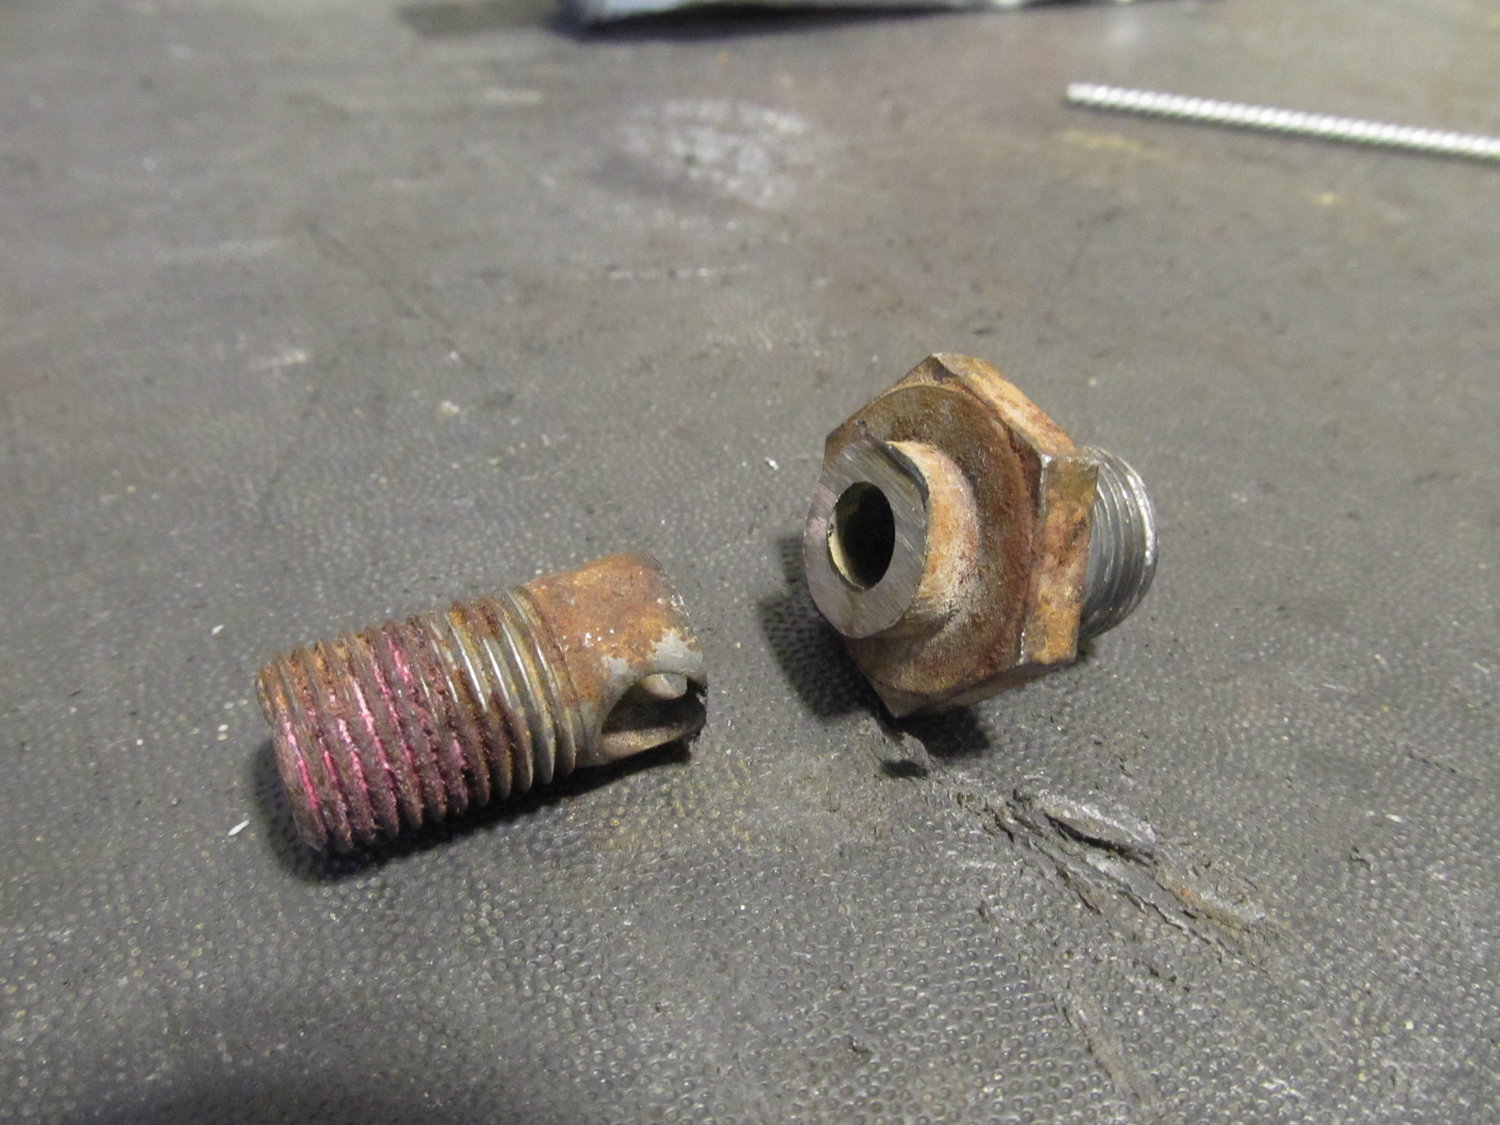
Cleaned up:

And QuikSteel:
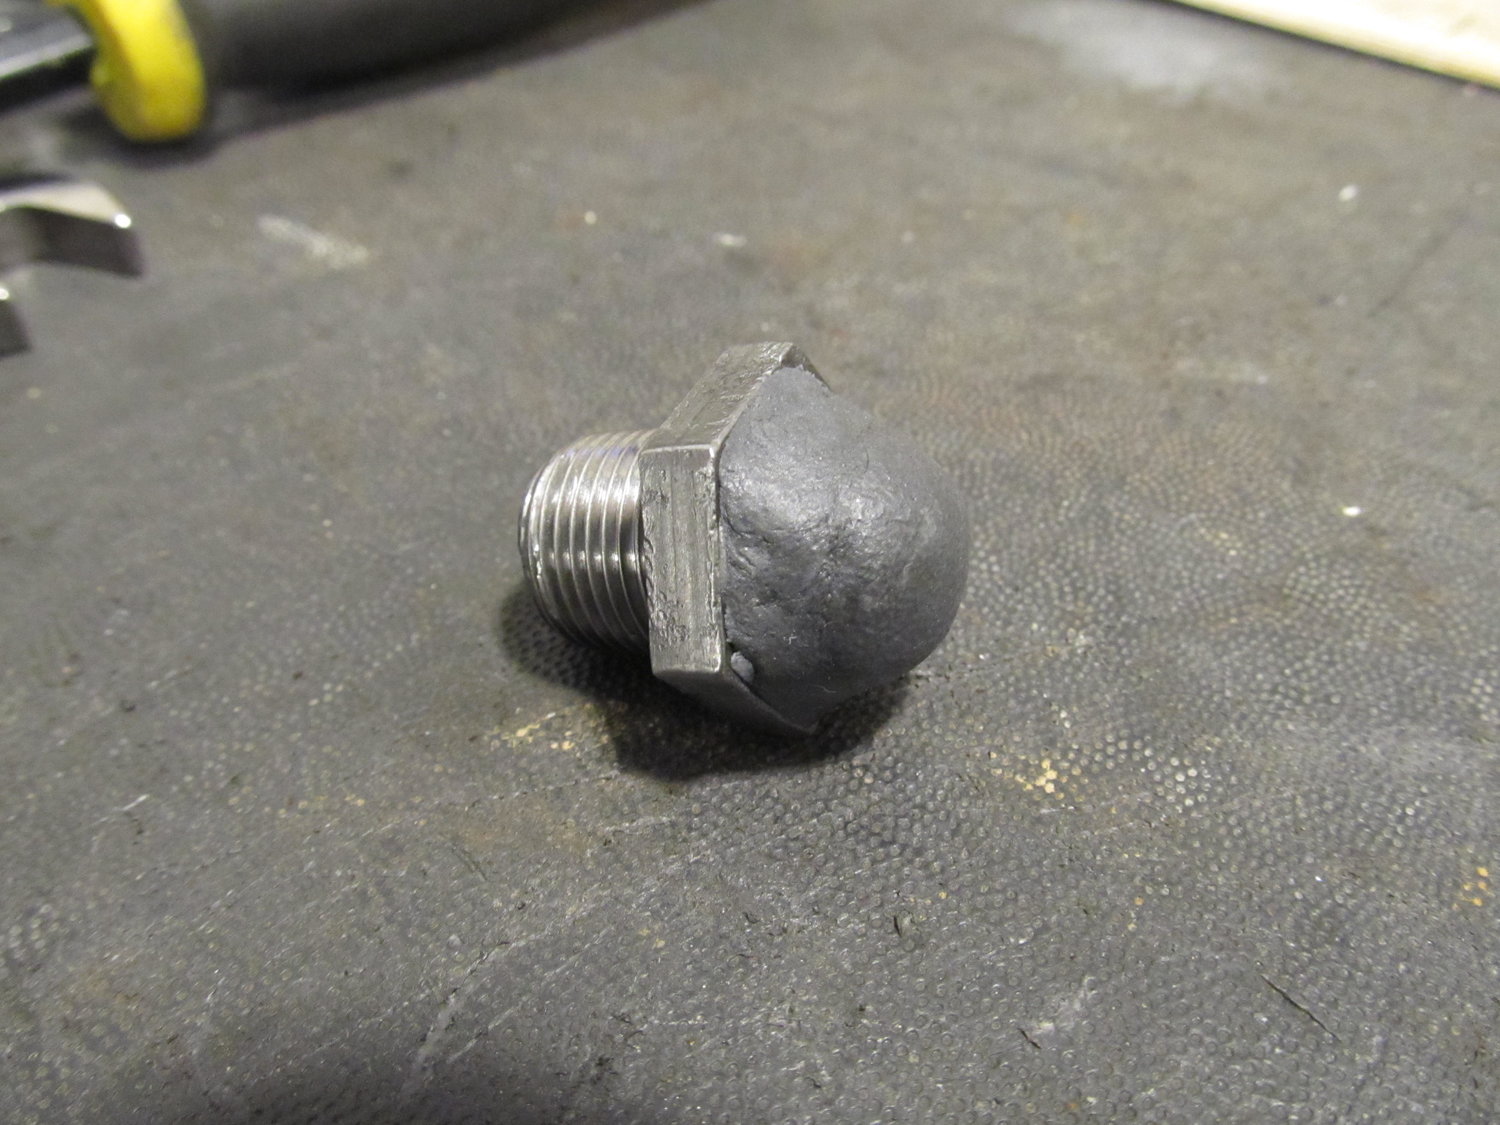
And installed with some red RTV:
I've got my fingers crossed for this one!
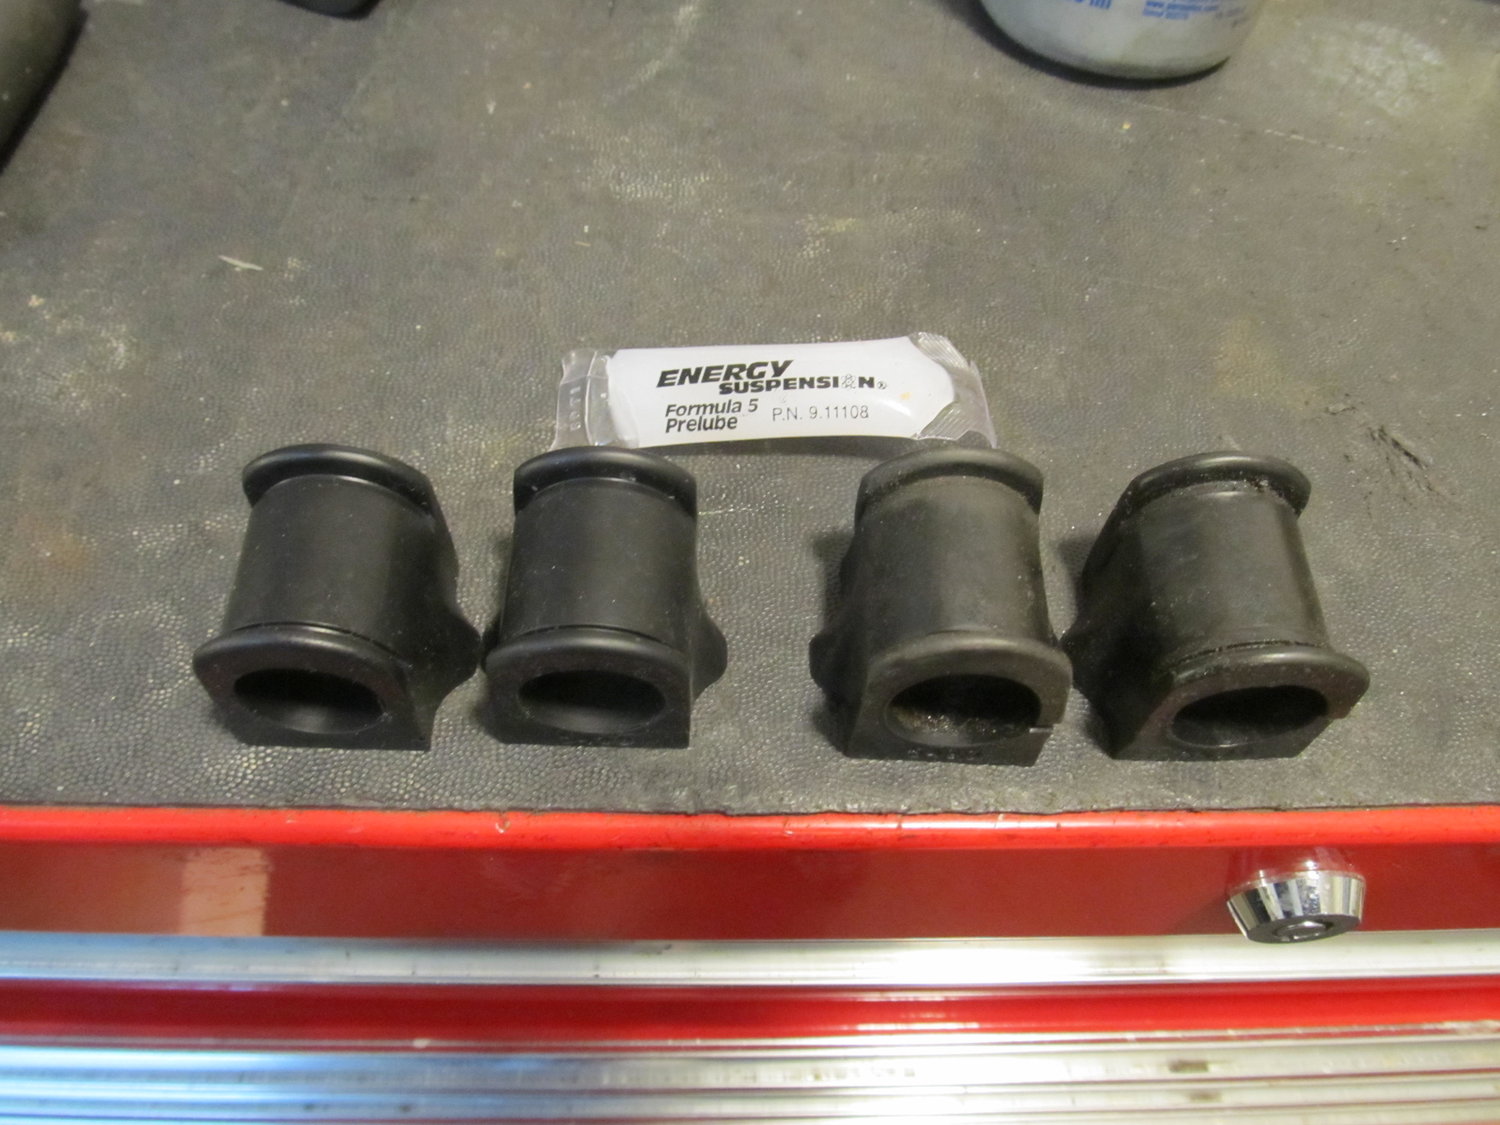
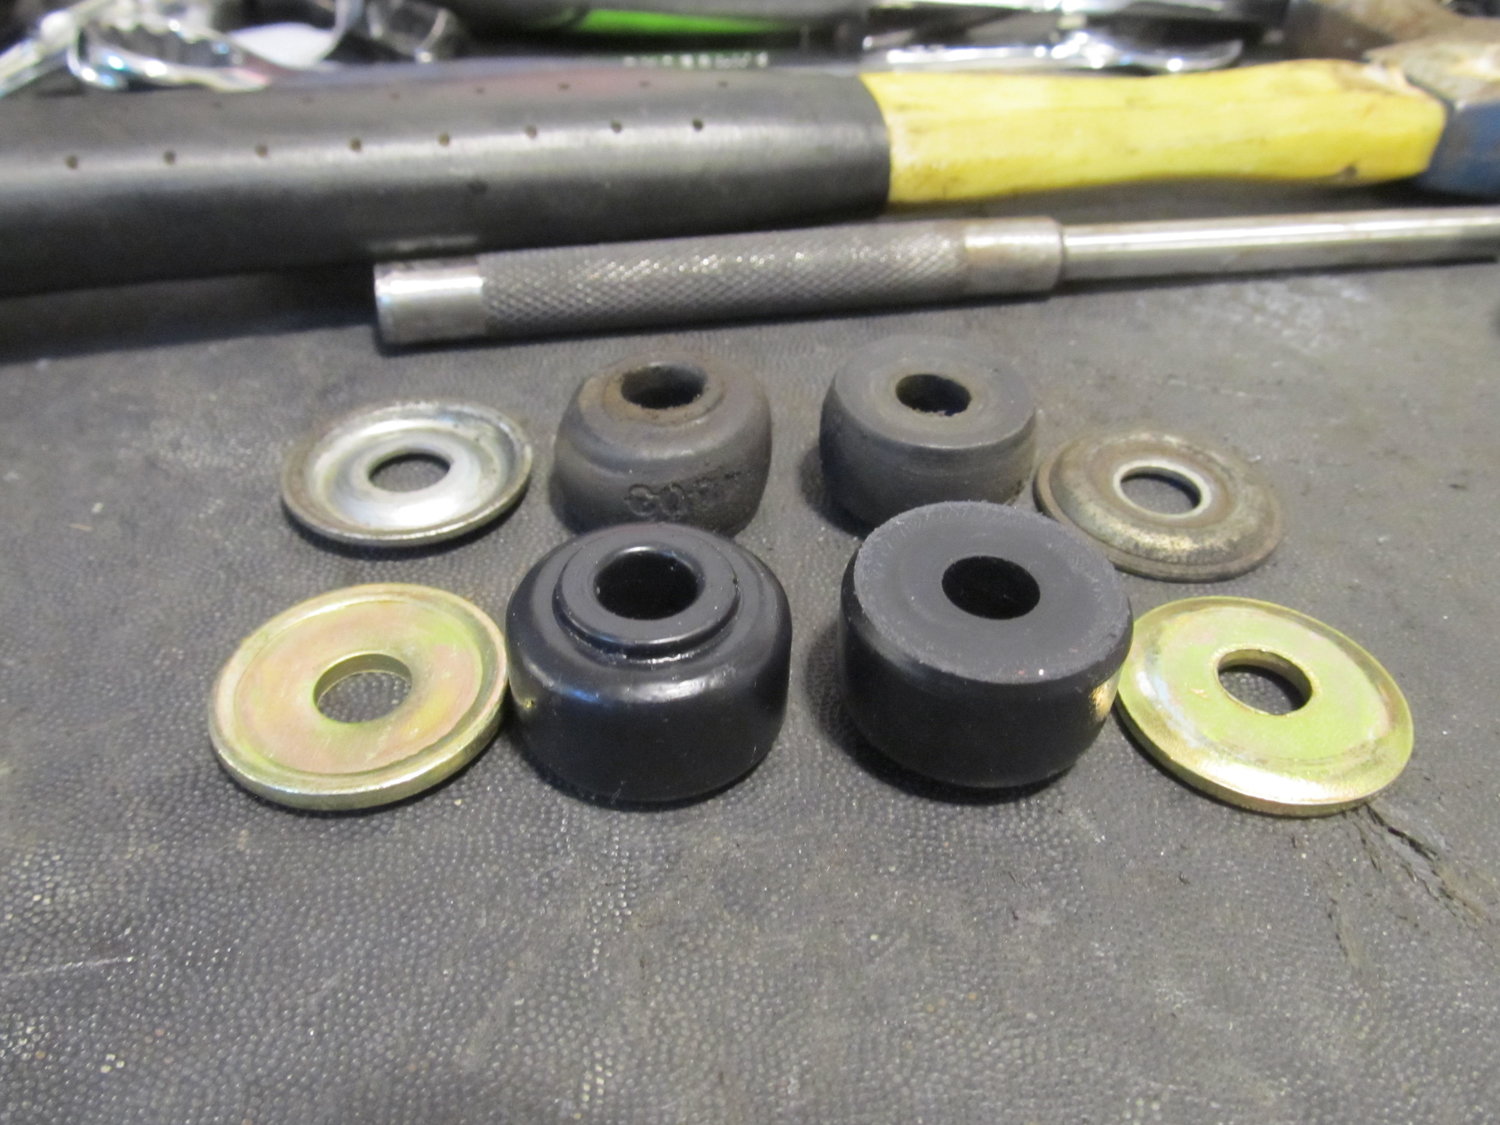
Anyways, back to the main job. I got the new ES sway bar bushings ready...
First step was to press out the control arm bushings. I tried my ball joint press, but I couldn't keep it lined up straight...
So I had to set up the shop press. Thankfully, the process was a breeze!
Bushings out! No thanks to the ball joint tool....
I was a little concerned about the construction of the new control arms before they arrived, but thankfully I had nothing to worry about. These Moogs had roughly double the amount of welds than the OEM pieces!
The welds also appeared to be of higher quality:
This is what my Amsoil trans fluid looked like after one year and some 3,000 miles. Yuck! Time for new fluid.....sigh.
So driving around for a year with a torn axle boot will cause grease to reach the tiniest crevices of your vehicle. Cleaning it all up took a few hours.....
New axles are purdy
The culprit, with its weird things on the shaft:
With the axles out, I had better access to the coolant drain plug on the back of the motor that had been slowly dripping. It was tough to tell with it in the car, but it appeared as if the coolant was leaking out through the middle/center of the bolt, and not from the threads. This, of course, didn't make any sense. It wasn't dripping down the block, it was dripping off the end of the bolt. WTF? Well, it all made sense when I finally got the bolt out:
It's a damn banjo bolt that someone had welded shut, and the weld had started to fail, allowing coolant to seep through the center.
Unfortunately, I couldn't match the thread pitch to ANYTHING. It seemed like it was some weird M17x1.25 or something stupid like that. So, rather than simply replace the banjo bolt with a normal one, I had to improvise and reuse the banjo bolt. I settled on using QuikSteel to seal it all up. I cut off the end of it so I could get a short socket over it, since I had to use a wrench to remove it due to the height requiring a tall socket, which didn't fit beneath the header.
Cleaned up:
And QuikSteel:
And installed with some red RTV:
I've got my fingers crossed for this one!
Anyways, back to the main job. I got the new ES sway bar bushings ready...
03-17-2018, 07:24 AM
#440
New end link bushings...
And for probably the first time in a very long time, I torqued all the control arm bolts in the correct sequence to the proper torque spec (while holding the arms up at ride height)! The last time I replaced them a few years back I don't think I used my Haynes manual, and I remember having problems getting some of the bolts started. Well, I ended up chasing the threads on most of them because they weren't threading smoothly by hand, but now everything goes in nice and smooth. Three cheers for tap and die sets!
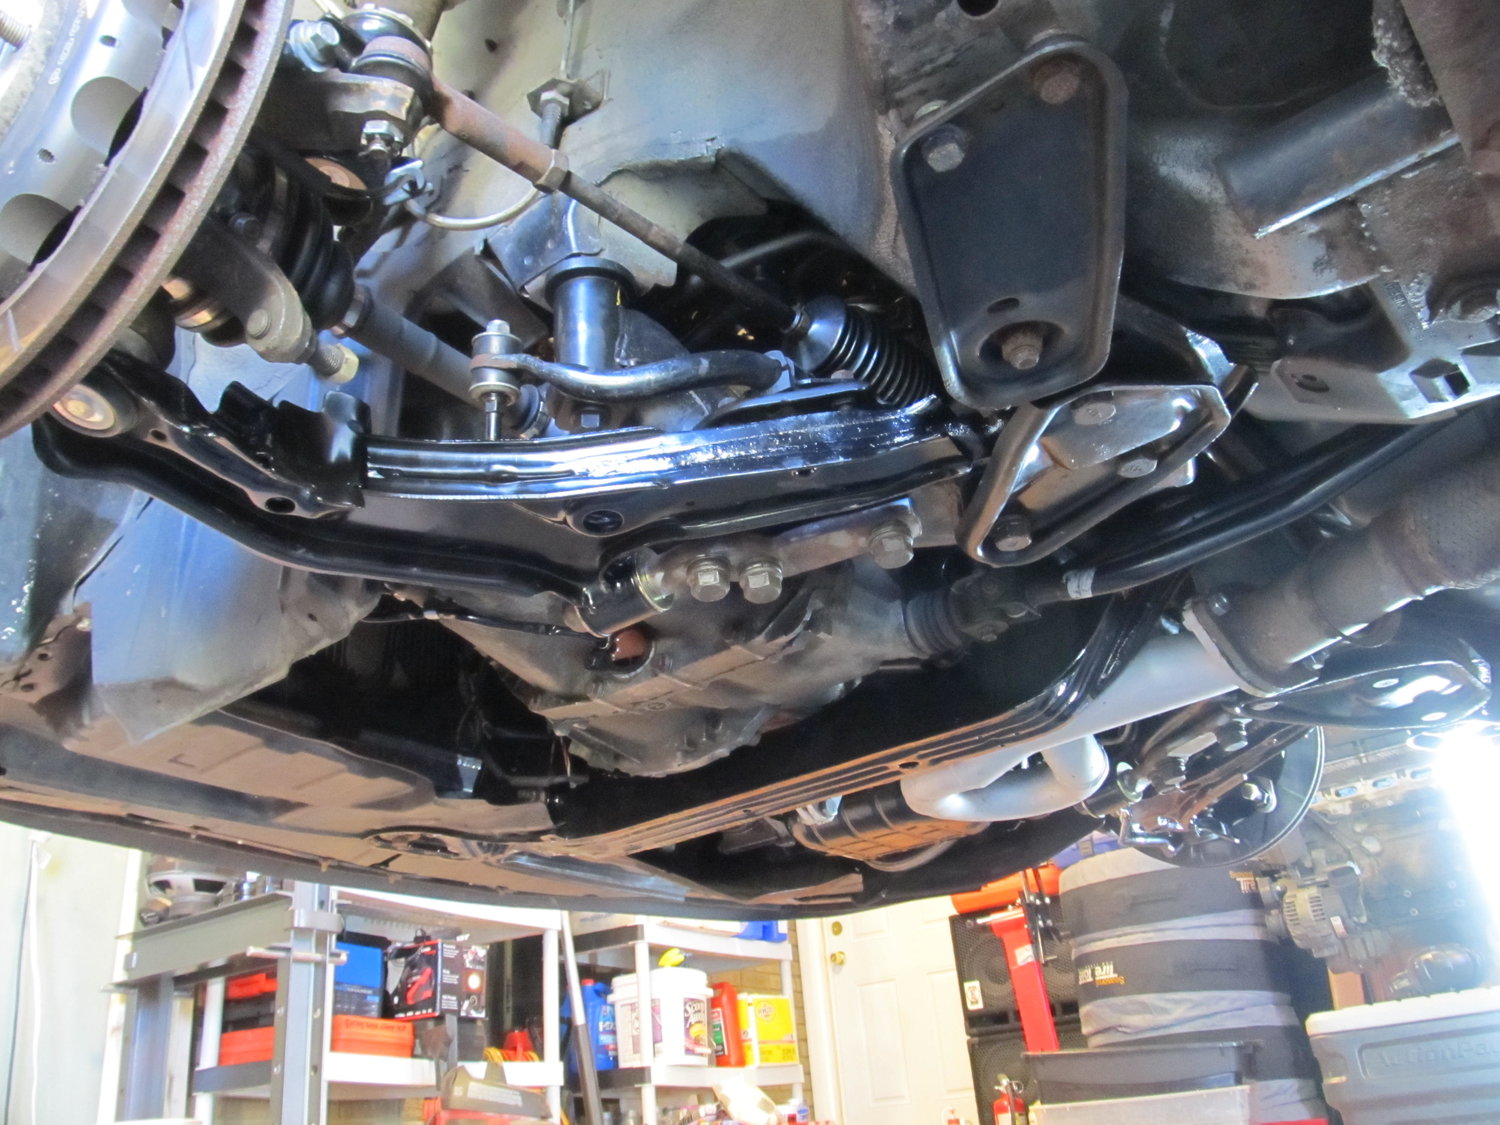
Oh yes, that's the stuff.
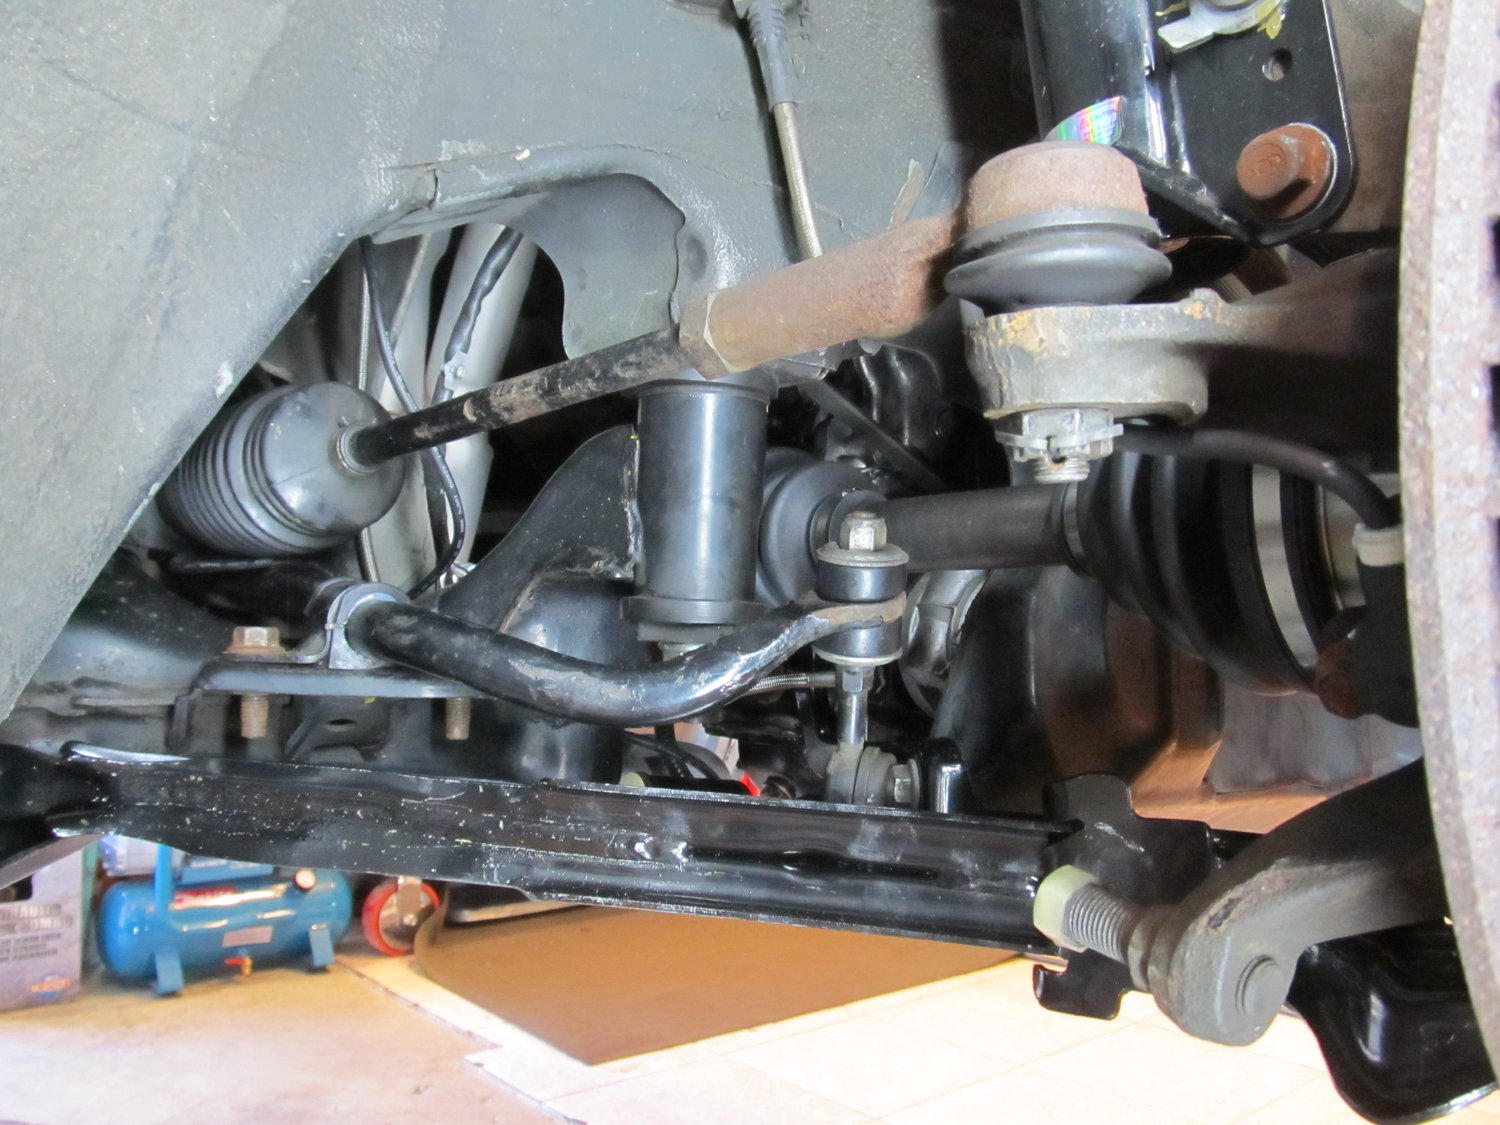
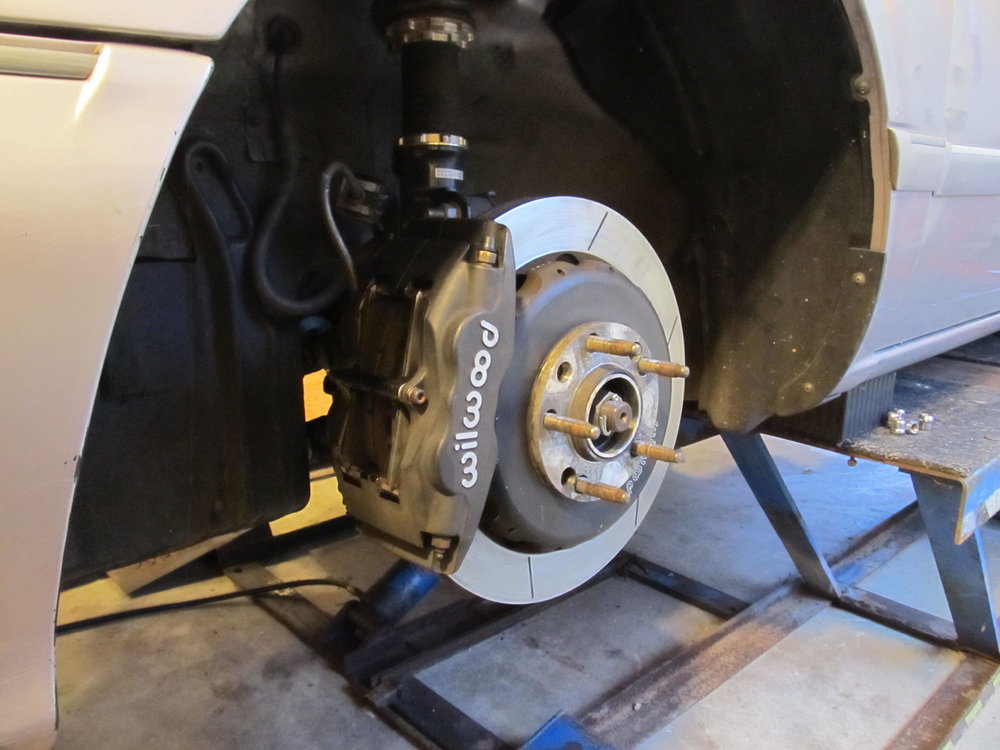
Everything was going well until I did a final check before putting the wheels on. I noticed that there was interference between the new control arm on the PS and the Wilwood rotor. There was some clearance on the DS:

But not so much on the PS:
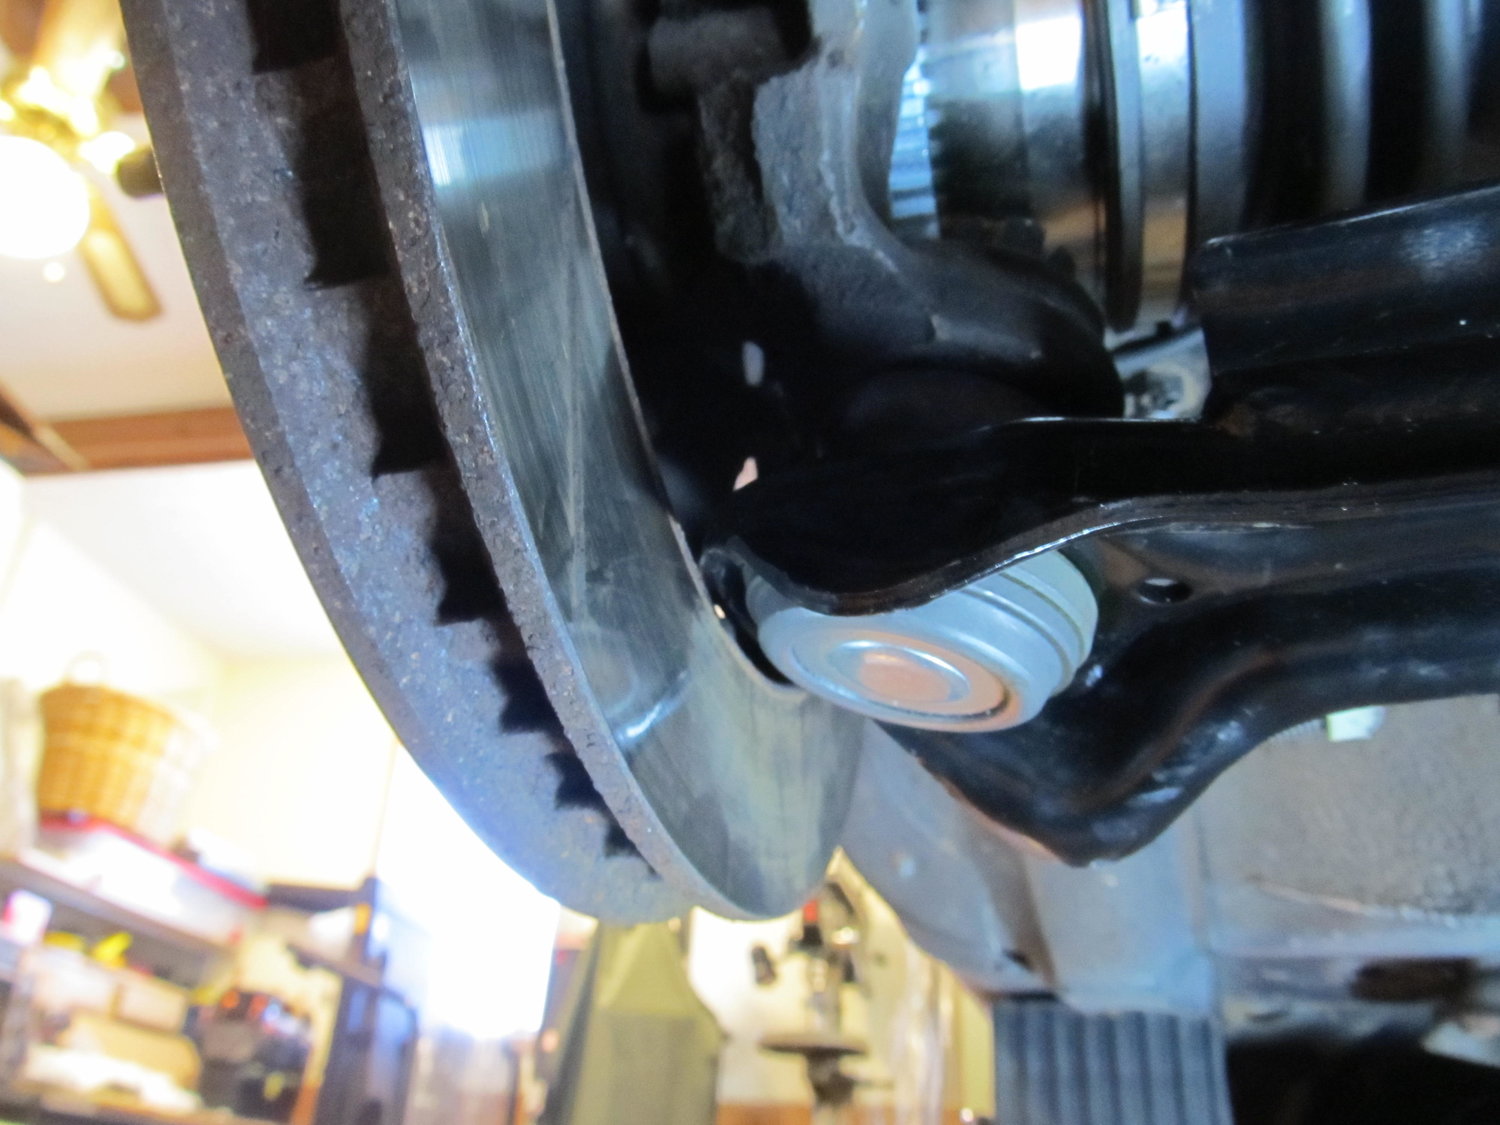
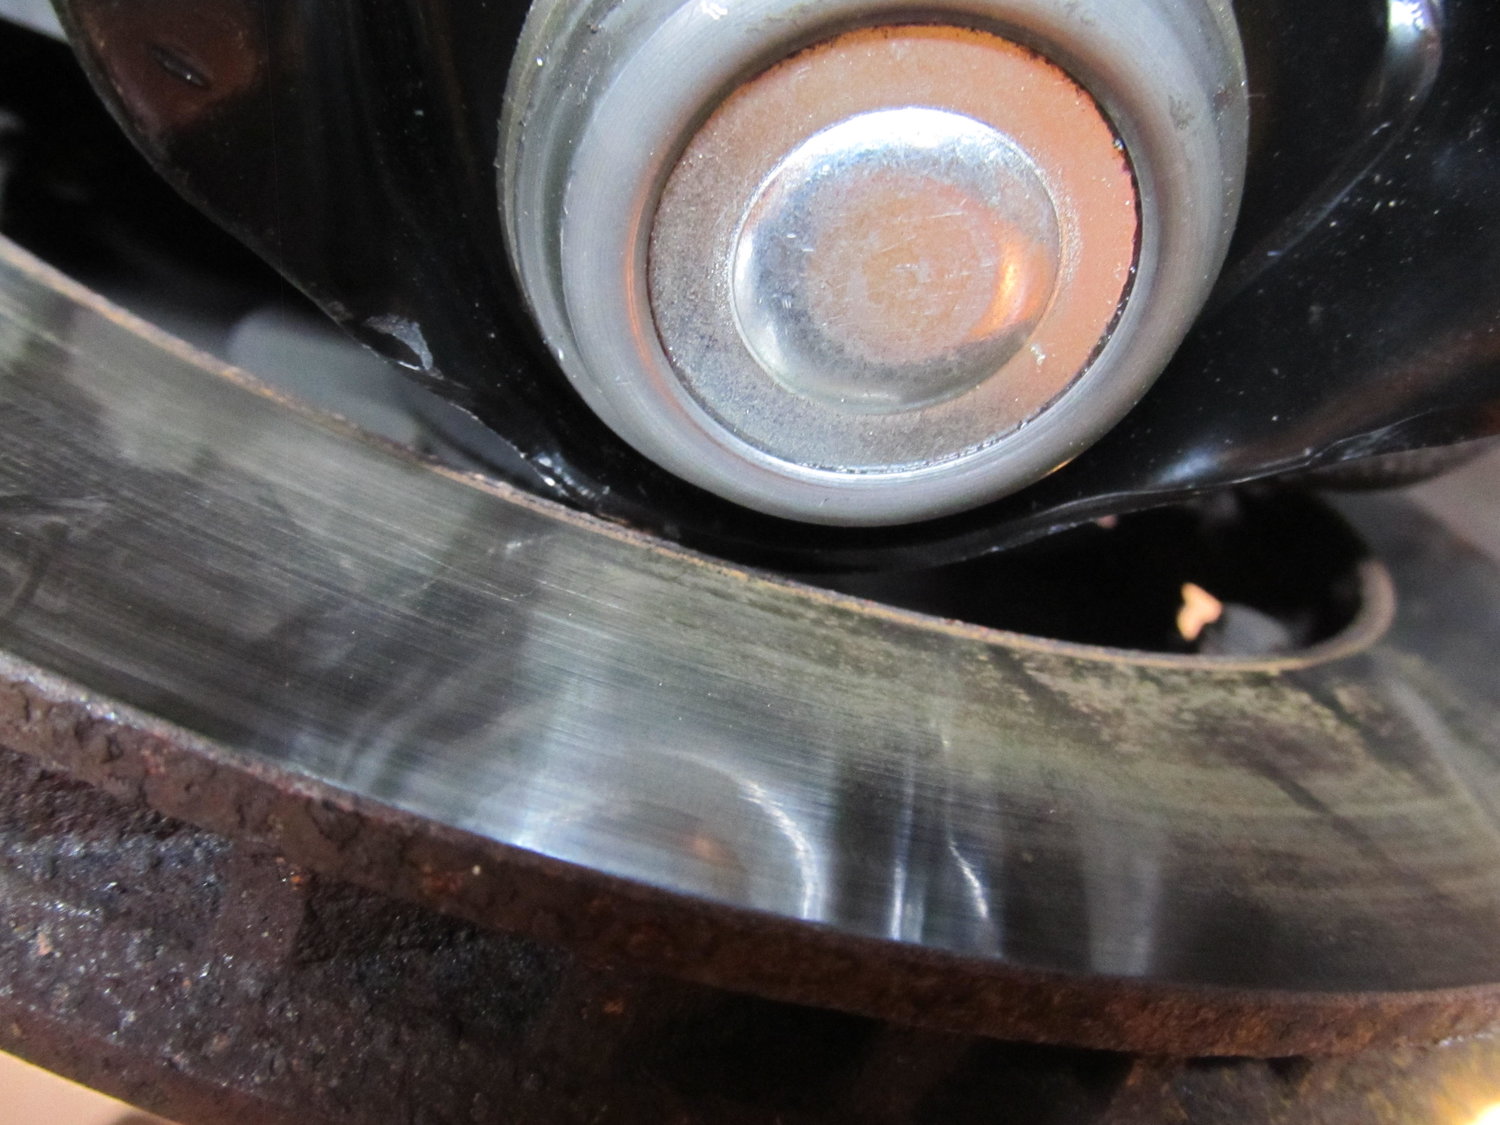
You may remember I had problems after I last replaced my ball joints with rotor interference. I had ordered two of the greasable Moog ball joints, but received two different ones, and only one was greasable. It was also larger than the other ones, and rubbed against my rotor during hard left turns at auto-x:
But that was the ball joint (well, mostly at least). This was all the control arm. At first I thought I hadn't pushed the ball joint up through the control arm all the way, since the problem was only on one side, but I undid the cotter pin and redid it, but still didn't have clearance. I ended up taking about 3mm off the tip of the arm with my dremel, but after a little driving, it doesn't seem like it was enough.
DS:

PS:

And with that, most of the front end was rebuilt! With an alignment, it should be ready to race. Woo!!
And for probably the first time in a very long time, I torqued all the control arm bolts in the correct sequence to the proper torque spec (while holding the arms up at ride height)! The last time I replaced them a few years back I don't think I used my Haynes manual, and I remember having problems getting some of the bolts started. Well, I ended up chasing the threads on most of them because they weren't threading smoothly by hand, but now everything goes in nice and smooth. Three cheers for tap and die sets!
Oh yes, that's the stuff.
Everything was going well until I did a final check before putting the wheels on. I noticed that there was interference between the new control arm on the PS and the Wilwood rotor. There was some clearance on the DS:
But not so much on the PS:
You may remember I had problems after I last replaced my ball joints with rotor interference. I had ordered two of the greasable Moog ball joints, but received two different ones, and only one was greasable. It was also larger than the other ones, and rubbed against my rotor during hard left turns at auto-x:
But that was the ball joint (well, mostly at least). This was all the control arm. At first I thought I hadn't pushed the ball joint up through the control arm all the way, since the problem was only on one side, but I undid the cotter pin and redid it, but still didn't have clearance. I ended up taking about 3mm off the tip of the arm with my dremel, but after a little driving, it doesn't seem like it was enough.
DS:
PS:
And with that, most of the front end was rebuilt! With an alignment, it should be ready to race. Woo!!