
Write-Up: squeaky clutch pedal giving you the blues?

Thread Starter

Joined: Feb 2007
Posts: 43,322
From: Central NC
Write-Up: squeaky clutch pedal giving you the blues?
So are any of you stick-shifting 3rd genners noticing a super-annoying creaky-squeaky clutch pedal? You are? Well here's how to fix it.
1) Go to your LOCAL dealer (courtesynissan will end up costing more due to shipping) and get one of these:

2) remove the knee panel of your dash for better visibility and access, and tilt your wheel all the way up and move your seat all the way back.
3) get your 12mm socket, about 12in of extensions and a 3/8 drive ratchet. Look up at the top of the clutch pedal bracket and unbolt that bolt that goes into the dash support beam. Also unclip both harness plugs on the pedal assembly, pop the clevis cotter pin out and remove the clevis pin.

4) open your hood and take a 12mm deep socket, short extension on 1/4 drive ratchet and remove the nut on the clutch master cylinder closer to the brake booster. You'll need a 12mm box wrench for the one closer to the fender. Put the nuts aside and go back inside the car.

5) Wiggle the pedal out. It'll require some force to pop it past the HVAC tube, but just be careful and firm, and it'll come out eventually. the master cylinder should still be in its normal location even after you remove the pedal.
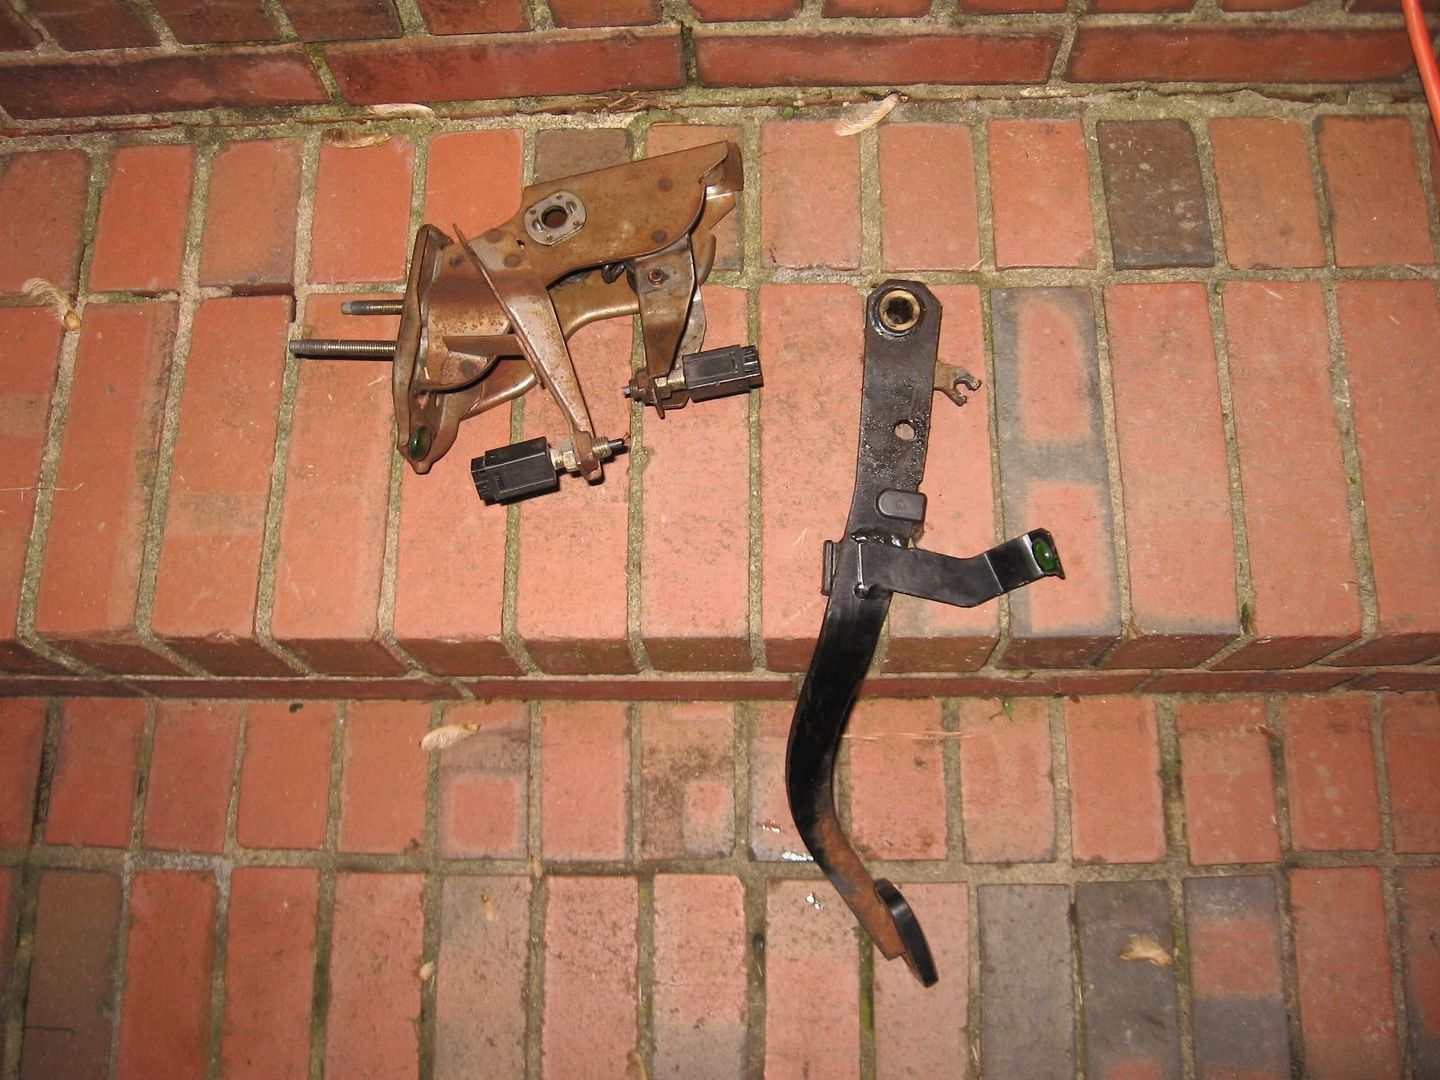
6) Now get a 14mm box wrench and remove the nut that holds the pedal arm into the bracket. Use your favorite tool to tap the bolt out, and grab it once it clears the nut-side of the bracket and then just pull it on out. separate the two pieces and put the bracket aside.

7) remove the old spring bushing from the pedal arm, if there even was one (i didn't even have one). now open the package your bushing is in and pop the bushing into the pedal arm and use some caliper slide pin lube or whatever's handy to fill the notch.

1) Go to your LOCAL dealer (courtesynissan will end up costing more due to shipping) and get one of these:

2) remove the knee panel of your dash for better visibility and access, and tilt your wheel all the way up and move your seat all the way back.
3) get your 12mm socket, about 12in of extensions and a 3/8 drive ratchet. Look up at the top of the clutch pedal bracket and unbolt that bolt that goes into the dash support beam. Also unclip both harness plugs on the pedal assembly, pop the clevis cotter pin out and remove the clevis pin.

4) open your hood and take a 12mm deep socket, short extension on 1/4 drive ratchet and remove the nut on the clutch master cylinder closer to the brake booster. You'll need a 12mm box wrench for the one closer to the fender. Put the nuts aside and go back inside the car.

5) Wiggle the pedal out. It'll require some force to pop it past the HVAC tube, but just be careful and firm, and it'll come out eventually. the master cylinder should still be in its normal location even after you remove the pedal.
6) Now get a 14mm box wrench and remove the nut that holds the pedal arm into the bracket. Use your favorite tool to tap the bolt out, and grab it once it clears the nut-side of the bracket and then just pull it on out. separate the two pieces and put the bracket aside.
7) remove the old spring bushing from the pedal arm, if there even was one (i didn't even have one). now open the package your bushing is in and pop the bushing into the pedal arm and use some caliper slide pin lube or whatever's handy to fill the notch.

Last edited by CapedCadaver; Apr 8, 2008 at 09:16 PM. Reason: typo on step 4; on step 5, added "the master cylinder should...." & step 7 "remove the old.... even have one)."
Thread Starter
Joined: Feb 2007
Posts: 43,322
From: Central NC
8) grab the pedal arm and bracket, and put the arm back in the bracket, but move it around until you can get the spring to fit into the bushing, and just push on it until it pops into place.

9) now pull the pivot of the pedal arm as close to the studs as you can and make sure the pedal is in the pushed position b/c i think that makes it easier to line the holes up. line the holes up as shown, and quickly jam the bolt in so you can rest your hands. It probably won't go in all the way but you can figure that part out.

10) tighten the nut back on the pedal assembly and install everything in the reverse order. remember to lube the clevis pin.
go drive around the block (or take a slightly longer trip, if desired) and enjoy your fresh, silent clutch pedal.

9) now pull the pivot of the pedal arm as close to the studs as you can and make sure the pedal is in the pushed position b/c i think that makes it easier to line the holes up. line the holes up as shown, and quickly jam the bolt in so you can rest your hands. It probably won't go in all the way but you can figure that part out.
10) tighten the nut back on the pedal assembly and install everything in the reverse order. remember to lube the clevis pin.
go drive around the block (or take a slightly longer trip, if desired) and enjoy your fresh, silent clutch pedal.


Thread Starter
Joined: Feb 2007
Posts: 43,322
From: Central NC
if the sound works, then this is what mine sounded like before i even removed the half-broken bushing... once i removed it the sound got even worse, and now it's gone.
http://s164.photobucket.com/albums/u...t=MVI_1143.flv
http://s164.photobucket.com/albums/u...t=MVI_1143.flv
I'm going to do this this week on my black VE. What a shame the whole assembly has to come out to replace that stupid little bushing.
Has anybody tried to re-lube the bushing instead of replacing it altogether?
Has anybody tried to re-lube the bushing instead of replacing it altogether?


Joined: Jul 2009
Posts: 16
From: Arizona
Clutch padal assist bushings
I was able to get to that bushing on my 01 Max without taking the whole assembly out. I had to replace the two other plastic bushings that the assist spring ends go into that were shot. The one you guys are talking about looks similar to the one in the center of the spring on my 01 Max. I took the spring off and all three of my cluch pedal assist spring bushings were accessible. Might not be the case for the previous Gen. Max's
Thread Starter
Joined: Feb 2007
Posts: 43,322
From: Central NC

I was able to get to that bushing on my 01 Max without taking the whole assembly out. I had to replace the two other plastic bushings that the assist spring ends go into that were shot. The one you guys are talking about looks similar to the one in the center of the spring on my 01 Max. I took the spring off and all three of my cluch pedal assist spring bushings were accessible. Might not be the case for the previous Gen. Max's
So I never got around to doing this. I'm finally ordering all my final parts to finish my black VE overhaul (hope I don't forget something  ). Which part is this exactly in the diagram?
I'm thinking it's 4625MA but want to make sure:

). Which part is this exactly in the diagram? I'm thinking it's 4625MA but want to make sure:

Junior Member
Joined: Nov 2011
Posts: 24
From: Norcross, GA
I think that would be the one labelled 46525M (and 46525MA being bushings for where the spring attaches to the rest of the assembly, since there's two), although the part shown in the OP is a different number entirely.

Thread
Thread Starter
Forum
Replies
Last Post
My Coffee
New Member Introductions
15
Jun 6, 2017 02:01 PM
HerpDerp1919
3rd Generation Maxima (1989-1994)
2
Sep 29, 2015 02:02 PM
carlosvq30
5th Generation Maxima (2000-2003)
4
Sep 26, 2015 09:44 AM
ef9
5th Generation Classifieds (2000-2003)
0
Sep 10, 2015 10:35 PM