
Y-Pipe and Cat Removal Tips


Thread Starter
Senior Member
Joined: Jan 2011
Posts: 3,037
From: Central AR
Y-Pipe and Cat Removal Tips
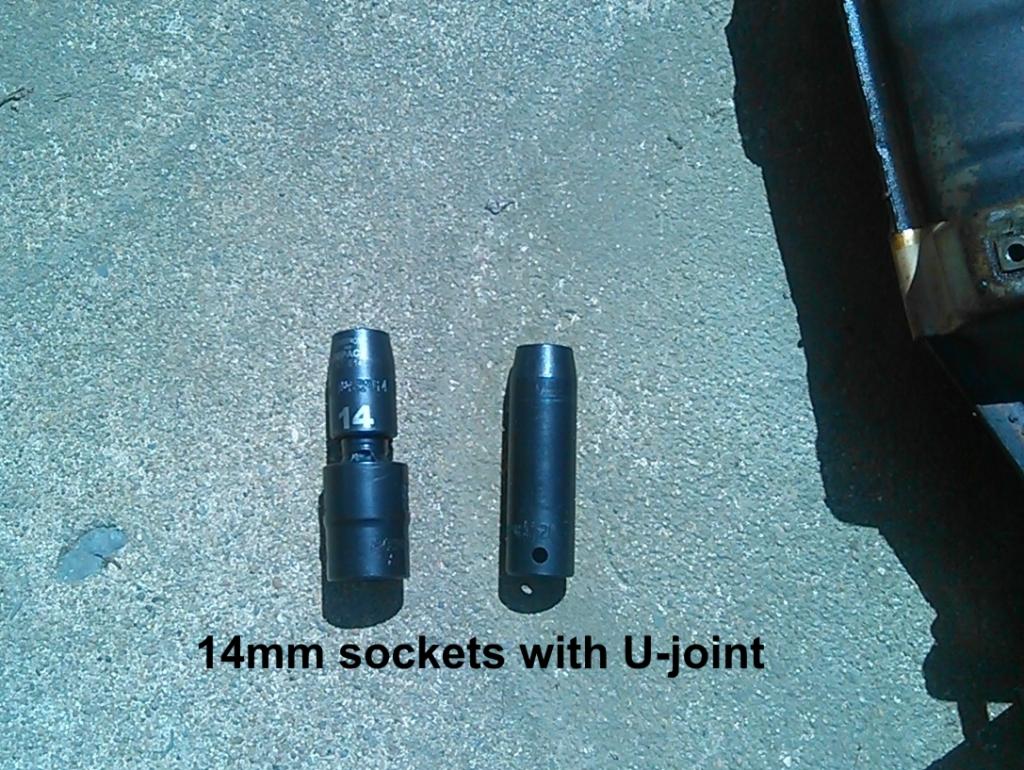
This weekend I followed information in the following sticky thread for removing the Y-Pipe. When I started removing the old Y-pipe, I hit trouble when attempting to remove the "right hand" (e.g. closest to the firewall) exhaust bolts. My existing U-joint drivers were just not working in the cramped location between the engine and the firewall. So I made a trip to my nearest parts store (NAPA) and found an impact type "Armstrong Brand" U-joint and 14mm sockets. The even torque distribution and stability provided by impact U-joint definitely changed the "difficult bolt" removal game for the better.
If you are interested in removing the Y-Pipe to install a new one, please refer to the following sticky thread in the link below and the information from the pictures in this thread.
Note: I had no problem removing the "left hand" (e.g closest to the radiator) exhaust bolt nuts with conventional (read discount store) tools. When I attempted to remove the "right hand" (e.g. closest to the firewall) side, I had to stop the job and make a trip to my nearest part store that primarily serves local mechanics.
READ THIS STICKY POST THREAD FIRST
http://forums.maxima.org/4th-generat...tall-pics.html
SUPPLEMENTAL INFORMATION AND PICTURES BELOW
1) Tools
The following tools seemed to make Y-Pipe removal easy. The U-joint is an impact type "Armstrong Brand" from NAPA. The U-joint turns evenly and stays put while you wind the 14mm socket into position. Until I started using this stronger impact type U-joint, I would frequently break other types of U-joints. If you've ever used a low cost U-joint, then you get the idea.
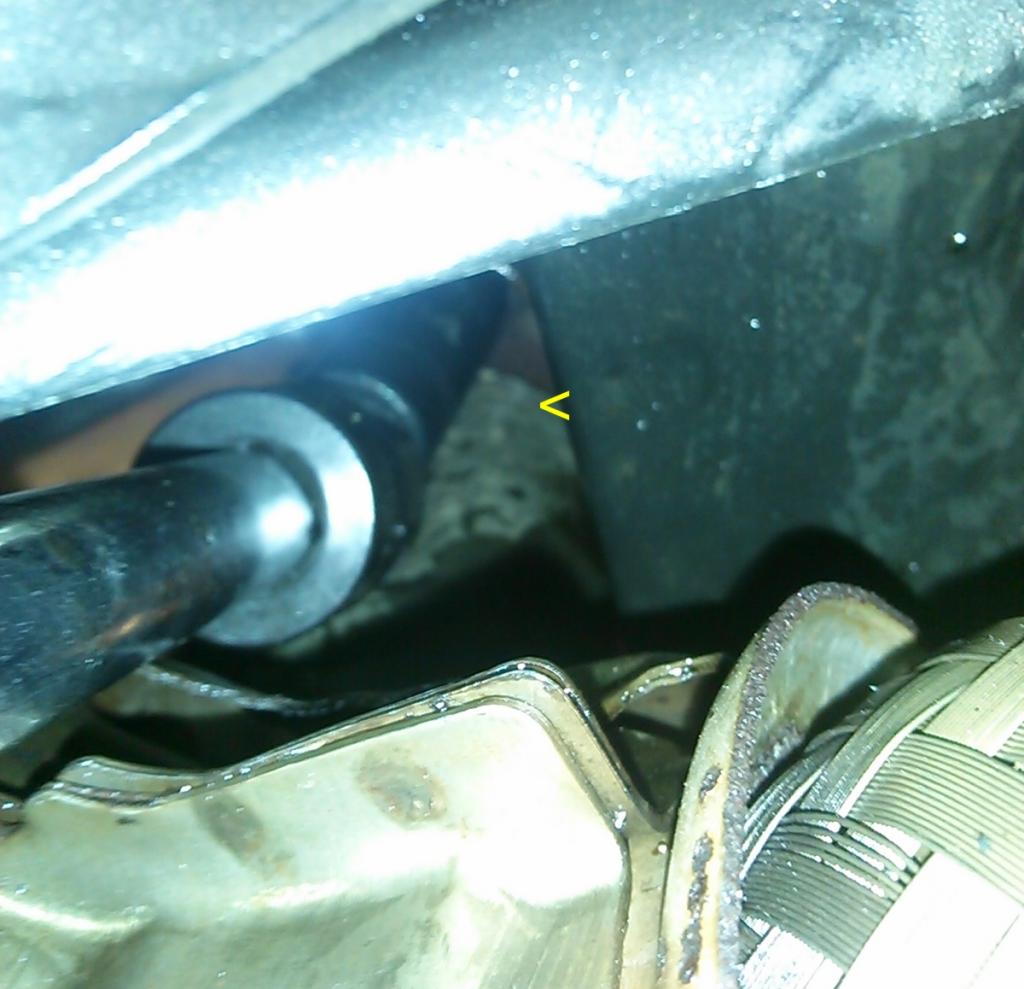
2) Most Difficult 14mm Nut
There is one 14mm nut on the "right hand" (e.g. closest to the firewall) exhaust manifold bolt that was the hardest to reach. The 14mm barrel socket worked best for that nut. You'll be glad you have a 6-point 14mm barrel socket when you start to remove that nut.
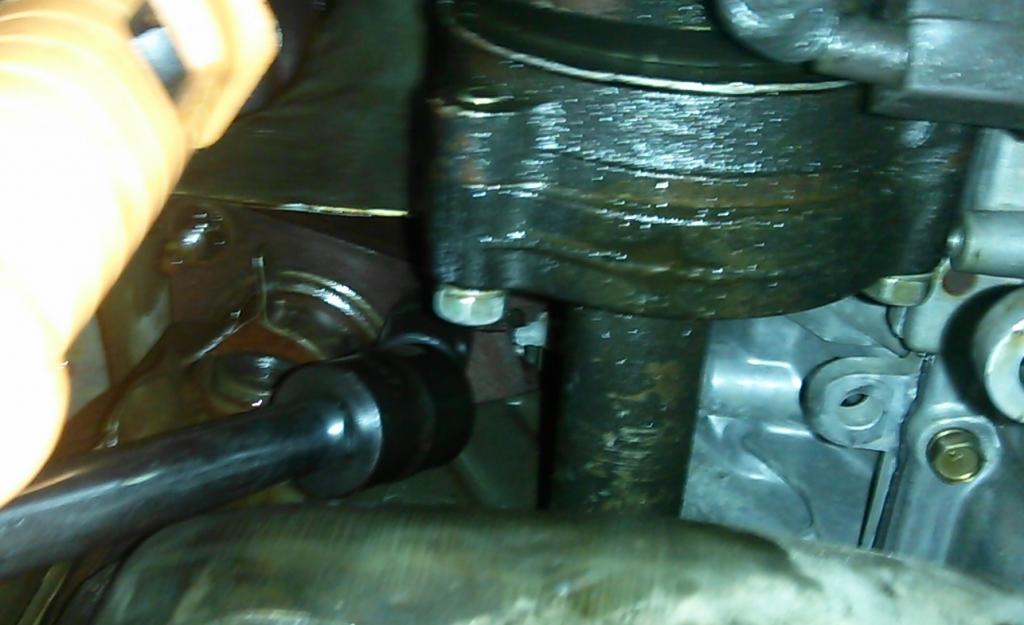
3) Next Nut Removal Pic
After you remove the nut in the picture above, you will want to switch from 14mm barrel socket to the regular size shown in this picture. The barrel was too long for this nut.
4) Right Hand Pipe (e.g. closest to firewall) View
Here's a picture of the "right hand" (e.g. closest to the firewall) exhaust pipe with all nuts removed.

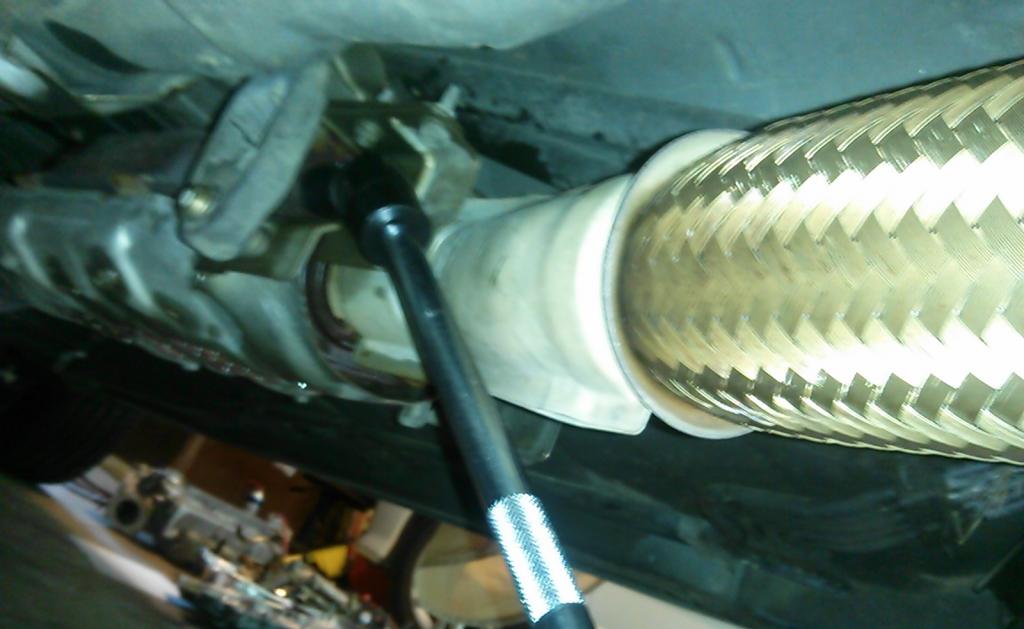
5) Pipe To Cat Removal Picture
Here's a picture of using the U-joint for the Y-Pipe to Cat removal.
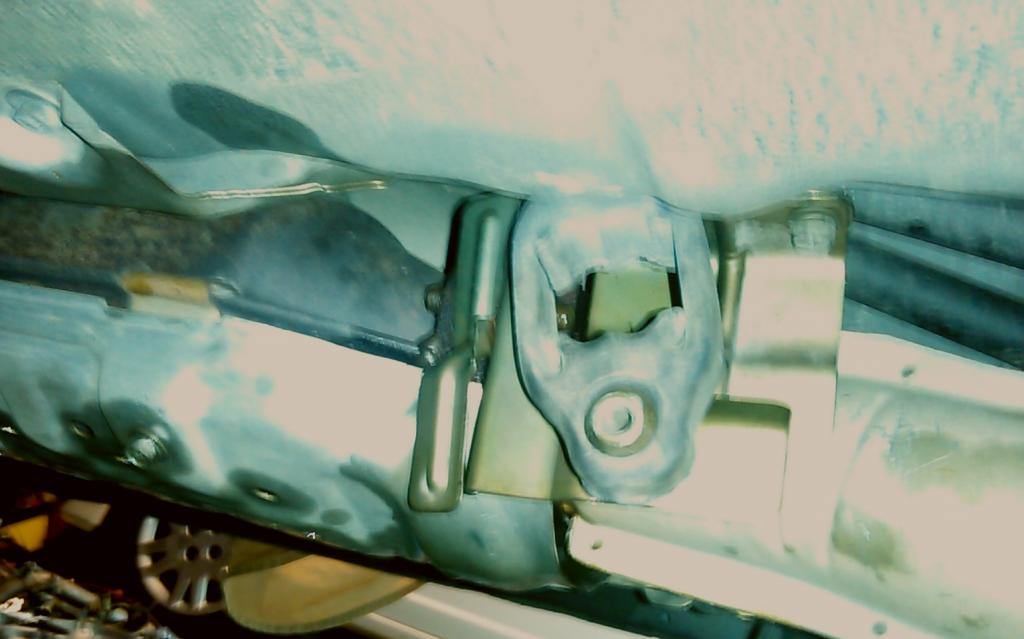
6) Rubber Hanger Bracket
I slipped a large blade screwdriver behind the rubber hanger bracket to slide it off the mount. Removal could have been easier if I had sprayed some NAPA Ru-Glyde (or other tire mounting) rubber dressing on it before removal.
New Y-Pipe and high-flow cat alongside the old.
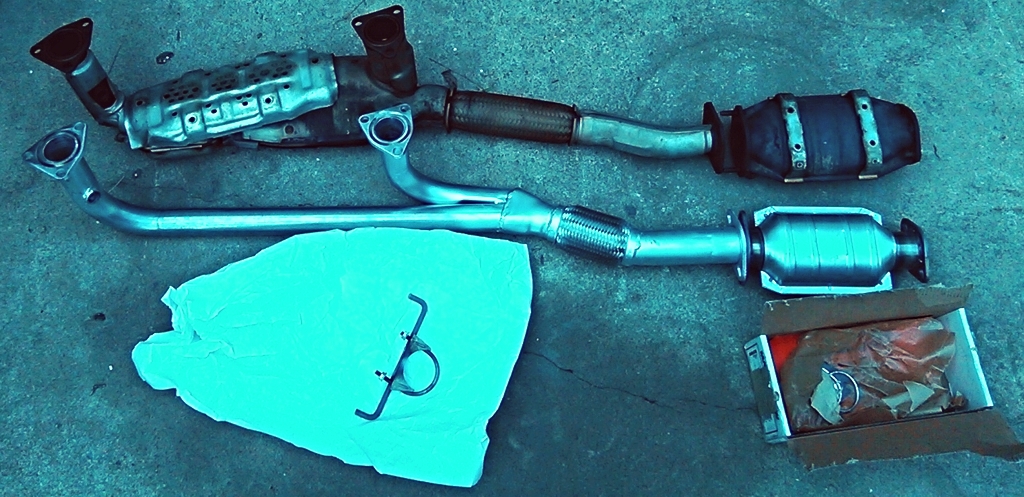
Here are a couple of pictures with the Y-Pipe installed below. I picked up some new 14mm 1.25 pitch nuts for the exhaust manifold at AdvanceAuto.
The new pipes give more room for an easy installation.
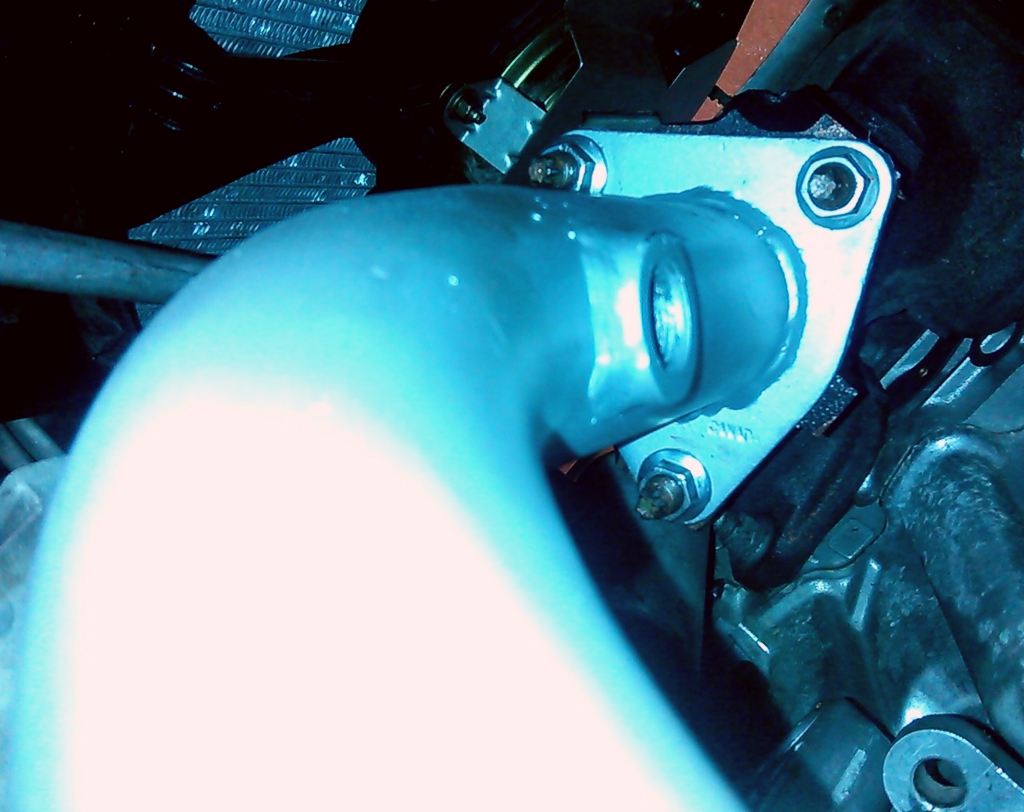
Left Side (e.g. by the Radiator) Pipe-to-Exhaust Manifold
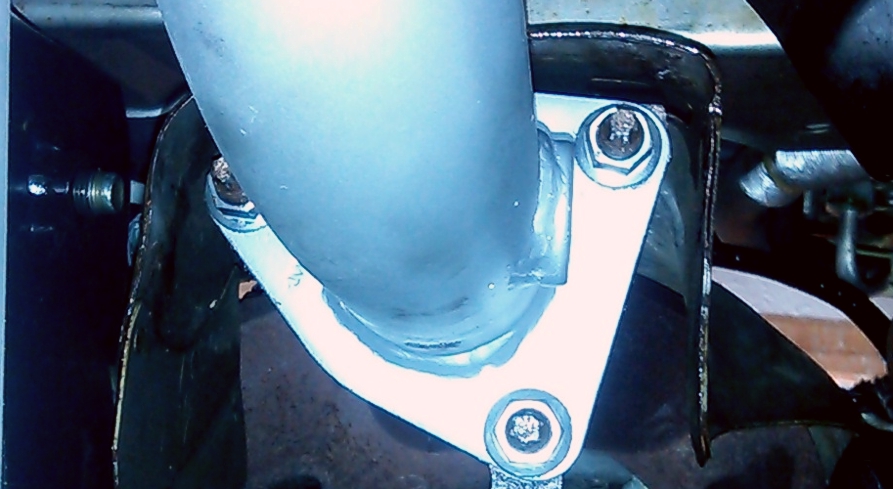
Right Side (e.g. by the Radiator) Pipe-to-Exhaust Manifold
I ended up priming and painting the new Y-Pipe and Cat and with some VHT header paint. I let the freshly painted parts sit in the sun for a couple of days to warm up and cure before installation.
If you are interested in removing the Y-Pipe to install a new one, please refer to the following sticky thread in the link below and the information from the pictures in this thread.
Note: I had no problem removing the "left hand" (e.g closest to the radiator) exhaust bolt nuts with conventional (read discount store) tools. When I attempted to remove the "right hand" (e.g. closest to the firewall) side, I had to stop the job and make a trip to my nearest part store that primarily serves local mechanics.
READ THIS STICKY POST THREAD FIRST
http://forums.maxima.org/4th-generat...tall-pics.html
SUPPLEMENTAL INFORMATION AND PICTURES BELOW
1) Tools
The following tools seemed to make Y-Pipe removal easy. The U-joint is an impact type "Armstrong Brand" from NAPA. The U-joint turns evenly and stays put while you wind the 14mm socket into position. Until I started using this stronger impact type U-joint, I would frequently break other types of U-joints. If you've ever used a low cost U-joint, then you get the idea.
2) Most Difficult 14mm Nut
There is one 14mm nut on the "right hand" (e.g. closest to the firewall) exhaust manifold bolt that was the hardest to reach. The 14mm barrel socket worked best for that nut. You'll be glad you have a 6-point 14mm barrel socket when you start to remove that nut.
3) Next Nut Removal Pic
After you remove the nut in the picture above, you will want to switch from 14mm barrel socket to the regular size shown in this picture. The barrel was too long for this nut.
4) Right Hand Pipe (e.g. closest to firewall) View
Here's a picture of the "right hand" (e.g. closest to the firewall) exhaust pipe with all nuts removed.
5) Pipe To Cat Removal Picture
Here's a picture of using the U-joint for the Y-Pipe to Cat removal.
6) Rubber Hanger Bracket
I slipped a large blade screwdriver behind the rubber hanger bracket to slide it off the mount. Removal could have been easier if I had sprayed some NAPA Ru-Glyde (or other tire mounting) rubber dressing on it before removal.
New Y-Pipe and high-flow cat alongside the old.
Here are a couple of pictures with the Y-Pipe installed below. I picked up some new 14mm 1.25 pitch nuts for the exhaust manifold at AdvanceAuto.
The new pipes give more room for an easy installation.
Left Side (e.g. by the Radiator) Pipe-to-Exhaust Manifold
Right Side (e.g. by the Radiator) Pipe-to-Exhaust Manifold
I ended up priming and painting the new Y-Pipe and Cat and with some VHT header paint. I let the freshly painted parts sit in the sun for a couple of days to warm up and cure before installation.
Last edited by CS_AR; May 4, 2014 at 04:55 PM.


In the automotive world, the left and right sides of the car and the engine are always the same, regardless of where/how you have positioned yourself to look at it.
This was established in the days of rear wheel drive. When you are sitting in the car looking forward through the front window, this establishes left and right. With rear wheel drive, the water pump is on the front of the engine and the transmission is on the rear of the engine.
When cars began using front wheel drive, the engine was rotated 90 degrees to the right (or clockwise). So now the left side of the engine is towards the radiator and the right side of the engine is towards the firewall. But the labels of left and right have not changed.

Junior Member
Joined: Mar 2013
Posts: 20
From: Florida
Many Hondas have their transmission on the passenger side of the car, so the orientation of their engines are opposite of ours... I usually consider the timing chain/belt and the accessory belts as the front of the engine, and derive engine orientation from that.
Thread Starter
Senior Member
Joined: Jan 2011
Posts: 3,037
From: Central AR
In the automotive world, the left and right sides of the car and the engine are always the same, regardless of where/how you have positioned yourself to look at it.
This was established in the days of rear wheel drive. When you are sitting in the car looking forward through the front window, this establishes left and right. With rear wheel drive, the water pump is on the front of the engine and the transmission is on the rear of the engine.
When cars began using front wheel drive, the engine was rotated 90 degrees to the right (or clockwise). So now the left side of the engine is towards the radiator and the right side of the engine is towards the firewall. But the labels of left and right have not changed.
This was established in the days of rear wheel drive. When you are sitting in the car looking forward through the front window, this establishes left and right. With rear wheel drive, the water pump is on the front of the engine and the transmission is on the rear of the engine.
When cars began using front wheel drive, the engine was rotated 90 degrees to the right (or clockwise). So now the left side of the engine is towards the radiator and the right side of the engine is towards the firewall. But the labels of left and right have not changed.
Aircraft engine positions are numbered from left to right from the view of the pilot looking forward.
The right or left side of a locomotive is determined by standing in the cab and looking forward. It appears the operator view of right vs. left was established in the early 1800s.
OP updated with (e.g. firewall/radiator) references.
Last edited by CS_AR; Apr 28, 2014 at 06:31 AM.


Thread
Thread Starter
Forum
Replies
Last Post
jmlee44
4th Generation Maxima (1995-1999)
8
Oct 2, 2022 02:13 PM
My Coffee
New Member Introductions
15
Jun 6, 2017 02:01 PM
CAN-Toronto 97 SE BLACK w/ BLACK. PART OUT.
worldwiderecognized
4th Generation Classifieds (1995-1999)
2
Sep 24, 2015 06:56 PM