
How to: MKIII MR2 Seat Install


How to: MKIII MR2 Seat Install
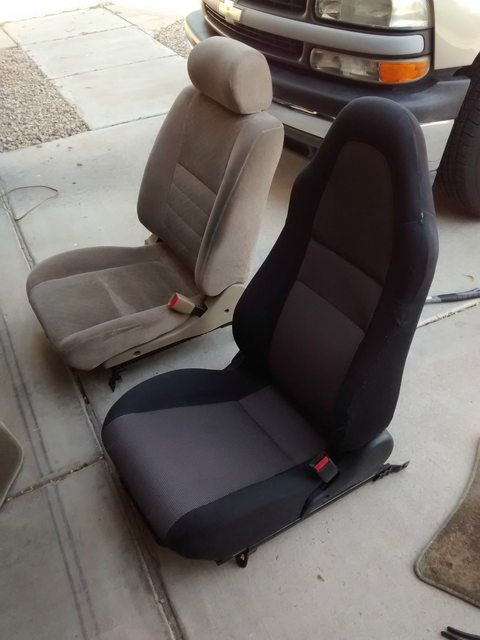
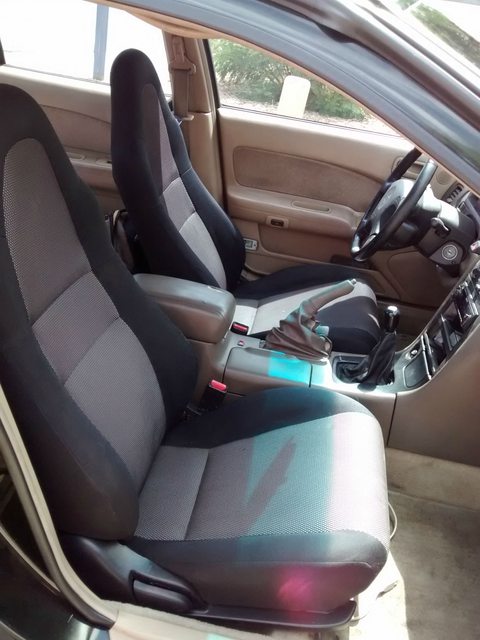
Greetings everyone, today I will be showing you how to install MKIII MR2 (ZZW30) seats in your A32.
First off, the most important part - weight.
A32 '97 SE Power Cloth Driver Seat = 44lbs
A32 (unknown year&trim) Manual Cloth Driver Seat = 40lbs
ZZW30 '02 Spyder Manual Cloth Driver Seat = 34.8lbs
A32 '97 SE Manual Cloth Passenger Seat = 36.2lbs
ZZW30 '02 Spyder Manual Cloth Passenger Seat = 32.8lbs
My total weight savings: ~12lbs taking into account longer bolts and spacers.
All weights measured to the tenth were done with an AMW-TL440, The rest were done with a bathroom scale. I plan to update the old bathroom scale weights in the future.
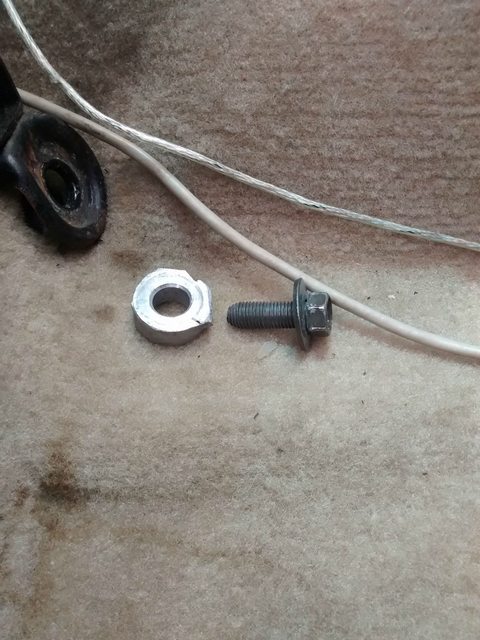
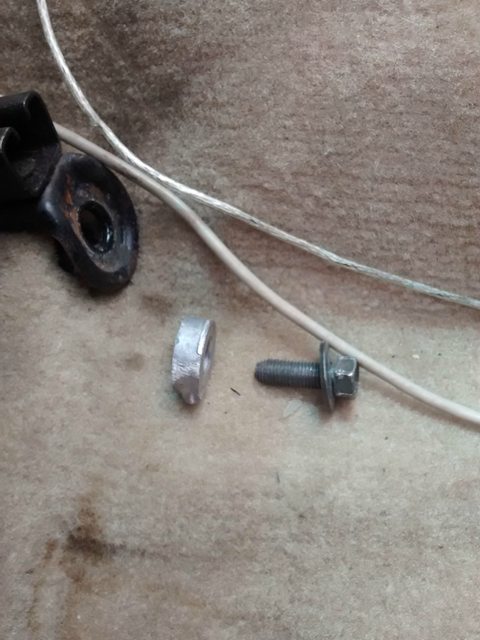
What you will need per seat:
The longer bolts I used were taken off of a precat from a 99 Cali Spec.
The 1/8" washer I had laying around. The 3/8" and 3/4" spacers were salvaged from an aluminum 7th gen engine mounting bracket.
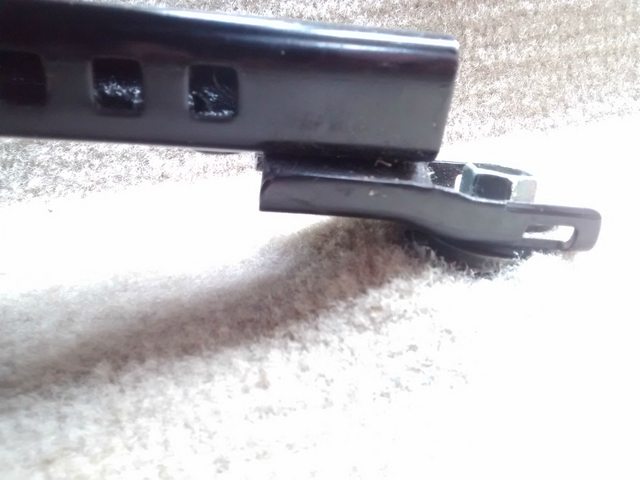
First order of business is to trim off these locating tabs near the front two bolt holes.
Next, bend the front two mounting ears down about ~70�. Don't bend it too far, you can always bend it down more, but the more that the joint is bent back and forth, the weaker it will become - which can lead to premature failure.
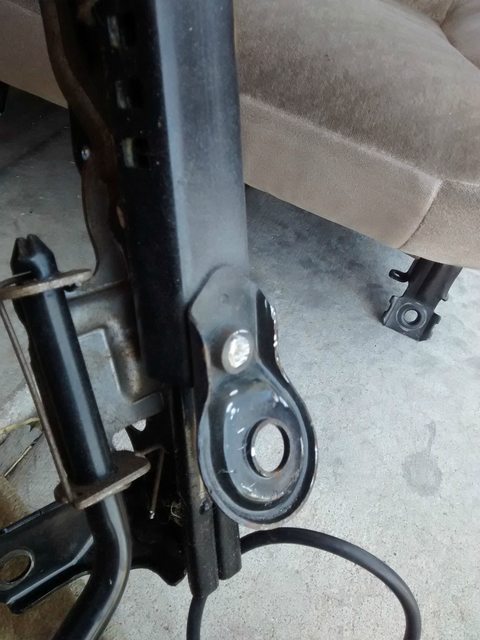
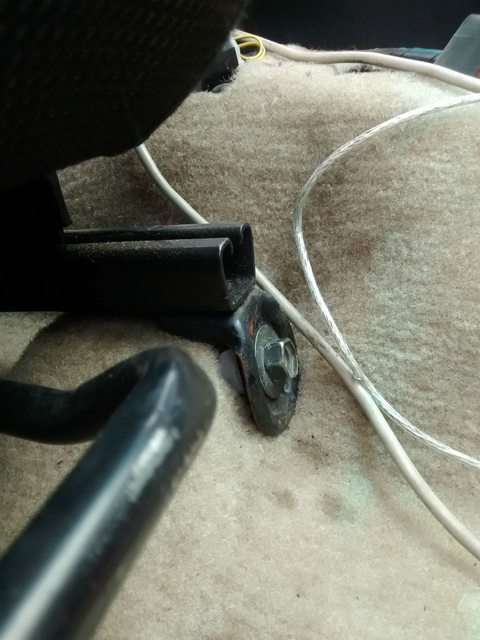
Rear mounting points. The 1/8" washer goes underneath the rear bolt hole nearest the door. This can be shimmed to your personal preference, but so far the seat feels pretty level.

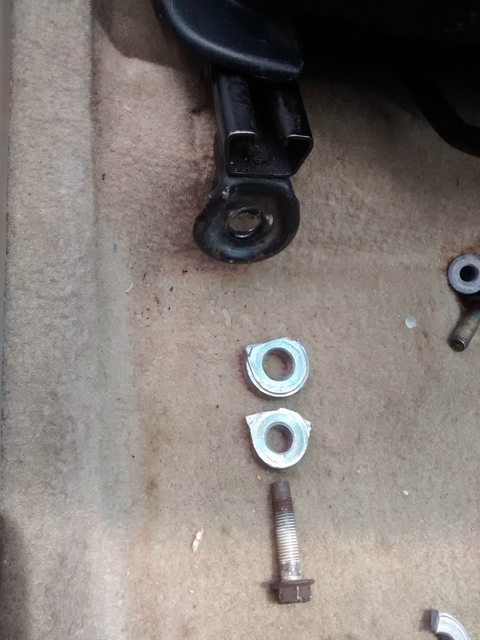
Front mounting point, exhaust tunnel side gets a 3/8" spacer.
Front mounting point, door side gets (2) 3/8" spacers totaling 3/4" and the longer bolt.

The least frustrating way to bolt the seats in is to get the two rear bolts a couple turns away from being snug, so that there is still a fair amount of wiggle room. Then insert the spacers on the front and get those bolts started. Tighten up the front bolts, then the rears.
The way I have attached these seats makes the slider mechanism a little sticky, so extra effort will be required to ensure that the slider is locked into position after moving the seat.
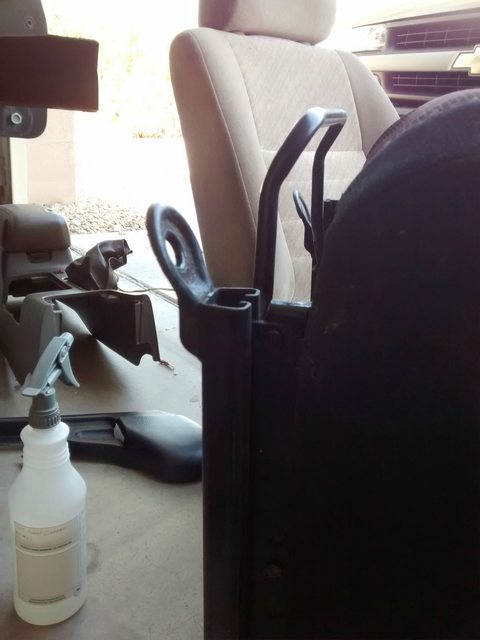
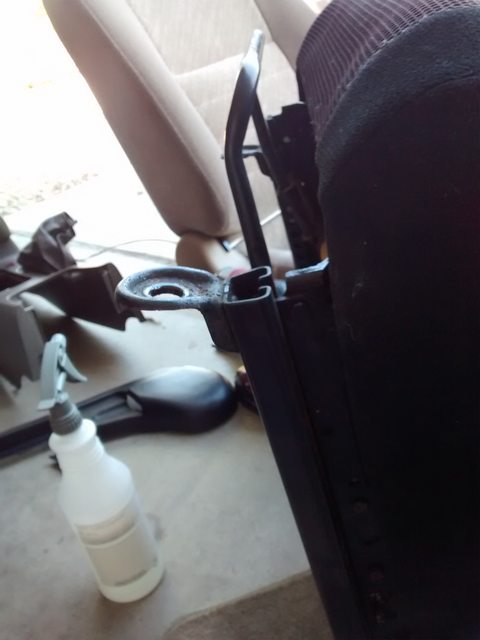
Lastly, these seats do sit a little lower than stock. And they make it feel more like a race car
First off, the most important part - weight.
A32 '97 SE Power Cloth Driver Seat = 44lbs
A32 (unknown year&trim) Manual Cloth Driver Seat = 40lbs
ZZW30 '02 Spyder Manual Cloth Driver Seat = 34.8lbs
A32 '97 SE Manual Cloth Passenger Seat = 36.2lbs
ZZW30 '02 Spyder Manual Cloth Passenger Seat = 32.8lbs
My total weight savings: ~12lbs taking into account longer bolts and spacers.
All weights measured to the tenth were done with an AMW-TL440, The rest were done with a bathroom scale. I plan to update the old bathroom scale weights in the future.
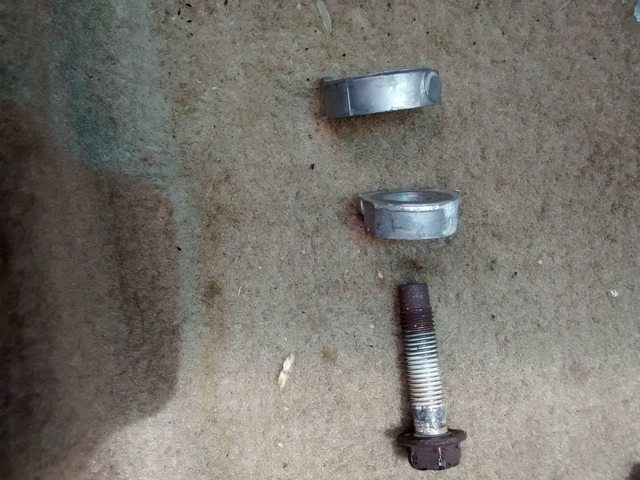
What you will need per seat:
- [1] ZZW30 Seat
- [1] Longer bolt
- [1] 1/8" washer
- [1] 3/8" Spacer
- [1] 3/4" Spacer
The longer bolts I used were taken off of a precat from a 99 Cali Spec.
The 1/8" washer I had laying around. The 3/8" and 3/4" spacers were salvaged from an aluminum 7th gen engine mounting bracket.
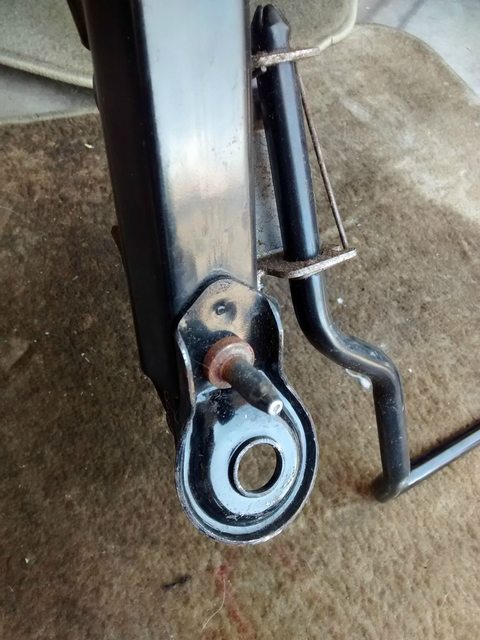
First order of business is to trim off these locating tabs near the front two bolt holes.
Next, bend the front two mounting ears down about ~70�. Don't bend it too far, you can always bend it down more, but the more that the joint is bent back and forth, the weaker it will become - which can lead to premature failure.
Rear mounting points. The 1/8" washer goes underneath the rear bolt hole nearest the door. This can be shimmed to your personal preference, but so far the seat feels pretty level.
Front mounting point, exhaust tunnel side gets a 3/8" spacer.
Front mounting point, door side gets (2) 3/8" spacers totaling 3/4" and the longer bolt.
The least frustrating way to bolt the seats in is to get the two rear bolts a couple turns away from being snug, so that there is still a fair amount of wiggle room. Then insert the spacers on the front and get those bolts started. Tighten up the front bolts, then the rears.
The way I have attached these seats makes the slider mechanism a little sticky, so extra effort will be required to ensure that the slider is locked into position after moving the seat.
Lastly, these seats do sit a little lower than stock. And they make it feel more like a race car
Last edited by schmellyfart; Jul 13, 2015 at 08:28 PM.


Thread
Thread Starter
Forum
Replies
Last Post
MR2 T'd
5th Generation Classifieds (2000-2003)
6
Jul 9, 2021 05:06 AM
MaxLife17
8th Generation Maxima (2016-)
43
Jun 27, 2019 01:37 PM