
The LED Light Picture Thread -Interior-


Originally Posted by max_dreamer
heres my super solder skills on the main window switch... looks like factory huh!? 

lol, yeah yeah! its close though. i like using alot so it has less chance of breaking loose, although it prolly never would. i had to use less on the surface mounts though, it was pretty tight spacing on those...


i look a little video of some of my leds the shifter u cant see to well in the video and i forgot to open the ashtray also the video does my gauges no justice i need a new climate contro mine has a huge crack in it but ive got other things to worry about
VIDEO
http://youtu.be/xOXHxKdafgs
VIDEO
http://youtu.be/xOXHxKdafgs

good lights everyone!! but i do have a question, i want to do my acc unit an cant figure out which size i need for it. i want the ones with a base already attached (plug an play) i kno the 98-99's use a t4 size but not sure if its the same for mine (96) i have looked an didnt find any solid answers

good lights everyone!! but i do have a question, i want to do my acc unit an cant figure out which size i need for it. i want the ones with a base already attached (plug an play) i kno the 98-99's use a t4 size but not sure if its the same for mine (96) i have looked an didnt find any solid answers
here:
http://forums.maxima.org/8372651-post154.html
youre welcome :-)
I am using that thread as well for my 4th gen lighting ideas...trying out 360* individual LEDs for the backlight of my ACC on my 99.
it's the neo3. according to this:
http://forums.maxima.org/4th-generat...bulb-info.html (post number 19)

what voltage led's did you use and did you change the resistors also?


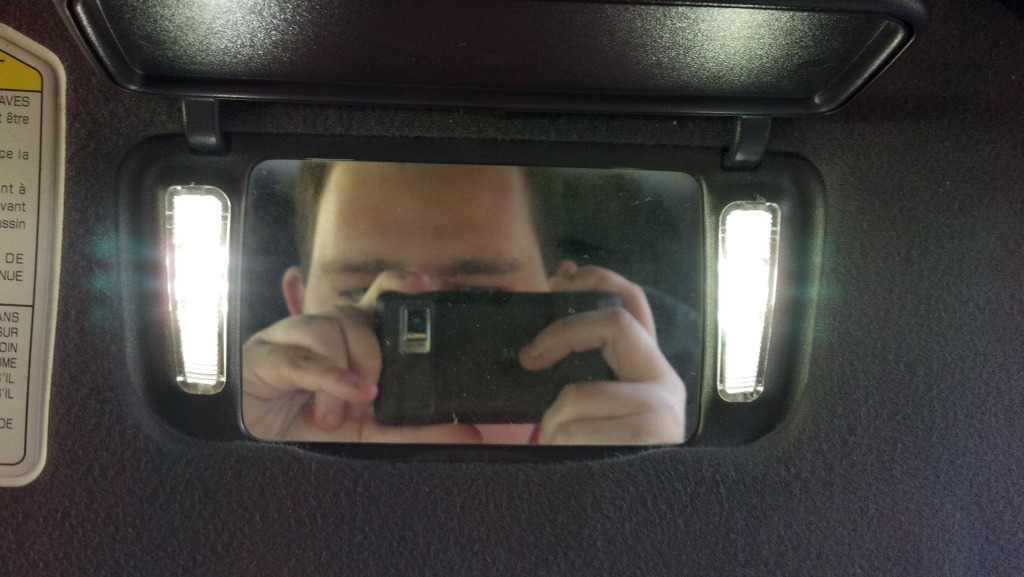
LED Vanity mirrors
FIN
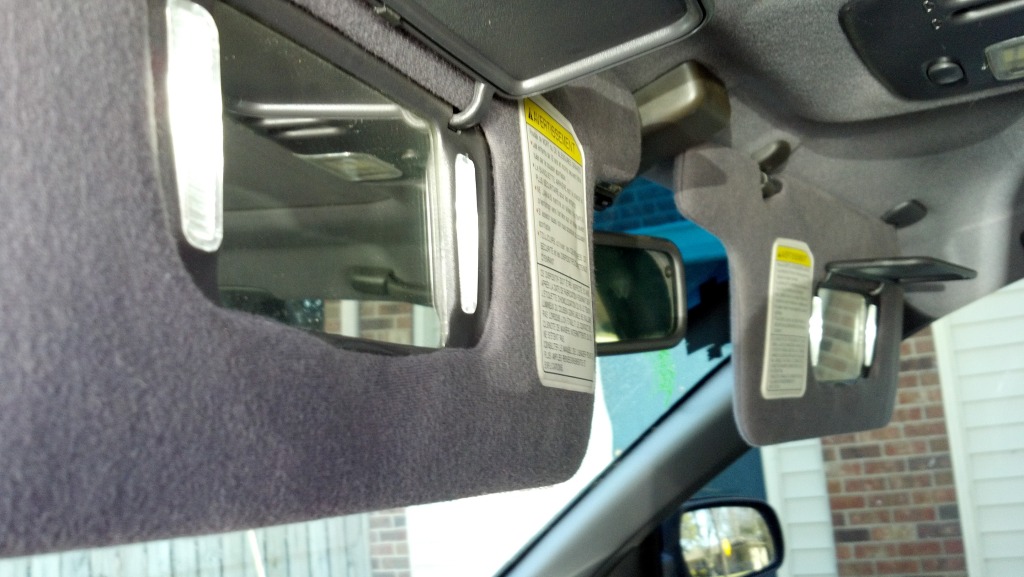
bought them from here......31mm vanity, xenon white
http://www.wardenjp.com/stores/festoon.html
FIN
bought them from here......31mm vanity, xenon white
http://www.wardenjp.com/stores/festoon.html
An what size were the vanity mirror bulbs brad? I kno you mentioned 31mm, did these work? An at night are they too bright or just perfect? My wife already has said if they too bright I can't do em lol
Rite on!! What color did you get? Shoot me a pm if they don't work for you.
An what size were the vanity mirror bulbs brad? I kno you mentioned 31mm, did these work? An at night are they too bright or just perfect? My wife already has said if they too bright I can't do em lol
An what size were the vanity mirror bulbs brad? I kno you mentioned 31mm, did these work? An at night are they too bright or just perfect? My wife already has said if they too bright I can't do em lol
does she plan on driving down the road with the visor down and putting make up on ............at night?
CRUISE CONTROL LED SWITCH
For those of us that want to add LED to the cruise control switch, Below is some info you will need. I searched and didn't find any specific info, so I'm going to put this here.
The following applies specifically to my 99SE, I do not know if this will be the same as other years / trim levels.
The cruise control switch on the left side of the steering column has two bulbs in it. One is illuminated with a push of the switch to tell you cruise is ON (green square), the other bulb is illuminated when parking lights / headlights are on (backlighting). In my case, I wanted to change the backlight bulb since mine was out.
Taking the switch apart is no problem - two tabs and it's done. There are TWO bulbs, left and right. The one with the blue condom on it is on the right (for reference purposes). This is the backlighting bulb. When replalcing this with an LED, you need one 3mm LED and 470 Ohm resistor. Solder the resistor to the positive prong of the LED. I re-used both the blue condom and the rubber bulb housing, since I could not for the life of me find the correct way to orient the LED (which side is positive and which side is negative). So I bent the legs of my resistor / LED around the rubber housing same as the original bulb. This way, if I get polarity wrong I can just switch orientation and it's all good.
PROPER ORIENTATION of this LED setup: 12V is the OUTSIDE prong and ground is the INSIDE prong.
This is for the backlighting bulb ONLY. I did not change the bulb that illuminates when CC is turned on, so I can not speak to proper orientation of that.
I can take pics (and edit this post accordingly) if y'all want.
Last edited by Amerikaner83; Feb 29, 2012 at 06:38 PM.
The 3mm did work for me...however, they were really tight so I actually farked up the install and broke two of them. I ended up just soldering a resistor to a 5mm 360* component LED and re-using the original bulb base to get mine working.
some pretty pictures:
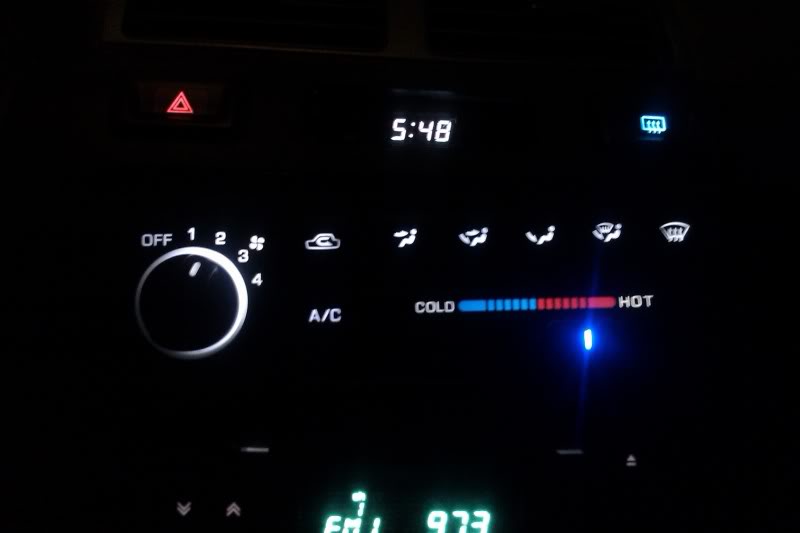
(360* 5mm white component LED with 470 Ohm resistor for backlight)
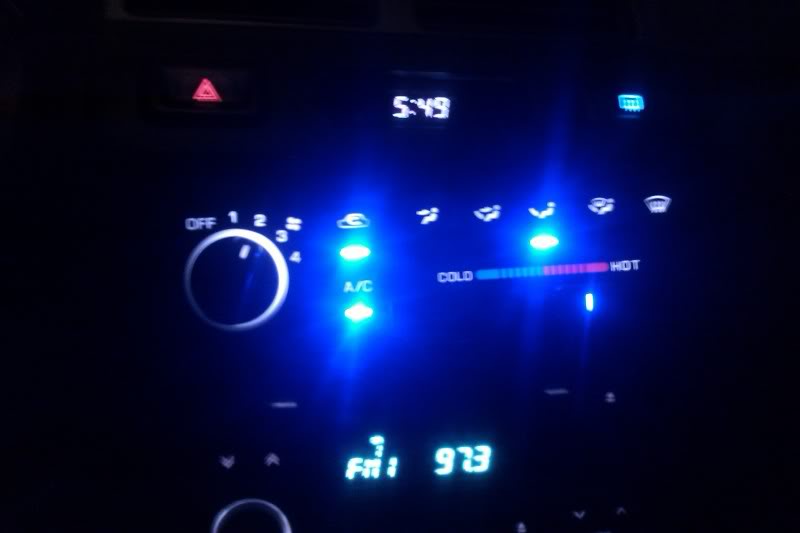
(Blue indicator LEDs......I will sand these down though, HELLA bright right now)
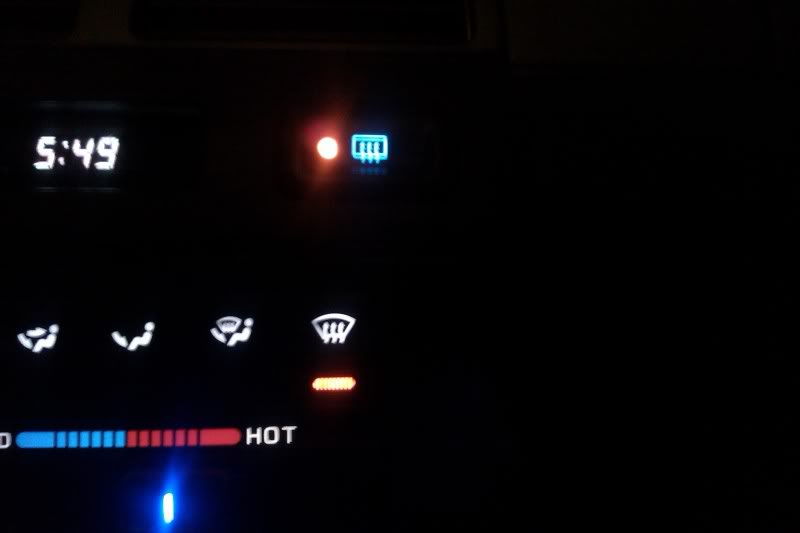
(kept both standard orange LEDs for the defrost indicators)
(360* 5mm white component LED with 470 Ohm resistor for backlight)
(Blue indicator LEDs......I will sand these down though, HELLA bright right now)
(kept both standard orange LEDs for the defrost indicators)
Last edited by Amerikaner83; Feb 29, 2012 at 06:31 PM.
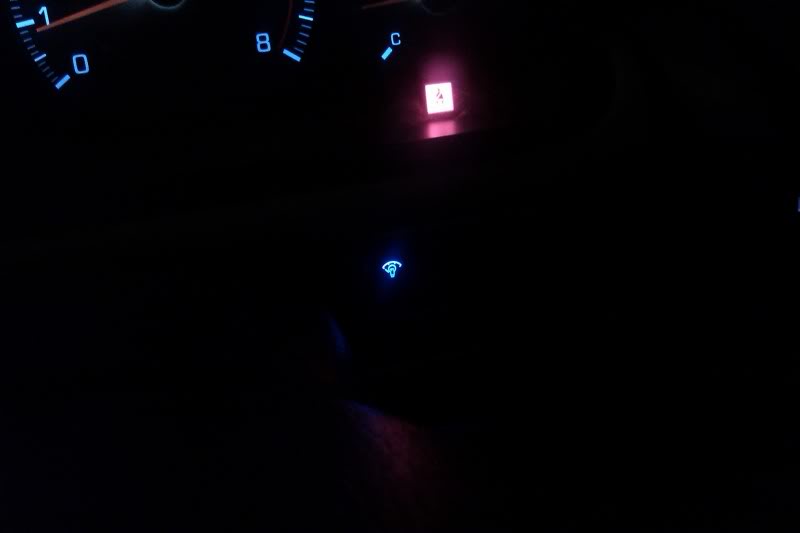
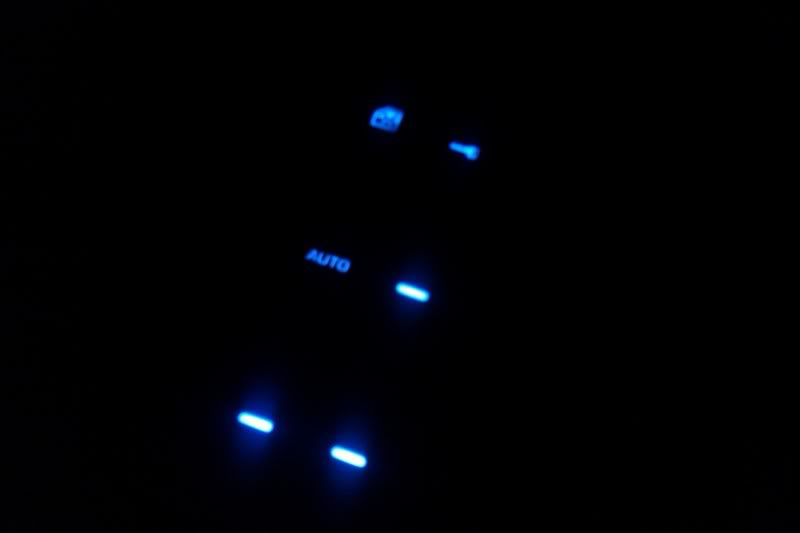
So the blue indicator LEDs were too blinding...very distracting at night. I ended up sanding the LED "bulbs" and going over them afterwards with a white paint pen (white out, basically). PERFECT. Visible during the day still, yet bright and blue at night. Look above at the pic with the 3 blue indicators, taken from my cell phone.
Now look at the pic below, also taken with my cell (same settings):
Much better, no?
Now look at the pic below, also taken with my cell (same settings):
Much better, no?

Junior Member
Joined: Apr 2011
Posts: 47
From: Saint Charles, IL
I couldn't help but want to do some of what you guys are up to after seeing this thread. I generally like to keep it stock/OEM style inside and out, but the lighting in the Maxima is awful. I don't know if my bulbs were just old, but it seemed like they threw less light than any car I've had previously. Threw some SMD panels in the dome, map, trunk and door lights. I'm going to wire in two Cold Cathodes in the footwells that will be on only when the door panel lights are on. That way, when I drop something and turn on the dome light, I can actually see what's what down there.
Before:

After:

Threw a 48 SMD panel in the dome, one in the map, and one in the trunk (not pictured, but a vast improvement). Ordered 2 25 SMD panels for the doors, those are going in with the cold cathode tubes over the weekend.

Before:
After:
Threw a 48 SMD panel in the dome, one in the map, and one in the trunk (not pictured, but a vast improvement). Ordered 2 25 SMD panels for the doors, those are going in with the cold cathode tubes over the weekend.
Last edited by EmergesUnscathed; Mar 6, 2012 at 01:01 PM.
Love those SMD panels! I'm thinking of adding two more to my trunk, and mounting at an angle, wiring it to the other SMD panel I have in there so i'l have 3 separate SMD panels in the trunk...total illumination!!
Dam I'm laggin on my LEDs!! Gonna feel awesome to be able to see all my buttons an dials, didn't even kno some lit up til recently!!
Looks good bro! Do you have any pics of how you soldered in the resistors? Money is tite ATM so I can't afford any oops' lol
Looks good bro! Do you have any pics of how you soldered in the resistors? Money is tite ATM so I can't afford any oops' lol
resistor gets soldered to the positive lead of the LED... and (at least on my 99) on the hazards, defrost, and dimmer switch, the ground lead is on the top of the switch, the positive is the bottom
On the Cruise switch, the positive is the outside, the ground is the inside. You can actually re-use the factory rubber bulb housing and the only soldering you do is the LED to resistor connection.
On the Cruise switch, the positive is the outside, the ground is the inside. You can actually re-use the factory rubber bulb housing and the only soldering you do is the LED to resistor connection.
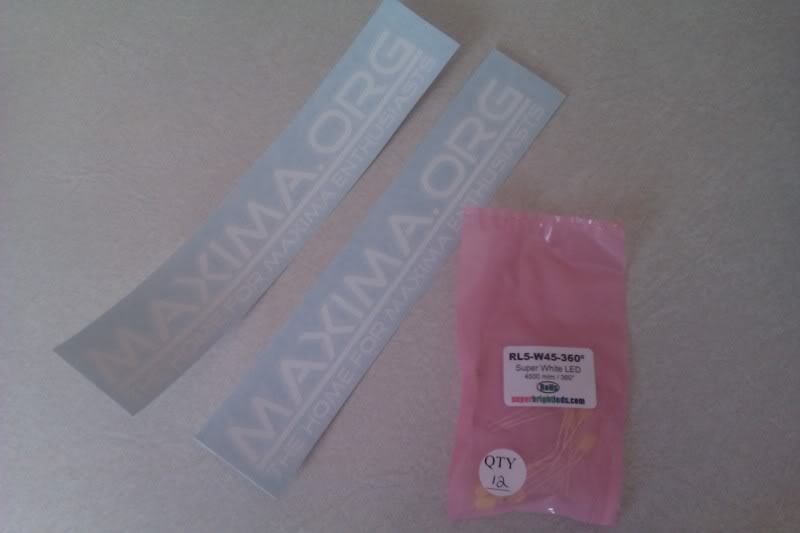
...waiting at the mailbox for me today...
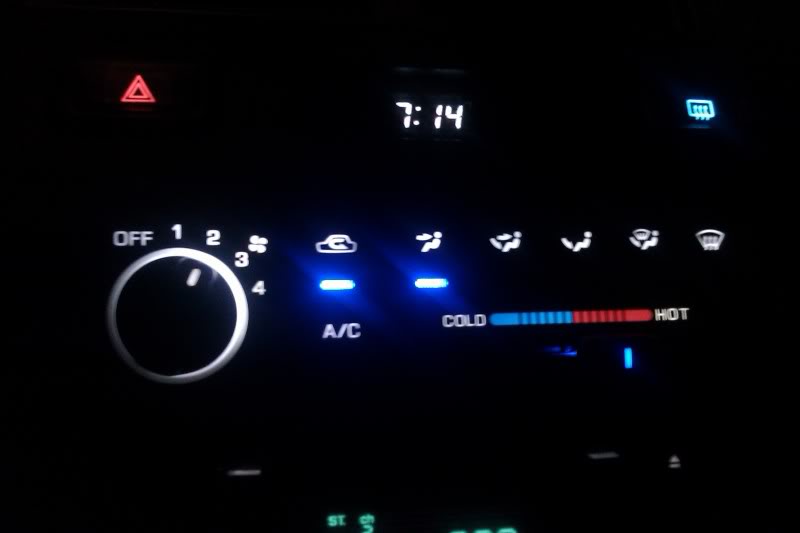
What sucks though...is I'm not sure if I want to do white or blue for the backlighting on my stock radio... white would match the cc backlighting above, while blue would match the shifter below!
What do you guys think? I have the white now, so I will install those up and see if I like it I guess... but my mind keeps straying to see what the blue would be like, especially @ night
Check the "general classifieds", there's a member on here selling them...erty67... 3 bucks each, 1 dollar shipping.
http://forums.maxima.org/general-max...-stickers.html
http://forums.maxima.org/general-max...-stickers.html
99 Factory NON-Bose LED changeover
So this one is actually a bit more of a ***** than I expected it to be...not a "skip lunch and get it done" like I thought.
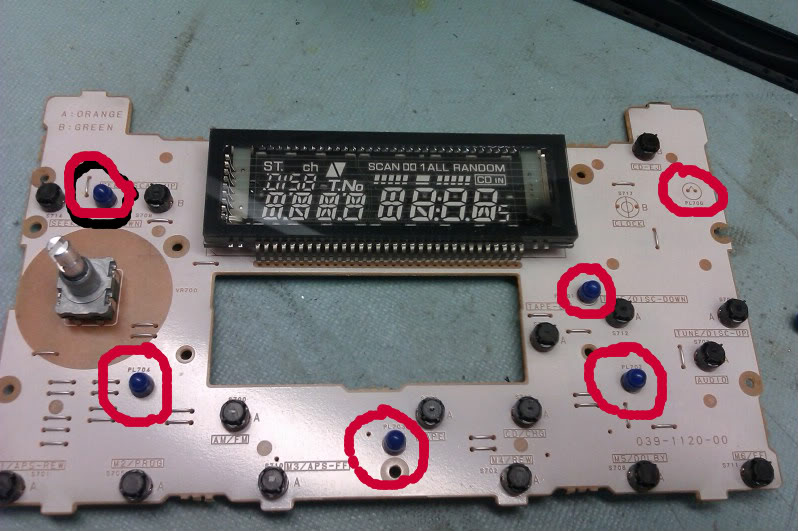
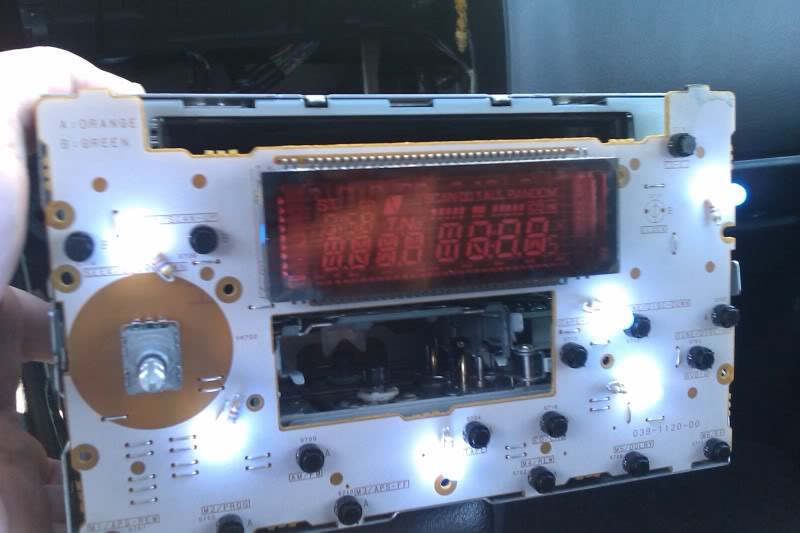
^^ This ^^ is what my factory PCB looks like. I circled the little bulbs (6 of them)...don't worry about the missing one top right corner, I removed that one already. These are little incandescent light bulbs, NOT LEDs as I had hoped. Just makes it a bit more time-consuming, that's all.
I have both 5mm 360* white LEDs as well as regular 30* 3mm white LEDs...I am not sure which ones to use. I'm going to try and use the 5mm 360* LEDs but if space is tight, I'll have to use the smaller ones. BUT a bit if good news: since these all have the little bulb condoms on them I won't have to worry about shoosing white or blue I can pull the little covers off if I want the change
Will edit this post with process as I go along.
EDIT 1:
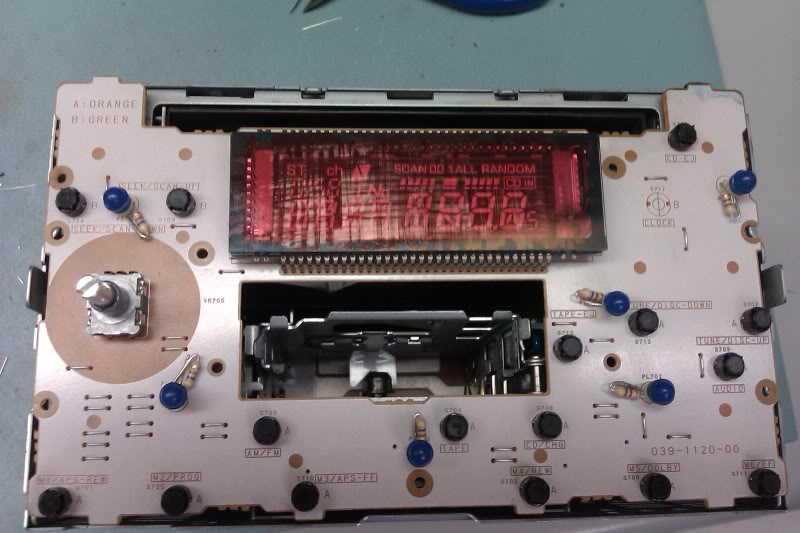
Here is the thing with all the LEDs + resistors installed. VERY tight squeeze with the light diffuser when the faceplate goes on, but first, before the faceplate, we need to plug it in and make sure they work. The red on the VFD is just sharpie...I'm at work right now and I left my cello paper @ home.
...aaaand all lit up:
I removed the red sharpie since it didn't do well at all with regard to readability... will just throw cello paper on when I get home.
very carefully put the faceplate on and re-test with 9V battery to pwr and ground pins, all looks good, with a nice blue coloring to all the buttons... (No pic since I did this when I wasn't on a break - don't tell my boss)
ok, fine...quick pic:
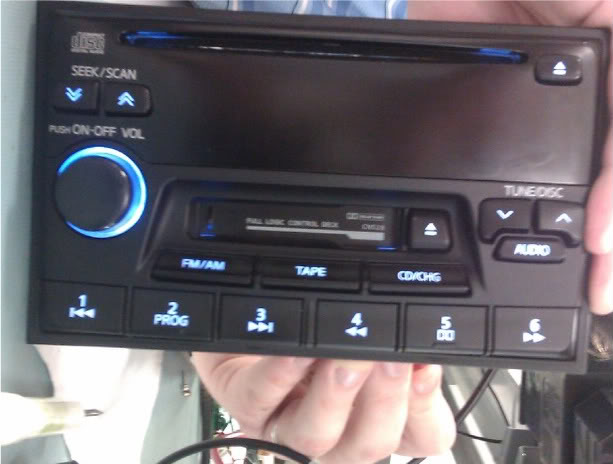
Contrary to how it looks, all of the buttons are nice and evenly lit up in a shade of blue that's perfect! Can't wait to see it in my dark garage when I get home.
This is about as good as it's going to get taken here @ work... Never realized how light it actually is in here until I want it dark...I always thought it was pretty dark in my little corner...
^^ This ^^ is what my factory PCB looks like. I circled the little bulbs (6 of them)...don't worry about the missing one top right corner, I removed that one already. These are little incandescent light bulbs, NOT LEDs as I had hoped. Just makes it a bit more time-consuming, that's all.
I have both 5mm 360* white LEDs as well as regular 30* 3mm white LEDs...I am not sure which ones to use. I'm going to try and use the 5mm 360* LEDs but if space is tight, I'll have to use the smaller ones. BUT a bit if good news: since these all have the little bulb condoms on them I won't have to worry about shoosing white or blue
I can pull the little covers off if I want the changeWill edit this post with process as I go along.
EDIT 1:
Here is the thing with all the LEDs + resistors installed. VERY tight squeeze with the light diffuser when the faceplate goes on, but first, before the faceplate, we need to plug it in and make sure they work. The red on the VFD is just sharpie...I'm at work right now and I left my cello paper @ home.
...aaaand all lit up:
I removed the red sharpie since it didn't do well at all with regard to readability... will just throw cello paper on when I get home.
very carefully put the faceplate on and re-test with 9V battery to pwr and ground pins, all looks good, with a nice blue coloring to all the buttons...
(No pic since I did this when I wasn't on a break - don't tell my boss)ok, fine...quick pic:
Contrary to how it looks, all of the buttons are nice and evenly lit up in a shade of blue that's perfect! Can't wait to see it in my dark garage when I get home.
This is about as good as it's going to get taken here @ work... Never realized how light it actually is in here until I want it dark...I always thought it was pretty dark in my little corner...
Last edited by Amerikaner83; Mar 6, 2012 at 03:34 PM.
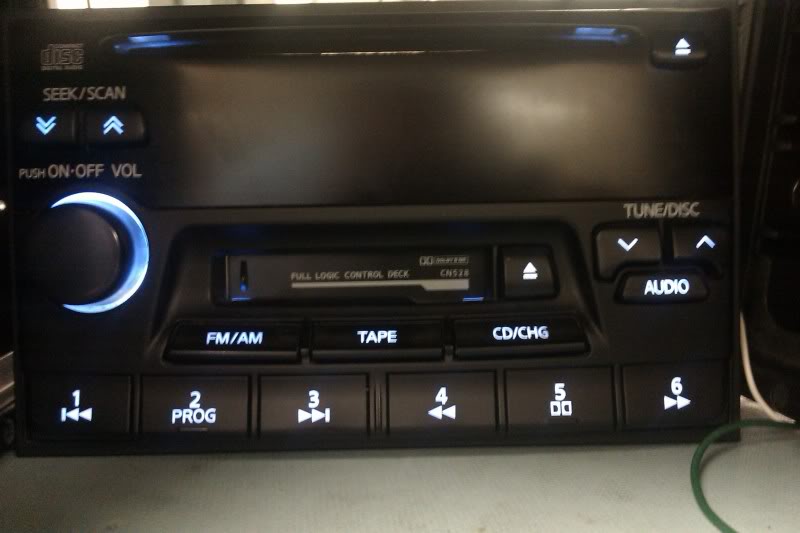
Finished the LED interior...got her all buttoned up again.
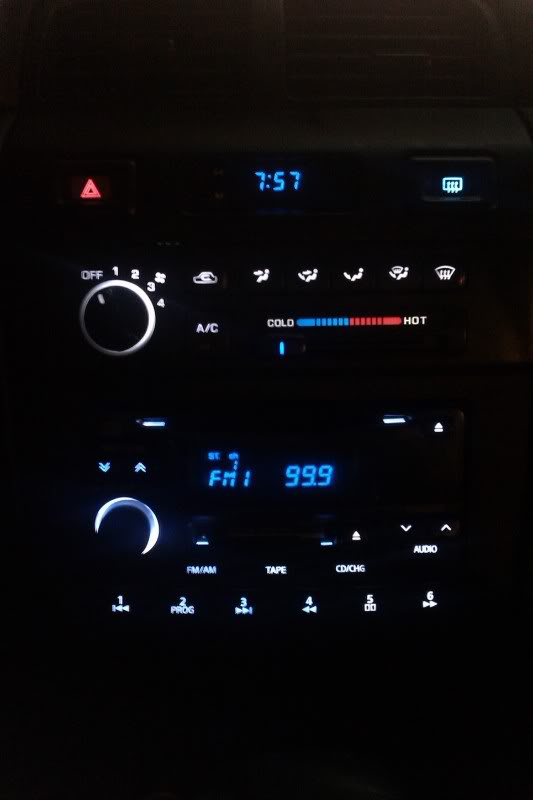
^^ Center console (Radio with white LEDs+blue bulb covers=nice faint blue backlighting)
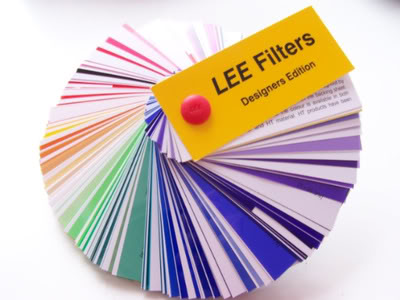
^^This stuff is GREAT!!!!! For changing the clock color. None of that cello paper crap LOL
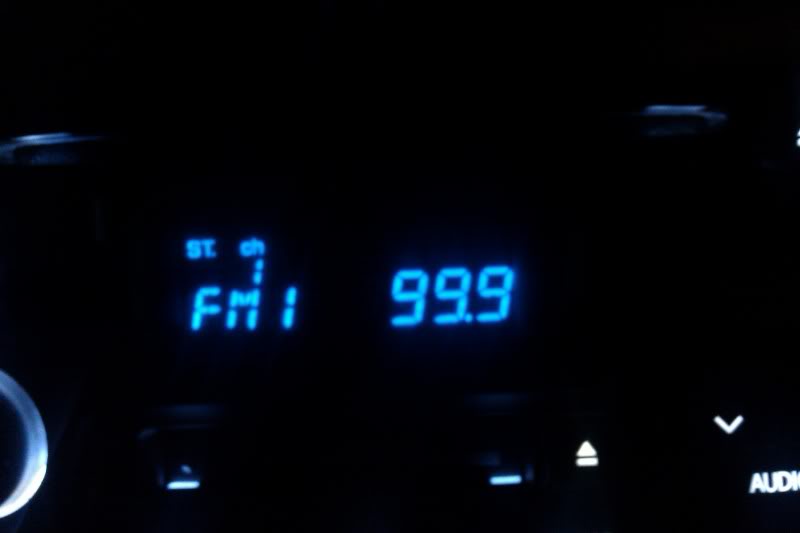
^^Blue filter from LEE Filter media shown above, in radio display
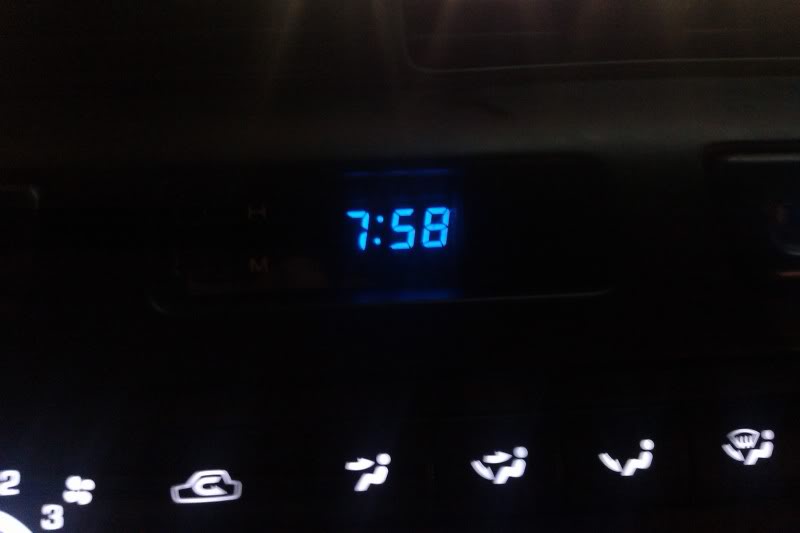
^^ Slightly darker blue filter from LEE media shown above, in clock.
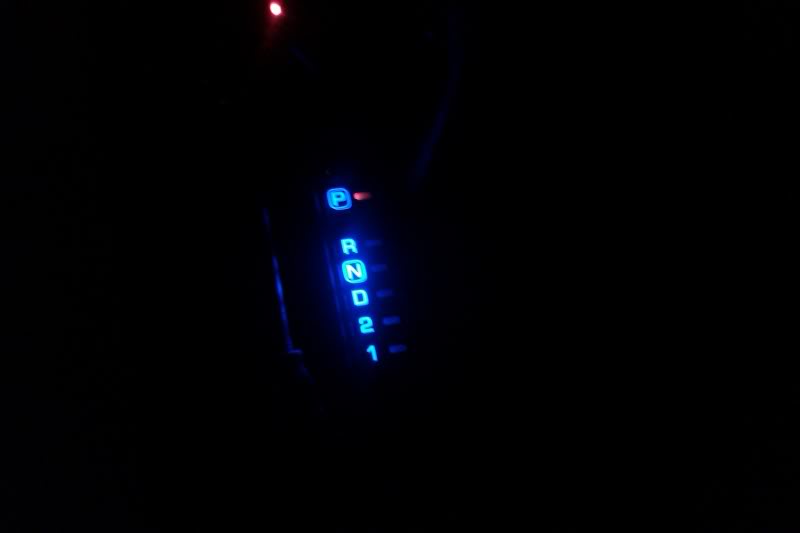
Changed out shifter LED from the bright blue to a less-bright white. Goes better with the subtle-blue of the radio. Mee likey!
^^ Center console (Radio with white LEDs+blue bulb covers=nice faint blue backlighting)
^^This stuff is GREAT!!!!! For changing the clock color. None of that cello paper crap LOL
^^Blue filter from LEE Filter media shown above, in radio display
^^ Slightly darker blue filter from LEE media shown above, in clock.
Changed out shifter LED from the bright blue to a less-bright white. Goes better with the subtle-blue of the radio. Mee likey!
Last edited by Amerikaner83; Mar 7, 2012 at 08:40 PM.

I couldn't help but want to do some of what you guys are up to after seeing this thread. I generally like to keep it stock/OEM style inside and out, but the lighting in the Maxima is awful. I don't know if my bulbs were just old, but it seemed like they threw less light than any car I've had previously. Threw some SMD panels in the dome, map, trunk and door lights. I'm going to wire in two Cold Cathodes in the footwells that will be on only when the door panel lights are on. That way, when I drop something and turn on the dome light, I can actually see what's what down there.
Before:
After:
Threw a 48 SMD panel in the dome, one in the map, and one in the trunk (not pictured, but a vast improvement). Ordered 2 25 SMD panels for the doors, those are going in with the cold cathode tubes over the weekend.
Before:
After:
Threw a 48 SMD panel in the dome, one in the map, and one in the trunk (not pictured, but a vast improvement). Ordered 2 25 SMD panels for the doors, those are going in with the cold cathode tubes over the weekend.
Great Idea with the foot light, functional not just for looks

Really nice work .. I remember I put LEDS in my Bose radio a few years ago then I upgraded my radio all together. Hours of work but worth the happy results when your done.
Last edited by maxprivate; Mar 8, 2012 at 04:14 AM.
They're made for movie lights so I'm not worried about melting or anything...VFDs don't get all that hot. I only spend one dollar on the entire sample pack too, just went into a specialty lighting store local to me (that happens to be a reseller of LEE media) and told him what I was doing, and asked if he'd be cool with me buying the little sample pack. One dollar and I was out of there.
Last edited by Amerikaner83; Mar 8, 2012 at 07:04 AM.
I can't stay away from LEDs!
Just bought two 12SMD panels in BLUE to swap out for the 9SMD panels in WHITE i currently have in my door lights, and a 48SMD BLUE to swap out for the 24 or 36SMD panel in white I currently have for my dome light.
hehehe
Gonna take those white ones and do something nice for the trunk :-)
Just bought two 12SMD panels in BLUE to swap out for the 9SMD panels in WHITE i currently have in my door lights, and a 48SMD BLUE to swap out for the 24 or 36SMD panel in white I currently have for my dome light.
hehehe
Gonna take those white ones and do something nice for the trunk :-)