
V2 officially on board. chalk another one up for CA

Guest
Posts: n/a
V2 officially on board. chalk another one up for CA
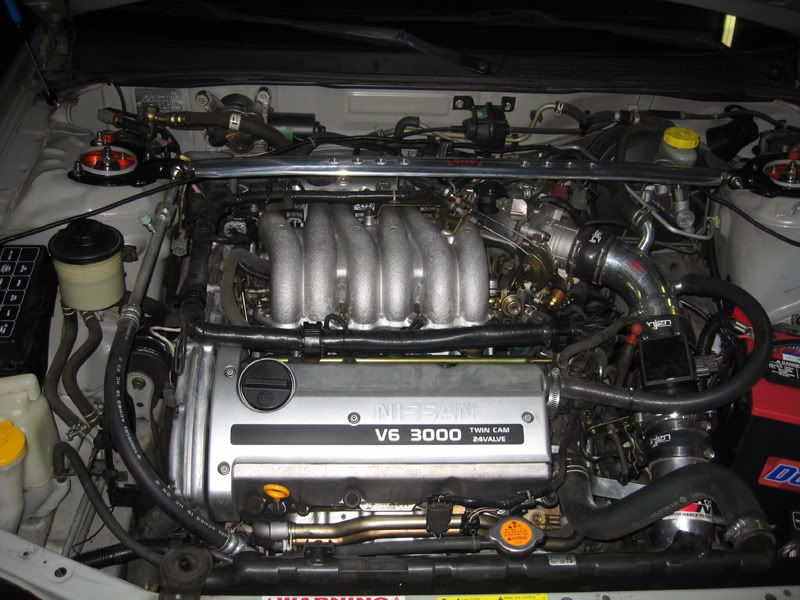
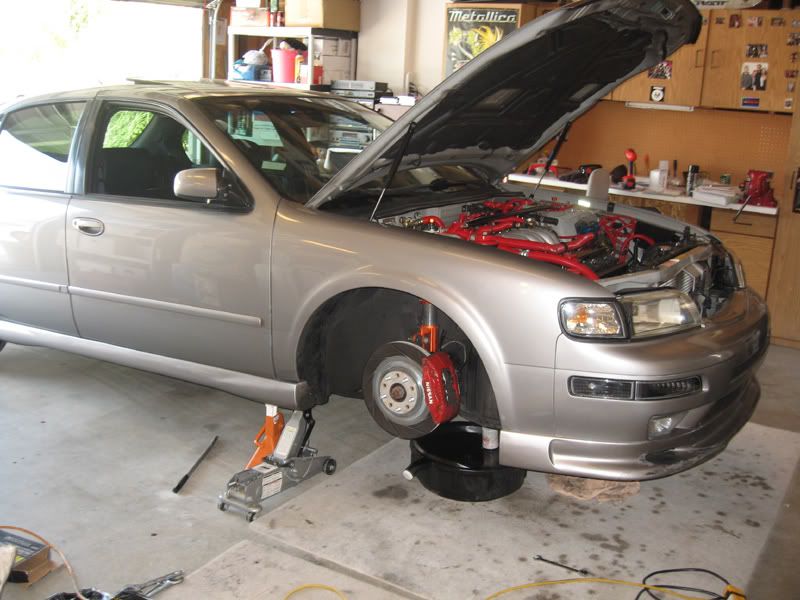
engine bay 2 weeks ago
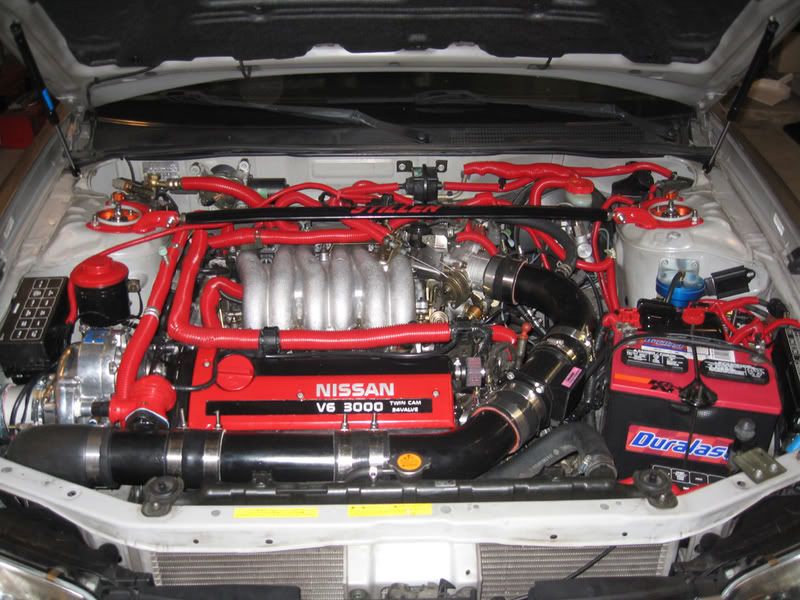
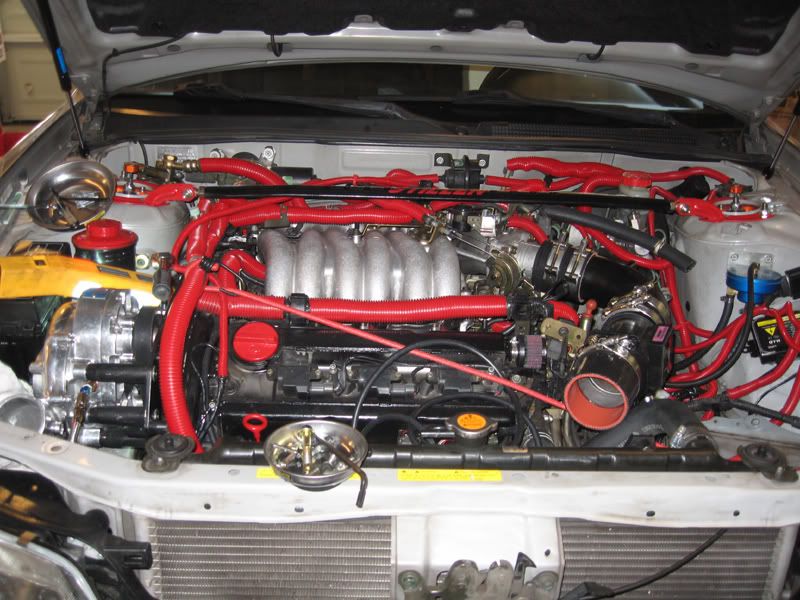
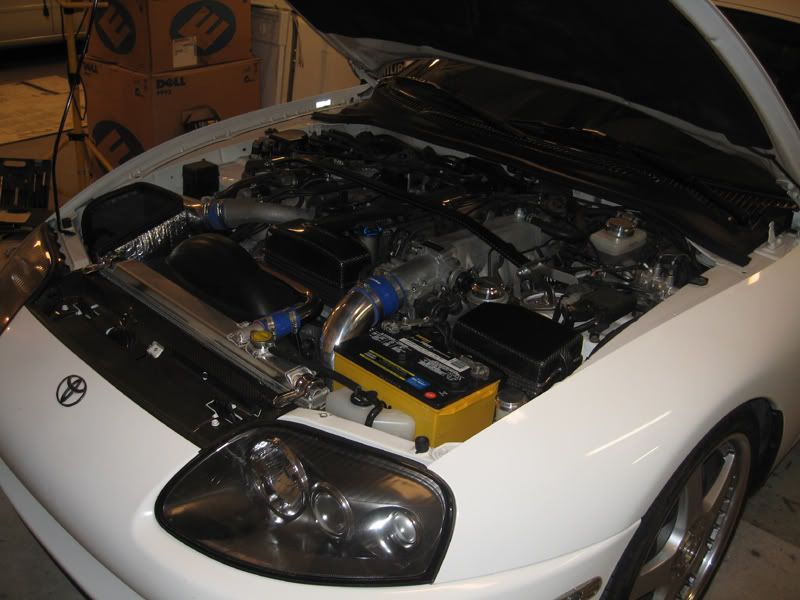
engine bay today
ALL credit goes to Josh (ptatohed) & James (The Wizard) for doing a flawless install. these guys are definetly the gurus when it comes down to this stuff. they knew the entire process like the back of their hands. very very knowledagble and extremly paitent. they treated my car as if it was their own & stayed up late at night ensuring that every step is done right. they went above and beyond all expectations to help out a fellow org member with doors wide open. they paid attention to every single detail and took great care of my car. car started up within 2 seconds, flawlessly and all tools were put aside minutes later. absolutly no tweaks or adjustsments done after start up. true examples of perfectionists. simply put, words can not describe how thankful i am. thank you guys for everything, all the hard work and staying up late at night. thanks for the food, drinks and the guest bedroom. this thread wouldnt exist without these guys.
also wanna thank the .org for all the valuable info, specially i30ds for helping me numerous times to source parts and of course matty for reproducing the v1 plates. creating your own kit with his starter kit is easily managable if the homework is done. we only had to go out for parts ONCE and that was to get PS fluid & some more 5/32 hose since we came up short. and luckily local nissan stealership had a belt tensioner in stock, my stupid mechanic had snapped mine off.
oh and the kid who sold me the kit claiming it was "pretty much a complete kit used for 1000 miles".... bull ****. only thing out of the kit worth while was the V1 starter kit and blower. everything else i bought new/fabricated pre-install. no way in hell this kit was ever mounted on a VQ, never.
V2 on V1
10 PSI Pulley
3" charge pipe all the way
NGK 1 step colder plugs
CAI with monster filter
vortech 8:1
knock off Greddy RS BOV (**** is closed at all times). is anyone using the legit type RS and can vouch for no compressor surge?
walbro 255 lph.
we found out why some of you guys have problems with this pump @ 1/4 tank. the strainer that comes with the walbro is designed in a way that it sits facing up once in a tank therefore when gas drops to 1/4 full, it cant suck up the remaining 1/4. the stock pump has the strainer parallel to the bottom of the gas tank sucking up every last drop of gas where as the strainer on the walbro faces up. use stock strainer on the walbro and all problems solved. thanks james & josh for noticing this !
engine bay today
ALL credit goes to Josh (ptatohed) & James (The Wizard) for doing a flawless install. these guys are definetly the gurus when it comes down to this stuff. they knew the entire process like the back of their hands. very very knowledagble and extremly paitent. they treated my car as if it was their own & stayed up late at night ensuring that every step is done right. they went above and beyond all expectations to help out a fellow org member with doors wide open. they paid attention to every single detail and took great care of my car. car started up within 2 seconds, flawlessly and all tools were put aside minutes later. absolutly no tweaks or adjustsments done after start up. true examples of perfectionists. simply put, words can not describe how thankful i am. thank you guys for everything, all the hard work and staying up late at night. thanks for the food, drinks and the guest bedroom.
this thread wouldnt exist without these guys.also wanna thank the .org for all the valuable info, specially i30ds for helping me numerous times to source parts and of course matty for reproducing the v1 plates. creating your own kit with his starter kit is easily managable if the homework is done. we only had to go out for parts ONCE and that was to get PS fluid & some more 5/32 hose since we came up short. and luckily local nissan stealership had a belt tensioner in stock, my stupid mechanic had snapped mine off.
oh and the kid who sold me the kit claiming it was "pretty much a complete kit used for 1000 miles".... bull ****. only thing out of the kit worth while was the V1 starter kit and blower. everything else i bought new/fabricated pre-install. no way in hell this kit was ever mounted on a VQ, never.
V2 on V1
10 PSI Pulley
3" charge pipe all the way
NGK 1 step colder plugs
CAI with monster filter
vortech 8:1
knock off Greddy RS BOV (**** is closed at all times). is anyone using the legit type RS and can vouch for no compressor surge?
walbro 255 lph.
we found out why some of you guys have problems with this pump @ 1/4 tank. the strainer that comes with the walbro is designed in a way that it sits facing up once in a tank therefore when gas drops to 1/4 full, it cant suck up the remaining 1/4. the stock pump has the strainer parallel to the bottom of the gas tank sucking up every last drop of gas where as the strainer on the walbro faces up. use stock strainer on the walbro and all problems solved. thanks james & josh for noticing this !


Guest
Posts: n/a
i am auto for now
well on my way back i was on the highway at about 3k rpm and i dumped the pedal once and i felt a bit of pull. my wheels hold me back and it threw a P1447 code back on cuz of my EVAP. the piping was given to me when i bought the kit but i had to fabricate it more pre & during install. i think its from intakehoses.com very very veryyyy lightweight pipes, so thin that the T bolt clamps can easily bend them.
Originally Posted by QnzMax
Wooohhhoooo! Once you push it a little, trust me you'll feel it. Insanely clean install bro. Platohead and TheWizard did an amazing job. Where did you source your full 3" charge piping?
well on my way back i was on the highway at about 3k rpm and i dumped the pedal once and i felt a bit of pull. my wheels hold me back and it threw a P1447 code back on cuz of my EVAP. the piping was given to me when i bought the kit but i had to fabricate it more pre & during install. i think its from intakehoses.com very very veryyyy lightweight pipes, so thin that the T bolt clamps can easily bend them.


nice looks like all your research finally paid off
very very clean install. Fix that BOV and get on it, then you'll really see what all that research and part sourcing was for
- Dan
very very clean install. Fix that BOV and get on it, then you'll really see what all that research and part sourcing was for
- Dan

Congrats on the setup, what really made me happy was the clarifiying of why the walbros fail, I've been holding off on installing mines for that reason, now i know to just keep the stock strainer.
Turbo install..one part at a time.
Hope that suggestion fixes that bov problem for ya.
Turbo install..one part at a time.
Hope that suggestion fixes that bov problem for ya.
Guest
Posts: n/a
Originally Posted by Ghase
Check the vac lines and adjust screw on bov. I had the same problem on my 240sx with the real Greddy Type RS.
Originally Posted by maxgtr2000
Congrats on the setup, what really made me happy was the clarifiying of why the walbros fail, I've been holding off on installing mines for that reason, now i know to just keep the stock strainer.
Turbo install..one part at a time.
Hope that suggestion fixes that bov problem for ya.
Turbo install..one part at a time.
Hope that suggestion fixes that bov problem for ya.
hehe, do what i told u and the walbro works like a champ. matter of fact, we started the install with gas light on, and after the install it started right up and we took it for a cruize no problems.
Oh **** I forgot to tell you that it's 2 springs inside that bov, take the harder one out by unscrewing the 6 or 7 screws on top!!!!!!!!!!!!!! It should work now.....
***Check and see how easy it blows off once you do it, because I'm thinking the SC will work better with the harder spring due to how much cfm it pushes out. My turbo 240sx with the small T25 turbo work great with the soft spring, but note that turbo is big as my HAND....LOL
***Check and see how easy it blows off once you do it, because I'm thinking the SC will work better with the harder spring due to how much cfm it pushes out. My turbo 240sx with the small T25 turbo work great with the soft spring, but note that turbo is big as my HAND....LOL

Congratulations again Michael. That was fun. And, again, thanks for the thanks. It's always a pleasure to help out someone who is so grateful.
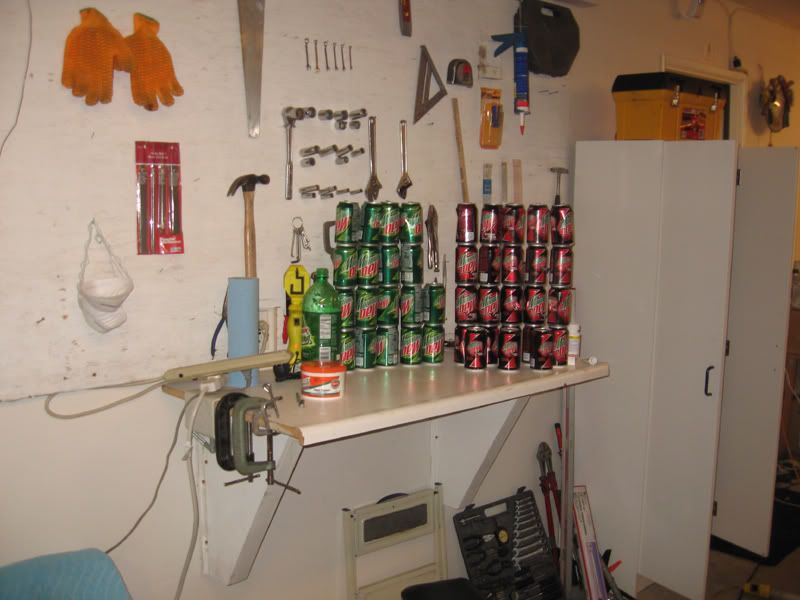
I love the picture of the Dews - boy were we "chain drinking"! Too bad we didn't take a picture of the multiple Little Caesar's pizza boxes.
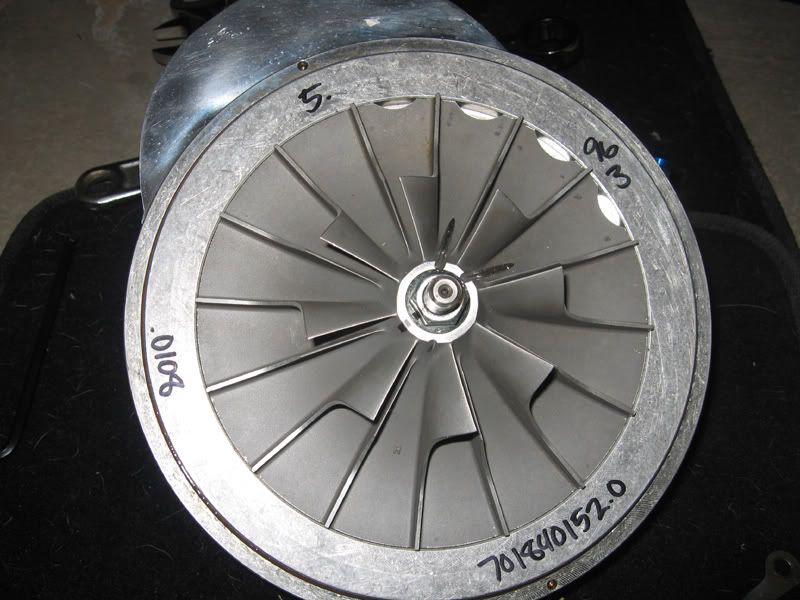
Speaking of pictures, you better post up the obligatory photo of you holding the snail prior to installation (and re-installation….. and re-installation)!
Like, Mike said, it went pretty well. No major roadblocks. Probably the biggest curve ball we were thrown was, instead of the blower pulley being screwed in from behind by a flush allen bolt, it was screwed in by a 3-D hex bolt (which of course collided with the timing cover). We had to sand it down to about 40-50% of its original thickness. Needless to say, the blower came on and off a few times. :/ We only had to do one trip to the store(s) (not including the few times we sent out my little sister to pick up more Dew and pizza). James and I had never installed a V1 plate before so there was a little twist there but we adapted easily. Everything else went pretty smooth.
Michael did a great job. He did all his homework ahead of time, he helped with the install the whole time, he endured our heavy metal music, he tolerated our bad jokes, he lived off of 4 hours of sleep each night and he survived a major allergy/cold attack!
It took us about 30 hours total, maybe a little more, including a CAI and an electronic boost gauge ‘almost’ installed (a few wires left to be installed with “T” taps). We lived primarily off of a diet consisting of Mountain Dew and pizza. It was literally a blood, sweat and tears job (Jim cut his finger with an Exacto knife, I sweated like a pig and Mike had watery eyes with his allergy attack).
Good times.
- Josh
I love the picture of the Dews - boy were we "chain drinking"! Too bad we didn't take a picture of the multiple Little Caesar's pizza boxes.
Speaking of pictures, you better post up the obligatory photo of you holding the snail prior to installation (and re-installation….. and re-installation)!
Like, Mike said, it went pretty well. No major roadblocks. Probably the biggest curve ball we were thrown was, instead of the blower pulley being screwed in from behind by a flush allen bolt, it was screwed in by a 3-D hex bolt (which of course collided with the timing cover). We had to sand it down to about 40-50% of its original thickness. Needless to say, the blower came on and off a few times. :/ We only had to do one trip to the store(s) (not including the few times we sent out my little sister to pick up more Dew and pizza). James and I had never installed a V1 plate before so there was a little twist there but we adapted easily. Everything else went pretty smooth.
Michael did a great job. He did all his homework ahead of time, he helped with the install the whole time, he endured our heavy metal music, he tolerated our bad jokes, he lived off of 4 hours of sleep each night and he survived a major allergy/cold attack!
It took us about 30 hours total, maybe a little more, including a CAI and an electronic boost gauge ‘almost’ installed (a few wires left to be installed with “T” taps). We lived primarily off of a diet consisting of Mountain Dew and pizza. It was literally a blood, sweat and tears job (Jim cut his finger with an Exacto knife, I sweated like a pig and Mike had watery eyes with his allergy attack).
Good times.
- Josh

Originally Posted by ptatohed
Congratulations again Michael. That was fun. And, again, thanks for the thanks. It's always a pleasure to help out someone who is so grateful.
I love the picture of the Dews - boy were we "chain drinking"! Too bad we didn't take a picture of the multiple Little Caesar's pizza boxes.
Speaking of pictures, you better post up the obligatory photo of you holding the snail prior to installation (and re-installation�.. and re-installation)!
Like, Mike said, it went pretty well. No major roadblocks. Probably the biggest curve ball we were thrown was, instead of the blower pulley being screwed in from behind by a flush allen bolt, it was screwed in by a 3-D hex bolt (which of course collided with the timing cover). We had to sand it down to about 40-50% of its original thickness. Needless to say, the blower came on and off a few times. :/ We only had to do one trip to the store(s) (not including the few times we sent out my little sister to pick up more Dew and pizza). James and I had never installed a V1 plate before so there was a little twist there but we adapted easily. Everything else went pretty smooth.
Michael did a great job. He did all his homework ahead of time, he helped with the install the whole time, he endured our heavy metal music, he tolerated our bad jokes, he lived off of 4 hours of sleep each night and he survived a major allergy/cold attack!
It took us about 30 hours total, maybe a little more, including a CAI and an electronic boost gauge �almost� installed (a few wires left to be installed with �T� taps). We lived primarily off of a diet consisting of Mountain Dew and pizza. It was literally a blood, sweat and tears job (Jim cut his finger with an Exacto knife, I sweated like a pig and Mike had watery eyes with his allergy attack).
Good times.
- Josh

Congrats on the blower!!! Shall be fun once you get that BOV issue figured out. But I'll have to agree with JSutter, that loom has to GO. It sticks out more than the blower piping, lol. Besides that, looking great! Let us know how it feels once its operational (dyno n track times please!!!)


looks good man minus all the red accents. I'm not much of a fan of that stuff. looks like a nice clean install none the less.
damnit. looks like I need to step my game up and get the rest of my parts together. lol my blower should be back this week. hopefully that'll be some motivation for me to get the ball rolling.
damnit. looks like I need to step my game up and get the rest of my parts together. lol my blower should be back this week. hopefully that'll be some motivation for me to get the ball rolling.

Originally Posted by VIP Maxima
lol, i pushed it a bit today and the auto kills it. by the time u feel any real boost that damn auto tranny dumps it into next gear. 5spd swap is next !!!
I've got a tranny for you my friend. only 10k miles on it.
Ahhhh......the joys of doing a SC install. 2 days and 3 showers later, my hands and fingernails are still stained with dirt and grime. LOL
I'm glad to hear and read that you're very happy with the install. Like Josh said, it's cool that you're very appreciative and grateful for the work we did.
And like others have said, you pulled it off!! You're the 3rd owner of this "kit" but the 1st to actually get it installed! You spent countless hours gathering the correct parts after extensive research on the org, many PM's to myself and others, reading Josh's SCIFD writeup over and over etc etc. Your efforts definitely made the install easier. Great job Mike.
I can already see you at the next car show... you'll have your car parked and the hood popped in seconds.....you finally got some 'Go' to go with your 'Show'
Enjoy the Boooooooooooooooooooooooost!!!
I'm glad to hear and read that you're very happy with the install. Like Josh said, it's cool that you're very appreciative and grateful for the work we did.
And like others have said, you pulled it off!!
You're the 3rd owner of this "kit" but the 1st to actually get it installed! You spent countless hours gathering the correct parts after extensive research on the org, many PM's to myself and others, reading Josh's SCIFD writeup over and over etc etc. Your efforts definitely made the install easier. Great job Mike. I can already see you at the next car show... you'll have your car parked and the hood popped in seconds.....you finally got some 'Go' to go with your 'Show'
Enjoy the Boooooooooooooooooooooooost!!!

wow....did mike pay attention?...very surprise...good thing he really jumped into the project...its not really deep down worthy unless you do your own...good job Mike... now you know its a PITA. again James and Josh you are and the S/C gurus...you are lucky to have them to help you out...now you know how and what it takes to put that **** together....yup about 2 daze...WOW ...30 hours....dang...much prop to ya..I know when it comes down to blood sweat and tears it is all true....we shall meet again...let our boosted max reunite... can't wait to meet again...let's do a boosted max meet.
Glad to see the teamwork but where were you guys when he started looming everything up! Code Red got into you Mike!
Always like to hear about good experiences off the .org, congrats on the trouble free install and enjoy it!
Always like to hear about good experiences off the .org, congrats on the trouble free install and enjoy it!
Originally Posted by The Wizard
Ahhhh......the joys of doing a SC install. 2 days and 3 showers later, my hands and fingernails are still stained with dirt and grime. LOL
I hear you! Guess what I am doing right now? Eating left-over Little Caesar's pizza (for the 4th day in a row) for lunch, with black hands

Guest
Posts: n/a
darn it, i just installed the legit greddy BOV. same thing, it doesnt open at idle. it doesnt open when i rev it either. matter of fact, when i rev it, i see the valve inside close further more. this is frustrating. is the bov suppose to be open at idle? when i rev the car i hear this PFFFFpffppfpfpfpfpffff noise which is compressor surge. bov never opens.
im begining to think im not making real boost. i went WOT on highway today and my boost gauge only read 2.5 psi and the car didnt feel all that fast...... but then again according to autometer, my boost gauge is defective and i have to send it back because when i turn off the car, the needle doesnt go back to 0 and it just stays at 8 vac.
im begining to think im not making real boost. i went WOT on highway today and my boost gauge only read 2.5 psi and the car didnt feel all that fast...... but then again according to autometer, my boost gauge is defective and i have to send it back because when i turn off the car, the needle doesnt go back to 0 and it just stays at 8 vac.
Originally Posted by VIP Maxima
darn it, i just installed the legit greddy BOV. same thing, it doesnt open at idle. it doesnt open when i rev it either. matter of fact, when i rev it, i see the valve inside close further more. this is frustrating. is the bov suppose to be open at idle? when i rev the car i hear this PFFFFpffppfpfpfpfpffff noise which is compressor surge. bov never opens.
im begining to think im not making real boost. i went WOT on highway today and my boost gauge only read 2.5 psi and the car didnt feel all that fast...... but then again according to autometer, my boost gauge is defective and i have to send it back because when i turn off the car, the needle doesnt go back to 0 and it just stays at 8 vac.
im begining to think im not making real boost. i went WOT on highway today and my boost gauge only read 2.5 psi and the car didnt feel all that fast...... but then again according to autometer, my boost gauge is defective and i have to send it back because when i turn off the car, the needle doesnt go back to 0 and it just stays at 8 vac.
At idle, you should feel air coming out of the BOV. If not, try the adjustment screw (but after fully reading the instructions) as sometimes going too far in either direction can damage/mess up the diaphrams/stuff inside.
When you rev it and you see it closing more, it's doing its job. The question is, is it closing all the way during part throttle/WOT? If not, there's goes some boost.
Does it come with multiple springs?
See my PM regarding the Boost gauge.
Prior, you mentioned getting an EVAP code and you didn't seem too concerned, as if you had a previous known problem. Do you have any EVAP stuff disconnected or any other mods/bypasses done in the engine bay??
Guest
Posts: n/a
ive had the evap for a few months and im slowly diagnosting what it is. its hard to source it. i changed my fuel cap and it went away for 3 weeks but came back on after sc install. something i need to take care of.
as for the BOV. i took it apart. there are 2 springs inside, one is softer than the other. taking out either spring results to open bov valve @ idle. now using the screw on top, i can adjust how open i want the valve to be. when i rev it, yes it does close and open back up. but i also get compressor surge too if reved to redline. i tested the car to redline in 1st gear multiple times with different settings, none of that nice PSTTT blow off valve sound and lots of compressor surge. also the car doesnt seem to pull in 1st gear visiting redline.
from what i can understand, the key to setting the BOV is having it open enough that when reved up, u want it to close immediatly !