5.5 gen 6 speed swap
 05-25-2014, 08:43 AM
#41

 05-25-2014, 08:52 AM
#42

I wasn't going to but I found a local transmission shop that has experience with dual mass flywheels and after they looked at it they determined that it could be locked down in their machine and done properly. It's a bit of a risk but the alternative is a new one at $500. I did go the route of a new Exedy clutch kit however.
05-25-2014, 10:15 AM
#43
Senior Member

Join Date: Jul 2011
Location: Ottawa, ON
Posts: 361
@Maverick. I know its not a big deal but its not mentioned anywhere. And due to the fact that dealers no longer carry this part he's **** out of luck for the metal piece. If he wants to know EVERYTHING then there is everything. Just wanted to put it out there.
05-28-2014, 07:55 AM
#44
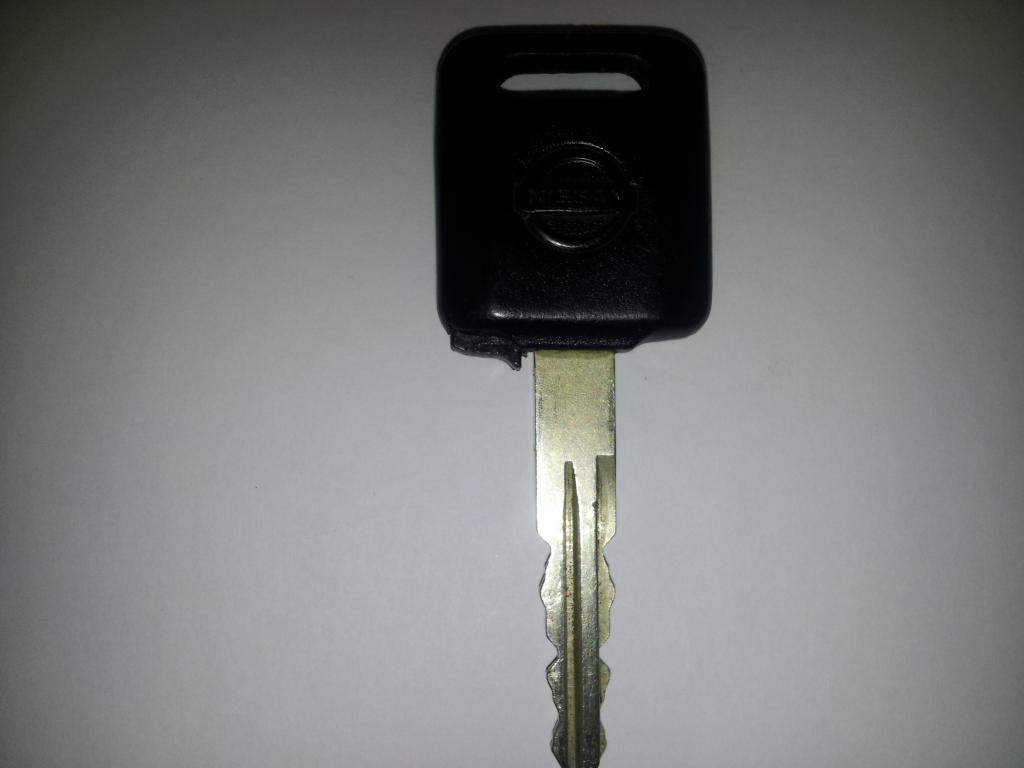
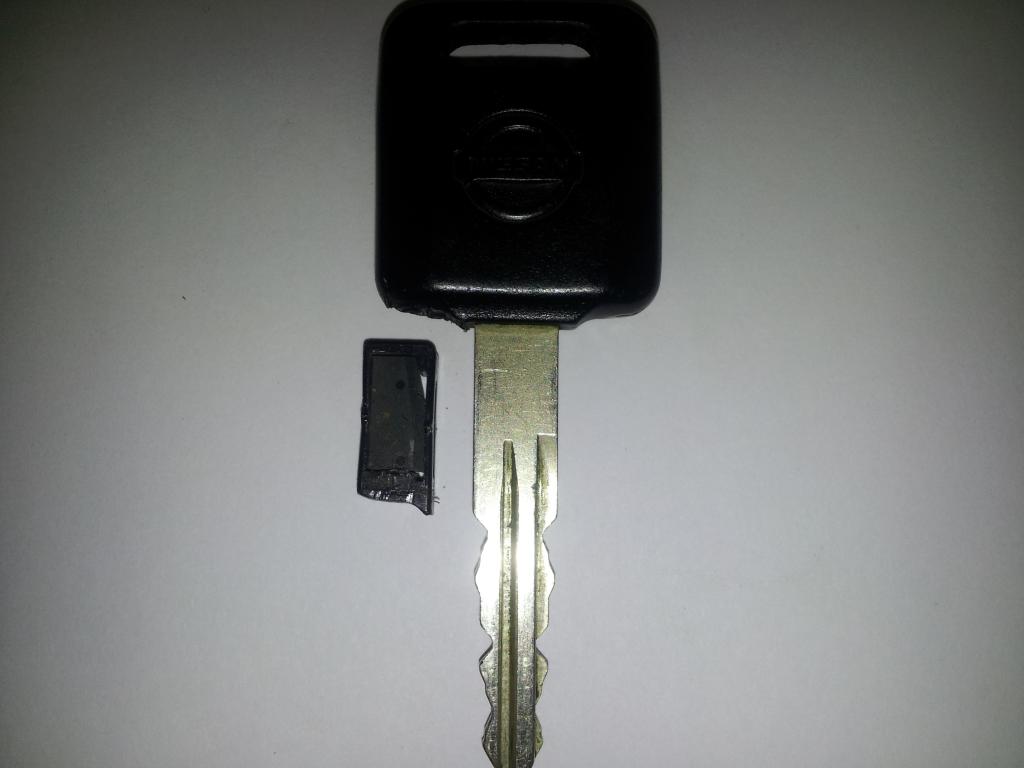
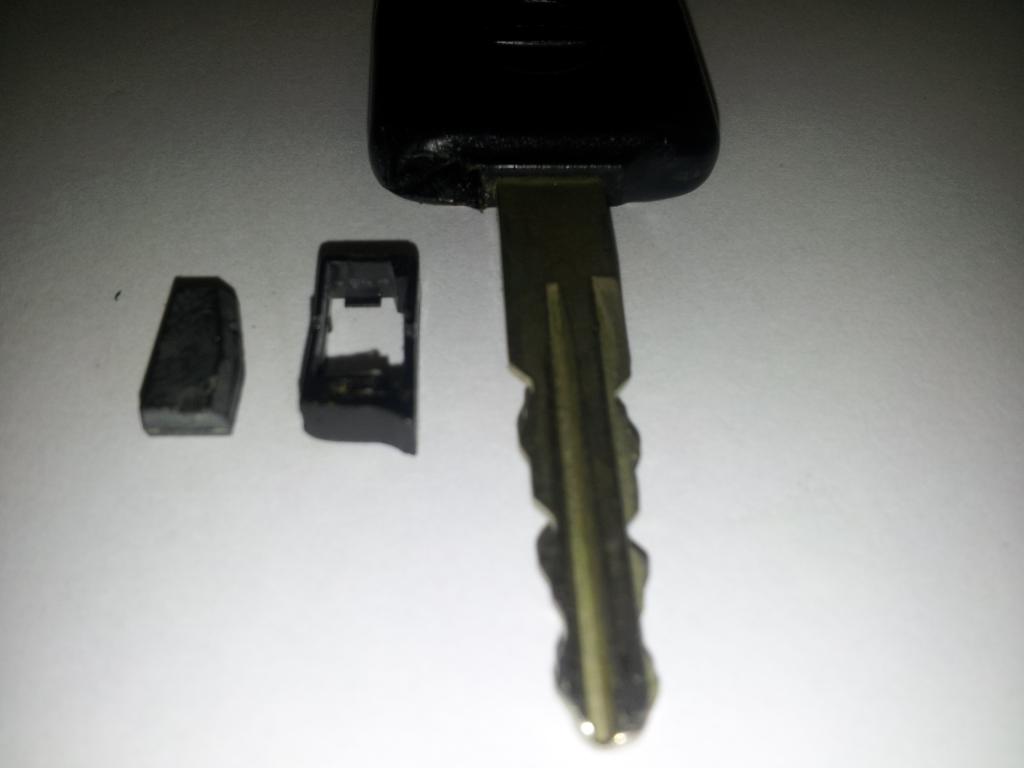
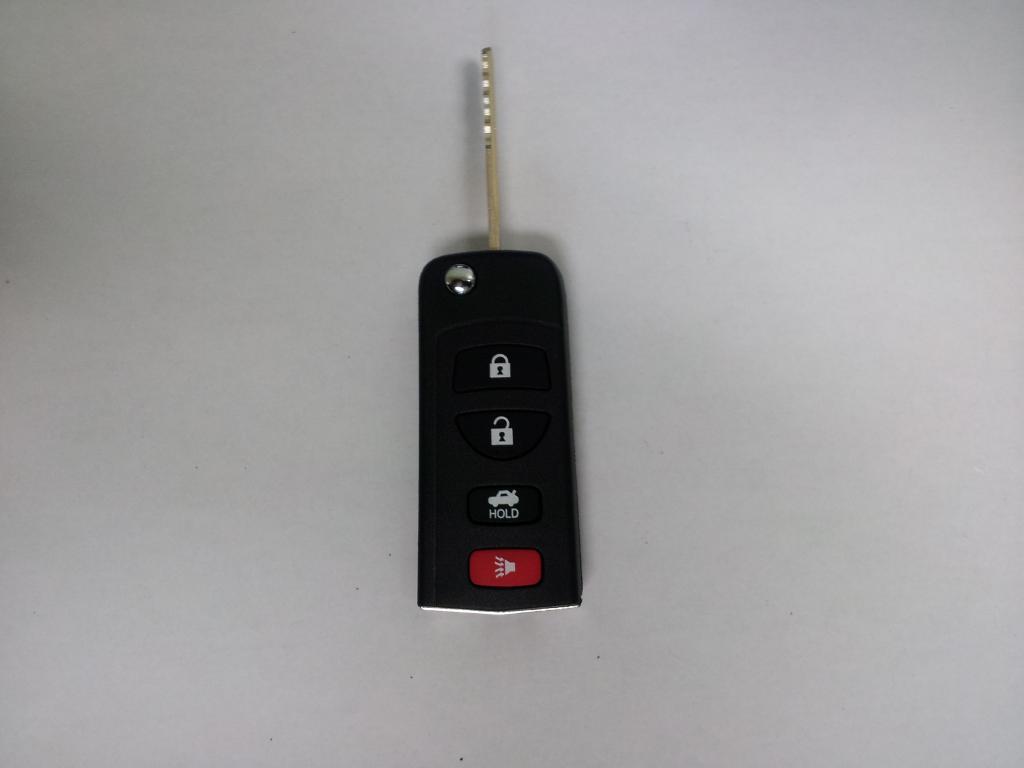
I was thinking about the immobilizer issue when the new manual ecu gets put in. I don't want the hassle of going to the dealer so I started to look at the donor car key. In 5 minutes I had removed the immobilizer chip. Really easy to do. I've ordered a blank flip key shell for $12 from ebay. Once it comes in I'll get the key cut and drop the key fob guts and manual immobilizer chip into it and I'll be ready once the swap is complete. $12 instead of $100+.
06-17-2014, 03:16 PM
#45
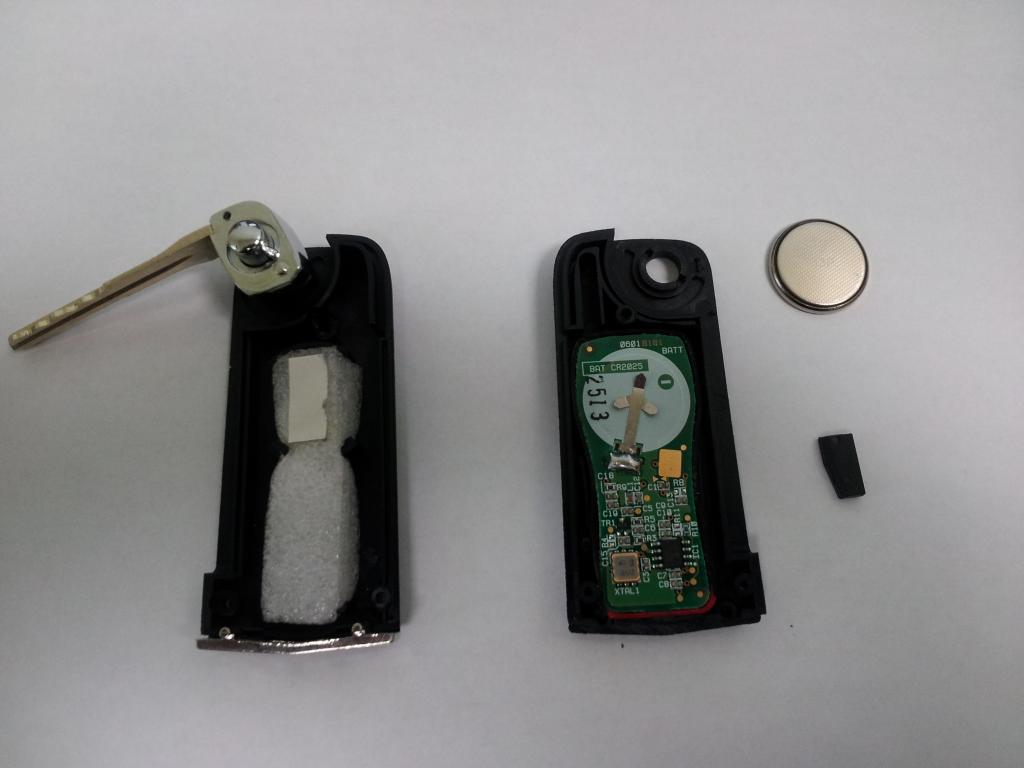
ebay flip key came in. Got it cut for free at a dealership because I was picking up some other parts. 15min to swap the guts and taped the manual immobilizer chip inside. Now if I could only find the time to actually do the swap!")
 07-01-2014, 08:42 AM
#48


 08-30-2014, 08:26 PM
#51
Started this the other day.
Some how I missed this though -- does the AT trans mount have to be cut off? In all the research I saw that you need to reuse the physical mount from the manual donor but now I've realized the AT mount is welded on vs. bolted on.
What did people do to remove this? Cut, grind??
And what method did you use to attach the manual? Bolt or weld?
08-31-2014, 06:41 AM
#53
Started this the other day.
Some how I missed this though -- does the AT trans mount have to be cut off? In all the research I saw that you need to reuse the physical mount from the manual donor but now I've realized the AT mount is welded on vs. bolted on.
What did people do to remove this? Cut, grind??
And what method did you use to attach the manual? Bolt or weld?
Some how I missed this though -- does the AT trans mount have to be cut off? In all the research I saw that you need to reuse the physical mount from the manual donor but now I've realized the AT mount is welded on vs. bolted on.
What did people do to remove this? Cut, grind??
And what method did you use to attach the manual? Bolt or weld?
09-03-2014, 07:26 PM
#55

I've been lucky on all 3 of my 6mt swaps, I drill and tap my holes OEM style, makes it easier for removal. But there is not that much material on the frame so becareful... If ya fck up you'll have to nut n bolt it.
 09-04-2014, 10:40 AM
#58
Not yet. The big stuff is done. Now the interior stuff - shifter, pedals, master cylinder, engine harness, ECU, etc.. Oh and the exhaust is off and gutted. Just need to reinstall.
09-11-2014, 07:37 PM
#59
Immobilizer issue
Ok. I've run into an immobilizer issue with this swap. I got everything back together today and as luck would have it I accidently left the old key with the chip programmed to the old auto ECU in the ignition when I connected the battery. Ugh. I quickly realized and removed but when I tried to start it now with the new key with the MT chip in it for the swapped ECU I get a solid red security light. It cranks which is great but nothing else. I have code P1610 an P1650.
Please tell me there is a way to reset the ECU so that I can start this thing without having to take to the dealer?
Please tell me there is a way to reset the ECU so that I can start this thing without having to take to the dealer?
 09-12-2014, 02:58 AM
#61

Ok. I've run into an immobilizer issue with this swap. I got everything back together today and as luck would have it I accidently left the old key with the chip programmed to the old auto ECU in the ignition when I connected the battery. Ugh. I quickly realized and removed but when I tried to start it now with the new key with the MT chip in it for the swapped ECU I get a solid red security light. It cranks which is great but nothing else. I have code P1610 an P1650.
Please tell me there is a way to reset the ECU so that I can start this thing without having to take to the dealer?
Please tell me there is a way to reset the ECU so that I can start this thing without having to take to the dealer?
The keys are "registered" into both the ECU and the NATS unit in the steering column. So unless you can get the corresponding IMMU unit from the donor car, you're stuck.
The bad news is that no one has ever found a way to "reset" the car after it has been immobilized. So you're kinda screwed.
You can take the car (tow) to the dealer or call a local locksmith and have them come out and do it. The local locksmith will probably be cheaper but call and get quotes from the dealer as well as several locksmiths.
If you don't have a spare key or need some extras, this would be the time to do it.

 09-12-2014, 06:21 AM
#63
It's alive!!!
Ok problem solved with no call to locksmith.
What I did was swap out the NATS IMMU unit in the steering column so that I had both the MT ECU and IMMU. There is a sequence to escape from Lock Mode of turning ignition on - wait 5 seconds - turn ignition off - repeat 2 more times - then start the car. When I turned the key to start it fired right up.
Thanks for the help.
09-12-2014, 06:42 AM
#64
It's alive!!!
Ok problem solved with no call to locksmith.
What I did was swap out the NATS IMMU unit in the steering column so that I had both the MT ECU and IMMU. There is a sequence to escape from Lock Mode of turning ignition on - wait 5 seconds - turn ignition off - repeat 2 more times - then start the car. When I turned the key to start it fired right up.
Thanks for the help.
Ok problem solved with no call to locksmith.
What I did was swap out the NATS IMMU unit in the steering column so that I had both the MT ECU and IMMU. There is a sequence to escape from Lock Mode of turning ignition on - wait 5 seconds - turn ignition off - repeat 2 more times - then start the car. When I turned the key to start it fired right up.
Thanks for the help.
09-13-2014, 08:12 AM
#65
Beware of Beck Arnley front manual engine mount 104-1754. It was sent to me when I ordered it and it looked different from the auto but I thought what the hell it must be right I'll put it on. Wow! The vibration at idle was crazy. I just swaped back to the auto for now and vibration gone. Anyone have a part number of one that actually fits. They seem to be hard to pinpoint. For example the Rock Auto ones look the same and when you cross reference their part numbers on the Beck website you get the 104-1754 which says it is only for 95-99.
Here is a pic of the difference between the OEM auto.
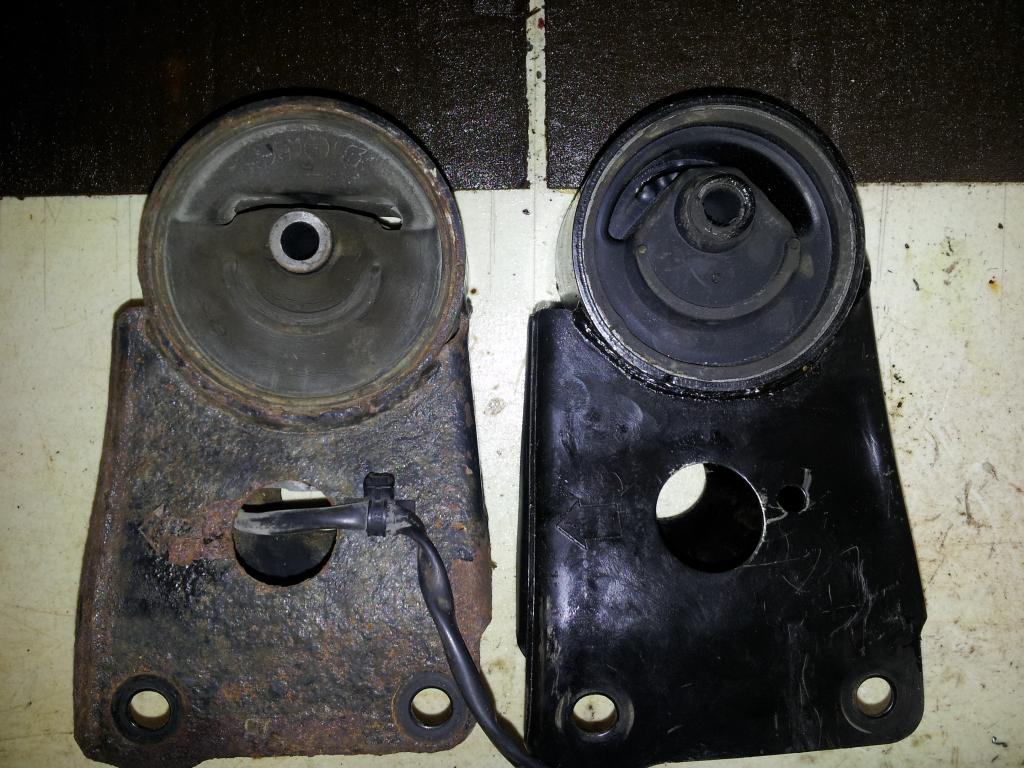
Here is a pic of the difference between the OEM auto.
09-15-2014, 09:56 AM
#67
Beware of Beck Arnley front manual engine mount 104-1754. It was sent to me when I ordered it and it looked different from the auto but I thought what the hell it must be right I'll put it on. Wow! The vibration at idle was crazy. I just swaped back to the auto for now and vibration gone. Anyone have a part number of one that actually fits. They seem to be hard to pinpoint. For example the Rock Auto ones look the same and when you cross reference their part numbers on the Beck website you get the 104-1754 which says it is only for 95-99.
Here is a pic of the difference between the OEM auto.

Here is a pic of the difference between the OEM auto.
I'm really looking to solve this mystery. All the pics of aftermarket front manual engine mounts seem to look like the one in my attached picture which doesn't seem to have the same centered mounting point as the auto mount I removed. It seems to be much higher when you compare overall geometries. When I put this manual one on I got crazy engine vibrations which have subsided to very minimal now that I have the auto one back on. Does anyone have a pic of the OEM front manual engine mount to compare?
Also is there any difference between the rear auto vs. rear manual mounts? I seem to have a non-electronic rear engine mount. Some posts say auto's come with front and rear electronic and some posts have said that the rear isn't electronic in all cases. Not sure what the right answer is.
09-15-2014, 10:11 AM
#68

2002-2003 Maxima automatic have
Front electronic engine support and manual rear engine support. You need to buy the OEM Genuine Nissan front Engine mount , aftermarket parts will give annoying engine vibration. The cheapest way if you can buy a used working front electronic engine support that will not fry the ecu. Or just use the oem manual front engine with minimal engine vibration.
Front electronic engine support and manual rear engine support. You need to buy the OEM Genuine Nissan front Engine mount , aftermarket parts will give annoying engine vibration. The cheapest way if you can buy a used working front electronic engine support that will not fry the ecu. Or just use the oem manual front engine with minimal engine vibration.
09-15-2014, 11:37 AM
#69
2002-2003 Maxima automatic have
Front electronic engine support and manual rear engine support. You need to buy the OEM Genuine Nissan front Engine mount , aftermarket parts will give annoying engine vibration. The cheapest way if you can buy a used working front electronic engine support that will not fry the ecu. Or just use the oem manual front engine with minimal engine vibration.
Front electronic engine support and manual rear engine support. You need to buy the OEM Genuine Nissan front Engine mount , aftermarket parts will give annoying engine vibration. The cheapest way if you can buy a used working front electronic engine support that will not fry the ecu. Or just use the oem manual front engine with minimal engine vibration.
09-15-2014, 03:45 PM
#73
Yes it's the front engine mount by the rad. Yes already unplugged long ago. I actually took it right out and put in this Beck Arnley manual trans version of their front engine mount. That's where I ran into problems. I got crazy vibration and when putting the mount in I noticed it was super snug to get in there vs. the OEM auto mount I removed. That's why I'm trying to understand why the mounting hole through the rubber portion of the manual mount appears to sit higher than the auto mount. I'm looking for a pic of an OEM front MT mount so I can compare. Maybe you have to change both front and rear when you do this? I don't know. I'm just baffled why I got soooo much vibration from this MT mount (which virtually disappeared when I swapped back to the auto mount) when people have supposedly done this swap often without issue.
09-17-2014, 01:44 PM
#74
5.5 Gen Auto to 6 speed swap
Well I got everything completed and but for a few minor details to still take care of everything went perfectly. I spent two weeks working on it which was a few hours here and a few hours there. I think there were a few nights I spent 3-4 hours straight on it. There is a lot of info out there and a few members were very helpful so thank you. A lot of the documented info pertains to gen 4 and 5 so hopefully these tips might help those with a 5.5 that are wondering what works for them. I'm not going to regurgitate how to do every single thing, there is already great documentation of that, but I wanted to provide more detail on the things that were unclear or surprised me.
Parts List:
It takes a long time to collect everything and my advice would be to collect it all before you begin:
� manual transmission
� MT pass and drivers side axles
� Flywheel
� Clutch kit
� SS Clutch line (optional)
� ES shifter bushings (optional)
� 5/16 clevis pin for STS mod (optional)
� Redline 75w85 manual trans fluid GL-4
� Clutch fluid - DOT3 brake fluid
� Trans seals (optional)
� MT front and rear motor mounts (optional)
� MT trans mount
� MT shifter assembly / cables, dash trim piece, shifter boot and ****
� slave and master cylinder
� MT starter
� MT engine harness
� MT key chip, immobilizer unit and ECU
� MT brake pedal
� clutch pedal
� single pair - weatherproof wire for clutch switch
� Torx 55 bit (this is the only tool that is somewhat unique)
� Lithium moly grease
Tips and things I found unclear:
- you only have to remove two bolts from the bottom of the strut in order to lower the knuckle enough to slide the front axles out and back in. No need to disconnect sway bar links or tie rods or ball joints.
- both pass and drivers side MT axles are required. You CANNOT use the auto axles.
- the carrier supporting the passenger side axle can be a bear. The axle may be seized in there. Lots of PB Blaster and a well placed air chisel should get it moving. Just don't chisel away too much on the three lobes that bolts screw in to. They are very soft and will crack. Trust me. Coat the new with anti-seize for easy future removal.
- I used two jacks under the car - one on the engine oil pan (with a block of wood to protect the pan) and one on the trans pan (with block of wood.). It made it easier to support and move things around. Auto trans is HEAVY.
- with everything torn apart you might as well gut your precats. Taking those exhaust components off will also give you a lot of extra room to work.
- the MT shifter cable will go in the same hole in the firewall as the auto however I found that the cable was very tight once connected to the trans and shifter. I enlarged the hole with a dremel/grinder to relieve tension on the cable.
- under the dash on the MT cars there are two spacers attached to the inside of the firewall that spaces the clutch pedal approximately 17mm from the firewall. The auto does not have a) holes for the clutch pedal / master cylinder nor b) spacers attached to the firewall. To overcome this you need to create a template of the master cylinder, transfer it to the firewall and drill those holes. I used two nuts together to recreate a 17mm spacer. Once the lower dash trim is removed there is lots of room to drill from the inside out.
- when pulling the engine harness make sure you tape the connectors down flat on the harness on the inside of the vehicle. Done properly it won't snag too much and although it doesn't seem possible it will come out. Removing the intake gives you a lot more room to manipulate things. The MT harness has fewer connectors and is much easier to put back in. I laid the two harnesses side by side in the engine bay while I plugged and unplugged all the connectors. This ensured I didn't miss anything.
- the MT trans mount is different than the AT trans mount. The MT mount bolts to the frame. The AT mount is spot welded to the frame. You will need to grind or drill out the spot welds to remove that mount. Then you will need to drill and bolt or weld the manual mount in the proper spot. I welded but in hindsight I would bolt just in case the mount fails and you want to replace. It would be hard to press that out while mounted to the car.
- Sand down all the mating surfaces on the block and trans as well as the grounding spots. A common issue when people have tried to start the car after all this work is bad grounds.
- The clutch pedal has two switches on it. One is at the top of the pedal stroke. This one is normally used to turn off cruise control as soon as pedal is pushed. There is no harness to plug this into under the dash of the AT car. I left it unconnected which is fine because if you touch the brake pedal it will still turn off cruise. Not an issue for me. Just remember it though if you are used to the clutch method of turning off cruise in a standard car.
The second switch is at the bottom of the clutch pedal stroke. In normal operation this only allows the starter to engage if the clutch is pressed in. The same situation exists - their is no harness to plug this into. To resolve this you will need to run a single pair wire connected to this switch from under the dash (I fed it through within the MT engine harness) to a relay box under the hood close to the drivers side headlight. You will see a relay for INHIBIT. If you tap into the Green Orange wire with one wire from the pair and ground the second wire then when the clutch is depressed the circuit is completed and the Green Orange will be provided a ground. This is the same as the AT being put in P or N. Once it has a ground it will allow the starter power and the car will turn over.
- The only lights I have on my dash are the Traction Control OFF light and the SLIP indicator. I don't know if there is much of a work around for turning this off. No SES light.
- To ensure the car starts properly and is not immobilized by the NATS system you must insure that the key chip, the immobilizer unit on the steering column and the manual ECU are all swapped over. Otherwise you will need to have the system programmed by a locksmith or dealer to make all three things talk to each other properly.
- When securing the shifter I was not able to reuse any of the existing auto shifter mounting bolts. I drilled new holes with longer bolts and then raised the shifter with spacers to stop any rubbing.
That's all I can think of. I'll post more if I can think of anything.
10-17-2014, 07:24 AM
#76
Update for those thinking about doing a swap in the future.
DO NOT resurface the dual mass flywheel. My own fault for trusting a shop that said they could do it. It's not worth the potential savings because the risk of it not being done correctly is too great. The slightest imperfection can cause an imbalance leading to vibration and then you have to take everything apart again.
Now I can drive this thing and enjoy it -- until the snow starts.
06-16-2019, 05:41 AM
#77
Newbie - Just Registered

Join Date: Dec 2017
Posts: 1
Ok so the list so far:
transmission with all sensors (got it - 6sp but not HLSD)
shifter cables (got it)
clutch and brake pedal (got it)
manual trans mount and bracket (got it - I believe it bolts in place of AT mount. Is that correct?)
slave and master cylinder (got it)
clutch and pressure plate (will buy a new set - my understanding is that OEM is a good option. No tracking just DD. Thoughts?)
flywheel (I'm not sure of current condition. At minimum I will have resurfaced. Thoughts?)
flywheel bolts(from the dealer) (can't I use the ones on the donor car?)
both cv axles (I thought that only drivers side was needed? I will have both but my car has far less km on it)
new ss clutch line (I'll order that)
you can run the auto ecu but you will have ses light for trans codes and no cruise control. manual ecu solves all of that. (have the MT ECU)
Starter (I have the manual starter. Not sure what you mean yet by cutting off the connector)
Gauge Cluster - Got it
Thoughts/Questions:
When I remove the auto trans it's going to have a bunch of sensors attached to it that aren't relevant to the manual. Can the PNP connector be reused for the manual and how do I plug in a back-up lamp switch harness? Is this solved by swapping the MT harness? What about the sensors at the clutch pedal?
Immobilizer - Let me know if I have this correct. Without putting the MT ECU in the car should run but there will be trans codes. Once I put the MT ECU in I will be able to start it iff I have the MT key taped somewhere near the tumbler. If I go to the dealership however they should be able to either reprogram the MT ECU to my AT keys or swap the chip from the MT key to my AT key.
Any other glaring issues I have missed.

Thread
Thread Starter
Forum
Replies
Last Post
Hoooper
5th Generation Maxima (2000-2003)
25
02-18-2015 10:44 AM