
Hood Project!


Hood Project!
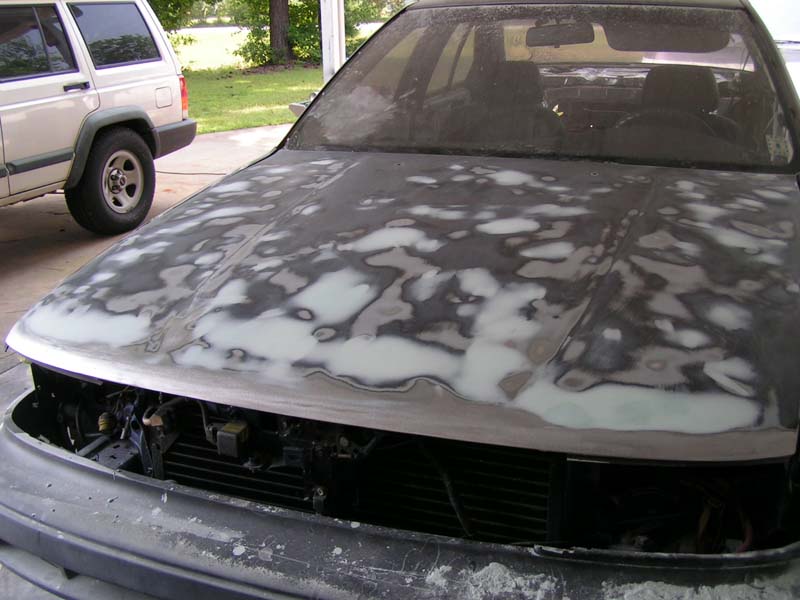
So my hood was previously bondo'd and was cracking horribly in the center and chipping bad (paint was coming off like snake skin) so I grinded it all down (lost about a half inch where the bondo was) all the way to bare metal. Anyway, It was my first time using bondo, actually... just my first time doing body work all together, but after about 5 hours I'm thinking it looks pretty good, ready to be painted tomorrow. Just thought I'd share as I'm no longer a body work virgin anymore! Yay...
pics: ( I should have taken "before" to show you had bad it was...


I'll take more when I get it re-painted....
________
IPAD ACCESSORIES
pics: ( I should have taken "before" to show you had bad it was...
I'll take more when I get it re-painted....
________
IPAD ACCESSORIES
Last edited by Pearl93VE; Apr 18, 2011 at 12:59 AM.
 bondo on a hood

good job for your first try...a couple of things though...
1. it will crack again because 1/2" it too thick for bondo. You should bang it out first.
2. They make flexible filler which would be best on a hood.
3. Those spots that you filled will show up under the paint as low spots because of the way you filled them. When doing filler work its best to feather edge it farther past the bad spot then prime and block sand to make sure there are no low spots. With you just having the low spots filled like you do it will be lower than the rest of the hood. You may not think so but you will see after you get the paint on.
Not trying to be negative but just trying to share my experiences with you.
Originally Posted by Michael
good job for your first try...a couple of things though...
1. it will crack again because 1/2" it too thick for bondo. You should bang it out first.
2. They make flexible filler which would be best on a hood.
3. Those spots that you filled will show up under the paint as low spots because of the way you filled them. When doing filler work its best to feather edge it farther past the bad spot then prime and block sand to make sure there are no low spots. With you just having the low spots filled like you do it will be lower than the rest of the hood. You may not think so but you will see after you get the paint on.
Not trying to be negative but just trying to share my experiences with you.
1. it will crack again because 1/2" it too thick for bondo. You should bang it out first.
2. They make flexible filler which would be best on a hood.
3. Those spots that you filled will show up under the paint as low spots because of the way you filled them. When doing filler work its best to feather edge it farther past the bad spot then prime and block sand to make sure there are no low spots. With you just having the low spots filled like you do it will be lower than the rest of the hood. You may not think so but you will see after you get the paint on.
Not trying to be negative but just trying to share my experiences with you.
________
EXPERT INSURANCE
Last edited by Pearl93VE; Apr 18, 2011 at 12:59 AM.
Originally Posted by 94maxshima
Well the reason it is such a big area is because I bondo'd on top of previous paint about 2 inches past the low part itself, then feathered it in and sanded with 320 grit sand paper wrapped around a rubber block. so even though the bondo portruded past the existing level of the hood at one time, it's all pretty level now that I sanded it afterwards.
ok...I am not talking about the big part. Just get it painted and see what you did wrong so you can learn from it. Either way I am sure it will look much better than big cracks.
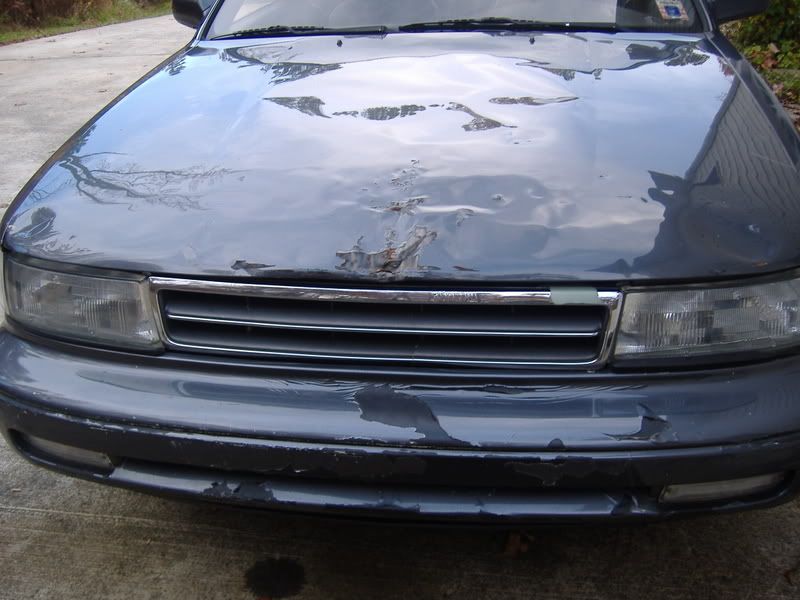
Edit...here is an example of what I am talking about. See all the spots that look like big bondo spots? They are actually very small, very shallow dings but looking at it you would thing I used a LOT of filler and the dents were huge. Its just how you feather it. The little small spots were chip repairs. Now after this step I primed it and block sanded it to make sure I had everything level and didnt have any low spots (the primer helps transition the filler work to the rest of the paint).
as it is with yours you just filled in the small dings but didnt feather past it and when you paint it you will see those spots as low spots.
one last thing before the pic. I painted this hood black and it was perfect. Looked brand new with no low or high spots.
I am just telling you this stuff for your benefit. I made the same mistake you did when I first tried this stuff and learned from it.
Yeah, I see what you mean now, and I appreciate your input, better to learn from others more experienced. My dad gave me a little bit of help near the beginning, but for the most part I was on my own. I'm thinking of rattle canning just the part I did to see how bad it dips, or if I have any rolls. But yeah, Hopefully a cheap remedy from buying a new hood, and It looked HORRIBLE before. I couldn't stand it.
________
Paxil attorneys
________
Paxil attorneys
Last edited by Pearl93VE; Apr 18, 2011 at 12:59 AM.


Originally Posted by saxytothemaxima
haha. how do you fix this?
 <br>
<br>
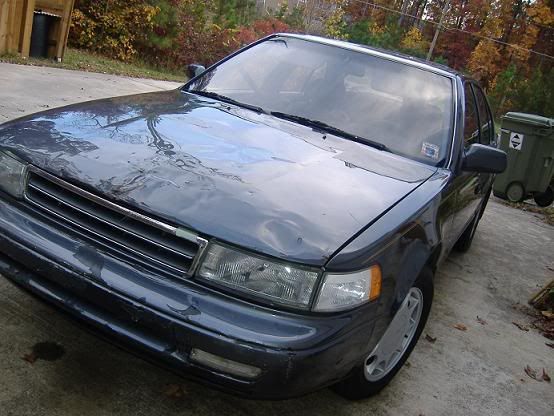
<br>Ummmm..... salvage yard time
 ?
?________
Wellbutrin class action lawsuit
Last edited by Pearl93VE; Apr 18, 2011 at 01:00 AM.
Originally Posted by saxytothemaxima
haha. i went to one and they were going to charge me 80$ for a half finished hood. it looked like it was wrecked.
http://www.sandwauto.com/
This yard is in lithonia,they have several hoods to choose from,all for $75..

Considering you'll spend probubly $40-50 on materials, over 8 hours and possibly still not have the hood look right. It would benefit to buy one in good shape. Did you try pull-a-part in Doraville? They shouldn't charge more than 50, and I KNOW they have a few good hoods.
Edit, there is a Pull-A-Part in conely and norcross. Hoods are 28.28
Edit, there is a Pull-A-Part in conely and norcross. Hoods are 28.28

IMO, throw it away and get a new hood. that much damage and bondo on it will show back up quickly and just as ugly as before. been there, done that.
for something as large and flexible as a hood, you don't want to use much, if any, Bondo on it. thin layers to fix paint chips like Michael showed you are fine... but anything more than about 1/8" will eventually crack and show... The hood flexes a LOT, and bondo is a pretty brittle solid once it completely cures. you can see where I'm going with this....
for the time and effort you've spent on it, it's a great lesson in how to learn bodywork, but you'd be better off buying a junkyard hood, then sanding and repainting it.


Originally Posted by therealgoon9
Considering you'll spend probubly $40-50 on materials, over 8 hours and possibly still not have the hood look right. It would benefit to buy one in good shape. Did you try pull-a-part in Doraville? They shouldn't charge more than 50, and I KNOW they have a few good hoods.
Edit, there is a Pull-A-Part in conely and norcross. Hoods are 28.28
Edit, there is a Pull-A-Part in conely and norcross. Hoods are 28.28

Thread
Thread Starter
Forum
Replies
Last Post
AaronL
5th Generation Maxima (2000-2003)
15
Aug 8, 2020 10:31 AM
Unclejunebug
5th Generation Maxima (2000-2003)
10
Apr 2, 2016 05:42 AM