
Suede interior write up...install tomorrow pics today

Thread Starter

Joined: May 2005
Posts: 972
From: Dallas, TX
Suede interior write up...install tomorrow pics today
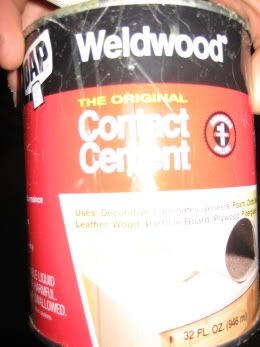
So I started my suede interior while I'm back at home for break, and it went great. I used DAP contact cement....from a reccomendation by juan (shavedmax). Here's the steps I took to complete this job:
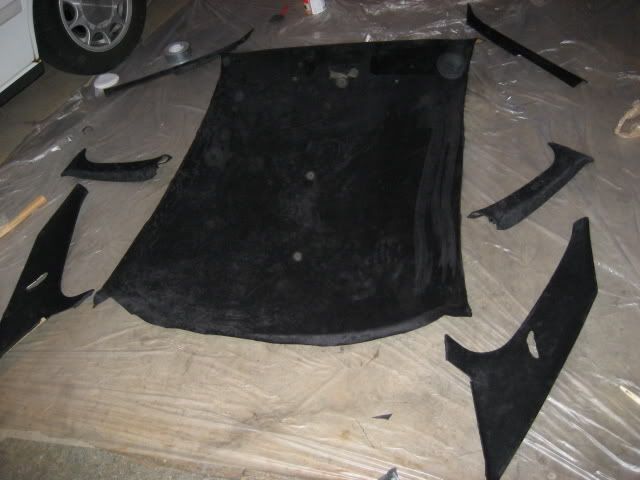
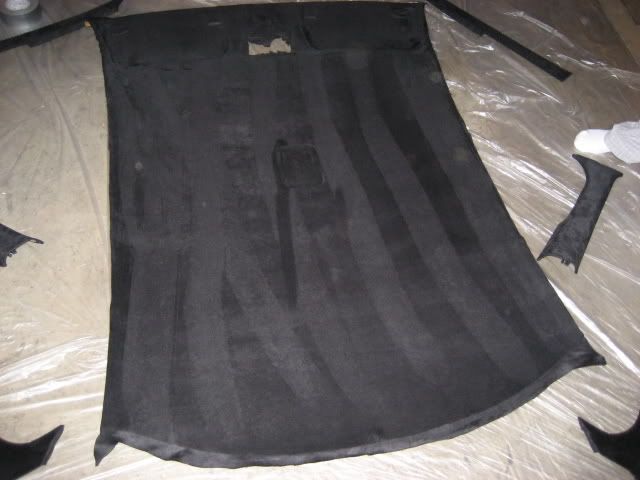
1.) Remove old trim with fabric on it...most of it pretty much snaps off with little brackets, but the long piece on top has to slide one way, so be careful...it's easy to break off the little metal snaps. To remove the rear trim piece, you have to remove the rear seat back. If you don't already know how to remove your trim, you probably shouldn't be doing this in the first place people!
2.) Carefully pull off the old fabric, it's okay if the foam remains...you'll just have to rub it off with your hand and finish with light grained sand paper to ensure a smooth surface.
3.) Lay the fabric pieces out over the suede and make exact replicas. **MAKE SURE TO NOTICE THE LAY OF YOUR FABRIC>>>IT WILL MAKE ALL THE DIFFERENCE IN THE FINAL APPEARANCE!!!**
If you notice on suede, it looks different one way than it does another. I made sure all pieces had the same look from the hood to the trunk, so the suede lays flat when you move your hand front to back and top to bottom, and is rough bottom to top and back to front....get it?? You want the natural movement of the car to go with the lay of the fabric...this is critical, and I almost forgot it because I was trying to save fabric. don't do that.
4.) Once the pieces are all cut out, match them up to the corresponding parts to be sure everything looks good. One contact cement is on there, it'll want to stay there and you don't want to put on some fabric, then realise you cut the grain of it the srong way, or cut a corner too short. It's WAY harder to get off then put on.
5.) coat one piece, wait 5 min, then set on the fabric....aligning the curved parts first. The curved parts require more fabric than straight parts, and they also require more skill.
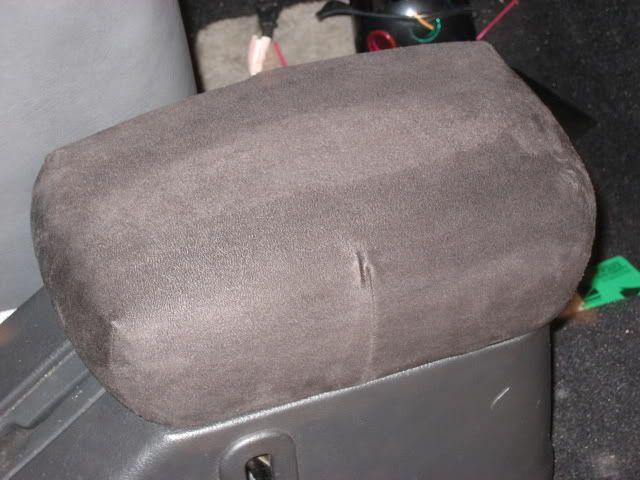
6.) The arm rest is the toughest part....you're pretty much on your own with that one. It's easy to remove, but it took me a day and a half to make a piece that went back on like factory. I ended up putting a little more slits in the fabric to tighten it up, if you can make it fit by just sewing the corners good luck to you!
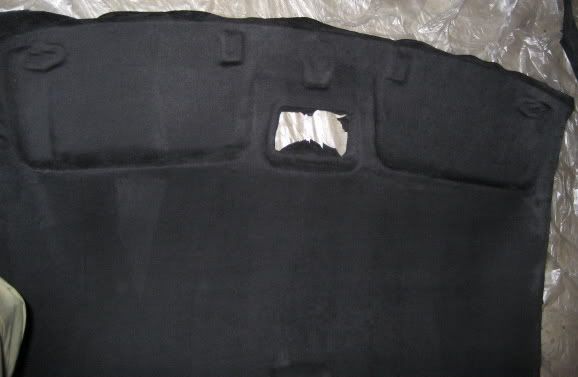
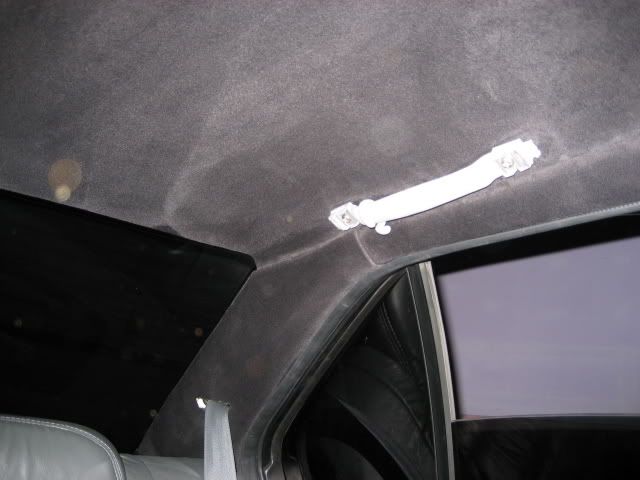
7.) By this step all you have left is the headliner and door panels. The door panels go on like the previous steps, but they glue on. The headliner is another story. You'll have to remove the rear view mirror, safety handles, visors, and lights. I used a screwdriver and putty knife to pry. I kind of messed up one of my handles this way, but they're a b*tch to remove, so good luck finding another way.
8.) By now the headliner should pretty much fall down by its own. You'll have to take out the drivers side seat, and the rear seats are already out from taking out the trim, so the headliner should just slip neatly out the back drivers side door. Juan (shavedmax) said that he just put the cement right over the old stuff and went to town with the fabric. I tried that, but the stuff soaks the cement right in, like a sponge.
9.) This pissed me off way too much after I was out like a whole can, so I decided to sand off the old stuff and apply my fabric to the particle board headliner. It took me about 5 hours with a small power sander and 80 grit and 120 grit paper to get it all nice and smooth with all traces of old glue and foam gone.
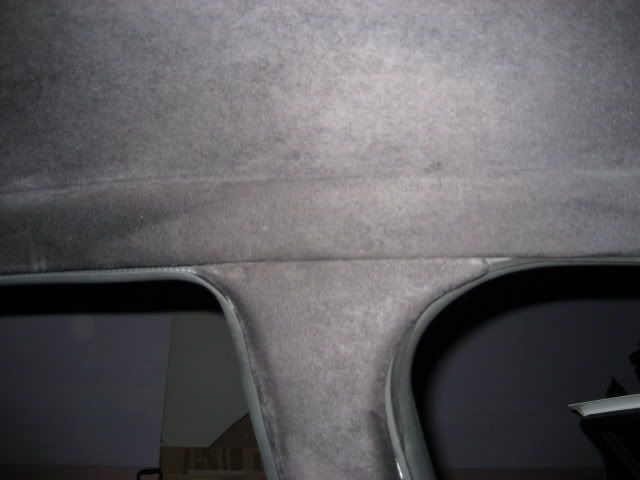
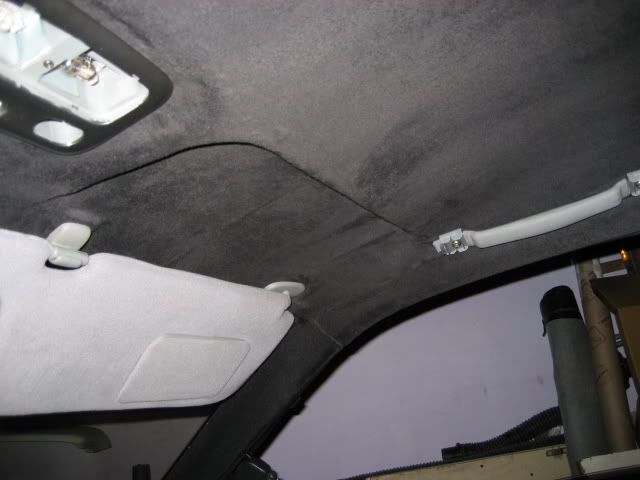
10.) With the headliner all smooth, sweep up all the crap that just came off the thing and try not to die of inhallation of all the little particles and fumes from the cement, lol. Coat the ENTIRE thing with a layer of contact cement, watch it soak it, and turn a dark brown. Now, let it sit an hour or so and completly dry. Then, do a small section at a time starting from the map lights and working outward and backwards towards the rear of the car. The visor part is REAL tough...and I still ended up with 2 small bubbles where it just wouldn't stick, but you can't tell.
11.) Put everything back together and enjoy!!! Time for pics now!!!
Contact cement I used:
Armrest...the best and hardest part:
The Visor section:
1.) Remove old trim with fabric on it...most of it pretty much snaps off with little brackets, but the long piece on top has to slide one way, so be careful...it's easy to break off the little metal snaps. To remove the rear trim piece, you have to remove the rear seat back. If you don't already know how to remove your trim, you probably shouldn't be doing this in the first place people!
2.) Carefully pull off the old fabric, it's okay if the foam remains...you'll just have to rub it off with your hand and finish with light grained sand paper to ensure a smooth surface.
3.) Lay the fabric pieces out over the suede and make exact replicas. **MAKE SURE TO NOTICE THE LAY OF YOUR FABRIC>>>IT WILL MAKE ALL THE DIFFERENCE IN THE FINAL APPEARANCE!!!**
If you notice on suede, it looks different one way than it does another. I made sure all pieces had the same look from the hood to the trunk, so the suede lays flat when you move your hand front to back and top to bottom, and is rough bottom to top and back to front....get it?? You want the natural movement of the car to go with the lay of the fabric...this is critical, and I almost forgot it because I was trying to save fabric. don't do that.
4.) Once the pieces are all cut out, match them up to the corresponding parts to be sure everything looks good. One contact cement is on there, it'll want to stay there and you don't want to put on some fabric, then realise you cut the grain of it the srong way, or cut a corner too short. It's WAY harder to get off then put on.
5.) coat one piece, wait 5 min, then set on the fabric....aligning the curved parts first. The curved parts require more fabric than straight parts, and they also require more skill.
6.) The arm rest is the toughest part....you're pretty much on your own with that one. It's easy to remove, but it took me a day and a half to make a piece that went back on like factory. I ended up putting a little more slits in the fabric to tighten it up, if you can make it fit by just sewing the corners good luck to you!
7.) By this step all you have left is the headliner and door panels. The door panels go on like the previous steps, but they glue on. The headliner is another story. You'll have to remove the rear view mirror, safety handles, visors, and lights. I used a screwdriver and putty knife to pry. I kind of messed up one of my handles this way, but they're a b*tch to remove, so good luck finding another way.
8.) By now the headliner should pretty much fall down by its own. You'll have to take out the drivers side seat, and the rear seats are already out from taking out the trim, so the headliner should just slip neatly out the back drivers side door. Juan (shavedmax) said that he just put the cement right over the old stuff and went to town with the fabric. I tried that, but the stuff soaks the cement right in, like a sponge.
9.) This pissed me off way too much after I was out like a whole can, so I decided to sand off the old stuff and apply my fabric to the particle board headliner. It took me about 5 hours with a small power sander and 80 grit and 120 grit paper to get it all nice and smooth with all traces of old glue and foam gone.
10.) With the headliner all smooth, sweep up all the crap that just came off the thing and try not to die of inhallation of all the little particles and fumes from the cement, lol. Coat the ENTIRE thing with a layer of contact cement, watch it soak it, and turn a dark brown. Now, let it sit an hour or so and completly dry. Then, do a small section at a time starting from the map lights and working outward and backwards towards the rear of the car. The visor part is REAL tough...and I still ended up with 2 small bubbles where it just wouldn't stick, but you can't tell.
11.) Put everything back together and enjoy!!! Time for pics now!!!
Contact cement I used:
Armrest...the best and hardest part:
The Visor section:


Thread Starter
Joined: May 2005
Posts: 972
From: Dallas, TX
I spent $55 on this project. $40 for three yards of suede on ebay from syfabrics and $14 for 2 cans of contact cement. Took about 2 days to complete the whole thing. Not a bad weekend in my opinion! Some things have to be painted still (passenger handles, door light, plastic parts for rear seatbelts, plastic cover for rear view mirror) and the wiring has to be fixed in the map lights, which is why th buttons are missing. Well...on to the pics!!
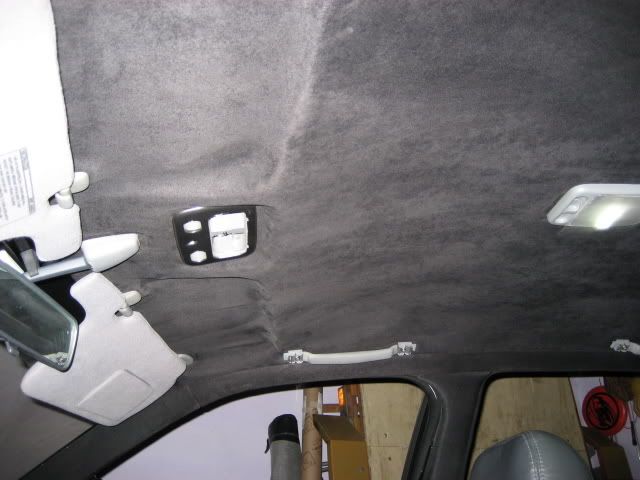
^^That little hole in the map light is where I put an LED for the ambient lighting...similar to Acura TL's and BMW's..it's molded in and everything.

^^That little hole in the map light is where I put an LED for the ambient lighting...similar to Acura TL's and BMW's..it's molded in and everything.
Thread Starter
Joined: May 2005
Posts: 972
From: Dallas, TX
Oh yeah, and I NEED some charcoal leather 4th gen sun visors...with the homelink preferably. Let me know if anyone has them. Other wise I'll have to sew some suede ones and I don't want to do that. It looks really hard!


Thread Starter
Joined: May 2005
Posts: 972
From: Dallas, TX
thanks for the feedback! It really makes the work worth it, knowing that you all think it turned out alright. I like the looks alot...the inside of the car is like a cave with the tinted windows...lol. Add that to the charcoal leather and black carpet and the interior is sweeet. I really appreciate any and all your comments though!
John dude, I was way to busy with getting ready for school and traveling back anf forth to purdue for work to find time to chill. We'll have to get another meet in soon though so I can show you this project in person! I didn't even get time for the CV boot yet. It's not cracked yet, but I want to get at the problem before it becomes one.
John dude, I was way to busy with getting ready for school and traveling back anf forth to purdue for work to find time to chill. We'll have to get another meet in soon though so I can show you this project in person! I didn't even get time for the CV boot yet. It's not cracked yet, but I want to get at the problem before it becomes one.

Thread
Thread Starter
Forum
Replies
Last Post
Violator
4th Generation Classifieds (1995-1999)
1
Sep 9, 2015 10:14 AM
sdotcarter
6th Generation Maxima (2004-2008)
2
Sep 2, 2015 09:53 PM