
Installed Aussie corners


Installed Aussie corners
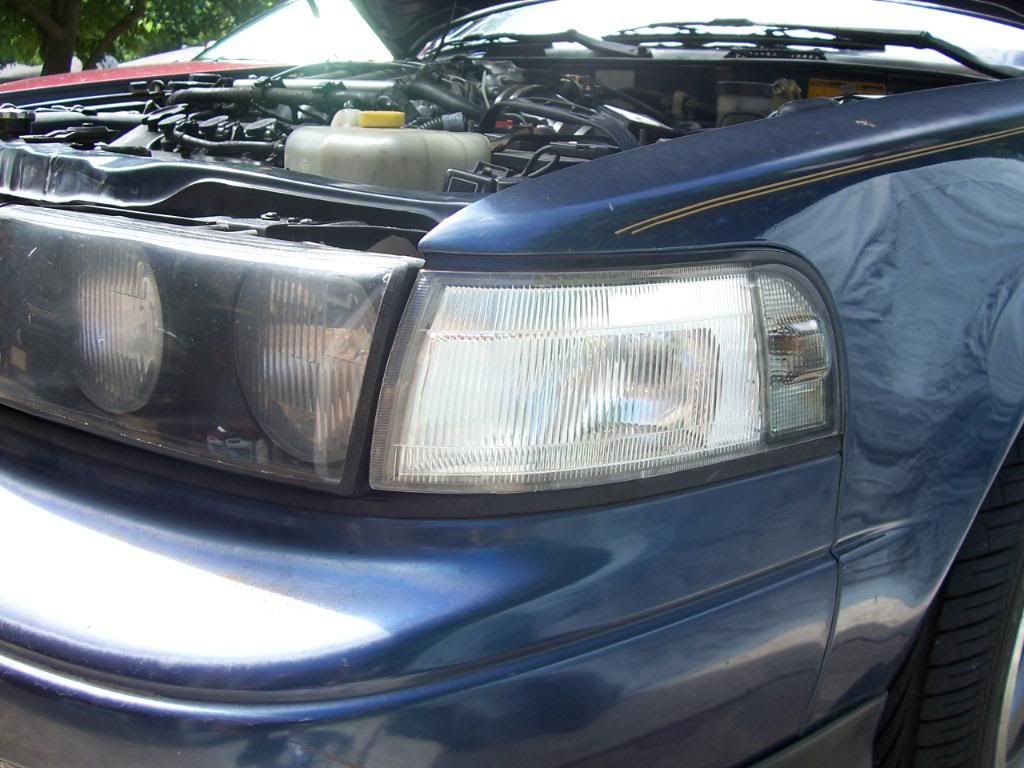
I decided to pull off the tint on my e36 headlights. I didn't like that you couldn't see the headlights during the day.. the e36's are too pretty to not show off 
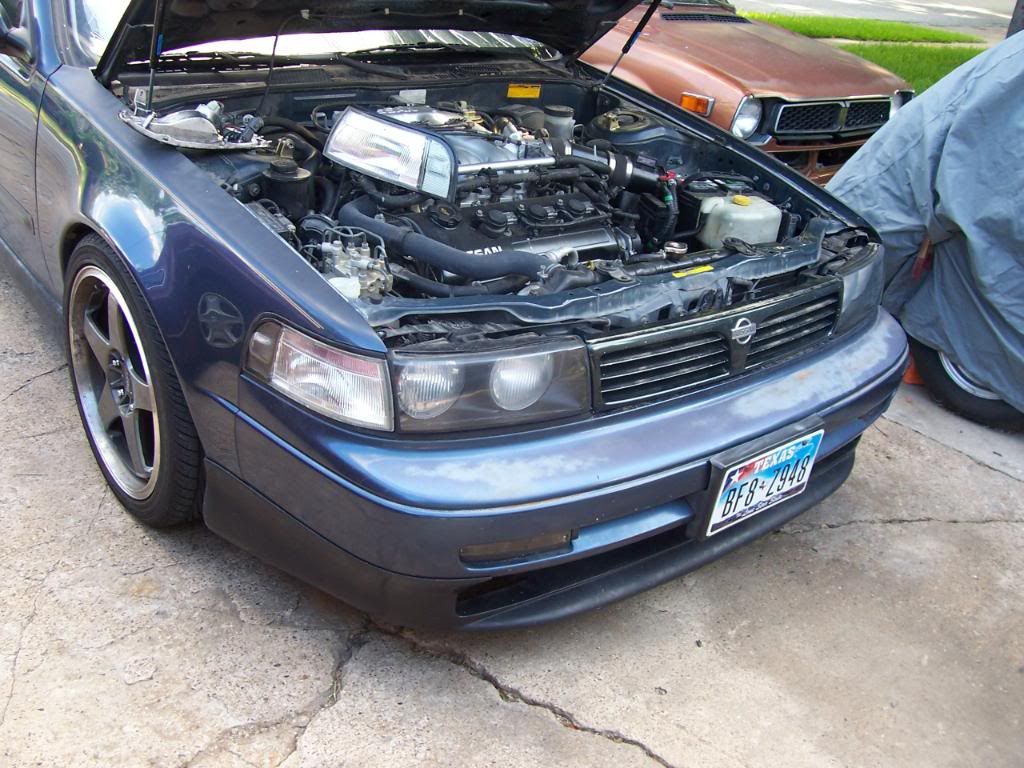
After doing that, I decided to install my Aussie grille and corners. I thought I could modify the corners to accept the USDM 194 bulbs but it looks like it's a no go. The section where the bulb harness twists into is a good 1/2"+ thick , so my attempt to cut out the proper shape was thwarted because it's too thick anyway.
I still like them though. I'll have to figure something out for the lights. Maybe do Craig's "always on" trick for the bigger bulb, but ideally I'd like to have the 194 bulb portion lit up and the large bulb not even in (looks better at night IMO). I suppose you could put the Aussie outer section on the USDM back, but I don't care enough to do that.
Now what I'd REALLY like is some UK fully smoked corners!
After doing that, I decided to install my Aussie grille and corners. I thought I could modify the corners to accept the USDM 194 bulbs but it looks like it's a no go. The section where the bulb harness twists into is a good 1/2"+ thick
, so my attempt to cut out the proper shape was thwarted because it's too thick anyway. I still like them though. I'll have to figure something out for the lights. Maybe do Craig's "always on" trick for the bigger bulb, but ideally I'd like to have the 194 bulb portion lit up and the large bulb not even in (looks better at night IMO). I suppose you could put the Aussie outer section on the USDM back, but I don't care enough to do that.
Now what I'd REALLY like is some UK fully smoked corners!

 I had them shipped along with the grille and bumper lights. I'll probably put the bumper lights on my black VE though
I have the same AUS stuff (grille, lights, signals).
I didn't like the bumper lights, since they are amber and I didn't like the look with my red car. I still haven't painted the grille.
I have lights in my corners. I didn't cut anything, but I can't recall what I did now.
I think I just swapped the light harnesses. IIRC, I had to swap all of the stuff in the signals because the plugs were different.
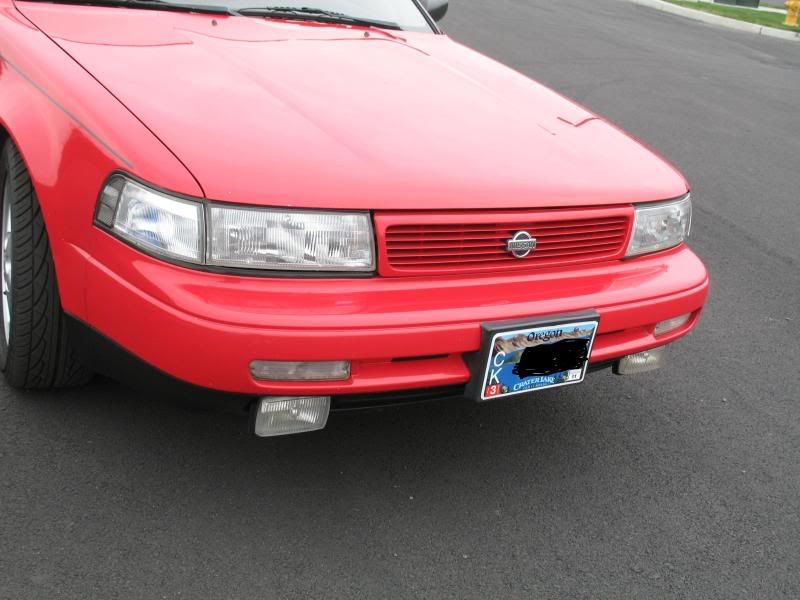

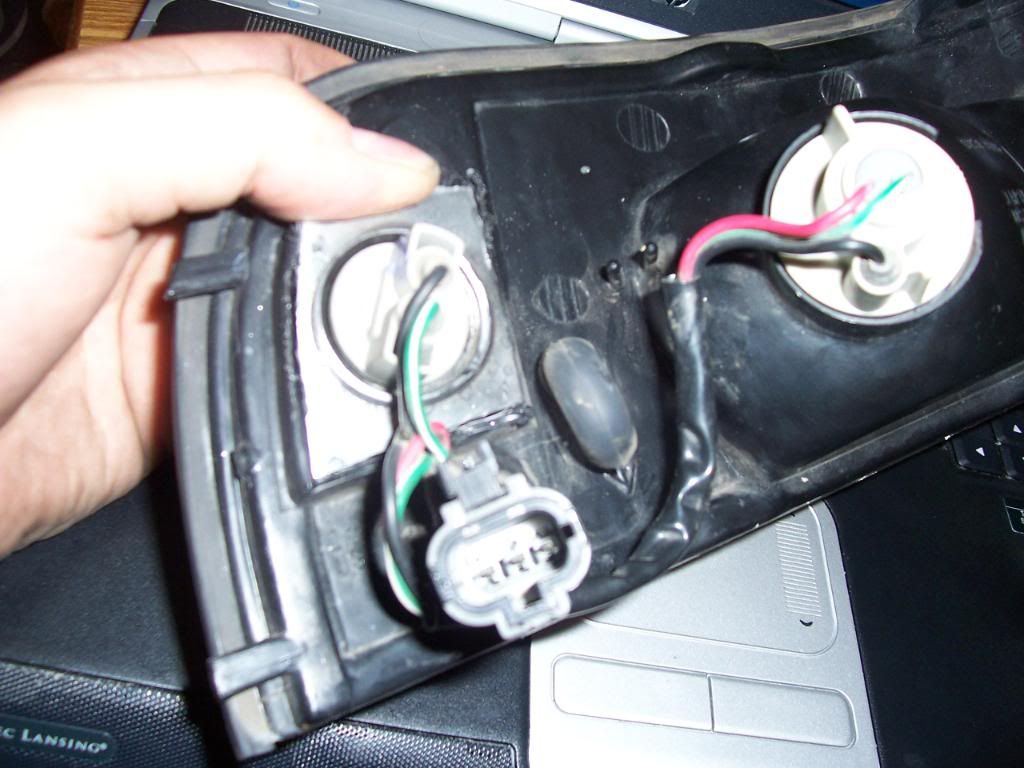
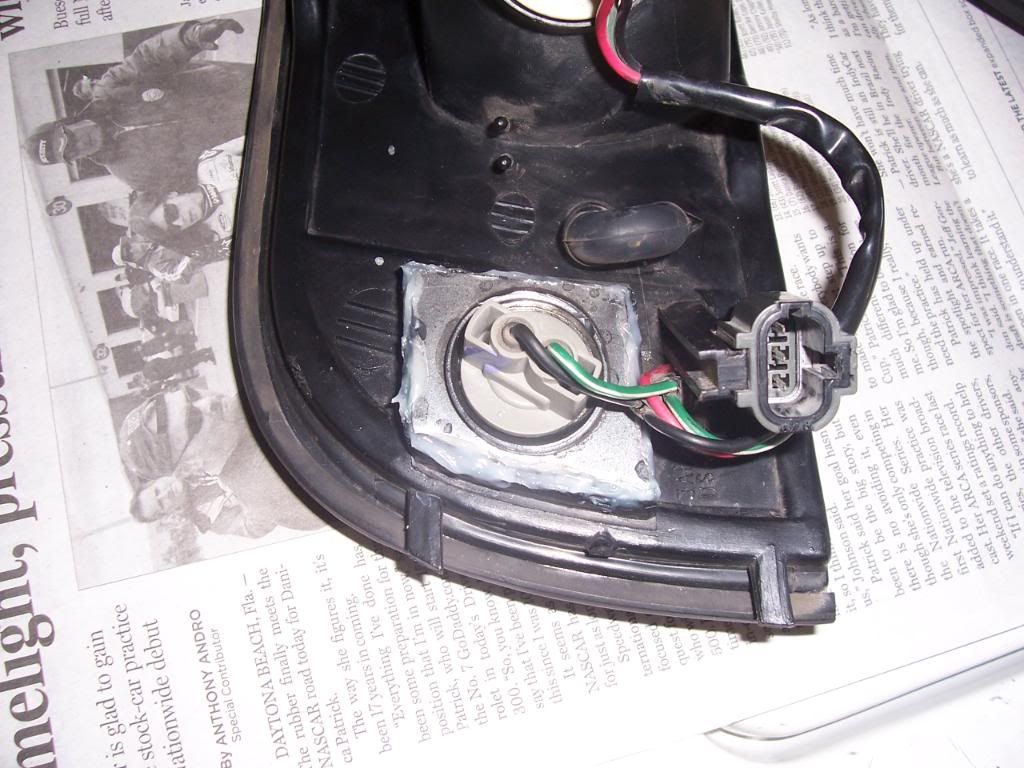
I wonder how you got bulbs in there. I swapped the light harnesses, and I made a template and drew the shape I needed to cut-out and started to cut it out. But then noticed the material there is seriously a 1/4" thick and so even if I have the proper cut-out, it won't work because it has to kind of "twist" in and can't with the material being so thick.
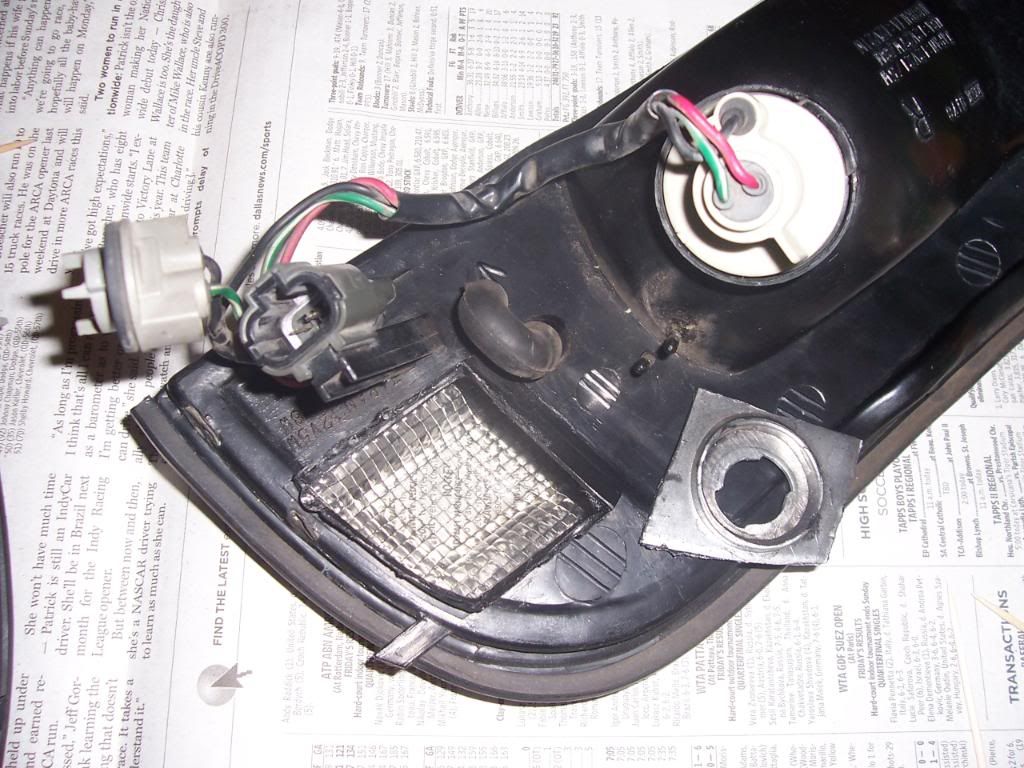
Ben, here's a pic of the back. It doesn't look any different except there's just nothing there. Lower left is the stock Aussie one, lower right is the Aussie one after I began to mod it (I shaved down that raised portion to ascribe my template to cut-out).
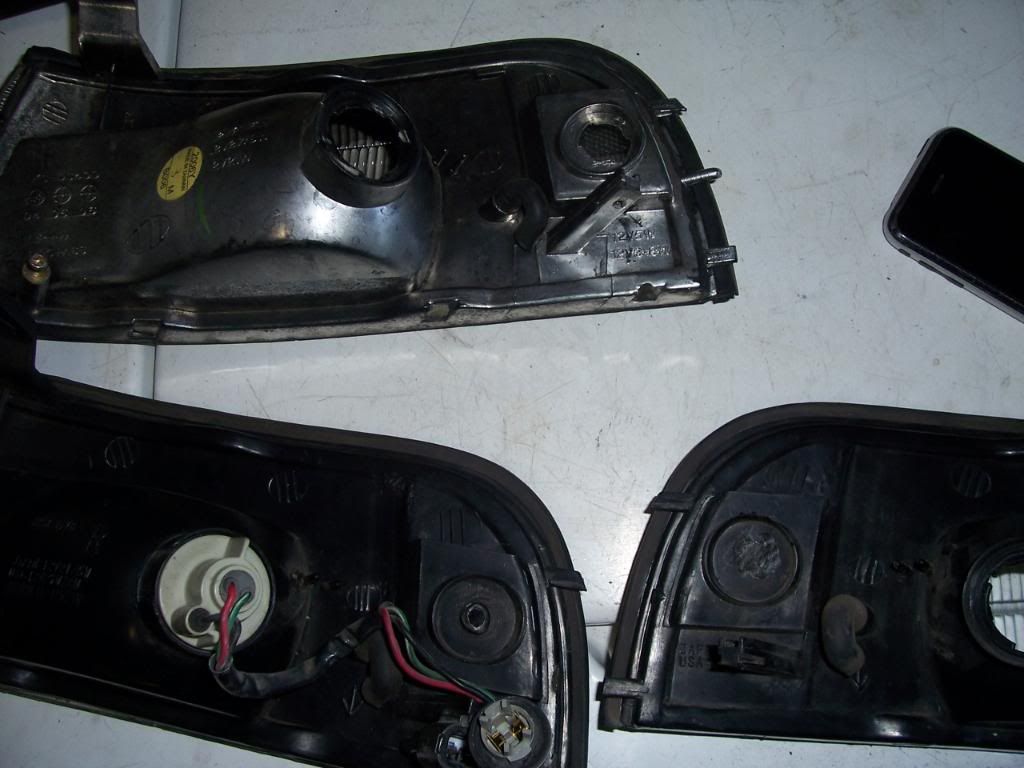
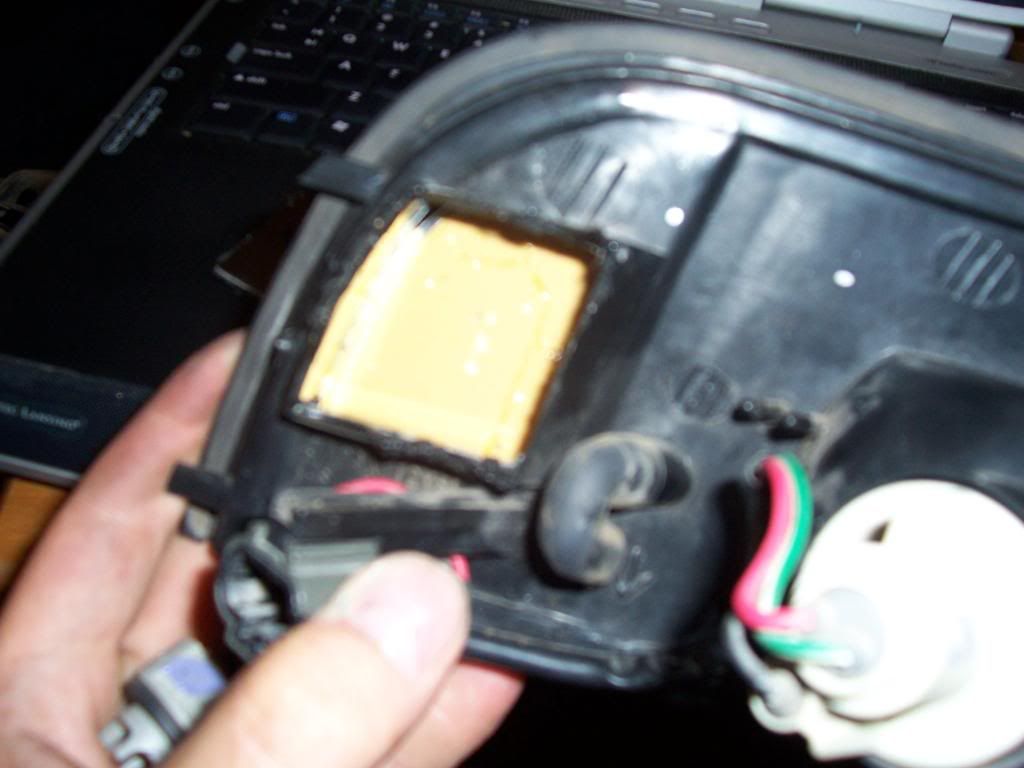
Well, I figured it out. The Aussie corners ARE thicker on the 194 back section (so as to not allow you to just cut the proper harness shape out) and there's also a thin piece of aluminum in between the lense and the backing. It took quite a bit of screwing around to get the aluminum piece out of there.
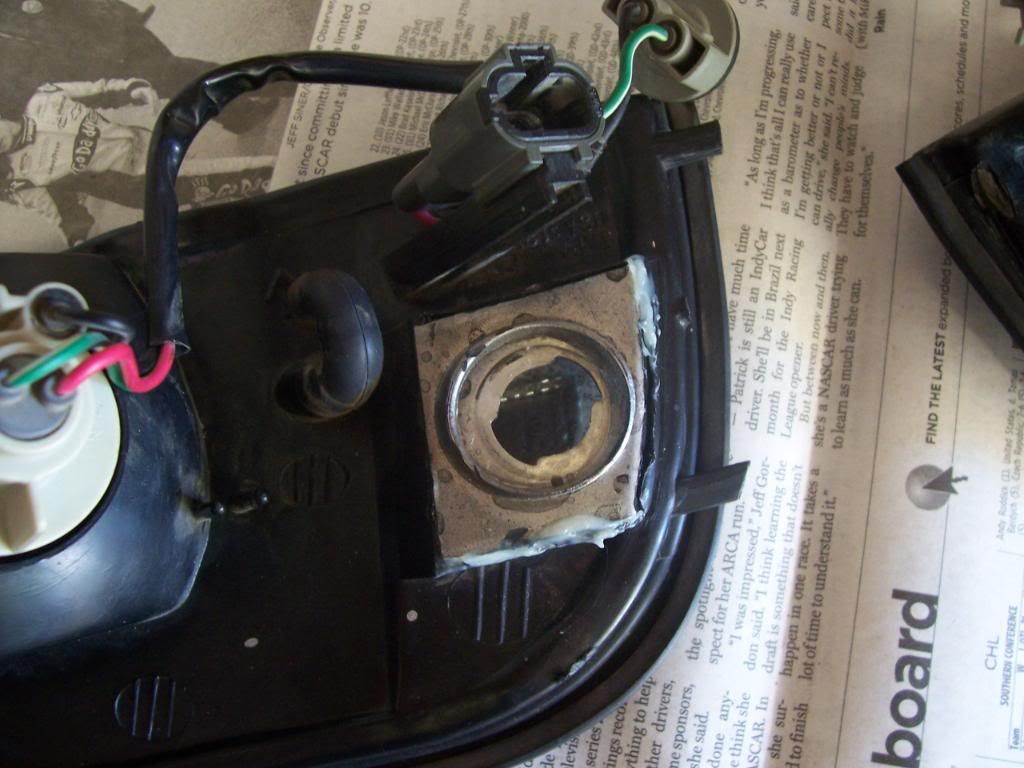
I decided to cut out the 194 bulb backing section from the USDM unit, cut out the same section from the Aussie one, and then fab the USDM section onto the Aussie cut-out. I'll get some plastic weld and finish this in the morning
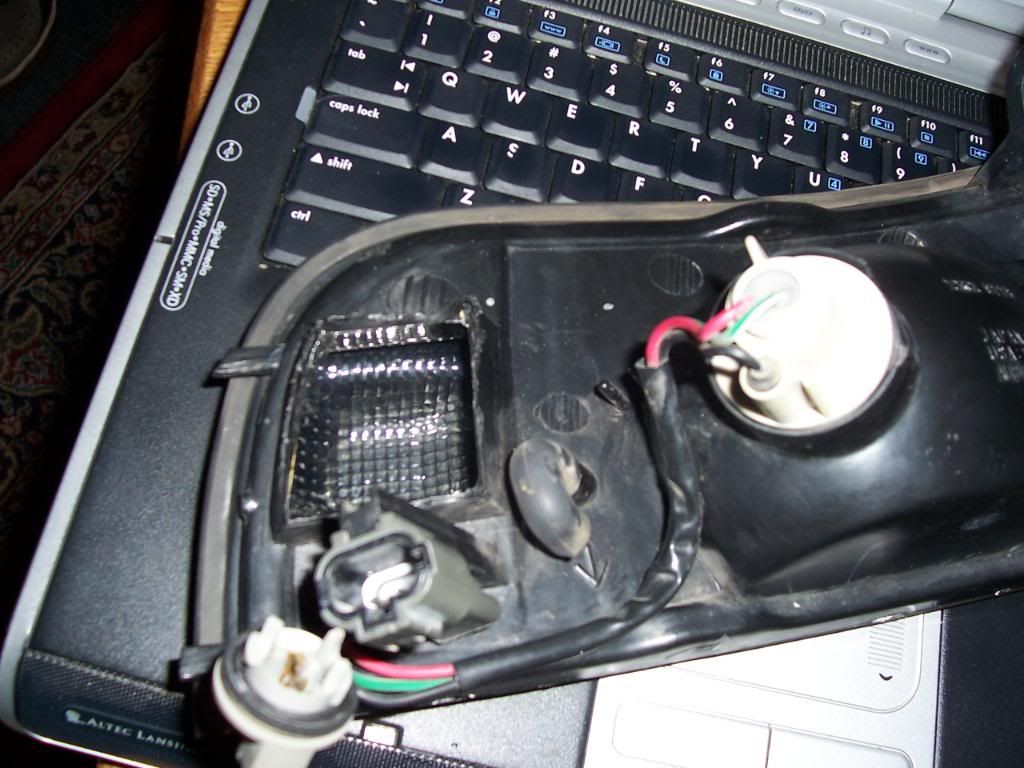
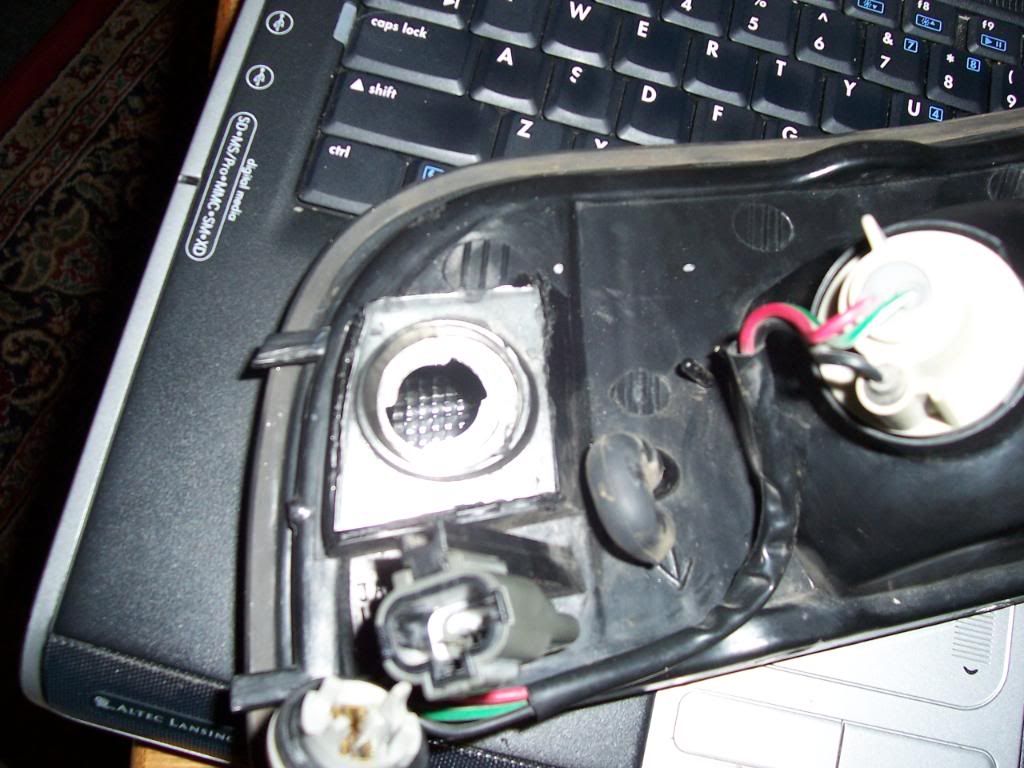
I decided to cut out the 194 bulb backing section from the USDM unit, cut out the same section from the Aussie one, and then fab the USDM section onto the Aussie cut-out. I'll get some plastic weld and finish this in the morning


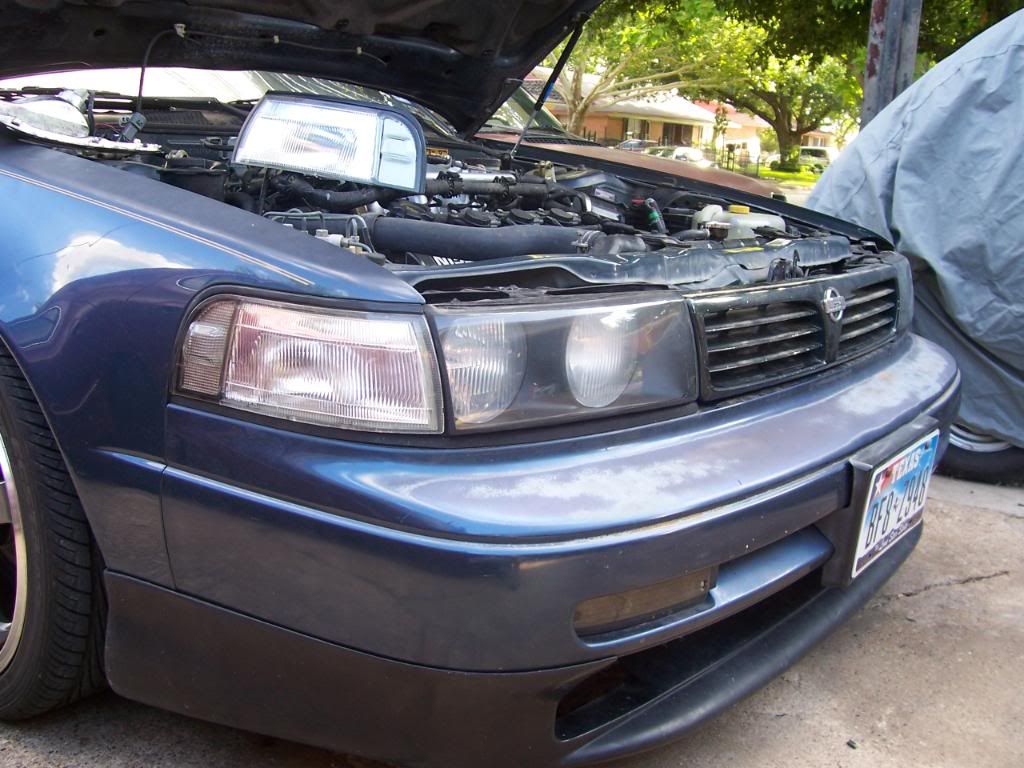
I don't traditionally like the Aussie grille either, which is why I've never put it on even though I've had it for over a year. I've actually thought it was kind of fugly on some of the stock-ish 3rd gens I've seen it on here over the years.
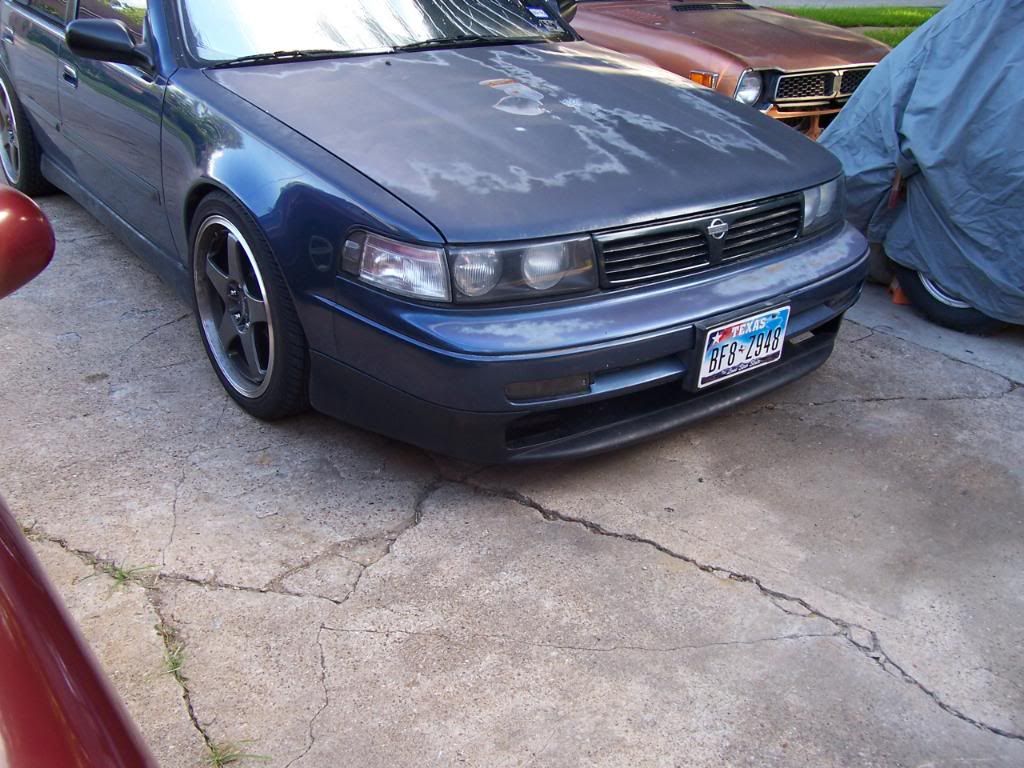
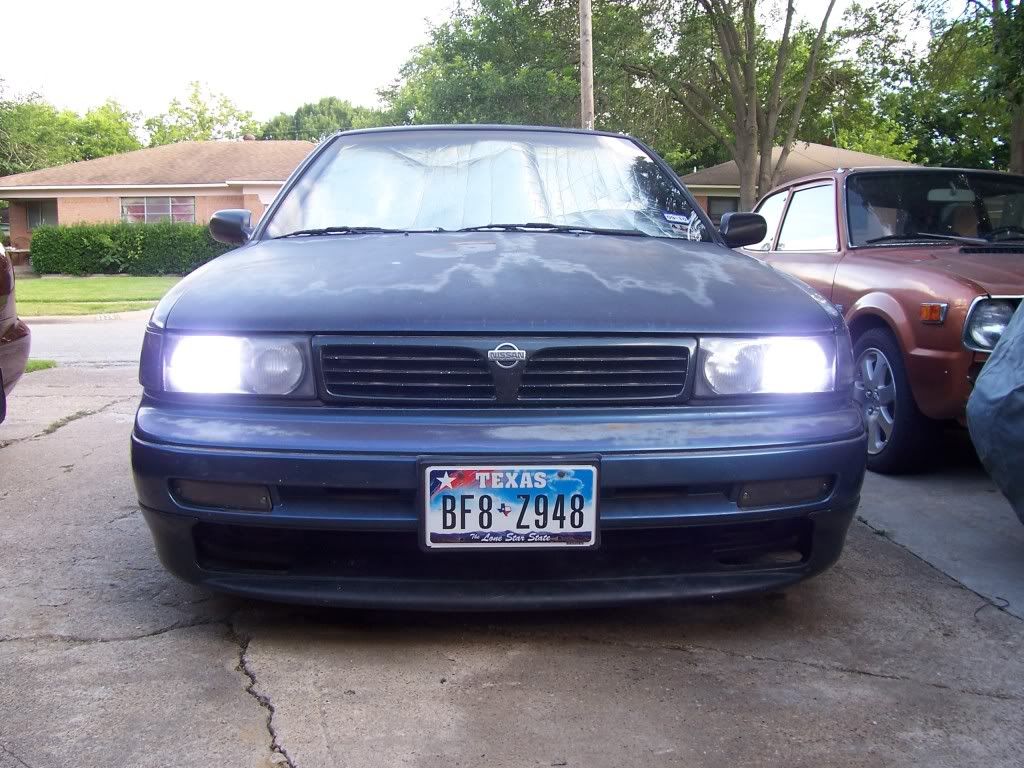
But, I DO like it with the Stillen lip. I think it looks fantastic and kind of draws the eye down toward the lip and whatnot. Without the Stillen lip, it makes the front end look kind of like.. I dunno.. a manatee or something
I don't care what anybody says, this looks badass
But, I DO like it with the Stillen lip. I think it looks fantastic and kind of draws the eye down toward the lip and whatnot. Without the Stillen lip, it makes the front end look kind of like.. I dunno.. a manatee or something
I don't care what anybody says, this looks badass


Hmm, good question. I'm not sure what the part number would be. Here's everything on it
The clear lense part:
Nissan IKI 9178 Japan R
DOT SAE AKPP2 86
The back:
IKI 9178 R
That's everything on it aside from the wattage ratings
I got them done this morning. Man, I love plastic weld. It lets you do just about anything you want when working with/fabbing plastic. I used a ton of that stuff on my headlights and it's been 6+ years now and still no leaking!
I used a Dremel to cut my Wade covers, and also bought several sheets of ABS plastic to fabricate the sides and bottom of my enclosures. I have a gazillion pics from back when I did it so if you PM me your e-mail addy I can send you a .zip file with all of them.
An important trick I did was to use black paint to spray into the plastic weld while I was mixing it, which tinted it black to use on the inners of the enclosure. That way, you can't see the plastic weld through the clear lense. I also painted the inside of the enclosure housing black, and then painted the perimeter of the outside black as well.
I basically cut the plastic lenses off the e36 lights, and built a "box" (using the Wade cover as the "front", and ABS to fabricate the rest), to fit onto the e36 housings. I waterproof tested the "box" as I went along by submerging it in a sink full of water to check for leaks. Then I welded that "box" onto the e36 rear housings, and pretty'd it all up after that.


Looks pretty good although I think the amber reflectors look better with the contrast to the blueness. What color is your other car?
Edit: Oh, I see.. KH1 or is that black? Well, amber looks good on both.. Smoke or clear looks nice on any color so I guess it's a toss up.
Edit: Oh, I see.. KH1 or is that black? Well, amber looks good on both.. Smoke or clear looks nice on any color so I guess it's a toss up.
Last edited by Hectic; Jun 15, 2010 at 02:38 PM.

Member
Joined: May 2004
Posts: 121
From: Christchurch, New Zealand
New Zealand had the clear corners also.
The reason that the smoked portion on the corners has no bulb or cutout for the indicator repeater is that the Aussie/NZ models have the indicator repeater on the wings between the wheel arch and door instead of in the corner lights.
Also our park/clearance lights are a bulb mounted into the reflector of the main headlight, and the corners are just cornering lights only which light up with the indicators.
NZ had the same grille for the 93-95 3rd gen Maximas as Aussie. The 91-92's had the same grill with a thick central bar instead of the 4 fine bars. Orange front indicator lenses were standard for us too.
91-92 grille

93-95 Grille. Shows the indicator repeater by the door on the wing and the clear corners. Front lip was standard to the Maxima Silhouette, which was our sportyish model in the New Zealand Maxima range. Mine comes off a wrecked Silhouette.

The Silhouette showing the front lip with driving lights. These were made by a New Zealand car spoiler company specifically for the Maxima which this is the ad for the company.

dang, I want one of those Silhouette front spoilers...
James, I looked at my stuff and realized that I just took the bulbs out and covered the light socket with electrical tape. I had just put in the front bulbs from my car. No cutting or anything.
James, I looked at my stuff and realized that I just took the bulbs out and covered the light socket with electrical tape. I had just put in the front bulbs from my car. No cutting or anything.


Its Permatex brand "PermaPoxy 5 mi. Plastic Weld". I've always gotten it from PepBoys but I'm sure other places sell it as well. It's a two-part dual-syringe deal. That stuff is great, seriously. It hardens into new plastic, so you can use it to not only "glue" things together, but to actually fill in gaps, build plastic up, fabricate, etc.
I used a Dremel to cut my Wade covers, and also bought several sheets of ABS plastic to fabricate the sides and bottom of my enclosures. I have a gazillion pics from back when I did it so if you PM me your e-mail addy I can send you a .zip file with all of them.
An important trick I did was to use black paint to spray into the plastic weld while I was mixing it, which tinted it black to use on the inners of the enclosure. That way, you can't see the plastic weld through the clear lense. I also painted the inside of the enclosure housing black, and then painted the perimeter of the outside black as well.
I basically cut the plastic lenses off the e36 lights, and built a "box" (using the Wade cover as the "front", and ABS to fabricate the rest), to fit onto the e36 housings. I waterproof tested the "box" as I went along by submerging it in a sink full of water to check for leaks. Then I welded that "box" onto the e36 rear housings, and pretty'd it all up after that.
 i think we have to meet so that i can check out how exactly the lights are put together so that i can finally finish my damn euro lens/E60/E36 headlights.
looks pimp as hell james, now you live in dallas and im currently in san antonio, so it seems im gonna have to go shopping in the middle of the night to your house. i think we have to meet so that i can check out how exactly the lights are put together so that i can finally finish my damn euro lens/E60/E36 headlights.
i think we have to meet so that i can check out how exactly the lights are put together so that i can finally finish my damn euro lens/E60/E36 headlights.Chris (maximo018) told me you were in SA now, but that you left your Maxima in Florida.. bastid
Man, there's no 3rd genners up here. Then you in SA and a bunch of VE 5 guys in Houston (and Cmax). Maybe we can all meet up one day
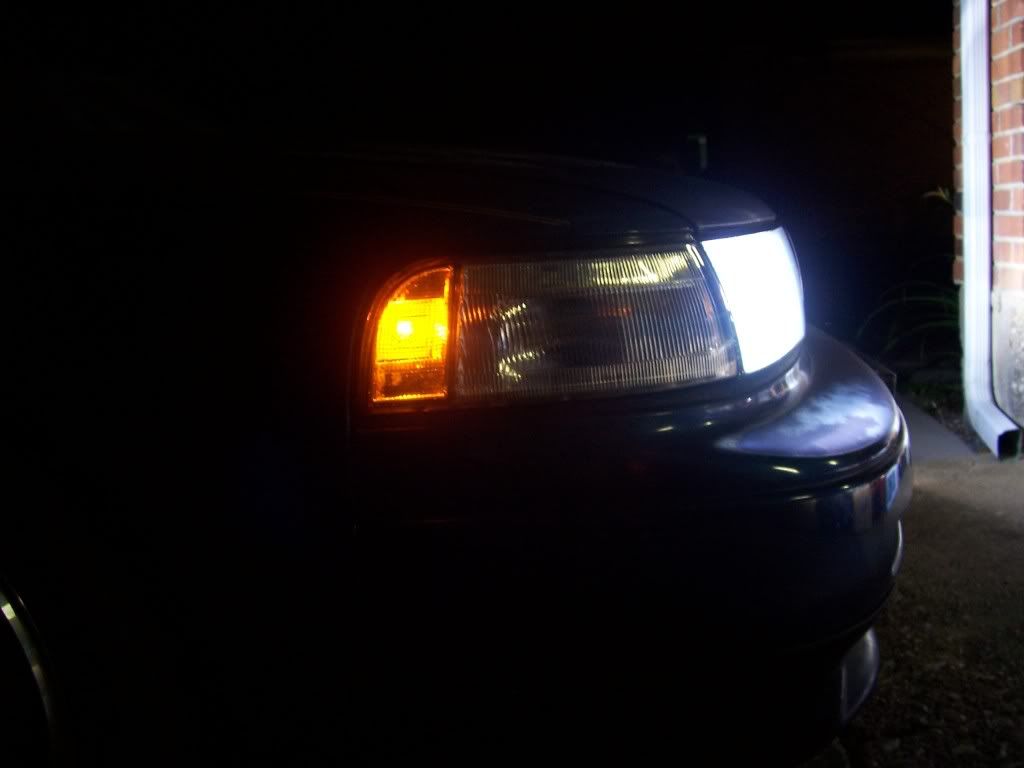
Here's a night shot. I hadn't even thought to check until tonight the light output of the 194 bulb. I was worried it might not be that great since the housing wasn't made for a bulb and with it being tinted and all, but the output is good!

This might be off topic but I'm interested to know how you did that to your trunk on your Max, it's DOPE!!!!!

Chris (maximo018) told me you were in SA now, but that you left your Maxima in Florida.. bastid
Man, there's no 3rd genners up here. Then you in SA and a bunch of VE 5 guys in Houston (and Cmax). Maybe we can all meet up one day
Here's a night shot. I hadn't even thought to check until tonight the light output of the 194 bulb. I was worried it might not be that great since the housing wasn't made for a bulb and with it being tinted and all, but the output is good!

james you dont understand how tough it is not having my 3rd gen here with me. Thank goodness ill be moving back to miami. SA is nice but i really miss the family and friends back home. But i think it would be cool to meet up so that you can finally show me how i can seal up my headlights once i move back home and to check your ve. Whatever happened to your old black ve?
Hah! Alright I'll shed some light on few things not all. what you up to Saturday night.

sad thing is some lady backed into him yesterday and the car got totaled
I used a flathead screwdriver to get it out, but it did take a bit of weasling and prying and messing with it, but I was able to get them out. I figured out on the second one that it's easiest to use the screwdriver to pry it up in the middle, then use some scissors to cut it in half and it's easier to work with two pieces than one large one

Member
Joined: May 2010
Posts: 32
From: Redcliffe, Western Australia
I used a flathead screwdriver to get it out, but it did take a bit of weasling and prying and messing with it, but I was able to get them out. I figured out on the second one that it's easiest to use the screwdriver to pry it up in the middle, then use some scissors to cut it in half and it's easier to work with two pieces than one large one
i did a similar thing with my gf's import mx5, those little reflectors on the bumpers, i just drilled out the back and put T10 wedge globes in, but hers didn't have this barrier,
so i got all excited and made up globe holders and looms and so on took apart my corners then seemed like i was screwed, so yeah thanks for the tip

Thread
Thread Starter
Forum
Replies
Last Post
MaxLife17
8th Generation Maxima (2016-)
43
Jun 27, 2019 01:37 PM
NERDJUSTBNME
8th Generation Maxima (2016-)
12
Sep 30, 2015 03:20 PM