
3rd gen project rebuild/restoration pictures
 06-08-2012, 06:43 PM
#1
Senior Member
Thread Starter
iTrader: (8)

Join Date: Oct 2001
Location: long island, NY
Posts: 3,996
3rd gen project rebuild/restoration pictures
Figured I would post up some pictures of the rebuild i did on my 92 SE from 2009-2011
Long story shortened to one sentence: What started as a JDM VE motor swap snowballed into fixing/repairing/restoring the entire car. Main reason for doing so was my noticing the fuel/brake lines were rusty; the hard lines that run under the car from the firewall all the way to the back
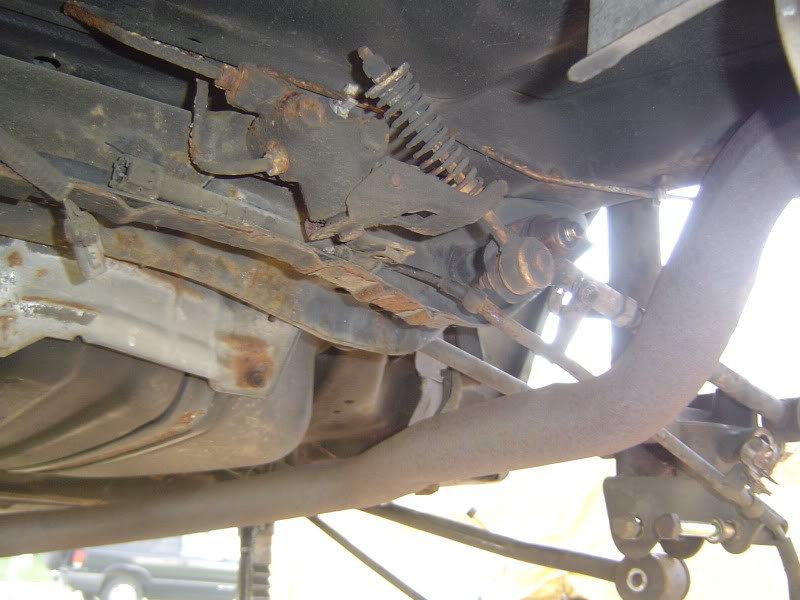
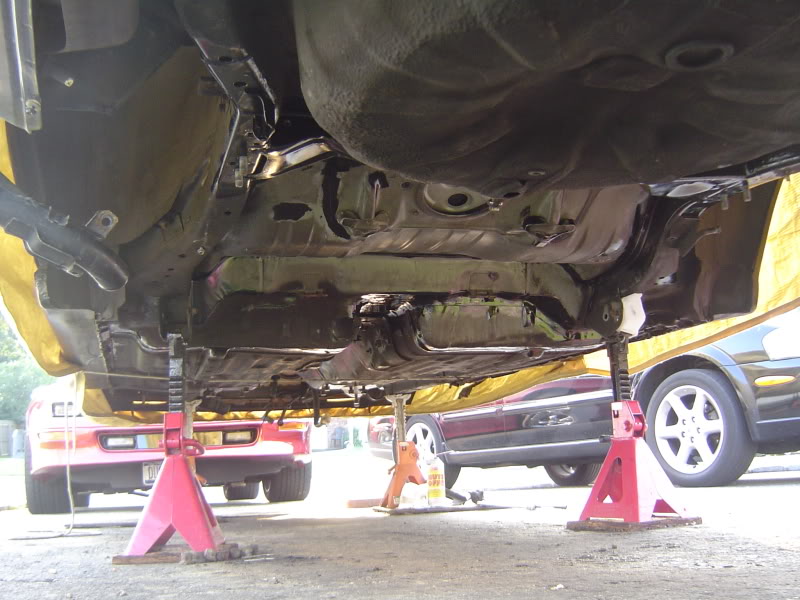
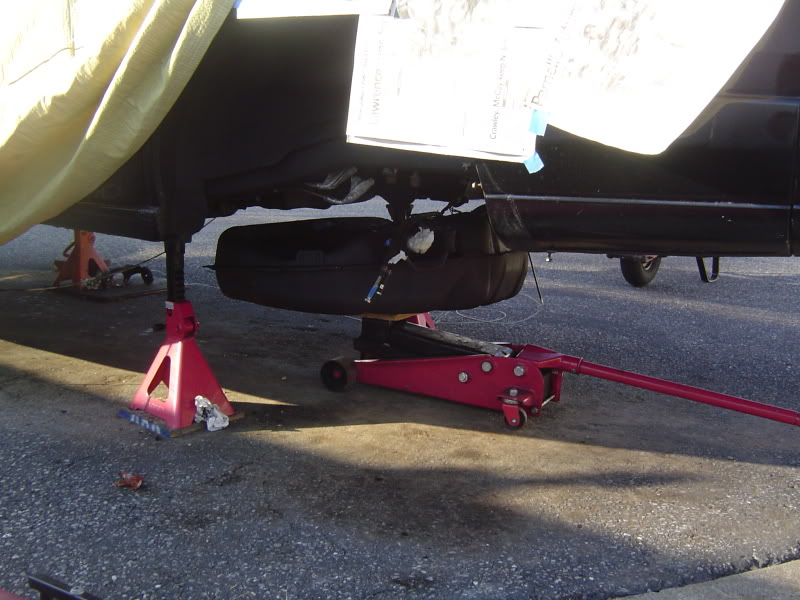
underbody "before" pictures.. you get the idea, rust is not too bad but I wanted to tackle it before it got worse over time

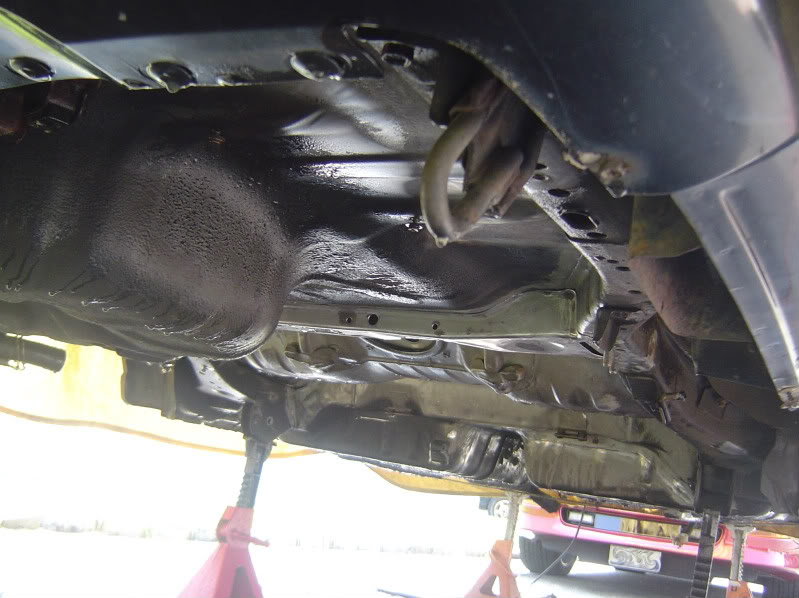
Underbody completely gutted and wire wheeled (only the rusted spots) This was the most down-n-dirty part of the job as im sitting there laying on my back on a creeper with goggles on wire wheeling off rust/undercoating/dirt/paint/spiderwebs and all kinds of neat stuff falling onto my face and all. If I wheeled off every single inch of surface it would take triple the time, plus the factory undercoating that was still there looks better than any backyard mechanic or restorer such as me could ever duplicate without doing a full rotisserie sandblast and re-coat with professional equipment
Close up of the seams
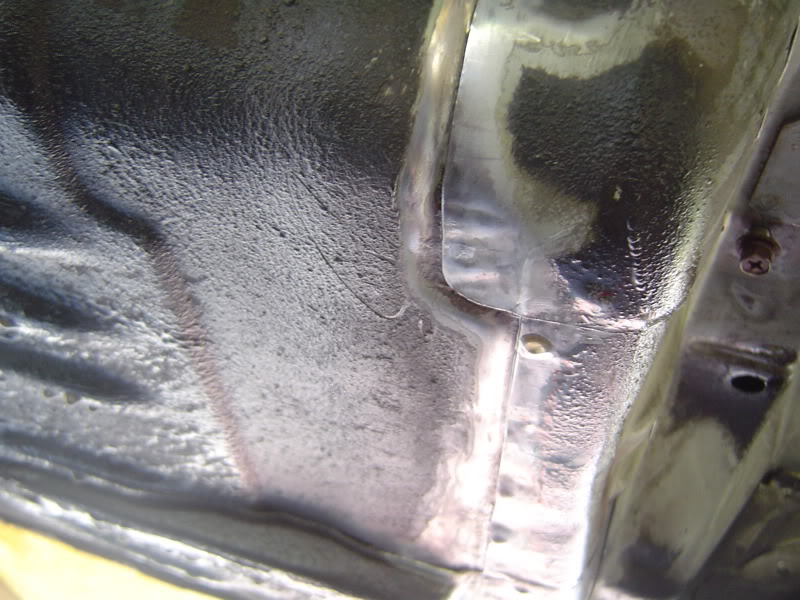
Surface prep and POR15 paint applied:
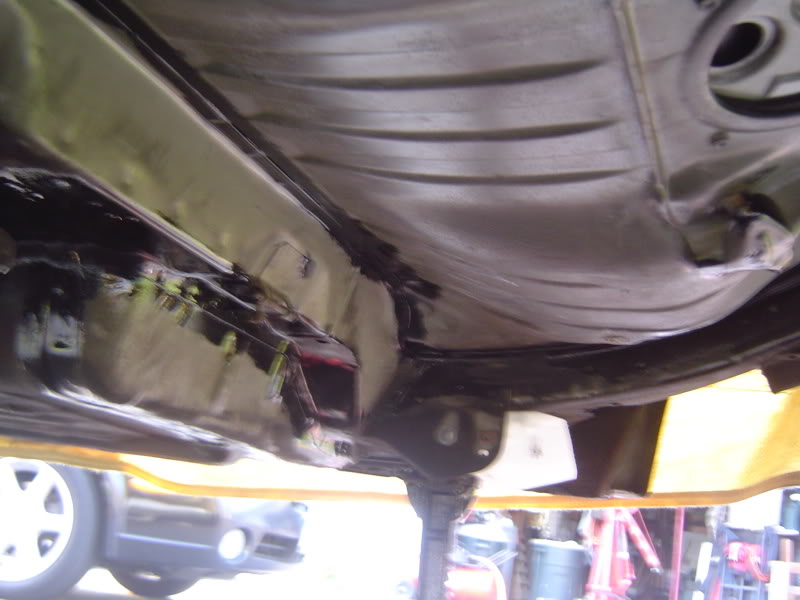

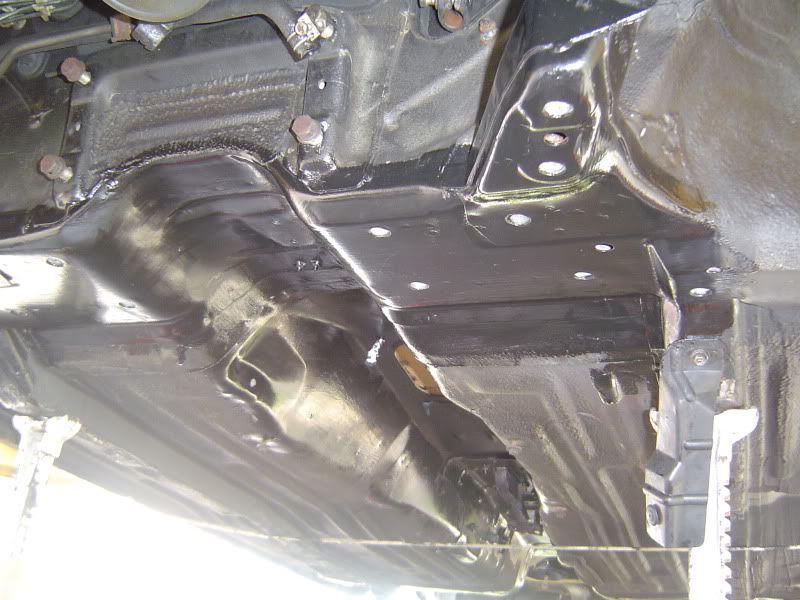
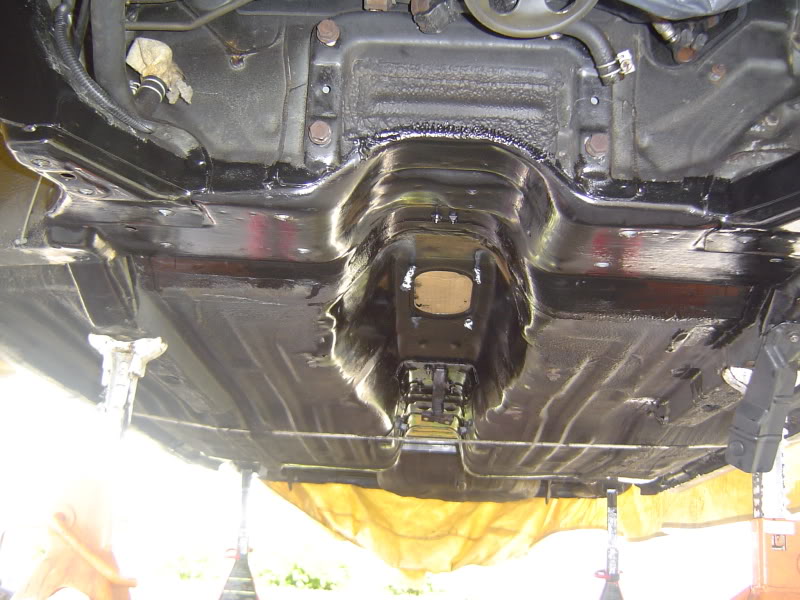
And then sprayed everything with 3M undercoating:
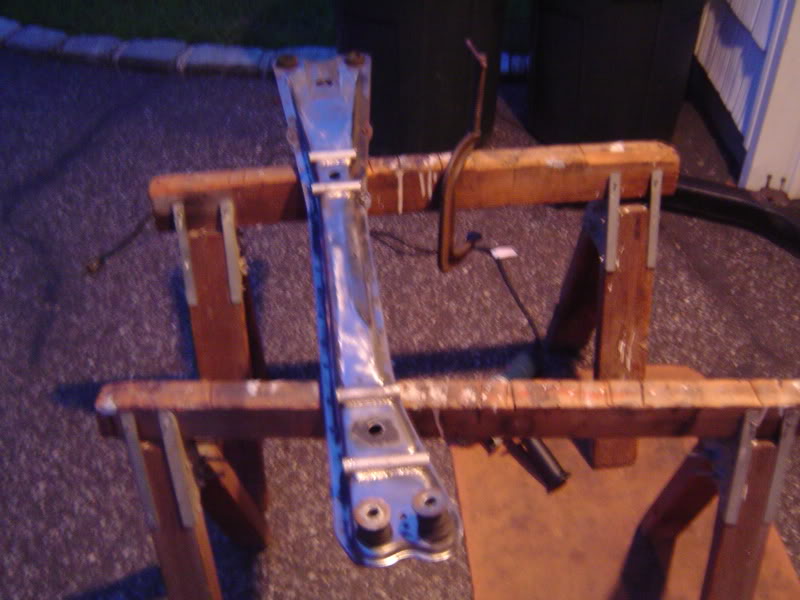
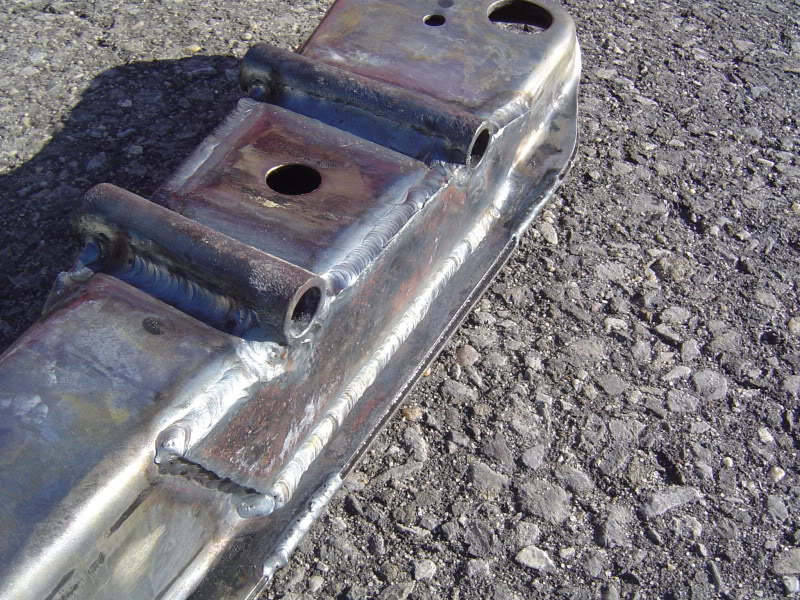
Front crossmember: I discovered a crack on the gusset tubes where the engine mount bolts go through
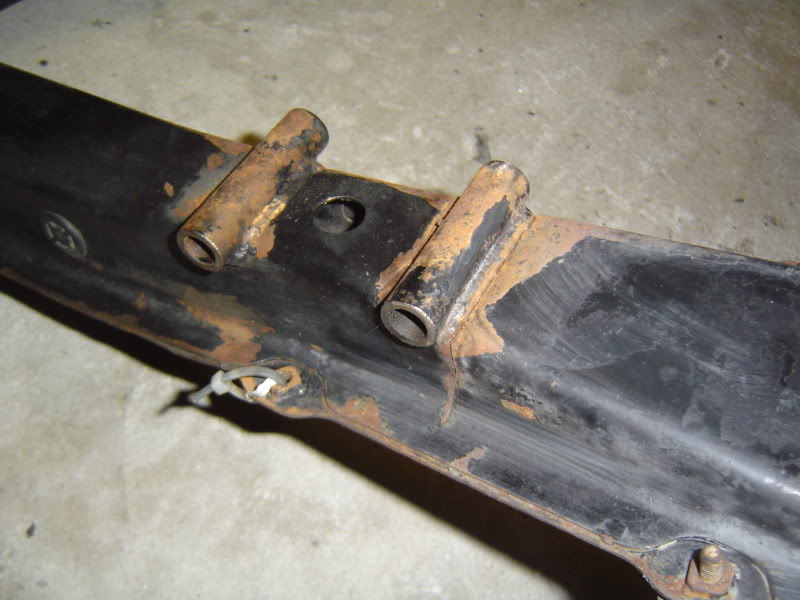
Wire wheeled all of the paint off, getting it ready to weld
continued---
Long story shortened to one sentence: What started as a JDM VE motor swap snowballed into fixing/repairing/restoring the entire car. Main reason for doing so was my noticing the fuel/brake lines were rusty; the hard lines that run under the car from the firewall all the way to the back
underbody "before" pictures.. you get the idea, rust is not too bad but I wanted to tackle it before it got worse over time
Underbody completely gutted and wire wheeled (only the rusted spots) This was the most down-n-dirty part of the job as im sitting there laying on my back on a creeper with goggles on wire wheeling off rust/undercoating/dirt/paint/spiderwebs and all kinds of neat stuff falling onto my face and all. If I wheeled off every single inch of surface it would take triple the time, plus the factory undercoating that was still there looks better than any backyard mechanic or restorer such as me could ever duplicate without doing a full rotisserie sandblast and re-coat with professional equipment
Close up of the seams
Surface prep and POR15 paint applied:
And then sprayed everything with 3M undercoating:
Front crossmember: I discovered a crack on the gusset tubes where the engine mount bolts go through
Wire wheeled all of the paint off, getting it ready to weld
continued---
 06-08-2012, 06:45 PM
#2
Senior Member
Thread Starter
iTrader: (8)
Join Date: Oct 2001
Location: long island, NY
Posts: 3,996
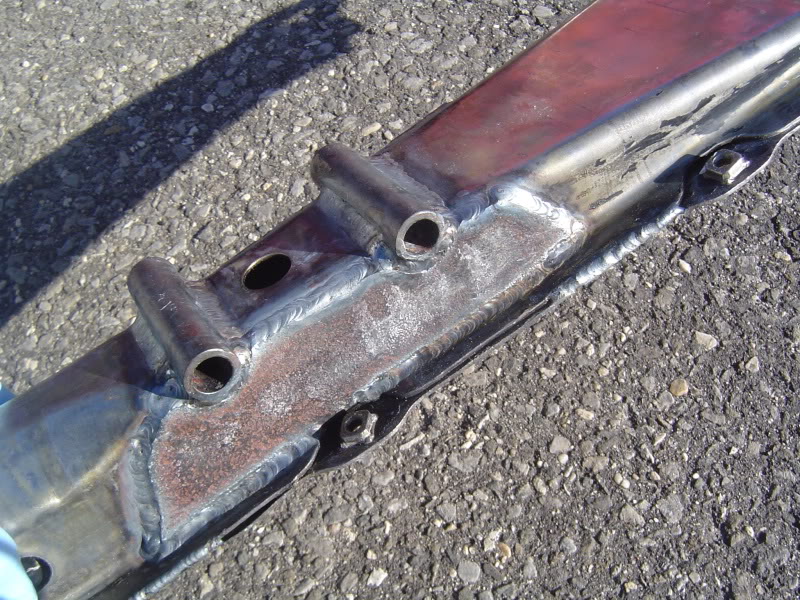
support plates added in 4 places, this thing is noticeably heavier now, but i know i will never break again
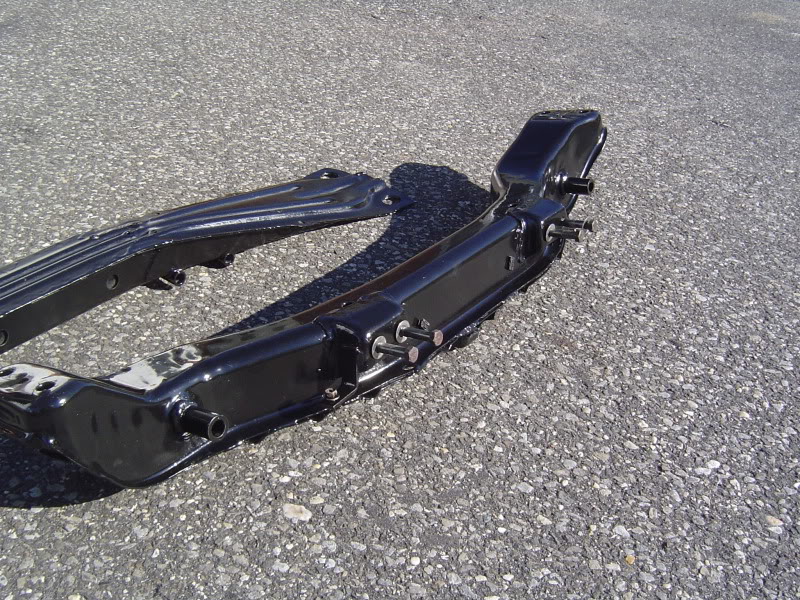
POR15 painted (did the rear crossmember too)
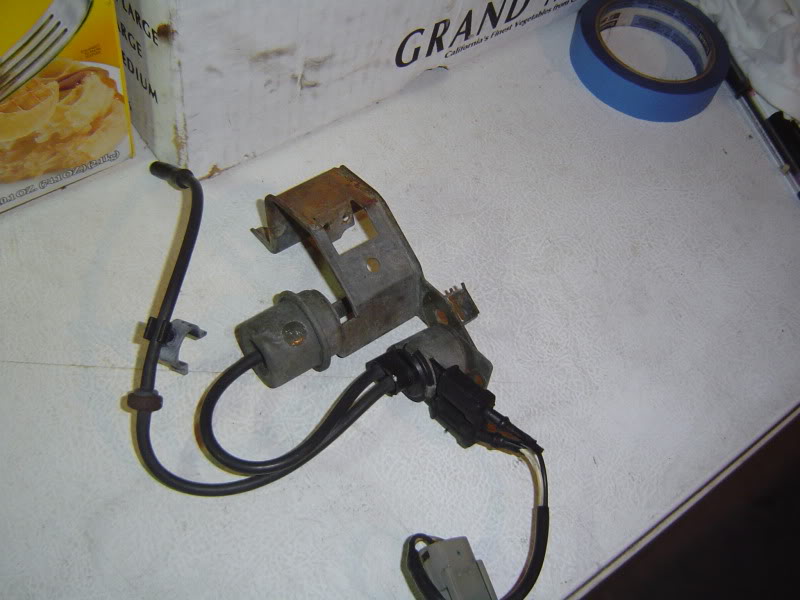
Load sensing valves for the rear brakes - I didnt completely dissasemble these (apparently youre not supposed to as per the FSM) but I just removed the springs and bolts to sand the rust off, blew out inside the valve assemblys with brake cleaner and compressed air, and coated w/ POR15
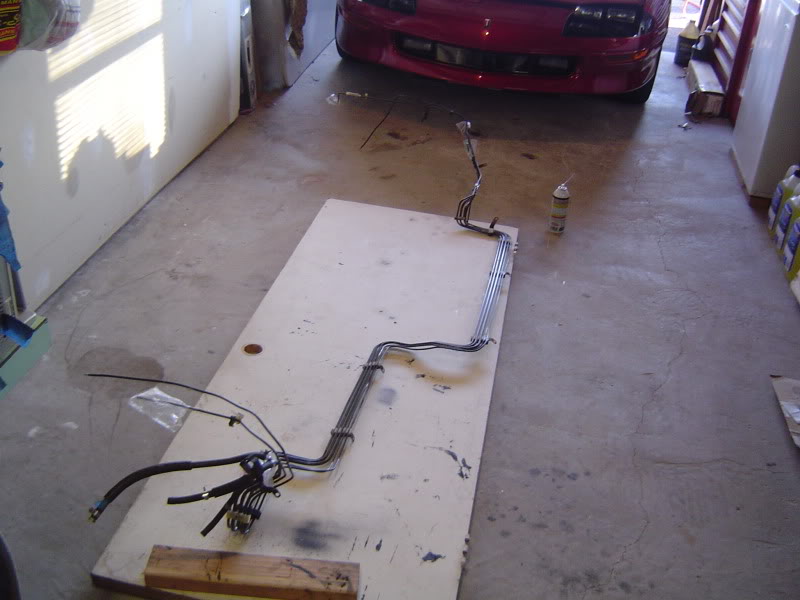
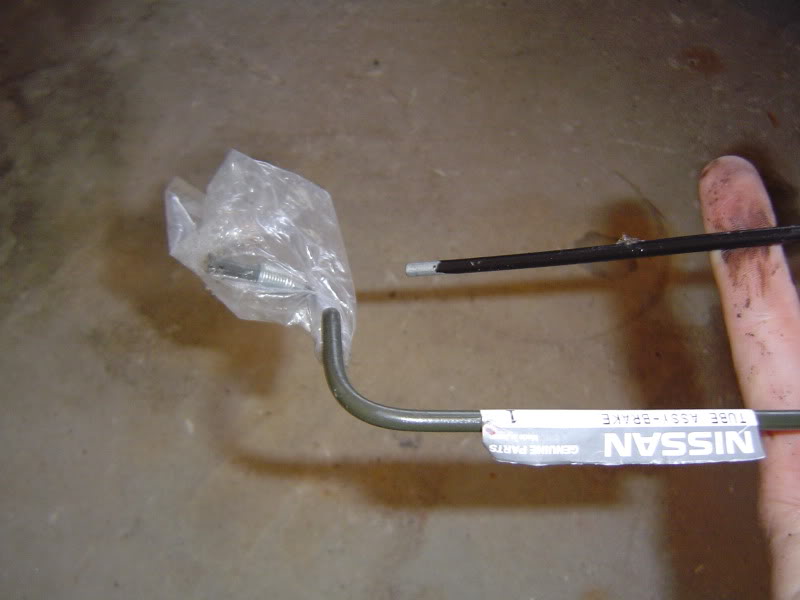
New Fuel Lines -
I was extremely lucky to find these available through my local Nissan dealer, this saved me what couldve been a big headache if I had to make all of these hard lines from scratch and make all of these bends..
- 3 fuel lines (feed, return, and evap line)
- 2 brake lines (from firewall to right rear load valve and from firewall to left rear load valve)
- 2 more shorter brake lines (from each load valve out to the caliper)
I did have to make one line myself as the one brake line (firewall to left rear) wasnt available.. I bought a coil of hard line from the parts store and straightened it out as best i could by hand and put bends in it with a line bending tool, and painted it with POR15 (it was a bare steel line). The other nissan lines already had a green paint on it so i left them as is. I had to use a flare tool to get the right flare on the line ends to screw into the brake line fittings on the car (i practiced a bunch of times on scrap pieces until i got the flare to come out right)
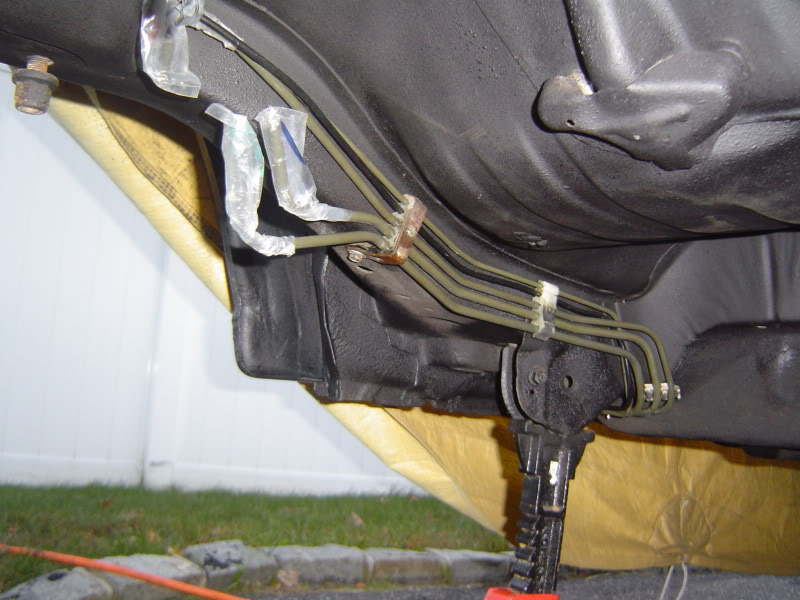
Layed out in the garage, putting them all together with the line clips/bundles
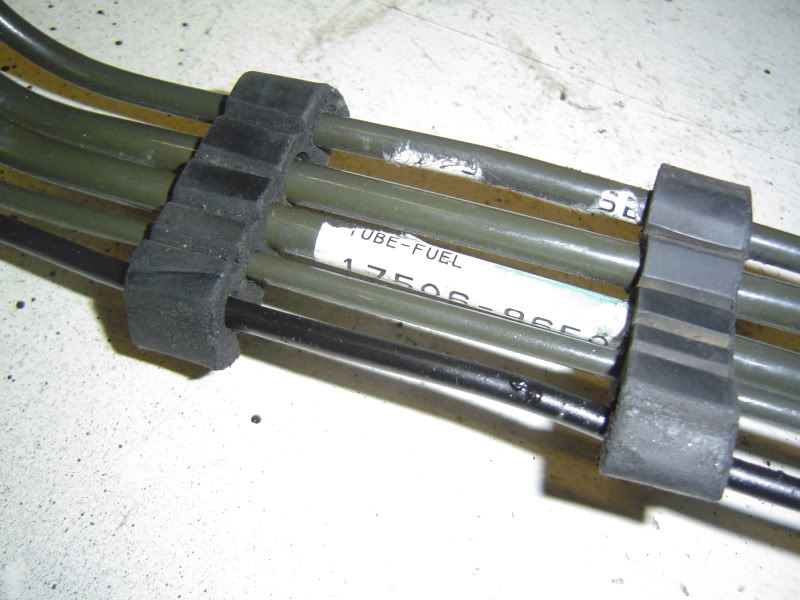
Nissan lines next to my self made line, before flaring
Installed
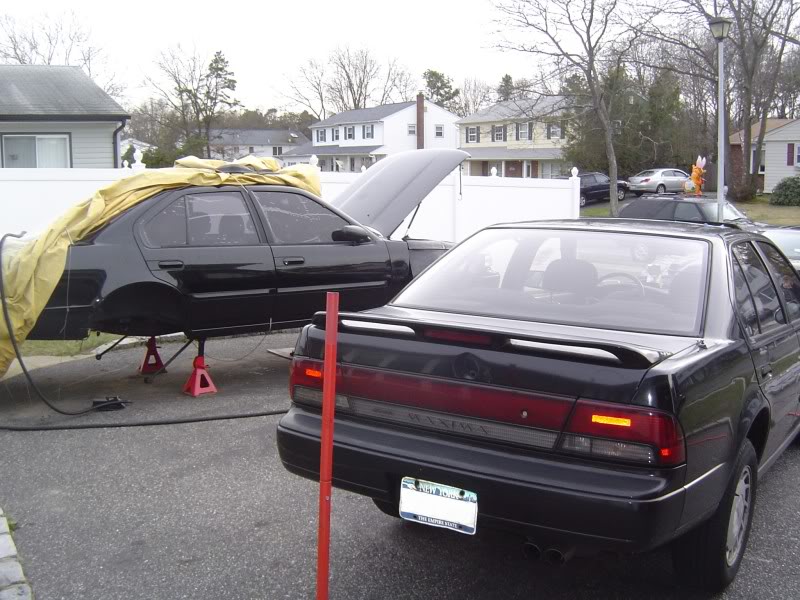
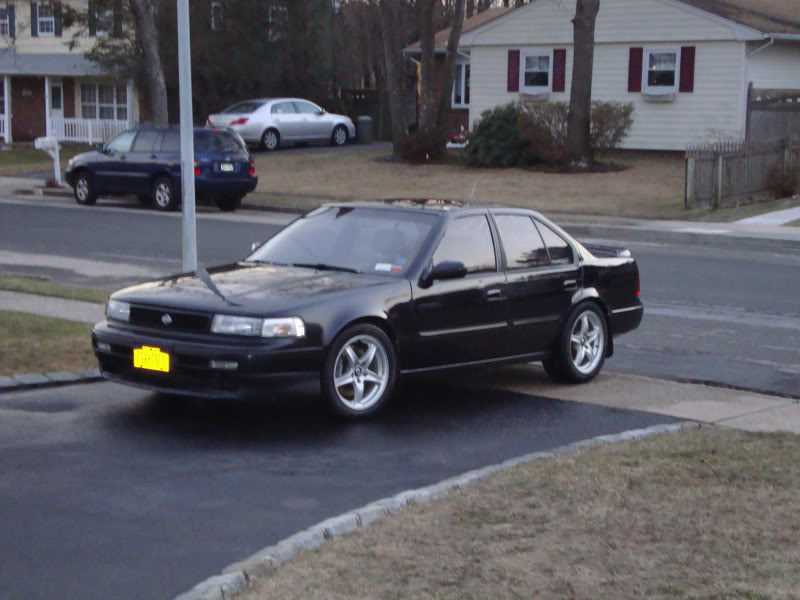
The twin.. I bought this car in late summer 2009 as a daily driver to buy me some time until I finished mine. I was looking for any kind of car to get around really and I just happened to find the same car, its a VE 5speed and it proved to be helpful to use as a guide in case I forgot where stuff went on my car. It looks lifted because i had it jacked up in the back to compare some things
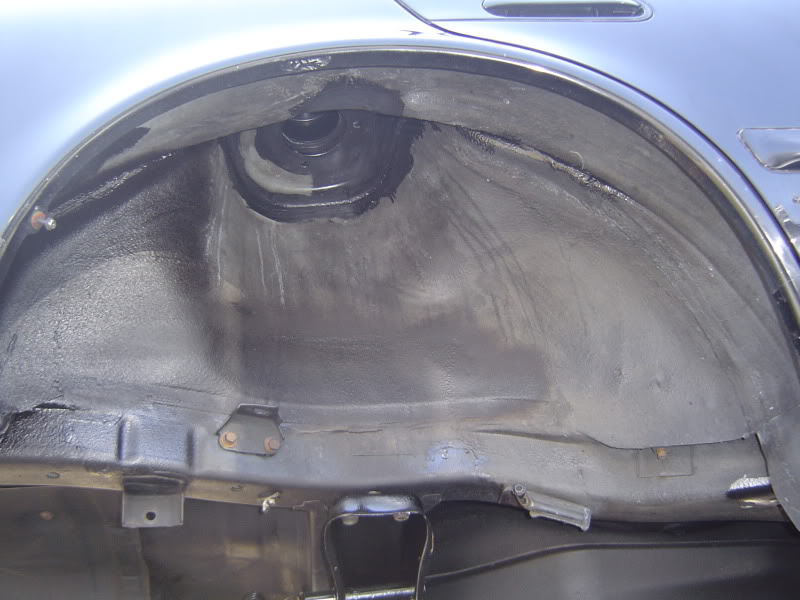
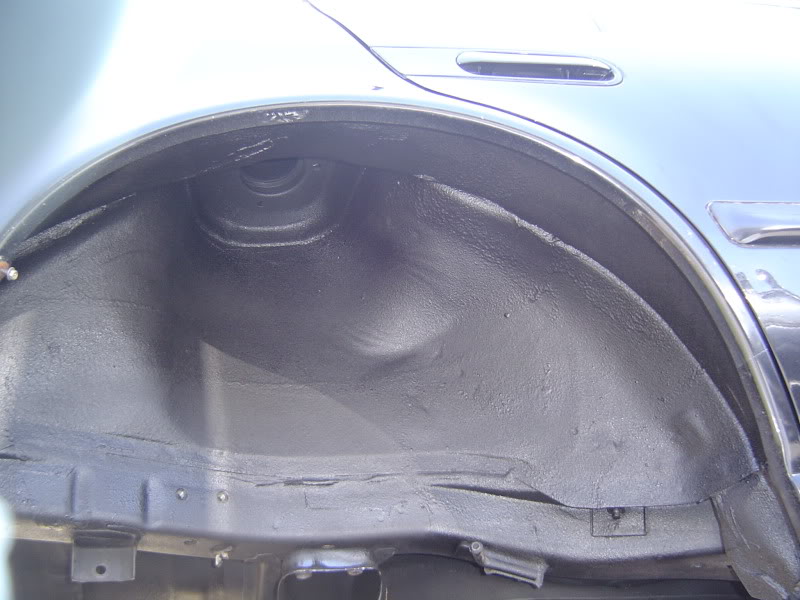
Repainted the gas cap area while the filler tube was out
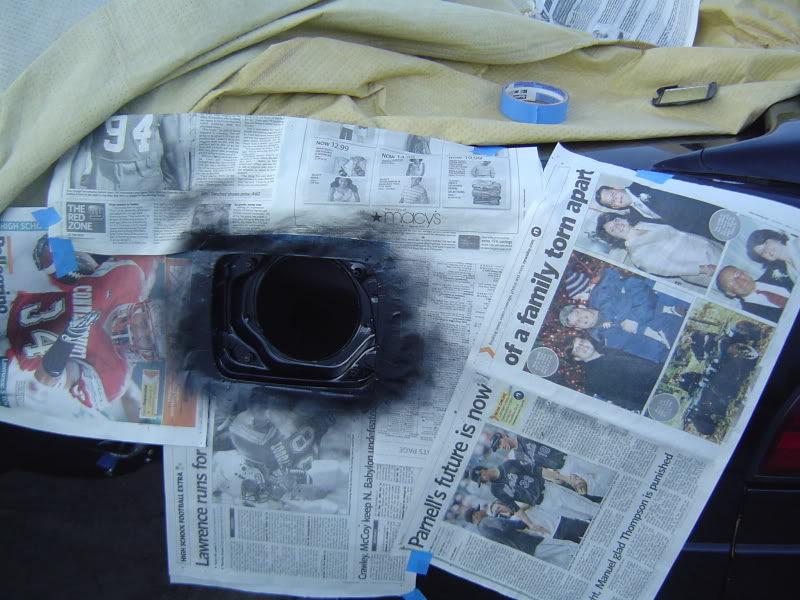
The tank was in good shape, i just cleaned off any minor flaking paint and sprayed it with the undercoating spray.. going back in:
continued---
POR15 painted (did the rear crossmember too)
Load sensing valves for the rear brakes - I didnt completely dissasemble these (apparently youre not supposed to as per the FSM) but I just removed the springs and bolts to sand the rust off, blew out inside the valve assemblys with brake cleaner and compressed air, and coated w/ POR15
New Fuel Lines -
I was extremely lucky to find these available through my local Nissan dealer, this saved me what couldve been a big headache if I had to make all of these hard lines from scratch and make all of these bends..
- 3 fuel lines (feed, return, and evap line)
- 2 brake lines (from firewall to right rear load valve and from firewall to left rear load valve)
- 2 more shorter brake lines (from each load valve out to the caliper)
I did have to make one line myself as the one brake line (firewall to left rear) wasnt available.. I bought a coil of hard line from the parts store and straightened it out as best i could by hand and put bends in it with a line bending tool, and painted it with POR15 (it was a bare steel line). The other nissan lines already had a green paint on it so i left them as is. I had to use a flare tool to get the right flare on the line ends to screw into the brake line fittings on the car (i practiced a bunch of times on scrap pieces until i got the flare to come out right)
Layed out in the garage, putting them all together with the line clips/bundles
Nissan lines next to my self made line, before flaring
Installed
The twin.. I bought this car in late summer 2009 as a daily driver to buy me some time until I finished mine. I was looking for any kind of car to get around really and I just happened to find the same car, its a VE 5speed and it proved to be helpful to use as a guide in case I forgot where stuff went on my car. It looks lifted because i had it jacked up in the back to compare some things
Repainted the gas cap area while the filler tube was out
The tank was in good shape, i just cleaned off any minor flaking paint and sprayed it with the undercoating spray.. going back in:
continued---
06-08-2012, 06:47 PM
#3
Senior Member
Thread Starter
iTrader: (8)
Join Date: Oct 2001
Location: long island, NY
Posts: 3,996
Suspension & Brakes -
I bought 4 new Tokico struts and had my Eibach springs powdercoated black, which was cheaper than buying new springs, my springs were fine except they had some rust on the rears where the tightly wound coils rub against each other. I was considering the Konis at this time but trying to watch what I spent, i stuck with the Tokicos
Tapping all threaded holes/studs
Rear crossmember in
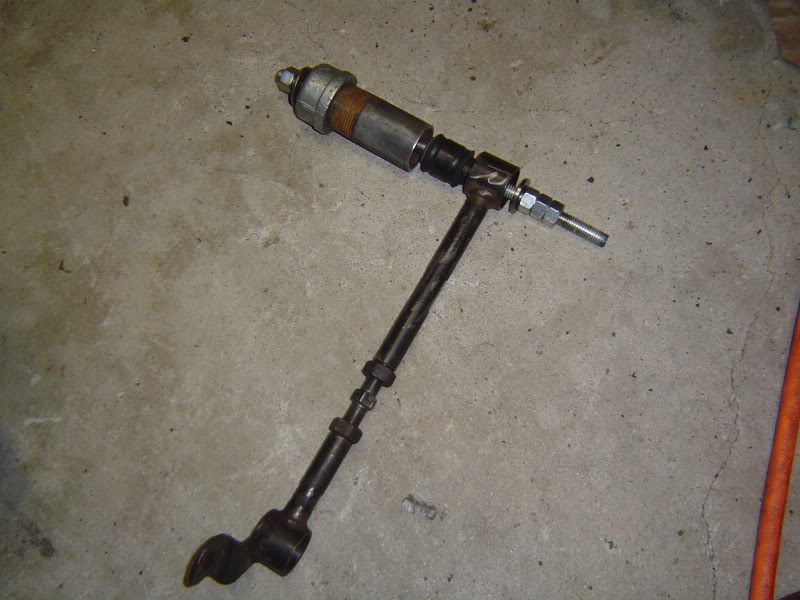
Tool setup i made to push out the bushings on the rear links, replaced with the polyurethane kit from Courtesy Nissan
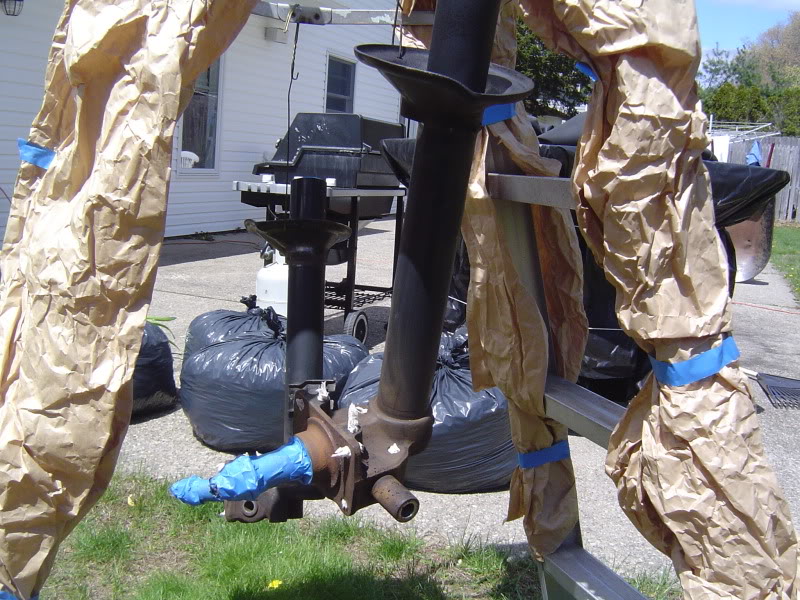
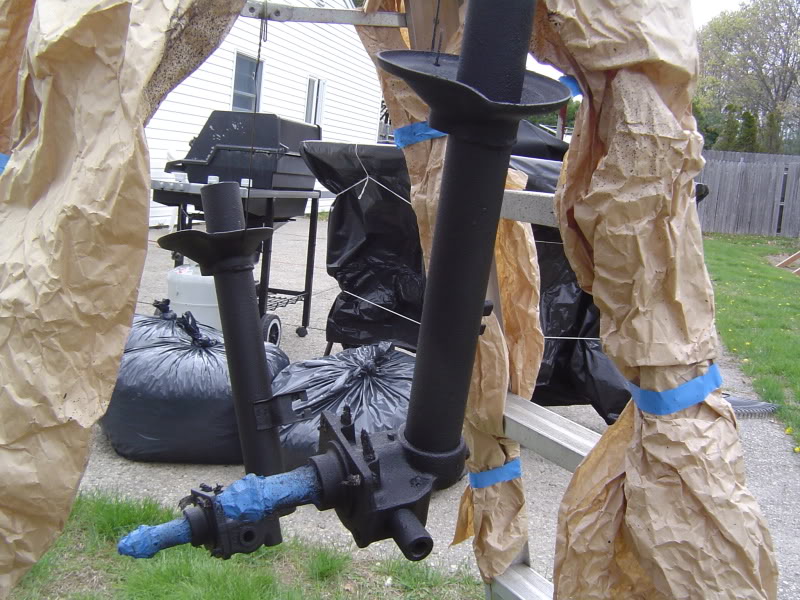
Wire wheeled down and spray undercoated
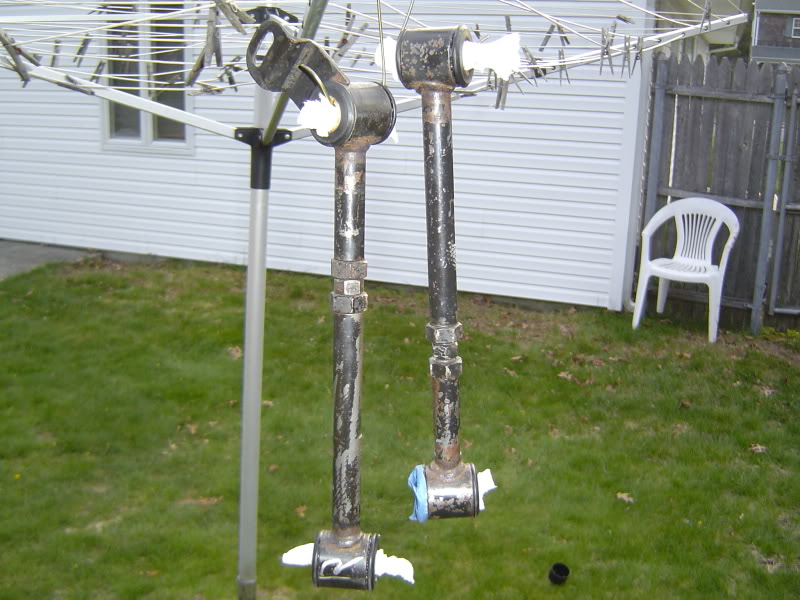
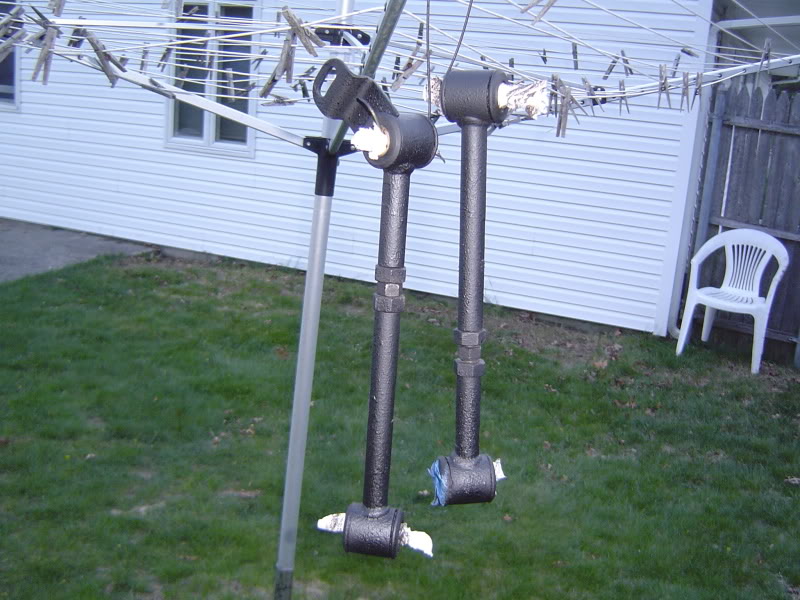
Rear strut housings also cleaned and undercoated
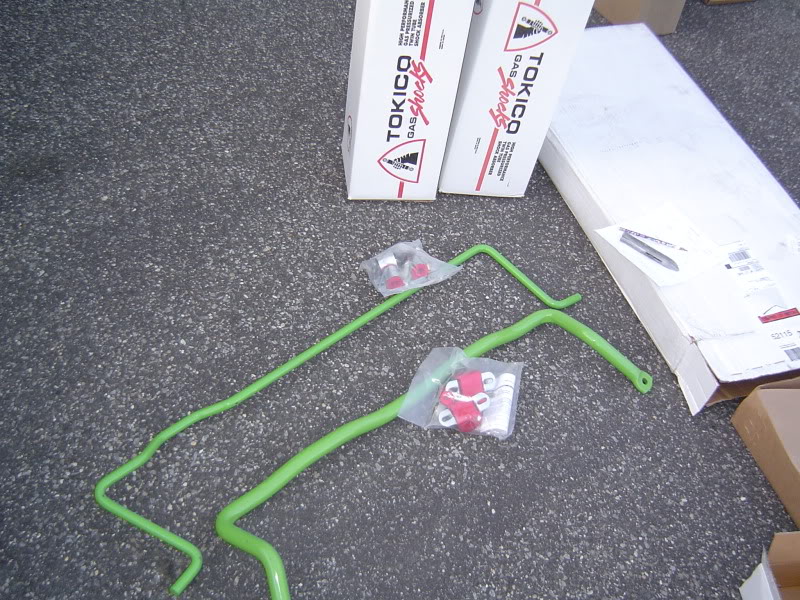
Suspension techniques sway bar kit.. flourescent green wtf! I was thinking theyd come in black or something, i dont remember seeing a choice of colors when I ordered. But eh, i sanded the bars down and painted them with metallic gunmetal wheel paint
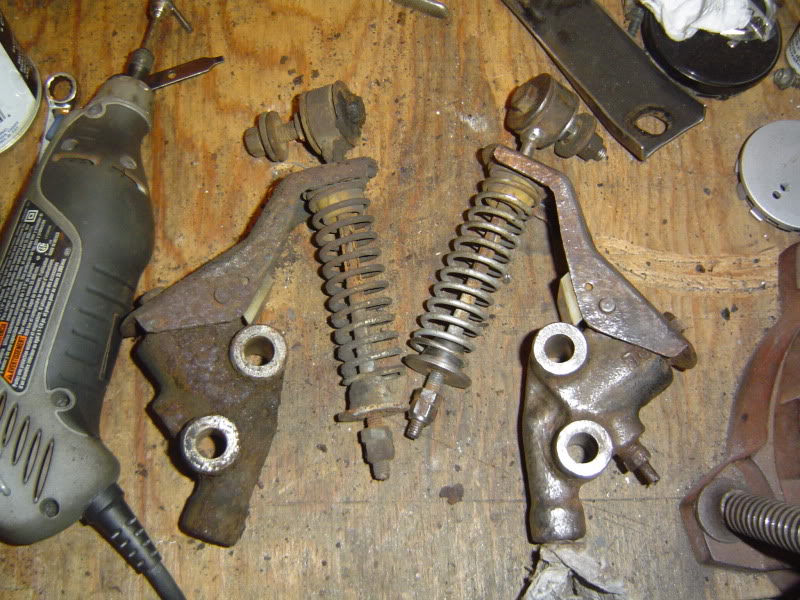
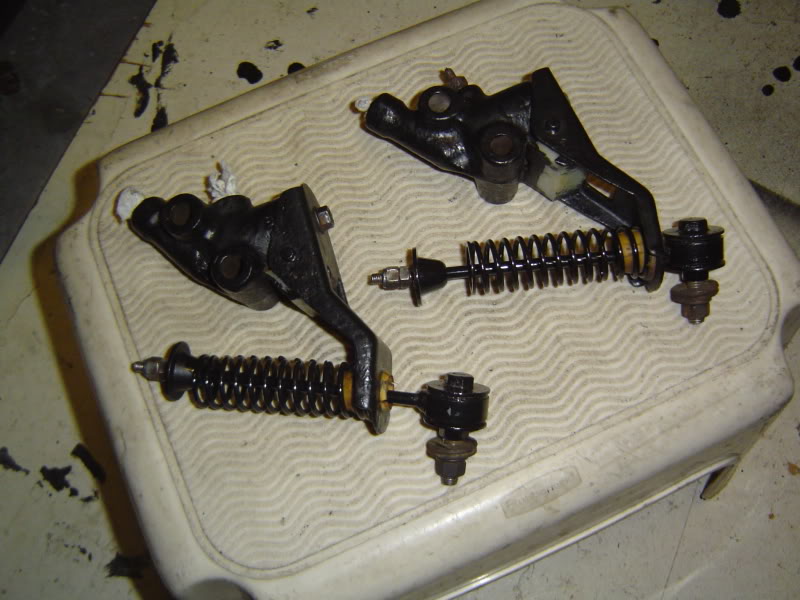
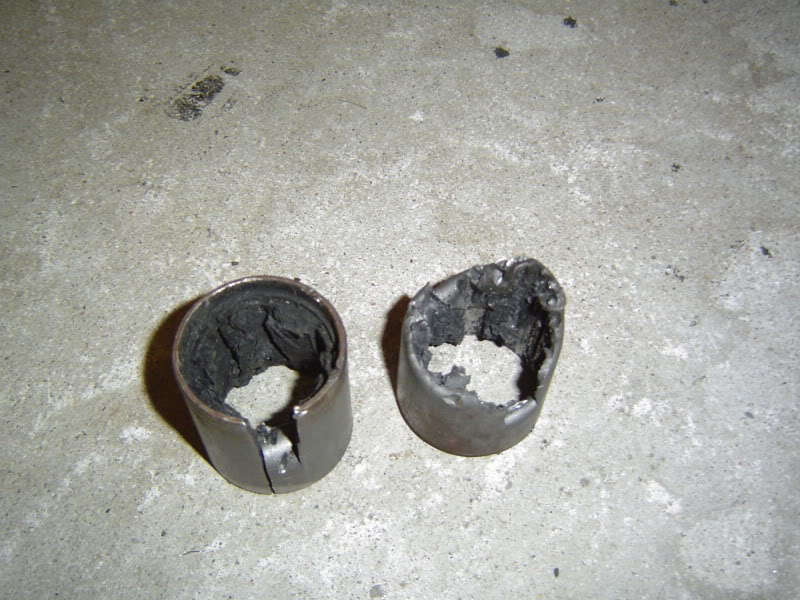
Front control arms bushings pushed out, dam was this tedious, even with using the air chisel. The one pictured on the left came out easier than the one on the right
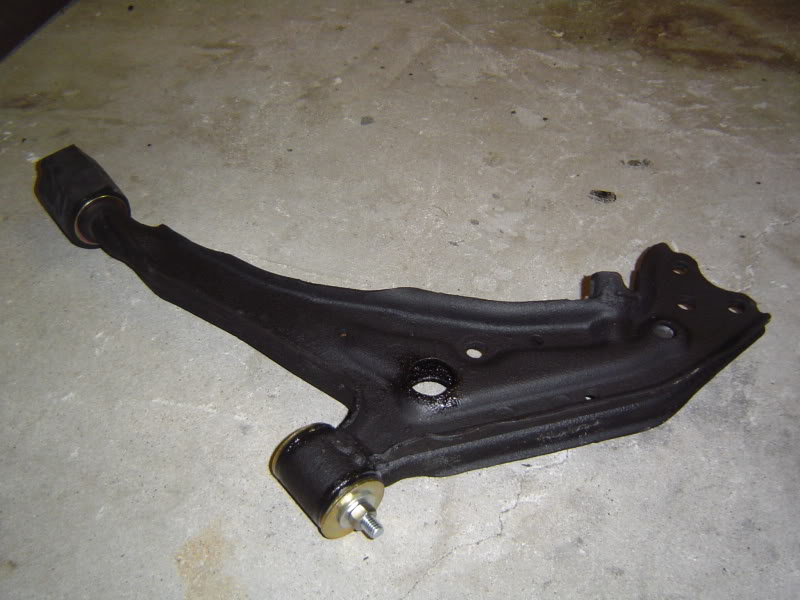
All done and ready to go and sprayed with undercoating (i did both arms but 1 is pictured) Washers and bolt is there to hold the poly bushing in place until i put it back on the car
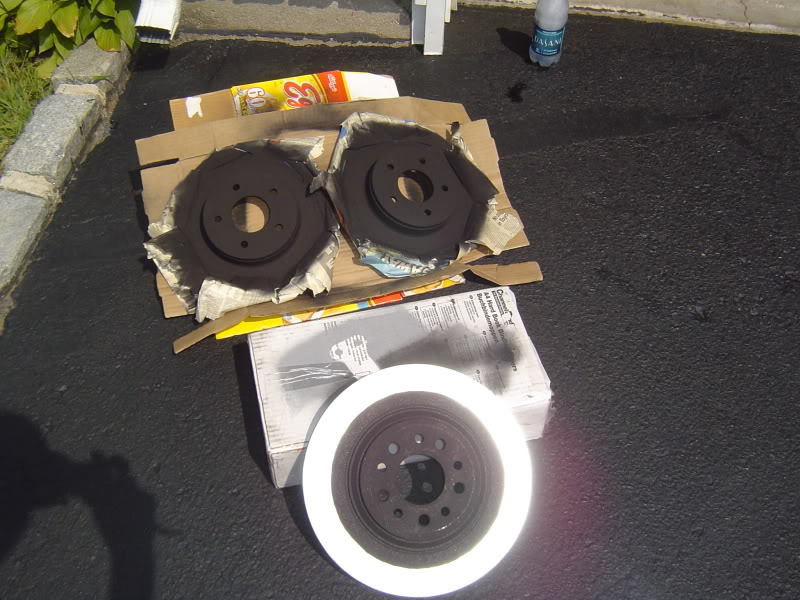
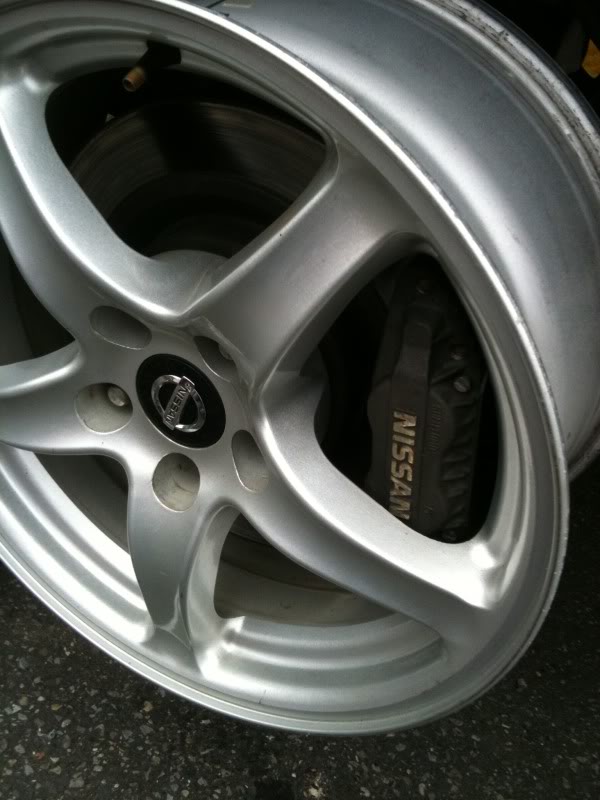
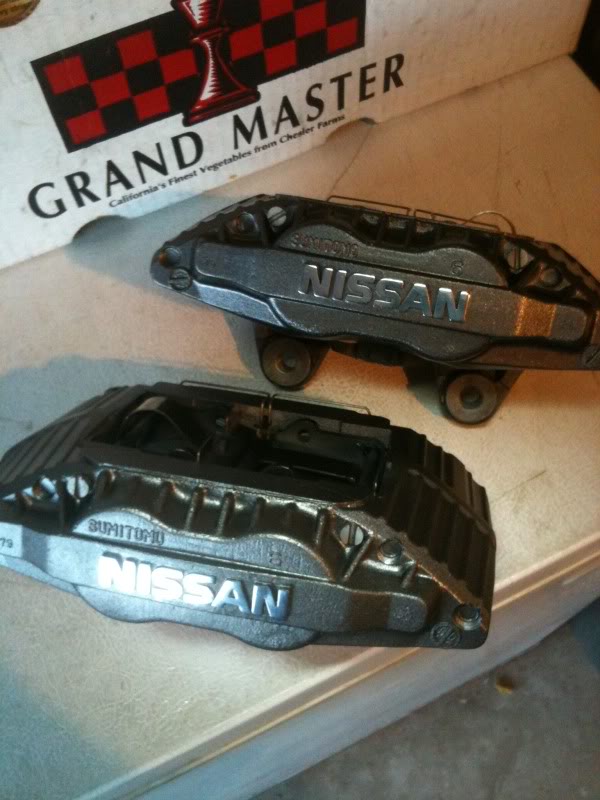
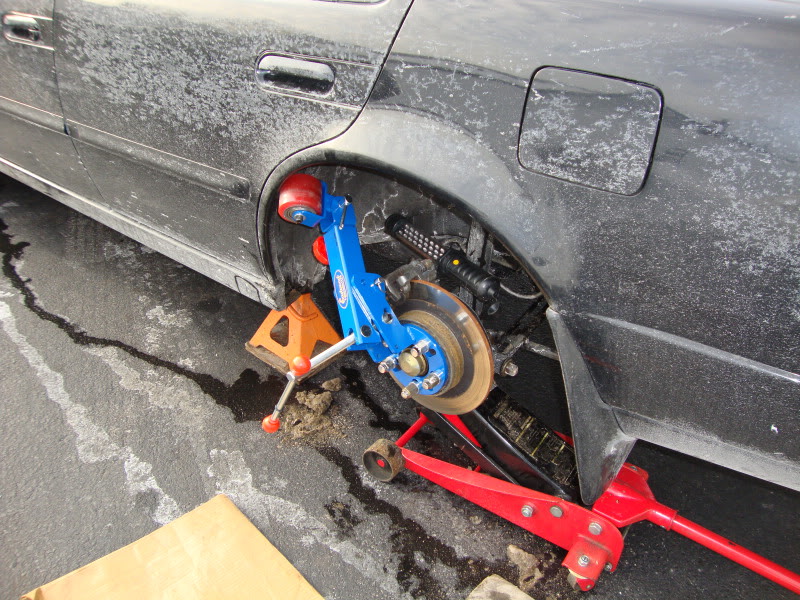
While i had everything teared down i figured id upgrade the brakes finally. I went with the Cobra rotor/Z32 caliper on the front and the Z31 rotor/stock caliper on the back. I dont know who originally pioneered this setup (Matt? Jeff?) but it seems to work well, got me out of a few close calls and short-stops. So not just for aesthetics of a big brake kit, but functionality and safety is why I justified doing this.
I used VHT high temp flat black header paint, so here are the rotors (rear Z31 rotors too) "baking" in the sun.. you can see my water bottle there sweating, it was a pretty hot day- this was summer 2010 at this picture. I dont really know if this helped but the paint can does say they should be baked in an oven to help cure it, I dont have a powdercoating oven (and not going to use the kitchen oven) The rear rotors didnt have a zinc coating like the front cobra rotors did so the black paint wore off a bit more on the rears, but i just hit them with a quick respray everytime i rotate the tires
Test fit on the front
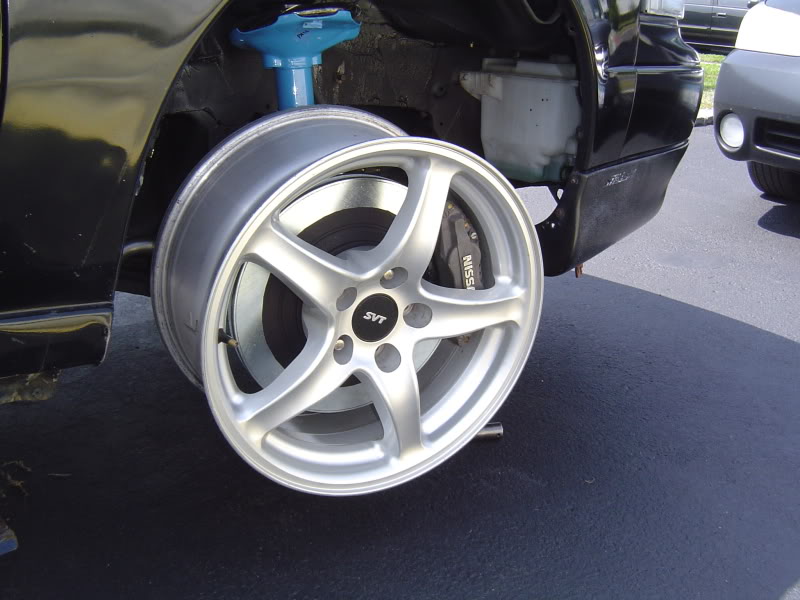
Modified the "SVT" center caps -
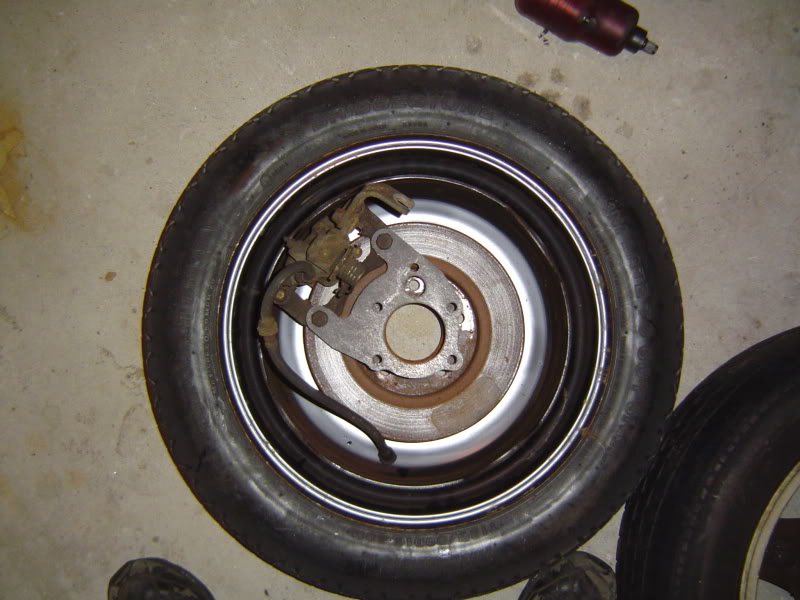
I knew the donut spare definitely doesnt fit on the front, so im checking donut fitment on the rears for the Z31 300zx rotors and the extension bracket, although this picture is with the stock rear rotors. It fits, so if i ever get a flat in the front (which i did actually) i will need to put the donut on the back and swap the back tire up to the front
continued---
I bought 4 new Tokico struts and had my Eibach springs powdercoated black, which was cheaper than buying new springs, my springs were fine except they had some rust on the rears where the tightly wound coils rub against each other. I was considering the Konis at this time but trying to watch what I spent, i stuck with the Tokicos
Tapping all threaded holes/studs
Rear crossmember in
Tool setup i made to push out the bushings on the rear links, replaced with the polyurethane kit from Courtesy Nissan
Wire wheeled down and spray undercoated
Rear strut housings also cleaned and undercoated
Suspension techniques sway bar kit.. flourescent green wtf! I was thinking theyd come in black or something, i dont remember seeing a choice of colors when I ordered. But eh, i sanded the bars down and painted them with metallic gunmetal wheel paint
Front control arms bushings pushed out, dam was this tedious, even with using the air chisel. The one pictured on the left came out easier than the one on the right
All done and ready to go and sprayed with undercoating (i did both arms but 1 is pictured) Washers and bolt is there to hold the poly bushing in place until i put it back on the car
While i had everything teared down i figured id upgrade the brakes finally. I went with the Cobra rotor/Z32 caliper on the front and the Z31 rotor/stock caliper on the back. I dont know who originally pioneered this setup (Matt? Jeff?) but it seems to work well, got me out of a few close calls and short-stops. So not just for aesthetics of a big brake kit, but functionality and safety is why I justified doing this.
I used VHT high temp flat black header paint, so here are the rotors (rear Z31 rotors too) "baking" in the sun.. you can see my water bottle there sweating, it was a pretty hot day- this was summer 2010 at this picture. I dont really know if this helped but the paint can does say they should be baked in an oven to help cure it, I dont have a powdercoating oven (and not going to use the kitchen oven) The rear rotors didnt have a zinc coating like the front cobra rotors did so the black paint wore off a bit more on the rears, but i just hit them with a quick respray everytime i rotate the tires
Test fit on the front
Modified the "SVT" center caps -
I knew the donut spare definitely doesnt fit on the front, so im checking donut fitment on the rears for the Z31 300zx rotors and the extension bracket, although this picture is with the stock rear rotors. It fits, so if i ever get a flat in the front (which i did actually) i will need to put the donut on the back and swap the back tire up to the front
continued---
06-08-2012, 06:49 PM
#4
Senior Member
Thread Starter
iTrader: (8)
Join Date: Oct 2001
Location: long island, NY
Posts: 3,996
JDM Engine & Engine Bay work -
The heart of this whole job! the engine work i saved till last since i wanted to be able to buy the motor, do the work, swap it in and get it running as quickly as possible so i would be able to spend time driving the car while the JDM engine was still under warranty (90 days)
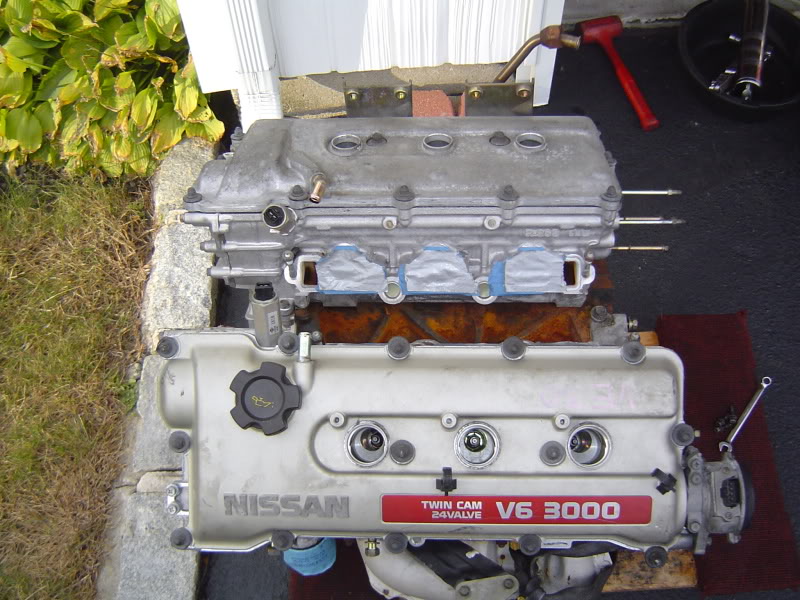
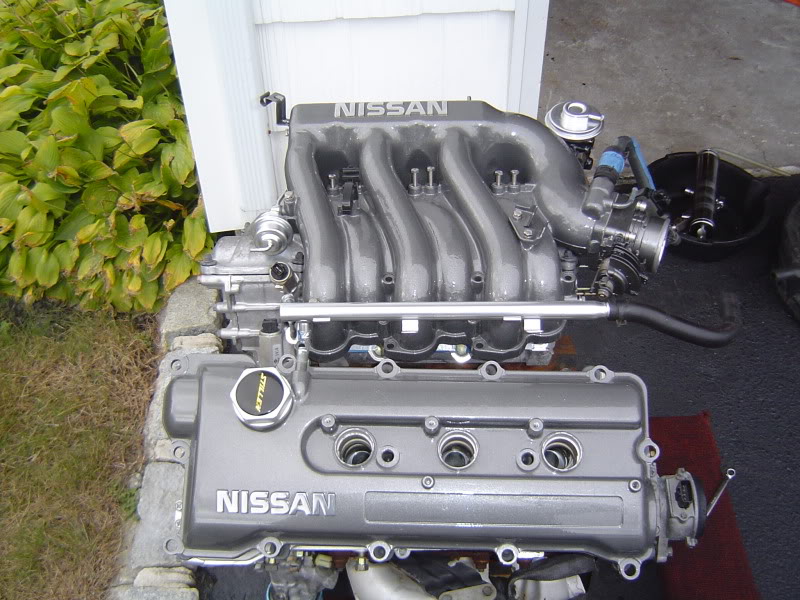
I got it from JDM Engine Depot in new jersey which was nice because i got to go out there and personally inspect the engine in person before i bought it. They had 2 VEs and i took the better of the 2.. the other one looked a bit orange colored inside the T-stat housing and both engine's valvetrain looked clean. So we loaded it in my friends truck and drove it home and i got right down to business the next day tearing it down (just to the block and heads, did not want to remove the heads and create more work)
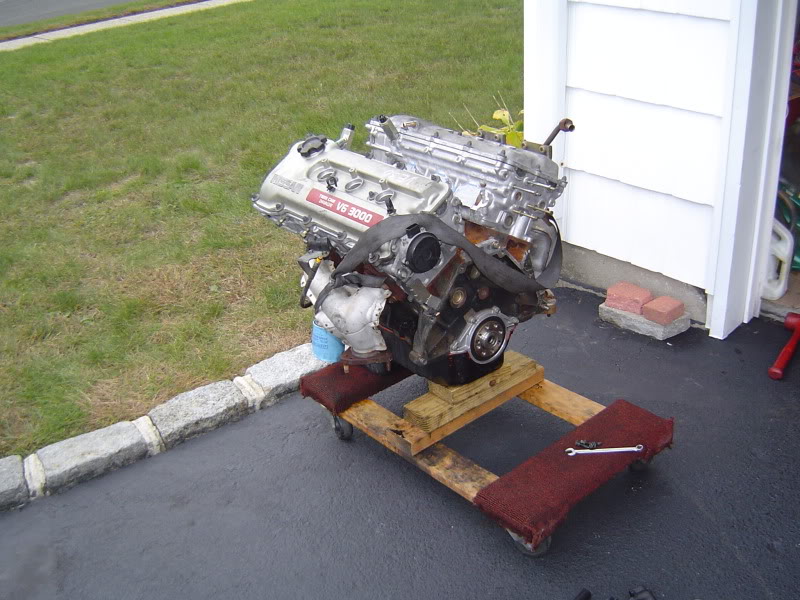
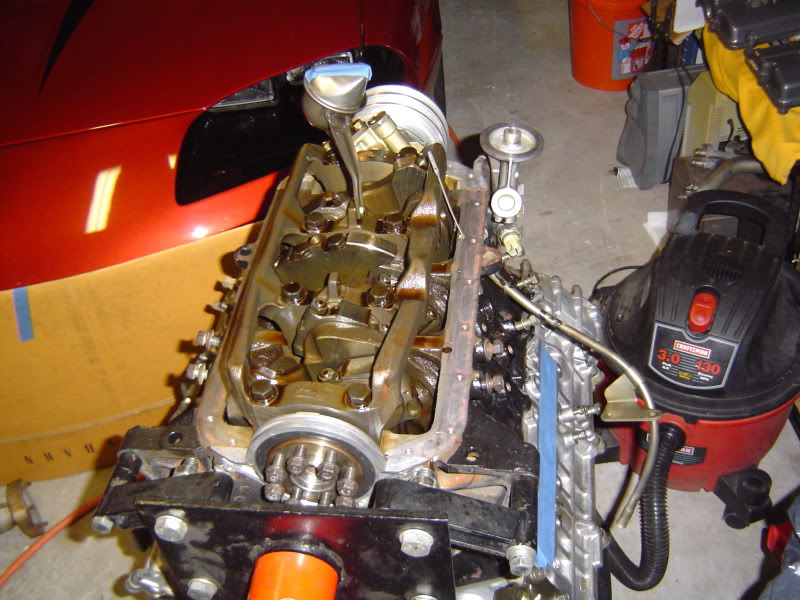
2 engines sitting in the garage, JDM engine on the dolly and my original one sitting behind it on the stand
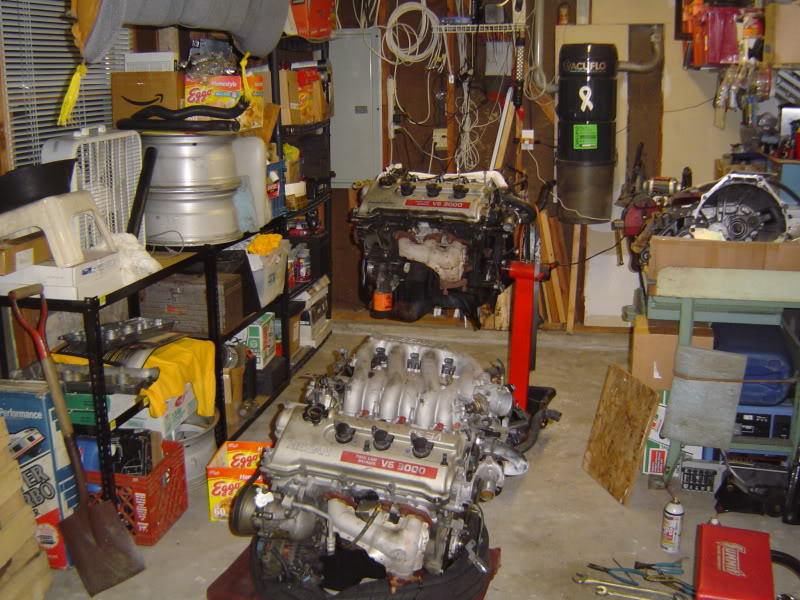
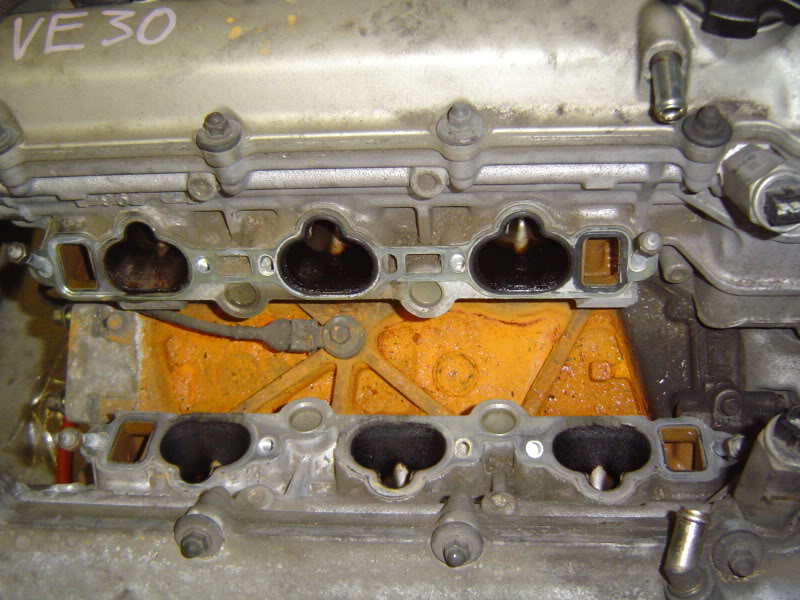
Orange/rusty in the valley here but i taped up all the ports and hit the entire engine with degreaser and power washed it

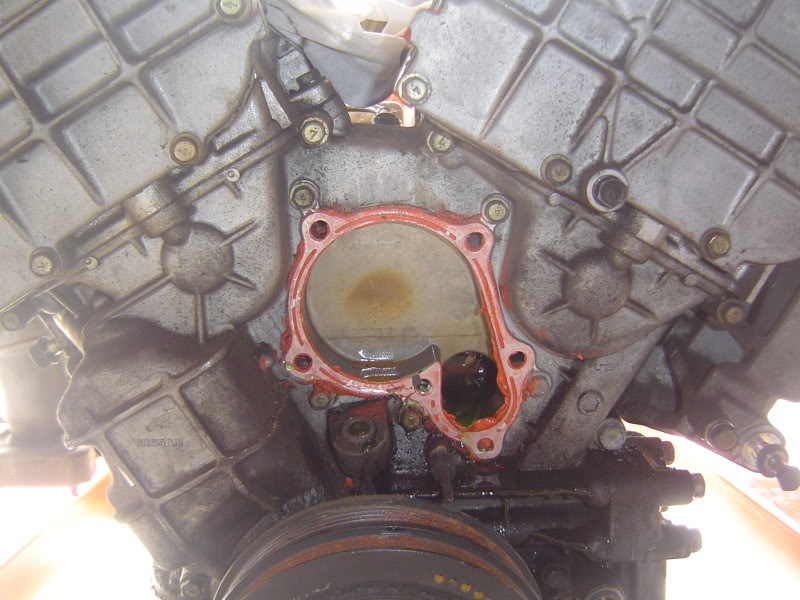
Water pump off, looks like it was replaced once before but i put a new one on anyway. Coolant passages looked good
All power washed clean and blew it dry with the air compressor. after this i painted the block with POR15 black engine enamel, i dont think i grabbed a picture of it but you can see it a bit here in the 2nd pic ..

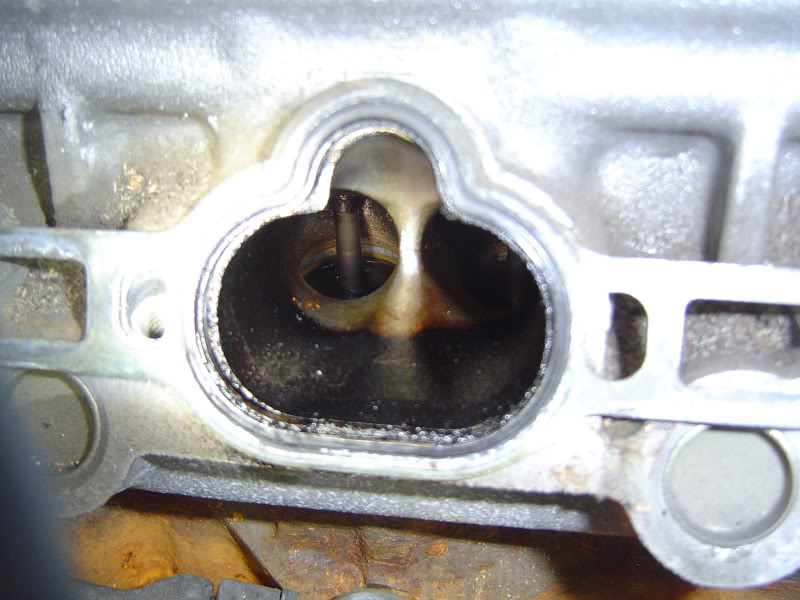
One thing that concerned me was excessive oil in the intake ports. See in the above picture how some of the paper towels wedged in the intake ports look darker then the rest? I had the engine turned upside down on the stand to do some oil pan work and noticed that when i flipped it back. All of the intake ports were coated with black oily soot, some more than others (bad PCV?) Some intake ports actually had a small pool of oil sitting on top of the closed intake valves (pic below) but ive been driving it since january with no oil loss or burning issues..
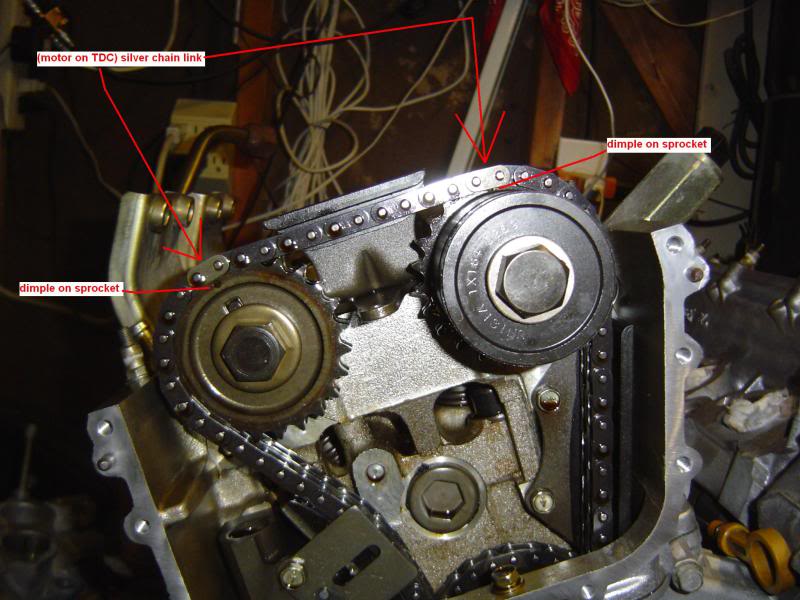
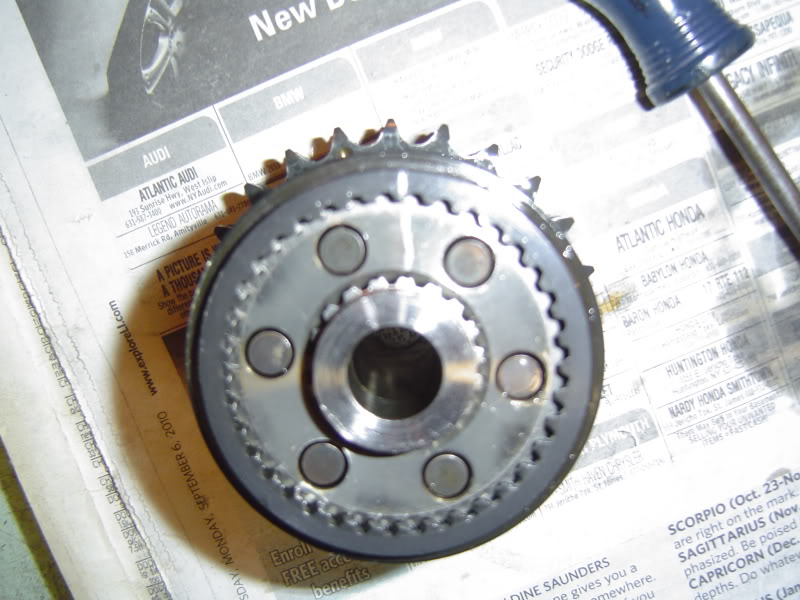
VTCs -
I figured this was easy to do now while the engine was sitting right in front of me. It really wasnt that hard to do after you do it for the first time. I just followed the FSM and the 3 technical service bulletins and marked all of the parts (gear, housing, etc) before i took anything apart.
Lining up the chain, marking everything before removing VTC sprockets off the engine. Also I put new chain tensioners in, I left the chain guides that were on there, they looked ok

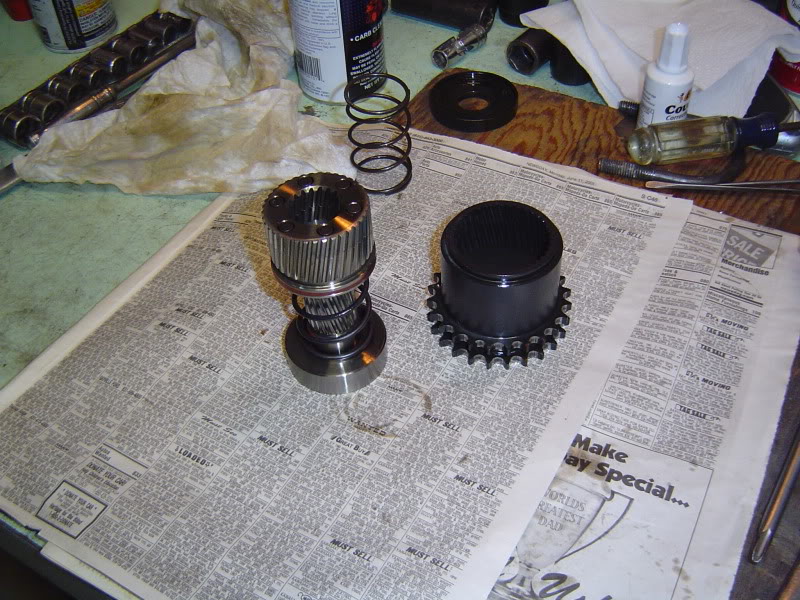
I used a socket and bench vice to press the assembly which popped the cap off
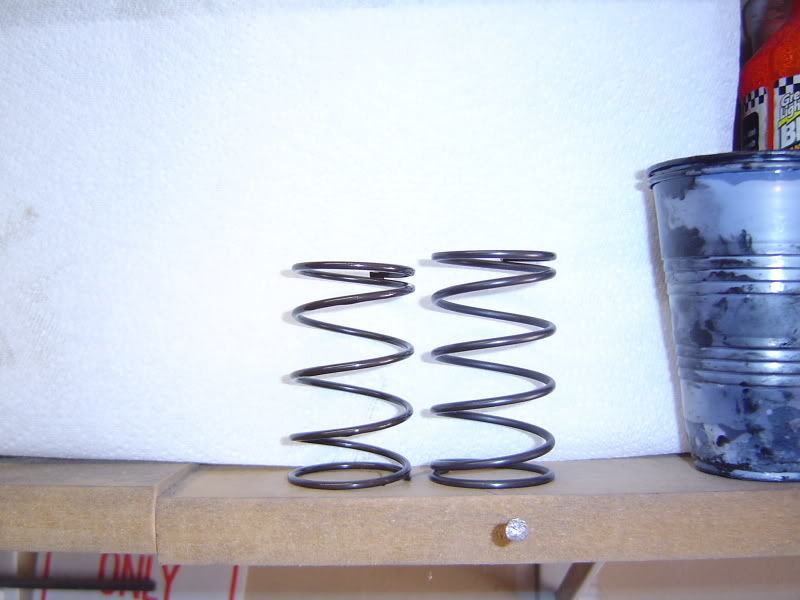
Differences between the old spring and the new one in the rebuild kit (slightly taller) The other VTC spring differences were about the same
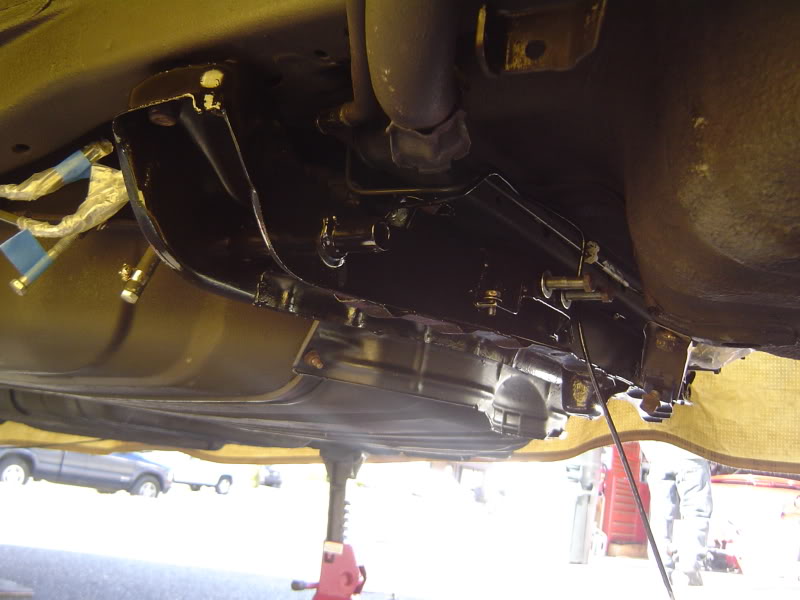
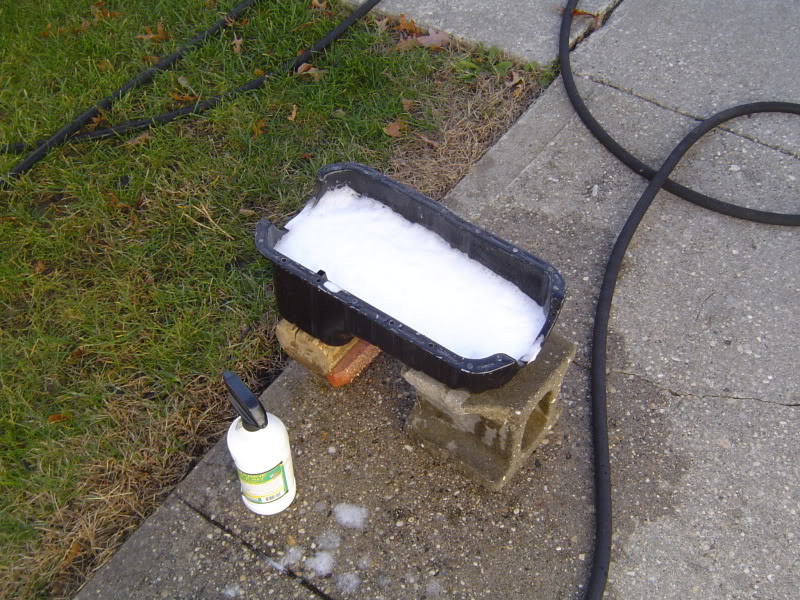
Oil pan - removed to inspect engine rotating assembly. Washed out oil pan with POR15 marine clean. New oil pan half moon gaskets installed and RTV. And yes i did remember to remove the blue tape i put over the pickup tube!
continued---
The heart of this whole job! the engine work i saved till last since i wanted to be able to buy the motor, do the work, swap it in and get it running as quickly as possible so i would be able to spend time driving the car while the JDM engine was still under warranty (90 days)
I got it from JDM Engine Depot in new jersey which was nice because i got to go out there and personally inspect the engine in person before i bought it. They had 2 VEs and i took the better of the 2.. the other one looked a bit orange colored inside the T-stat housing and both engine's valvetrain looked clean. So we loaded it in my friends truck and drove it home and i got right down to business the next day tearing it down (just to the block and heads, did not want to remove the heads and create more work)
2 engines sitting in the garage, JDM engine on the dolly and my original one sitting behind it on the stand
Orange/rusty in the valley here but i taped up all the ports and hit the entire engine with degreaser and power washed it
Water pump off, looks like it was replaced once before but i put a new one on anyway. Coolant passages looked good
All power washed clean and blew it dry with the air compressor. after this i painted the block with POR15 black engine enamel, i dont think i grabbed a picture of it but you can see it a bit here in the 2nd pic ..
One thing that concerned me was excessive oil in the intake ports. See in the above picture how some of the paper towels wedged in the intake ports look darker then the rest? I had the engine turned upside down on the stand to do some oil pan work and noticed that when i flipped it back. All of the intake ports were coated with black oily soot, some more than others (bad PCV?) Some intake ports actually had a small pool of oil sitting on top of the closed intake valves (pic below) but ive been driving it since january with no oil loss or burning issues..
VTCs -
I figured this was easy to do now while the engine was sitting right in front of me. It really wasnt that hard to do after you do it for the first time. I just followed the FSM and the 3 technical service bulletins and marked all of the parts (gear, housing, etc) before i took anything apart.
Lining up the chain, marking everything before removing VTC sprockets off the engine. Also I put new chain tensioners in, I left the chain guides that were on there, they looked ok
I used a socket and bench vice to press the assembly which popped the cap off
Differences between the old spring and the new one in the rebuild kit (slightly taller) The other VTC spring differences were about the same
Oil pan - removed to inspect engine rotating assembly. Washed out oil pan with POR15 marine clean. New oil pan half moon gaskets installed and RTV. And yes i did remember to remove the blue tape i put over the pickup tube!
continued---
06-08-2012, 06:51 PM
#5
Senior Member
Thread Starter
iTrader: (8)
Join Date: Oct 2001
Location: long island, NY
Posts: 3,996
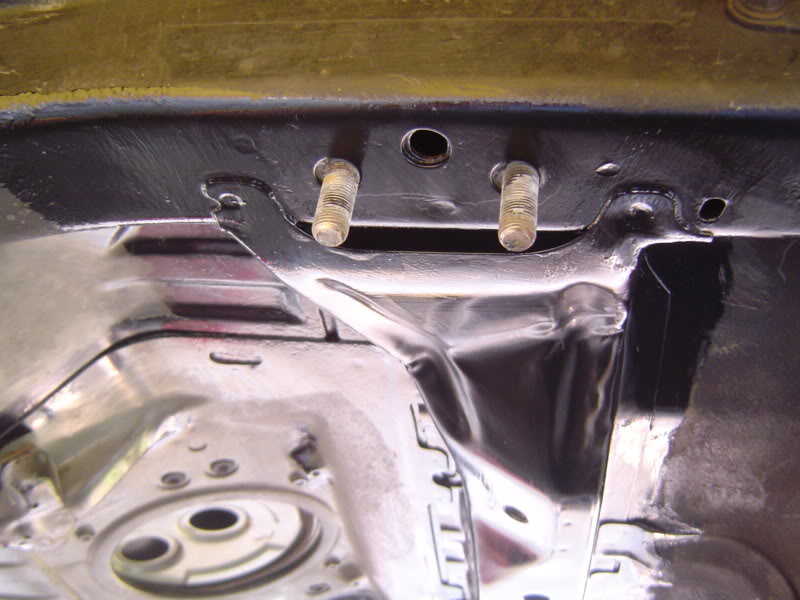
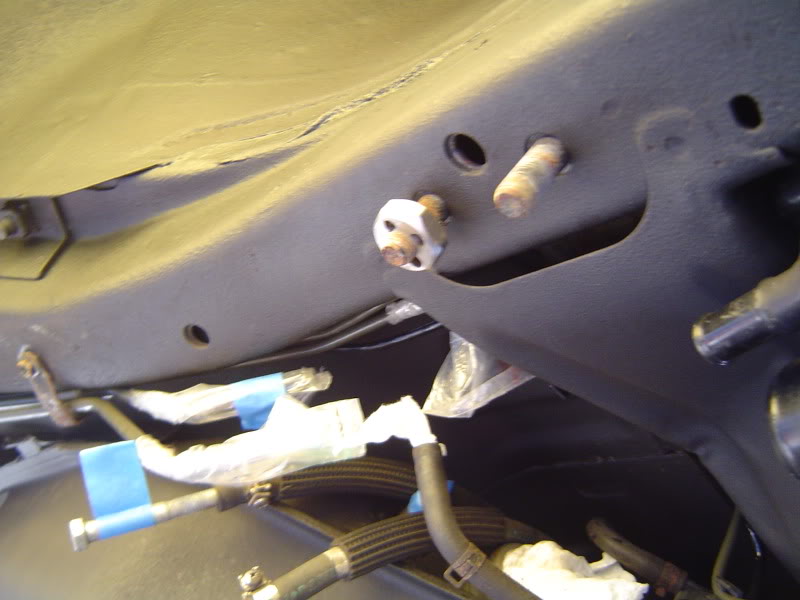
Exhaust manifold porting and Exhaust studs -
Removed the exhaust manifolds to replace the studs. There was nothing wrong with them but its understood that they were installed wrong from the factory, just trying to think proactively so I tackled it now.
I put alot of stock into the information in this thread before i did it - http://forums.maxima.org/3rd-generat...t-studs-2.html
See post #46 by Matt, i actually did buy the book Engineer to Win and read the exact section he referred to. Good book so far, i need to go finish reading it when i get time
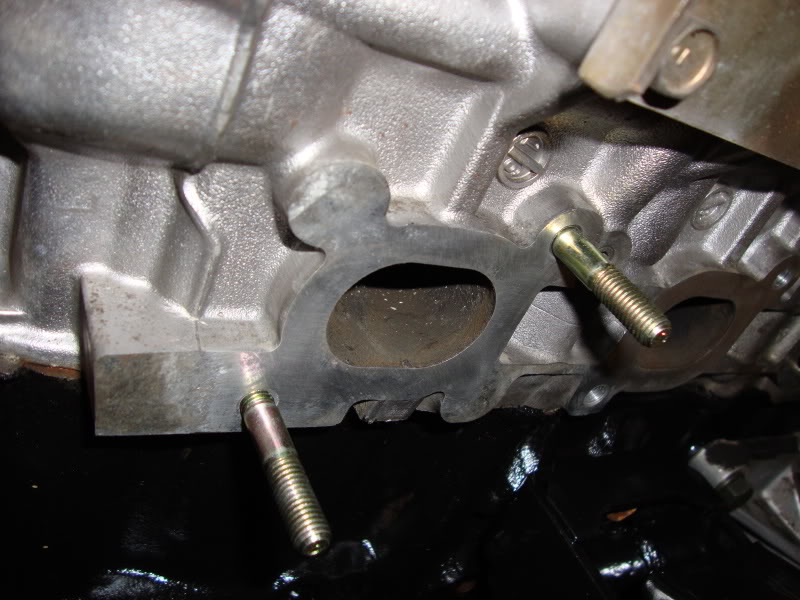
Now in the above picture, see the top stud is seated all the way in and the bottom one has some threads exposed? The one on the bottom is how i installed every stud into the head. After installing the manifolds, I couldnt get the proper torque on the nuts with the studs still free-spinning like that (the one on the bottom) since the stud wanted to keep screwing into the head until it stopped (the one on the top). I cant remember exactly what i did (yea i shouldve posted this thread back in january) but i think i used a jam nut setup to keep the stud from spinning while i torqued the nut. I know its right because the shoulder on the stud is not butt-up against the head, the nuts on the stud are torqued, the gaskets are crushed, and theres no exhaust leaks.
While the manifolds were off I noticed the god awful welds on the INSIDE of the ports, thinking that this has got to be hurting air flow. I sent Aaron92SE a quick message to get another opinion before i started grinding down those bulges, I know he did it to his stock manifolds on his old VE. I had some tack welds added on the outside where the flange meets the pipe, and then grinded those inside welds down
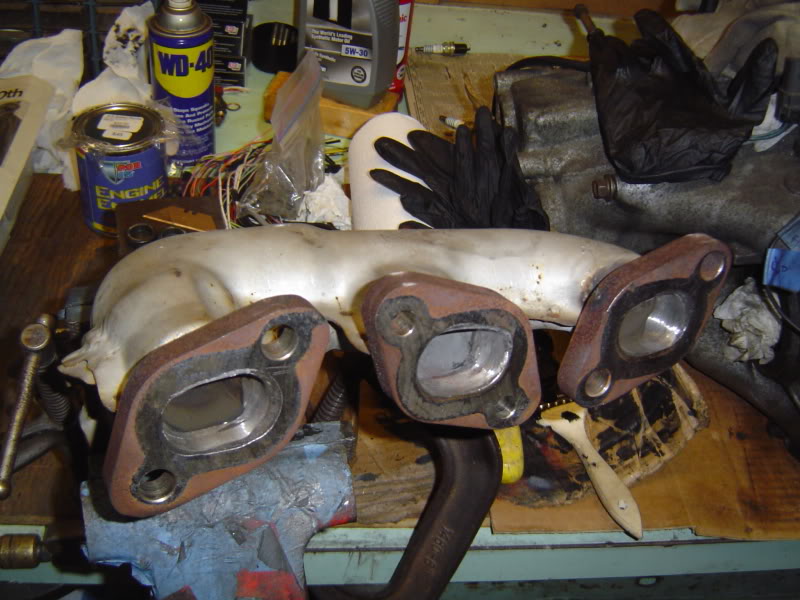
Im betting that theres no headers out there for the VE outside of a custom fab job. I havent seen any out of the 10 years ive been on this forum, and if they were worth any reasonable dollar per power gains, more people would have them. I decided to go with porting the stockers and for the remainder of the exhaust setup I have the WSP Y pipe, magnaflow cat and stock piping back to the stock original muffler still (Its still solid with no leaks or rusted through holes!) I have a G35 sedan muffler waiting to put on and i plan on getting the cat back piping from that group deal CMax put together
Powdercoating -
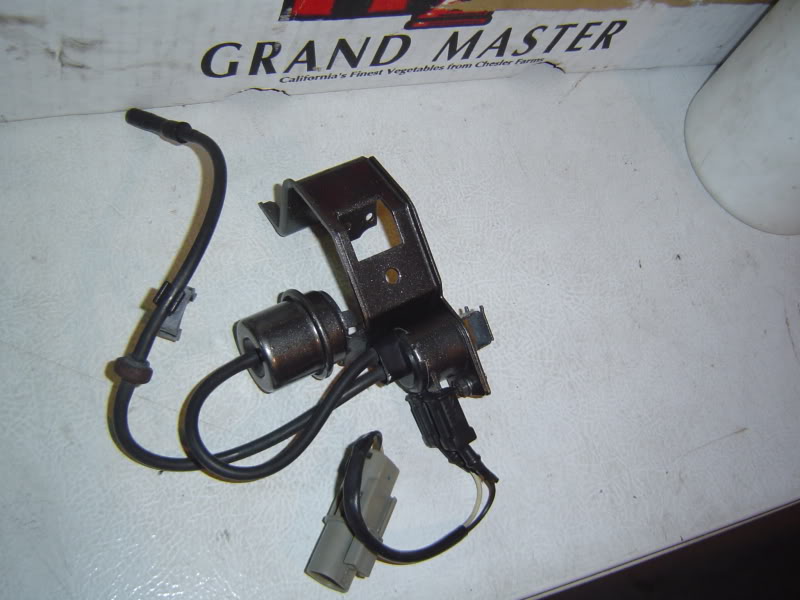
I took a liking to the dark metallic gray/gunmetal color after seeing Michaels (awsm66) work a few years back. I had both valve covers done, upper intake manifold, and some misc brackets. The eibach springs, upper strut mount plates and other "non-showy" brackets i had powdercoated in black. I found that the duplicolor gunmetal wheel paint and the dark gray color i chose for powdercoating were very close to each other so I used the spray paint on things i did not have powdercoated - the Z32 calipers, "water actuator" assembly, cruise control assembly, etc. Anything with rubber parts that i did not want to disassemble
I was able to remove the original V6 3000 decal without ruining it. I tried to order a new one but looks like theyre not made anymore
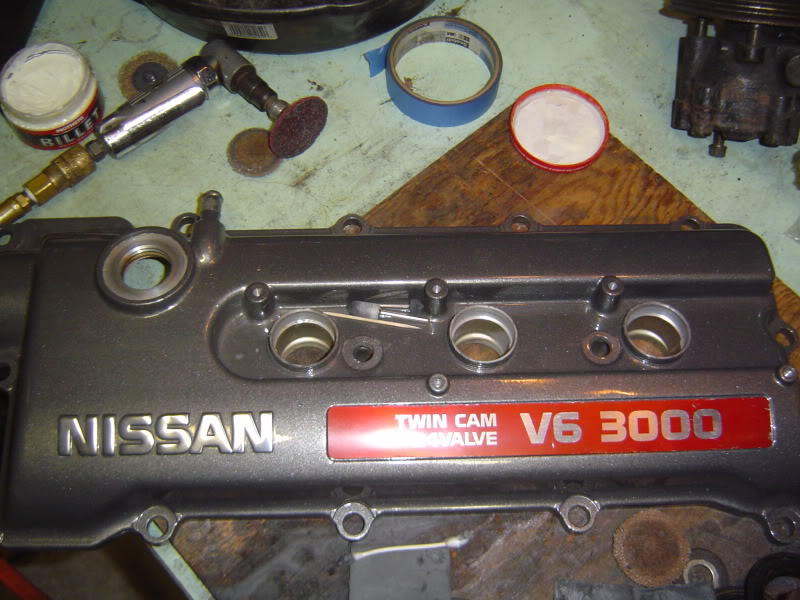
Before & After - I also added all stainless hardware and painted EGR body with POR15. I painted the EGR top, the intake power valve, and vent tube with bright silver paint. These are only small parts that i could always respray later on to touch it up.
Engine bay touch ups -
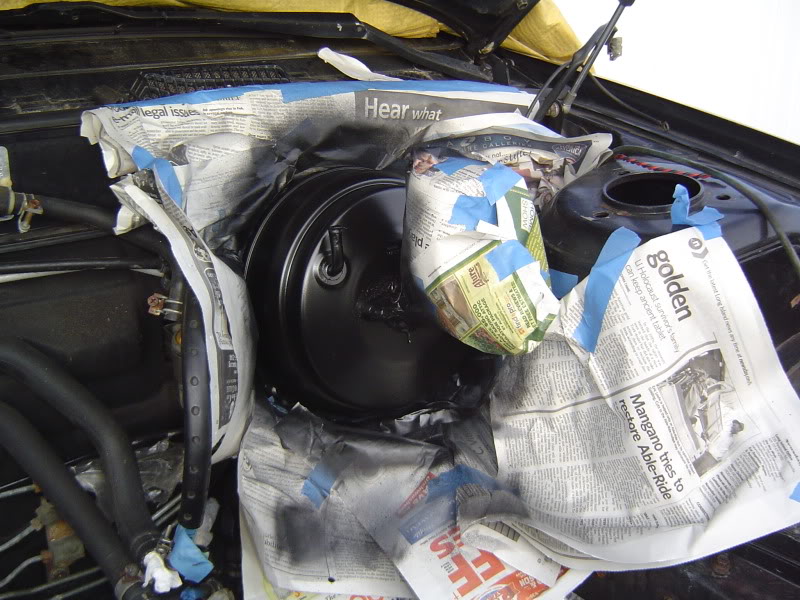

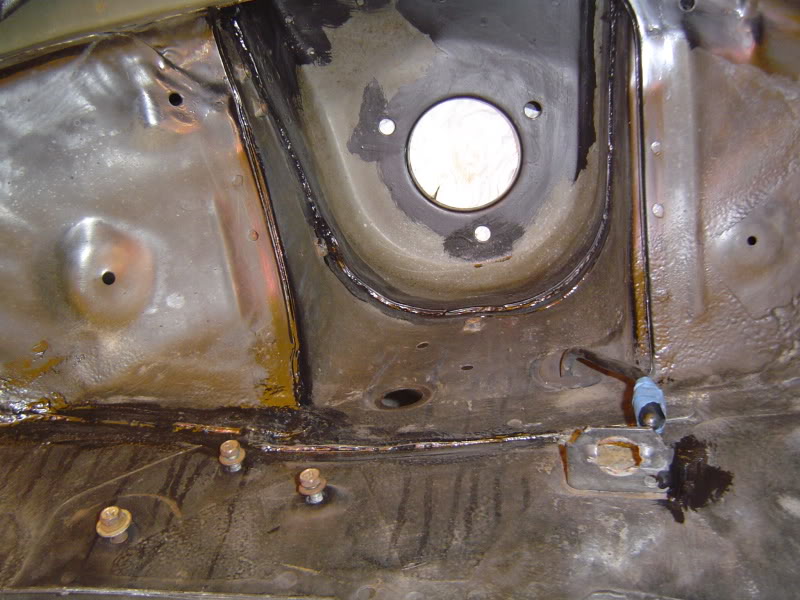
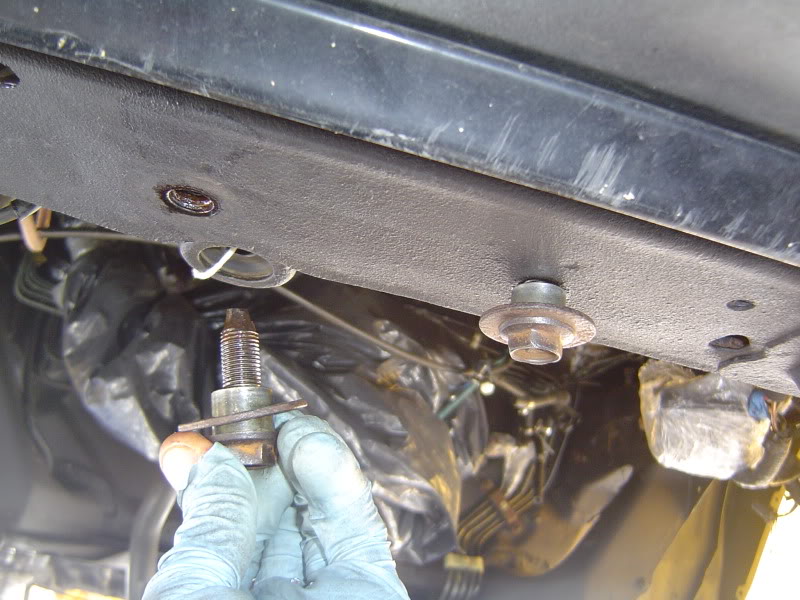
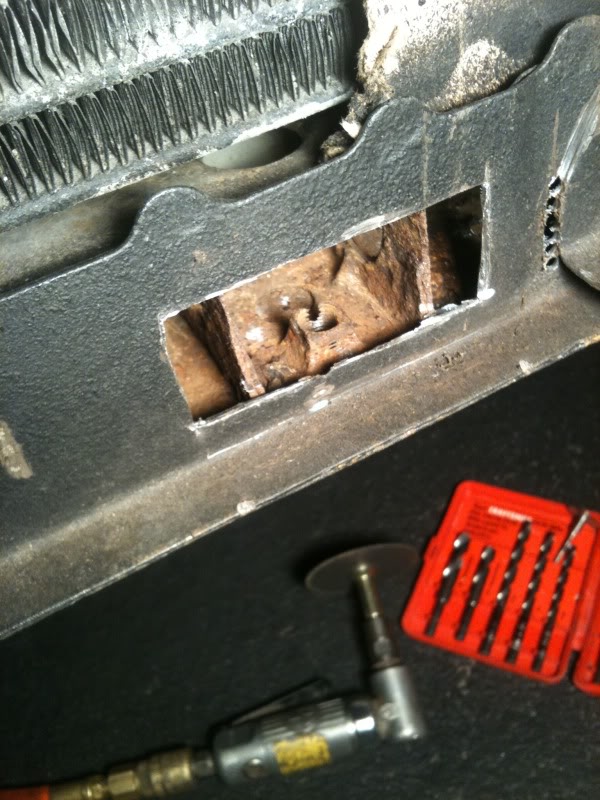
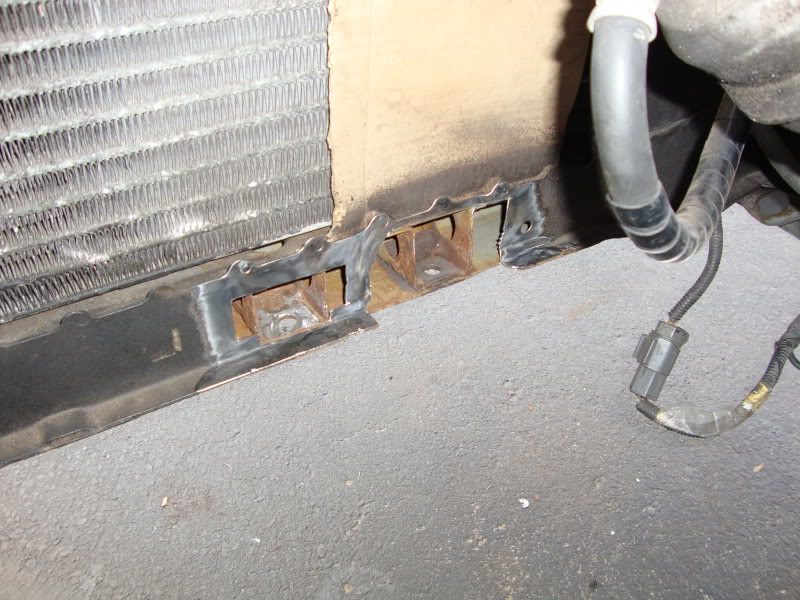
Almost ready to get the engine in the car and noticed the threads on the crossmember bolts didnt look so good, and then discovered there wasnt much left of the nut threads also, thanks to rust
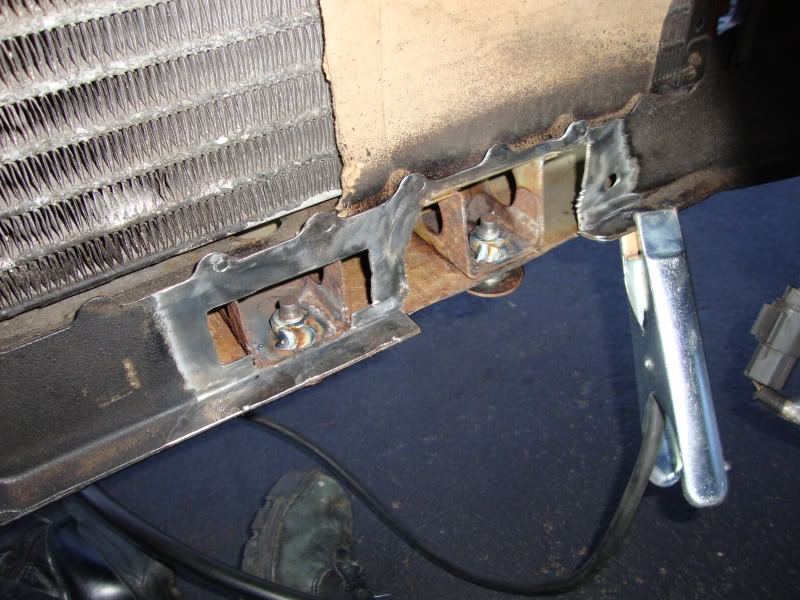
I cut out 2 "windows" to expose the nuts inside, one is larger because of the radiator mount, i cut it out as one whole piece so it could be welded back into position easier. I grinded the old nuts out and had welded 2 new ones back in place, then made a patch panel to close up the window i cut, and put back the radiator mount, then painted/undercoated over it to conceal it. You dont see this at all anyway when the radiator is in
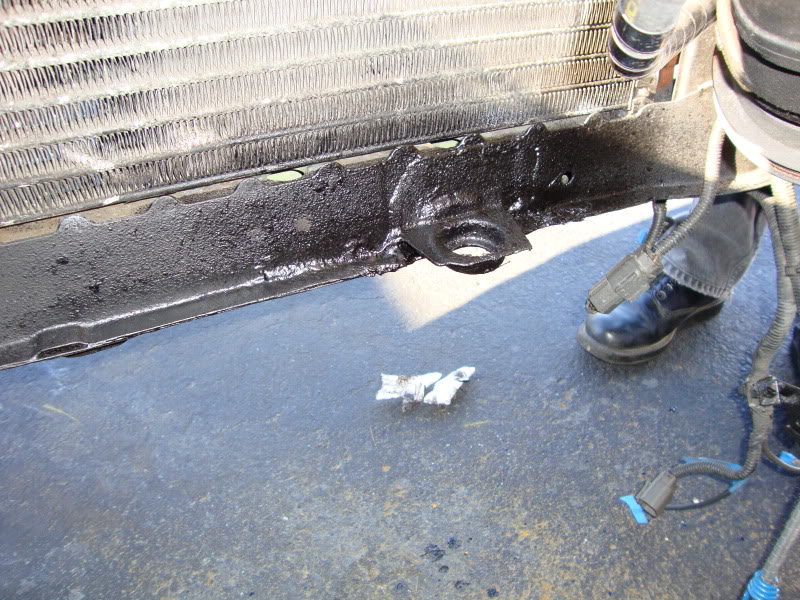
I sprayed inside both nut holes with this paint when i was done -
http://www.eastwood.com/internal-fra...ay-nozzle.html
continued---
Removed the exhaust manifolds to replace the studs. There was nothing wrong with them but its understood that they were installed wrong from the factory, just trying to think proactively so I tackled it now.
I put alot of stock into the information in this thread before i did it - http://forums.maxima.org/3rd-generat...t-studs-2.html
See post #46 by Matt, i actually did buy the book Engineer to Win and read the exact section he referred to. Good book so far, i need to go finish reading it when i get time
Now in the above picture, see the top stud is seated all the way in and the bottom one has some threads exposed? The one on the bottom is how i installed every stud into the head. After installing the manifolds, I couldnt get the proper torque on the nuts with the studs still free-spinning like that (the one on the bottom) since the stud wanted to keep screwing into the head until it stopped (the one on the top). I cant remember exactly what i did (yea i shouldve posted this thread back in january) but i think i used a jam nut setup to keep the stud from spinning while i torqued the nut. I know its right because the shoulder on the stud is not butt-up against the head, the nuts on the stud are torqued, the gaskets are crushed, and theres no exhaust leaks.
While the manifolds were off I noticed the god awful welds on the INSIDE of the ports, thinking that this has got to be hurting air flow. I sent Aaron92SE a quick message to get another opinion before i started grinding down those bulges, I know he did it to his stock manifolds on his old VE. I had some tack welds added on the outside where the flange meets the pipe, and then grinded those inside welds down
Im betting that theres no headers out there for the VE outside of a custom fab job. I havent seen any out of the 10 years ive been on this forum, and if they were worth any reasonable dollar per power gains, more people would have them. I decided to go with porting the stockers and for the remainder of the exhaust setup I have the WSP Y pipe, magnaflow cat and stock piping back to the stock original muffler still (Its still solid with no leaks or rusted through holes!) I have a G35 sedan muffler waiting to put on and i plan on getting the cat back piping from that group deal CMax put together
Powdercoating -
I took a liking to the dark metallic gray/gunmetal color after seeing Michaels (awsm66) work a few years back. I had both valve covers done, upper intake manifold, and some misc brackets. The eibach springs, upper strut mount plates and other "non-showy" brackets i had powdercoated in black. I found that the duplicolor gunmetal wheel paint and the dark gray color i chose for powdercoating were very close to each other so I used the spray paint on things i did not have powdercoated - the Z32 calipers, "water actuator" assembly, cruise control assembly, etc. Anything with rubber parts that i did not want to disassemble
I was able to remove the original V6 3000 decal without ruining it. I tried to order a new one but looks like theyre not made anymore
Before & After - I also added all stainless hardware and painted EGR body with POR15. I painted the EGR top, the intake power valve, and vent tube with bright silver paint. These are only small parts that i could always respray later on to touch it up.
Engine bay touch ups -
Almost ready to get the engine in the car and noticed the threads on the crossmember bolts didnt look so good, and then discovered there wasnt much left of the nut threads also, thanks to rust
I cut out 2 "windows" to expose the nuts inside, one is larger because of the radiator mount, i cut it out as one whole piece so it could be welded back into position easier. I grinded the old nuts out and had welded 2 new ones back in place, then made a patch panel to close up the window i cut, and put back the radiator mount, then painted/undercoated over it to conceal it. You dont see this at all anyway when the radiator is in
I sprayed inside both nut holes with this paint when i was done -
http://www.eastwood.com/internal-fra...ay-nozzle.html
continued---
06-08-2012, 06:53 PM
#6
Senior Member
Thread Starter
iTrader: (8)
Join Date: Oct 2001
Location: long island, NY
Posts: 3,996
Motor in and done, i finished this in the middle of winter as you see the snow on the ground, and salt all over the car - Also had to roll the rear fenders as the 245/45/17s did rub a bit over bumps. I used the Eastwood fender roller

Finished, and still basically as it sits and looks today. Ill have to get some nicer shots once i repaint the stillen lip, new rear spoiler, and do some other touch ups
Finished, and still basically as it sits and looks today. Ill have to get some nicer shots once i repaint the stillen lip, new rear spoiler, and do some other touch ups


 06-08-2012, 08:22 PM
#9

Fantastic man! I was always hoping you'd do a thread like this. I bet it sure is satisfying knowing you've got the car basically restored. Real nice welding on the crossmember!
I don't know why ST is doing their sway bars in that tacky green color these days. ST sways were actually my very first mod ever on my original 3rd gen when I was 17 in 2000ish. I remember back then they were just a standard gray color.
I don't know why ST is doing their sway bars in that tacky green color these days. ST sways were actually my very first mod ever on my original 3rd gen when I was 17 in 2000ish. I remember back then they were just a standard gray color.

 06-09-2012, 02:24 AM
#13

Nice job, it takes a lot of dedication to tend to rust. The weather is very kind to cars where I live, so thankfully this stuff is a non issue, I see what others have to deal with. I give you props for tackling it, although it does look like you simply coated over some rusty spots. I hope everything holds up for you. Good you got those fuel lines, that's a big one.
Last edited by Hectic; 06-09-2012 at 02:30 AM.
 06-10-2012, 12:12 AM
#16

 06-10-2012, 12:15 PM
#21
06-10-2012, 07:26 PM
#22
Member

Join Date: Nov 2003
Location: Jacksonville FL.
Posts: 141
I have to say very nice work and attention to detail. That VE is is clean. I will be soon following you with pics of my similar VG build that I'm finishing up. Hats off! Keep maxxin and it was done for the love

 06-11-2012, 06:21 AM
#26
Senior Member
Thread Starter
iTrader: (8)
Join Date: Oct 2001
Location: long island, NY
Posts: 3,996
Thanks for the comments everyone
Yeah i wish i could take credit for the welds, but i didnt do it I would love to get more involved in welding and get better at it, but i really dont have the room to store a welder and all the equipment right now. It was done by someone i know through the local camaro/F body guys, He has a 10 sec LS2 4th gen camaro, and he fabricates his own suspension parts. If anyone on long island needs some good welding done i can refer you and give you his shop info
I did all this work the best i could with what i had. I wouldve liked to bolt the body to a rotisserie in a shop and sandblast the undercarriage and use the POR15 through a spray gun and coat everything. Its holding up pretty good still. Every oil change i get under there and check up on everything, wipe down the valve covers/intake with a damp soapy rag (its powdercoated). The vent tube is starting to rust and paint is flaking off (one of the only few parts i painted) but its easy enough to remove so ill probably just take it to get powdercoated soon.
The suspension is stiff with all the poly bushings and the sway bars. Its a blast to drive on the highway and through the turns, but its a rough ride through bumpy neighborhood streets. If it REALLY continues to bother me, ill probably go back to rubber bushings but keep the sway bars
Yeah i wish i could take credit for the welds, but i didnt do it
I would love to get more involved in welding and get better at it, but i really dont have the room to store a welder and all the equipment right now. It was done by someone i know through the local camaro/F body guys, He has a 10 sec LS2 4th gen camaro, and he fabricates his own suspension parts. If anyone on long island needs some good welding done i can refer you and give you his shop infoI did all this work the best i could with what i had. I wouldve liked to bolt the body to a rotisserie in a shop and sandblast the undercarriage and use the POR15 through a spray gun and coat everything. Its holding up pretty good still. Every oil change i get under there and check up on everything, wipe down the valve covers/intake with a damp soapy rag (its powdercoated). The vent tube is starting to rust and paint is flaking off (one of the only few parts i painted) but its easy enough to remove so ill probably just take it to get powdercoated soon.
The suspension is stiff with all the poly bushings and the sway bars. Its a blast to drive on the highway and through the turns, but its a rough ride through bumpy neighborhood streets. If it REALLY continues to bother me, ill probably go back to rubber bushings but keep the sway bars
06-11-2012, 06:38 AM
#27
Fantastic thread and great job on the car.
I am glad someone has the dedication to basically do a complete restoration of one of these cars. It is especially demanding due to the complexities of this particular model.
hats off to you
I am glad someone has the dedication to basically do a complete restoration of one of these cars. It is especially demanding due to the complexities of this particular model.
hats off to you
06-11-2012, 04:23 PM
#28

 Congrats ... now do my car for beer.
 06-25-2012, 05:13 PM
#30
Wow man, I am very impressed. At least your 3rd gen was fairly clean to begin with! Mine is just barely getting back on the road and it will be my moms daily driver hopefully for at least a few more months before it gets junked or parted out :/ I agree with the poly bushing, they're too harsh for my taste as well.
Are you looking to sell that twin you got there?
Once again, awesome job!
Are you looking to sell that twin you got there?
Once again, awesome job!
06-26-2012, 11:12 PM
#31
Wow man, I am very impressed. At least your 3rd gen was fairly clean to begin with! Mine is just barely getting back on the road and it will be my moms daily driver hopefully for at least a few more months before it gets junked or parted out :/ I agree with the poly bushing, they're too harsh for my taste as well.
Are you looking to sell that twin you got there?
Once again, awesome job!
Are you looking to sell that twin you got there?
Once again, awesome job!
06-27-2012, 09:23 AM
#32
Senior Member
Thread Starter
iTrader: (8)
Join Date: Oct 2001
Location: long island, NY
Posts: 3,996
it was a good learning experience especially with the por15 paint process and attention to detail. One day when i have the time and facilities to build or redo an entire project car i have a taste of what to expect. A VQ35 swap did sound appealing to do while i had this all apart, but it wouldve added alot more time and money into the project
and yes the stock 92 is for sale
and yes the stock 92 is for sale
06-27-2012, 02:49 PM
#34

really nice! clean clean clean! it'll last for a while! i never heard of this por 15 stuff... got me thinking that i should do this to my 4th gen eventually. Will be tough though, as someone said before living in an apartment limits us to small work. luckily the super isn't a **** about it, he's actually always interested in what i'm doing lol
whats the mileage on the newer VE? i read you were looking for headers, obx has a whole set including y pipe for under $300 http://www.obxracingsports.com/products.php?pk=1788 i don't know about fitment but i read here that for the 95-01 (w/ unequal y) doesn't fit very well. still worth the money though if you gotta make some fitment mods
whats the mileage on the newer VE? i read you were looking for headers, obx has a whole set including y pipe for under $300 http://www.obxracingsports.com/products.php?pk=1788 i don't know about fitment but i read here that for the 95-01 (w/ unequal y) doesn't fit very well. still worth the money though if you gotta make some fitment mods
06-28-2012, 09:36 AM
#36
 06-29-2012, 05:02 AM
#38
Junior Member

Join Date: Sep 2011
Posts: 44
Yeah I would definately like to know how big of a budget it was because soon my 89 needs to be redone and and going to add some power adders to get a little better fuel economy and a meaner stance I think. I have a Florida Maxima so rust isnt a issue for me but definately needs a paint job, brake upgrade, refreshed suspension, antiroll strut bars and sway bars, and all that goodness. By the way, when you did the rear brakes, were they drum and then you switched them over to the z31 or was it already disc? I want badly to do the z32 front and z31 rear brake swap (I drive fast and hard all the time).
07-11-2012, 11:59 AM
#39
obx vg/ve headers http://www.ebay.com/itm/OBX-SS304-HE...ht_2264wt_1180
07-11-2012, 07:18 PM
#40
Yeah I would definately like to know how big of a budget it was because soon my 89 needs to be redone and and going to add some power adders to get a little better fuel economy and a meaner stance I think. I have a Florida Maxima so rust isnt a issue for me but definately needs a paint job, brake upgrade, refreshed suspension, antiroll strut bars and sway bars, and all that goodness. By the way, when you did the rear brakes, were they drum and then you switched them over to the z31 or was it already disc? I want badly to do the z32 front and z31 rear brake swap (I drive fast and hard all the time).