
Removing And Cleaning The Iacv Help!!

Thread Starter

Joined: Jun 2006
Posts: 689
From: Lawrenceville, GA
Removing And Cleaning The Iacv Help!!
I know there has been threads on how to remove and clean the IACV. Can somebody either direct me to the thread or help me. 
I've read the stickes but i must've missed it. Thanks le tme know.
PICTURES WOULD BE GREAT.
I've read the stickes but i must've missed it. Thanks le tme know.
PICTURES WOULD BE GREAT.

Post 16 under maintenance
The credit goes to Mango95SE for this procedure.
Tools needed:
10 and 12 mm sockets
3 inch socket extension
universal joint (swivel pivot socket thing)
12-inch rachet (a short rachet may not work - need something to apply a lot of torque to loosen the bolts
Philip's screwdriver
rag
throttle body cleaner
1. Unplug the 4 connectors from the IAC assembly. Undo the hose that connects teh IAC to the intake assembly.
2. The metal bracket holding up the gray-colored connector is blocking one of the IAC mounting bolts. Using a 10mm socket, remove the bolt that holds the metal bracket. The bolt is just below the purple connector - you have to twist your head and crane your neck around to see the bolt.
3. Remove the 3 mounting bolts using the 12mm socket. The lowest bolt may require the Universal joint.
4. Pull out your IAC valve and clean it w/throttle body cleaner, rag, and old toothbrush.
You may even want to separate the plastic valve to clean it more thoroughly. Use a philip's head screwdriver, but make sure it is a snug fight. It's on there tight and if you don't have a good fitting screwdriver, you could ruin the screw head.
Reinstallation is just the reverse of these steps. It may be easier access to the IAC if you remove the whole air intake assembly, but it's not necessary.

Senior Member
Joined: Nov 2006
Posts: 2,389
this was written to me by Cdg2125 on how to do the TB and the IACV at the same time: which is what i did
here is a very detailed writeup that shouldn't require pictures:
Tool required:
ratchet
10m socket
12mm socket
flathead or 8mm socket
pliers or vise grips
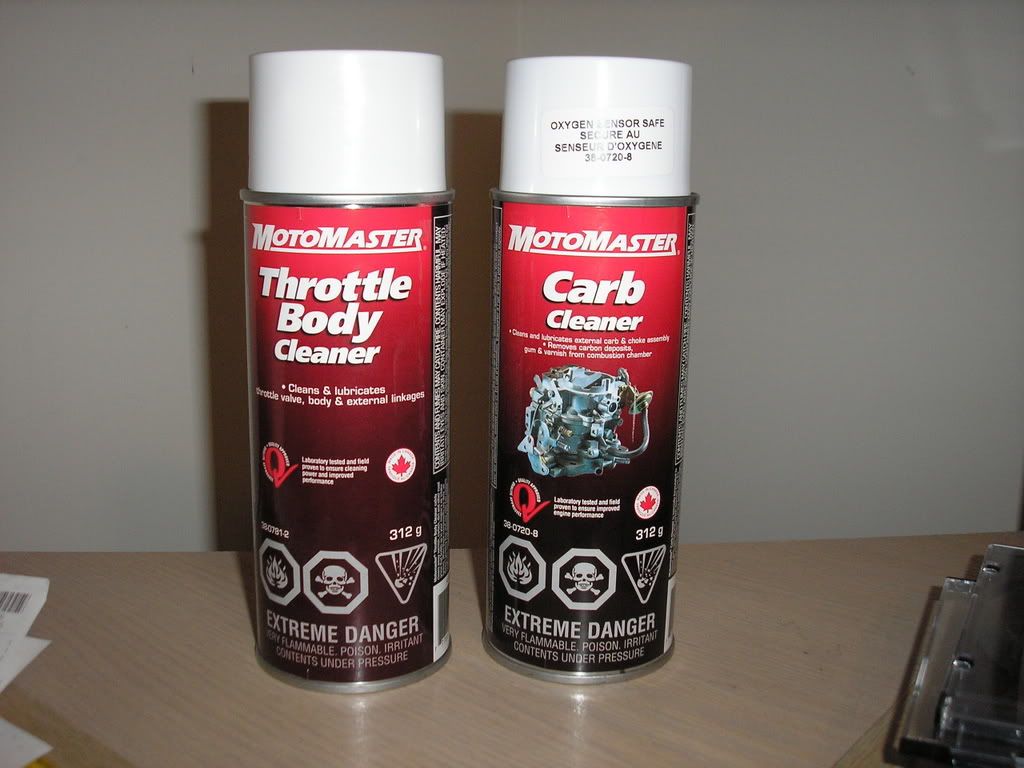
1 can of Throttle Body cleaner
1 can of Carb cleaner (I find Berrymans B12 to work fastest)
new throttle body gasket
new IAC Valve Gasket (dealer only)
1) disconnect battery. unclip airbox, unplug MAF Sensor, use pliers to slide clamps holding hoses to airbox down and slide off hoses, use flathead or 8mm socket to loosen clamp holding air tube to throttle Body, remove 10mm socket on side of airbox holding it down and remove air intake assembly.
2) move throttle to fully open position, lift throttle cables one at a time forward and wiggle out of the TB (towards the left of the TB). Unplug 2 Throttle Position Sensor Plugs.
3) remove the 4 12mm bolts holding the TB to the plenum
4) on the bottom of the TB there will either be 2 or 3 hoses attatched. use pliers to slide clamps down and remove hoses. make sure your radiator cap is still on or engine coolant will start to flow out. If hoses have seized on, use flathead to pry the top and break the seal.
5) Remove throttle body. scrape old gasket from both surfaces. clean entire buttefly plate (both faces) and cylinder. there should be no black when done. use only tb cleaner as carb cleaner will remove teflon coating which can later lead to faster corrosion and/or deposit formation
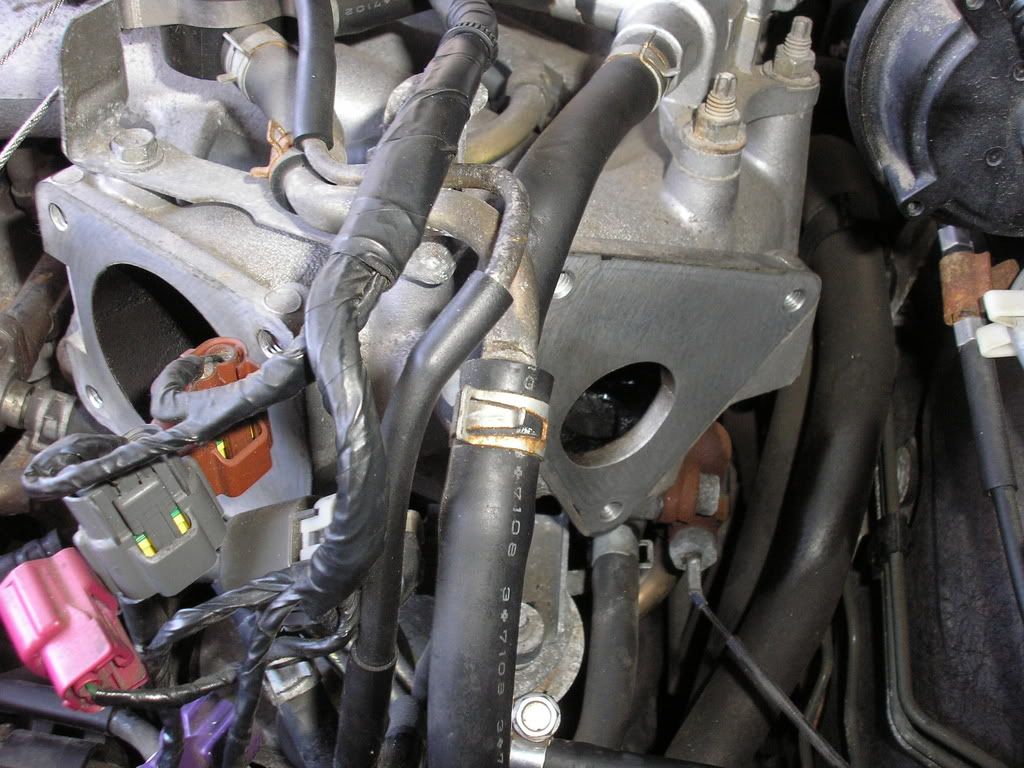
6) locate IAC Valve (triangular unit bolted to drivers side of the plenum right in front of the firewall with a large hose that was connected to the air intake assembly) unplug all 4 plugs.
7) remove 10mm bolt holding EGR Temp Sensor plug to the IAC Valve. (hard to see so you may have to feel around the firewall side for it) It is the only plug of the 4 not directly attatched to the IAC Valve body
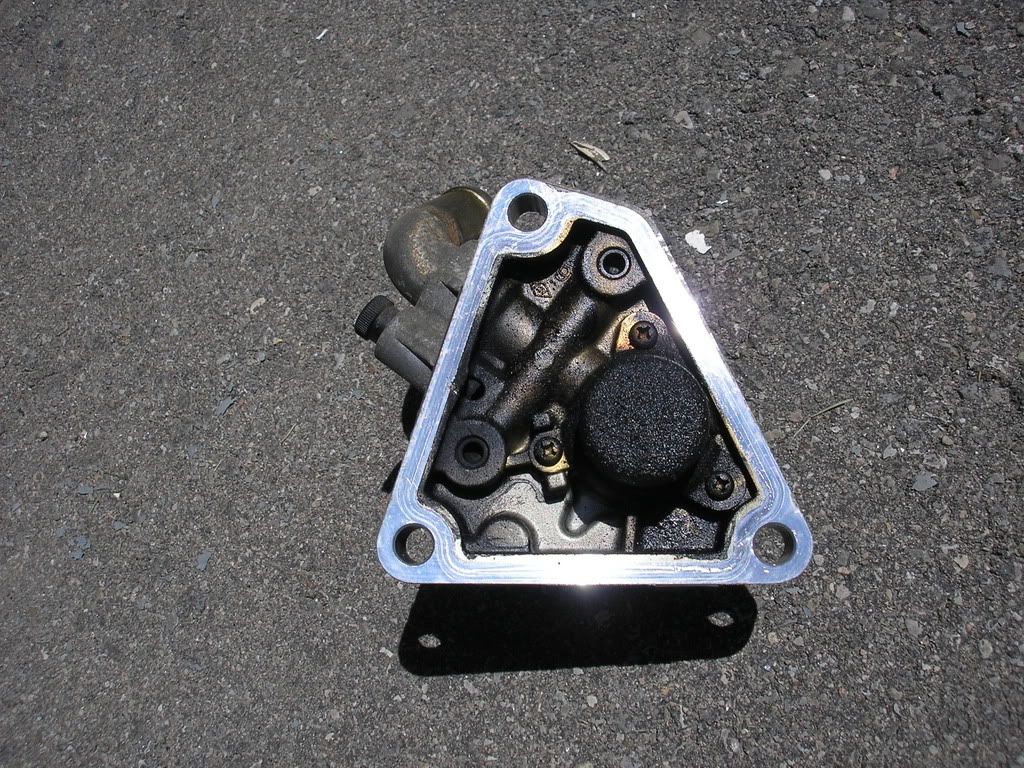
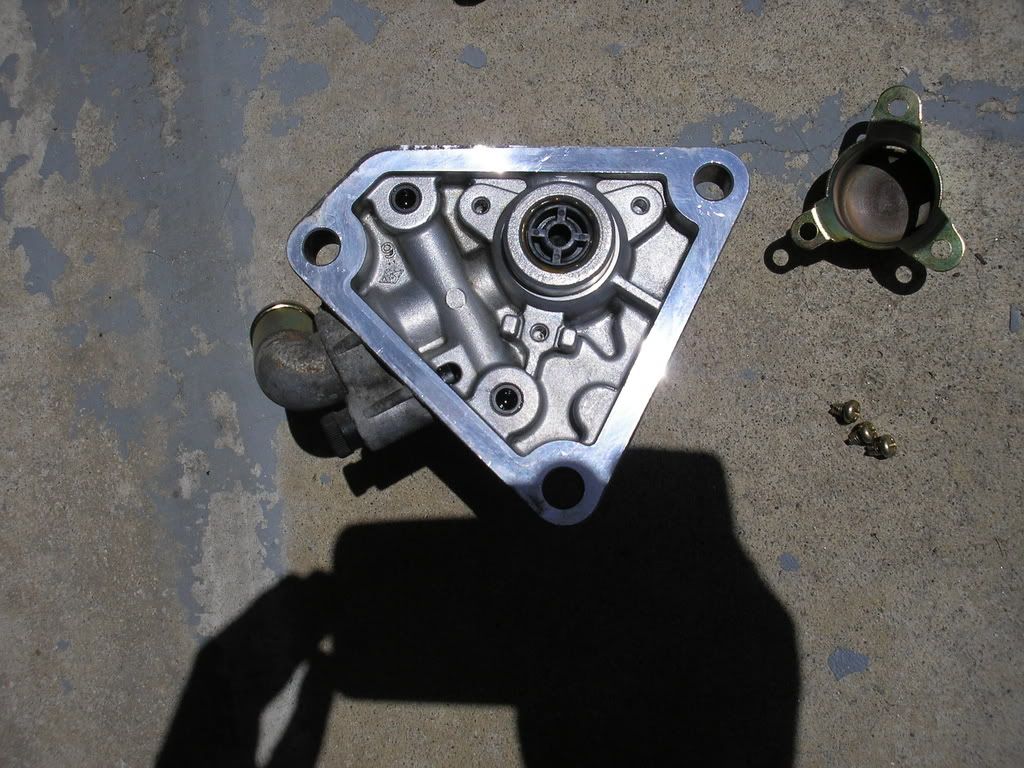
8) remove 3 12mm bolts holding IAC Valve to the plenum and remove IAC Valve. Remove old gasket (no need for scraping as it is a metal gasket).
9) spray/wipe the entire inside of the triangular face clean. Spray the inside of the brass housing clean of all deposits. spray base of Idle screw clean to ensure no carbon deposits remain. Be liberal with the spray.
10) replace gaskets and reassemble in reverse order. make sure when attatching the air tube to the TB you tighten the clamp. a loose clamp = a small vacuum leak that probably cant be heard but will be felt (high idle).
before reassmebling, some like to spray remaining tb cleaner/carb cleaner into the plenum to clean it up. This is usually a waste of time since oil coming from the PCV will quickly muck it up again but pooled cleaner may help clean downstream intake when you start it back up. not enough to make a bg difference but hey. If you do this, dont be alarmed by the blue smoke at startup (oil and sludge being burned off). Start the car, take it for a short run to blow any remaining cleaner out and you are done.
pics:
oh yeah and this was in the stickies too

i love taking pictures
here is a very detailed writeup that shouldn't require pictures:
Tool required:
ratchet
10m socket
12mm socket
flathead or 8mm socket
pliers or vise grips
1 can of Throttle Body cleaner
1 can of Carb cleaner (I find Berrymans B12 to work fastest)
new throttle body gasket
new IAC Valve Gasket (dealer only)
1) disconnect battery. unclip airbox, unplug MAF Sensor, use pliers to slide clamps holding hoses to airbox down and slide off hoses, use flathead or 8mm socket to loosen clamp holding air tube to throttle Body, remove 10mm socket on side of airbox holding it down and remove air intake assembly.
2) move throttle to fully open position, lift throttle cables one at a time forward and wiggle out of the TB (towards the left of the TB). Unplug 2 Throttle Position Sensor Plugs.
3) remove the 4 12mm bolts holding the TB to the plenum
4) on the bottom of the TB there will either be 2 or 3 hoses attatched. use pliers to slide clamps down and remove hoses. make sure your radiator cap is still on or engine coolant will start to flow out. If hoses have seized on, use flathead to pry the top and break the seal.
5) Remove throttle body. scrape old gasket from both surfaces. clean entire buttefly plate (both faces) and cylinder. there should be no black when done. use only tb cleaner as carb cleaner will remove teflon coating which can later lead to faster corrosion and/or deposit formation
6) locate IAC Valve (triangular unit bolted to drivers side of the plenum right in front of the firewall with a large hose that was connected to the air intake assembly) unplug all 4 plugs.
7) remove 10mm bolt holding EGR Temp Sensor plug to the IAC Valve. (hard to see so you may have to feel around the firewall side for it) It is the only plug of the 4 not directly attatched to the IAC Valve body
8) remove 3 12mm bolts holding IAC Valve to the plenum and remove IAC Valve. Remove old gasket (no need for scraping as it is a metal gasket).
9) spray/wipe the entire inside of the triangular face clean. Spray the inside of the brass housing clean of all deposits. spray base of Idle screw clean to ensure no carbon deposits remain. Be liberal with the spray.
10) replace gaskets and reassemble in reverse order. make sure when attatching the air tube to the TB you tighten the clamp. a loose clamp = a small vacuum leak that probably cant be heard but will be felt (high idle).
before reassmebling, some like to spray remaining tb cleaner/carb cleaner into the plenum to clean it up. This is usually a waste of time since oil coming from the PCV will quickly muck it up again but pooled cleaner may help clean downstream intake when you start it back up. not enough to make a bg difference but hey. If you do this, dont be alarmed by the blue smoke at startup (oil and sludge being burned off). Start the car, take it for a short run to blow any remaining cleaner out and you are done.
pics:
oh yeah and this was in the stickies too
i love taking pictures
Senior Member
Joined: Nov 2006
Posts: 2,389
You see this is exactly why this site works, this is what i love about this place
Some people say they hate to answer old questions (the dreaded IACV) but its all good
if u have any problems doing this PM me and i will help if i can
Some people say they hate to answer old questions (the dreaded IACV) but its all good
if u have any problems doing this PM me and i will help if i can

Thread
Thread Starter
Forum
Replies
Last Post

