my retrofit!
 12-16-2008, 10:18 AM
#1
Senior Member
Thread Starter
iTrader: (11)

Join Date: Jun 2006
Location: Cherry Hill, NJ / Hoboken, NJ
Posts: 1,325
my retrofit!
Hi everybody
I'd like to share the build log for my headlights.
The goal: Install HIDs in them. I could just drop 9004 HID bulbs in them and call it a day. But I wanted a proper beam pattern and no glare. I picked up a pair of projector lenses. Projectors have a "cutoff shield", which blocks light above a certain point. This is the reason that if you stand in front of a car with HIDs, it looks like the lights are dim, but if you duck and look under the shield, they're super bright.
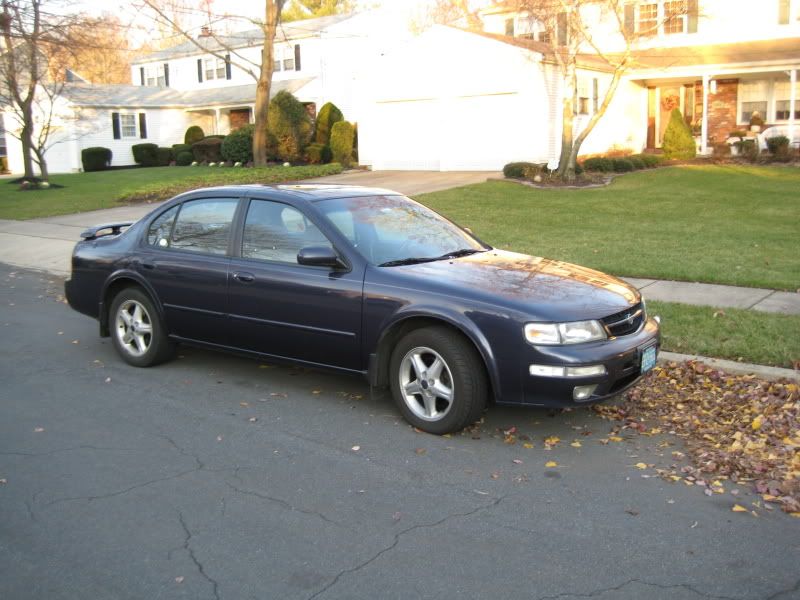
I drive a 1997 Nissan Maxima. The stock headlights are a crappy 9004 single relector design. The beam pattern is terrible and if I'm driving through a place with streetlight, I can't even tell whether the lights are on or not. The 95-99 Maxima has two different headlights. 95-96 uses a fluted glass lenge, and 97-99 uses a clear plastic lens. I got a good deal on a pair of 95-96 headlights. I was told that the fluting on them would disrupt the beam pattern from my projectors, so I decided to install them on my car for spares, and do the retrofit on my stock 97-99 clears.
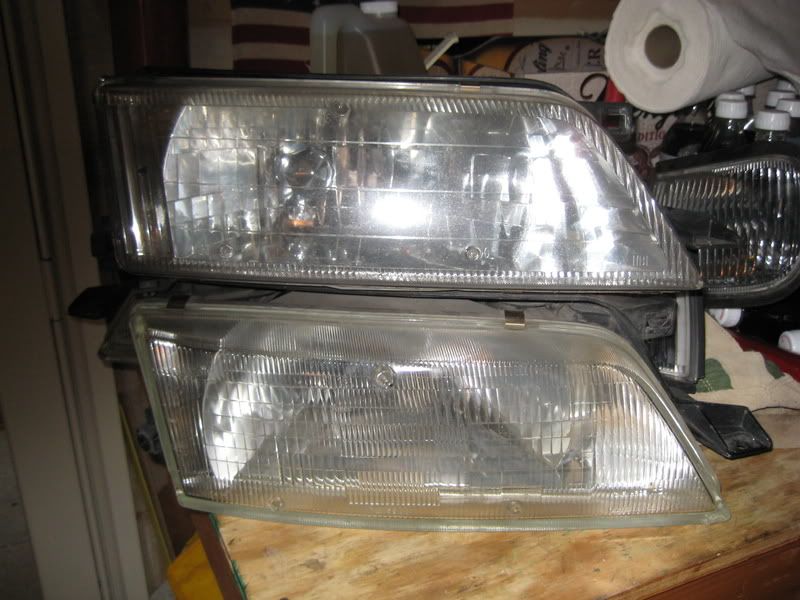
Here we see a comparison, 95-96 on bottom, 97-99 on top
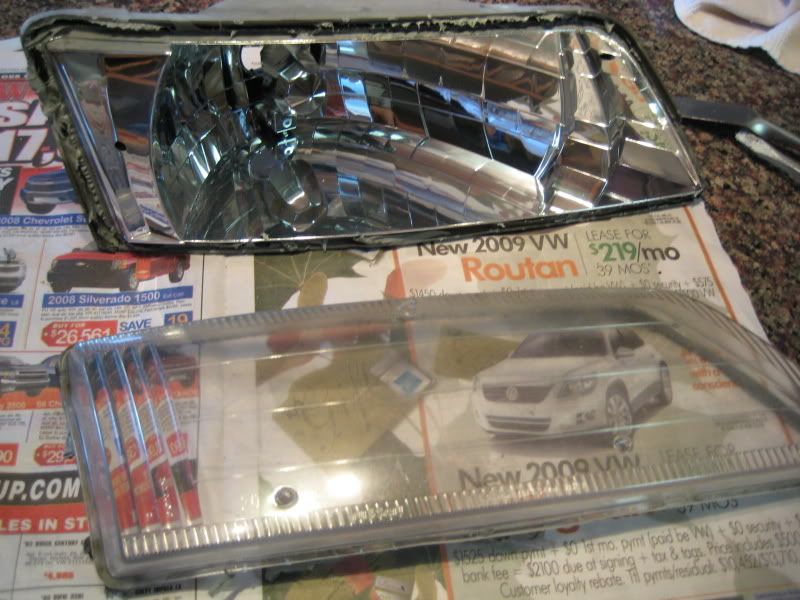
So, with the fluted lights on my car, I got to work on the clears.
First thing first, I opened them up. Baked them at 250 for 10 minutes, pried them apart. Hint: It would have been a lot easier with another person helping hold them.
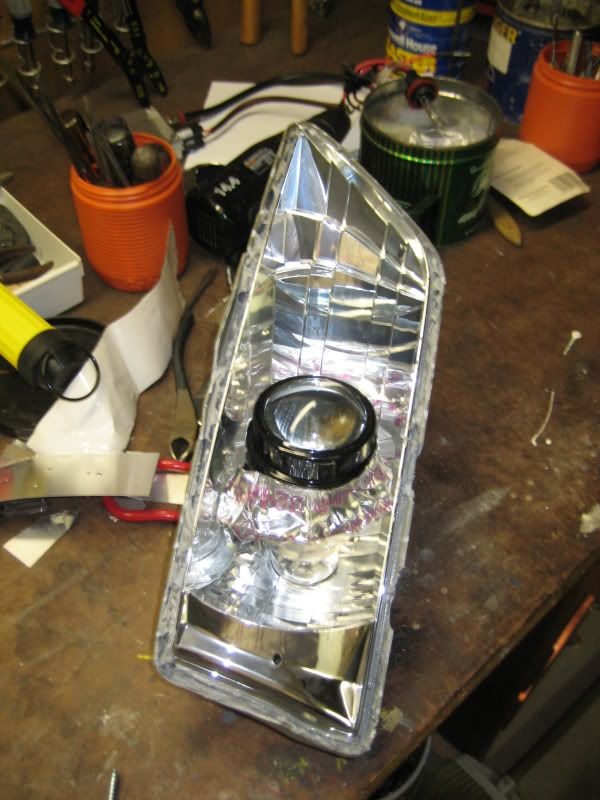
Next, the projectors. These are Stanley projectors, from a MDX or Camry. They're originally halogen, using a H11 bulb, rather than the D2S that a HID projector will use.
I test-fit them in the reflector bowls. Later on, I'll cut out the back of the headlights to let them sit deeper in, and allow me access to the bulbs after I seal the headlgihts back up.
I'd like to share the build log for my headlights.
The goal: Install HIDs in them. I could just drop 9004 HID bulbs in them and call it a day. But I wanted a proper beam pattern and no glare. I picked up a pair of projector lenses. Projectors have a "cutoff shield", which blocks light above a certain point. This is the reason that if you stand in front of a car with HIDs, it looks like the lights are dim, but if you duck and look under the shield, they're super bright.
I drive a 1997 Nissan Maxima. The stock headlights are a crappy 9004 single relector design. The beam pattern is terrible and if I'm driving through a place with streetlight, I can't even tell whether the lights are on or not. The 95-99 Maxima has two different headlights. 95-96 uses a fluted glass lenge, and 97-99 uses a clear plastic lens. I got a good deal on a pair of 95-96 headlights. I was told that the fluting on them would disrupt the beam pattern from my projectors, so I decided to install them on my car for spares, and do the retrofit on my stock 97-99 clears.
Here we see a comparison, 95-96 on bottom, 97-99 on top
So, with the fluted lights on my car, I got to work on the clears.
First thing first, I opened them up. Baked them at 250 for 10 minutes, pried them apart. Hint: It would have been a lot easier with another person helping hold them.
Next, the projectors. These are Stanley projectors, from a MDX or Camry. They're originally halogen, using a H11 bulb, rather than the D2S that a HID projector will use.
I test-fit them in the reflector bowls. Later on, I'll cut out the back of the headlights to let them sit deeper in, and allow me access to the bulbs after I seal the headlgihts back up.
 12-16-2008, 10:18 AM
#2
Senior Member
Thread Starter
iTrader: (11)
Join Date: Jun 2006
Location: Cherry Hill, NJ / Hoboken, NJ
Posts: 1,325
The first thing to do was cover up the squirrel finders. Most halogen projectors have something called a "squirrel finder" which is a narrow flap in the cutoff shield that allows light to go above the cutoff shield. It's not usually a problem with dimmer halogen bulbs. Since I'm using HIDs, I sealed the flap closed, to prevent glare to other drivers.
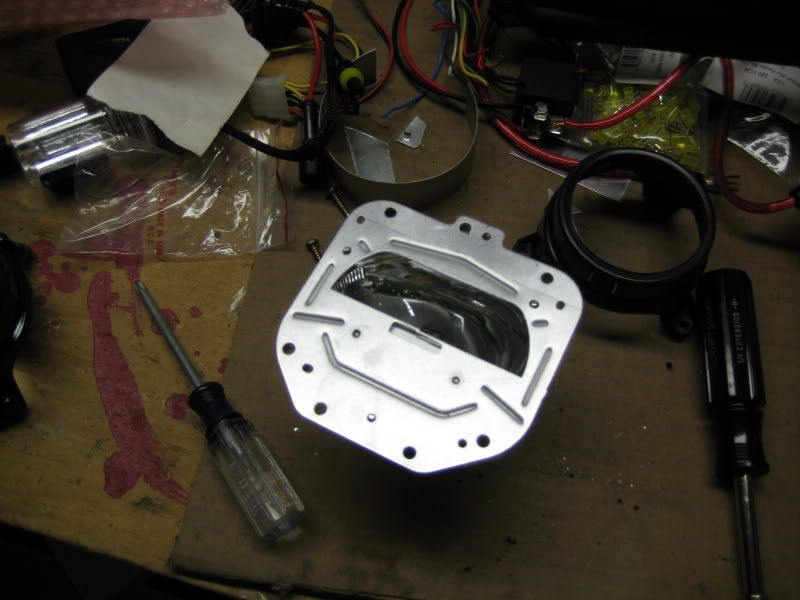
The upper wide opening is the area that the light comes through. The small rectangular below it is the squirrel finder opening. Because we're shooting this through the lens, the image will be inverted, which is why the opening is on the top.
I put the bulbs in and fired them up for a trial. As you can see, I missed a tiny slit in the squirrel finder, but I later filled it in.
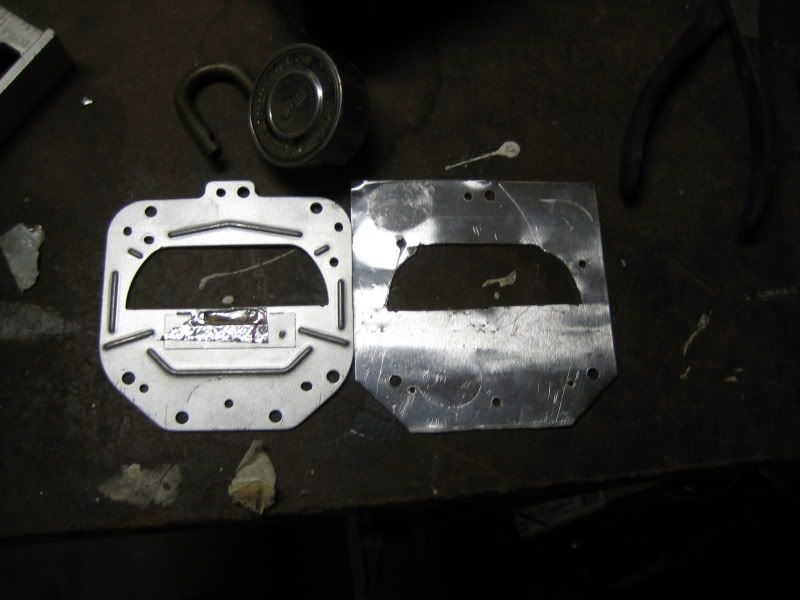
Now, through a bizarre sequence of events, I ended up with two projectors and one cutoff shield. So, I had to fabricate another out of aluminum sheet. I went crazy with my power drill, dremel, and a file, to get this
Updates coming soon.
The upper wide opening is the area that the light comes through. The small rectangular below it is the squirrel finder opening. Because we're shooting this through the lens, the image will be inverted, which is why the opening is on the top.
I put the bulbs in and fired them up for a trial. As you can see, I missed a tiny slit in the squirrel finder, but I later filled it in.
Now, through a bizarre sequence of events, I ended up with two projectors and one cutoff shield. So, I had to fabricate another out of aluminum sheet. I went crazy with my power drill, dremel, and a file, to get this
Updates coming soon.
 12-16-2008, 10:35 AM
#4

i keep hearing people say "why halogen pojectors and not the proper projectors?", but at the same time to someone that doesnt really know much about them, like myself, they seem to perform the same, and the beams definitely look the same. so why is that? how are they different and why are halogen projectors so much worse? (just trying to learn here)
12-16-2008, 10:54 AM
#5
Senior Member
Thread Starter
iTrader: (11)
Join Date: Jun 2006
Location: Cherry Hill, NJ / Hoboken, NJ
Posts: 1,325
Well, the MDX projectors are a "gem in the rough" so to speak. Do not expect results like this from most halogen projectors.
Most halogen projectors have a smaller bowl, and focus the light more towards the center. a HID projector will usually have a wider beam.
Another problem with the smaller bowl is that it could overheat easier.
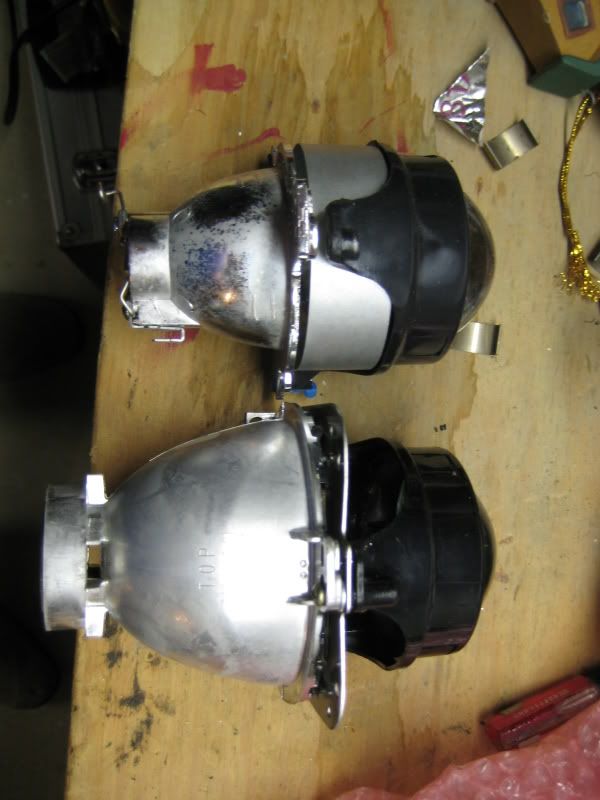
Here is my MDX projector next to a H3 projector out of those ebay projector headlights
In addition, some halogen projectors have a weird cutoff. A HID projector is flat with a 'step' in the mdidle. A halogen projector often has more of a slope, which can blind drivers to your right. A halogen beam isnt as intense there, so its ok.
Cutoff comparison:

Plus, as I mentioned before, squirrel finders
But, a good halogen projector can handle HIDs. There isn't a magical aspect that a HID projector has that a halogen doesn't. If you seal up the squirrel finders, give it a good shield, and the bowl doesn't overheat, it works fine.
Most halogen projectors have a smaller bowl, and focus the light more towards the center. a HID projector will usually have a wider beam.
Another problem with the smaller bowl is that it could overheat easier.
Here is my MDX projector next to a H3 projector out of those ebay projector headlights
In addition, some halogen projectors have a weird cutoff. A HID projector is flat with a 'step' in the mdidle. A halogen projector often has more of a slope, which can blind drivers to your right. A halogen beam isnt as intense there, so its ok.
Cutoff comparison:
Plus, as I mentioned before, squirrel finders
But, a good halogen projector can handle HIDs. There isn't a magical aspect that a HID projector has that a halogen doesn't. If you seal up the squirrel finders, give it a good shield, and the bowl doesn't overheat, it works fine.
12-16-2008, 10:56 AM
#6

i keep hearing people say "why halogen pojectors and not the proper projectors?", but at the same time to someone that doesnt really know much about them, like myself, they seem to perform the same, and the beams definitely look the same. so why is that? how are they different and why are halogen projectors so much worse? (just trying to learn here)
 12-16-2008, 11:13 AM
#8
 Basically the main difference between HID projectors and halogen projectors is that HID projectors are made to have the proper optics to go with an HID capsule vs. a halogen projector. The reason halogen projectors aren't designed more like HID projectors is because they don't have as much light to spread around as HID projectors do. For example:
H3 - 1450 lumens
D2S - 3200 lumens
12-16-2008, 11:17 AM
#9
Senior Member
Thread Starter
iTrader: (11)
Join Date: Jun 2006
Location: Cherry Hill, NJ / Hoboken, NJ
Posts: 1,325
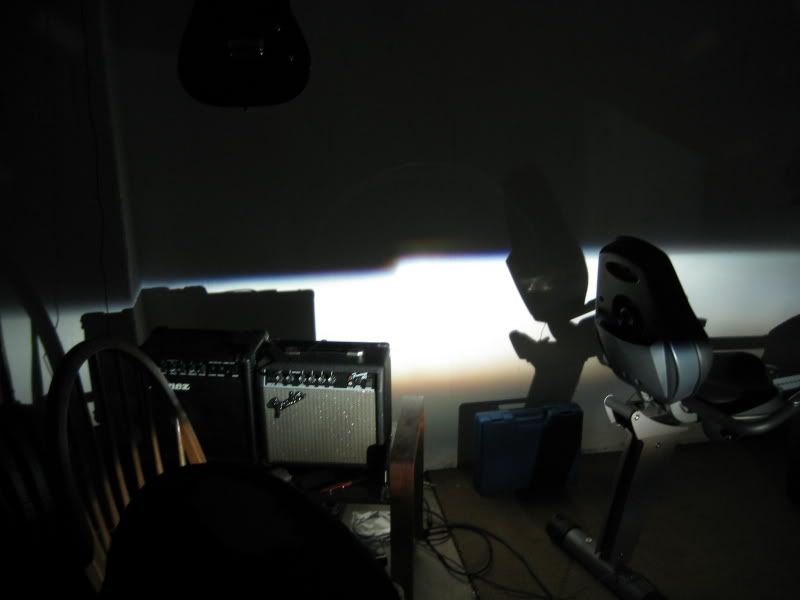
Ok, I finished up the custom cutoff shield and painted it.
From 20 feet away, at eye level. Now, this was taken with all the lights off, in a basement. All shots are at exactly the same camera settings, unaltered.
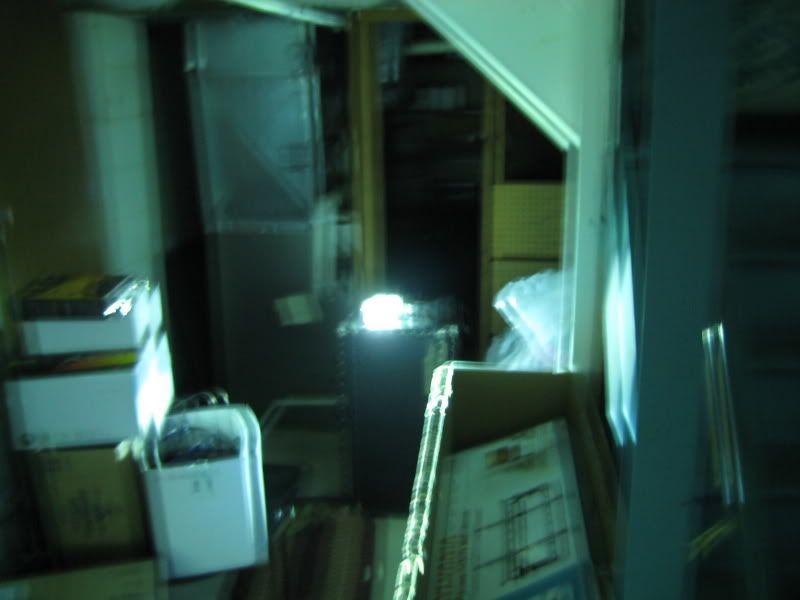
THIS IS WHY YOU USE PROJECTORS AND DONT JUST DROP THAT ISH IN YOUR STOCK HOUSINGS
Notice that the light has about the same intensity as your 1156 reverse lights.
Now let's drop under the cutoff.
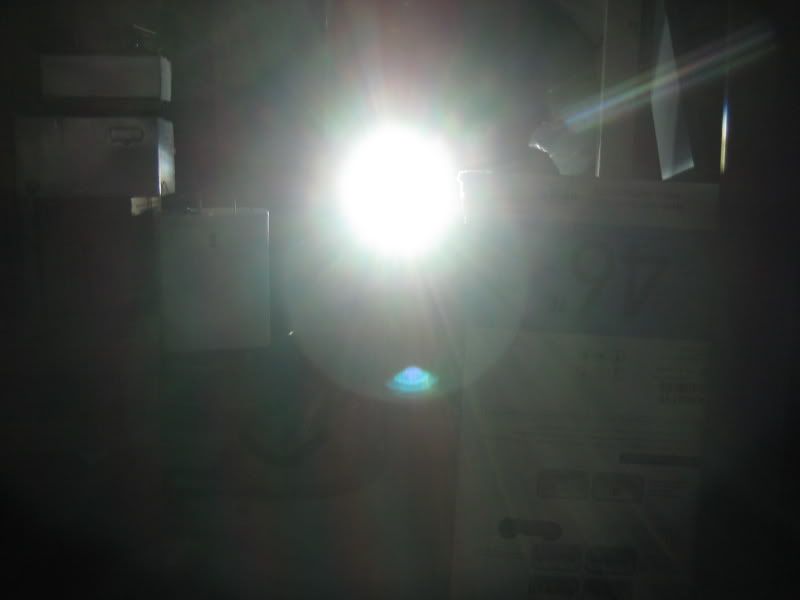
Wow. There's where all the light is hiding.
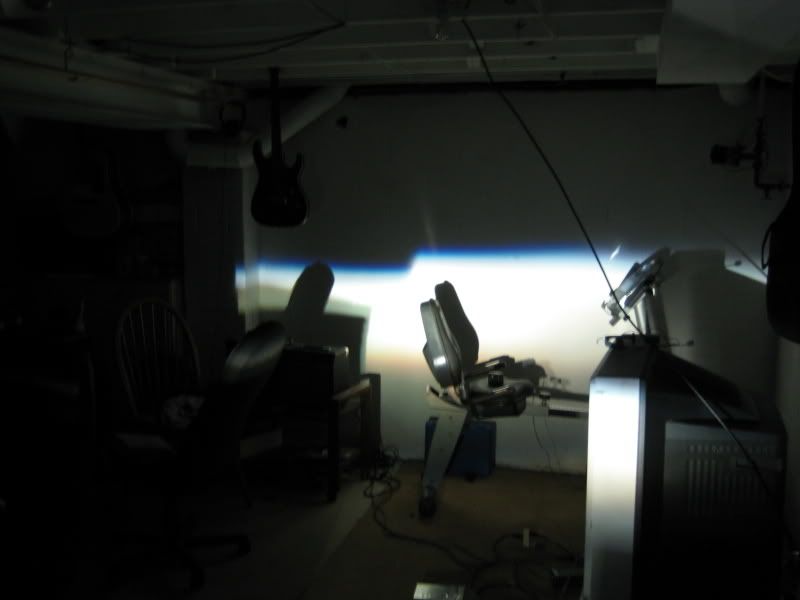
Beam pattern at 20 feet. I'm pretty impressed with my cutoff shield. $2 in sheet metal and an hour with a drill, a dremel, and a file gave me this. The beam is actually wider, but due to the weird shape of the basement, that was all that was visible. The rest was hitting another wall
Close-up of the color.

From 20 feet away, at eye level. Now, this was taken with all the lights off, in a basement. All shots are at exactly the same camera settings, unaltered.
THIS IS WHY YOU USE PROJECTORS AND DONT JUST DROP THAT ISH IN YOUR STOCK HOUSINGS
Notice that the light has about the same intensity as your 1156 reverse lights.
Now let's drop under the cutoff.
Wow. There's where all the light is hiding.
Beam pattern at 20 feet. I'm pretty impressed with my cutoff shield. $2 in sheet metal and an hour with a drill, a dremel, and a file gave me this. The beam is actually wider, but due to the weird shape of the basement, that was all that was visible. The rest was hitting another wall
Close-up of the color.
Last edited by nalc; 12-16-2008 at 11:20 AM.
12-16-2008, 11:19 AM
#10
Senior Member
Thread Starter
iTrader: (11)
Join Date: Jun 2006
Location: Cherry Hill, NJ / Hoboken, NJ
Posts: 1,325
Basically, to do D2S in a H11 housing is doable. You need to shave 2.8mm of material off the back, because the D2S capsule is not as far from the base as the H11 filament, so you need to let it sit further in.
This was instrumental in helping me with my retro:
http://www.cardomain.com/ride/578450

 12-16-2008, 11:57 AM
#13
Senior Member
Thread Starter
iTrader: (11)
Join Date: Jun 2006
Location: Cherry Hill, NJ / Hoboken, NJ
Posts: 1,325
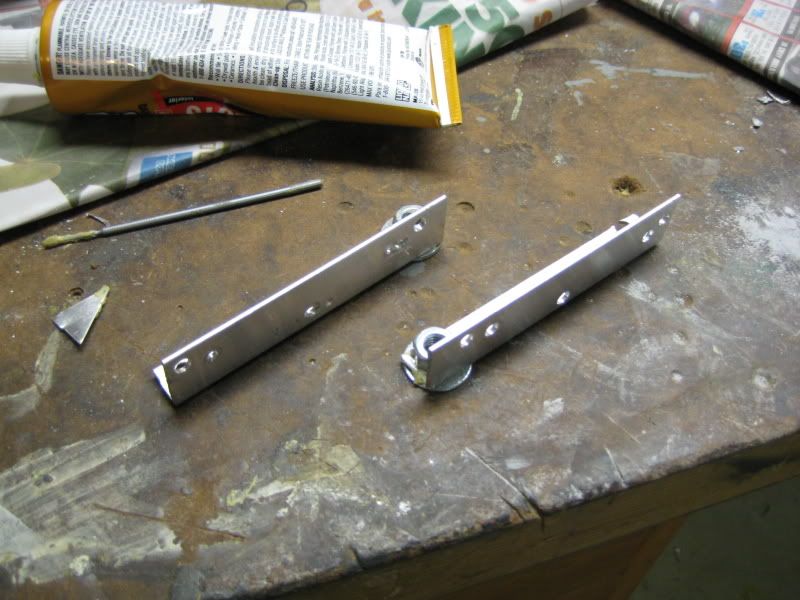
I decided to fab up some brackets.
I wanted to do JnC's method, but the housing is really cramped. I would have been much better off springing the extra money for "R34 style" housings. They look much easier to work with.
The stock adjustment brackets allow a goofy kind of diagonal rotation. I decided to make my projector brackets to allow adjustment in the opposite diagonal direction. Between the two, I should be able to adjust them properly.
So, the brackets are going to be a piece of aluminum L-channel. I liquid-nail'ed two washers on the bottom of each, and a 1/4" nut on the top of each. I'll bolt them to the bottom through the 1/4" nut, and tighten them. That will let me pan them left and right. Then, I'm going to use a 4" machine screw through the top of the projector on the opposite corner, allowing up/down tilt.
 12-16-2008, 01:33 PM
#15
Nice man, you're going to be a pro at retros soon. Excellent job on the cutoff shield.
Good choice on putting the Pjs in the plastic housing, I took a look at my lenses earlier this week and the light would definitely be messed up going through them.
Btw, blue 4th gens ftw.
Good choice on putting the Pjs in the plastic housing, I took a look at my lenses earlier this week and the light would definitely be messed up going through them.
Btw, blue 4th gens ftw.
 12-16-2008, 02:57 PM
#17
Senior Member
Thread Starter
iTrader: (11)
Join Date: Jun 2006
Location: Cherry Hill, NJ / Hoboken, NJ
Posts: 1,325
Next, I wanted to get some stuff done with my harness.
Because the stock headlight wiring is thin and runs from the fuse box to the steering column then to the headlights, the high powered HID ballasts risk melting it.
I used 10awg wire. The 9004 is switched positive hi/low. I put a diode between them so that high beams or low beams will fire up the ballast. I then connected a 6800uf cap across low beam and ground, so that if for some reason I switch to high beams, the lights won't flicker in the half second that neither has power.
Then they trigger a relay, which switches power directly from the battery to the two AMP connectors for the HID ballasts.
12-16-2008, 04:45 PM
#20
Senior Member
Thread Starter
iTrader: (11)
Join Date: Jun 2006
Location: Cherry Hill, NJ / Hoboken, NJ
Posts: 1,325
Yeah, I was going to wetsand them then hit them with a clearcoat of something. Should I dremel the little nubs off?
The harness was kinda an experiment. I wasn't sure what direction I wanted to go in. Not having high beams is kinda shaky... I may try to put some cheapo halogen bulbs inboard of the MDXs to be my highs, or possibly rewire the fogs as high beams. I was going to deal with that once I finish dealing with mounting them.
The harness was kinda an experiment. I wasn't sure what direction I wanted to go in. Not having high beams is kinda shaky... I may try to put some cheapo halogen bulbs inboard of the MDXs to be my highs, or possibly rewire the fogs as high beams. I was going to deal with that once I finish dealing with mounting them.


 12-16-2008, 09:52 PM
#24
12-17-2008, 07:45 AM
#25
I decided to fab up some brackets.
I wanted to do JnC's method, but the housing is really cramped. I would have been much better off springing the extra money for "R34 style" housings. They look much easier to work with.
The stock adjustment brackets allow a goofy kind of diagonal rotation. I decided to make my projector brackets to allow adjustment in the opposite diagonal direction. Between the two, I should be able to adjust them properly.
So, the brackets are going to be a piece of aluminum L-channel. I liquid-nail'ed two washers on the bottom of each, and a 1/4" nut on the top of each. I'll bolt them to the bottom through the 1/4" nut, and tighten them. That will let me pan them left and right. Then, I'm going to use a 4" machine screw through the top of the projector on the opposite corner, allowing up/down tilt.
I wanted to do JnC's method, but the housing is really cramped. I would have been much better off springing the extra money for "R34 style" housings. They look much easier to work with.
The stock adjustment brackets allow a goofy kind of diagonal rotation. I decided to make my projector brackets to allow adjustment in the opposite diagonal direction. Between the two, I should be able to adjust them properly.
So, the brackets are going to be a piece of aluminum L-channel. I liquid-nail'ed two washers on the bottom of each, and a 1/4" nut on the top of each. I'll bolt them to the bottom through the 1/4" nut, and tighten them. That will let me pan them left and right. Then, I'm going to use a 4" machine screw through the top of the projector on the opposite corner, allowing up/down tilt.
Im a bit confused as to where are these brackets being mounted and attached to?
12-17-2008, 08:36 AM
#26
Senior Member
Thread Starter
iTrader: (11)
Join Date: Jun 2006
Location: Cherry Hill, NJ / Hoboken, NJ
Posts: 1,325
Those brackets are being 'sandwiched' in between the projector bowl and the cutoff shield. Then a bolt is going between them and the bottom of the housing.
Here is the projector mounted in the housing. The bracket is supporting the bottom, and a long machine screw is holding the top.
Here is the projector mounted in the housing. The bracket is supporting the bottom, and a long machine screw is holding the top.
12-17-2008, 01:10 PM
#29

It is like JNC's mounting method. The nuts that are welded onto the bracket... are threaded. Then the large bolt... on this last picture.... is his vertical adjustment.
Right?.....
nalc, what's going into the big hole in the housing?
Right?.....
nalc, what's going into the big hole in the housing?
12-17-2008, 01:41 PM
#30
Senior Member
Thread Starter
iTrader: (11)
Join Date: Jun 2006
Location: Cherry Hill, NJ / Hoboken, NJ
Posts: 1,325
it's not quite JnC's method... he uses a pair of brackets individually adjustable, I use a single one. His has rotational adjustment and up/down tilt, mine has left/right and up/down tilt. I am going to mount them up in the housings and put them on the car and do adjustments with those two bolts and with the stock aiming bolts. Hopefully I can get a decent aligment.
The hole... we'll see. Might do a pair of H3 driving lights inboard, wired as high beams.
The hole... we'll see. Might do a pair of H3 driving lights inboard, wired as high beams.
12-17-2008, 08:04 PM
#32
Senior Member
Thread Starter
iTrader: (11)
Join Date: Jun 2006
Location: Cherry Hill, NJ / Hoboken, NJ
Posts: 1,325
Hey man, I was wondering. Since you're one of the first people to do the foglight highbeams inboard of the projectors, how do you change the bulb? Every kind I've seen requires taking apart like half the housing, and I have no idea how I'm supposed to do that if it's baked in my headlight.
12-17-2008, 08:43 PM
#33
Well, look at it this way, i've had my retrofit since 05' and we are going into 09' and haven't had to change them yet. I don't use high beams alot though either. I don't think if you have to change it out every 3-4 years would be that bad to take the headlight apart, you might not even decide to keep your maxima by the time it needs to be changed out.
12-17-2008, 09:26 PM
#34
Senior Member
Thread Starter
iTrader: (11)
Join Date: Jun 2006
Location: Cherry Hill, NJ / Hoboken, NJ
Posts: 1,325
I was tossing around the idea of just mounting a pair of round driving lights on the bumper, and wiring them as the highs. like a toned down 'rally' look
I bought a pair of 1.5" pep boys foglights... and they are just kinda dumb looking. Everything they had was with a blue tinted lens, which looks ricey. I'm going to paint the inside of the housings a dark gunmetal color, and I think they'll stick out like a sore thumb.
I bought a pair of 1.5" pep boys foglights... and they are just kinda dumb looking. Everything they had was with a blue tinted lens, which looks ricey. I'm going to paint the inside of the housings a dark gunmetal color, and I think they'll stick out like a sore thumb.
 12-18-2008, 11:02 AM
#36
Senior Member
Thread Starter
iTrader: (11)
Join Date: Jun 2006
Location: Cherry Hill, NJ / Hoboken, NJ
Posts: 1,325
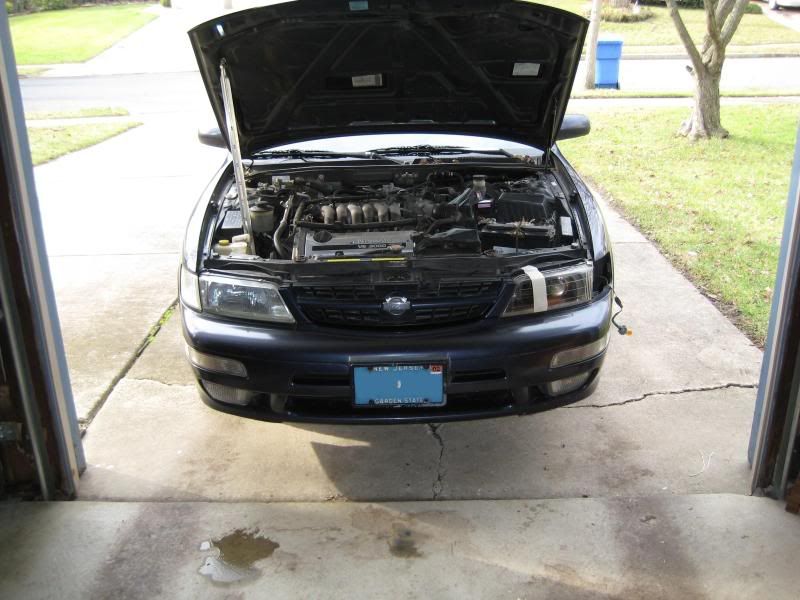
Well, I put the driver side one on the car to test, got it all wired up, then realized that my ring terminals on the harness are too small.
Time to go to the hardware store and pick up some decent connectors.
Time to go to the hardware store and pick up some decent connectors.
12-18-2008, 08:28 PM
#38
Senior Member
Thread Starter
iTrader: (11)
Join Date: Jun 2006
Location: Cherry Hill, NJ / Hoboken, NJ
Posts: 1,325
I got the right terminals. then couldn't get the positive one threaded because it hit the clamp funny. So I had to put it on with a M6 nut.
then, it didn't work.
I tried everything until I realized that the fuse was blown. Replaced it and everything lit up fine, until the cap started smoking. Cut out the cap and now everything's dandy.
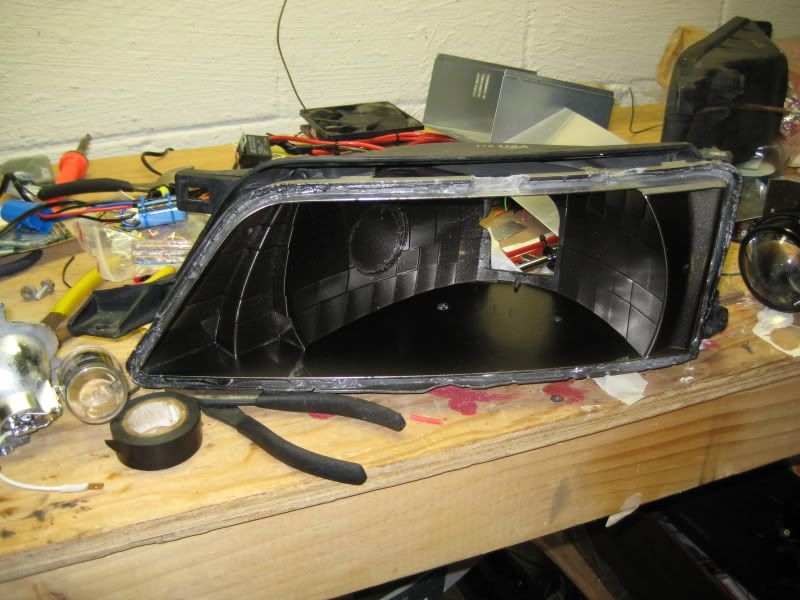
I'm going to work on shrouds now, and work on cutting the other side housing.
then, it didn't work.
I tried everything until I realized that the fuse was blown. Replaced it and everything lit up fine, until the cap started smoking. Cut out the cap and now everything's dandy.
I'm going to work on shrouds now, and work on cutting the other side housing.
12-18-2008, 08:39 PM
#39
Senior Member
Thread Starter
iTrader: (11)
Join Date: Jun 2006
Location: Cherry Hill, NJ / Hoboken, NJ
Posts: 1,325
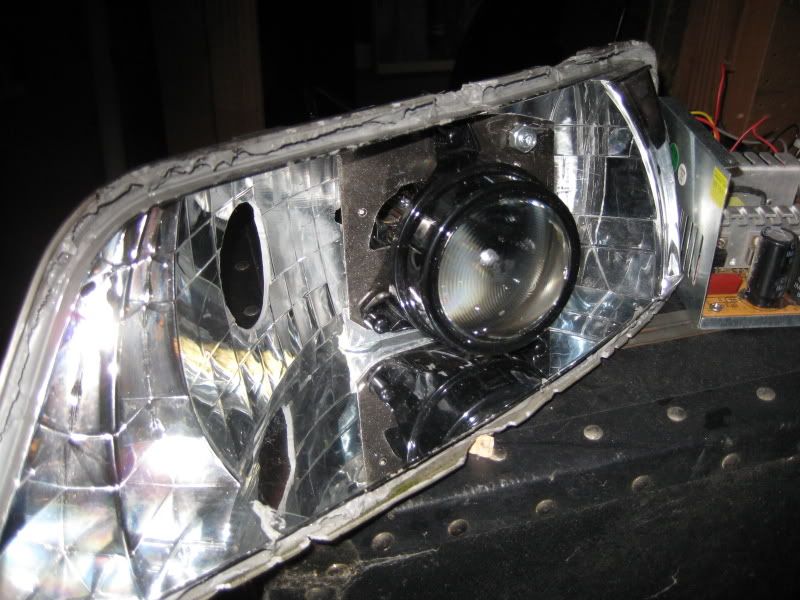
I painted the housing first, and remounted them in the aiming brackets (which I had to dremel a little bit)
Then, I mounted the projector and temporarily taped the cover on. I hit this with Meguiar's PlastX, and it cleared it up. I'm going to do another coat soon. I don't want to sand if I don't have to.
Here's the projector installed
Then, I worked on the harness. I had to replace my old terminal connectors with new ones that actually fit.

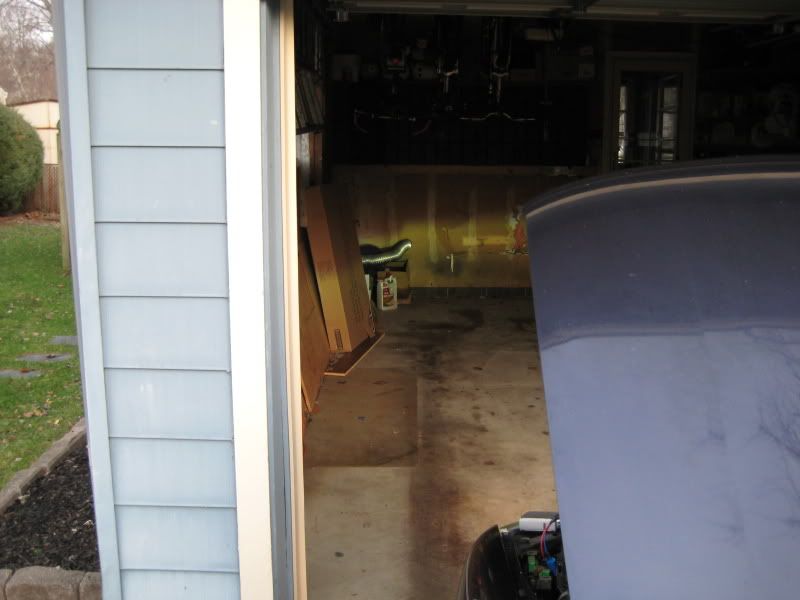
Here's the cutoff! Don't mind the height, it was on a sloped driveway. I was just glad that it was parallel to the ground and that it was pretty much straight ahead. Hopefully I won't have to do a ton of adjustments. Don't mind the odd green color, it was taken on an overcast day against a stained and patched garage wall.
Then, I mounted the projector and temporarily taped the cover on. I hit this with Meguiar's PlastX, and it cleared it up. I'm going to do another coat soon. I don't want to sand if I don't have to.
Here's the projector installed
Then, I worked on the harness. I had to replace my old terminal connectors with new ones that actually fit.
Here's the cutoff! Don't mind the height, it was on a sloped driveway. I was just glad that it was parallel to the ground and that it was pretty much straight ahead. Hopefully I won't have to do a ton of adjustments. Don't mind the odd green color, it was taken on an overcast day against a stained and patched garage wall.
