
Well, i got tired of looking at all the rust in my car and decided to do something about it. Had very little space to work with so its not perfect but it looks 10x better.
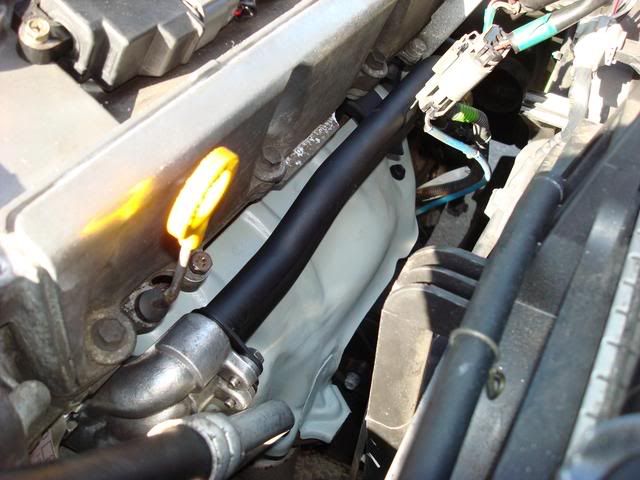
First off we have the coolant log and heat shield. These things just made my engine look like a piece of ****. Took them off, put them in my Electrolysis bucket to remove the rust, sanded them, and painted with Rust Converter. heat shield was just painted. Only bought one can so I didnt want to waste it on heat shield since im going to replace stock headers anyways. I painted it with high performance Rustoleom paint, gray color. (which matched my engine bay paint pretty well and helped contrast)
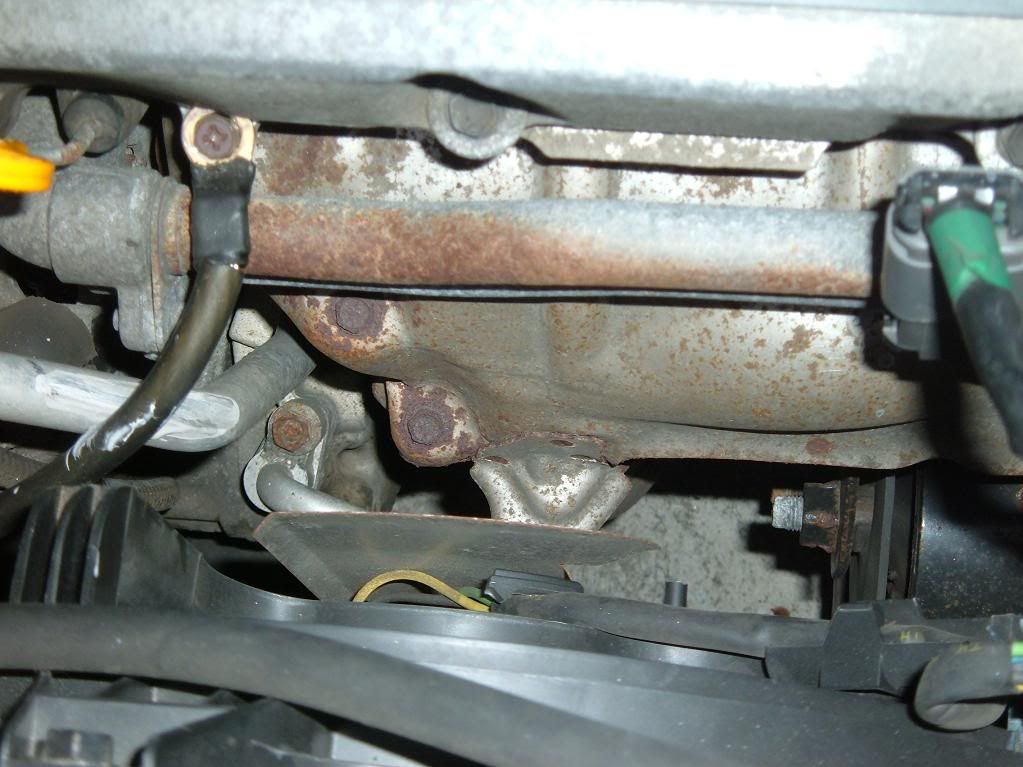

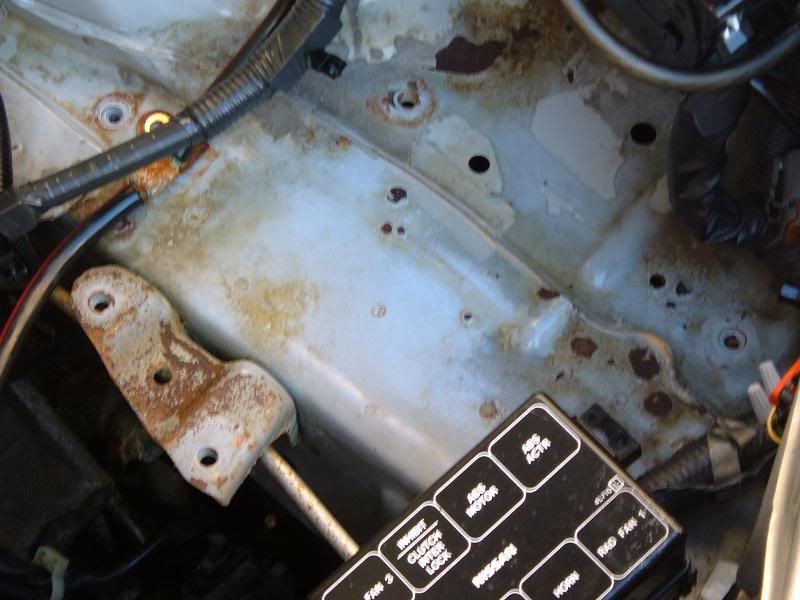
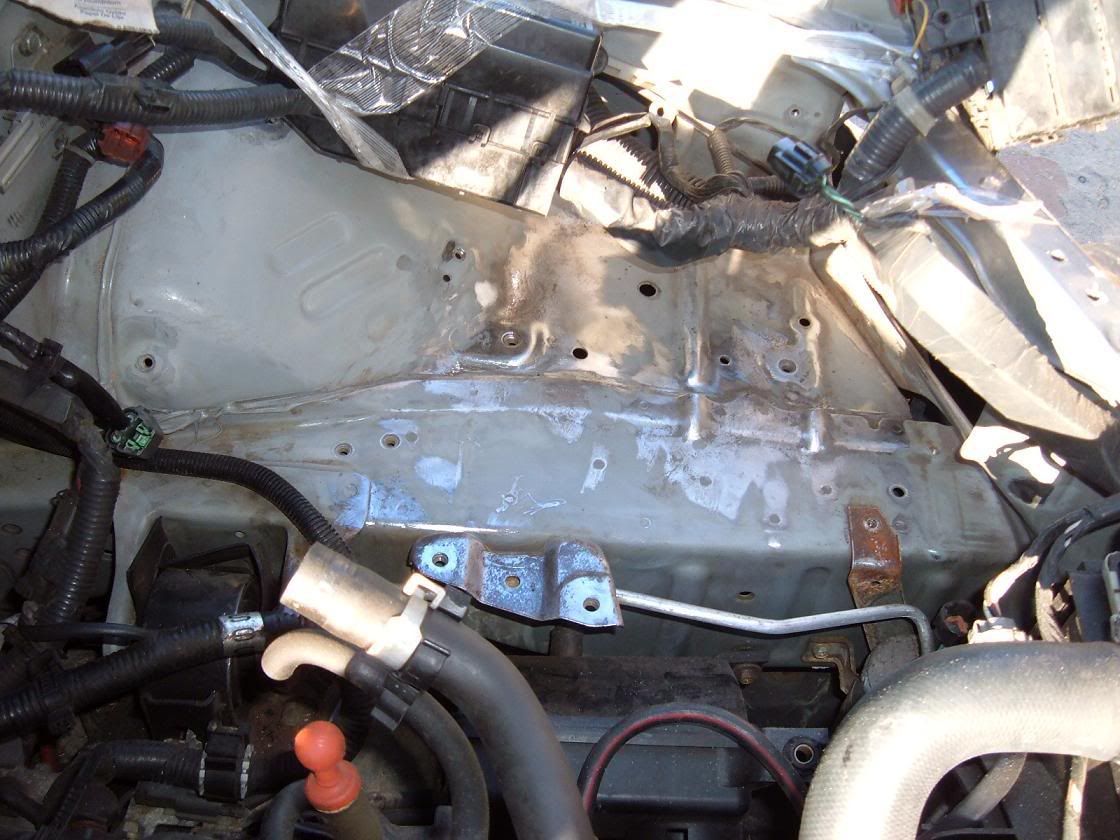
Next we have the rusty engine bay under the battery. Pictures speak for themselves. Rust was heavy underneath the paint. The more i sanded, the more the rust was revealed.
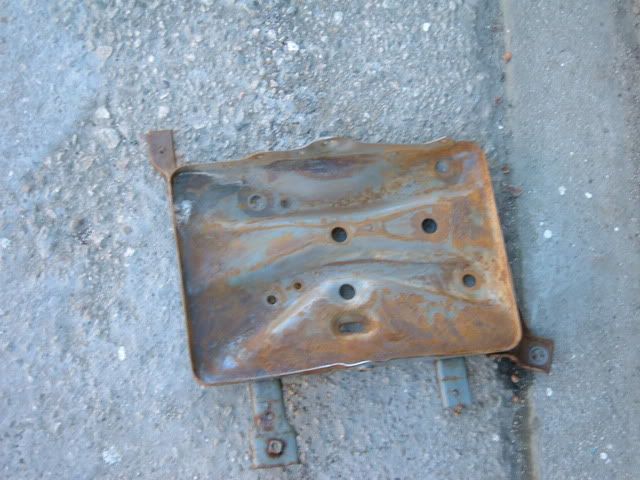
I assume this was the source of the problem which spread the rust. This was the rustiest piece in the car. Didnt get any after pictures, but i treated it with Rust converter just like the coolant log.
First off we have the coolant log and heat shield. These things just made my engine look like a piece of ****. Took them off, put them in my Electrolysis bucket to remove the rust, sanded them, and painted with Rust Converter. heat shield was just painted. Only bought one can so I didnt want to waste it on heat shield since im going to replace stock headers anyways. I painted it with high performance Rustoleom paint, gray color. (which matched my engine bay paint pretty well and helped contrast)
Next we have the rusty engine bay under the battery. Pictures speak for themselves. Rust was heavy underneath the paint. The more i sanded, the more the rust was revealed.
I assume this was the source of the problem which spread the rust. This was the rustiest piece in the car. Didnt get any after pictures, but i treated it with Rust converter just like the coolant log.
After Sanding/grinding. (Used a drill and a 3" coarse Wire wheel, and some Dremel attachments for the tight spots)
Treated with rust converter
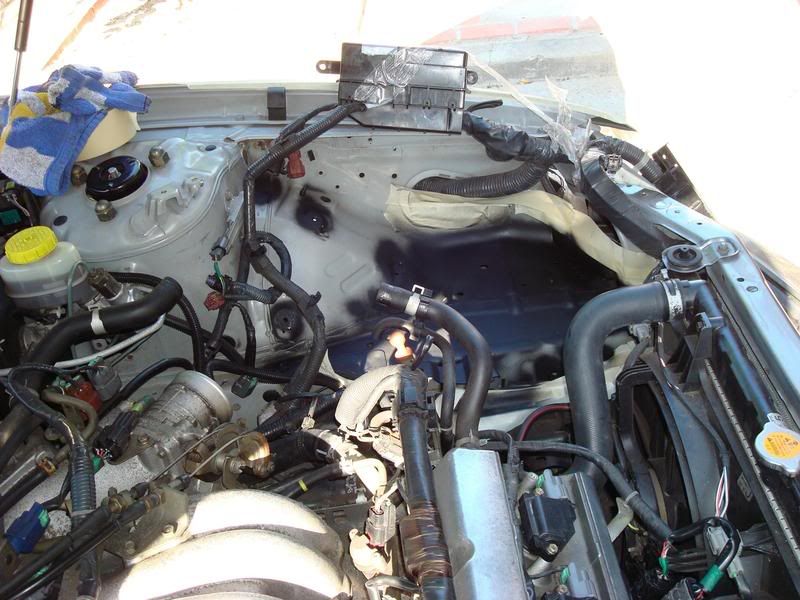
And finally, painted.
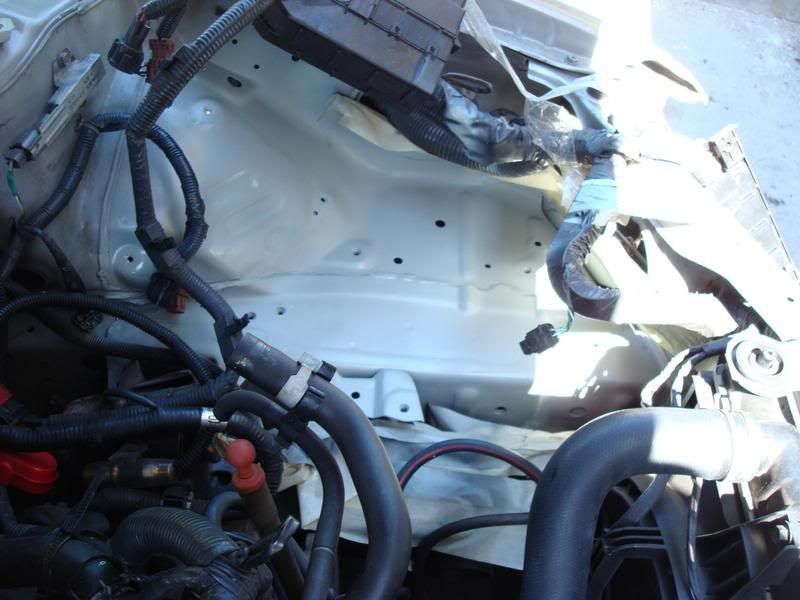
Voila! Ill update this thread later when i install my 00vi and take pictures of smaller parts, like the battery tray and the rusted AC canister that i also treated but forgot to take pictures of.
Also, don't try this at home unless you're prepared to immobilize your car for about a week... Took way longer than expected. Sanding and grinding rust is no joke.
Treated with rust converter
And finally, painted.
Voila! Ill update this thread later when i install my 00vi and take pictures of smaller parts, like the battery tray and the rusted AC canister that i also treated but forgot to take pictures of.
Also, don't try this at home unless you're prepared to immobilize your car for about a week... Took way longer than expected. Sanding and grinding rust is no joke.


Senior Member
yeah i need to get off my **** and make my bay look better since i have something to show off now 


Senior Member
Wow very good job! I've been planning on doing this for EVER but I am afraid of taking my car apart. Maybe one day.... hahahaha
But I love the paint job, looks professional
But I love the paint job, looks professional


Hey dude, long time no talk! 
This is a great idea. There's a few small places on my car I should really do this to. I'm wondering if the rust converter stuff works well enough to tackle suspension pieces
This is a great idea. There's a few small places on my car I should really do this to. I'm wondering if the rust converter stuff works well enough to tackle suspension pieces


its actually a light gray and it matched the Sterling Mist engine bay pretty well. A tad bit lighter than OEM but nothing noticeable.

