
J30 Retrofit in Progress


Thread Starter
Senior Member
Joined: Jan 2010
Posts: 1,393
From: Denver, CO
J30 Retrofit in Progress
Finished Product!!! Scroll to POST #3 to see progress pictures.
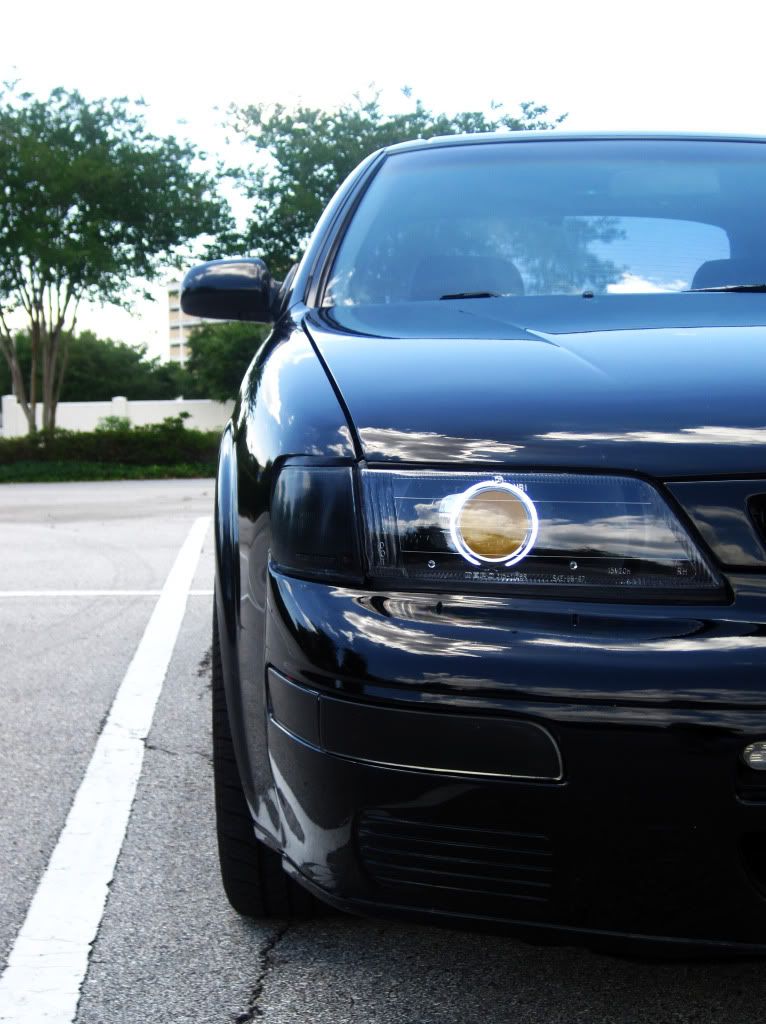
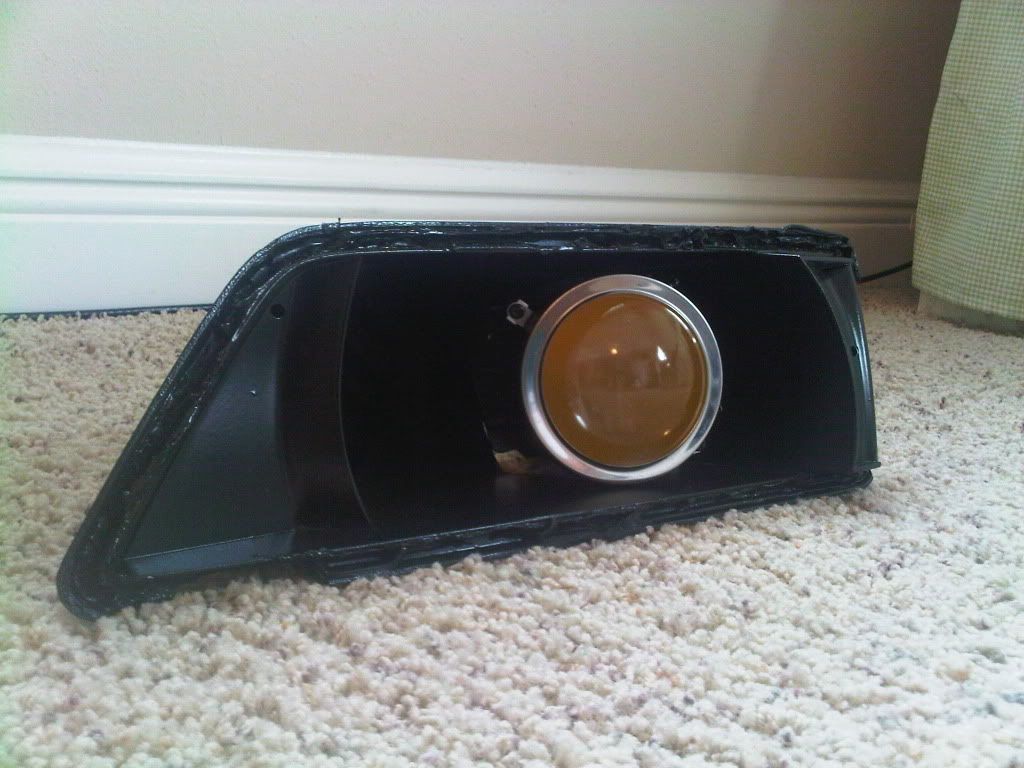
Off:
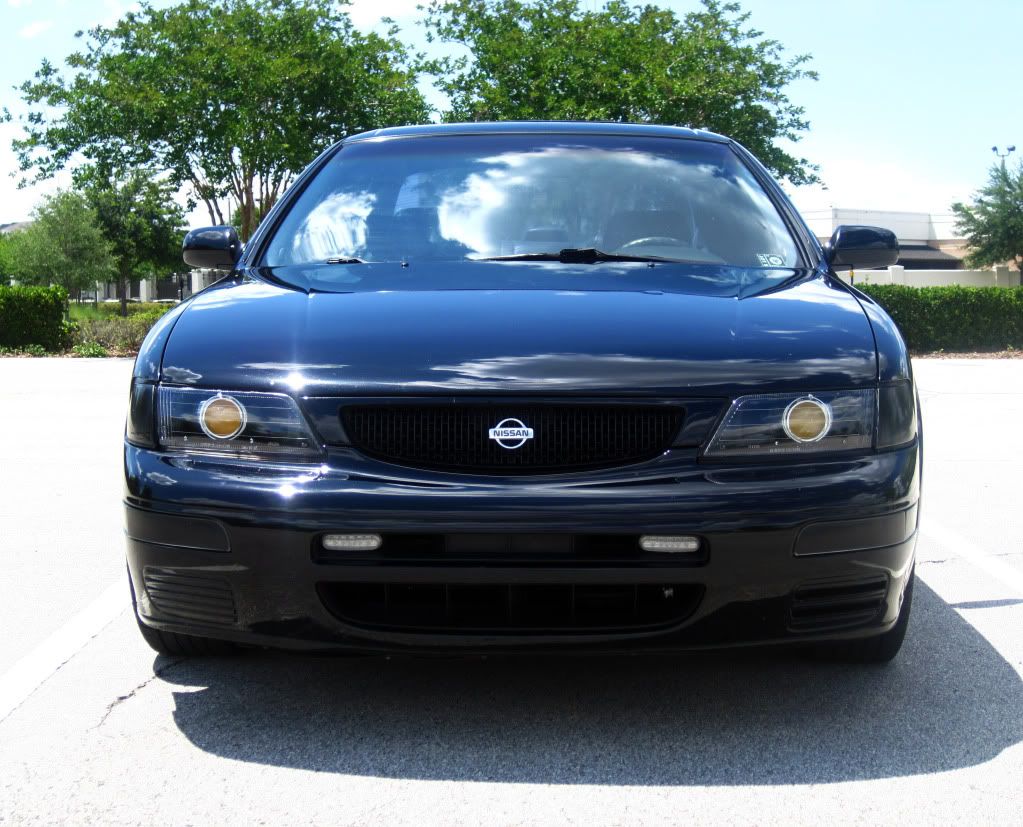
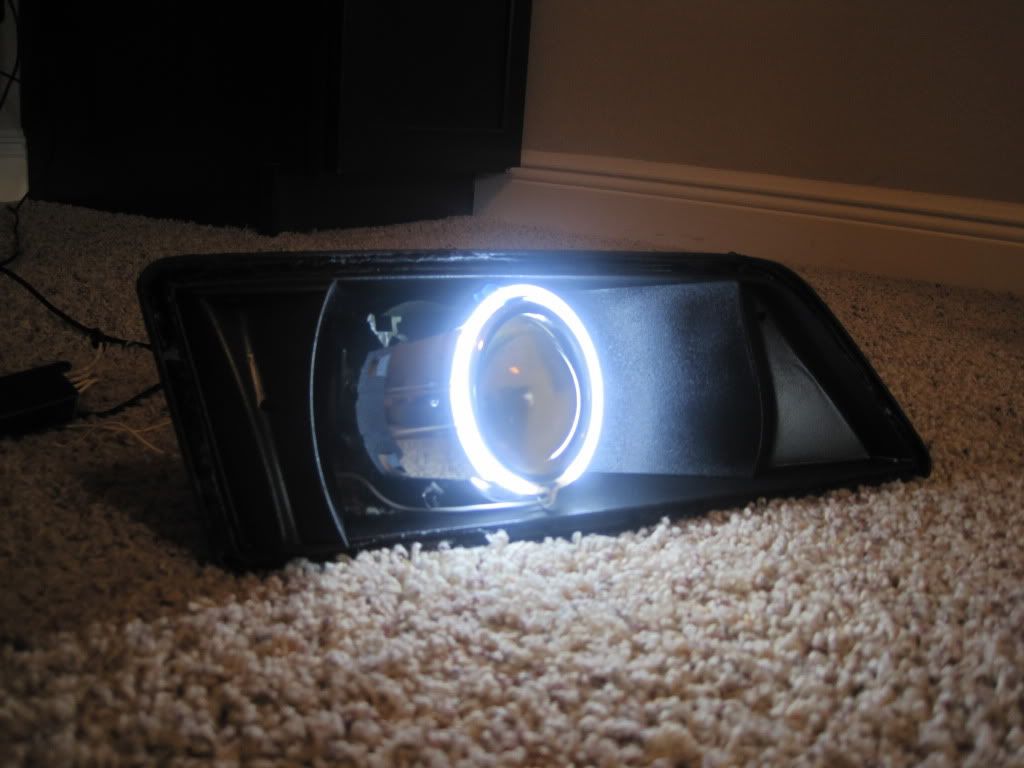
Angel Eyes:
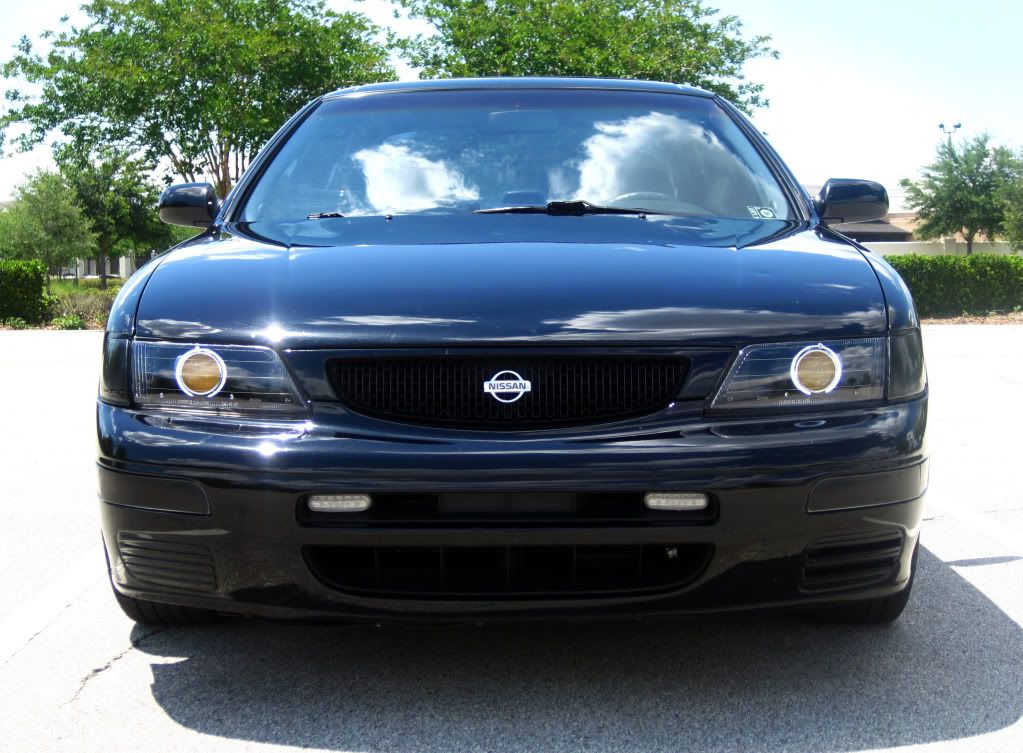
On:
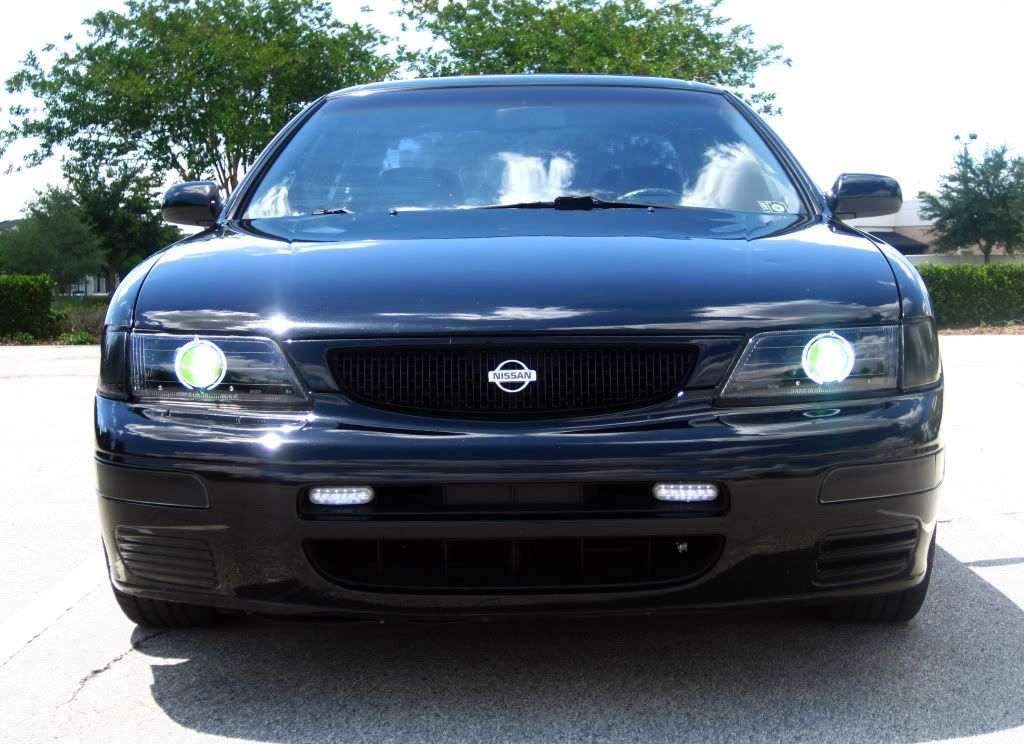
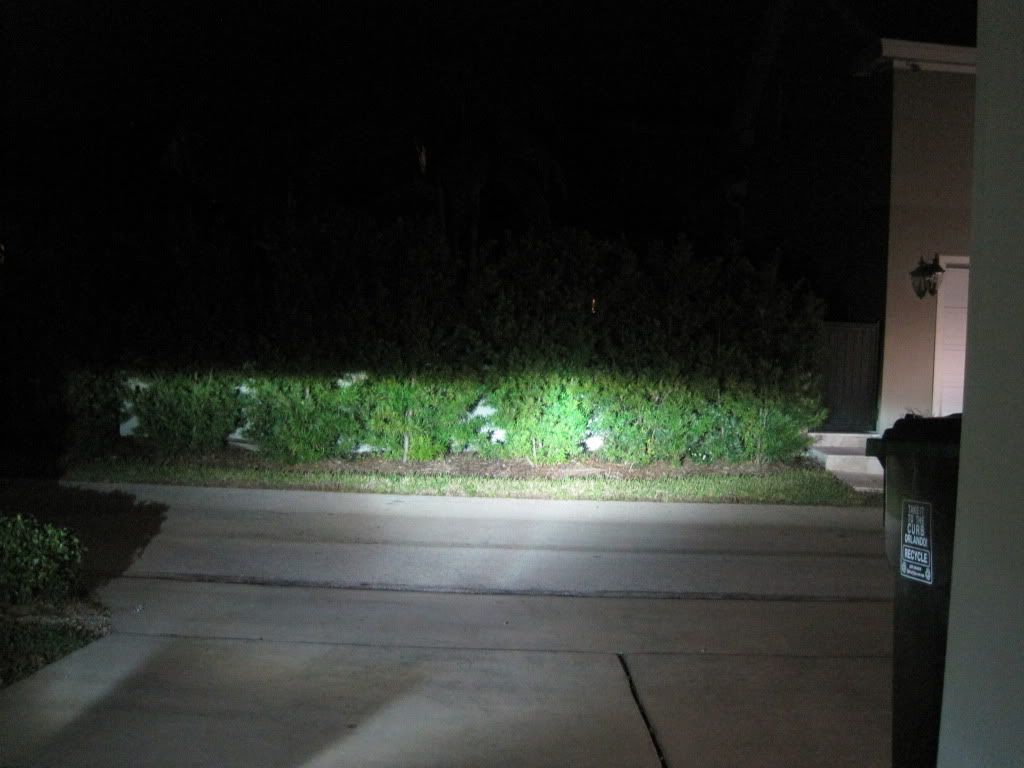
Output:
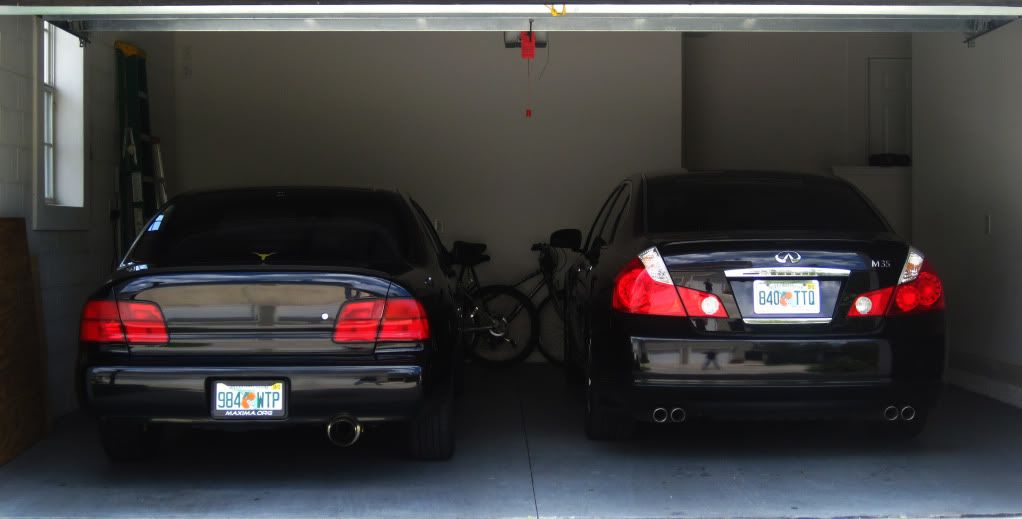
The Two Nissan Bred Beasts....
Off:
Angel Eyes:
On:
Output:
The Two Nissan Bred Beasts....
Last edited by 95Maxed; May 15, 2011 at 08:04 PM.

Thread Starter
Senior Member
Joined: Jan 2010
Posts: 1,393
From: Denver, CO
Hey guys, i finally pulled the trigger. Im doing a j30 retrofit. I had/have no idea where to start, ChrisMan has been guiding me the whole way and I owe him.
J30's
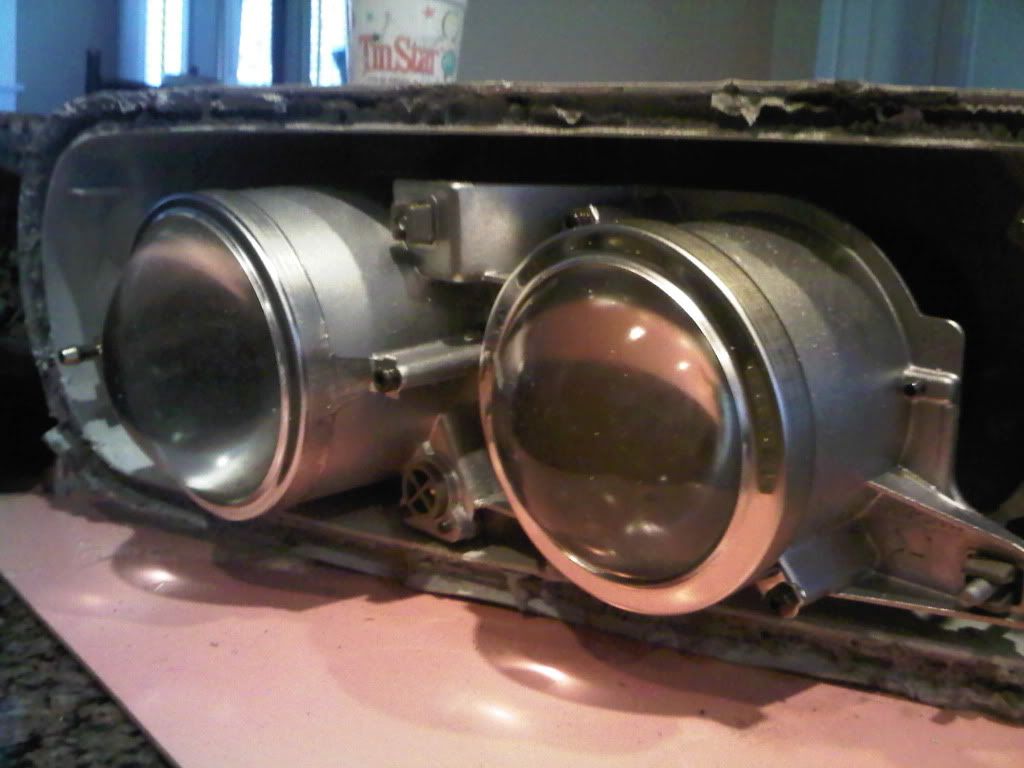
Low Beam Projectors after I separated them
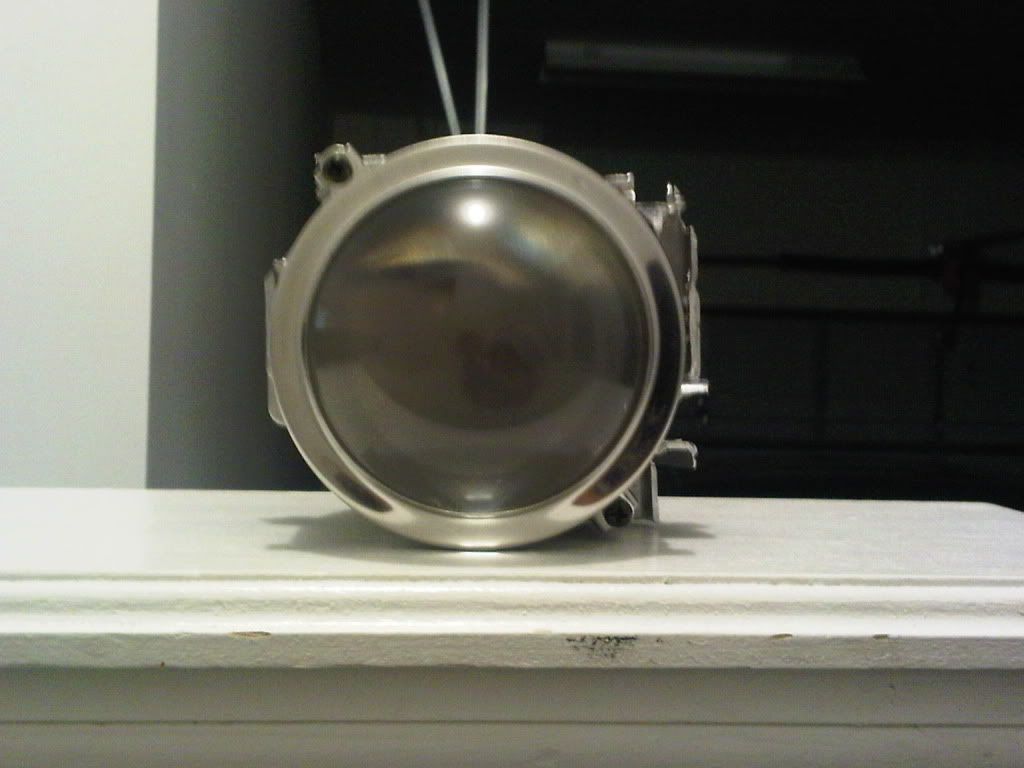
Housing
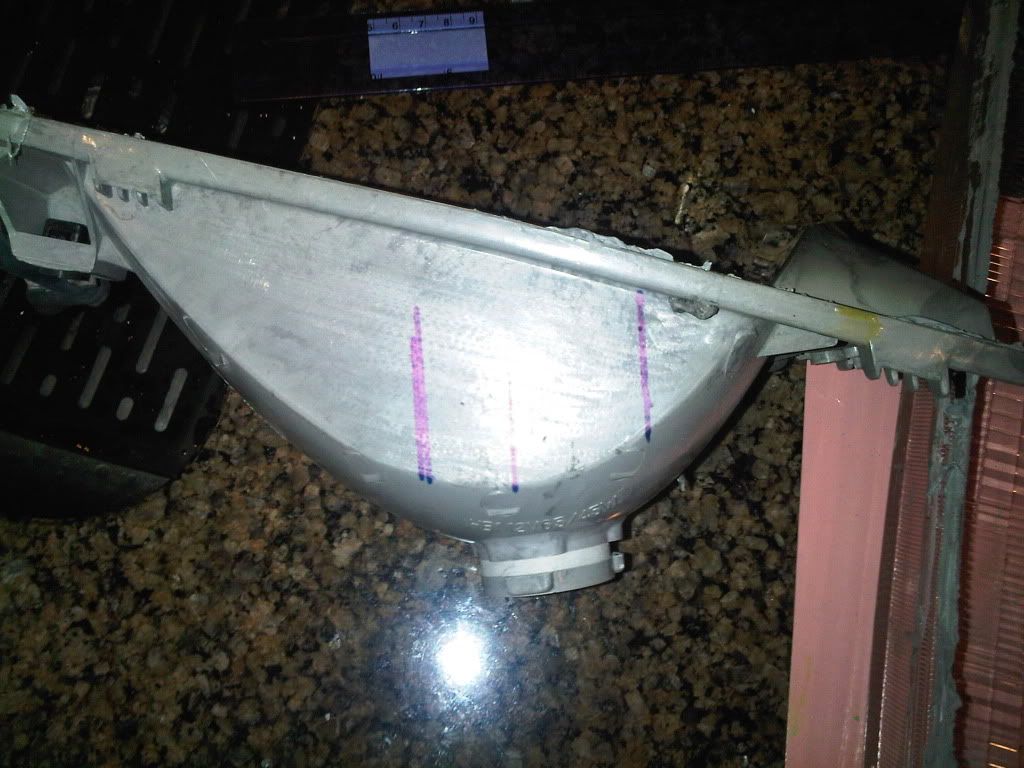
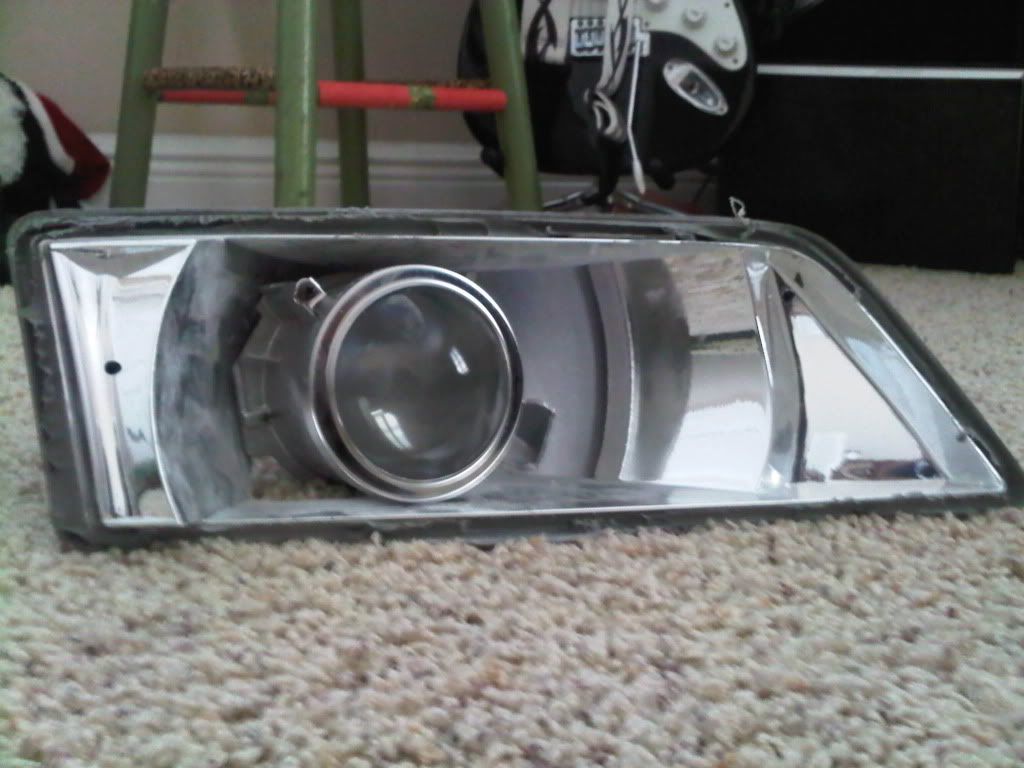
Test Fit
EDIT: New Progress
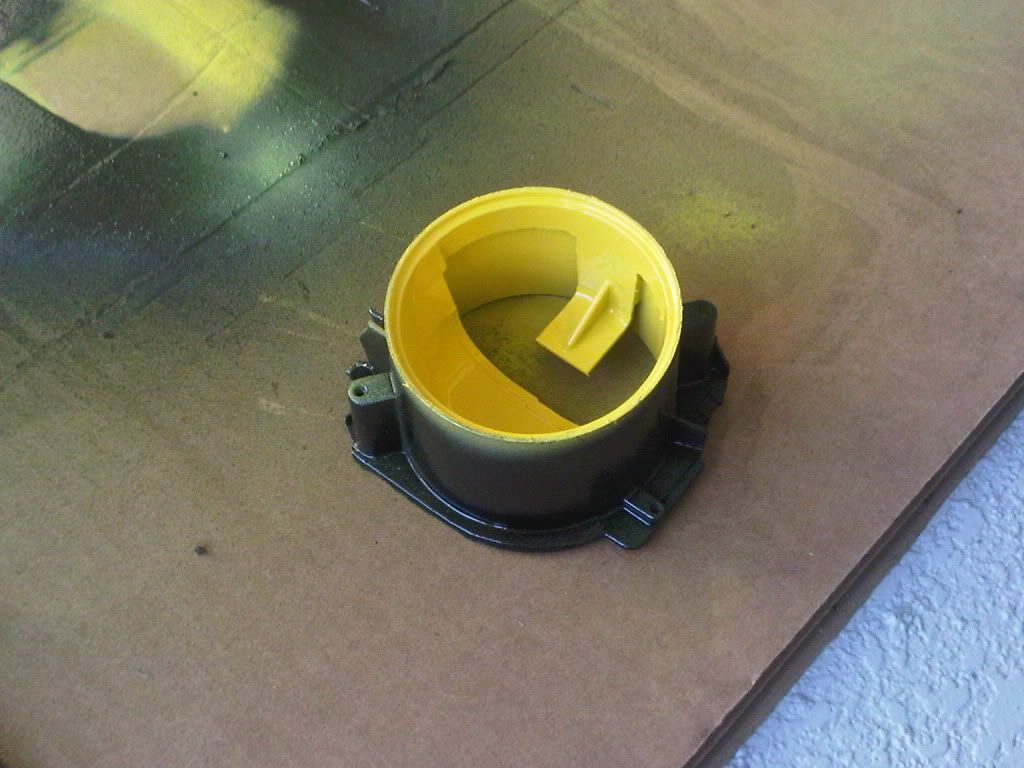
Painted Housings and Projector Shields
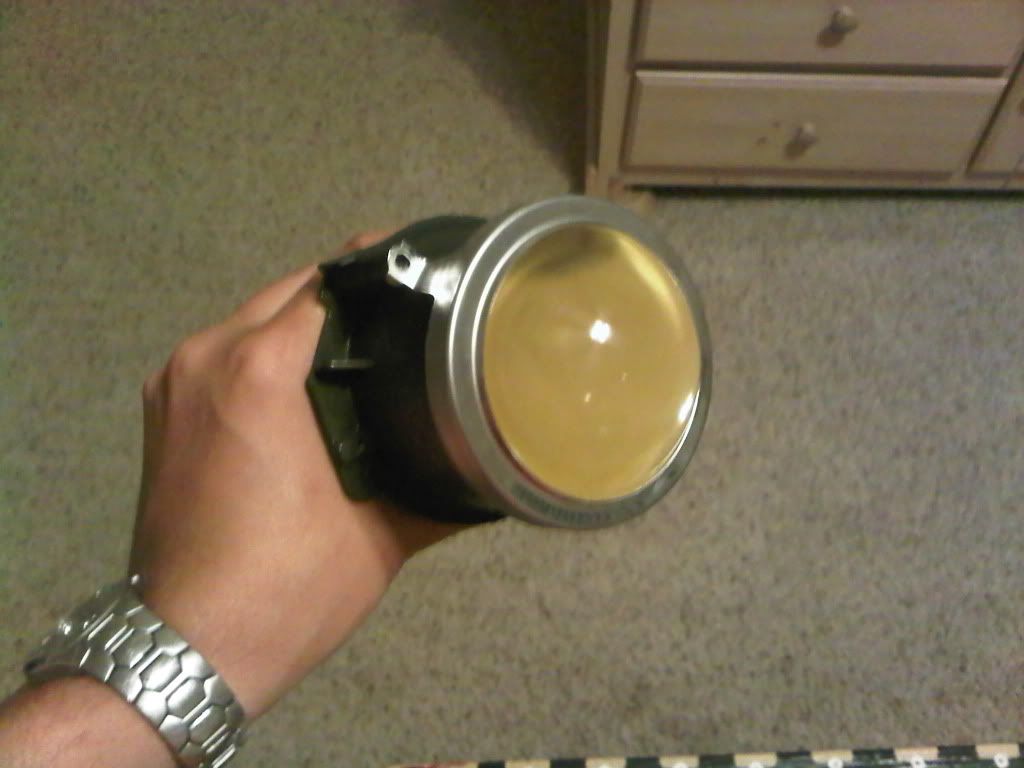
EDIT: Projectors Put Back Together and Painted
EDIT: Test Fitting, Everything is Painted

NEW PICS: RETROFIT FITTING SESSION!!!

UPDATED MAY 1st!!!!!!
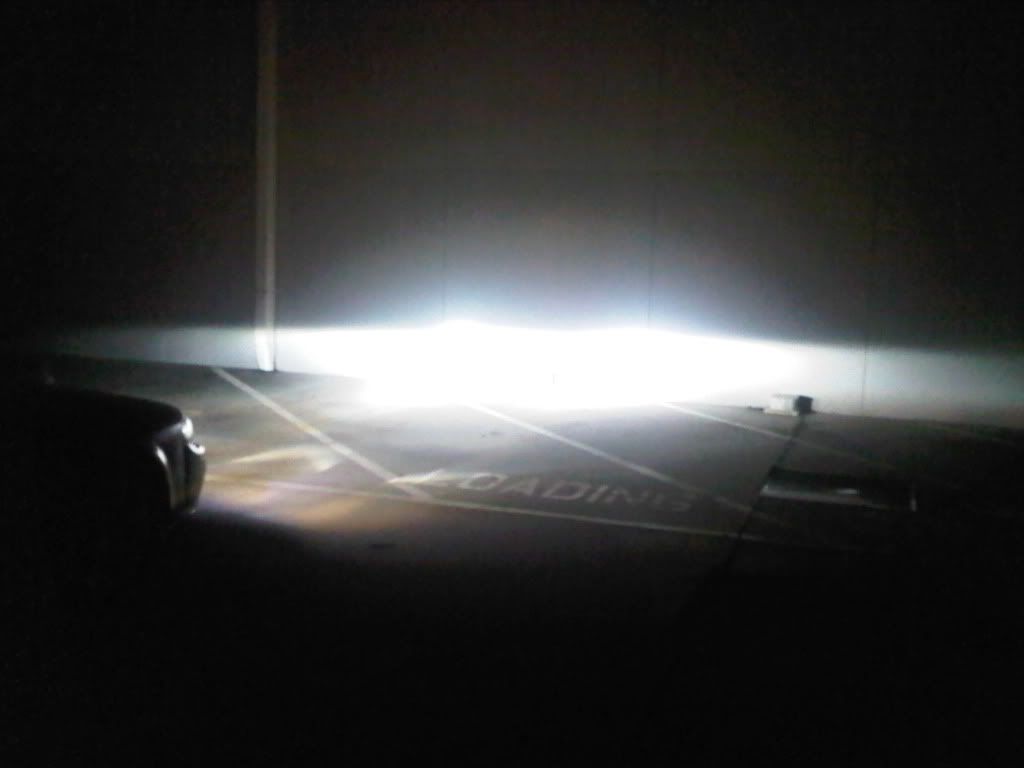
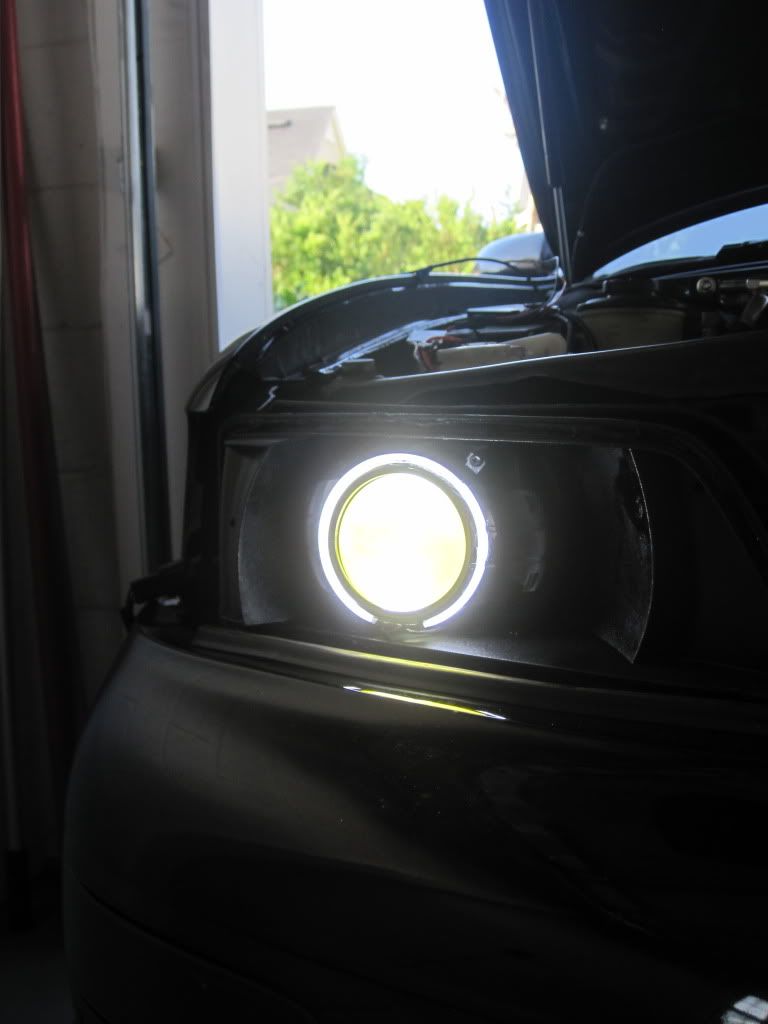
Test output
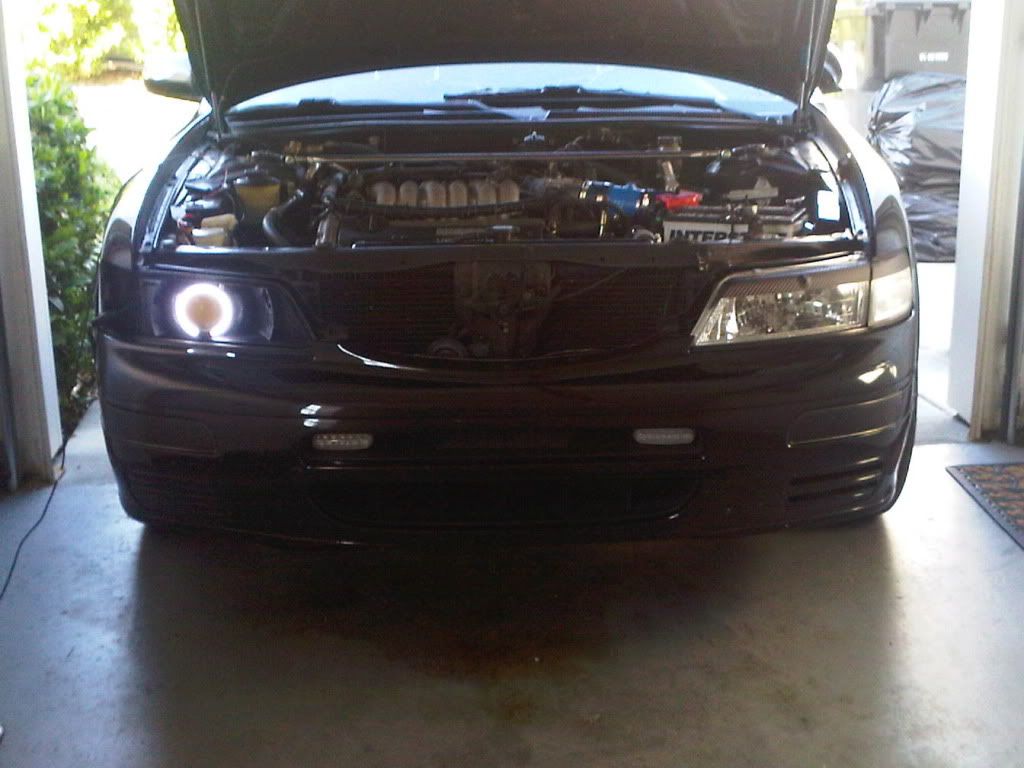
UPDATED: Test Fitted them in the car!

BEAUTIFUL CUTOFF!
Close Up
J30's
Low Beam Projectors after I separated them
Housing
Test Fit
EDIT: New Progress
Painted Housings and Projector Shields
EDIT: Projectors Put Back Together and Painted
EDIT: Test Fitting, Everything is Painted
NEW PICS: RETROFIT FITTING SESSION!!!
UPDATED MAY 1st!!!!!!
Test output
UPDATED: Test Fitted them in the car!
BEAUTIFUL CUTOFF!
Close Up
Last edited by 95Maxed; May 15, 2011 at 08:02 PM.

Thread Starter
Senior Member
Joined: Jan 2010
Posts: 1,393
From: Denver, CO
Its really not as hard as I had imagined. Im decent with wiring and electronics so that should be easy enough. I was just concerned about the baking open lights, and cutting them and all that junk. Its a learning experience lol, and a fun one at that.

Thread Starter
Senior Member
Joined: Jan 2010
Posts: 1,393
From: Denver, CO
ChrisMan told me in the oven at 225 for 10 minutes, id say 10-12. That got the glue nice and soft for me and you just pry them apart with a screw driver.


i use a baking pan, fold a towel and put the towel in the baking pan. and the headlight on the towel. i just feel that if i put the headlight right into the baking pan the pan would maybe melt the headlight plastic? idk....
IN for pics of painted projector insides!!
IN for pics of painted projector insides!!
i always just use the existing glue. put it back in the oven again to remelt the glue, and when u take it back out press it back together and the glue will dry again and seal it back together.
make sure yall aim them PERFECTLY the first time, since it will also be your last time if youre using epoxy and jb weld! good luck with that.
make sure yall aim them PERFECTLY the first time, since it will also be your last time if youre using epoxy and jb weld! good luck with that.
Thread Starter
Senior Member
Joined: Jan 2010
Posts: 1,393
From: Denver, CO
Yea, what Chris said, ill be using QuikSteel to mount the projectors and cover the big gaps in the rear of the housings. I sketched some lines even with the rad support bar as guides so they should be nice and even.

Looks like you are set on using these projectors. But did you think about switching to a HID projector? I can't imagine doing all this work and not having a real HID projector in there. The halogen projectors will not be as bright and will not distribute light as well.
And if you are set on this projector, have you looked into a clear lens mod and spacing mods? Check out www.hidplanet.com; their forums cover all this and their forsale forum has tons of projectors.
And if you are set on this projector, have you looked into a clear lens mod and spacing mods? Check out www.hidplanet.com; their forums cover all this and their forsale forum has tons of projectors.

Senior Member
Joined: Sep 2009
Posts: 4,005
From: Worcester, MA
Yo maxed man,
u have taken that max from ashy to classy lol. Nice work man. Im in for the pics too

My only concern with HIDs is that with my amp/sub installed, i may start to kill my alternator. Any retrofit guys have problems with this? how many watt rms sized system?
Hid's only use alot of power on the initial startup, after that they only use 35w which is less than a standard halogen bulb. Make sure you don't use the stock wiring and you will be fine. I have HID Heads and Fogs, electric oil pump, 800w, system and a bunch of other stuff on the stock alternator; it works fine.
Thread Starter
Senior Member
Joined: Jan 2010
Posts: 1,393
From: Denver, CO
Kevlo: yea, i'm set on using these projectors, theyre all I can afford right now. Eventually, yes I will switch to the clear lenses. I aslo know there will be a slight hotspot when using these, but based on the output pics from ChrisMan, its not too bad.
Cashiot: All my HID kits have always been plug and play and I've never had problems with them. Thanks for the compliment on my car! I've poured money, blood, sweat and tears into it lol.
Cashiot: All my HID kits have always been plug and play and I've never had problems with them. Thanks for the compliment on my car! I've poured money, blood, sweat and tears into it lol.
Last edited by 95Maxed; Apr 18, 2011 at 07:18 AM.

Thread Starter
Senior Member
Joined: Jan 2010
Posts: 1,393
From: Denver, CO
Thanks Lav, I'm gonna buy the paint for the insides of the projectors and the housings today. Gonna paint the inside of the projectors yellow, sorta like non illuminated demon eyes, and then the housings black.
Quiksteel can easily be cut or chiseled off so if you do have to reaim it's not a problem. But remember you should be able to use your stock adjustment screws if you have to.
As for sealing them up I always apply a fresh batch of butyl tape, heat up that tape a little and slap the lens on, press them together as much as I can, then throw them in the oven and heat/press a few times. Once they're pressed I use clamps to keep them together as the butyl hardens.
As for sealing them up I always apply a fresh batch of butyl tape, heat up that tape a little and slap the lens on, press them together as much as I can, then throw them in the oven and heat/press a few times. Once they're pressed I use clamps to keep them together as the butyl hardens.

Thread Starter
Senior Member
Joined: Jan 2010
Posts: 1,393
From: Denver, CO
Ive heard it works with some projectors and others it doesnt. Its really just for show. Keep in mind that these are halogen projectors. In order for me to have a really nice clean cutoff i will need to order some 3 inch Clear Lens' and spacers for them. But that will come in the future, down the road.