
What do you do to make your engine look pretty? :)


Pitch is metric. Imperial threads are measures threads per inch, metric id measured by distance between threads. 1mm pitch is 1mm from top of thread to top of thread. I'm not sure which screws you are talking about. Most of the screws under the hold are M6. Which ones are M10?
Duh, misread your post. The struts are M10 x 1.25
99 times out of 100 you will want the coarse metric thread for the maxima. Larger number coarse, smaller is fine. M10 x 1 is fine M10 x 1.25 is coarse
99 times out of 100 you will want the coarse metric thread for the maxima. Larger number coarse, smaller is fine. M10 x 1 is fine M10 x 1.25 is coarse
Last edited by knight_yyz; Sep 8, 2010 at 10:52 AM.
Strut nuts are M10 x 1.25. Got it. Thanks.
It seems this is a slightly better deal than Toronto Bikes:
http://www.dressupbolts.com/products...&product_id=23
Boy, that's true! M6 everywhere!
One exception I know of... the VIAS vacuum tank uses a M8 bolt to the UIM. But I deleted that.
It seems this is a slightly better deal than Toronto Bikes:
http://www.dressupbolts.com/products...&product_id=23
Boy, that's true! M6 everywhere!
One exception I know of... the VIAS vacuum tank uses a M8 bolt to the UIM. But I deleted that.
...should it?

Last edited by Rochester; Sep 8, 2010 at 11:12 AM.
The Brake Booster line has a 12", metallic tube in the middle of the hose configuration, secured to the firewall with plastic clips. Why?  I don't know... you would think an uninterrupted hose would work just fine.
But that's not my point. The point is that after 8 years, it was pretty corroded. And it's a really simple matter to disengage the tube, grind it down on the wire wheel (or use sandpaper, if you'd rather), then prime and paint.
Here it is before...

...and here it is after.

BTW, the brake booster lines are ripe for shiny new stainless-steel mini-clamps... which I'm hoping to know more about from knight_yyz and rroderiques77. (They're my mini-clamp guinea pigs. )
)
I don't know... you would think an uninterrupted hose would work just fine. But that's not my point. The point is that after 8 years, it was pretty corroded. And it's a really simple matter to disengage the tube, grind it down on the wire wheel (or use sandpaper, if you'd rather), then prime and paint.
Here it is before...
...and here it is after.
BTW, the brake booster lines are ripe for shiny new stainless-steel mini-clamps... which I'm hoping to know more about from knight_yyz and rroderiques77. (They're my mini-clamp guinea pigs.
)
Last edited by Rochester; Sep 8, 2010 at 04:54 PM.


http://www.torontocycles.com/Selling...ium_Bolts.html
Order all your bolts, then you have to add the color to the cart for 2 bucks (click on the left side titanium anodizing then "add to cart"). Shipping is 5 bucks.
Order all your bolts, then you have to add the color to the cart for 2 bucks (click on the left side titanium anodizing then "add to cart"). Shipping is 5 bucks.
Notice the side-by-side with these titanium M6 Shoulder Bolts. Do you think they would work? The shank is obviously smaller.

The more I look at this, more more I'm thinking these titanium shoulder bolts would work just fine. At some point, I'm going to purchase a handful of nuts & bolts from http://www.Probolt-Usa.com, and I could probably get one of these to test out.
M6-25mm Titanium Shoulder Bolts are $6.56 a piece:
http://www.probolt-usa.com/Products/...ered/TIORFB625
If it doesn't work, I also discovered is that the OEM bolt cleans up very nicely on the wire-wheel. Nice and shiny clean. Well... maybe not perfectly shiny, certainly not in macro mode on the camera. But from a foot or two away, it looks fine. Better than otherwise, at least.
Last edited by Rochester; Sep 10, 2010 at 05:34 PM.
Finally found a place for that extra JDM fender washer. I was happy with the 4 already in place, 2 each at each headlight. But everywhere I tried that 5th fender washer that came in the kit, it just looked dumb. (That's a relative opinion, natch.)
Ended up having it tucked away as the tie-down bolt for that oddly shaped black wire caddy (or whatever you want to call it), just next to the VIAS. Or in this case, where the VIAS used to be. It looks good against the black, and isn't at all obvious... unless you stick a camera over it.

And speaking of "finally"... I kept that old PROGRESS decal that came with my rear sway bar way back when. Never knew what to do with it, until I noticed it might look good on the inside engine lip of the fender:

...which goes with the theme of putting decals in the engine bay, but not on the engine cover. I got around to removing all the factory warning stickers from the front support arm, painted the radiator cap to match the color of the radiator tie-downs clamps, and used the Nismo decal, that I didn't use for the oil cap, on the radiator cap. I think it looks good there... even though it's not really a Nismo rad cap. (Oh well.)

Ended up having it tucked away as the tie-down bolt for that oddly shaped black wire caddy (or whatever you want to call it), just next to the VIAS. Or in this case, where the VIAS used to be. It looks good against the black, and isn't at all obvious... unless you stick a camera over it.
And speaking of "finally"... I kept that old PROGRESS decal that came with my rear sway bar way back when. Never knew what to do with it, until I noticed it might look good on the inside engine lip of the fender:
...which goes with the theme of putting decals in the engine bay, but not on the engine cover. I got around to removing all the factory warning stickers from the front support arm, painted the radiator cap to match the color of the radiator tie-downs clamps, and used the Nismo decal, that I didn't use for the oil cap, on the radiator cap. I think it looks good there... even though it's not really a Nismo rad cap. (Oh well.)
Last edited by Rochester; Sep 12, 2010 at 06:40 AM.
I had one of those "Duh!" moments today, when I realized the primary air-conditioning coolant pipe could be polished to a chrome-like finish.
By hand.
Without removing it.
 Yes it can.

Oh, and the black wiper motor canister cleans up real nice, too.
By hand.
Without removing it.
Yes it can.Oh, and the black wiper motor canister cleans up real nice, too.
Last edited by Rochester; Sep 12, 2010 at 11:58 AM.

 i used metal polish on that once but it never got that shiny
No steel wool, just simple 3M Metal polish and some light elbow grease with (get this) paper toweling. Honest, it wasn't any effort at all. I was... shocked. Seriously, shocked.
 Had to post the findings.
Now I've got this gleaming, chrome-like piping in the engine bay where there was always this dull, flat aluminum. Amazing, huh? I kind of want to do the same to the squirrelly little AC tubing on the other side, but don't want to break anything, or end up with bloody knuckles.
Last edited by Rochester; Sep 12, 2010 at 03:51 PM.
Yeah, I noticed too, and it looks like it is holding pretty well. My current SRI has a bracket holding the Apexi filter from the bottom and I don't really like it. But I prefer Rochester Frankencar's bracket better, does anyone sell the bracket itself or do I have to make my own?
I think I want to buy some kind of table-mounted polishing wheel. Is there such a thing?

This. I want one of these.

I have an old table-mounted grinder, with a wire-wheel at one end, but it's ancient and scary. This looks really nice, where I could swap a wire-wheel for a buffing wheel.
I need one of these things here.
I have an old table-mounted grinder, with a wire-wheel at one end, but it's ancient and scary. This looks really nice, where I could swap a wire-wheel for a buffing wheel.
I need one of these things here.

I been doing a little polishing too with some help from friends. here's some pics of the progress. first I power-washed the whole motor. The valve cover was cleaned with a wire wheel, then polished by hand with Mothers metal polish. The other parts were painted with Duplicolor wheel coating. This most resent makeover was the byproduct of a much needed motor replacement.


Last edited by bryan163; Sep 13, 2010 at 11:15 PM.
Then I wrote to ProBolt-usa.com, and they tell me the shoulder on their Ti-bolts is 10mm.
Then I measured the hole in the Valve Cover, and that looks between 11mm and 12mm.
edit: I just now noticed the full product description on that shoulder-bolts page:
http://www.probolt-usa.com/Products/...Hex_Shouldered
...where it lists the shoulder at 11.90mm. Well, that seems to be exactly the diameter of the VC hole, which would give it zero play if it fit.
Now I don't know what to think.
Last edited by Rochester; Sep 14, 2010 at 11:02 AM.
I measured the shoulder on the OEM valve cover bolts: 9mm.
Then I wrote to ProBolt-usa.com, and they tell me the shoulder on their Ti-bolts is 10mm.
Then I measured the hole in the Valve Cover, and that looks between 11mm and 12mm.
edit: I just now noticed the full product description on that shoulder-bolts page:
http://www.probolt-usa.com/Products/...Hex_Shouldered
...where it lists the shoulder at 11.90mm. Well, that seems to be exactly the diameter of the VC hole, which would give it zero play if it fit.
Now I don't know what to think.
I did those gaskets when I replaced the motor. the kit came with some shiny new zink plated grommet washers. I restored the stock bolts as best i could.
You know... I'm going to pass on these Titanium Shoulder Bolts, and either clean up the ones I have, or purchase new OEM bolts from Nissan.
Thanks, knight_yyz and bryan163!
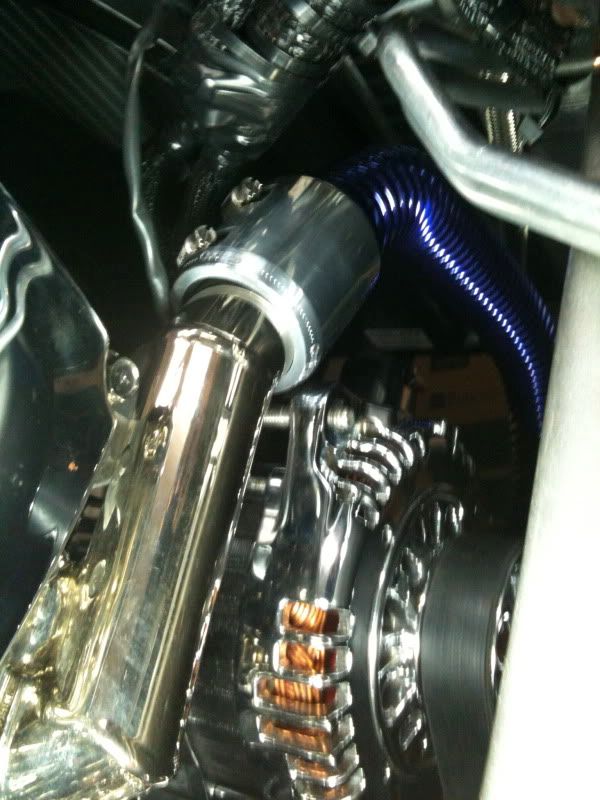
Here are some photos of the Mini clamps...
Power steering reservoir

Brake booster

Brake booster lines

Oil catch can hoses

Vacuum line to rear of elbow

Coolant pipe

Turbo pipes

Front of elbow near throttle body

Evap service port

Power steering reservoir

Brake booster

Brake booster lines

Oil catch can hoses

Vacuum line to rear of elbow

Coolant pipe

Turbo pipes

Front of elbow near throttle body

Evap service port

Last edited by rroderiques77; Sep 16, 2010 at 02:18 PM.
What's your opinion on all this, Roy? Are you glad you went with SS mini-clamps vs. the OEM spring clamps?
Do you know which sizes to order for which hoses now?
The one on the turbo-pipe looks like a worm-clamp.
I really like your catch-can. Where'd you get that? (You totally have me researching blow-back catch-cans now. Thanks, Roy!)
And last... how come you're still running coolant around your TB? You live in the desert, right?
Last edited by Rochester; Sep 16, 2010 at 03:20 PM.
What's your opinion on all this, Roy? Are you glad you went with SS mini-clamps vs. the OEM spring clamps?
Do you know which sizes to order for which hoses now?
The one on the turbo-pipe looks like a worm-clamp.
I really like your catch-can. Where'd you get that? (You totally have me researching blow-back catch-cans now. Thanks, Roy!)
And last... how come you're still running coolant around your TB? You live in the desert, right?
Do you know which sizes to order for which hoses now?
The one on the turbo-pipe looks like a worm-clamp.
I really like your catch-can. Where'd you get that? (You totally have me researching blow-back catch-cans now. Thanks, Roy!)
And last... how come you're still running coolant around your TB? You live in the desert, right?
Last edited by rroderiques77; Sep 16, 2010 at 03:54 PM.
So 2 sizes...? Could you use the little guys on the evap lines for your radiator overflow hose?
Reading now (and for some time, I think) about the catch-can. That was never really on my radar until I saw your photo. I need to put that on my list of projects.
And I was totally mistaken... that's the evap connection to the intake, not the TB coolant fluid. My bad.
Reading now (and for some time, I think) about the catch-can. That was never really on my radar until I saw your photo. I need to put that on my list of projects.
And I was totally mistaken... that's the evap connection to the intake, not the TB coolant fluid. My bad.

I just found a local powdercoating shop that will bead-blast my FSTB brackets and powdercoat them in "Black Chrome", which is this awesome gun-metal color... for only $25!
My polished titanium strut nuts will be showing up next week. Together with these reborn brackets, my strut towers should look amazing.
I'm very psyched for this. Pictures late next week.
My polished titanium strut nuts will be showing up next week. Together with these reborn brackets, my strut towers should look amazing.
I'm very psyched for this. Pictures late next week.
I actually had my FSTB black chromed, and all the bolts & nuts show chromed. I have yet to get it but that should be in the next week or so. I'd be really interested in seeing your FSTB, 25$ is really cheap.

Man, I love this thread. I can't believe I've turned into an engine-bling *****. Particularly when just over a year ago I would have dissed all this crap.


I guess people can say that I'm totally focked up. Instead of putting my money in drug abuse I prefer to invest it in chrome abuse. Lol
At this point I'm very close to start the engine, hopefully next week-end. I will keep you guys posted asap.
Cheers
AA
At this point I'm very close to start the engine, hopefully next week-end. I will keep you guys posted asap.
Cheers
AA
That is jaw-dropping stuff, doublea. You are so far out of my league, it's humbling to allow for any similarity in the discussion.
Of course, I can drive my car to work in the dead of winter, and you're stuck driving that BMW X5...
Wait for the humor to sink in... There it is.
Of course, I can drive my car to work in the dead of winter, and you're stuck driving that BMW X5...
Wait for the humor to sink in...
There it is.
Check the company website: www.coolflex.com
It was a bit expensive but now I know why.
It was a bit expensive but now I know why.