

Senior Member
Great write-up! Attention to detail make the car stand out from the rest. Another alternative is to have the nuts/bolts powdercoated along with your other engine goodies. Note the radiator bracket & bolts. I also painted the alternator bracket bolt. It lasts but eventually wears out. Here's a pic. from my work-in-progress '89 Supra Turbo:

Best way if having the parts PC, is to put as many parts in a bucket and give it to the shop.
Sorry the engine is still filthy.....and one has to put cloth around a wrench when removing those bolts, but hey.....
I'm going to use your advice for my other bolts/nuts which will be a nice complement. Thanks again for the post!

Newbie - Just Registered
Great write up bro! Thanks for the info i've been thinking about somthing like this for a while now!
beautiful whip too! good luck with her...
beautiful whip too! good luck with her...
Quote:
beautiful whip too! good luck with her...
Nice of you to say. Welcome to the Org.Originally Posted by Mr Yaaoowwa
Great write up bro! Thanks for the info i've been thinking about somthing like this for a while now!beautiful whip too! good luck with her...

Senior Member
your attention to details is unbelievable.
I've already started with my engine bay you inspired me!
I've already started with my engine bay
you inspired me!
Member
SLAP CHOP! Your gonna love my nuts. LITTLE KIDS! There gonna love my nuts.
http://www.youtube.com/watch?v=TaR4L...eature=channel
http://www.youtube.com/watch?v=TaR4L...eature=channel

Junior Member
That is some serious TLC, but it definitely paid off.
Great write-up and very inspiring. If my Maxima continues to run well, I definitely want to spruce up under the hood.
Great write-up and very inspiring. If my Maxima continues to run well, I definitely want to spruce up under the hood.
This past summer, I bought the NWP Torque Link engine brace, and drove with it 24/7. There's a fair amount of NVH, but it's a bit of a rush more often than not. Anyway, for this winter, I took it off... no sense on getting that kind of snap to the wheels when you're running snow tires. I've got some plans for the Torque Link this winter, such as Ti-bolts for the frame plate, and powercoating the main bar. But for now, I'm focused on the two retaining nuts at each end of the bar.
These nuts are 1/2 height, 1/2 inch, fine-thread, steel with some kind of anti-corrosion coating on them. They're not particularly attractive, and they seem kind of soft to the wrench.
A simple trip to LOWES, and you can spend $1.50 on a couple of replacements, in Stainless Steel and full-height.

The thing is, it only works for one side.
The other side is a reverse thread, or a left-threaded nut & bolt arrangement. These are kind of a PITA to locate. I ended up going to my local Fastenal and ordering one. Just one... it was kind of embarassing. And just the one was like $4 plus another $4 to have it shipped. It seems kind of a silly thing to tweak, but the before/after improvement is worth it, IMO.
Here is the original nut:

...and here's the new one. (This is the left-threaded side.)

These nuts are 1/2 height, 1/2 inch, fine-thread, steel with some kind of anti-corrosion coating on them. They're not particularly attractive, and they seem kind of soft to the wrench.
A simple trip to LOWES, and you can spend $1.50 on a couple of replacements, in Stainless Steel and full-height.
The thing is, it only works for one side.
The other side is a reverse thread, or a left-threaded nut & bolt arrangement. These are kind of a PITA to locate. I ended up going to my local Fastenal and ordering one. Just one... it was kind of embarassing.
And just the one was like $4 plus another $4 to have it shipped. It seems kind of a silly thing to tweak, but the before/after improvement is worth it, IMO.Here is the original nut:
...and here's the new one. (This is the left-threaded side.)


That looks like something I would have done had I kept mine. Great job.... And as always, great research!!!

No apologies necessary for the bump, Jon, and I'm glad you liked the thread. Bumping it reminds me that I was last talking about plans for the NWP Torque Link, which have since worked out real well, IMO.
Powdercoated in Black Chrome, with SS lock nuts and Titanium button-caps on the frame plate. Here's a picture:

Powdercoated in Black Chrome, with SS lock nuts and Titanium button-caps on the frame plate. Here's a picture:

Senior Member
i'm sorry, but when i hear of black chrome this is what i've always had come to mind

not what you recieved or what fellfrosch7 did to his wheels...i mean it looks good, but im not happy w/ the naming of the 'color'
not what you recieved or what fellfrosch7 did to his wheels...i mean it looks good, but im not happy w/ the naming of the 'color'
Quote:
not what you recieved or what fellfrosch7 did to his wheels...i mean it looks good, but im not happy w/ the naming of the 'color'
How does that wheel dress up your engine bay? Originally Posted by phatboislim
i'm sorry, but when i hear of black chrome this is what i've always had come to mindnot what you recieved or what fellfrosch7 did to his wheels...i mean it looks good, but im not happy w/ the naming of the 'color'


^^^
Thanks!
I realized just now that the following picture is old:

I've since powdercoated the brackets, and started using Titanium Washers with the ti-nuts.
It looks better, (and downright gorgeous IMO), in person

Thanks!
I realized just now that the following picture is old:
I've since powdercoated the brackets, and started using Titanium Washers with the ti-nuts.
It looks better, (and downright gorgeous IMO), in person

Senior Member
Quote:
Thanks!
I realized just now that the following picture is old:
I've since powdercoated the brackets, and started using Titanium Washers with the ti-nuts.
It looks better, (and downright gorgeous IMO), in person
That's just beautiful. Start powercoating these and selling them John, guaranteed 75% of the org has rusted ones Originally Posted by Rochester
^^^Thanks!
I realized just now that the following picture is old:
I've since powdercoated the brackets, and started using Titanium Washers with the ti-nuts.
It looks better, (and downright gorgeous IMO), in person

Quote:
The brackets are only $4.50/each at the dealer.Originally Posted by luvlexus101
That's just beautiful. Start powercoating these and selling them John, guaranteed 75% of the org has rusted ones
http://www.courtesyparts.com/21546p-...3-p-45190.html
And powdercoating shouldn't be more than $5 - $10 each. Heck, the titanium nuts and washers were more expensive than all that.
There's nothing special about what I did, I just got off my azz and did something about the problem. But I totally agree with you on one point: 75% (or more) of 5th gens have rusted radiator brackets. And if I owned powdercoating equipment, then absolutely I would start taking orders.
Here's another picture:

This post has nothing to do with the engine bay, but it's my thread, so 
Have you ever washed the car and been vaguely aware that the screws holding the rear bumper skin down are really rusty? I noticed that again today, but more so because the rust is staining the surrounding area a little.
A few pennies at the hardware store for stainless steel pieces, and problem solved. For the next couple years, at least.
Quote:
The rubber grommets are parted out as separate items from the brackets themselves. Weird, huh?Originally Posted by phatboislim
where'd you get the grommets for the radiator brackets?
Anyway, those are my originals. I just cleaned them up.
Senior Member
Quote:
Have you ever washed the car and been vaguely aware that the screws holding the rear bumper skin down are really rusty? I noticed that again today, but more so because the rust is staining the surrounding area a little.
A few pennies at the hardware store for stainless steel pieces, and problem solved. For the next couple years, at least.
I have been meaning to do that for so long, my wheel well screws look terrible, it's even worse on my white car Originally Posted by Rochester
This post has nothing to do with the engine bay, but it's my thread, so Have you ever washed the car and been vaguely aware that the screws holding the rear bumper skin down are really rusty? I noticed that again today, but more so because the rust is staining the surrounding area a little.
A few pennies at the hardware store for stainless steel pieces, and problem solved. For the next couple years, at least.

Thanks for reminding me, I'll have to get off my azz and get that done soon
Senior Member
Quote:
wow...if i remember correctly mine look like shiz...or maybe its because it horribly blends in so 'well' w/ the brackets themselves...i guess ima paint mine black..i was gona do purp or something...but thatd just be uglyOriginally Posted by Rochester
Anyway, those are my originals. I just cleaned them up.
Quote:
Buy some new grommets. They are only like 3 bucks. Plus, they start to wear which allows for less absorption of the radiator as it jostles around.Originally Posted by phatboislim
wow...if i remember correctly mine look like shiz...or maybe its because it horribly blends in so 'well' w/ the brackets themselves...i guess ima paint mine black..i was gona do purp or something...but thatd just be ugly

Member
Quote:
Originally Posted by phatboislim
wow...if i remember correctly mine look like shiz...or maybe its because it horribly blends in so 'well' w/ the brackets themselves...i guess ima paint mine black..i was gona do purp or something...but thatd just be ugly
Yea Slim...mine looks like trash too. For $3...you can't beat the fresh look.
This thread is sick! Roch has given me so many ideas my mind is all over the place!
After shiny hardware has been on the car for a while, particularly through a Northeast Winter, I took a look at the inevitable question today: how do you clean these stainless-steel bolts?
If I had a buffing wheel (or polishing wheel, or whatever you would call it), that would be one answer. Another would be to cramp up my fingers and polish the bolt heads with brute force. Not owning the former, and not wanting to pursue the latter, I gave it some thought today, and here's my combo technique.
It's easy, and it totally works.
If I had a buffing wheel (or polishing wheel, or whatever you would call it), that would be one answer. Another would be to cramp up my fingers and polish the bolt heads with brute force. Not owning the former, and not wanting to pursue the latter, I gave it some thought today, and here's my combo technique.
- Use a common kitchen scrubby sponge; the kind which is sponge on one side, and scrubby on the other.
- Set the scrubby on the table and apply dab of metal polish easily into the plastic abrasive side of the sponge.
- Take the bolt in your hand, and vigorously scrub the head into the scrubby.
- Let dry, then use a microfiber tower and buff to a shine.
It's easy, and it totally works.

Senior Member
If you plan on treking across the border again any time soon, I definitly want to see this up close and in person.
Quote:
There are places that will sand-blast parts and powdercoat them. Start with google... check your local yellow pages... ask around some local paint & body shops. It's not that uncommon.Originally Posted by Sneaky Green
how and where do you powdercoat anything?

Member
Found somewhere...It's wild how I would have never came into contact with the things and places I find myself dealing with if it wasn't for the org.
A few weeks ago, I found the perfect replacement for the horizontal pins securing my FSTB to the brackets. M10x60 Polished Titanium, tapered allenhead bolts from some eBay motorcycle store for $5/each. They look absolutely fantastic (!!!), replacing the chrome (and rusting) bolts that came with the FSTB.
And today I ordered replacement M8x20 Titanium bolts for my NWP block off plate, because those too have been corroding over time. The replacements are Titanium buttoncaps from DressUpBolts, to match all my other hardware from DressUpBolts.com.
Sadly, my camera's bounce flash has died. And I'm reluctant to take pictures unless I'm in control of the lighting. Damn.
And today I ordered replacement M8x20 Titanium bolts for my NWP block off plate, because those too have been corroding over time. The replacements are Titanium buttoncaps from DressUpBolts, to match all my other hardware from DressUpBolts.com.
Sadly, my camera's bounce flash has died.
And I'm reluctant to take pictures unless I'm in control of the lighting. Damn.Quote:
And today I ordered replacement M8x20 Titanium bolts for my NWP block off plate, because those too have been corroding over time. The replacements are Titanium buttoncaps from DressUpBolts, to match all my other hardware from DressUpBolts.com.
Sadly, my camera's bounce flash has died. And I'm reluctant to take pictures unless I'm in control of the lighting. Damn.
just use a flash light Rochester. Im sure your know-how and crazy good skillz at taking pictures will make them look fine. Maybe not your usual National Geographic quality but far better than anything i could take.Originally Posted by Rochester
A few weeks ago, I found the perfect replacement for the horizontal pins securing my FSTB to the brackets. M10x60 Polished Titanium, tapered allenhead bolts from some eBay motorcycle store for $5/each. They look absolutely fantastic (!!!), replacing the chrome (and rusting) bolts that came with the FSTB.And today I ordered replacement M8x20 Titanium bolts for my NWP block off plate, because those too have been corroding over time. The replacements are Titanium buttoncaps from DressUpBolts, to match all my other hardware from DressUpBolts.com.
Sadly, my camera's bounce flash has died.
And I'm reluctant to take pictures unless I'm in control of the lighting. Damn.
B
Quote:
Here... no flash, but well-lit. Not exactly the kind of photo to write home about.Originally Posted by NissanMan97
just use a flash light Rochester. Im sure your know-how and crazy good skillz at taking pictures will make them look fine. Maybe not your usual National Geographic quality but far better than anything i could take.
Anyway, this replaces the chrome bolts that came with the Racingline FSTB two years ago, which were starting to rust out on the inside of the allenhead. These new bolts are solid, polished titanium, M10x60. No rust. And they match the black-chrome powdercoat on the brackets much better than the chrome bolts did, which is a nice detail.
Titanium is such a cool metal. These bolts are really quite large, and yet feel weightless in your hand. Weird.

Pictures of the new Ti-bolts on the Polished NWP Block-off Plate.
The nickle-plated bolts that come with the NWP parts look good out of the box, and are certainly strong, but the finish degrades over time. Ti-bolts are better. They just are.


The nickle-plated bolts that come with the NWP parts look good out of the box, and are certainly strong, but the finish degrades over time. Ti-bolts are better. They just are.
Just this weekend, I realized the little M6x15 bolts that secure the Radiator Overflow Tank were staring me in the face. I completely missed those little guys last year...
...which is perfect, because I had 2 little bolts left-over from DressUpBolts.com.
Radiator Overflow Tank. Add that to the list.
...which is perfect, because I had 2 little bolts left-over from DressUpBolts.com.
Radiator Overflow Tank. Add that to the list.


Junior Member
Quote:
...which is perfect, because I had 2 little bolts left-over from DressUpBolts.com.
Radiator Overflow Tank. Add that to the list.
I replaced the overflow bolts a couple months back, have the FSTB bolts coming in the mail, and really like the look of the block-off plate bolts. Keep the good ideas coming. I love titanium Nuts and Bolts!Originally Posted by Rochester
Just this weekend, I realized the little M6x15 bolts that secure the Radiator Overflow Tank were staring me in the face. I completely missed those little guys last year......which is perfect, because I had 2 little bolts left-over from DressUpBolts.com.
Radiator Overflow Tank. Add that to the list.
Quote:
These aren't titanium, however they are a titanium finish. If you haven't seen these yet, Mr. Gasket makes a number of end-caps that match the titanium bolts really well. Originally Posted by 03Alt3.5Biz
I replaced the overflow bolts a couple months back, have the FSTB bolts coming in the mail, and really like the look of the block-off plate bolts. Keep the good ideas coming. I love titanium Nuts and Bolts!
Not exactly "nuts & bolts", and not exactly "titanium", but it all kind of ties together.


Member
Not a dress up post but a nice one about clean and shine the VQ30
Before (I received the engine bay in this condition, Yuk!)

After (Gunk's Engine Shine with citrus power)
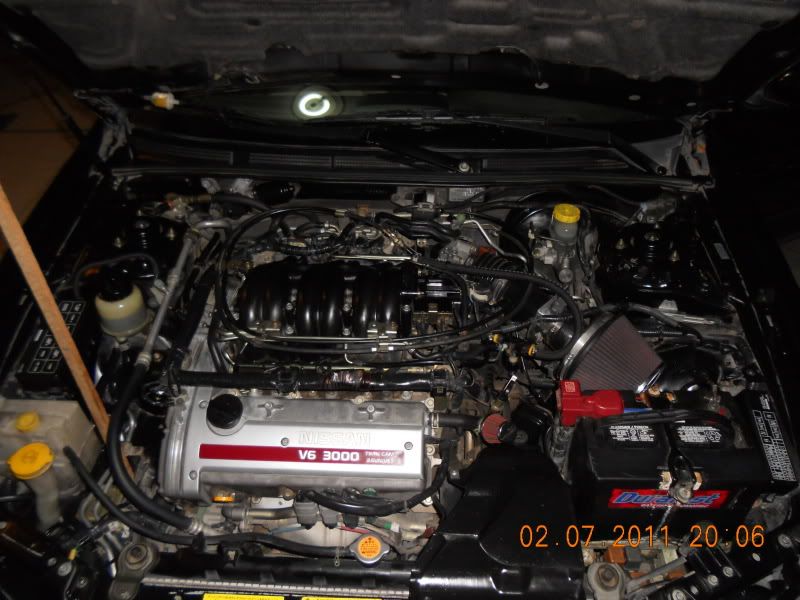
What a change my friend, what a change...
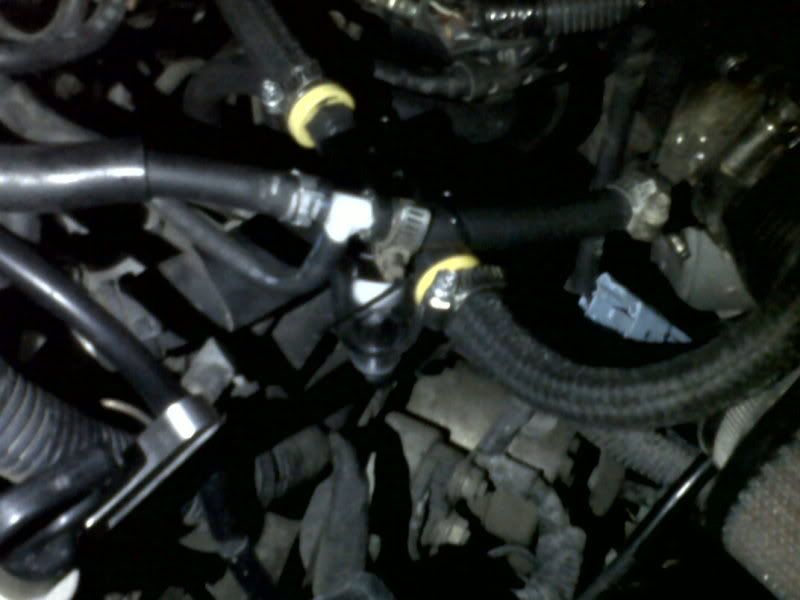
Also I installed my DIY Oil Catch Can. I need to secure it to something else instead of that hose LOL
Greetings everyone.
Before (I received the engine bay in this condition, Yuk!)
After (Gunk's Engine Shine with citrus power)
What a change my friend, what a change...
Also I installed my DIY Oil Catch Can. I need to secure it to something else instead of that hose LOL
Greetings everyone.
