
What do you do to make your cab look pretty?


I think people shy away from a total re-upholstering because places charge by the inch, and the final cost can be astronomical. (Unless you live near the Tijuana border.
 )
)


Newbie - Just Registered
Joined: Sep 2009
Posts: 5
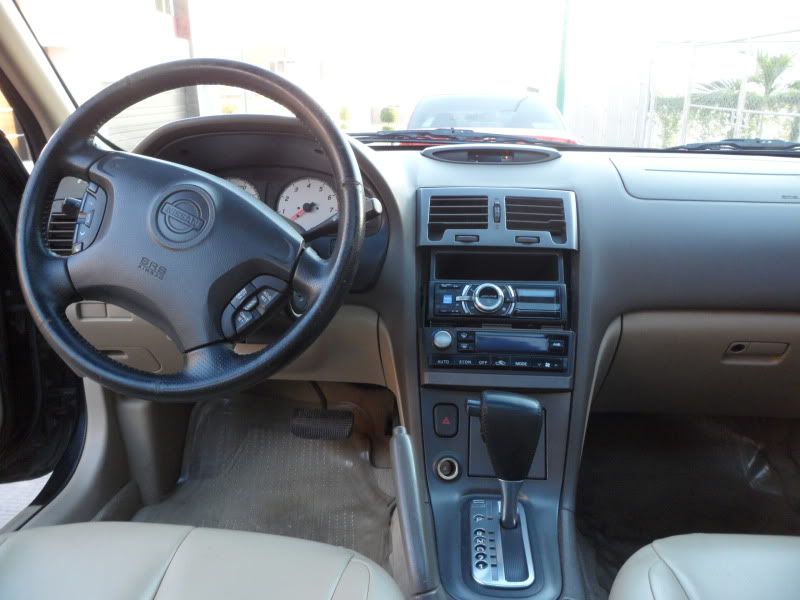
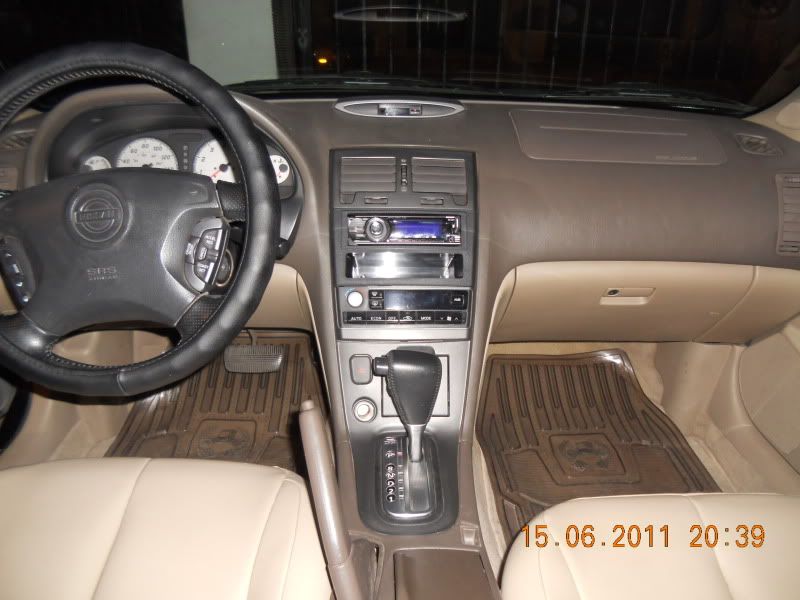
303 Aerospace Protectant on all interior vinyl and plastics (and exterior for that matter).
Also removed that awful, sticky, easily-scratched/damaged grey matte finish from the door trim and a few (not all) console/dash trim pieces with some rubbing alcohol (dilute-to-strength detailing cleaners might make it easier... don't know...). Revealed a very nice glossy black plastic on the door trim (looks like BlackKila's marble, but of course without the marble effect) and the bottom of the HVAC headunit, and a glossy plastic about the same greyish color as the OEM finish on the shifter trim. Thinking of using FW1 Cleaning Wax on the pieces as well as the exterior and interior glass to prevent fingerprints and smudges and fill the swirl-like scratches the glossy plastic is prone to. Not sure yet if it will work well on the trim... If you have any thoughts on that they'd be welcomed!
Also removed that awful, sticky, easily-scratched/damaged grey matte finish from the door trim and a few (not all) console/dash trim pieces with some rubbing alcohol (dilute-to-strength detailing cleaners might make it easier... don't know...). Revealed a very nice glossy black plastic on the door trim (looks like BlackKila's marble, but of course without the marble effect) and the bottom of the HVAC headunit, and a glossy plastic about the same greyish color as the OEM finish on the shifter trim. Thinking of using FW1 Cleaning Wax on the pieces as well as the exterior and interior glass to prevent fingerprints and smudges and fill the swirl-like scratches the glossy plastic is prone to. Not sure yet if it will work well on the trim... If you have any thoughts on that they'd be welcomed!

Just did the back door handle finishers. That's a television screen reflection on the pieces. Notice the guy's face reflected (upside-down) at the bottom of the one on the left. Helps you get an idea of the glossiness.


NOTES:
1. This requires a LOT of elbow grease for a long time. If that's not your cup of tea, you may want to think twice before taking this on.
2. The finish comes off in two layers. Removing the first layer, the grey matte finish, leaves a dull black finish. This step is VERY messy/sticky - you may want to wear rubber gloves and you should probably protect whatever surface you're working on (carpet, linoleum, table, workbench, etc). Newspaper worked fine for me. Also, don't use a cloths unless you have a load of them and plan to throw them away when you're done. I used paper towels but I went through at least half a roll, so have plenty on hand.
3. Removing the dull black finish to reveal the glossy black plastic is the part that requires generous amounts of elbow grease and takes the most time. The tight little inside corners down in and around the power window button hole and the little notch around the handle hole are especially difficult to get. Fortunately, they're also relatively hidden when the piece is installed, so I just did them as well as I could and left them alone.
4. This process removes all finishes and protection from the plastic. It is therefore ***ABSOLUTELY NECESSARY*** to apply a high-quality protectant to the finished (or, unfinished, as it were) product on a very regular basis as the plastic will otherwise be completely unprotected from UV degradation and fade. Fortunately, you'll be reminded when it's time to do this by the unsightly smudges and rain spots that shiny surfaces are prone to collecting over time. Might want to keep a small bottle in the car in case of spills, etc. I recommend 303 Aerospace Protectant.
5. You'll notice in the photos that I didn't remove the finish from the hazard light button, the change pocket door, the stereo,the vents at the top of the center stack, the clock trim. Left those alone for several reasons. First, making surfaces on the top of your dash shiny is a very big safety hazard. On bright days the sun can glare off of them and make it very difficult to see. Second, those pieces were all in decent condition (not scratched up and hadn't become a sticky nuisance). Third, it looks nice this way

Good luck, hope you like it!
Maxcellent


Things don't always look as good in real-life as they do in photographs. I know that first-hand because I take a lot of engine bay pictures. But damn... these photos look absolutely fantastic.
This is a gorgeous interior mod. Very well done, Maxcellent.
Knowing how well it came out, are you going to paint your vent and clock to match?
This is a gorgeous interior mod. Very well done, Maxcellent.
Knowing how well it came out, are you going to paint your vent and clock to match?
Last edited by Rochester; May 26, 2011 at 03:15 PM.


Newbie - Just Registered
Joined: Sep 2009
Posts: 5
Things don't always look as good in real-life as they do in photographs. I know that first-hand because I take a lot of engine bay pictures. But damn... these photos look absolutely fantastic.
This is a gorgeous interior mod. Very well done, Maxcellent.
Knowing how well it came out, are you going to paint your vent and clock to match?
This is a gorgeous interior mod. Very well done, Maxcellent.
Knowing how well it came out, are you going to paint your vent and clock to match?

You're right, sometimes photos do look better than real life. That might be a little true here. The photos sort of give it the appearance of a heftier material with a flawless lacquer finish, whereas in real life you can tell it is just a nice plastic material and the long, very thin hairline scratches are more apparent (albeit only if you're examining it). That said, they do look very nice and I've even gotten some random compliments on them.
About the vent and clock, I don't plan to alter those (or the hazard light button, change pocket door or stereo for that matter). Leaving those alone for several reasons. First and foremost, making surfaces on the top of your dash shiny is a very big safety hazard. On bright days the sun can glare off of them and make it very difficult to see. Second, those pieces are all in decent condition (not scratched up and haven't become a sticky nuisance). Third, I think it looks nice like it is... kinda breaks up the shininess and adds an element of continuity. I have been thinking about checking the junkyards for a replacement change pocket door finisher though, because that piece is starting to go downhill.

With all this talk about engine bay bling this and nuts and bolts that, did we forget about the inside of our cars? We stare at it on a daily basis, probably more often than the engine bay (well, for most of you anyway).
Well, anyway, let's see what it is you do to to make the cab (and trunk if you want) look presentable.
AE door sills
Well, anyway, let's see what it is you do to to make the cab (and trunk if you want) look presentable.
AE door sills


Thread
Thread Starter
Forum
Replies
Last Post
Violator
4th Generation Classifieds (1995-1999)
1
Sep 9, 2015 10:14 AM

