
Removing Switch Trim?


Thread Starter
Senior Member
Joined: Mar 2012
Posts: 410
Removing Switch Trim?
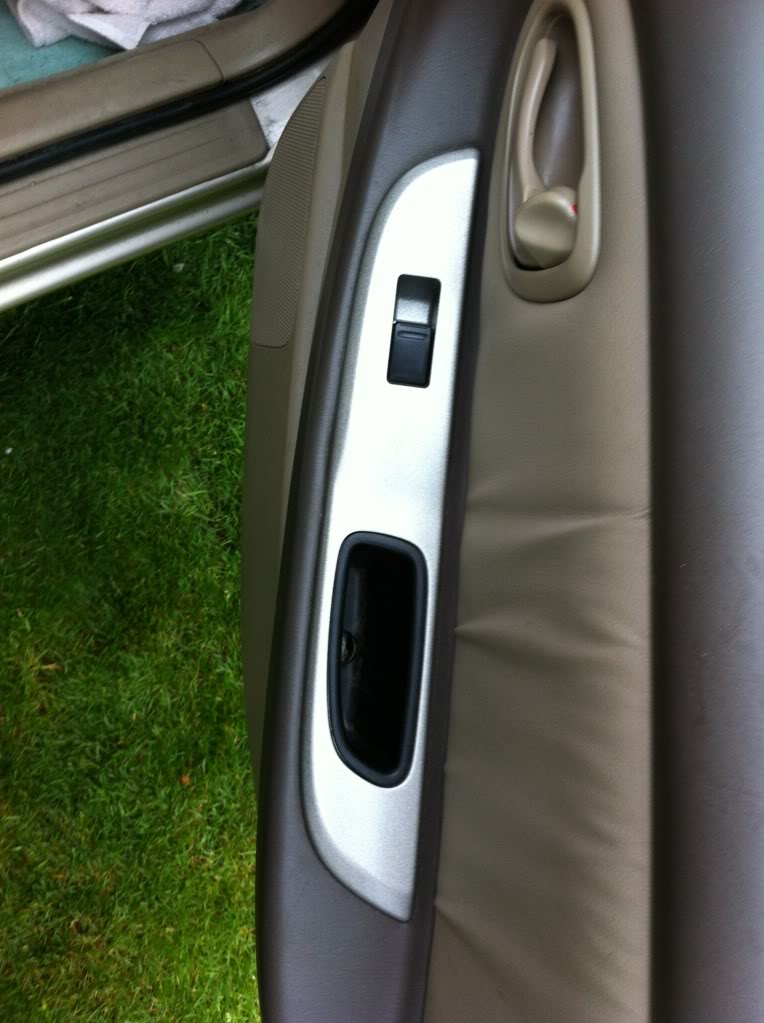
The trim around the window/lock switches were painted an off shade of greyish black at some point in their lives, and by now it's rubbed off and is starting to fade in spots, so i'm going to lightly sand and and re finish them. Before i go break something, how do i properly remove the trim?


Thread Starter
Senior Member
Joined: Mar 2012
Posts: 410
Whoa boys, there' s screw in that...
The grab handle piece has a little plastic cover pop that out with a small flathead and you'll see a Phillips (star) screw, remove it, then the whole thing comes off, unplug the Master switch/window switch.
You can further disassemble by removing the 3 screws that hold the Master switch tot he trim piece.
Thread Starter
Senior Member
Joined: Mar 2012
Posts: 410
Thanks Tuner, I ended up finding the screw under the little rubber plug. Going to completely take it apart and out after school today. Should have it sanded and primed by tonight or tomorrow. I'll take a few pics invade anyone's curious.
I totally forgot about the screw. And I had the door panels off of my car hundreds of times when I owned it. 
I guess it's because in the last year that I've owned my Infiniti, I've taken its door panel off about a hundred times as well. And there's no screw to be found in the window switch trim.
I guess it's because in the last year that I've owned my Infiniti, I've taken its door panel off about a hundred times as well. And there's no screw to be found in the window switch trim.

Senior Member
Joined: May 2012
Posts: 336
From: vancouver
your actually supposed to remove the screw, and pop away the back side first(closest to the rear) pull up,then back. when replacing, reverse the steps by sliding the front side in first the push down, i have the same greyish paint on mine which i can run a my lail gently along and actually scrape off the soft greyish paint. best way to clean them up is by removing the switch completly from the bezel, wet sand wit 800 grit, removing all paint ( so when u apply new paint it doesnt wrinkle) clean it good with a degreaser then prime it, scuff it and paint it, i painted all mine the same color, then cleared them as well, right after that, i painted down my drivers side and had the bezel hanging in the door for easy acsess to roll up and down the window, when i shut the door i snapped it in half right in between the pocket slot! i ended up shaving the pocket out of it so its completley flat and wrapped it in a flat black vinyl! looks clean! but, its a pain to close that door from the inside! im contemplating doing the rest because i like the no pocket look, but everyone who gets in my car sits there for a couple seconds wondering where to grab from to close the door hahahah!
^ good instructions on removal above! Great post.
Sucks to hear about breaking the trim piece though, I almost did that a few times with misc stuff, always disconnect it and put it somewhere safe!!!
Sucks to hear about breaking the trim piece though, I almost did that a few times with misc stuff, always disconnect it and put it somewhere safe!!!

Thread
Thread Starter
Forum
Replies
Last Post
My Coffee
New Member Introductions
15
Jun 6, 2017 02:01 PM
Dennis Twohy
1st & 2nd Generation Maxima (1981-1984 and 1985-1988)
0
Oct 1, 2015 06:01 PM
HerpDerp1919
3rd Generation Maxima (1989-1994)
2
Sep 29, 2015 02:02 PM