When you click on links to various merchants on this site and make a purchase, this can result in this site earning a commission. Affiliate programs and affiliations include, but are not limited to, the eBay Partner Network.
That tutorial is great. Here are the results on the 2003 that I had. In a year it didn't fade at all. Get 600 or 800 and work your way up. I loosly followed the tutorial based on the sand paper I had. Started at 400, then 600, then 1000, then 1200, then 1500, then 2000, and after clear coat fullly settled, wet sanded with 3000grit carefully (also all the sanding should be wet sanding obviously)
Last edited by flames101sully; May 9, 2018 at 09:47 AM.
I initially did the sanding/polishing on my lights but you have to repeat the process, at least the polishing regularly. I eventually gave up and ordered a set of aftermarket lights. Sure it costs more but then you have several years without having to do the polishing. Just a thought.
I initially did the sanding/polishing on my lights but you have to repeat the process, at least the polishing regularly. I eventually gave up and ordered a set of aftermarket lights. Sure it costs more but then you have several years without having to do the polishing. Just a thought.
Did you spray clear coat? I believe that step stops it from yellowing again.
I initially did the sanding/polishing on my lights but you have to repeat the process, at least the polishing regularly. I eventually gave up and ordered a set of aftermarket lights. Sure it costs more but then you have several years without having to do the polishing. Just a thought.
Aftermarket lights are something I can't afford right now lol
I initially did the sanding/polishing on my lights but you have to repeat the process, at least the polishing regularly. I eventually gave up and ordered a set of aftermarket lights. Sure it costs more but then you have several years without having to do the polishing. Just a thought.
I read that aftermarket doesn't throw the light as far as OEM's.
Aftermarket lights are something I can't afford right now lol
Don't worry, the chris fix method is great and it lasts.
And I am skeptical of that "3 minute" method. Before this method which I think is the best, on the 2000 at one point I did buff them similar to that video. The initial results weren't as good as the sanding and spray clear coat method, and it began to yellow again in a couple weeks...also his light in the video looks no where near as bad as ours.
Don't waste your time polishing. The yellow will return very fast.
spraying with the normal stuff will also not last very long because it can be wiped/worn off over time.
look for the 2k stuff on amazon this stuff is forever. hard as a rock an looks bling af.
i'll post some before and after. The thing is it's really hardcore stuff you need a mask from homedepo or it could damage your lungs.
This is a before / after clear coat.
on top of that the before is the fog light just after polishing
with a polishing wheel so it was as good as it was going to get with just polishing.
3 years later this is my car maybe a week ago lights still blinging like jewels.
, on Flickr
Last edited by Donkeypunch; May 15, 2018 at 09:45 PM.
I read that aftermarket doesn't throw the light as far as OEM's.
I ended up buying two separate headlights. The first I could not tell the difference. The 2nd there was a slight difference but only visible if you want to a wall to see the light pattern.
I followed ChrisFix's tutorial to a T but I messed up severely with the clear coat. I didn't realize I had a matte finish (I used Dupli-color Acrylic Enamal - Clear coat with matte finish instead of glossy), so my driver's side headlight is mucked up. I'm assuming the only way to remove this is to wet sand the headlight all over again.
I'm also skeptical of the 3 minute restoration but if this doesn't work out, I might try that later
The three minute video works great unless there was clear coat already applied or there is yellowing. I should have mentioned that.
For those issues then yes, you must wet sand. I dont like the idea of clear coating with regular spray paint. Maybe with a 2K. Either way, no matter what method you use, you need to do some sort of upkeep like wax, uv protectant and polishing. Otherwise you will have to eventually sand them again. Obviously everyone has their own opinion and YT video about this. Hear what people have to say and then make your own decision. :-)
Don't waste your time polishing. The yellow will return very fast.
spraying with the normal stuff will also not last very long because it can be wiped/worn off over time.
look for the 2k stuff on amazon this stuff is forever. hard as a rock an looks bling af.
i'll post some before and after. The thing is it's really hardcore stuff you need a mask from homedepo or it could damage your lungs.
This is what it looked like before my dumbass sprayed 2 more coats
Ended up driving to the garage, had to drive super slow lmao. I think I have to re-do the passenger side headlight unfortunately since I got over ambitious and applied too many coats. I never leave things alone lol, my cousin said the driver's side was a bit shinier than the passenger side so I thought applying 2 more coats on top of the 3 it already had would do the trick, but unfortunately it looks milky. Kinda sucks because I really don't want to have to deal with 2k stuff again, stuff is hazardous
Last edited by mo neenja31; Jun 4, 2018 at 01:13 AM.
Ended up driving to the garage, had to drive super slow lmao. I think I have to re-do the passenger side headlight unfortunately since I got over ambitious and applied too many coats. I never leave things alone lol, my cousin said the driver's side was a bit shinier than the passenger side so I thought applying 2 more coats on top of the 3 it already had would do the trick, but unfortunately it looks milky. Kinda sucks because I really don't want to have to deal with 2k stuff again, stuff is hazardous
Even with the orange peel, looks fantastic especially when compared to before. You could try to wetsand with a high grit sand paper and see how that turns out. I did that step for both the headlights and it did help. By the end if held up to a certain light and a certain angle you could still see some orange peel, but it was for the most part gone when looking at it from most directions. Re-doing this stuff would never be fun after the first time.
Last edited by flames101sully; Jun 4, 2018 at 07:57 AM.
I would just get a pair of aftermarket headlights at Ebay for $150 or so and use the lens only, then wax it or apply UV protection (not clear coat) every wash and call it good. This should last several years. Stripping it down and do clear coat are option, but its not going to look like new anyway.
Even with the orange peel, looks fantastic especially when compared to before. You could try to wetsand with a high grit sand paper and see how that turns out. I did that step for both the headlights and it did help. By the end if held up to a certain light and a certain angle you could still see some orange peel, but it was for the most part gone when looking at it from most directions. Re-doing this stuff would never be fun after the first time.
I was thinking about doing a final sand to remove any orange peel but knowing me I'd sand the Clearcoat away, might just throw on the coats and put some turtlewax on and call it a day.
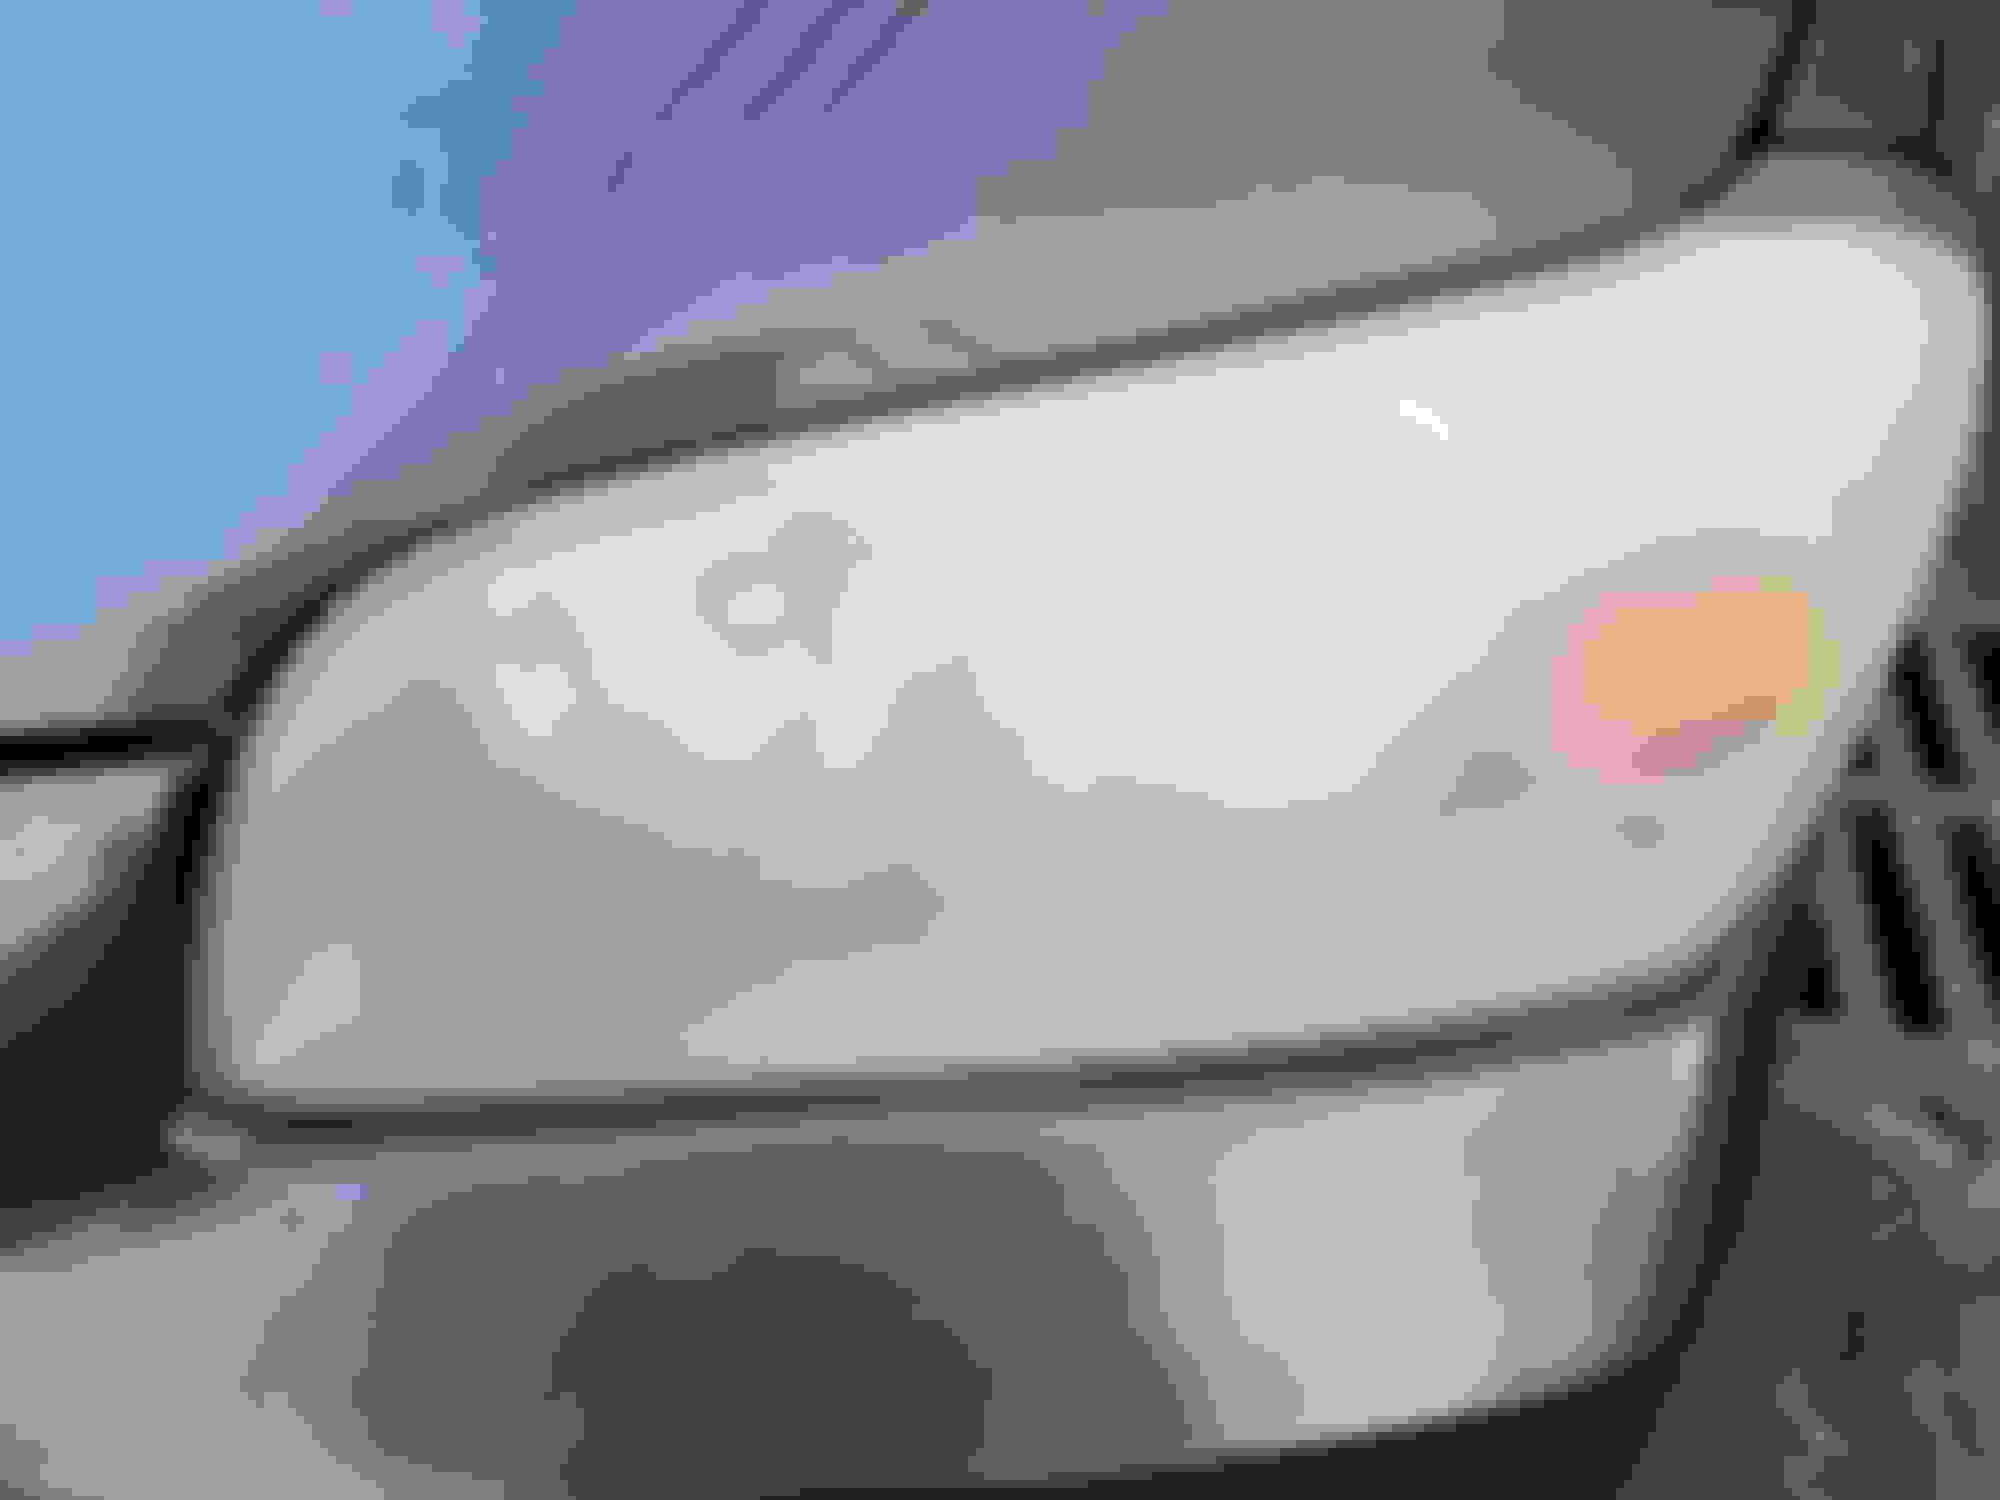
Ughh just noticed that there's like 3 or 4 streaks on the driver's side headlight, not sure if it's because I haven't put any wax on yet. I let the headlights dry for a day Will applying wax work?
Ughh just noticed that there's like 3 or 4 streaks on the driver's side headlight, not sure if it's because I haven't put any wax on yet. I let the headlights dry for a day Will applying wax work?
You can apply wax, but the streaks will stay. For touching it up 2500-3000 (to play it safe) grit wetsand the headlights then you can polish and wax.
To be honest, even though the light from your picture has the streaks, it looks 100% better than before, and even just putting a final step of wax would be good enough.
OK that's good to know. When I wetsand with 2500 or 3000, should the headlight be slightly hazy again? And I have Turtle Wax polishing compound as well, is it worth applying that too?
OK that's good to know. When I wetsand with 2500 or 3000, should the headlight be slightly hazy again? And I have Turtle Wax polishing compound as well, is it worth applying that too?
Shouldn't be hazy again, make sure that when sanding there is always a good amount of water and don't wet sand too much. Wipe the light down after. Then yes, you can apply the polisishing compound, and then the wax.


 , on Flickr


