
Stillen FSTB installed


Stillen FSTB installed
Got it put on today. Here are some pics. Oh yeah and I removed the center section of the engine cover too. I have affectionately renamed it simply "The plastic heat blanket". Figure it'll let the intake cool off a bit better and doesn't look any worse, although I may need to trim up the remaining cover a bit.
BEFORE

AFTER


BEFORE
AFTER


did u have to modify/cut the plastic pieces that go over the struts...
I had mine painted so i really would not like to ruin them...
pics looks great...
I am waiting to see taz's final product... then i will chooose one...
price ??
Time to install? 5 mins?
I had mine painted so i really would not like to ruin them...
pics looks great...
I am waiting to see taz's final product... then i will chooose one...
price ??
Time to install? 5 mins?
So i just looked at stillen and it says the FSTB is 148.50 plus shipping...? I know its stillen so it will always be a little more, but isnt taz's going for 90 shipped?
Anyone have any comments on pro's and con's of the stillen bar?
Anyone have any comments on pro's and con's of the stillen bar?

Senior Member
Joined: Oct 2005
Posts: 619
Got it put on today. Here are some pics. Oh yeah and I removed the center section of the engine cover too. I have affectionately renamed it simply "The plastic heat blanket". Figure it'll let the intake cool off a bit better and doesn't look any worse, although I may need to trim up the remaining cover a bit.
BEFORE
AFTER
BEFORE
AFTER

LOL some good feedback here.
1. Yes I had to trim the driver side plastic overlay a bit to fit over the brace.
2. No I didn't have to shave the intake
3. I did have to "play" with the AC lines just a bit but unbolting them and moving them around while installing the FSTB but once the FSTB was in place I simply screwed the AC line back into place with no problem.
4. Total install time about 10min (mostly because I had to dig for the right tools).
5. No it wasn't cheap, yes it arrived in about 4 days!
6. I've noticed an ever so slight tightness on handling, noticed it last night going into a highway entry doing about 50mph on a VERY tightass turn. But like Deus says, regardless, it sure looks good!
Joined: May 2005
Posts: 10,197
From: Displaced New Yorker in Southern, MD
The Stillen FSTB is great and looks good, Stillen is a proven performance parts provider and you cannot loose getting a Stillen and no waiting... And I know for a fact that other then slightly trimming the plastic strut covers, no shaving or rubbing on mine and I have worked enough on Rambergs car to know his Stillen does not rub either... Last, it can be polished!!!
Last edited by chernmax; Sep 30, 2007 at 09:10 AM.
Damn Chern that looks SICK! Love the polish man. How much elbow grease did that take??
Also, do you apply a cleaner/protectant to your plastic and rubber parts by the windshield? Looks damn good.
Also, do you apply a cleaner/protectant to your plastic and rubber parts by the windshield? Looks damn good.
Joined: May 2005
Posts: 10,197
From: Displaced New Yorker in Southern, MD
My boy Ramberg bought a new IM and had it polished beautifully. When he took his old IM off he mailed it to me and I took about 6 weeks and ported/polished it myself. I then swapped them out and mailed him back my old one. So the whole time my car was down only 3 hrs for the swapout. And when I did the swapout, thats how I then learned how to do the IM spacer mod, so I did that myself also...

wet sand paper from 250-1000 grit are a must!!!
As well as a good professional polishing liquid!!! I use:
RI WASH 'n GUARD� Premium Metal Polish
https://dri-wash.us/cgi-bin/storefro...RDERID!#polish
For upkeep I use Windex and a paper towel and every couple months, I'll polish all the metal surfaces...

Last edited by chernmax; Sep 30, 2007 at 11:21 AM.
It took the FUSB to a polisher who took 16 hours and charged me $60 bucks, during the process he showed my how he polished and I went out and bought a Demel polisher kit with flex neck and polisher bit set. So when the time came that I wanted to polish my IM, this is what happened.
My boy Ramberg bought a new IM and had it polished beautifully. When he took his old IM off he mailed it to me and I took about 6 weeks and ported/polished it myself. I then swapped them out and mailed him back my old one. So the whole time my car was down only 3 hrs for the swapout. And when I did the swapout, thats how I then learned how to do the IM spacer mod, so I did that myself also...
wet sand paper from 250-1000 grit are a must!!!
As well as a good professional polishing liquid!!! I use:
RI WASH 'n GUARD� Premium Metal Polish
https://dri-wash.us/cgi-bin/storefro...RDERID!#polish
For upkeep I use Windex and a paper towel and every couple months, I'll polish all the metal surfaces...

Stang-seeking Max Missile

Joined: Dec 2005
Posts: 204
From: CT
It's a bit pricey but the quality is 2nd to none- you certainly get what u pay for.
Joined: May 2005
Posts: 10,197
From: Displaced New Yorker in Southern, MD
I just removed the gray IM looking plastic thingy (they separate), then using a Dremel cutting bit I removed as much plastic off the lip so you sand less. Then with a Dremel flat sanding belt, sand it down till it's flush, then go to a high grid (400) to smooth it out!!! This will then expose your real IM and in my opinion, cools better because you now have more cool air over the top of the IM to dissipate heat faster.
Last edited by chernmax; Sep 30, 2007 at 02:02 PM.
") Here checkout this thread. http://forums.maxima.org/showthread.php?t=407157
Here checkout this thread. http://forums.maxima.org/showthread.php?t=407157
I just removed the gray IM looking plastic thingy (they separate), then using a Dremel cutting bit I removed as much plastic off the lip so you sand less. Then with a Dremel flat sanding belt, sand it down till it's flush, then go to a high grid (400) to smooth it out!!! This will then expose your real IM and in my opinion, cools better because you now have more cool air over the top of the IM to dissipate heat faster.

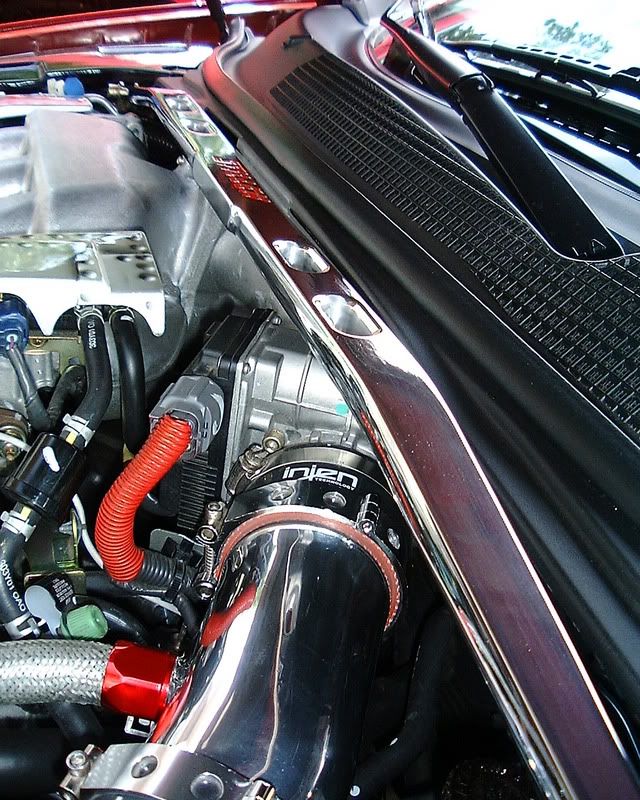
FYI here is a shot of the Stillen level so you can see the clearance over the IM.

Another shot from the side.

Just a shot of the sweet Injen CAI, Oooops, how did that get in there?

Another shot from the side.
Just a shot of the sweet Injen CAI, Oooops, how did that get in there?
Last edited by Mack; Sep 30, 2007 at 03:22 PM.

Thread
Thread Starter
Forum
Replies
Last Post
MaxLife17
8th Generation Maxima (2016-)
43
Jun 27, 2019 01:37 PM

