
Quote:
") ...sigh....
...sigh....

Originally Posted by larsim
I love the ride in your sig!!! Nice, very nice setup........sigh....


Senior Member
Quote:
I gotta 08 blue max n i think the way the factory one lookz hot.. a reas0n i got the blue =] chec my cardomain 2 see pics of the bac...Originally Posted by RHMax
Probably not too hot on blue either...
 pic is kinda far n not that bright but you gotta see it in pers0n.. lookz hot.. i'd say get it 4 your blue maxx..
WOw bro I just noticed that you got them on! It looks great!!
I think I might give it a shot! Good Job bro!
I think I might give it a shot! Good Job bro!
Quote:
I think I might give it a shot! Good Job bro!
Go for it. It is definetely worth it. I was driving behind my car the other day on another car, and it looks very eye catchingOriginally Posted by GrimMax
WOw bro I just noticed that you got them on! It looks great!!I think I might give it a shot! Good Job bro!

Quote:
And its basically... a giant vinyl?Originally Posted by larsim
Go for it. It is definetely worth it. I was driving behind my car the other day on another car, and it looks very eye catching
Man bro.. but I am
 when it comes to installs.
Can I really do this myself though?
Quote:
Man bro.. but I am when it comes to installs.
Can I really do this myself though?
Sure can - if you buy it pm me and I'll give every single detail.... it is very simple Originally Posted by GrimMax
And its basically... a giant vinyl?Man bro.. but I am
when it comes to installs.Can I really do this myself though?

Quote:
LOL Where can I but it from buddy?Originally Posted by larsim
Sure can - if you buy it pm me and I'll give every single detail.... it is very simple

Junior Member
i think it would hot on a smoke max if it was painted like an aluminum color to match the factory SE wheels!?!?!? anybody agree?

This Space for Rent
im thinking about getting one- but im not too sure on installing it myself.
i mean, its a big assed sticker
i mean, its a big assed sticker
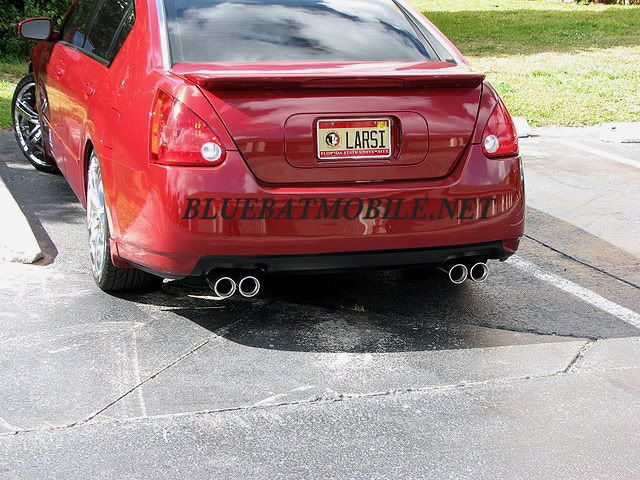
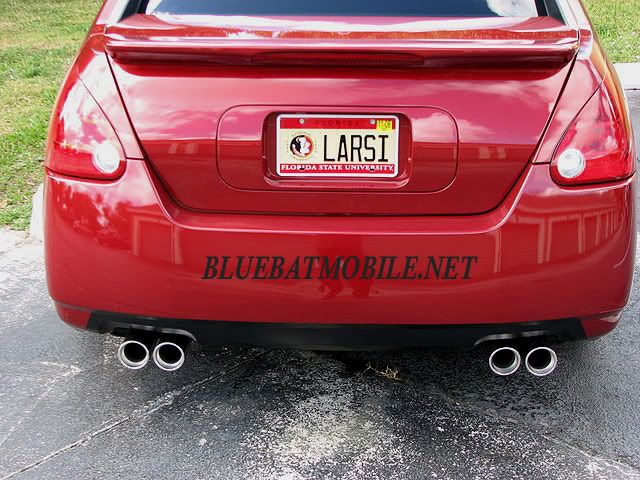
Guys, it is very easy. When you get the overlays, instructions will be included. But here is how I installed mine and it came out w/o any bubbles whatsoever  :
:
1) The overlays will come in two parts - drivers and passenger side. It is NOT one single overlay going from one side to the other. It is - I guess you can say, cut in half.
2) Before you even begin the installation process make sure you have a soap, a bottle of water spray, a credit card, a hairdryer and scissors.
3) Prep the bumper for the installation making sure it is clean
4) The overlay will have a band-aid like adhesive that you will need to remove. Remove it and rub the soap on the overlay while spraying it with water (the idea here is to make the overlay slippery making it easy to move it on the bumper's surface).
You can start the actual application process at either the driver's or passenger's side. I started on the passenger's side.
5)Set the overlay at the right position (this perhaps is the trickiest part because you want to make sure the overlay is sitting just right).
6)Once the overlay is sitting where you want it to be, turn on the hairdryer and with the credit card start removing the water. (On this process you will notice that because of the heat, the overlay will become somewhat user friendly allowing you to contour the curves of the bumper).
7)Once the passenger's side is completed, move on to the driver's side.
8) Repeating steps 5 and 6 - sit the driver's side overlay in place, you will notice that it will overlap the passenger's side by about an inch or so. Using the scissors cut about a half inch or so, or until you see that it fits the driver's side just right.
And - that is all she wrote! You're done.......
:1) The overlays will come in two parts - drivers and passenger side. It is NOT one single overlay going from one side to the other. It is - I guess you can say, cut in half.
2) Before you even begin the installation process make sure you have a soap, a bottle of water spray, a credit card, a hairdryer and scissors.
3) Prep the bumper for the installation making sure it is clean
4) The overlay will have a band-aid like adhesive that you will need to remove. Remove it and rub the soap on the overlay while spraying it with water (the idea here is to make the overlay slippery making it easy to move it on the bumper's surface).
You can start the actual application process at either the driver's or passenger's side. I started on the passenger's side.
5)Set the overlay at the right position (this perhaps is the trickiest part because you want to make sure the overlay is sitting just right).
6)Once the overlay is sitting where you want it to be, turn on the hairdryer and with the credit card start removing the water. (On this process you will notice that because of the heat, the overlay will become somewhat user friendly allowing you to contour the curves of the bumper).
7)Once the passenger's side is completed, move on to the driver's side.
8) Repeating steps 5 and 6 - sit the driver's side overlay in place, you will notice that it will overlap the passenger's side by about an inch or so. Using the scissors cut about a half inch or so, or until you see that it fits the driver's side just right.
And - that is all she wrote! You're done.......
Quote:
Email bat @ bluebatmobile@san.rr.comOriginally Posted by GrimMax
LOL Where can I but it from buddy?

Senior Member
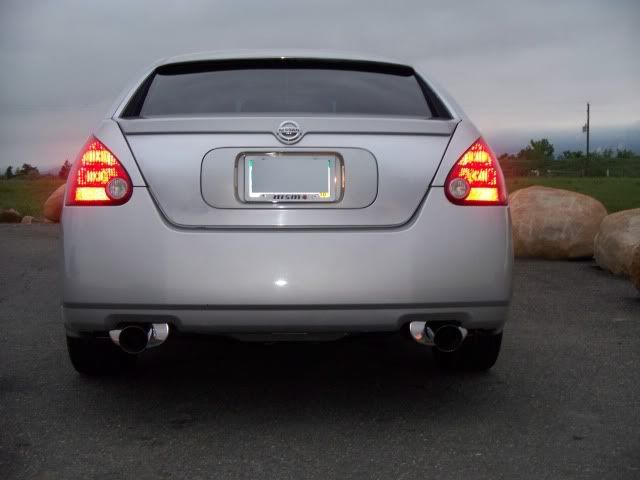
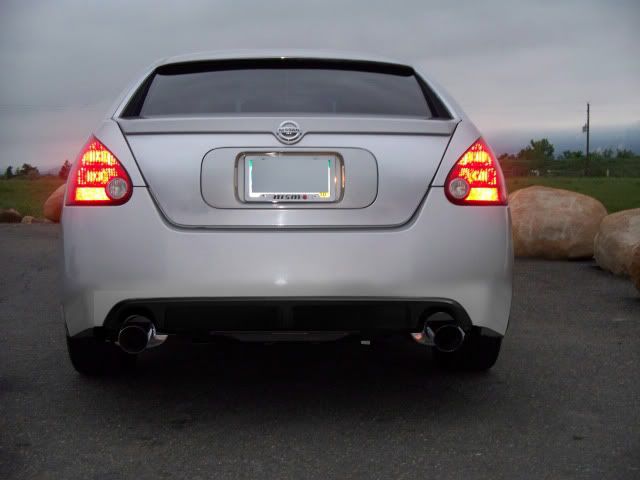
Okay digging this one up big time but Larsim put his overlay on, it looked great and then the thread died. Deus made a rear valence, the 07-08 bumper has a nice valence. I saw the Altima cpupe valence one day at the dealership and thought it was the best.
K10 graciously photoshopped it onto my car but the reality of finding a way to make that fit is in the far future, if it's even possible.
Then I remembered BlueBat had made an overlay for our cars and for $42 it's far more "doable" the custom valences. Has anyone beside Larsim ever put one on? If Blue Bat still has them I think I am taking the plunge.
This Space for Rent
i painted mine when the bat overlay became so FVCKED up, it was useless during install
That's the kind of input I need. I've never heard anymore about these. How they hold up and install issues.

Senior Member
i can see how they would turn out very well. but you've gotta be patient with overylays/stickers/vinyl installs. and with something like this. two people may not be a bad idea.
Thanks ddelaud, I know I had trouble even with my sidemarker overlays. They can be tricky. Larsim did an awesome job on the install. Maybe Domestic doesn't have the overlay skilzzz
Senior Member
haha maybe not. I KNOW this is something you'd wanna use the soapy water for. just not too much soap! cause then it'll take long to dry. good luck with it if you decide to do it.
So is that it? 2 people have purchased this overlay? Larsim and Domestic. 1 successfull and 1 not. Not much to go on.