
How to remove your axle


How to remove your axle
I only did the driver side, but the passenger side is the same with addition to 3 bolts which looked like 12mm or 14mm that hold the axle in place.
Tools required/used:
-Snap-On Impact gun
-14mm socket/wrench
-22mm deep socket or wrench
-22mm short socket or wrench
-17mm socket
-19mm wrench
-32mm socket
-4 total jack-stands...or something tall enough to rest the caliper/hub on
-pliers
-rubber hammer
-thick, long flat-head screwdriver
1.) Jack both sides of the car up and take the driver side wheel off (both sides as to release the pressure on the end-links)
2.) Life the two black rubber tabs off of the strut
3.) Use a flat-head along with a rubber hammer to hit the clip off that is retaining the brake line
4.) Use the 19mm wrench to hold the rear of the end-link and a 17mm socket to take the front nut off
5.) Get a pair of pliers and take off the cotter pin that is on the 32mm axle nut
6.) Use the 32mm socket to take the nut off the axle *Be careful not to damage the threading on the axle*
7.) Use the 19mm wrench to hold the nut on the strut and a 17mm socket to take the bolt off. There are two of these.
8.) Pop the hood and remove the plastic cover that is over the strut
9.) Prop a jack under the control arm so that it doesn't put excess pressure on it when you release the strut
10.) Remove the three 14mm nuts on top of the strut
11.) Carefully take the strut out...it weighs about 15-20lbs
12.) Loosen the brake caliper bolts with a 14mm socket , but do not fully take them off yet.
13.) Use a 22mm socket to take the caliper mount off. There are two bolts holding it down
14.) After the mount is off, carefully hold the caliper so you do not bend the brake line and now you can full dismount the caliper from the mount and put the caliper on a jack-stand or secure it on something so it does not put excessive pressure on the line.
15.) Remove the rotor
16.) Use a pair of pliers to take the cotter pin off of the tie-rod
17.) Use a 17mm socket to take the nut off of the tie-rod, then pop it off
18.) Use a pair of pliers to take off the cotter pin that is on the ball joint of the control arm
19.) Use a 22mm short socket or wrench to take the nut off the ball joint
20.) Carefully lift the hub off the ball joint and wiggle the axle out of the hub if possible, if not then put the 32mm nut back on the axle and hit it with a rubber hammer until it pops out. Then take the nut off and remove the axle fully from the hub
21.) Place the hub on a jack-stand or secure it somewhere as well because the ABS sensor is still connected and I did not want to disconnect it, figuring that something might get need to reset or debris might get in
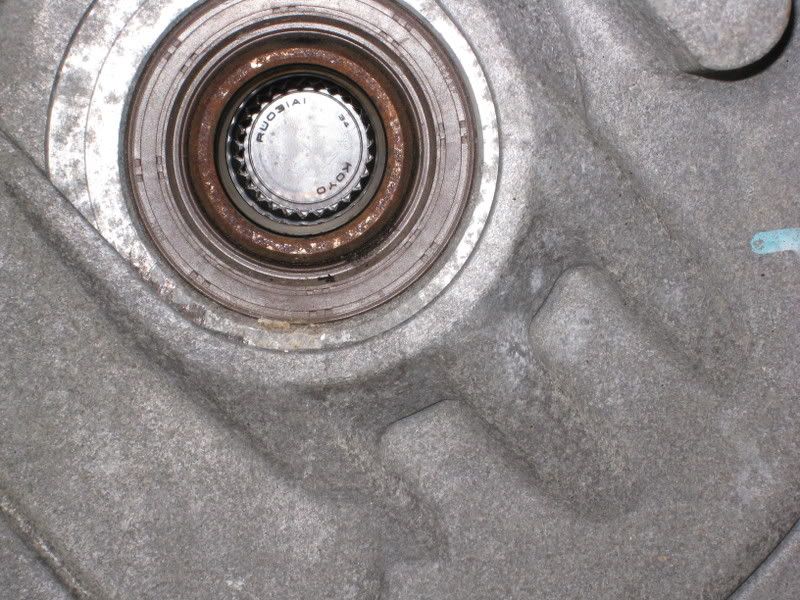
22.) Go under the car and wedge a long flat head screw driver in between the big rusty chunk of metal that is at the end of the axle and the transmission. (I mistakenly thought that the seal was the end of the axle and hit that a few times... ) Wedge the flat-head in there and hit it with the rubber hammer a few times and re-position the flat-head if the axle doesn't pop out.
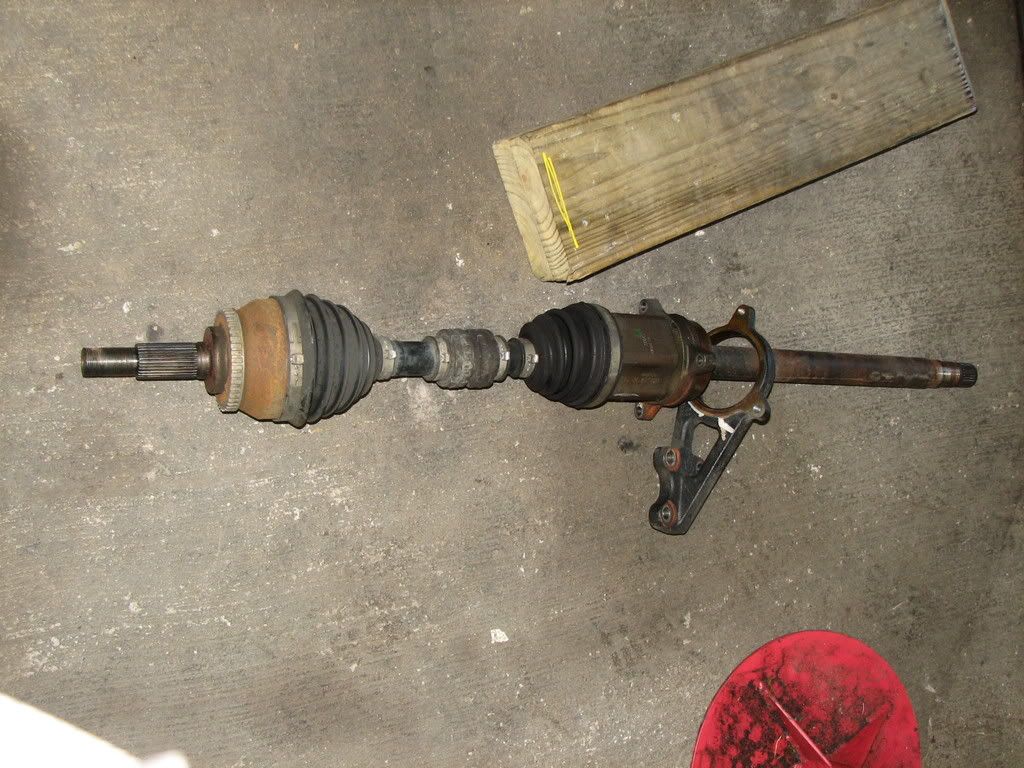
23.) After it pops out, just make sure to carefully guide it out and inspect it for any damage to the teeth...which doubtfully will have any
Reinstalling it is just reverse order.
-Only difficult part may be popping the axle fully into the transmission, but you can just use the rubber hammer for that.
-When putting the 17mm nut back on the tie-rod, the bolt might/will keep spinning so you just have to put pressure on it from the sides while threading the nut on completely.
-Make sure to check that the backing plate behind the rotor is not bent and touching the rotor because it will cause a hideous screech.
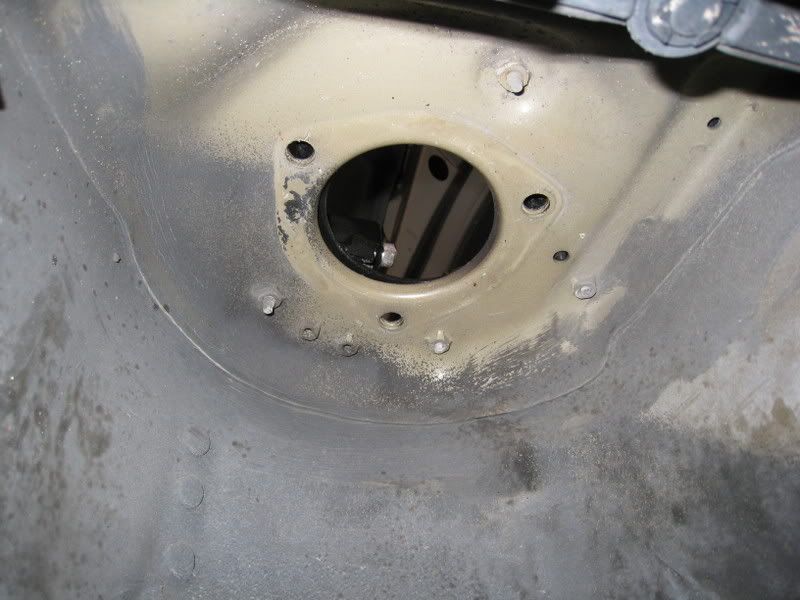
Everything taken apart

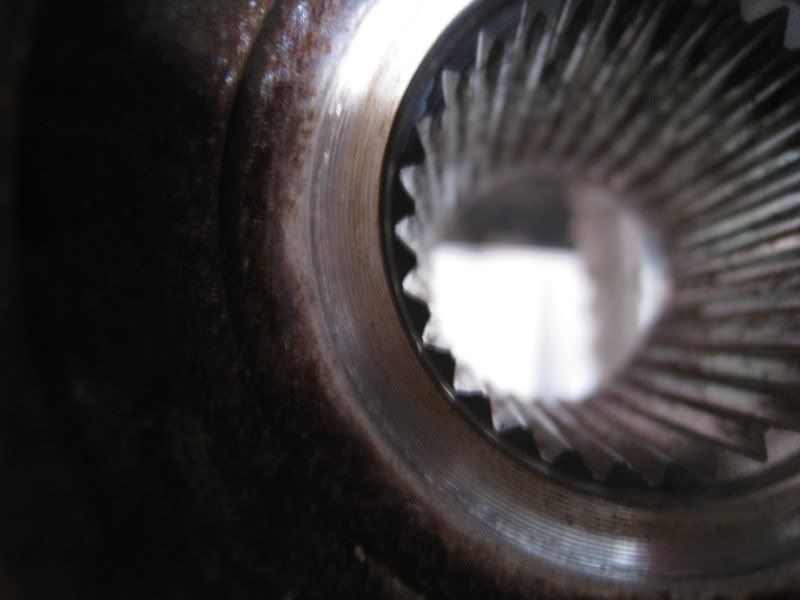
Hub teeth
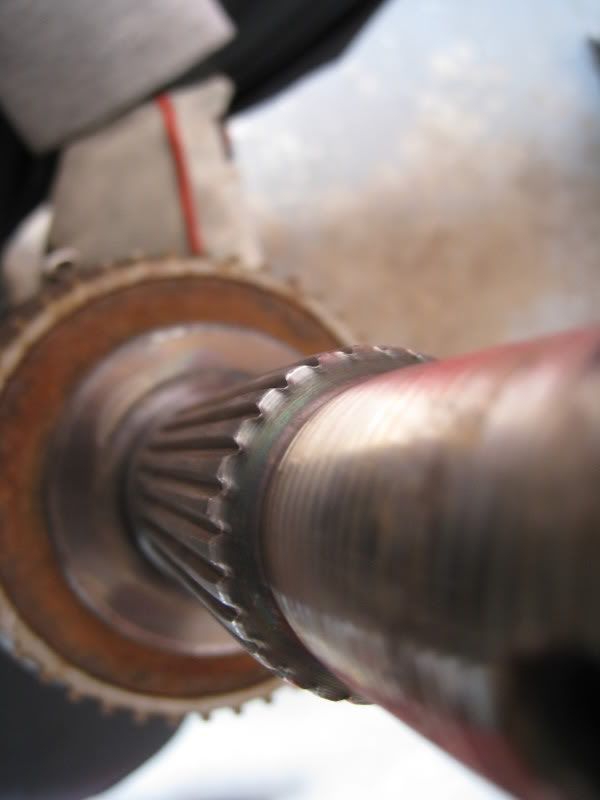
Axle teeth
Tools required/used:
-Snap-On Impact gun
-14mm socket/wrench
-22mm deep socket or wrench
-22mm short socket or wrench
-17mm socket
-19mm wrench
-32mm socket
-4 total jack-stands...or something tall enough to rest the caliper/hub on
-pliers
-rubber hammer
-thick, long flat-head screwdriver
1.) Jack both sides of the car up and take the driver side wheel off (both sides as to release the pressure on the end-links)
2.) Life the two black rubber tabs off of the strut
3.) Use a flat-head along with a rubber hammer to hit the clip off that is retaining the brake line
4.) Use the 19mm wrench to hold the rear of the end-link and a 17mm socket to take the front nut off
5.) Get a pair of pliers and take off the cotter pin that is on the 32mm axle nut
6.) Use the 32mm socket to take the nut off the axle *Be careful not to damage the threading on the axle*
7.) Use the 19mm wrench to hold the nut on the strut and a 17mm socket to take the bolt off. There are two of these.
8.) Pop the hood and remove the plastic cover that is over the strut
9.) Prop a jack under the control arm so that it doesn't put excess pressure on it when you release the strut
10.) Remove the three 14mm nuts on top of the strut
11.) Carefully take the strut out...it weighs about 15-20lbs
12.) Loosen the brake caliper bolts with a 14mm socket , but do not fully take them off yet.
13.) Use a 22mm socket to take the caliper mount off. There are two bolts holding it down
14.) After the mount is off, carefully hold the caliper so you do not bend the brake line and now you can full dismount the caliper from the mount and put the caliper on a jack-stand or secure it on something so it does not put excessive pressure on the line.
15.) Remove the rotor
16.) Use a pair of pliers to take the cotter pin off of the tie-rod
17.) Use a 17mm socket to take the nut off of the tie-rod, then pop it off
18.) Use a pair of pliers to take off the cotter pin that is on the ball joint of the control arm
19.) Use a 22mm short socket or wrench to take the nut off the ball joint
20.) Carefully lift the hub off the ball joint and wiggle the axle out of the hub if possible, if not then put the 32mm nut back on the axle and hit it with a rubber hammer until it pops out. Then take the nut off and remove the axle fully from the hub
21.) Place the hub on a jack-stand or secure it somewhere as well because the ABS sensor is still connected and I did not want to disconnect it, figuring that something might get need to reset or debris might get in
22.) Go under the car and wedge a long flat head screw driver in between the big rusty chunk of metal that is at the end of the axle and the transmission. (I mistakenly thought that the seal was the end of the axle and hit that a few times...
) Wedge the flat-head in there and hit it with the rubber hammer a few times and re-position the flat-head if the axle doesn't pop out.23.) After it pops out, just make sure to carefully guide it out and inspect it for any damage to the teeth...which doubtfully will have any
Reinstalling it is just reverse order.
-Only difficult part may be popping the axle fully into the transmission, but you can just use the rubber hammer for that.
-When putting the 17mm nut back on the tie-rod, the bolt might/will keep spinning so you just have to put pressure on it from the sides while threading the nut on completely.
-Make sure to check that the backing plate behind the rotor is not bent and touching the rotor because it will cause a hideous screech.
Everything taken apart
Hub teeth
Axle teeth
Last edited by !PrjctMax!; May 9, 2008 at 06:48 PM.


Only thing that sucked for me was when I somehow accidentally damaged the threading on the end of the axle. I tried tapping the bend out with a chisel/hammer, but it didn't budge, so I thought I could re-thread it with the nut and my impact like I did on my strut, but NO...the bolt just ground away inside and then I was just screwed...called Nissan up and my discount price would be $460 for the axle...
So I searched around on the web and called Napa up to find that they had re-manufactured axles for $70 w/life-time warranty. So my screw-up only cost me $70, which I don't think is bad at all...compared to $460...
So I searched around on the web and called Napa up to find that they had re-manufactured axles for $70 w/life-time warranty. So my screw-up only cost me $70, which I don't think is bad at all...compared to $460...


Joined: May 2005
Posts: 10,197
From: Displaced New Yorker in Southern, MD
To remove the axles on my car, I did not have to remove the struts assembly nor front endlinks, we disconnected the bottoms only (lower strut, endlink, control arm, wheel nut, and axle bracket), turned the wheel assembly hard right and out came the front axle's but you have to remove them forward of the wheel. Since the scope of your work is not clear you may have your own reason for removing everything but it's not required. We even left the brakes rotors, calipers etc connected...

So what you doing bro???
But again, great job with the writeup!!!
So what you doing bro???
But again, great job with the writeup!!!
Last edited by chernmax; May 9, 2008 at 08:06 PM.
That was better than 460 though.Just the pain of changing added to the cost of install. I always use a triangular file to cut the threads back if one gets damaged. But at least you have it fixed again. You may want to get this posted in the how to if it does not already exist.
CHRIS-
 I just wanted a smooth slide-out instead of fishing things, so the extra few nuts and bolts to take out weren't an issue for me...mainly because of my impact gun making the job quick and easy
At first I didn't take out the strut, but my tech said that it'd be a little easier, so I just took the top 3 nuts off and off it went. The top of the end-link is much easier to take off...for me at least.
Main reason for me doing this is to just venture further into my car...and ****ed up the threads in the process
Wanted to check the teeth on the actual axles because I thought they might be worn out due to a thud that I've been noticing while quickly accelerating and quickly stopping...but that's most likely my motor mount so meh
Last edited by !PrjctMax!; May 9, 2008 at 08:57 PM.
Joined: May 2005
Posts: 10,197
From: Displaced New Yorker in Southern, MD
There were at least 3-4 threads that were damaged totaling to about 4mm worth of "cutting" that I would have had to do.
CHRIS-
I just wanted a smooth slide-out instead of fishing things, so the extra few nuts and bolts to take out weren't an issue for me...mainly because of my impact gun making the job quick and easy
At first I didn't take out the strut, but my tech said that it'd be a little easier, so I just took the top 3 nuts off and off it went. The top of the end-link is much easier to take off...for me at least.
Main reason for me doing this is to just venture further into my car...and ****ed up the threads in the process Wanted to check the teeth on the actual axles because I thought they might be worn out due to a thud that I've been noticing while quickly accelerating and quickly stopping...but that's most likely my motor mount so meh
CHRIS-
I just wanted a smooth slide-out instead of fishing things, so the extra few nuts and bolts to take out weren't an issue for me...mainly because of my impact gun making the job quick and easy At first I didn't take out the strut, but my tech said that it'd be a little easier, so I just took the top 3 nuts off and off it went. The top of the end-link is much easier to take off...for me at least.
Main reason for me doing this is to just venture further into my car...and ****ed up the threads in the process
Wanted to check the teeth on the actual axles because I thought they might be worn out due to a thud that I've been noticing while quickly accelerating and quickly stopping...but that's most likely my motor mount so meh
Last edited by chernmax; May 10, 2008 at 07:28 AM.

To remove the axles on my car, I did not have to remove the struts assembly nor front endlinks, we disconnected the bottoms only (lower strut, endlink, control arm, wheel nut, and axle bracket), turned the wheel assembly hard right and out came the front axle's but you have to remove them forward of the wheel. Since the scope of your work is not clear you may have your own reason for removing everything but it's not required. We even left the brakes rotors, calipers etc connected...
So what you doing bro???
But again, great job with the writeup!!!
So what you doing bro???
But again, great job with the writeup!!!
Hay! Off the subject for just a second, Chernmax your upper front end-link bolt that connects to the strut runs through the front. I know the bottom end-link bolt that connects to the sway bar does, but are they suppose to run in the same pattern like that? Is that the correct placement because your running coil-overs?


Joined: May 2005
Posts: 10,197
From: Displaced New Yorker in Southern, MD
Hay! Off the subject for just a second, Chernmax your upper front end-link bolt that connects to the strut runs through the front. I know the bottom end-link bolt that connects to the sway bar does, but are they suppose to run in the same pattern like that? Is that the correct placement because your running coil-overs?
Understand bro, but my point is procedure wise that the Struts, front endlinks, brake assy do not have to be removed in order to remove the axles and if you would have seen the way we turned the front wheels, my axle slipped in/out pretty easy also. Doing it this way now adds a front alignment and brake line bleed and refill. Your writeup and pictures are still top notch.
Are you saying that the way I did it requires an alignment and bleeding the brakes? Don't see how I would need that since no brake lines were disconnected and tie-rods weren't twisted around...

Joined: May 2005
Posts: 10,197
From: Displaced New Yorker in Southern, MD
Don't get me wrong, I definitely understand your point. It's just that with the small experience I've had doing my own stuff, I would much rather take off a few more bolts than fish things through.
Are you saying that the way I did it requires an alignment and bleeding the brakes? Don't see how I would need that since no brake lines were disconnected and tie-rods weren't twisted around...
Are you saying that the way I did it requires an alignment and bleeding the brakes? Don't see how I would need that since no brake lines were disconnected and tie-rods weren't twisted around...


I don't see how an alignment would be needed if the struts are replaced though. The bolts in the struts are positioned in one area, so it's not like they move around. I remember asking a tech that I worked with a while ago about that, and that is the exact thing that he told me. I'm not arguing with you, just stating what I have heard and been told.
Joined: May 2005
Posts: 10,197
From: Displaced New Yorker in Southern, MD
I don't see how an alignment would be needed if the struts are replaced though. The bolts in the struts are positioned in one area, so it's not like they move around. I remember asking a tech that I worked with a while ago about that, and that is the exact thing that he told me. I'm not arguing with you, just stating what I have heard and been told.
I still have techs telling me also that my oil needs to be changed every 3000 miles even if I'm using full synthetic.
Oh and a tech before him who said a set of Nissan Altima SE-R Hotshot Headers would not fit the Max.
Oh and tech after him who said a 6th Gen can't be Turbo'ed
")
Last edited by chernmax; May 10, 2008 at 05:06 PM.


Senior Member
Joined: Aug 2002
Posts: 121
I just did mine and afterwards I'm left with vibration at highway speeds so I'm wondering if removing the strut bolts did it. I also replaced the outer tie rod end but I was sure to replace it and thread it to the right position. Now I'm wondering if I need to replace the whole tie rod since it doesn't stay in position or provide any resistance when I hold the tie rod end and let it drop, the whole thing drops instantly even without the outer tie rod end connected.


Member
Joined: Nov 2006
Posts: 251
From what I remember, you don't have to mess with struts or brakes when replacing axles, all you do is remove axle nut and swing steering all the way out to create some room. Then all you do is compress the axle until it pops right out. And yes, pass side axle is connected to a bracket, you would need to remove 3 bolts holding it, and pry the axle out, it can be stubborn, especially with rust build up, but will move eventually, just be patient
Also, just read about some mechanic recommending 3000 mile full synth oil changes, just forget that mechanic's name, address, and phone number, you will thank me later.
Also, just read about some mechanic recommending 3000 mile full synth oil changes, just forget that mechanic's name, address, and phone number, you will thank me later.

Thread
Thread Starter
Forum
Replies
Last Post
my03maxima
7th Generation Maxima (2009-2015)
9
Jul 28, 2024 07:40 AM
RealityCheck
4th Generation Maxima (1995-1999)
7
Oct 2, 2015 06:34 PM