Cleaning Headlights for 2004 Maxima


 07-04-2011, 01:56 PM
#44
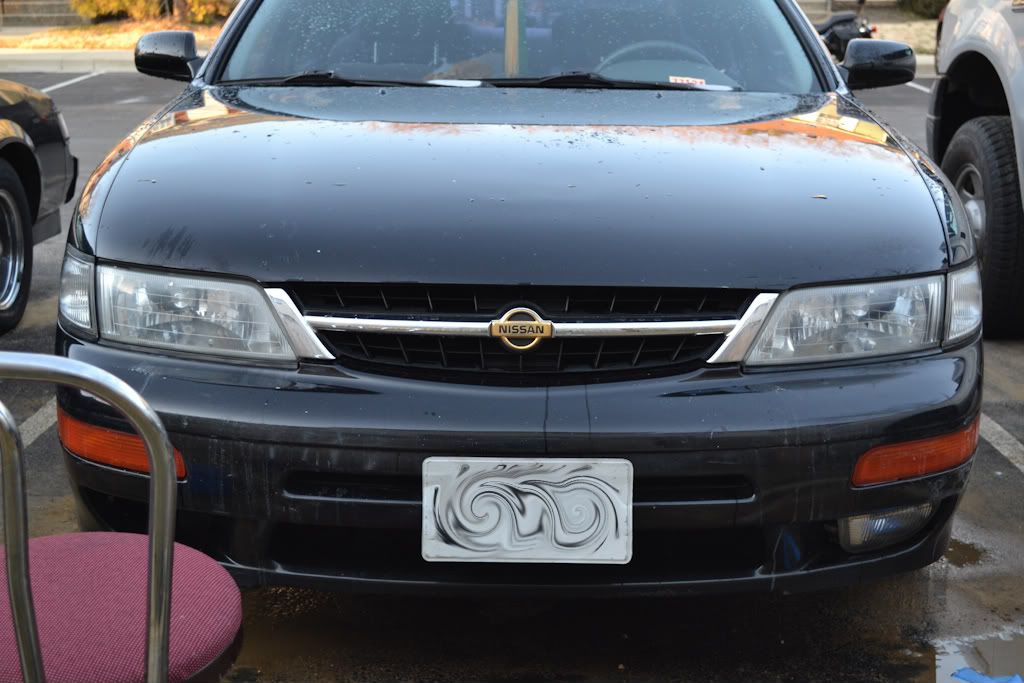
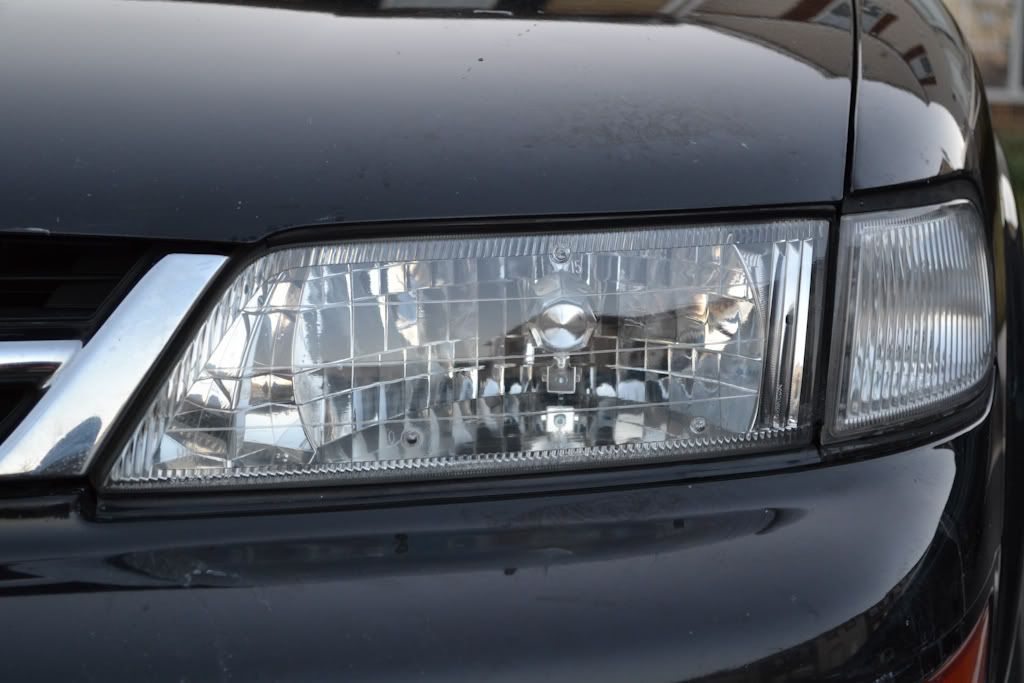
Here is the reason i want it to clean the lights

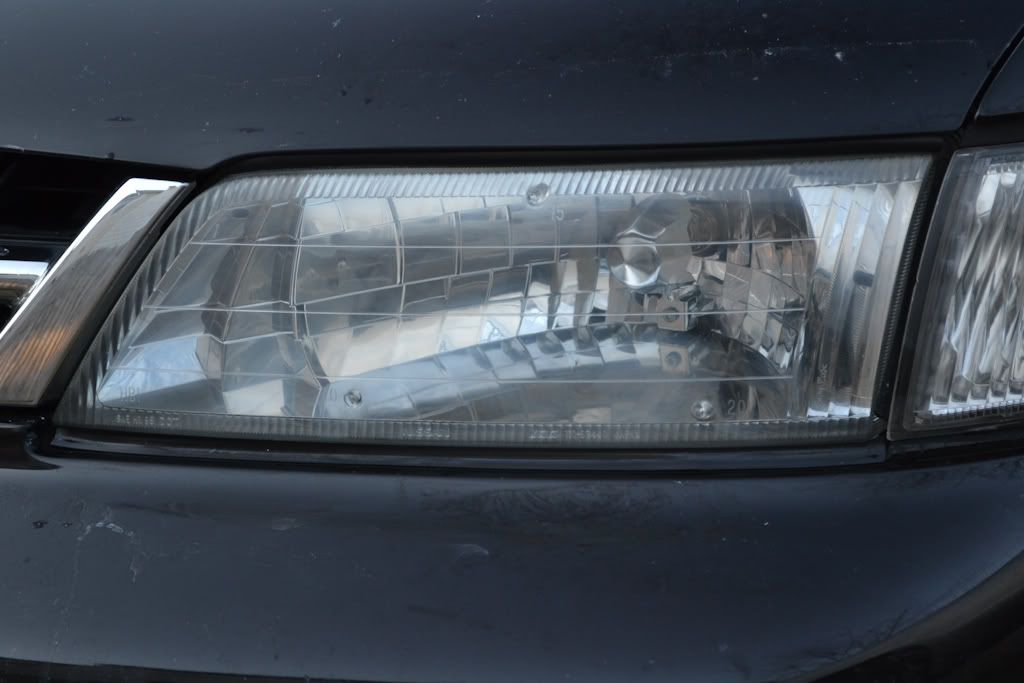
Here is the right side dont look so bad but still did it

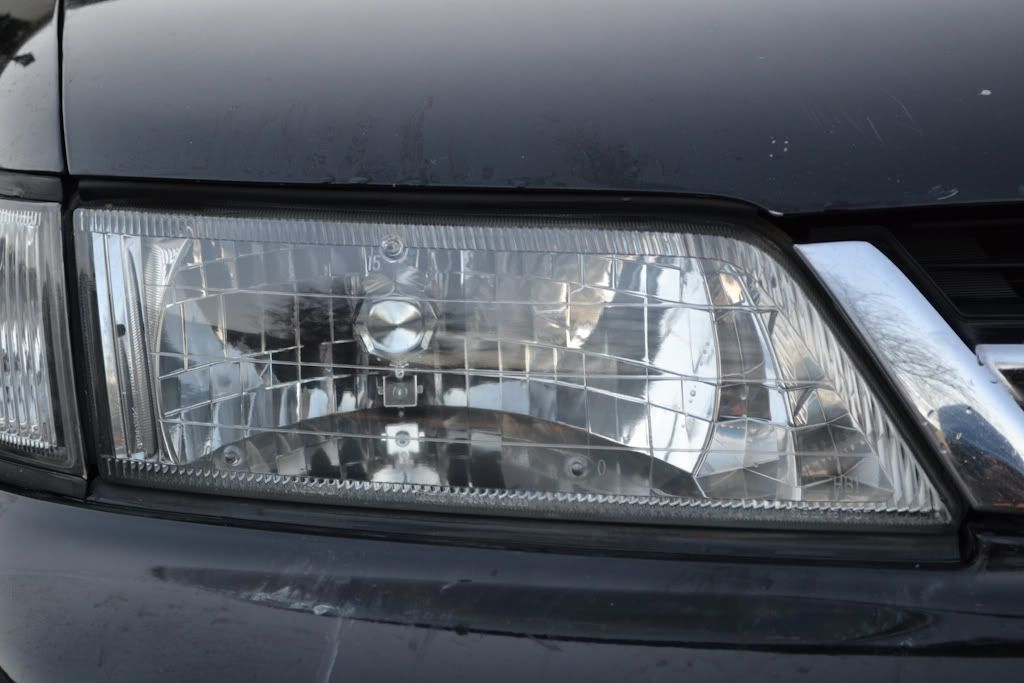
Ok here is what i use to clean it and how it came out.


Here is the right side dont look so bad but still did it
Ok here is what i use to clean it and how it came out.
Last edited by MaxPrime; 07-04-2011 at 02:00 PM.
07-04-2011, 02:06 PM
#45
Junior Member

Join Date: May 2011
Posts: 88
07-04-2011, 08:39 PM
#47
Senior Member

Join Date: May 2010
Location: inside my own mind
Posts: 1,506
Looks good man!
If your looking on saving some money then the PlastX will last you for a LONG time. Your gonna have to use again whenever it rains. Which will wash that top layer off. Just re-apply it and your good. The scratchX can be used on your car if you have some minor scratches anywhere on the car obviously. Plus, your going to eventually have to re-do that again sooner or later so it's better to just have that stuff on hand.
Anyways, all that stuff that you bought will be equaling out in the long run.
Last edited by 6.5affiliate; 07-04-2011 at 09:15 PM.
07-05-2011, 05:51 AM
#48
Yeah just playing lol i am happy i got it all feel like i have my own autozone in the house , but anyway what you think about the lights 6.5 the driver side is a lil worst but i made it look lil better i will do this process next week again and thast it for a wild.
07-05-2011, 07:39 PM
#49
Senior Member
Join Date: May 2010
Location: inside my own mind
Posts: 1,506
It's hard to tell in the pics because of the sun but after looking at both pics for a while. I do notice the difference in the drivers side headlight. Still hard to tell how bad the haze is though. Anyways,
There's two possibilities :
1. You didn't use enough pressure and compound to get all the haze off the lens.
*Sometimes it's better to apply the compound, wipe it off to see if you got it all. If not, then compound it again until your sure that the haze is gone.
2. The haze is actually on the inside the lens. If that's the case than there isn't much that you can do except cracking them open, very carefully clean them out since the inside of the lens scratches HELLA easy. Also, you can use this opportunity to paint your headlights.
Like I said in the other thread. Sometimes the sealant gets old which allows moisture inside of the headlight. Creating a little condensation that leads to haze and fogging. Usually cracking them open and re-sealing them will solve the issue but to be extra sure. It's better to use some new OEM sealant to make sure that they're sealed.
Or, get new headlights or just live with it.
BUT, before any of that happens. Make sure that it's on the outside by thoroughly getting rid of all the haze there first. If you have done the job right than the lens will be smooth as a babies butt and obviously, your lens is going to be crystal clear.
That's because haze that builds up on the outside can be felt by touch obviously. Your headlights will look and feel horrible. The only way to know if the haze is on the inside IMO is to clean the outer haze off first. A lot of people miss that since sometimes the haze on the outside is blocking what's happening on the inside.
Let me know if you have any other questions about this...
07-05-2011, 08:00 PM
#50
Yeah i feel good about the results and i will do the hold process again this weekend just to make sure but i am happy thanks for your help.
P.S what i do need help with is this , i wan t to get this foglights and led strip i already ask the dude but he didnt get back to me with the links, ebay is where he got them from but i can seem to find them see if you can work magic , he said he paid 65 for fogs and about 15 for strip so lets see if you can work some magic lol here is the picture

P.S what i do need help with is this , i wan t to get this foglights and led strip i already ask the dude but he didnt get back to me with the links, ebay is where he got them from but i can seem to find them see if you can work magic , he said he paid 65 for fogs and about 15 for strip so lets see if you can work some magic lol here is the picture
07-06-2011, 10:26 PM
#51
Senior Member
Join Date: May 2010
Location: inside my own mind
Posts: 1,506
No problem man, glad I could help out. Those fogs are 6.5 OEM's with halos or it might be angel eyes. It's been a while since I seen that ride. And yeah, it's going to be pretty damn hard to find those exact LED strips on Ebay since there's HELLA.
EDIT: If you want some high end LED strips than here's these:
http://www.jlclightings.com/ecommerc...rl-5-leds.html
EDIT: If you want some high end LED strips than here's these:
http://www.jlclightings.com/ecommerc...rl-5-leds.html
Last edited by 6.5affiliate; 07-06-2011 at 10:28 PM.
07-06-2011, 10:31 PM
#52
Yeah i got the fogs on ebay for 65 dollars going to oder it soon, but i was wondering if that ride have 6led or 8led not sure what the car need going to have to just get the bumper and lip first to find out.
07-07-2011, 10:59 AM
#53
Junior Member
Join Date: May 2011
Posts: 88

 07-12-2011, 07:07 PM
#58
Senior Member

Join Date: Oct 2007
Posts: 1,531
I used 1000 grit sandpaper to remove scratches. Then just used scratchx 2.0 on a drill with buffer pad until clear, then wax.... Takes a while with the drill turning fast. Few minutes per side. Dont think of doing this by hand.
Tried the turtle wax rubbing and buffing compound, but it seemed to me that the rubbing compound was rougher than 1000 grit, and the buffing seemed to do like 1000 grit.... so just paper + scratch x...
They are back to full clear
Tried the turtle wax rubbing and buffing compound, but it seemed to me that the rubbing compound was rougher than 1000 grit, and the buffing seemed to do like 1000 grit.... so just paper + scratch x...
They are back to full clear
07-12-2011, 07:31 PM
#59
I used 1000 grit sandpaper to remove scratches. Then just used scratchx 2.0 on a drill with buffer pad until clear, then wax.... Takes a while with the drill turning fast. Few minutes per side. Dont think of doing this by hand.
Tried the turtle wax rubbing and buffing compound, but it seemed to me that the rubbing compound was rougher than 1000 grit, and the buffing seemed to do like 1000 grit.... so just paper + scratch x...
They are back to full clear
Tried the turtle wax rubbing and buffing compound, but it seemed to me that the rubbing compound was rougher than 1000 grit, and the buffing seemed to do like 1000 grit.... so just paper + scratch x...
They are back to full clear
07-13-2011, 07:45 AM
#60

I just used the 3m Headlight restoration kit it work Great because i had some harsh lines going across. but the only thing is i had to do 3000 grit wet sand alot more because i think i went to hard on the 500 grit. It comes with 500, 800, & a 3000 wet. I notice you guys used 2000, if i get that it would be Mint so where can i get that 2000?
07-13-2011, 06:39 PM
#63
Member

Join Date: Jul 2010
Location: Omaha, NE
Posts: 53
3m headlight restoration kit worked like a charm for me. I also got some cheap headlight sealer from autozone and put it on after i was done sanding, that worked better than the rubbing compound. my headlights look brand new.
07-13-2011, 06:41 PM
#64

 07-13-2011, 10:05 PM
#65
Senior Member
Join Date: May 2010
Location: inside my own mind
Posts: 1,506
I used 1000 grit sandpaper to remove scratches. Then just used scratchx 2.0 on a drill with buffer pad until clear, then wax.... Takes a while with the drill turning fast. Few minutes per side. Dont think of doing this by hand.
Tried the turtle wax rubbing and buffing compound, but it seemed to me that the rubbing compound was rougher than 1000 grit, and the buffing seemed to do like 1000 grit.... so just paper + scratch x...
They are back to full clear
Tried the turtle wax rubbing and buffing compound, but it seemed to me that the rubbing compound was rougher than 1000 grit, and the buffing seemed to do like 1000 grit.... so just paper + scratch x...
They are back to full clear
1000 grit does a great job as well. This is just an alternative. Glad everything worked out for you though.
Last edited by 6.5affiliate; 07-13-2011 at 10:23 PM.
07-15-2011, 10:59 PM
#67
Senior Member
Join Date: May 2010
Location: inside my own mind
Posts: 1,506
A few tips I want to give you regarding a buffer since you've never used one. Is to use light pressure. Basically your just guiding the buffer with your hands. Also, don't stay in one place to long and keep the buffer flat on the surface.
Without doing all of those things. You WILL damage the paint on your car and sometimes chip it depending on where your using it.
But, it also depends on the buffer that your using. If your using a 20 buffer than it's not going to go that fast to the point to where your gonna have a greater chance of damaging paint. Which is why I recommended something like that since you can consider it a "starter kit".
It'll be a totally different story if your using something like a variable speed polisher. But, that's in the 300-500 range.
Last edited by 6.5affiliate; 07-15-2011 at 11:02 PM.
07-19-2011, 09:54 PM
#73
Junior Member

Join Date: Dec 2007
Location: Fulshear, Texas
Posts: 62
I used this stuff to make my 6th gen look brand new. MAKE SURE YOUR HEADLIGHTS ARE OFF AND THE HOUSING IS COOL. It may not work if it is hot. If your headlights are severely cloudy then I would use a kit with sandpaper. If they look like Dafedexman's lights then I would use this kit:
http://www.walmart.com/ip/Meguiar-s-...n-Kit/16386195
USE AN ELECTRIC DRILL THAT PLUGS INTO THE WALL, NOT A BATTERY POWERED ONE. You will be charging that thing all night if you use the latter.
http://www.walmart.com/ip/Meguiar-s-...n-Kit/16386195
USE AN ELECTRIC DRILL THAT PLUGS INTO THE WALL, NOT A BATTERY POWERED ONE. You will be charging that thing all night if you use the latter.
 08-25-2011, 09:20 PM
#77
Senior Member
Join Date: May 2010
Location: inside my own mind
Posts: 1,506
Anyways, all the methods on this thread will work. It just depends if you have the necessary materials and skill to get it done.
08-25-2011, 09:27 PM
#78

This is a post I made a while back when I cleaned mine. Hope it helps you.
I'm going to be doing a HID Projector retrofit soon so I decided to clean the headlights on my wife's maxima.
The following is a write up with pictures of the products and procedure I used. Hopefully this can help someone else.
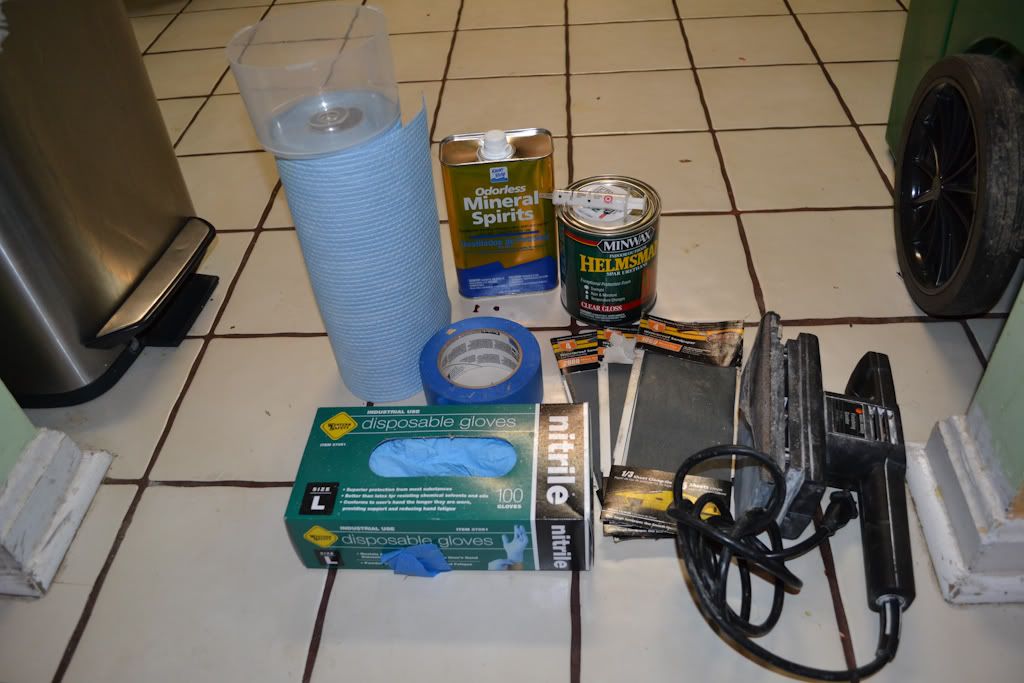
Sandpaper for Wet sanding : 1000, 1500 and 2000 grit.
Painters tape
Nitrile golves to protect your hand
Oderless Mineral Spirits Model # QKSP94005 / Store SKU # 200658 Home Depot Link
Minwax Helmsman UV Sealer Model # 63210 / Store SKU # 422541 Home Depot Link
An old drywall sander I found
A shop towel
Container to mix the UV sealer
measuring instrument for UV sealer mix
Not pictured - spray bottle for wet sanding.
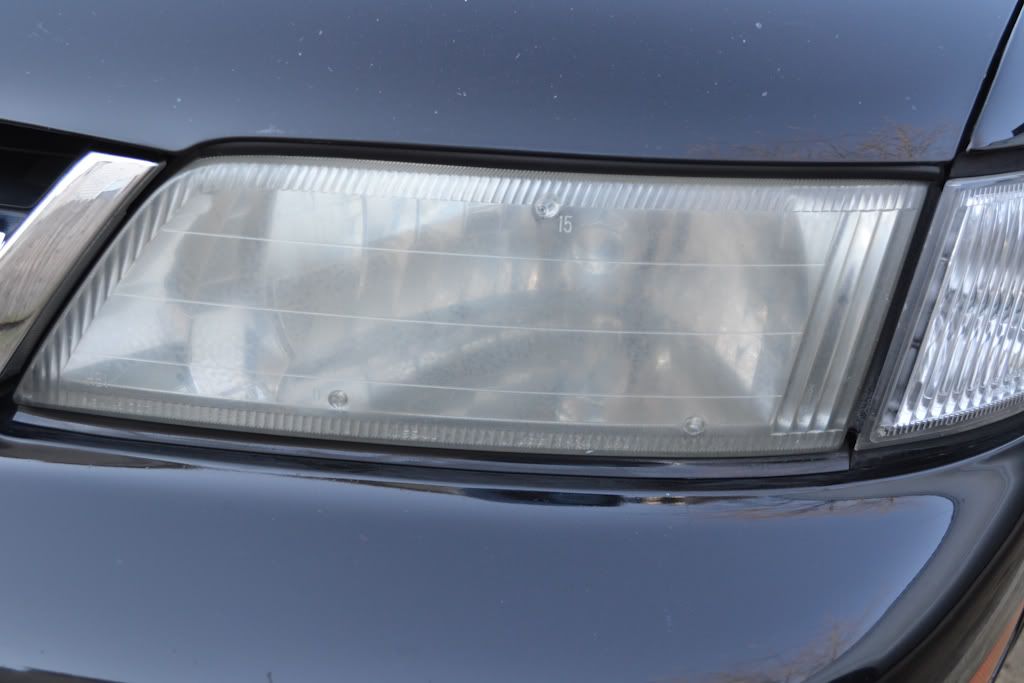
Before Pictures
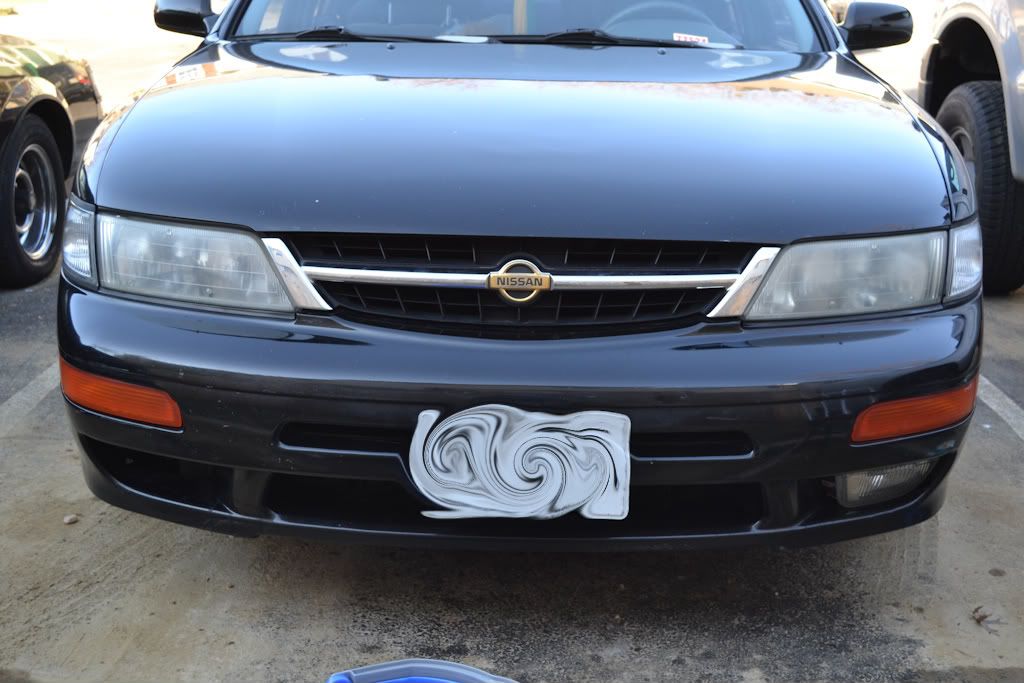
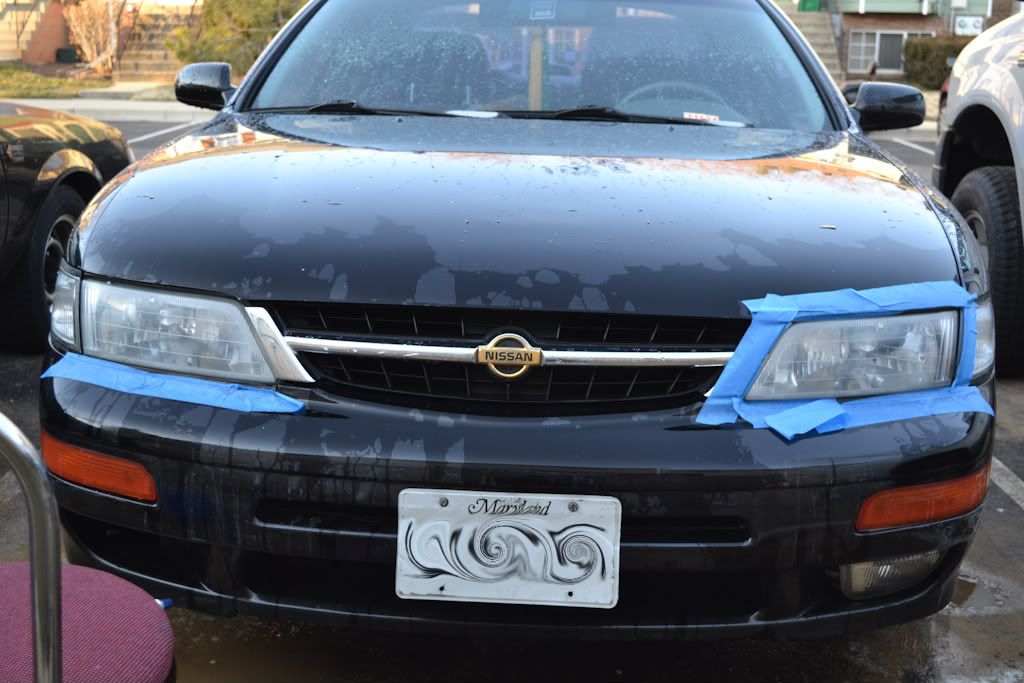
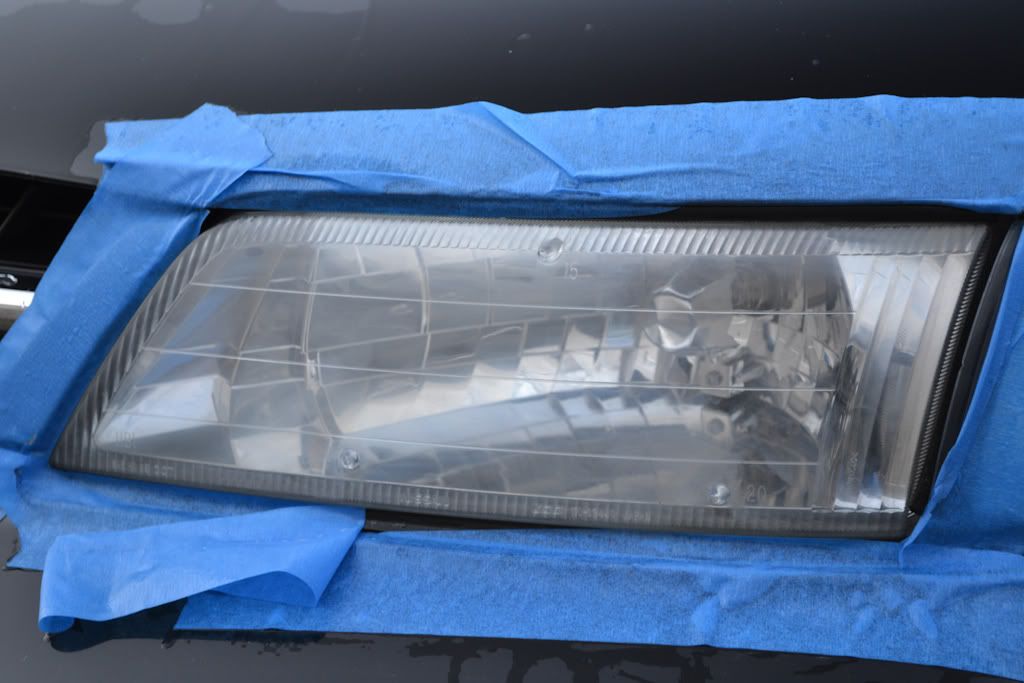
Wash the lights and tape off the areas you do not want the sandpaper to scratch.
After sanding with the 1000 grit, I got this:
Move on to the 1500 grit and got this result
2000 girt gets.....
Opps, gotta find those pictures.
Next step is to rinse and dry the lights off and prepare your UV treatment.
Since the sanding is removing the old protection from the elements and UV rays, you are now going to replace it. I found out about this method from another forum which pointed to yet another forum. The person who did this had some pictures a year adn a half later and the lights still looked the same.
Here we go.
Mix 1 part mineral spirits to 1 part Minwax helmsman sealer. I used a shop towel to gently "paint" the lens. Be careful not to let it run. If it does, clean it off with some of the mineral spirits and start again. When I do this to the 240sx, I'll use a 1" foam brush to apply the sealer.
UV sealer stage after 1 application.
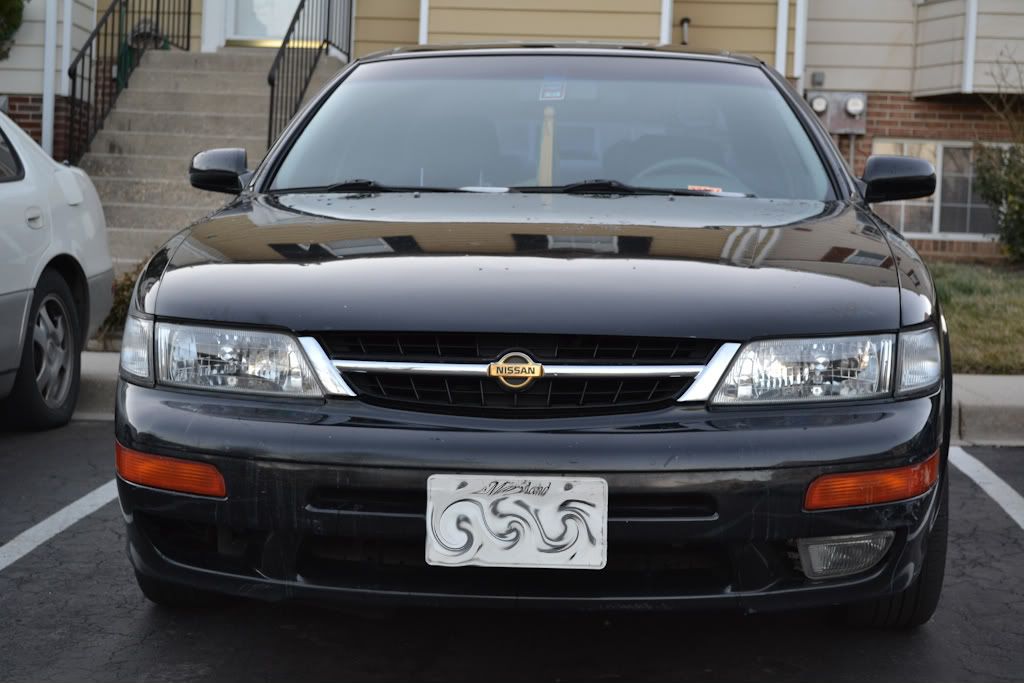
Took the car for a drive at night and there was a lot more light on the road than before.
The following is a write up with pictures of the products and procedure I used. Hopefully this can help someone else.
Sandpaper for Wet sanding : 1000, 1500 and 2000 grit.
Painters tape
Nitrile golves to protect your hand
Oderless Mineral Spirits Model # QKSP94005 / Store SKU # 200658 Home Depot Link
Minwax Helmsman UV Sealer Model # 63210 / Store SKU # 422541 Home Depot Link
An old drywall sander I found
A shop towel
Container to mix the UV sealer
measuring instrument for UV sealer mix
Not pictured - spray bottle for wet sanding.
Before Pictures
Wash the lights and tape off the areas you do not want the sandpaper to scratch.
After sanding with the 1000 grit, I got this:
Move on to the 1500 grit and got this result
2000 girt gets.....
Opps, gotta find those pictures.
Next step is to rinse and dry the lights off and prepare your UV treatment.
Since the sanding is removing the old protection from the elements and UV rays, you are now going to replace it. I found out about this method from another forum which pointed to yet another forum. The person who did this had some pictures a year adn a half later and the lights still looked the same.
Here we go.
Mix 1 part mineral spirits to 1 part Minwax helmsman sealer. I used a shop towel to gently "paint" the lens. Be careful not to let it run. If it does, clean it off with some of the mineral spirits and start again. When I do this to the 240sx, I'll use a 1" foam brush to apply the sealer.
UV sealer stage after 1 application.
Took the car for a drive at night and there was a lot more light on the road than before.
Last edited by maximus nismo; 08-25-2011 at 09:30 PM.

Thread
Thread Starter
Forum
Replies
Last Post
Dennis Twohy
1st & 2nd Generation Maxima (1981-1984 and 1985-1988)
0
10-01-2015 06:01 PM
MAXSE5SPD
Other For Sale/Wanted
2
08-23-2015 12:06 PM
YourLocalAsian
6th Generation Maxima (2004-2008)
3
08-17-2015 02:33 PM
soon2ownmax
6th Generation Maxima (2004-2008)
0
08-13-2015 02:19 PM