
Eibach Spring Install How to/DIY


Thread Starter
Senior Member
Joined: Oct 2011
Posts: 452
From: STL MO
Start with a set of Eibach Pro Springs

and a 2009-2012 Maxima

You will need a jack, 21mm impact or socket to remove the wheels, 18 mm socket and wrench, one allen wrench and i am unsure of the size. a spring compressor, an additional jack, a hammer, a flathead screwdriver...
I had the luxury of a lift for my lift. if you dont have a lift you can simply use a jack. put her up in the air, take off the wheels. i started in the back of the car because it is the easiest part of the job.
After removing the rear wheels you will need the 18mm wrench on the inside nut and another 18mm wrech on the outside bolt. losen and let the control arm drop

this is a view of the top

an impact comes in handy to speed up the process

you will need to jack up the control arm to get the bolt out of its place a little easier.
simply drop the control arm and pop out the old spring, here the springs are side by side. the eibach is on the left and factory is on the right.

Put the eibach in the existing spring location with the eibach lettering right side up

You may have to wiggle the bolt back into its place by adjusting the second jack under the control arm and lifting to the appropriate height until the bolt slides in. some coaxing with a hammer helps.
repeat this process for the other side of the vehicle. when the wheels are back on the proceed to the front of the car
remove your front wheels, raise the front of the car, pop your hood and remove the plastic componets on each side held by two plastic clips each
First when you have your wheel off, I removed this first with an 18mm socket wrench and set it safely out of harms way.

you must remove a brake line from the strut assembly that you simply pull from its housing. using a flathead screwdriver remove the other line connected to the strut assembly aswell. do not lose the metal tab that holds it in place.

in the photo above you will see two arrows. you must remove these two bolts to be able to drop the strut out of the wheel well. you will need a 18mm socket or impact and a adjustable wrench to hold the nut in place so it does not turn on you. after removing the brake lines from the housing and the additional line connected with the tab and removing all nuts and bolts connected to the strut you can move out of the wheel well into the top of the engine bay.
you will see four bolts on top of the strut assembly. the bolt on the tower bar is meaningless for this procedure. you can simply remove it.

remove the 3 silver bolts using a socket wrench to drop the strut from its housing

dont be alarmed, unless you have someone helping, the strut will fall out and when it is removed it will look like this

this is where a spring compressor comes in. if you do not have one, you can rent one from your local auto parts store. I was fortunate to have a machined spring compressor. this is tricky, you must use this with caution. this is very dangerous if not done correctly. compress the spring to remove the strut and replace with eibach spring

after compressing the spring
use a 18mm wrench to hold the nut on top of strut assembly
use a allen wrench to keep this bolt from spinning. I recommend an allen wrench that has a socket attatchment and using a socket wrench. after safely removing the nut, the assembly will come apart, you may remove the factory spring.
compress the eibach spring before attempting to install on the strut assembly
make sure to cup the new eibach spring to the bump stop on the bottom of the strut assembly.
tighten the nut completely on top of the strut assembly before decompressing the new spring.
here is a side by side comparison of the two springs

after you must instal the strut assembly in the reverse order.
it is the same for the other side.
here are some pics of it all done
if you have any questions, ask.
my first write up diy, i hope this helps
and a 2009-2012 Maxima
You will need a jack, 21mm impact or socket to remove the wheels, 18 mm socket and wrench, one allen wrench and i am unsure of the size. a spring compressor, an additional jack, a hammer, a flathead screwdriver...
I had the luxury of a lift for my lift. if you dont have a lift you can simply use a jack. put her up in the air, take off the wheels. i started in the back of the car because it is the easiest part of the job.
After removing the rear wheels you will need the 18mm wrench on the inside nut and another 18mm wrech on the outside bolt. losen and let the control arm drop
this is a view of the top
an impact comes in handy to speed up the process
you will need to jack up the control arm to get the bolt out of its place a little easier.
simply drop the control arm and pop out the old spring, here the springs are side by side. the eibach is on the left and factory is on the right.
Put the eibach in the existing spring location with the eibach lettering right side up
You may have to wiggle the bolt back into its place by adjusting the second jack under the control arm and lifting to the appropriate height until the bolt slides in. some coaxing with a hammer helps.
repeat this process for the other side of the vehicle. when the wheels are back on the proceed to the front of the car
remove your front wheels, raise the front of the car, pop your hood and remove the plastic componets on each side held by two plastic clips each
First when you have your wheel off, I removed this first with an 18mm socket wrench and set it safely out of harms way.
you must remove a brake line from the strut assembly that you simply pull from its housing. using a flathead screwdriver remove the other line connected to the strut assembly aswell. do not lose the metal tab that holds it in place.
in the photo above you will see two arrows. you must remove these two bolts to be able to drop the strut out of the wheel well. you will need a 18mm socket or impact and a adjustable wrench to hold the nut in place so it does not turn on you. after removing the brake lines from the housing and the additional line connected with the tab and removing all nuts and bolts connected to the strut you can move out of the wheel well into the top of the engine bay.
you will see four bolts on top of the strut assembly. the bolt on the tower bar is meaningless for this procedure. you can simply remove it.
remove the 3 silver bolts using a socket wrench to drop the strut from its housing
dont be alarmed, unless you have someone helping, the strut will fall out and when it is removed it will look like this
this is where a spring compressor comes in. if you do not have one, you can rent one from your local auto parts store. I was fortunate to have a machined spring compressor. this is tricky, you must use this with caution. this is very dangerous if not done correctly. compress the spring to remove the strut and replace with eibach spring
after compressing the spring
use a 18mm wrench to hold the nut on top of strut assembly
use a allen wrench to keep this bolt from spinning. I recommend an allen wrench that has a socket attatchment and using a socket wrench. after safely removing the nut, the assembly will come apart, you may remove the factory spring.
compress the eibach spring before attempting to install on the strut assembly
make sure to cup the new eibach spring to the bump stop on the bottom of the strut assembly.
tighten the nut completely on top of the strut assembly before decompressing the new spring.
here is a side by side comparison of the two springs
after you must instal the strut assembly in the reverse order.
it is the same for the other side.
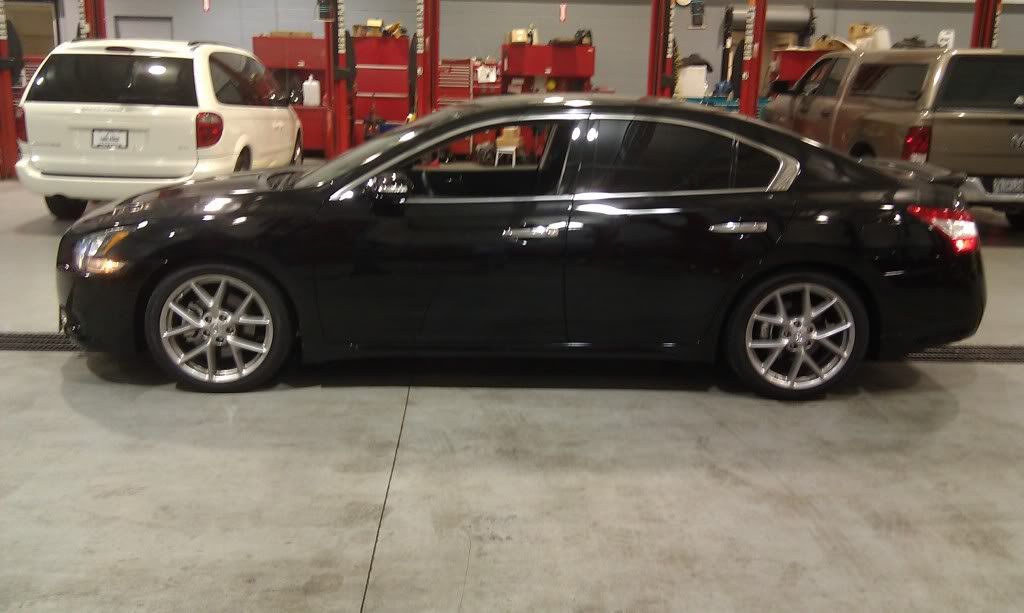
here are some pics of it all done
if you have any questions, ask.
my first write up diy, i hope this helps
Last edited by Stlbluzoo11; Nov 2, 2011 at 11:50 PM.
Thread Starter
Senior Member
Joined: Oct 2011
Posts: 452
From: STL MO
after 20 minutes of sitting

I also relocated the front license plate, didnt like the holes in the bumper, but black plastic tabs from autozone do the trick for $2.29/4 tabs

Coop helped me out a ton with the install, friends make it go way faster

I also debadged my rear "maxima" emblem for that cleaned up a$$

I also relocated the front license plate, didnt like the holes in the bumper, but black plastic tabs from autozone do the trick for $2.29/4 tabs
Coop helped me out a ton with the install, friends make it go way faster
I also debadged my rear "maxima" emblem for that cleaned up a$$


Member
Joined: Sep 2011
Posts: 179
Wow, thats a awsome write-up exactly what I was looking for. It's not as hard as I expected it to be at all. Thanx a lot.
Actually I did have a question about the front spring install, So after you remove the Strut asm, You have to hold the allen wrench fitting while removing the bolt that holds everything in place right? Can you loosen the nut a little to get it started while the strut asm is still bolted to the strut tower?
Actually I did have a question about the front spring install, So after you remove the Strut asm, You have to hold the allen wrench fitting while removing the bolt that holds everything in place right? Can you loosen the nut a little to get it started while the strut asm is still bolted to the strut tower?
Last edited by seesole; Nov 3, 2011 at 12:37 PM.
Thread Starter
Senior Member
Joined: Oct 2011
Posts: 452
From: STL MO
Wow, thats a awsome write-up exactly what I was looking for. It's not as hard as I expected it to be at all. Thanx a lot.
Actually I did have a question about the front spring install, So after you remove the Strut asm, You have to hold the allen wrench fitting while removing the bolt that holds everything in place right? Can you loosen the nut a little to get it started while the strut asm is still bolted to the strut tower?
Actually I did have a question about the front spring install, So after you remove the Strut asm, You have to hold the allen wrench fitting while removing the bolt that holds everything in place right? Can you loosen the nut a little to get it started while the strut asm is still bolted to the strut tower?


Junior Member
Joined: Oct 2010
Posts: 51
From: California
Thread Starter
Senior Member
Joined: Oct 2011
Posts: 452
From: STL MO
Thread Starter
Senior Member
Joined: Oct 2011
Posts: 452
From: STL MO

Thread Starter
Senior Member
Joined: Oct 2011
Posts: 452
From: STL MO
Thread Starter
Senior Member
Joined: Oct 2011
Posts: 452
From: STL MO
From my experience with tein coilovers, the eibach ride is softer, but I had the tein's slammed all the way down. How you should ride on coils. If you have the money buy coilovers. They are worth every penny. I got my moneys worth out of my eibach springs too.

you must compress the spring first. you must use an allen wrench to keep the nut from spinning with the bolt. if you losen that nut you will risk the nut shooting off the strut asm like a bullet. you must compress the spring before attempting to take off the nut. you would get hurt. that whole top peice would fly off at high speed


Thread Starter
Senior Member
Joined: Oct 2011
Posts: 452
From: STL MO
I see what he is saying, He was saying cant you just hit it with a quick impact or socket just to loosen it up while the assembly is still on the car. I am wondering the same thing because I always did this with my 5th gen and when I get the assembly off the car, I compress and then the bolt is already loose and will come right off. Im confused as to where the allen wrench comes into play.


Senior Member
Joined: Oct 2011
Posts: 552
From: Scottsdale,AZ
I have it as well in the front left assembly...it was the last corner to be done so i'm wondering if i just wasn't paying attention to detail when i put it back together. Only hear it when turning left.


Joined: Dec 2011
Posts: 17
From: New Jersey
djfrestyl did my eibach's this am- no issues. Really straight forward. Looks much much better. can't wait to rip thru some corners. (on the 5.0 in the background it did need new bumpstops, and strut mounts, and camber/caster plates...but it pulls 1.08g's on the road course  )
)


)
People who installed their own springs, how did you go about getting the end link an everything in the front to line back up?? I have the rear done easy and now were trying to bolt everything back and it's being a pita!

Member
Joined: Oct 2011
Posts: 200
From: Miami, FL
i did mines this saturday.. but i also have racingling endlinks and they lines up correctly... the way i did it was, i put the strut in, screwed the bolts in the strut tower to hold it in place, then went ahead nad re attached everything else.
Thank for the info. I just got them done. I just had one side jacked up and the other side still on the ground and hit had tension in the end link. Everything feels and looks great. I just have a slight clunk when I turn the wheel sharp. Any ideas on what it could be??

Thread Starter
Senior Member
Joined: Oct 2011
Posts: 452
From: STL MO
The white max looks great on the eibachs. Good stuff 7th gen fam. Keep the pics rolling in! I did my drop on a lift up here at work. I really didnt run into any problems with the car up in the air. I love the way mine looks with the drop and stillen lip on 19's. The factory rims look great