
Miami's Turn for a Build


 10-26-2008, 09:56 PM
#42
 10-27-2008, 07:00 AM
#44
i was impressed with the build, but i think you are straight crazy building it in the car...
but then it saves you from having to drop our pos 5 spd so i can kinda see why.
I did a 350 small block once while it was still in the truck, we learned never to do it like that again ( and wear long sleeves while pouring alcohol into a carb when trying to get it started.)
but then it saves you from having to drop our pos 5 spd so i can kinda see why.
I did a 350 small block once while it was still in the truck, we learned never to do it like that again ( and wear long sleeves while pouring alcohol into a carb when trying to get it started.)

 10-27-2008, 11:22 AM
#48
Thanks, trying! I need the car ASAP lol
Thanks for the compliment  lol
lol
Yea I've done the same with brake parts cleaner (who needs starter fluid? LOL) That flame was quite beautiful. It was also on a 350, an old Edelbrock crate motor. A thing of beauty lol
Thank you! LOL
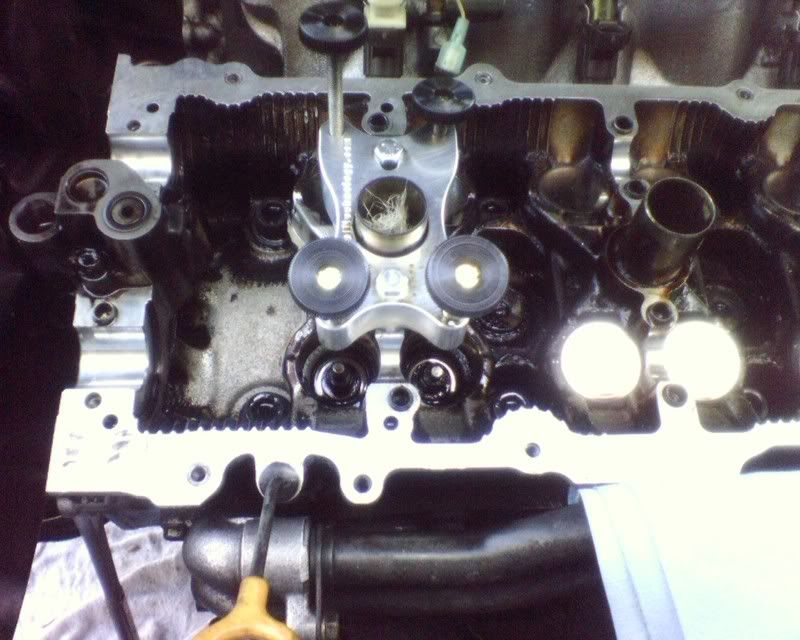
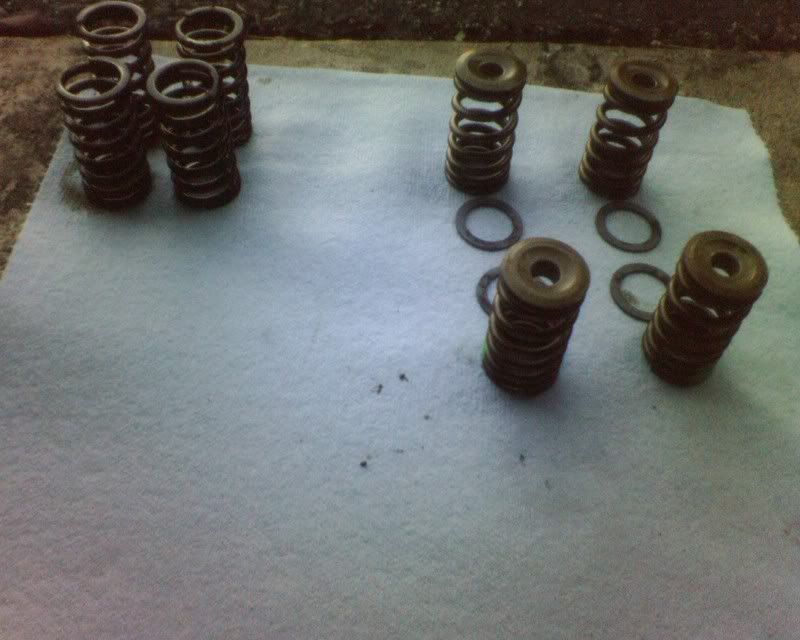
So far, the front head has all new valve springs and extra valve seats
i was impressed with the build, but i think you are straight crazy building it in the car...
but then it saves you from having to drop our pos 5 spd so i can kinda see why.
I did a 350 small block once while it was still in the truck, we learned never to do it like that again ( and wear long sleeves while pouring alcohol into a carb when trying to get it started.)
but then it saves you from having to drop our pos 5 spd so i can kinda see why.
I did a 350 small block once while it was still in the truck, we learned never to do it like that again ( and wear long sleeves while pouring alcohol into a carb when trying to get it started.)
lolYea I've done the same with brake parts cleaner (who needs starter fluid? LOL) That flame was quite beautiful. It was also on a 350, an old Edelbrock crate motor. A thing of beauty lol
Thank you! LOL
So far, the front head has all new valve springs and extra valve seats

 What is keeping them intact?
10-27-2008, 12:42 PM
What is keeping them intact?
10-27-2008, 12:42 PM
#53
10-27-2008, 05:40 PM
#55
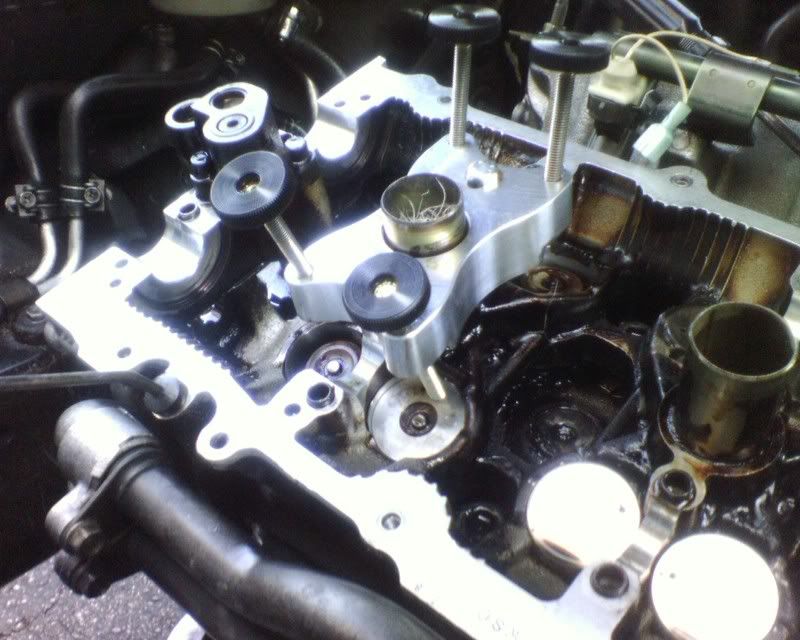
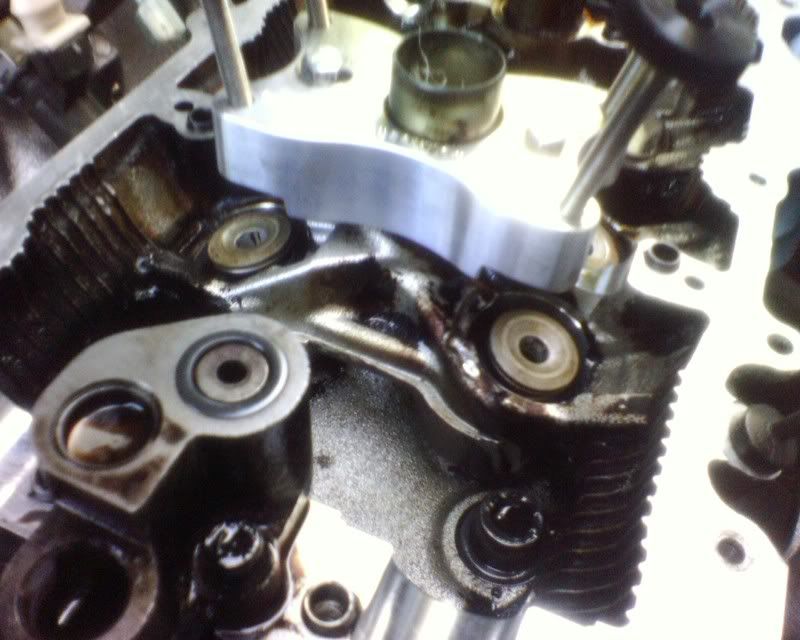
Drop piston to BDC, drop as much rope (or a shoe lace as well) in there as much as will fit, then bring the piston up to TDC. That simple
 10-27-2008, 05:43 PM
#56
Learned a long time ago that sometimes it's easiest and best to go ultra low-tech, rather than relying on shop air, or expensive/single purpose tools.
Always surprises people what some basic, innocuous stuff and a little ingenuity can accomplish.
10-27-2008, 08:26 PM
#57
werd. So well, report for today!
All valve springs have been swapped out to HR springs. All of them are sitting 1mm taller with the extra seat.
Tomorrow unfortunately I'm pulling a double shift, so from 7am to 3pm, then 3pm to 11pm (siiiiigh), so I will not be able to do anything on the car.
Weds I will do the ARP rod bolts, torque down the cams, and get started putting the timing stuff back on :-D.

 10-28-2008, 07:18 AM
#60
Supporting Maxima.org Member

iTrader: (29)
Join Date: Oct 2005
Location: Middleboro/Carver, Ma
Posts: 4,572
Thanks for the DRF's 
And yeah, I've used the shop air method doing valve seals on other cars, and ya know what.... That **** is scary! Every time I was like "All it takes is for a little failure or the compressor to not kick on one of those times and I'm fu*^ed"
And yeah, I've used the shop air method doing valve seals on other cars, and ya know what.... That **** is scary! Every time I was like "All it takes is for a little failure or the compressor to not kick on one of those times and I'm fu*^ed"
 10-28-2008, 07:32 AM
#62

I still dont quite understand how the rope method works to keep the valves in. If they do fall, you just have to remove the head at that point, right? Its not like you lose anything in a deep bottomless pit or anything. yeah?
 10-30-2008, 01:47 PM
#64
Thanks all! Today I was able to do work on it.
- Cams are torqued down.
- ARP rod bolts are installed
Right now I'm going to reinstall the rear timing cover and the secondary timing chains. I still need to go drill my primary chain intake cam sproksets. Soooo, I MAY just be finishing this tomorrow afternoon
Videos will possibly be made
- Cams are torqued down.
- ARP rod bolts are installed
Right now I'm going to reinstall the rear timing cover and the secondary timing chains. I still need to go drill my primary chain intake cam sproksets. Soooo, I MAY just be finishing this tomorrow afternoon
Videos will possibly be made
 10-30-2008, 05:53 PM
#66

Ok! I was not able to install the stuff, my girl came home early so you know how that goes. I was able to polish the rear timing cover and prep it for installation, so I will continue off on that tomorrow :-D
so far so good!
10-30-2008, 06:08 PM
#67
oh snap!!! its Mark! winner of the "baldest tires at the So. Florida NWP Engineering meet" trophy!!!!
Ok! I was not able to install the stuff, my girl came home early so you know how that goes. I was able to polish the rear timing cover and prep it for installation, so I will continue off on that tomorrow :-D
so far so good!
Ok! I was not able to install the stuff, my girl came home early so you know how that goes. I was able to polish the rear timing cover and prep it for installation, so I will continue off on that tomorrow :-D
so far so good!
10-30-2008, 06:45 PM
#68
oh snap!!! its Mark! winner of the "baldest tires at the So. Florida NWP Engineering meet" trophy!!!!
Ok! I was not able to install the stuff, my girl came home early so you know how that goes. I was able to polish the rear timing cover and prep it for installation, so I will continue off on that tomorrow :-D
so far so good!
Ok! I was not able to install the stuff, my girl came home early so you know how that goes. I was able to polish the rear timing cover and prep it for installation, so I will continue off on that tomorrow :-D
so far so good!
dont worry when im finish ill make a trip to SW and see wats up
 10-31-2008, 06:59 PM
#70
OK update for today!
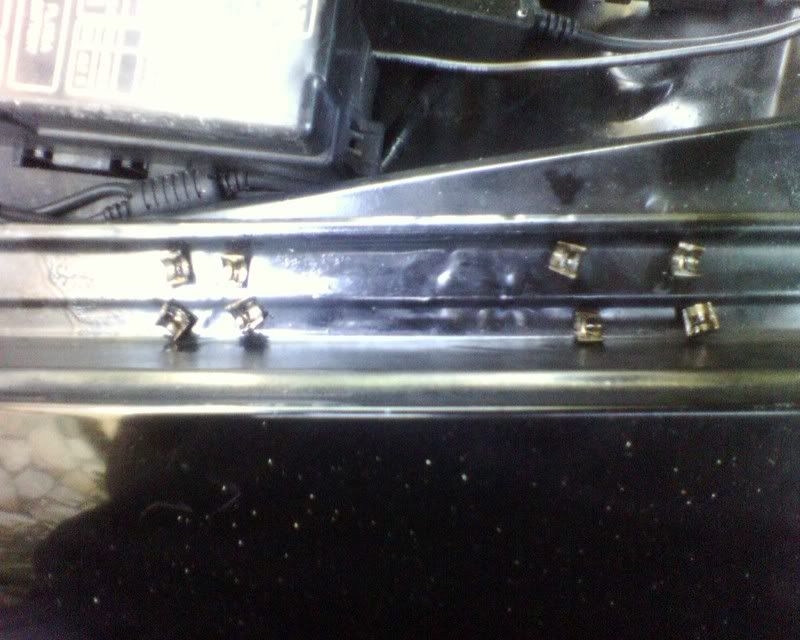
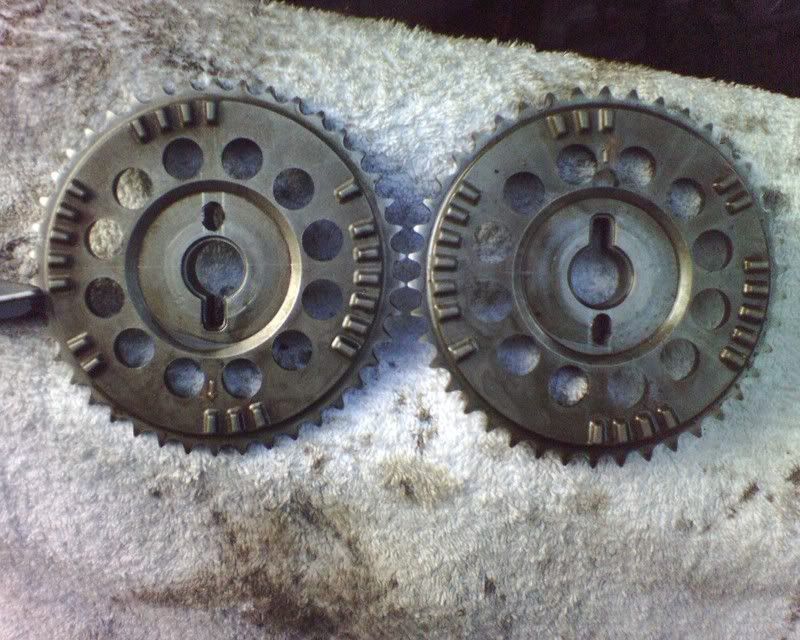
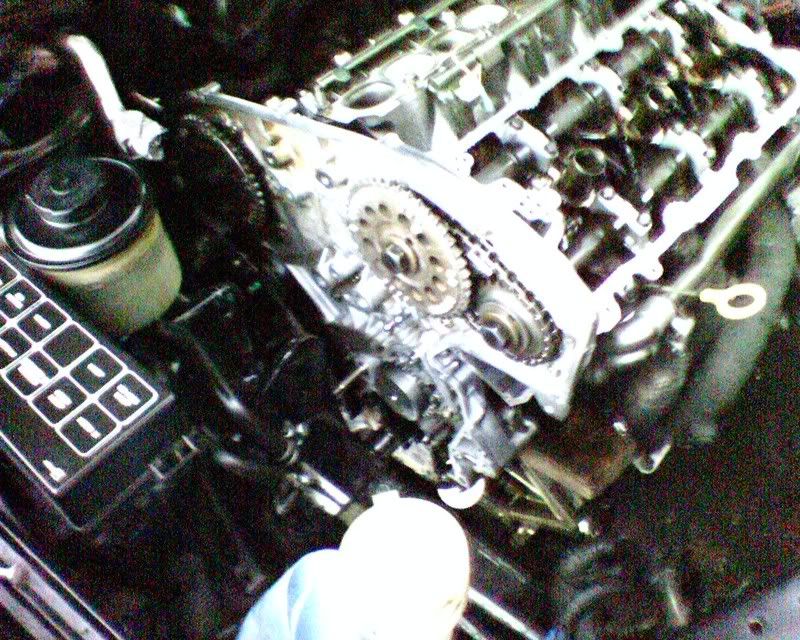
I found a place super close by with a drill press. I drilled out the dowel pin holes on the big sprockets (I just flipped the secondaries, no biggie with that). It turned out that I drilled the holes too far out, so streetzlegend helped me drill em back towards the inside to fit good... it worked. This is what they looked like at the end
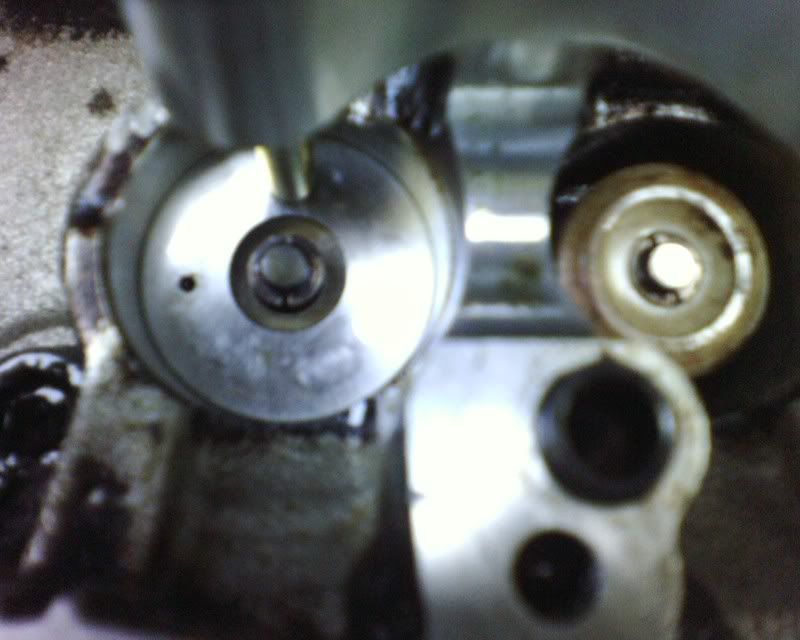
Ok so once this was done, the next step was to put on the newly polished rear timing cover. So I did that... Little did I notice, AFTER torquing down all 25 bolts, that I should haev put the plunger of the front cylinder head tensioner on prior to putting the cover on... soooo I tried to put it on, and of course I did not have enough clearance. I noticed on the rear head that once loose, the tensioner comes out only about 1/4" below the level of the "catch groove"... so me being me got the grinder and cut the sucker a bit until it fit in LOL!!!!!
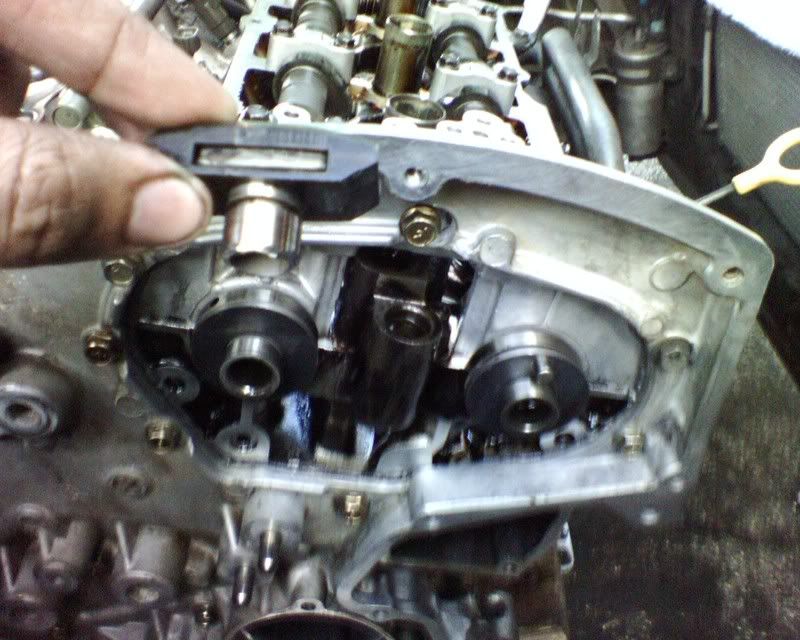
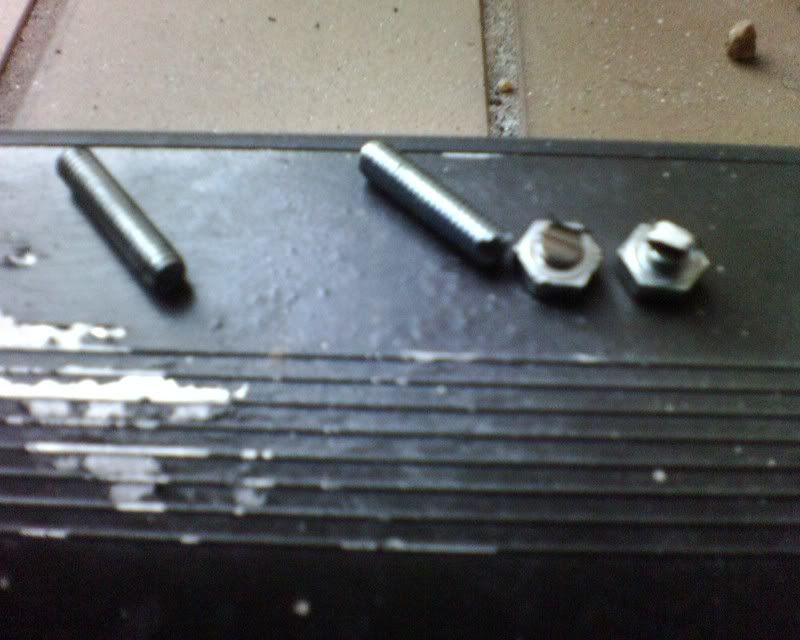
Another thing- I looked in ACE and also in Home Depot, NO ONE had a metric dowel that I needed (for what I needed, it had to have been an inch long 6mm dowel). So What did I do? I got inch long 6mm BOLTS and cut off the hex heads... they worked PERFECT as dowel :-D
At the end of the day, this is what it looked like after torquing down the cam bolts and stuff :-D
I SHOULD have finished this today, however, I had to stand in line for just over 2 hrs because I went to vote in the morning. So.. ALMOST THERE!!!!!!!!!!
W00H00!!!!!!!!!!!!!
I found a place super close by with a drill press. I drilled out the dowel pin holes on the big sprockets (I just flipped the secondaries, no biggie with that). It turned out that I drilled the holes too far out, so streetzlegend helped me drill em back towards the inside to fit good... it worked. This is what they looked like at the end
Ok so once this was done, the next step was to put on the newly polished rear timing cover. So I did that... Little did I notice, AFTER torquing down all 25 bolts, that I should haev put the plunger of the front cylinder head tensioner on prior to putting the cover on... soooo I tried to put it on, and of course I did not have enough clearance. I noticed on the rear head that once loose, the tensioner comes out only about 1/4" below the level of the "catch groove"... so me being me got the grinder and cut the sucker a bit until it fit in LOL!!!!!
Another thing- I looked in ACE and also in Home Depot, NO ONE had a metric dowel that I needed (for what I needed, it had to have been an inch long 6mm dowel). So What did I do? I got inch long 6mm BOLTS and cut off the hex heads... they worked PERFECT as dowel :-D
At the end of the day, this is what it looked like after torquing down the cam bolts and stuff :-D
I SHOULD have finished this today, however, I had to stand in line for just over 2 hrs because I went to vote in the morning. So.. ALMOST THERE!!!!!!!!!!
W00H00!!!!!!!!!!!!!
Last edited by 95BLKMAX; 10-31-2008 at 07:06 PM.
11-01-2008, 08:18 AM
#72

nice, now after all this is done, eventually youll go back to boost i hope. use lines with fittings, and forget about leaks on the turbo setup. or drop a 150 shot and youll be running disgusting. call me dude looks good.
11-01-2008, 09:48 AM
#73
Supporting Maxima.org Member
iTrader: (29)
Join Date: Oct 2005
Location: Middleboro/Carver, Ma
Posts: 4,572
hahaha, after you make that mistake twice you won't do it ever again! Make sure you clean out the bolt holes and tips of the bolts good now, it's a time consuming pita sitting there trying to fish those little chunks out with a pick but if you don't youll be finding threaded chunks later or the tourqe wrench will slip early and you'll regret it. (Edit: I know I'm too late but others might find this helpful, good job and it's coming along nicely, don't forget to use a new tensioner and submerge that ***** while priming it, but I know you know all of this)
Last edited by KRRZ350; 11-01-2008 at 09:50 AM.
11-01-2008, 11:28 AM
#74
hahaha, after you make that mistake twice you won't do it ever again! Make sure you clean out the bolt holes and tips of the bolts good now, it's a time consuming pita sitting there trying to fish those little chunks out with a pick but if you don't youll be finding threaded chunks later or the tourqe wrench will slip early and you'll regret it. (Edit: I know I'm too late but others might find this helpful, good job and it's coming along nicely, don't forget to use a new tensioner and submerge that ***** while priming it, but I know you know all of this)
11-01-2008, 11:37 AM
#75
Report for today- I got called into work
Sooo
- Primary chain is on and done with
- Outer timing cover is on
- Both valve covers are on
- CVCT solenoids are on
- Coils are on
- Timing cover motor mount is on
I guess it will have to be finished tomorrow. For now, off to make some money!
Sooo
- Primary chain is on and done with
- Outer timing cover is on
- Both valve covers are on
- CVCT solenoids are on
- Coils are on
- Timing cover motor mount is on
I guess it will have to be finished tomorrow. For now, off to make some money!
 11-02-2008, 12:19 PM
#77
dont hate luke! I work with what I have available, LOL
ITS DONE!!!!!!!!!!!!!!!!!!!!!!!!!!!!!!!
SHE RUNS! Slightly loppy idle, deep as hell though. Changed the tone of the motor to a deeper tone for sure, I can tell even at idle. Drove around but I cant really say of any difference, runs fine. I had 2 extra people in the car so I cant compare.
Im going to work now (highway!) so I'll bring back home my impressions around midnight.
Werd!
One more for the SW