

Another 3.5 swap thread


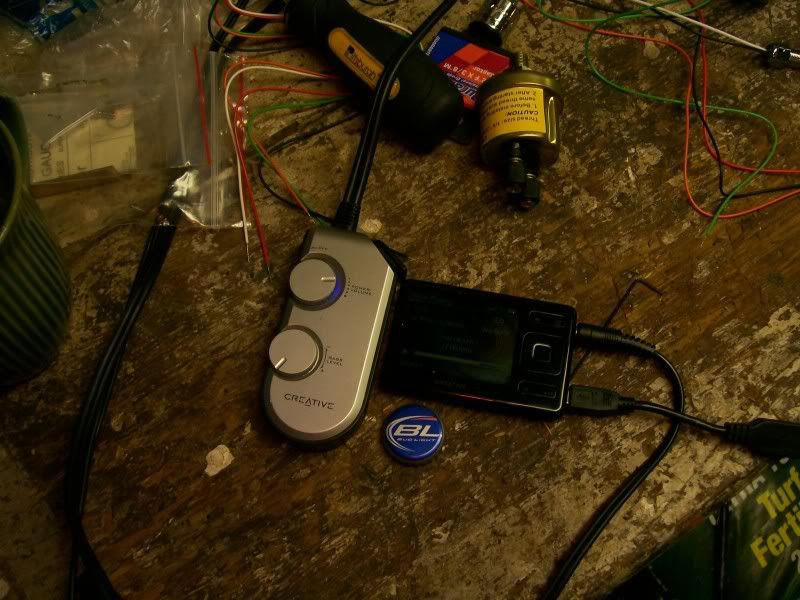
gotta have something to listen to and drink lol:
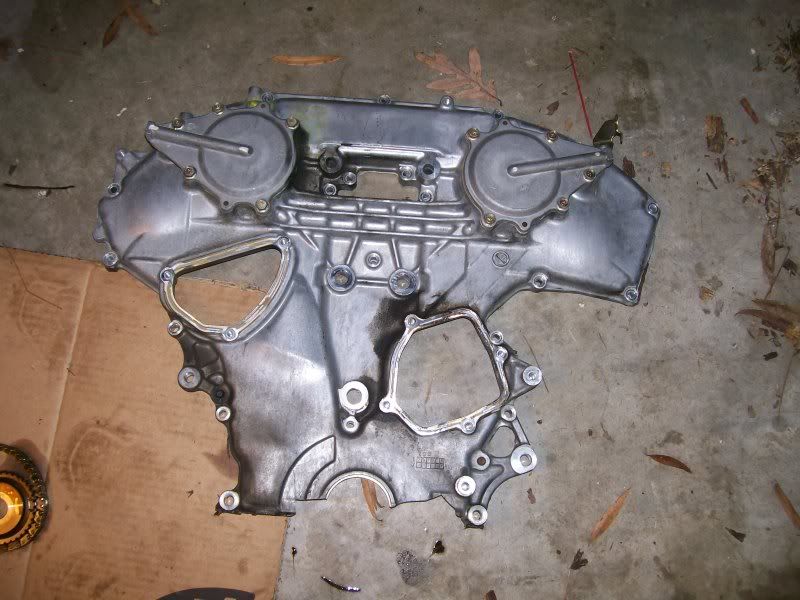
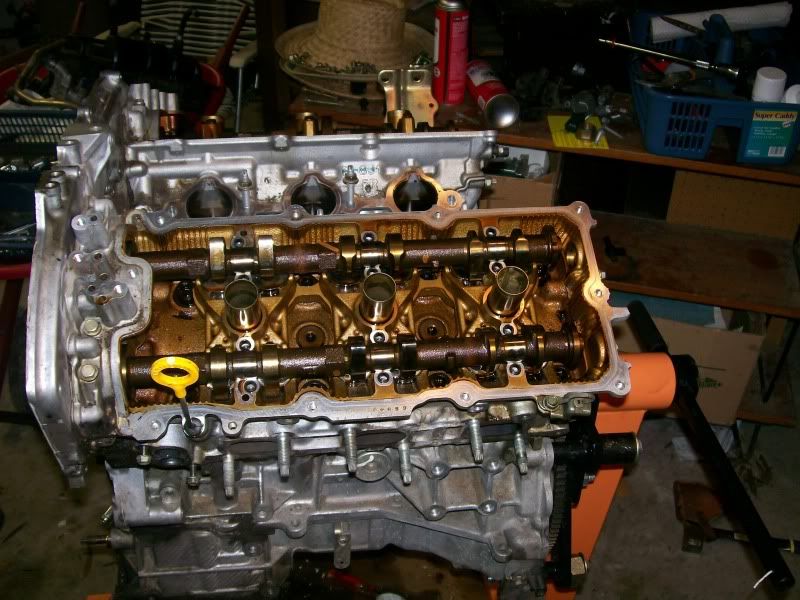
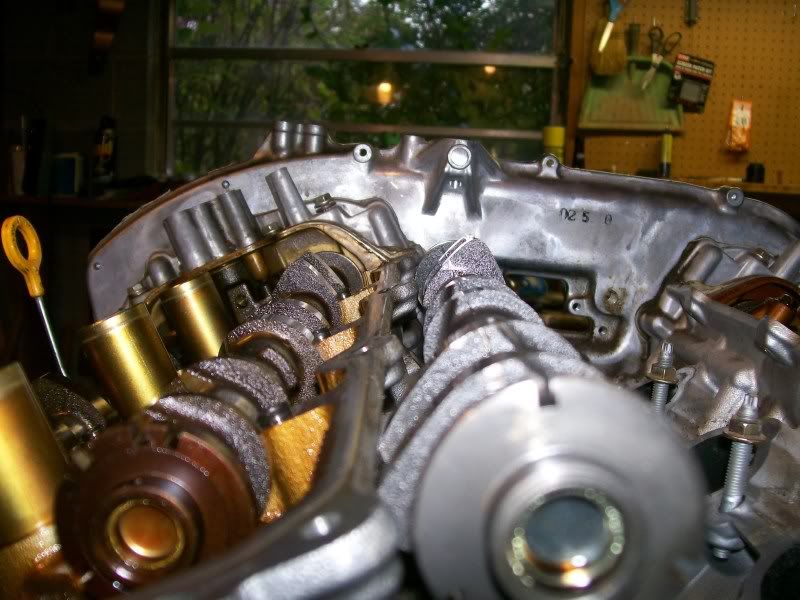
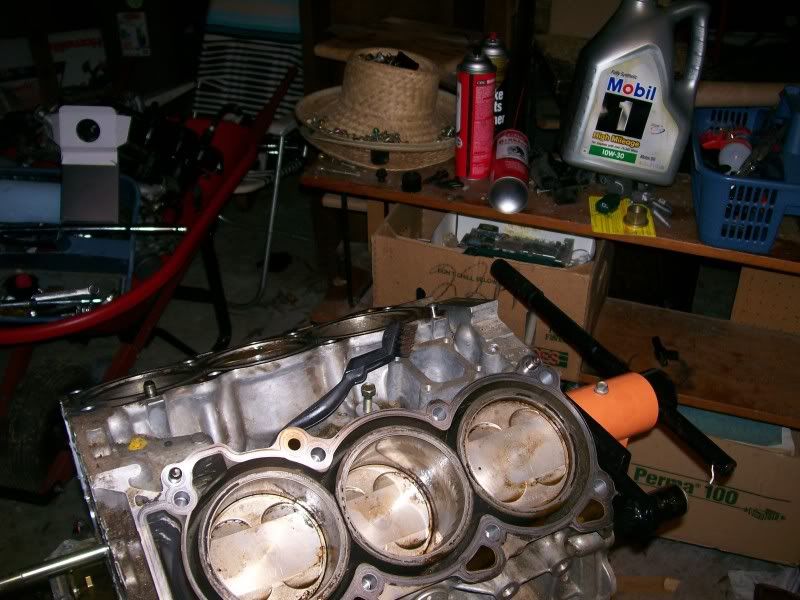
getting the timing cover off was the first headache:
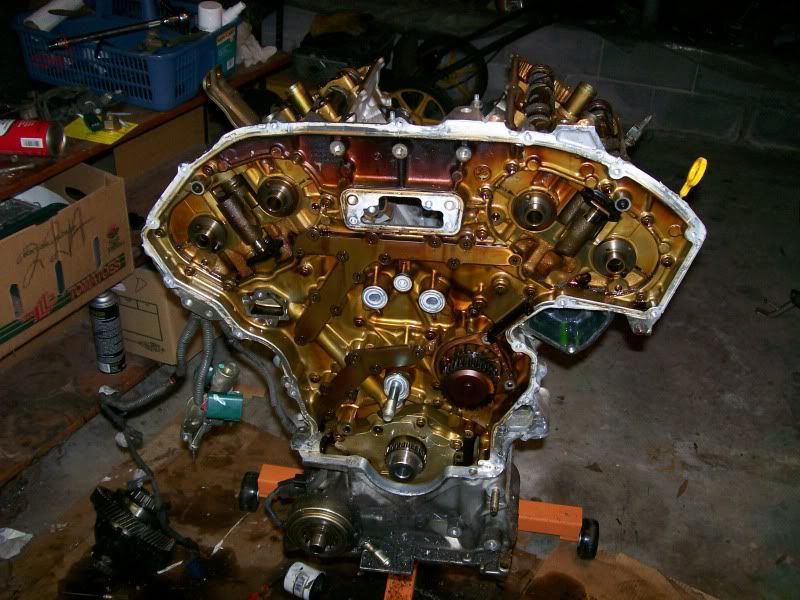
anything look wrong here:
take a second look
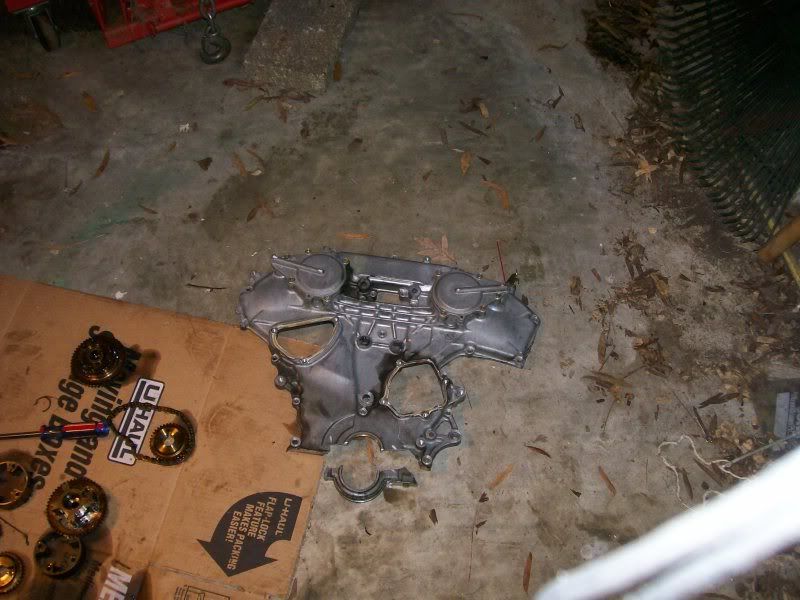
apparently there were 2 bolts that come from inside the oil pan, yes i have a FSM i skipped most of the oil pan stuff thou lol, good thing i dont need that timing cover
getting the timing cover off was the first headache:
anything look wrong here:
take a second look
apparently there were 2 bolts that come from inside the oil pan, yes i have a FSM i skipped most of the oil pan stuff thou lol, good thing i dont need that timing cover
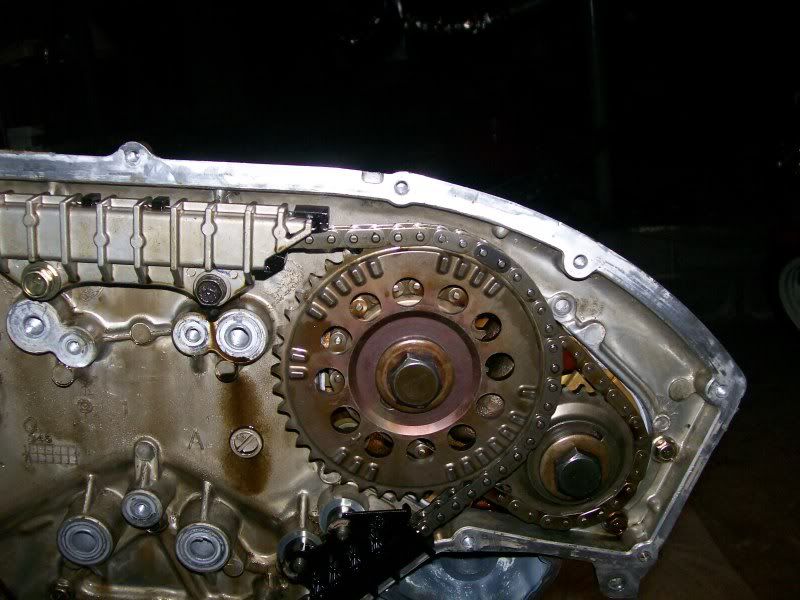
more stuff im glad i dont need, CVTC mechanism, the FSM said not to take it apart i pulled on it to get the cam gear off and well u can see what happened:
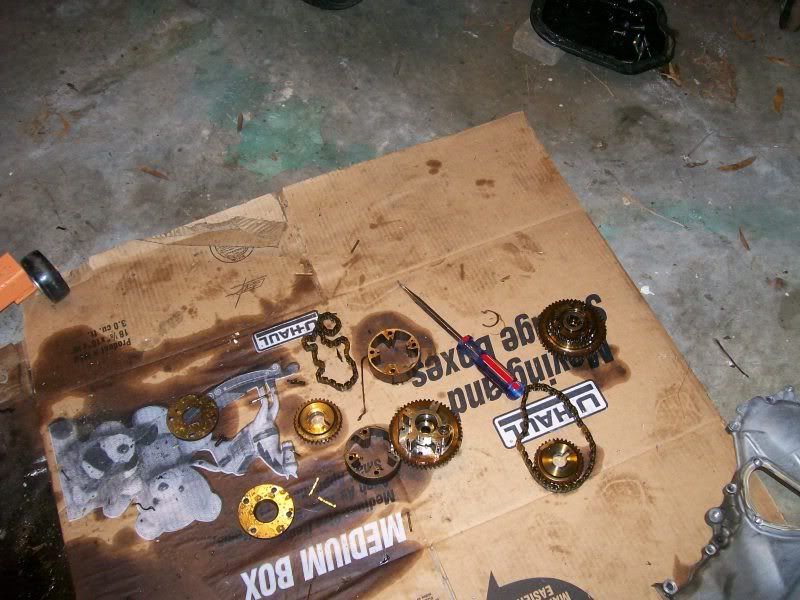
until i decide to get up and go buy a deep socket 10mm we will just have to deal with these for comparison between 350Z rev-up cams and the normal DE cams, when u look at them its quite obvious the rev ups have quite a bit more lift, and u can see where my 10mm wouldnt fit lol:
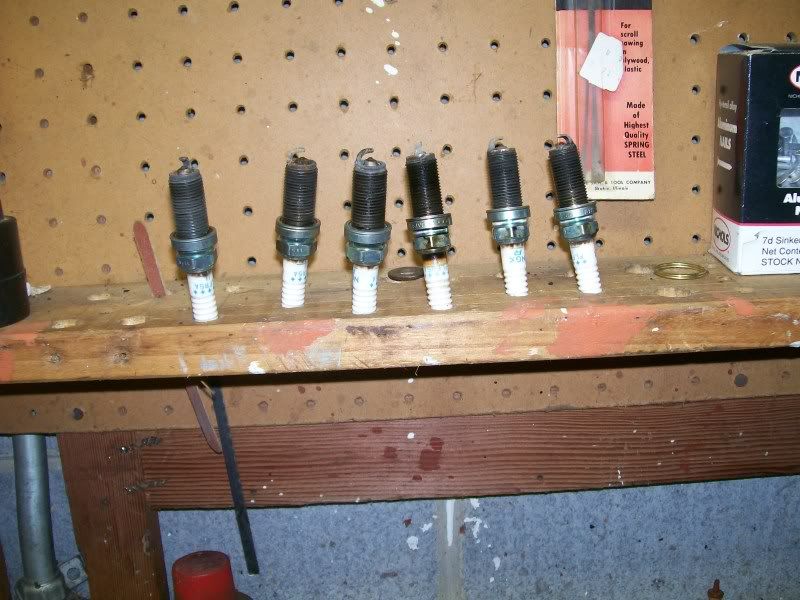
another thing that has concerned me alittle is the spark plugs that came out, not only does it look like they were long over due to be changed but im hoping this is just condensation that built up because the motor was sitting for a little while but the tip of every spark plug was wet, it was water not oil:
until i decide to get up and go buy a deep socket 10mm we will just have to deal with these for comparison between 350Z rev-up cams and the normal DE cams, when u look at them its quite obvious the rev ups have quite a bit more lift, and u can see where my 10mm wouldnt fit lol:
another thing that has concerned me alittle is the spark plugs that came out, not only does it look like they were long over due to be changed but im hoping this is just condensation that built up because the motor was sitting for a little while but the tip of every spark plug was wet, it was water not oil:
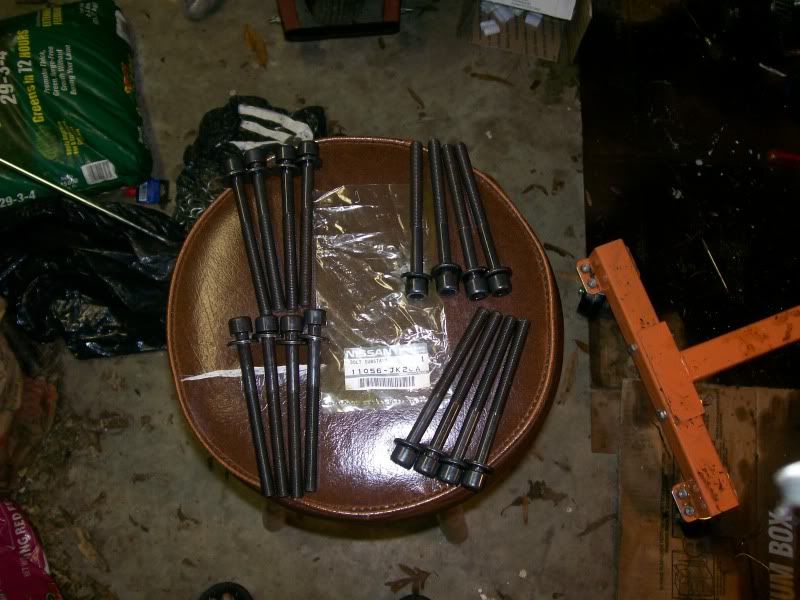
The mail man brought my HR headstuds:
test fitting the cam spacers, ok so what needs to be redrilled?

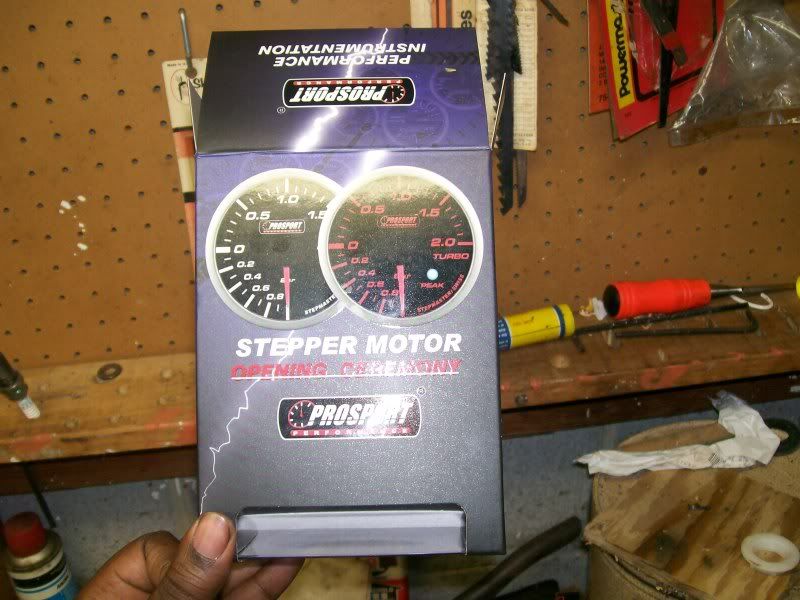
gauges came in aswell, oil press&temp and an AFR just to keep an eye on on it until i can buy an emanage or something of that sort to tune on.
test fitting the cam spacers, ok so what needs to be redrilled?
gauges came in aswell, oil press&temp and an AFR just to keep an eye on on it until i can buy an emanage or something of that sort to tune on.
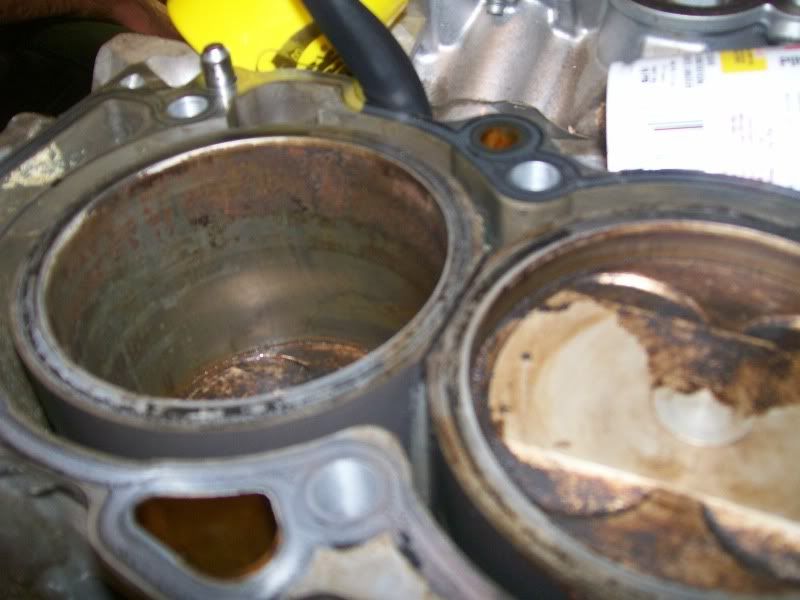
k got a question because i hope i didnt pull this thing apart for nothing, the 3.5 i got had been sitting idle for a while 3-4 months, very light rust on the cylinder walls, so what happens now, i know poeple let there car sit for a couple of months and fire it up and start driving it again and im hoping this is the case u can never be too careful, pictures will be coming soon
Cadaver was over earlier and he also looked at it and we started turn the motor over at first it was alittle coarse and rough but after one full turn it started moving smoothly, alot of the crap(it was primarly at the top of the cylinder wall) was pushed to the top of the motor and easily wiped off,
the top of the cylinder wall is still alittle rough much much better than before but i think it can be scrubed off, im not looking forward to take it to a machine shop and want to avoid that if i can money is very very tight.
the top of the cylinder wall is still alittle rough much much better than before but i think it can be scrubed off, im not looking forward to take it to a machine shop and want to avoid that if i can money is very very tight.
k got a question because i hope i didnt pull this thing apart for nothing, the 3.5 i got had been sitting idle for a while 3-4 months, very light rust on the cylinder walls, so what happens now, i know poeple let there car sit for a couple of months and fire it up and start driving it again and im hoping this is the case u can never be too careful, pictures will be coming soon
Also, it's ok for engines to sit for a while. The problem is that when they are first started, you will get top end rattle. Since you are tearing into this motor, LIBERALLY use Engine Assembly Lube. There's no alternative. The FSM says to use oil, but that's a joke.
Here's my favorite. Very sticky.
http://www.permatex.com/products/Aut...embly_Lube.htm
You can find it at some auto parts stores. I found it on the bottom shelf at Advance Auto Parts where you find Permatex products. Apply it to every surface where there is metal to metal contact, such as, cam lobes and lifters, the entire timing chain and all guides and tensioners, and valve stems and guides. You can't apply too much of the stuff. I'm not sure how deep you are going into the engine.
When I first cranked up my engine, I didn't get the slightest hint of rattle. It fired up quietly the very first time. It's the way it should be.

yea, this is what i found:
this is what it looks like now, i need to get some close ups:
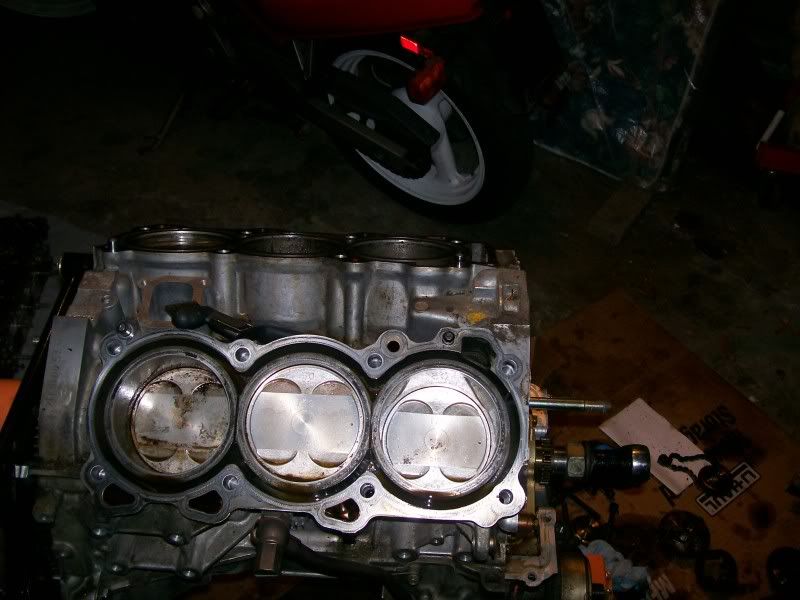
just have to clean up the pistons some more but cleaned up both sides and coated it with some oil and its turning over extremely fluid, but the only way i will be able to tell is when i turn on the car and drive it for a couple of weeks to see if anything is wrong; oil burn off.
but if it does go give me problem i will find another 3.5 swap it in then maybe bore and stroke this one turn it into a project, im thinking a nice round number 4.2L sounds good.
this is what it looks like now, i need to get some close ups:
just have to clean up the pistons some more but cleaned up both sides and coated it with some oil and its turning over extremely fluid, but the only way i will be able to tell is when i turn on the car and drive it for a couple of weeks to see if anything is wrong; oil burn off.
but if it does go give me problem i will find another 3.5 swap it in then maybe bore and stroke this one turn it into a project, im thinking a nice round number 4.2L sounds good.

Do you still see any crosshatching on the cylinder walls...I can't tell from the pics
but its looks like they cleaned up fine, so you should be okay. cadaver made it sound worse but its fine from the looks of it
but its looks like they cleaned up fine, so you should be okay. cadaver made it sound worse but its fine from the looks of it


no, just some discoloration due to it being used, but nothing out of the ordinary.


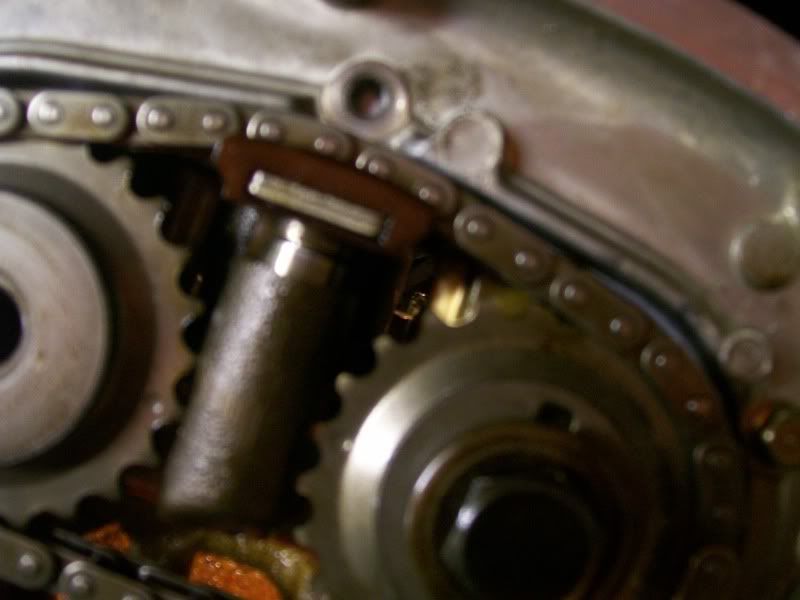
got everything i need off the 3.0, now getting the 3.5 ready, got all the timing equipment on but i have a few worries. First of all i will begin with the cam spacers, they are the stephan max ones, I wish i bought the JWT spacers and took the cams to the machine shop to have the dowel extended. because it looks like the 3.0s ECU reads Cam position timing off teh marks on the Intake cam sproket which is now out of wack, i cant line up the markings on the sprocket to the chain:
u cant see it but the arrow where the darker link of the chain is suppose to be is is never the bottom of the sprocket
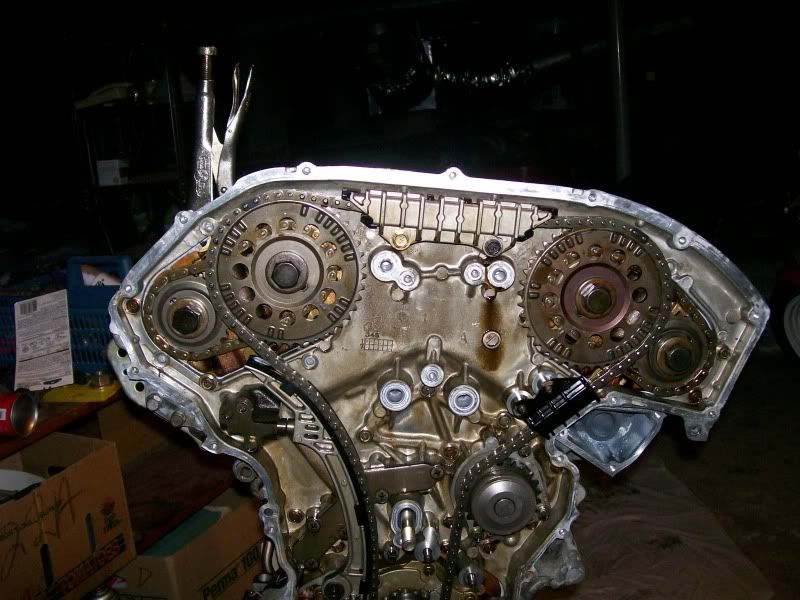
unless im wrong on how the cam position sensor works, wtf?
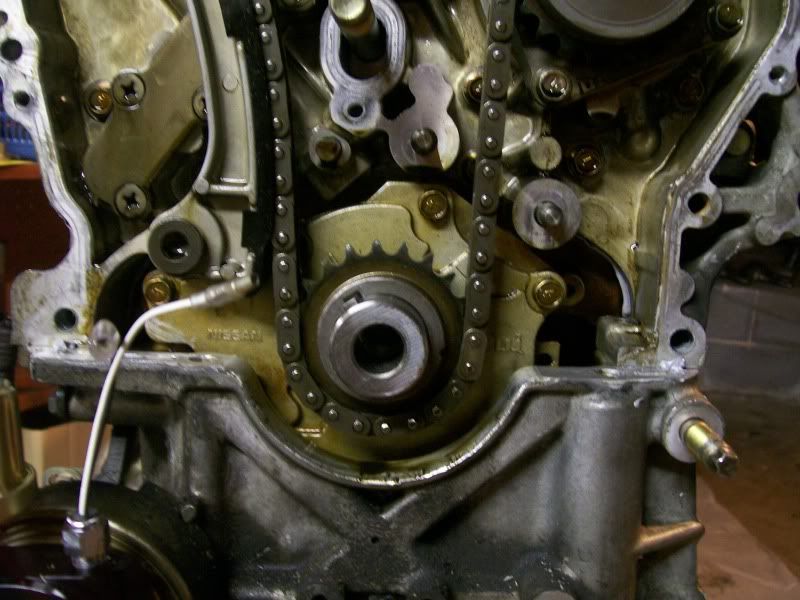
second concern which should be out of the way now is the secondary chains that drive the left side exhuast cam, it seemed as if it would be rubbign he timing cover, i want to modify the timing cover alittle to give it some space, we got it to clear but i think it will start to hit onces the car starts driving again:
there are more but those are my immediate concerns,
u cant see it but the arrow where the darker link of the chain is suppose to be is is never the bottom of the sprocket
unless im wrong on how the cam position sensor works, wtf?
second concern which should be out of the way now is the secondary chains that drive the left side exhuast cam, it seemed as if it would be rubbign he timing cover, i want to modify the timing cover alittle to give it some space, we got it to clear but i think it will start to hit onces the car starts driving again:
there are more but those are my immediate concerns,
pull the sproket off and align the arrow properly...
before let me ask this? Is the motor already at TDC? if not get the motor, or at this point. Get each bank at TDC, and the crank at TDC. Then put the sprockets on and you'll see they line up muuuch better.
before let me ask this? Is the motor already at TDC? if not get the motor, or at this point. Get each bank at TDC, and the crank at TDC. Then put the sprockets on and you'll see they line up muuuch better.
its impossible with that cam spacer to sit the sprocket to TDC, and everything is currently set to TDC, now i wish i went with the JWT spacer. and just had the dowel extended. I guess this is what was being talked about with re-drilling the cams but re-drilling seem to make this even more complicated. it would make it easy to confuse the cam's TDC point with a second hole drilled in the cams. This im not thrilled about im actually alittle pissed.
its impossible with that cam spacer to sit the sprocket to TDC, and everything is currently set to TDC, now i wish i went with the JWT spacer. and just had the dowel extended. I guess this is what was being talked about with re-drilling the cams but re-drilling seem to make this even more complicated. it would make it easy to confuse the cam's TDC point with a second hole drilled in the cams. This im not thrilled about im actually alittle pissed.
DO you have the correct spacer on the correct cam?
check the fsm for the 3.5 motor for TDC, I hope your not using the fsm for the 3.0 to set TDC.
its not impossible... if TDC is set, once the spacer are on and you put the spockets on the arrow will point at its proper respective angle. TDC has to be off for the sprocket an arrow to face downwared, there is a gap on the sprockets to allow the dowel pin to go into it. If your have it aligned like that then TDC has to be off.
DO you have the correct spacer on the correct cam?
check the fsm for the 3.5 motor for TDC, I hope your not using the fsm for the 3.0 to set TDC.
DO you have the correct spacer on the correct cam?
check the fsm for the 3.5 motor for TDC, I hope your not using the fsm for the 3.0 to set TDC.

i'm the one that was helping him with the chains...
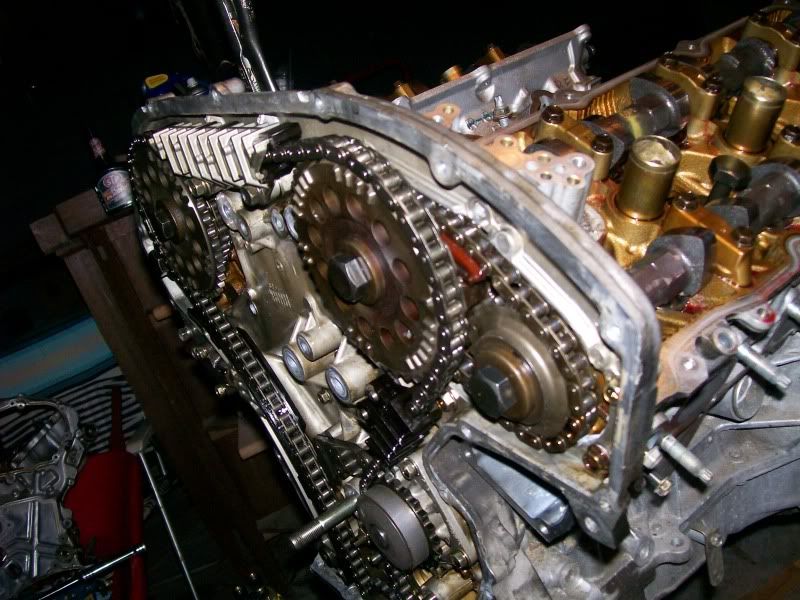
the issue with the spacer is that the dowel's position is reversed by 180deg with the stephenmax spacer. it has a small stud that goes into the hole in the cam, then 180deg across it has a stud that sticks out for the cam sprockets to line up with.... which means the big sprocket w/ the timing marks is also 180deg reversed from the normal arrows-up position.
and with the tensioner, if the tensioner is moved down at all, the chain has a LOT of slack. i think it will clear while running but only just (like by 1-2mm tops)
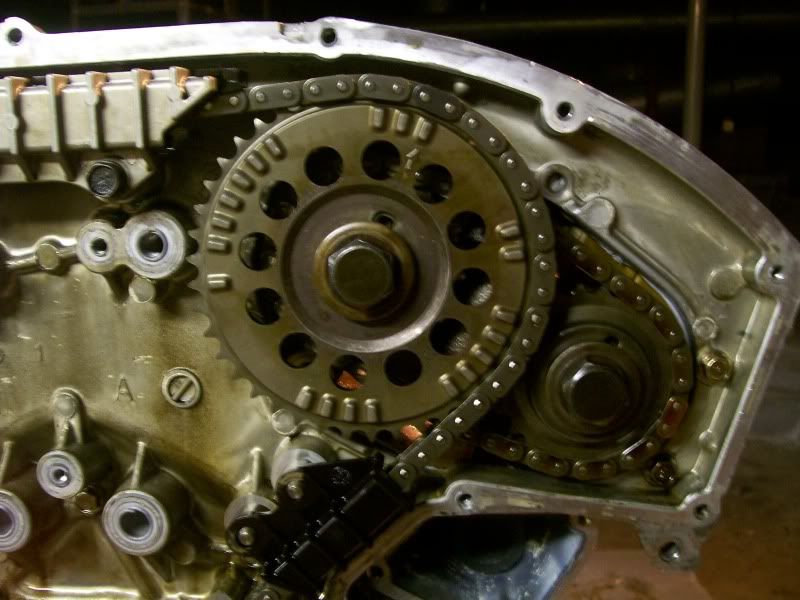
Before you put everything together remove the main chain turn the big sprockets so that they are pointing in the correct direction then install the chain. The one on the right will be fine but you'll have to slightly turn the left side to get the arrow to match up with the gold link. If your not 100% sure its right post pics. You dont want to put everything together and have to take it all back off again.
http://forums.maxima.org/6661214-post95.html
http://forums.maxima.org/6661214-post95.html
Last edited by ajcool2; Dec 23, 2009 at 11:35 PM.
i got the chains on and all timing set correctly, outer timing cover is on, I turned it over a couple of times and it seems to be fine, although when i turn it over there seems to be a point where there is alot of slack in the chain, what i might do is set it to TDC and re-do the chain tensioner, turn it over and see if there is still that slack in the chains.
i got the chains on and all timing set correctly, outer timing cover is on, I turned it over a couple of times and it seems to be fine, although when i turn it over there seems to be a point where there is alot of slack in the chain, what i might do is set it to TDC and re-do the chain tensioner, turn it over and see if there is still that slack in the chains.
thats what i thought too, the chain tensioner should take care of the slack, but it seems like it has alot of movement to do when i start turning the motor over. it worries me because im going to be spinning this thing up to 7200 and i dont want to have any failz with teeth skipping.
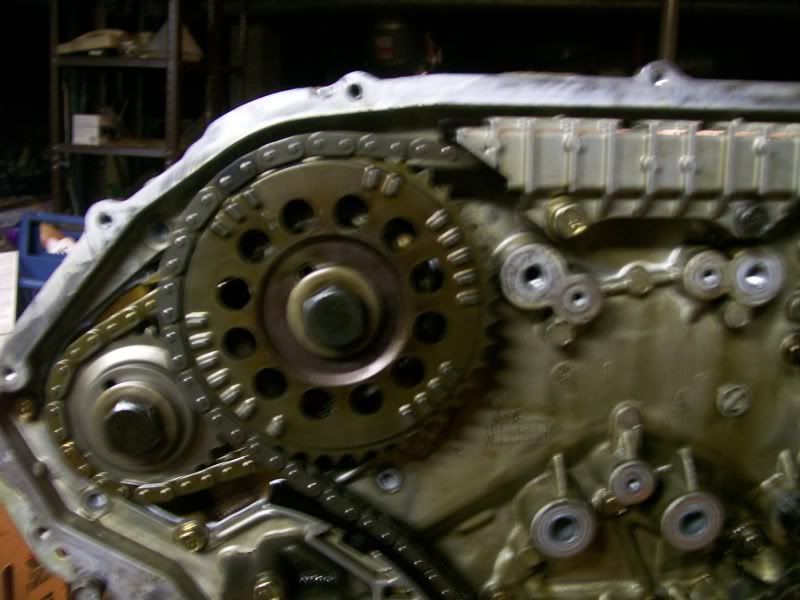
looking better now crusher!
but still once the tensioner is in place and you start to give it a turn it should snap, and lock up and its on tight. Unless your turning it counter clock wise then you might make slack but you shouldnt be turning it that way.
but still once the tensioner is in place and you start to give it a turn it should snap, and lock up and its on tight. Unless your turning it counter clock wise then you might make slack but you shouldnt be turning it that way.

dont forget how the cam lobes on cyl 1 and 4 look to help verify tdc. a good indicator is the line on the tensioner for the 2ndary chain. it should be lined up with the dowel pin. if so and its spot on you've got tdc. I know that made no sense....if I could copy and paste from the fsm it would make sense...
dont forget how the cam lobes on cyl 1 and 4 look to help verify tdc. a good indicator is the line on the tensioner for the 2ndary chain. it should be lined up with the dowel pin. if so and its spot on you've got tdc. I know that made no sense....if I could copy and paste from the fsm it would make sense...

I check TDC atleast 7 times when i was doing it. Making sure it was spot on, putting the chains on, checking again, tension etc, checking again. Rotating then checking again! you cant check too much, it can be the difference between a properly running motor, or having to tear into it while the motor is in the car, or a bent valve
