
00-04 I30/35 EL bulb to LED strip how-to...
 04-18-2012, 02:35 PM
#41
Junior Member

Join Date: Dec 2009
Location: Pacific Northwest
Posts: 29
Infiniti dash lighting replacement
A couple of questions:
How's the evenness of the lighting? Is it comparable to the CCFL?
Could you post a link to the LED strip you used?
Thanks much.
 01-17-2013, 08:53 AM
#42
Senior Member

Join Date: Aug 2000
Posts: 1,201
I am tempted to do this but step it up a notch.. Led strips come in many varieties.. The strips could use 3528 SMD LED's or 5050 SMD LED's. The 5050's are the newer technology and much brighter. There is also the option of the strip having 30 led's per meter or 60 per meter.. So the best strips are 5050 smd leds in the 60 led per meter style. There are also what are called RGB led strips which are also available in the different varieties listed above.
Now for the cool stuff.. You can also get remote control modules that connect between the strip and your power source. The remote is for the RGB strips which are capable of producing over 600,000 different colors . You can also make the led's strobe, control the speed, cycle thru colors with speed control, dim the led strip, etc... Imagine how damn cool that would be, I just wish I wasn't too scared to take apart my gauge cluster.
If anyone is interested in doing an LED retrofit, hit me up with any questions about anything I talked about above, I even have a ton of the materials sitting at my house from another project I was doing.


 11-23-2013, 02:56 PM
#44
Junior Member
Join Date: Dec 2009
Location: Pacific Northwest
Posts: 29
Replacing CCFL with LED strips - correct wiring points for 2000 I30
After only 4 years my replacement CCFL had dimmed to the point that I couldn't see the display when the car was very cold. It was only poorly visible even when warmed up so I decided to finally install LED's. I did this with a bit of hesitation because I could not find the cluster wiring points for LED's posted anywhere, despite hours of searching. With some work I was able to figure it out.
The LED strip and an extra connector was purchased from superbrightleds.com for less than $20 with shipping.
1 - NFLS-NW30X3-WHT Natural White LED Strip (includes 1 connector)
1 - NFLS10-2CPT Pigtail Connector
The LED strip has adhesive backing and can be cut every 2". I pulled the old CCFL, associated wiring and circuit board and mounted two 4" strips right to the CCFL plastic mount, one on either side of the transmission display. I placed them as close to the outside edge of the plastic as possible. They fit almost perfectly, only a tiny piece of plastic had to be trimmed from the mount. The wiring from the strips fit into the same run that the CCFL wiring ran through. I soldered the wires together.
I wanted the wiring to remain contained inside the cluster so I spent a few hours examining the schematics in the FSM and found the correct wiring points:
The wiring connection points are on the plug labeled M34, shown on page EL-145 of the FSM. It is fairly easy to solder wires directly to the pins on the base of the connector if you tin both the wire and pin first.
The negative LED wire connects to pin 49. That lead connects directly to the Illumination Control Switch (the dimmer control.) The FSM pages showing the wire endpoints are EL-120 and IL-123. The path of the wire runs across multiple pages of the schematic.
The positive LED wire connects to pin 66. Pin 66 connects to a 12V source that is controlled by the ignition key. It's shown on manual page EL-147.
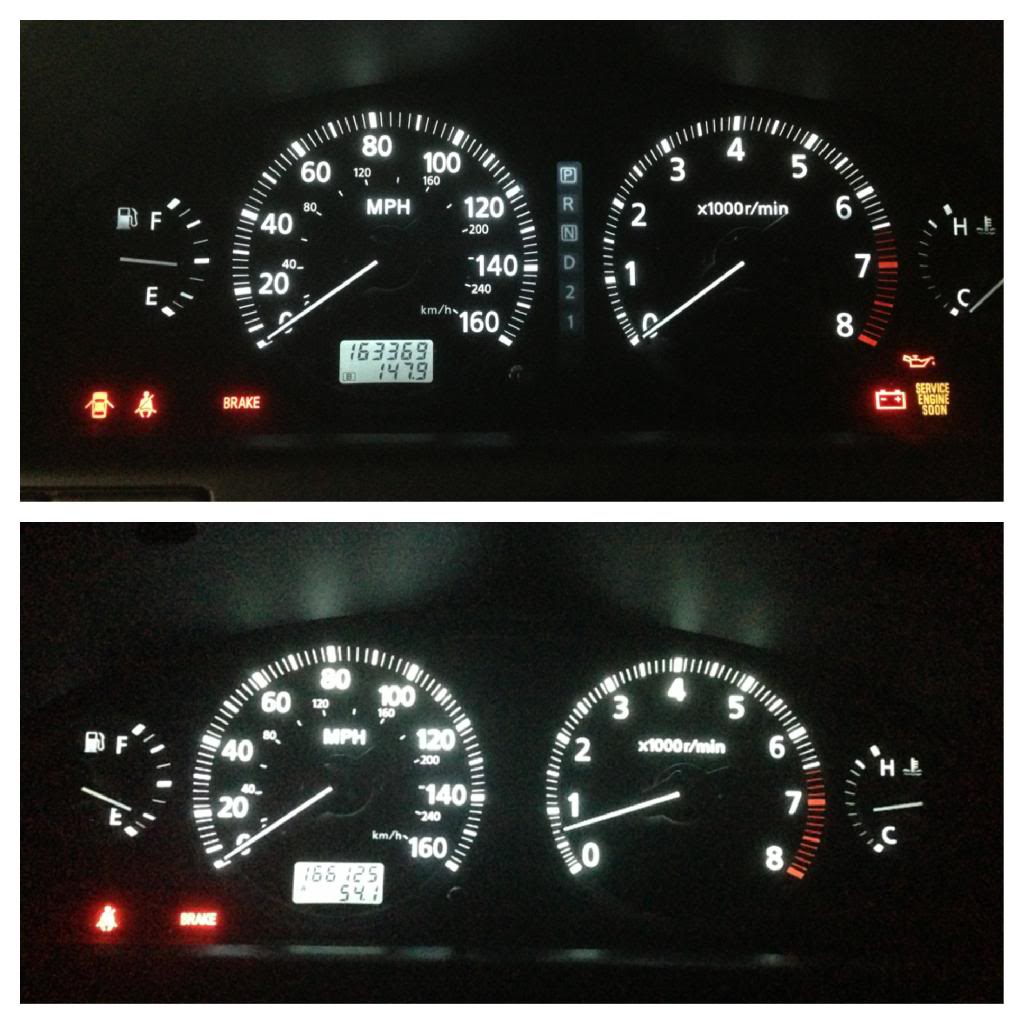
The results were well worth the time. For the first time the cluster lights look like they should, clearly visible in bright daylight even with sunglasses on. The odometer is also clearly legible all the time. When the headlights are turned on the cluster LEDs dim exactly as they should. The color of the LED strip is also excellent and lacks the purple hue of the last CCFL bulb I installed.
The only negative is very minor. The lighting across the display isn't quite as consistent as it was with the CCFL. It is a minor variation and I don't think I would have noticed it at all if I hadn't been looking for it.
Good luck.
Update: After driving the car for a few days in the daytime and being very pleased with the brightness of the display, I drove last night after dark. The new LED's are so bright that to get them down to a reasonable level at night requires turning the dimmer way down, too far down to clearly see the other displays that are also controlled by the dimmer. Unfortunately it won't be possible to contain fully contain the wiring withing the cluster and maintain the daytime brightness without adding a custom circuit. To allow the independent control of the cluster LED's I've decided to add a 2nd dimmer switch dedicated to the LED lights. Ebay had one for $12 shipped and I have an empty spot in the dash to install it so it looks like a stock control. I'll post back here with results.
Here's a pic taken in very bright Colorado sunshine.

The LED strip and an extra connector was purchased from superbrightleds.com for less than $20 with shipping.
1 - NFLS-NW30X3-WHT Natural White LED Strip (includes 1 connector)
1 - NFLS10-2CPT Pigtail Connector
The LED strip has adhesive backing and can be cut every 2". I pulled the old CCFL, associated wiring and circuit board and mounted two 4" strips right to the CCFL plastic mount, one on either side of the transmission display. I placed them as close to the outside edge of the plastic as possible. They fit almost perfectly, only a tiny piece of plastic had to be trimmed from the mount. The wiring from the strips fit into the same run that the CCFL wiring ran through. I soldered the wires together.
I wanted the wiring to remain contained inside the cluster so I spent a few hours examining the schematics in the FSM and found the correct wiring points:
The wiring connection points are on the plug labeled M34, shown on page EL-145 of the FSM. It is fairly easy to solder wires directly to the pins on the base of the connector if you tin both the wire and pin first.
The negative LED wire connects to pin 49. That lead connects directly to the Illumination Control Switch (the dimmer control.) The FSM pages showing the wire endpoints are EL-120 and IL-123. The path of the wire runs across multiple pages of the schematic.
The positive LED wire connects to pin 66. Pin 66 connects to a 12V source that is controlled by the ignition key. It's shown on manual page EL-147.
The results were well worth the time. For the first time the cluster lights look like they should, clearly visible in bright daylight even with sunglasses on. The odometer is also clearly legible all the time. When the headlights are turned on the cluster LEDs dim exactly as they should. The color of the LED strip is also excellent and lacks the purple hue of the last CCFL bulb I installed.
The only negative is very minor. The lighting across the display isn't quite as consistent as it was with the CCFL. It is a minor variation and I don't think I would have noticed it at all if I hadn't been looking for it.
Good luck.
Update: After driving the car for a few days in the daytime and being very pleased with the brightness of the display, I drove last night after dark. The new LED's are so bright that to get them down to a reasonable level at night requires turning the dimmer way down, too far down to clearly see the other displays that are also controlled by the dimmer. Unfortunately it won't be possible to contain fully contain the wiring withing the cluster and maintain the daytime brightness without adding a custom circuit. To allow the independent control of the cluster LED's I've decided to add a 2nd dimmer switch dedicated to the LED lights. Ebay had one for $12 shipped and I have an empty spot in the dash to install it so it looks like a stock control. I'll post back here with results.
Here's a pic taken in very bright Colorado sunshine.
Last edited by raincity; 11-26-2013 at 02:02 PM.

Thread
Thread Starter
Forum
Replies
Last Post
trsandrew
Group Deals / Sponsors Forum
2
10-25-2015 02:47 PM
RealityCheck
4th Generation Maxima (1995-1999)
7
10-02-2015 06:34 PM