
00-03 Maxima Full LED Tail lights


00-03 Maxima Full LED Tail lights
I've been wanting to do LED turn signal for quite sometimes now. Recently got a decent pair of 5.5th gen tail lights from member here and started using these to Prototype the final product ( will be using SE Tails). There is similar LED tails out there for $250 at eBay, I'd figure this build would be a little bit cheaper plus it can function and look the way I want it. My goal is to make it as clean and OEM as possible. I will be using Phiips Lumiled RED HPWT-DH00 Superfluxes for the brake/stop light and HPWT-DL00 for turn signal.
http://www.philipslumileds.com/uploads/3/DS05-pdf
My crude wiring diagram for Brake/City
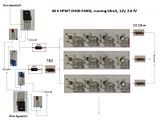


Red LED
with 33 ohm

with 33 + 220 ohm

Amber LED
With 33 ohm
With 33 Ohm + 220 Ohm

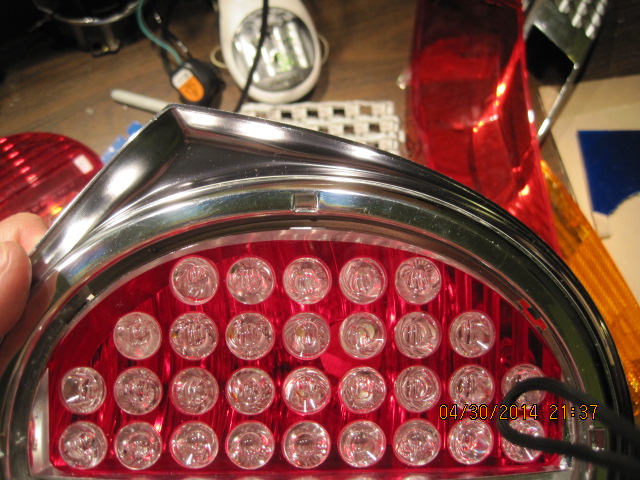
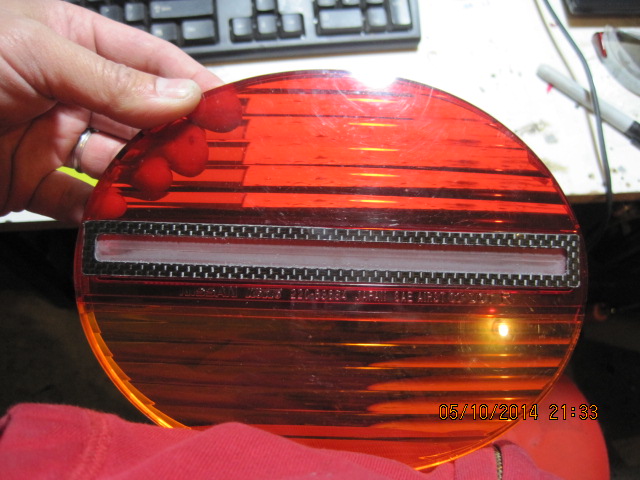
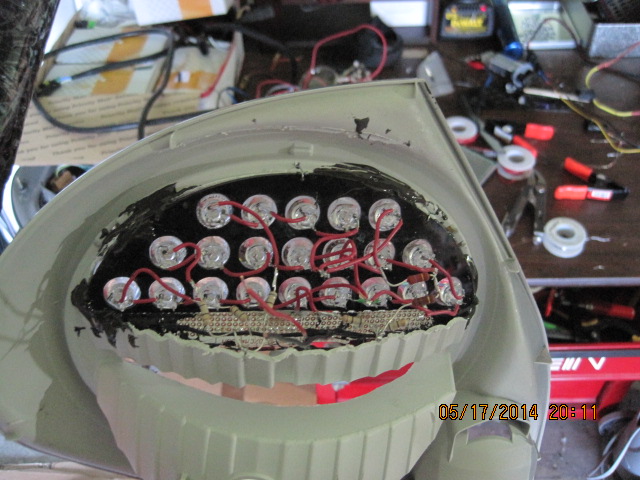
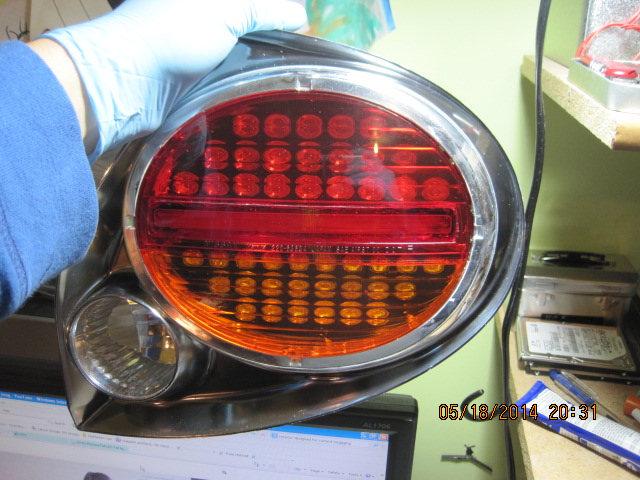
Taking apart the tail light
Damage the lens, the lens was attached using epoxy or some kinda perma seal, so combination heat and gentle prying were the way to do it
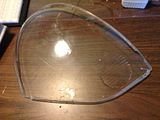
What it look like with the stock tail lens
Thinking of replacing those red and amber lens with smooth Red and amber polycarbonate ones. Most OEM application have smooth outside lens
http://www.philipslumileds.com/uploads/3/DS05-pdf
My crude wiring diagram for Brake/City
Red LED
with 33 ohm
with 33 + 220 ohm
Amber LED
With 33 ohm
With 33 Ohm + 220 Ohm
Taking apart the tail light
Damage the lens, the lens was attached using epoxy or some kinda perma seal, so combination heat and gentle prying were the way to do it
What it look like with the stock tail lens
Thinking of replacing those red and amber lens with smooth Red and amber polycarbonate ones. Most OEM application have smooth outside lens
Last edited by Genes1s; Feb 8, 2014 at 08:26 PM.


Thanks, I hope so too. You plan and plan again, contemplate, research, plan again and I finally said screw it, just go for it and see what's going to happen. The shape of the lens is kinda oblong/oval, so it was challanging to fill the area nicely. I would hate to see a single LED shining out from the rest. Another challange is how to open the light effectively. I destroyed the lens cover. Eventually I wan to do it in SE tails. If I didn't have to work on my Rear Trainling Arm bushing this weekend, I would hurry up and test the light at night...
Ok,
I finally able to spend more time on my own project now...yeahaa.
so, for this LED project, I have few scenarios but now sure if it is the right thing to do..
I'm using collimator lens out of flash lights, you can find these at Ebay and other online LED shops. One of the best OEM LED tail lights is FX35's tail IMO. I'm trying to duplicate that performance using Collimator lens. Since the LED has 60 degree viewing angle already, I'm going to see if I can play with the focusing the beam by varying the distance between the collimator and the LED and find the perfect balance between intensity and uniformity.
1st option
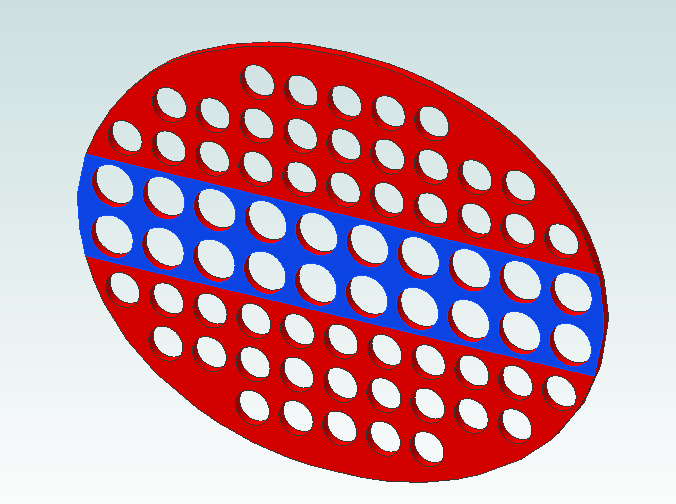
Basically use the exisiting brake and turn signal bucket/area and fill it with LED. Top is brake/city light, bottom is turn signal, bottom left corner is reverse light.
2nd option, basically like option # 1 but with tinted lens. Looks really good IMO, although the tint is a little too dark for my taste
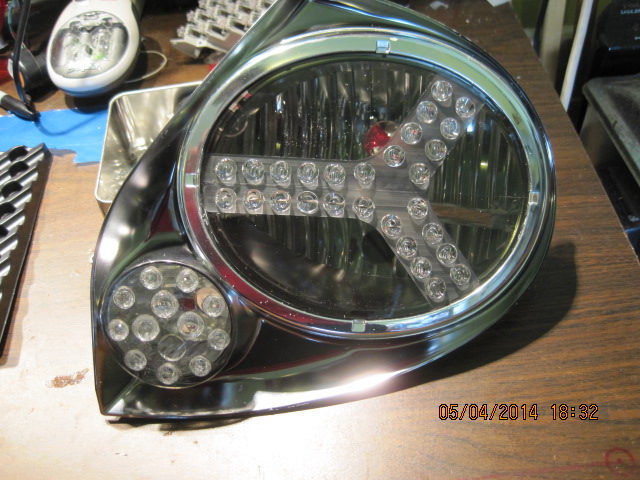
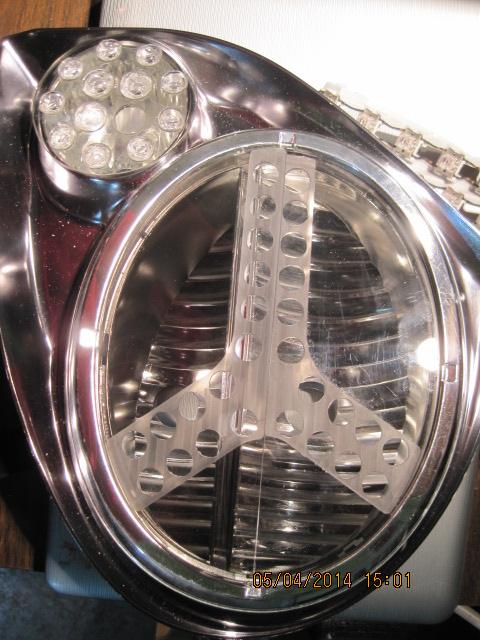
3rd option, A complete redesigned look. the 90 degree "Y" is the turn signal, inspired by the Lamborghini Aventador tail light design. The rest will be brake/city light with diffused lens ( no collimator). This can be done in red transparent lens and tinted lens on top or whatever color. I want a complete different look, but this design might be trying a little too hard......
It's going to be totally new look, but not sure if it goes together with the car.....
I finally able to spend more time on my own project now...yeahaa.
so, for this LED project, I have few scenarios but now sure if it is the right thing to do..
I'm using collimator lens out of flash lights, you can find these at Ebay and other online LED shops. One of the best OEM LED tail lights is FX35's tail IMO. I'm trying to duplicate that performance using Collimator lens. Since the LED has 60 degree viewing angle already, I'm going to see if I can play with the focusing the beam by varying the distance between the collimator and the LED and find the perfect balance between intensity and uniformity.
1st option
Basically use the exisiting brake and turn signal bucket/area and fill it with LED. Top is brake/city light, bottom is turn signal, bottom left corner is reverse light.
2nd option, basically like option # 1 but with tinted lens. Looks really good IMO, although the tint is a little too dark for my taste
3rd option, A complete redesigned look. the 90 degree "Y" is the turn signal, inspired by the Lamborghini Aventador tail light design. The rest will be brake/city light with diffused lens ( no collimator). This can be done in red transparent lens and tinted lens on top or whatever color. I want a complete different look, but this design might be trying a little too hard......
It's going to be totally new look, but not sure if it goes together with the car.....
Last edited by Genes1s; May 4, 2014 at 07:42 PM.

Thats some fine work youve done right there. I like the uniqueness of the y and I feel that it would look sweet when driving at nighg. However the tinted lens looks better for daytime use IMO.
Cant go wrong with either though because of they both are nice looking!
Cant go wrong with either though because of they both are nice looking!

I'm not sure how, but I'm sure it can be done, probably with relay and PWM to control the brightness.

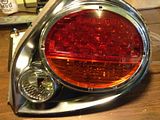
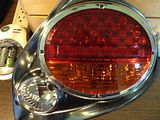
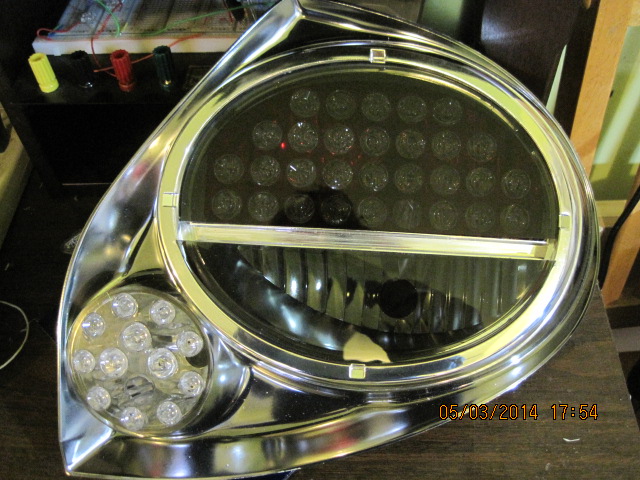
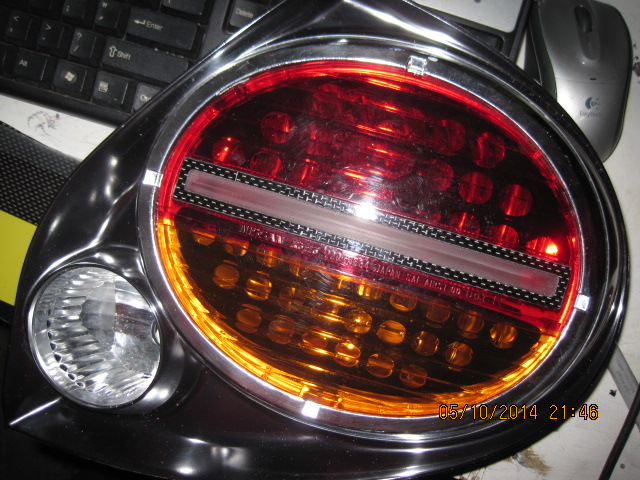
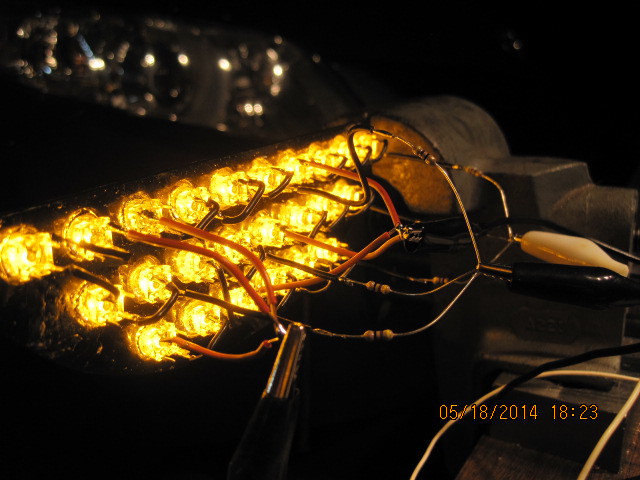
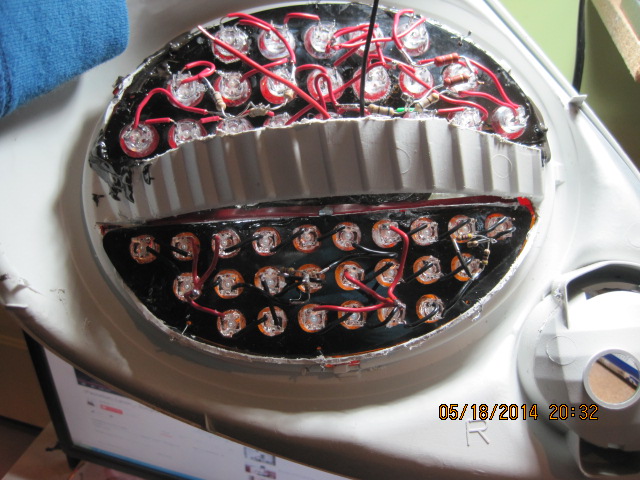
Finally decided to use the OEM lens. It looks so much cleaner. Still using collimator to get better focus.
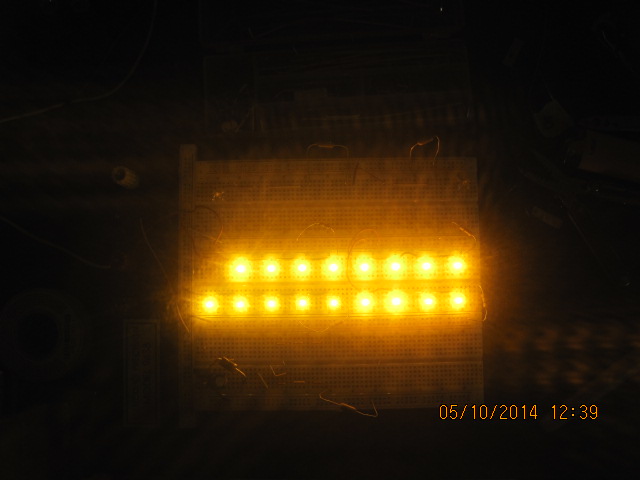
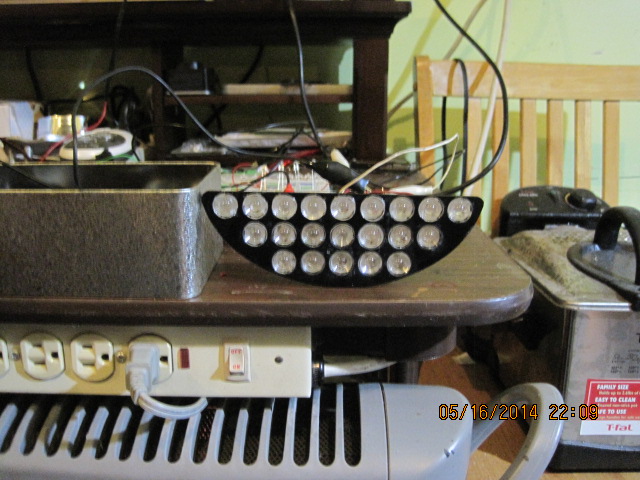
Turn Signals CREE P4 at 40ma. Bare LEDS
With Collimator

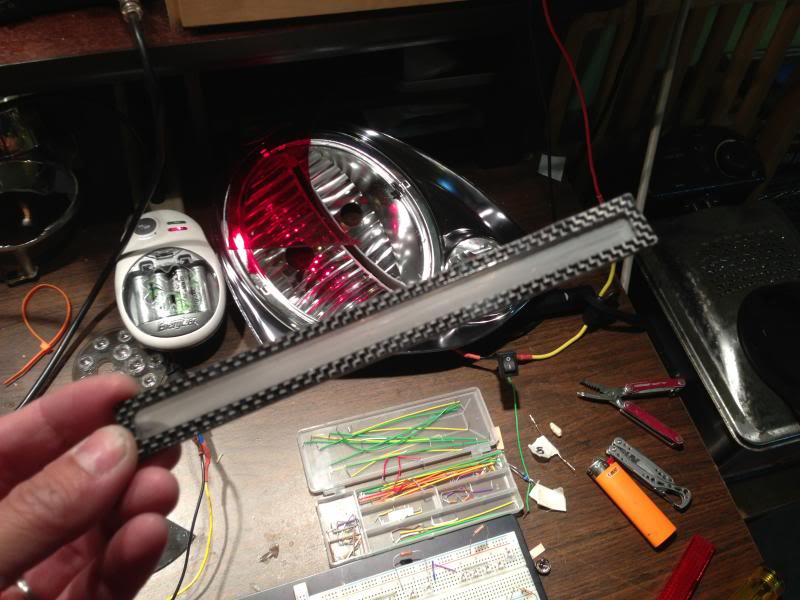
Carbon Fiber strip (.060") on Acrylic lens for Parking Light, HP at 40mA Bare LEDs + Collimator

Final Design
Turn Signals CREE P4 at 40ma. Bare LEDS
With Collimator
Carbon Fiber strip (.060") on Acrylic lens for Parking Light, HP at 40mA Bare LEDs + Collimator
Final Design
Last edited by Genes1s; May 10, 2014 at 10:47 PM.


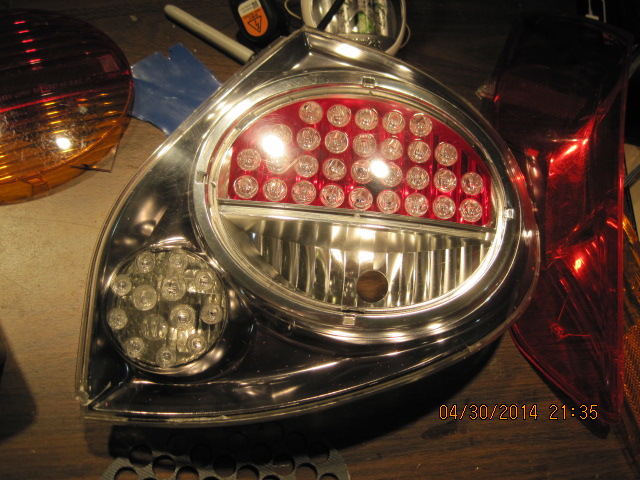
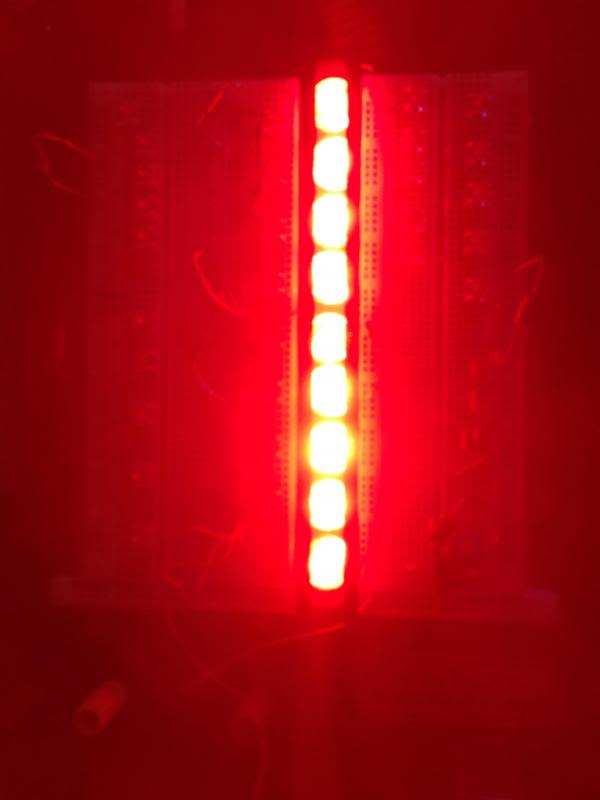
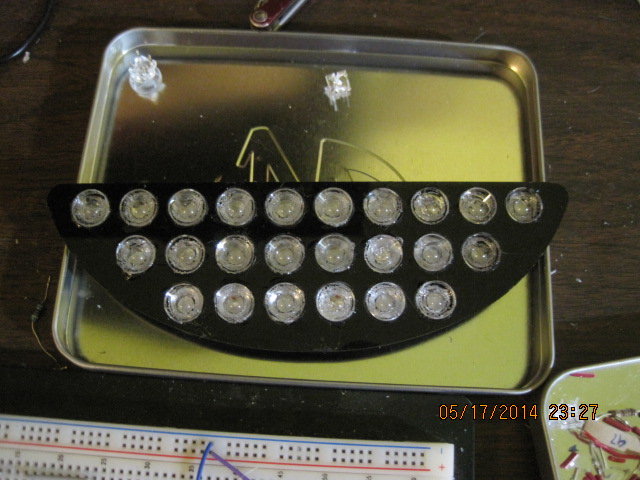
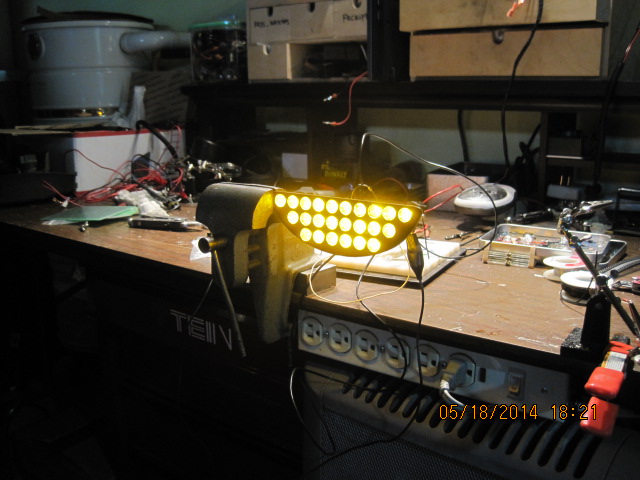
Got one brake light almost done. 21 LEDs, 2.7 Vf, 38mA using 33 ohm every 4 leds + 270 ohm for the last LED. 38mA seems really bright to me. I compared them to my Sienna OEM brake light and these are almost double. A stock brake bulb is typically 250-300 lumens. HPWTDH00 is 5 Lm at 70mA. Can I assume that the Lm is linear as the current goes down/up? .071 mA = 1 lumen?? thus 38 mA = 2.71 lm. If I have 21 bulbs that would be 21 * 2.71 = 57 Lm. This can't be right. It is brighter than my 21 W (250 Lm) OEM brake bulb for sure. Is there anyway to approximate the LED lumen output?
With Lens cover
With Lens cover


Stock Brake lights vs LED.
I decided to use the middle section between the brake and turn signal for Parking/City Light

Just got gluing turn signal LED to collimator and ready for wiring.
I decided to use the middle section between the brake and turn signal for Parking/City Light
Just got gluing turn signal LED to collimator and ready for wiring.


Gluing, cutting wires, soldering takes hours. Custom built one of these will be too much money I think unless I can figure out away to mold the collimator to the acrylic base and use flow oven with custom PCB to place the LEDs and Resistors.
I'll have seperate power supply unit that contain Vreg, Caps, and Diode as seperate unit.
I'll have seperate power supply unit that contain Vreg, Caps, and Diode as seperate unit.
Got the turn signal wired.
Added shield for the middle parking light to reduce the light bleeding.


Overall I'm pretty happy with how it turns out. Will build Vreg+Caps+Diode on seperate circuit and I can't wait to test it on the car.
Added shield for the middle parking light to reduce the light bleeding.
Overall I'm pretty happy with how it turns out. Will build Vreg+Caps+Diode on seperate circuit and I can't wait to test it on the car.
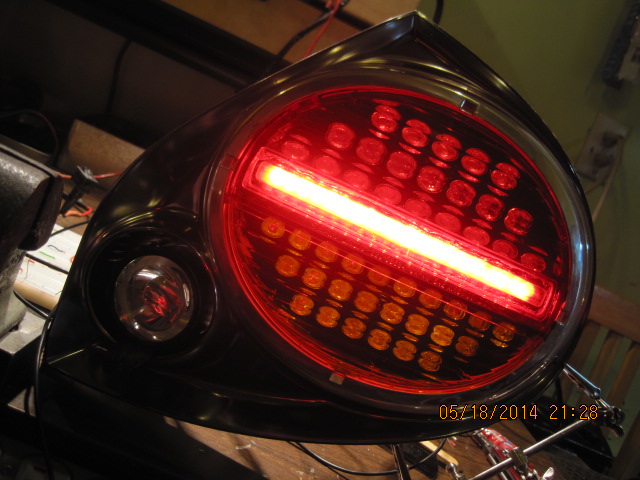
Not sure if this is the right thing to do, but it looks pretty good.
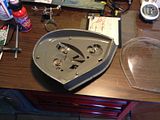
Plastidipped bezel. This is the first time I used plastidip and it is very forgiving. It has a nice texture too.


Plastidipped bezel. This is the first time I used plastidip and it is very forgiving. It has a nice texture too.

