
Kevlo RMT Turbo build -Works !!

Thread Starter

Joined: Dec 2000
Posts: 35,755
From: Lake Orion, MI
Kevlo RMT Turbo build -Works !!
UPDATE
I bought Eddy's old kit. I will make a new parts list of what I have and what I need. I will keep the old file up for anyone thinking of doing it. Will have more info later
-----------------------------
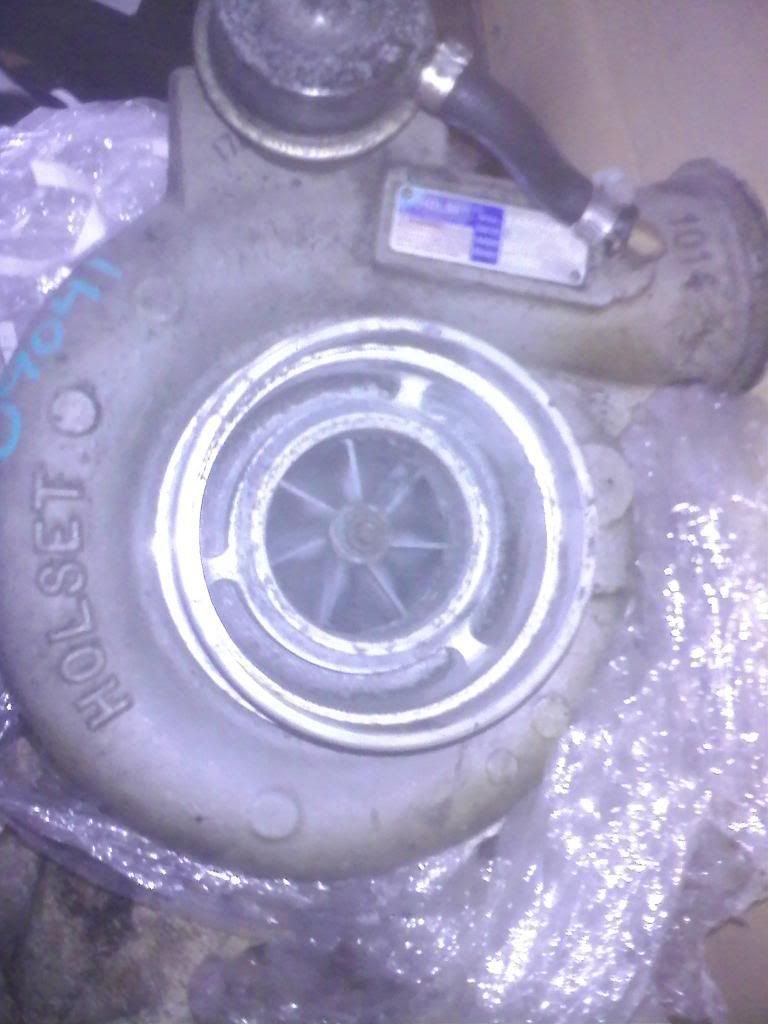
The only thing I have ordered is the turbo. It will be here tomorrow and I will have pics later on. Since winning the turbo(Holset HX35) I have been reading on boosting my car. I have made an excel file on what all I need and how I want to do things. I figured I would share this with everyone, not only to get new ideas but to help others incase they are doing the same.
http://spreadsheets.google.com/ccc?k...8oVIpYmqxsz-PA
That is the excel file I have right now, I will continuously update it.
For the exhaust, i THINK I need just a 3" V-Band flange but I also see this on ebay:
http://cgi.ebay.com/ebaymotors/Holse...5%7C240%3A1318
Keep this in mind when reading that excel sheet, I am ONLY planning to run 4-5 PSI for NOW. In the future I will go higher.
Fuel:
For now I do believe my stock fuel setup of the 290cc injectors will be enough to handle the 4-5psi of boost. If not, the 315-320cc's I will get from upping the PSI to 50(by adding the afpr of course) should be sufficient. For people that dont know, the DE-K injectors are the same as the 350z injectors accept the fact that the Z is at 50psi and the DE-K is around 41-45psi.
Air:
I plan to get an amsoil filter as soon as I figure out how everything will be mounted.
Tuning:
I already have an Emanage Ultimate with a wideband so I do not need anything else.
Clutch:
Also in the future I will upgrade the clutch, but the AE Nissan/Exedy clutch with the 2k3 Altima pressure plate should be fine with the 4-5 psi according to people I have spoken with.
Future:
Intercooler, meth injection, clutch, up the boost, electronic boost controller, afpr, ect...
Any comments/parts I need is welcome.
Pics:
to come
And a special thanks to streetz for helping me out
I bought Eddy's old kit. I will make a new parts list of what I have and what I need. I will keep the old file up for anyone thinking of doing it. Will have more info later
-----------------------------
The only thing I have ordered is the turbo. It will be here tomorrow and I will have pics later on. Since winning the turbo(Holset HX35) I have been reading on boosting my car. I have made an excel file on what all I need and how I want to do things. I figured I would share this with everyone, not only to get new ideas but to help others incase they are doing the same.
http://spreadsheets.google.com/ccc?k...8oVIpYmqxsz-PA
That is the excel file I have right now, I will continuously update it.
For the exhaust, i THINK I need just a 3" V-Band flange but I also see this on ebay:
http://cgi.ebay.com/ebaymotors/Holse...5%7C240%3A1318
Keep this in mind when reading that excel sheet, I am ONLY planning to run 4-5 PSI for NOW. In the future I will go higher.
Fuel:
For now I do believe my stock fuel setup of the 290cc injectors will be enough to handle the 4-5psi of boost. If not, the 315-320cc's I will get from upping the PSI to 50(by adding the afpr of course) should be sufficient. For people that dont know, the DE-K injectors are the same as the 350z injectors accept the fact that the Z is at 50psi and the DE-K is around 41-45psi.
Air:
I plan to get an amsoil filter as soon as I figure out how everything will be mounted.
Tuning:
I already have an Emanage Ultimate with a wideband so I do not need anything else.
Clutch:
Also in the future I will upgrade the clutch, but the AE Nissan/Exedy clutch with the 2k3 Altima pressure plate should be fine with the 4-5 psi according to people I have spoken with.
Future:
Intercooler, meth injection, clutch, up the boost, electronic boost controller, afpr, ect...
Any comments/parts I need is welcome.
Pics:
to come
And a special thanks to streetz for helping me out
Last edited by Kevlo911; Jun 29, 2009 at 11:58 AM.

Wow, everybody going rmt. Nice. In for results. 4-5 psi, everybody says that then they start dialing up the boost. You should get good numbers with the dek. Upgrade to 440cc injectors and not worry about anything else.
Last edited by maxgtr2000; Jun 22, 2009 at 09:28 PM.


as for the exhaust outlet from turbo, it should already have a lip on it (where the v clamp goes on), so all you need is the actual clamp, and a lip you can weld on the pipe that will go out to the muffler(or just to the tip out back). like this:
LINK
Also, you have to weld the wastegate closed. some weld the lil lever outside of the turbo, but I recommend you take out the plate/flange, and weld the actual door of the WG.
oh something i dont think we have talked about, you need a restrictor for the oil feel (into turbo). on mine i have a .052 nitrous jet, and im getting my oil from a sandwhich plate at the oil filter. Also you need a turbo timer, you have to wire up the timer to the Shurflo, that way when you turn off the car, it will leave the pump running for a minute or two. This will get rid of all the oil in the return line (hose between turbo and pump), because if you leave oil sitting in there, say overnight or after having car parked for a while, that oil WILL leak into the turbo and just be messy, smoke, etc...

Thread Starter
Joined: Dec 2000
Posts: 35,755
From: Lake Orion, MI
Yeah, I've been meaning to talk to him, don't see him online too much.
About the turbo timer, I forgot to add it to my list but I might just make my own(i think it is pretty easy). I was reading about the restrictor on the oil feed, so now I have the size(I forgot to ask on our im's)

And I have updated the excel file. Some reason my links don't show up on the google doc but I guess that is no biggie
Yeah, I've been meaning to talk to him, don't see him online too much.
About the turbo timer, I forgot to add it to my list but I might just make my own(i think it is pretty easy). I was reading about the restrictor on the oil feed, so now I have the size(I forgot to ask on our im's)
And I have updated the excel file. Some reason my links don't show up on the google doc but I guess that is no biggie
Thread Starter
Joined: Dec 2000
Posts: 35,755
From: Lake Orion, MI
Where do you guys get your maf adapters?
I am thinking of this:
TB - 3" mid pipe - Stock maf:Adapter 3" - Silicon reducer to 2.5/2.75 - 2.5/2.75" BOV adapter - silicon reducer to feed pipe(or my feed pipe might be the same at this point of the intake, not 100% sure yet)
I do not know what BOV to run that, but how does that look?
I am thinking of this:
TB - 3" mid pipe - Stock maf:Adapter 3" - Silicon reducer to 2.5/2.75 - 2.5/2.75" BOV adapter - silicon reducer to feed pipe(or my feed pipe might be the same at this point of the intake, not 100% sure yet)
I do not know what BOV to run that, but how does that look?
Last edited by Kevlo911; Jun 23, 2009 at 11:48 AM.
Where do you guys get your maf adapters?
I am thinking of this:
TB - 3" mid pipe - Stock maf:Adapter 3" - Silicon reducer to 2.5/2.75 - 2.5/2.75" BOV adapter - silicon reducer to feed pipe(or my feed pipe might be the same at this point of the intake, not 100% sure yet)
I do not know what BOV to run that, but how does that look?
I am thinking of this:
TB - 3" mid pipe - Stock maf:Adapter 3" - Silicon reducer to 2.5/2.75 - 2.5/2.75" BOV adapter - silicon reducer to feed pipe(or my feed pipe might be the same at this point of the intake, not 100% sure yet)
I do not know what BOV to run that, but how does that look?

Thread Starter
Joined: Dec 2000
Posts: 35,755
From: Lake Orion, MI
Cool thanks man.
Looks like I can keep my fogs and I need to buy an Injen style intake and I will be good to go.
Another question for you guys. Is it possible to install an intercooler w/o removing the bumper? If not, I am going to have to figure out a way to do so... I cannot remove my bumper due to the fact that my front lip is molded to the fenders/bumper(I told the body shop to mold the sides and rear but he did it all and when I got it it looked so good I didn't complain)
http://forums.maxima.org/supercharge...tercooler.html
Cool thanks man.
Looks like I can keep my fogs and I need to buy an Injen style intake and I will be good to go.
Another question for you guys. Is it possible to install an intercooler w/o removing the bumper? If not, I am going to have to figure out a way to do so... I cannot remove my bumper due to the fact that my front lip is molded to the fenders/bumper(I told the body shop to mold the sides and rear but he did it all and when I got it it looked so good I didn't complain)
Looks like I can keep my fogs and I need to buy an Injen style intake and I will be good to go.
Another question for you guys. Is it possible to install an intercooler w/o removing the bumper? If not, I am going to have to figure out a way to do so... I cannot remove my bumper due to the fact that my front lip is molded to the fenders/bumper(I told the body shop to mold the sides and rear but he did it all and when I got it it looked so good I didn't complain)
actually, yes you can do it without removing the bumper. here's an idea.
1st, you acntually have to cut up the bumper a little bit. but youll still be able to keep them fins that hold hold the bumpers lower lip (not from the lip kit, the actual lip of the bumper), you'll see when u test fit it.
you basically slide the IC from below (after u have shaved off some bumper material), and the bottom of the IC has mounting points, you can get two long pieces of metal, make a hole on the support bottom part, and then a hole on the metal so u can put a nut on the IC, get me? n thats it. the hard part, would be making the holes without taking out the IC.
First, what is this bumper lower lip? And what section of the intercooler would you place a nut onto?
On both intercoolers I had, they both had threaded inserts for a bolt to be screwed into, you could use brackets attached to the underside of the intercooler and find a location on the bottom of the car somewhere to bolt the other sides to I guess. I still think its going to be hard, space is pretty tight there.
When I installed the smaller IC, I actually drilled two holes in the bumper support and used long threaded bolts to attach the IC to the bumper support. Of course the bumper had to come off to do so. I also had to trim the back section of the bumper to accomadate the width of the IC.
Thread Starter
Joined: Dec 2000
Posts: 35,755
From: Lake Orion, MI
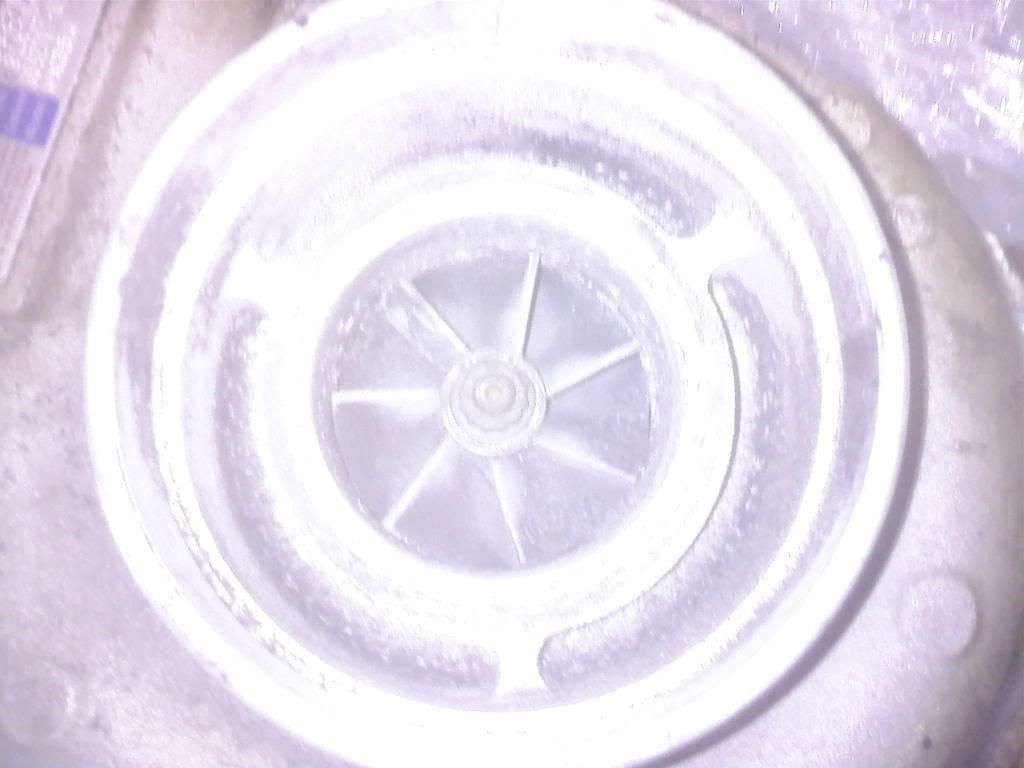


There is barely any shaft play, less than 1mm in any direction. I will see how the condition is of the turbo that will come with my kit. How would I go about cleaning this thing? Carb cleaner should be fine for the seals and such I believe. Also how do I make sure all the oil is drained from the turbo? I do no want to have anything mix.
None of the fins are bent but it might look like it with my ****ty cell cam
Thread Starter
Joined: Dec 2000
Posts: 35,755
From: Lake Orion, MI
Have any of you guys used this:
http://www.nolimitmotorsport.com/bli...timer-dtt.html
I like it alot, it is cheap and the display will serve as my boost gauge as well. If I use this I can keep my push out tray and just mold the display to the front of it. I would use the turbo timer to power the oil pump so oil doesn't drain back into the turbo, same way Streetz has his setup ran.
http://www.nolimitmotorsport.com/bli...timer-dtt.html
The BLITZ® DTT (Dual Turbo Timer) DCII is a one of a kind item. This is the only turbo tiimer in the world that incorporates a turbo timer with a boost gauge. The digital boost display can read up to 2.5hkpa (36.75psi) and also includes a digital boost peak hold. This turbo timer also features the two-piece design that allows the user to virtually mount the turbo timer anywhere in the vehicle. The Blitz DTT DC II is available in black and silver.


Have any of you guys used this:
http://www.nolimitmotorsport.com/bli...timer-dtt.html
I like it alot, it is cheap and the display will serve as my boost gauge as well. If I use this I can keep my push out tray and just mold the display to the front of it. I would use the turbo timer to power the oil pump so oil doesn't drain back into the turbo, same way Streetz has his setup ran.
http://www.nolimitmotorsport.com/bli...timer-dtt.html
I like it alot, it is cheap and the display will serve as my boost gauge as well. If I use this I can keep my push out tray and just mold the display to the front of it. I would use the turbo timer to power the oil pump so oil doesn't drain back into the turbo, same way Streetz has his setup ran.


Sweet! Great to hear someone else is trying this...
My kit is still on
Ive kept it at 7-8ish psi tho...still need to get a boost controller...ive been super lazy since i got the whole kit functional...
Im at my new job so i have access to the org again! so hopefully ill be able to chime in a bit more and maybe give some pointers on how i did it...although streetzlegend was the BIG help with mine...still running strong however...
As for the TT, i used the cheap Pen style ones from ebay...in turn works as a voltage meter oooooOOOoo...but over all it was super cheap and really small...still doing its job...
I was trying to keep everything as low key as possible...
wow im kinda excited to c this come together!
I had one of those on my Talon in the (relatively short) time that I owned it because the previous owner had put one on. It worked GREAT, it was unobtrusive, and it's so simple that I'm not sure it's possible to kill it in any way. Mine was authentic Apexi, so I can't speak for knock-offs.
Thread Starter
Joined: Dec 2000
Posts: 35,755
From: Lake Orion, MI
I have a turbonetics wastegate coming. I was going to get an electronic boost controller but I plan just to get a regular cheap one for now. I would rather spend the money on a good BOV.
I had one of those on my Talon in the (relatively short) time that I owned it because the previous owner had put one on. It worked GREAT, it was unobtrusive, and it's so simple that I'm not sure it's possible to kill it in any way. Mine was authentic Apexi, so I can't speak for knock-offs.
I was hesitant to run a cheapo Boost valve/controller thing....i was thinking about trying one out just for fun...Its nice to spend good money on an Elec one for peace of mind tho...but your right...bov is more important at this point...Im still stuck at 7psi ish...and im getting pretty bored of it now...still no intercooler tho...and havent messed with timing either...just a decent street tune on the EU...
Quick question...ive routed my piping different than anyone i think on my setup...and ive noticed on BLKMX's kit (the one you bought im assuming) the turbo oil lines look like they are running front to back rather than top to bottom...even with a sump pump, blow bi isnt an issue with the turbo like that?
I am running 3/4 inch rubber line OUT Of the turbo and all the way back to the rear part of the upper oil pan...and i have absolutely NO blo bi...no residue or anything....BUT i wish i could angle my turbo a bit more like on your kit without sacrificing my time and energy to get it functioning the way it is now...lol

I need to take off my .57 trim tomoro because of a mishap with a CRAP air filter...  maybe ill finally take some pics of my setup and make them public
Luckily i have .60 trim as a spare i will be putting on, so i will c how well that spools up
maybe ill finally take some pics of my setup and make them public Luckily i have .60 trim as a spare i will be putting on, so i will c how well that spools up
Dang them little turbo's lol. Depending on the back side of each they should be very close in spool but the 60 should outflow the 57 but again depeding on wheels and housing sizes.