
Hey Guys, I'm sure you have seen this over and over here. I just thought I share my photos as well. I should of replace the support 6 years ago when I first spotted the rust during an inspection. I had no idea it was common problem at the time.
After getting some expensive pricing on replacing the support, I decided to do this on my own. Many of the pictures that owners posted here were very helpful in guiding me to complete this task.
Photos:
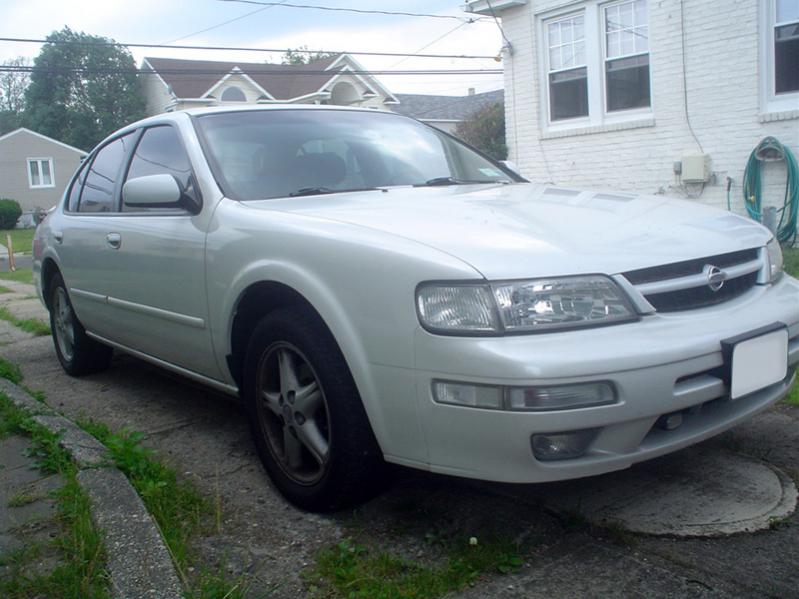
1: 98 SE
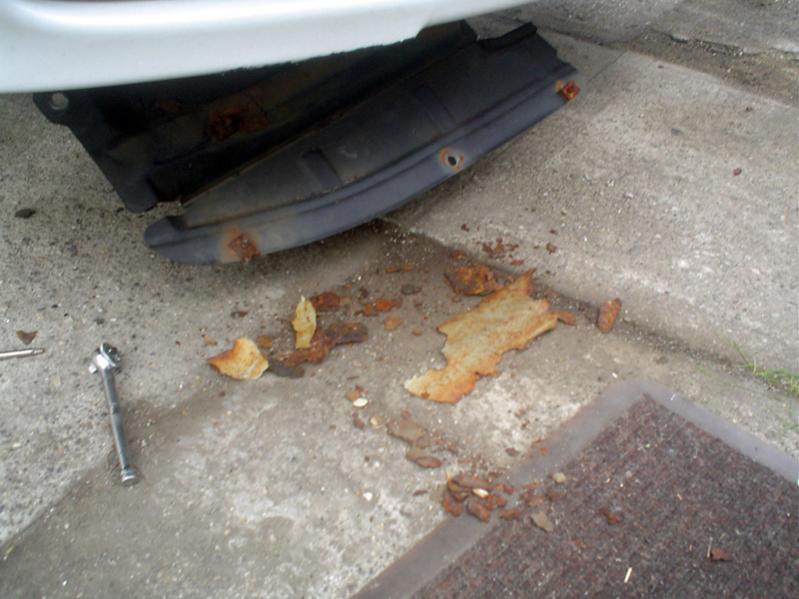
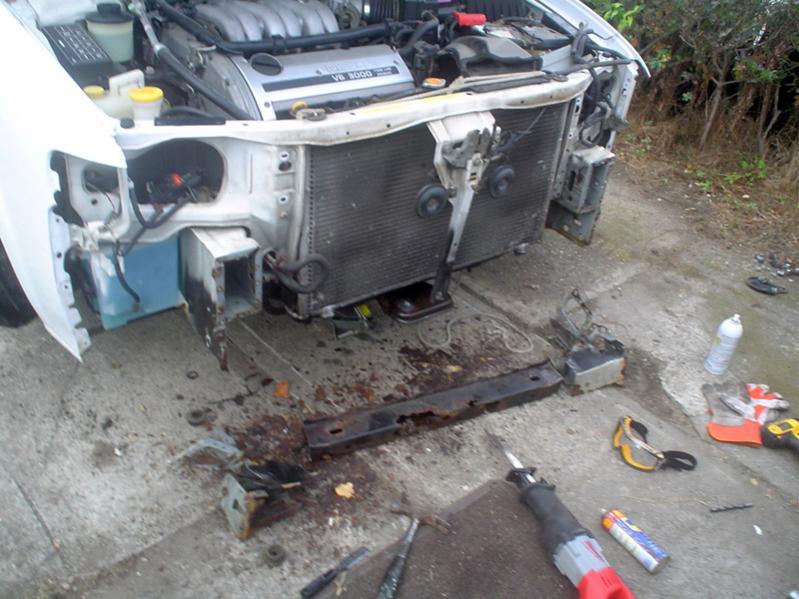
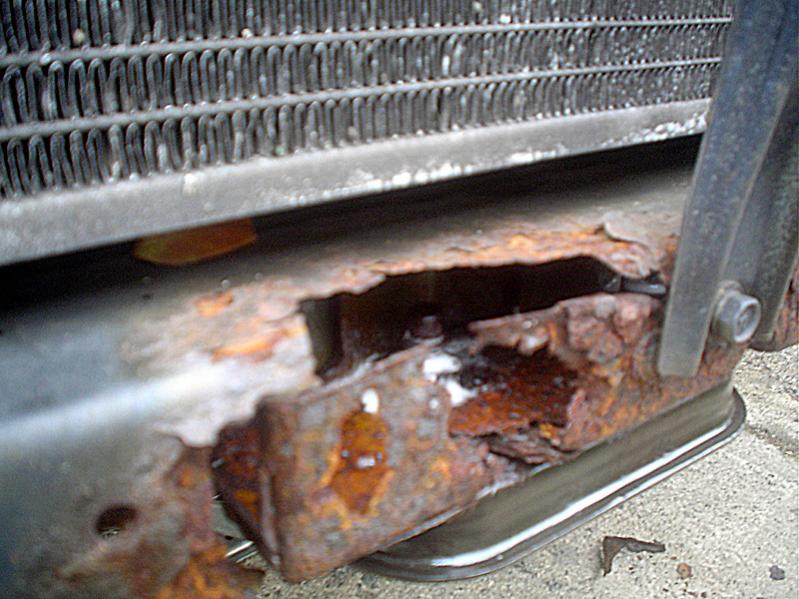
2: As soon I remove the lower covers, rust!
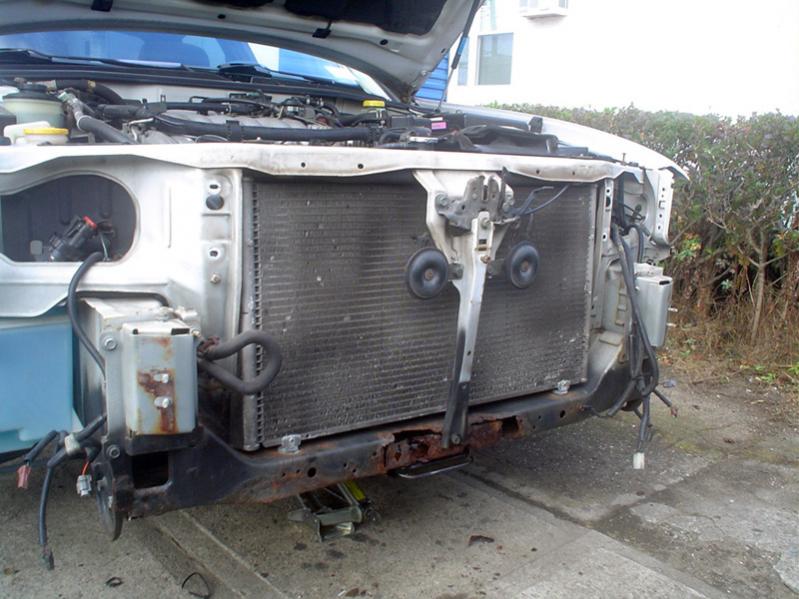
3: Front view of the support
4: Underneath view of the support
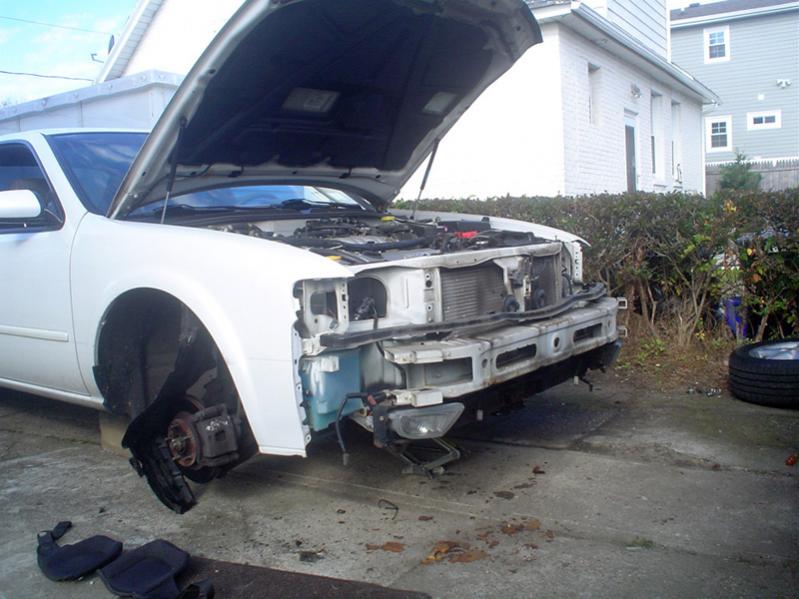
5: Bumper and wheels removed
After getting some expensive pricing on replacing the support, I decided to do this on my own. Many of the pictures that owners posted here were very helpful in guiding me to complete this task.
Photos:
1: 98 SE
2: As soon I remove the lower covers, rust!
3: Front view of the support
4: Underneath view of the support
5: Bumper and wheels removed


Photos continue
6: Complete removal of front end parts
7: Removing the spot welds, 32 total and 6 others I use a sawzall.
8: Removing the old support
9: The mess
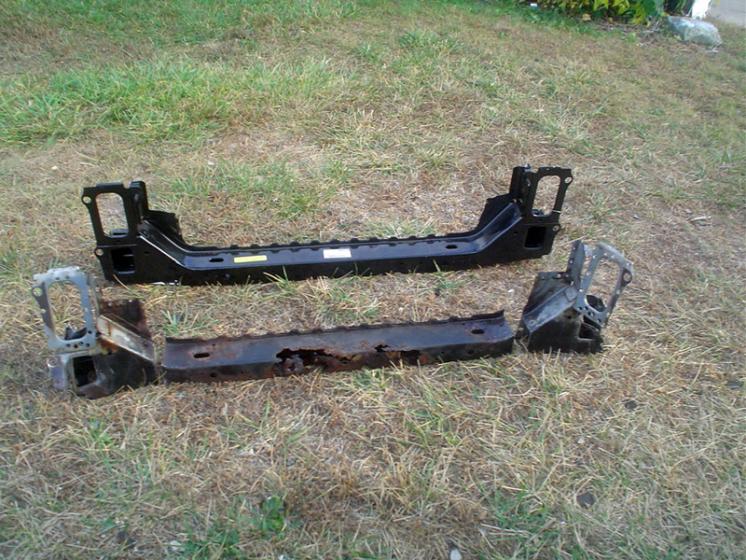
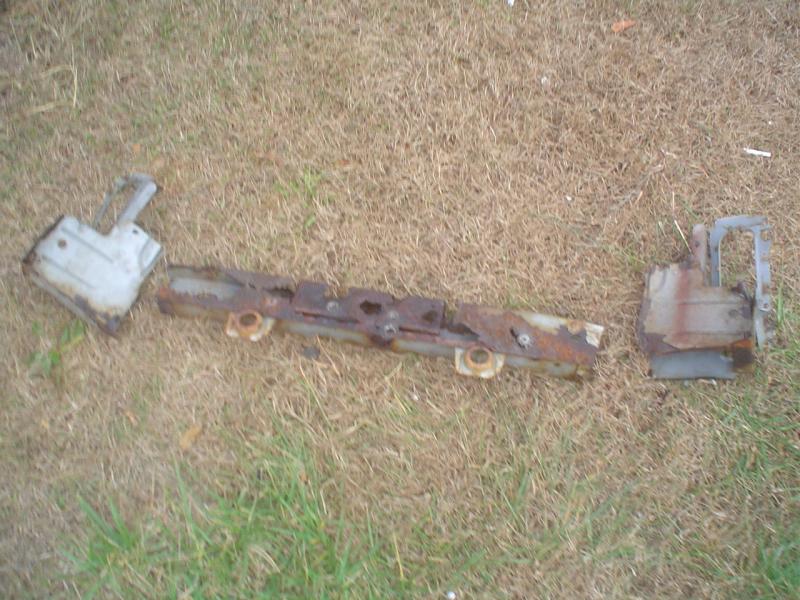
10: The old and new support side by side.
6: Complete removal of front end parts
7: Removing the spot welds, 32 total and 6 others I use a sawzall.
8: Removing the old support
9: The mess
10: The old and new support side by side.


More photos:
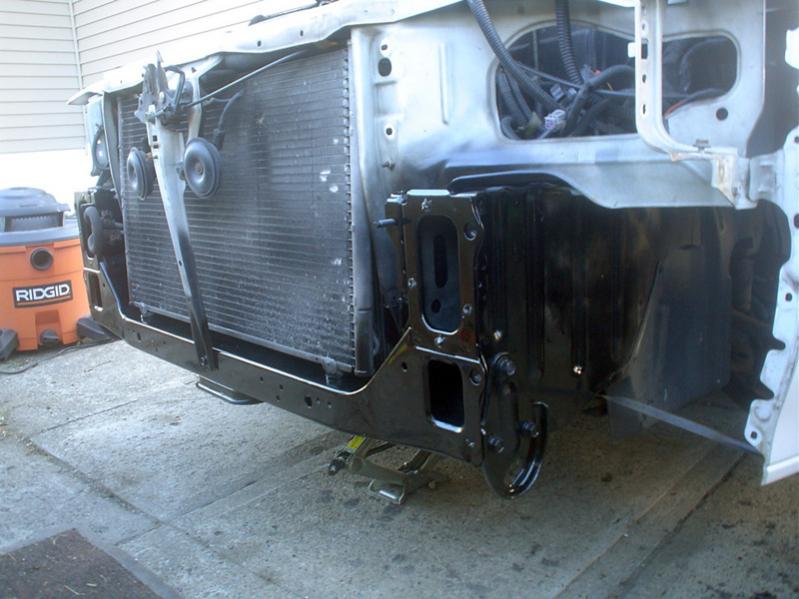
11: New support in place
12: New support welded in place.
13: First coat of POR 15 rust preventive paint.
11: New support in place
12: New support welded in place.
13: First coat of POR 15 rust preventive paint.


Final photos
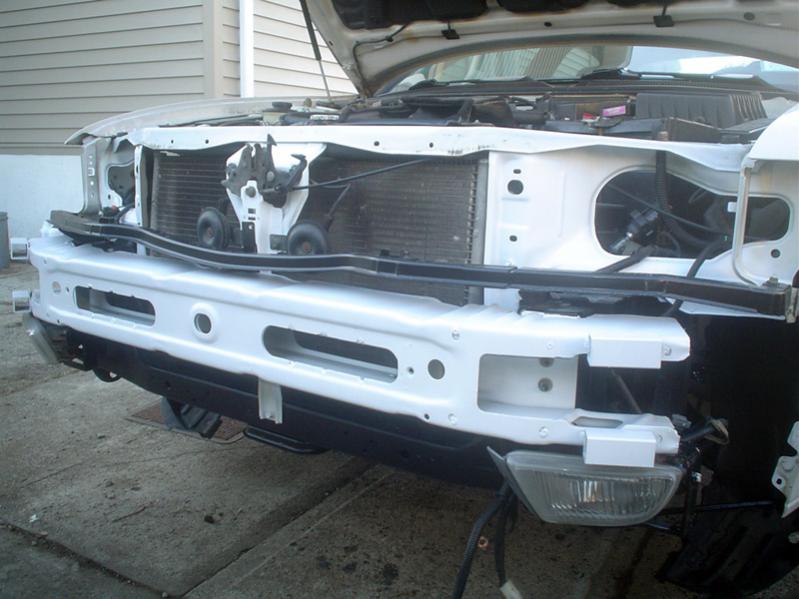
14: Second coat of POR 15 Chassis Coat Black
15: Painted all front end parts before the bumper.
16: Done, 2 days later. A total of 14 hours, due to additional painting and cleaning that a body shop probably wouldn't do.
14: Second coat of POR 15 Chassis Coat Black
15: Painted all front end parts before the bumper.
16: Done, 2 days later. A total of 14 hours, due to additional painting and cleaning that a body shop probably wouldn't do.


Sweet pics, and boy was that support busted.
Just a question, did you need to replace any of the bolts that held various parts of the front end together? Ive been wanting to tackle this job for a while but im afraid one of the crucial bolts are going to snap or the threads will get mangled. Did you have any of these problems? My support is pretty bad but not nearly THAT bad haha.
Just a question, did you need to replace any of the bolts that held various parts of the front end together? Ive been wanting to tackle this job for a while but im afraid one of the crucial bolts are going to snap or the threads will get mangled. Did you have any of these problems? My support is pretty bad but not nearly THAT bad haha.

Senior Member
Quote:
You did a nice job. But you are so diplomatic about what the body shop "probably" wouldn't do.Originally Posted by z_maxima
Done, 2 days later. A total of 14 hours, due to additional painting and cleaning that a body shop probably wouldn't do.

Senior Member
OP, I linked this thread in the Definitive Core Support thread because of the pictures that you included
http://forums.maxima.org/4th-generat...ml#post8568621
http://forums.maxima.org/4th-generat...ml#post8568621
Quote:
Just a question, did you need to replace any of the bolts that held various parts of the front end together? Ive been wanting to tackle this job for a while but im afraid one of the crucial bolts are going to snap or the threads will get mangled. Did you have any of these problems? My support is pretty bad but not nearly THAT bad haha.
No, I use penetrating oil to remove the two 17mm bolts up by the front. Since I had a nice hole in the front (see photo below), I was able to spray the oil inside the bolts. The three 14mm bolts on each side of the bar came out easy enough. I did lose one 10mm bolt which attach the cover to the inner wheel well. I was able to remove and replace the bolt with ease. While I was concerned with removing the bolts and spot welds, everything for the most part went smoothly. It was a good experience.Originally Posted by Slamrod
Just a question, did you need to replace any of the bolts that held various parts of the front end together? Ive been wanting to tackle this job for a while but im afraid one of the crucial bolts are going to snap or the threads will get mangled. Did you have any of these problems? My support is pretty bad but not nearly THAT bad haha.


Member
Quote:
1: 98 SE
????
5: Bumper and wheels removed
Originally Posted by z_maxima
Photos:1: 98 SE
????
5: Bumper and wheels removed
z_maxima:
can you briefly describe sequence of parts you removed to get from picture 1 to picture 5?
Thanks
Quote:
can you briefly describe sequence of parts you removed to get from picture 1 to picture 5?
Thanks
Sure.Originally Posted by saig
z_maxima:can you briefly describe sequence of parts you removed to get from picture 1 to picture 5?
Thanks
1. remove center grille.
2. remove side light first. Small screw on the top. Pop from the front out.
3. remove main head lights, 2 side bolts, 2 10mm nuts from the back.
4. remove the lower signal lights. Pop the smaller side marker light first, remove screw, then remove main signal light. Disconnect all wires.
5. remove the 3 bolts holding the center bumper.
6. remove the left and right retainers on the bumper that were under the Main headlights. 6 10mm bolts total.
7. remove all the engine covers attach to the bumper underneath
8. remove front wheels to open the liners to access the 3 10 mm nuts holding the side bumper to the fender. 6 total.
9. bumper should be free to come off. fog lights are attach to the inner reinforce bar. no need to remove them. Just disconnect wires.
I believed that covers up to picture 5. If you need photos of what I describe here, let me know. It is pretty much self explanatory once you start removing the center grille and lights. Hope that helps.

Senior Member
Very nice pictures and details!
I lost that bolt on the stay fender bar on both sides when I did this job 20 months ago. It screwed into a clip. I replaced it with nylon nuts and bolts and it has held fine since then. They used a clip because getting that nylon nut inside the splash shield was not easy. I also lost a 6mm bolt on each bumper to fender bracket. The bolts are welded onto the bracket so I drilled them out and replaced with loose SS 6mm nuts and bolts. All the other bolts came out with no problem and I replaced them all with SS bolts.
I lost that bolt on the stay fender bar on both sides when I did this job 20 months ago. It screwed into a clip. I replaced it with nylon nuts and bolts and it has held fine since then. They used a clip because getting that nylon nut inside the splash shield was not easy. I also lost a 6mm bolt on each bumper to fender bracket. The bolts are welded onto the bracket so I drilled them out and replaced with loose SS 6mm nuts and bolts. All the other bolts came out with no problem and I replaced them all with SS bolts.

Senior Member
good write up, but I question how you have the money for a decent mig welder but not a car jack lol js
Quote:
lol... Well I got the welder from work so I didn't have to buy or rent one. Originally Posted by S1cTech
good write up, but I question how you have the money for a decent mig welder but not a car jack lol js
") As for car jack, I simply place the car on concrete blocks with 2x4 spacers. The factory jack was perfect to lower or rasie the engine support bar when needed. I didn't trust the old support jacks I have and never replace them.
As for car jack, I simply place the car on concrete blocks with 2x4 spacers. The factory jack was perfect to lower or rasie the engine support bar when needed. I didn't trust the old support jacks I have and never replace them. 

Newbie - Just Registered
Sorry to bother do you happen to have a better picture of the front of the crosmember. Were the two bolts screw in. Having problems with mine that one just spinning and the other not budging. Thanks

Senior Member
thank god i had that re-welded b4 it even got close to that. new york, home of the rusted rad support, sheesh
Quote:
Originally Posted by Flab59
Sorry to bother do you happen to have a better picture of the front of the crosmember. Were the two bolts screw in. Having problems with mine that one just spinning and the other not budging. Thanks
If you are talking about the two 17mm bolts, i'm not sure how a better picture would help. Where the 2 bolts are screwed in, there are two welded nut inside a 8" long U channel piece of steel with in the support bar.
I attached 2 photos below, hope this helps. The first photo, you can see the bolt end through the nut where I sprayed penetrating oil inside the U channel. The other photo shows the support bar bottom facing up. You can clearly see the additional steel where the 17mm bolts are screw in. If one bolt is spinning it's probably because the female nut inside broke loose. Sorry for blurry photos.

Senior Member
Good job and out of curiosity what did the new support cost you and where did you get it? Thanks.
This is on my bucket list... Along with a few other things...
This is on my bucket list... Along with a few other things...
Quote:
This is on my bucket list... Along with a few other things...
I brought the support bar from http://www.nissan-auto-parts-dealer.com for 138.97. They only had 3 in stock at the time. I just check the website and it look like its not available anymore.Originally Posted by deloa84
Good job and out of curiosity what did the new support cost you and where did you get it? Thanks.This is on my bucket list... Along with a few other things...
You can try Nissan Parts Zone:
http://www.nissanpartszone.com/Page_Product/PartDetail.aspx?ModelName=Maxima&ModelYear=1998&Mo delSeries=A32B&FileType=239&SelectConditions=(1%3d CAL.S%3b2%3dVQ30DE%3b3%3dSE%3b4%3dAT%3b)&ShowCondi tions=(1%3dCAL.S%3b3%3dSE%3b4%3dAT%3b)&seeDesc=Fal se&goBack=True&SectionNo=J&ComponentsNo=625
SUPPORT ASSY-RADIATOR CORE LOWER **530-40U00 $139.46


Senior Member
Quote:
Originally Posted by gruesome
Have the same problem but a bad paycheck.right now. Would a chunk of 2x 4 in the hole work?

Quote:
I nominate you, oh brave explorer, to attempt this feat.Originally Posted by gruesome
Have the same problem but a bad paycheck.right now. Would a chunk of 2x 4 in the hole work?
You can then change your name to Evel Knievel


Newbie - Just Registered
Quote:
I attached 2 photos below, hope this helps. The first photo, you can see the bolt end through the nut where I sprayed penetrating oil inside the U channel. The other photo shows the support bar bottom facing up. You can clearly see the additional steel where the 17mm bolts are screw in. If one bolt is spinning it's probably because the female nut inside broke loose. Sorry for blurry photos.
I am in the middle of this replacement, I was wondering if anyone has had to replace these bolts, and if so do you have the part numbers for those bolts?Originally Posted by z_maxima
If you are talking about the two 17mm bolts, i'm not sure how a better picture would help. Where the 2 bolts are screwed in, there are two welded nut inside a 8" long U channel piece of steel with in the support bar.I attached 2 photos below, hope this helps. The first photo, you can see the bolt end through the nut where I sprayed penetrating oil inside the U channel. The other photo shows the support bar bottom facing up. You can clearly see the additional steel where the 17mm bolts are screw in. If one bolt is spinning it's probably because the female nut inside broke loose. Sorry for blurry photos.
Thanks!
Senior Member
Quote:
Thanks!
Those bolts only cost a few dollars so I replaced both front crossmember bolts while replacing the lower rad support.Originally Posted by badbest321
I am in the middle of this replacement, I was wondering if anyone has had to replace these bolts, and if so do you have the part numbers for those bolts?Thanks!
11298-40U01
Newbie - Just Registered
Quote:
11298-40U01
Yea, I had to cut them out, they were rusted beyond belief and I couldn't find it on the s diagrams. You wouldnt know the rubber grommets too?Originally Posted by jholley
Those bolts only cost a few dollars so I replaced both front crossmember bolts while replacing the lower rad support.11298-40U01
Newbie - Just Registered
Thanks man not sure how I'll go about fixing this -_-. don't really wana change the radiator support seeing as there's really nothing wrong with it except were the bolts go.

Banned
Quote:
Are you talking about the bolts that bolt in from the bottom and mount the support that goes under the motor?...if so that is the main reason why people do this repair! if the rad support is rotted where these 2 bolts are screwed in, then they arent doing much in terms of supporting the motor anymore.Originally Posted by Flab59
Thanks man not sure how I'll go about fixing this -_-. don't really wana change the radiator support seeing as there's really nothing wrong with it except were the bolts go.
Newbie - Just Registered
Quote:
Yea the two front bolts. My rad support is perfect, except for the dam bolt grabs a bit and wen it comes time to tightening it gets lose again (keeps spinning).I'm guessing the spot welds came lose and the nut also. Might just cut an opening and weld some nuts, close it back up for a temp fix. Plus have bigger problems on the car to fix. (Timing cover leaks, and previous owner selling the car with a lose steering rack.) But thanks for the help sorry for horing your thread.Originally Posted by 98maxaholic
Are you talking about the bolts that bolt in from the bottom and mount the support that goes under the motor?...if so that is the main reason why people do this repair! if the rad support is rotted where these 2 bolts are screwed in, then they arent doing much in terms of supporting the motor anymore.
Banned
Quote:
if the support is in as good of shape as u say ...im wonderin why u cant just tac a couple spots and weld the brace that goes under the motor right to the rad. support...that will buy some time!Originally Posted by Flab59
Yea the two front bolts. My rad support is perfect, except for the dam bolt grabs a bit and wen it comes time to tightening it gets lose again (keeps spinning).I'm guessing the spot welds came lose and the nut also. Might just cut an opening and weld some nuts, close it back up for a temp fix. Plus have bigger problems on the car to fix. (Timing cover leaks, and previous owner selling the car with a lose steering rack.) But thanks for the help sorry for horing your thread.

Hey guys new on here, have to say this really is a good write up, but I have a question� My girl got into a front end acc the other day not to serious front bumper, front reinforcement bar, rad support bar nd the rad got all messed up,, my main concern is this rad support bar iv been searching and reading all morning but still didn't get my answer, I want to replace the whole rad support bar but i want to know if I still have to weld or just bolt up??? I'm guessing i have to still weld but I'm not 100% sure PLEASE HELPPP
I'm guessing i have to still weld but I'm not 100% sure PLEASE HELPPPQuote:
I'm guessing i have to still weld but I'm not 100% sure PLEASE HELPPP
If youre referring to the lower radiator support (the topic of this thread) then yes you should have it spot welded where needed.Originally Posted by Erics1292
Hey guys new on here, have to say this really is a good write up, but I have a question� My girl got into a front end acc the other day not to serious front bumper, front reinforcement bar, rad support bar nd the rad got all messed up,, my main concern is this rad support bar iv been searching and reading all morning but still didn't get my answer, I want to replace the whole rad support bar but i want to know if I still have to weld or just bolt up??? I'm guessing i have to still weld but I'm not 100% sure PLEASE HELPPP
Ive heard rumors that the welding is actually not needed and you could get away with just bolting it in - however the people who claimed this and allegedly did so on their cars' never stuck around to confirm the support remained in place. IIRC the theory was that the spot welds are an "artifact" from the factory assembly line - due to how the front end was assembled the spot welds were needed to hold stuff in place because the bolts couldnt be installed before other components were installed.
Again - thats all theory and rumor so unless you dont mind having your max potentially sh*tting the engine onto the asphalt, id go ahead and do it the standard way which requires the spot welds.
Quote:
Ive heard rumors that the welding is actually not needed and you could get away with just bolting it in - however the people who claimed this and allegedly did so on their cars' never stuck around to confirm the support remained in place. IIRC the theory was that the spot welds are an "artifact" from the factory assembly line - due to how the front end was assembled the spot welds were needed to hold stuff in place because the bolts couldnt be installed before other components were installed.
Again - thats all theory and rumor so unless you dont mind having your max potentially sh*tting the engine onto the asphalt, id go ahead and do it the standard way which requires the spot welds.
Originally Posted by Slamrod
If youre referring to the lower radiator support (the topic of this thread) then yes you should have it spot welded where needed.Ive heard rumors that the welding is actually not needed and you could get away with just bolting it in - however the people who claimed this and allegedly did so on their cars' never stuck around to confirm the support remained in place. IIRC the theory was that the spot welds are an "artifact" from the factory assembly line - due to how the front end was assembled the spot welds were needed to hold stuff in place because the bolts couldnt be installed before other components were installed.
Again - thats all theory and rumor so unless you dont mind having your max potentially sh*tting the engine onto the asphalt, id go ahead and do it the standard way which requires the spot welds.
^THANKS,, well then since i don't have a welder ima have to take it to a shop to get it done then,, Anyone kno of place in NJ(hackensack area) where they can do this for a good price??
Quote:
Check the regional forums for that.Originally Posted by Erics1292
^THANKS,, well then since i don't have a welder ima have to take it to a shop to get it done then,, Anyone kno of place in NJ(hackensack area) where they can do this for a good price??