
best way to paint upper intake manifold


Senior Member
Joined: Oct 2012
Posts: 2,974
From: Portland, Oregon
It would be best to remove any grease or oil that is on the manifold. Then mask off what you don't want to paint. What color do you have in mind? What color is your car?
Painting the manifold would be easy if it was removed from the engine, as part of a larger project.
Painting the manifold would be easy if it was removed from the engine, as part of a larger project.


Not sure why one would want to paint it.
Perhaps a media blast or wire wheeling followed by a nice clear coat?
I've always been a fan and advocate of the bare metal finish.
Cleaned and finished correctly our UIMs are quite nice visual center-pieces to our e-compartments.
Perhaps a media blast or wire wheeling followed by a nice clear coat?
I've always been a fan and advocate of the bare metal finish.
Cleaned and finished correctly our UIMs are quite nice visual center-pieces to our e-compartments.

Thread Starter
Senior Member
Joined: Sep 2015
Posts: 366
Thanks... I'm currently doing valve cover gaskets, rear main seal and crankshaft seal before installing engine. The car is that sage mist green... I'm also thinking of replacing any vacuum lines. Just wanting a reliable ride, with good looks on a budget. While I'm at it i might paint the valve covers to match. Any other ideas
Last edited by blkmax1; Dec 9, 2015 at 06:53 PM.

Senior Member
Joined: Jan 2011
Posts: 3,037
From: Central AR
How many miles are on the replacement engine? What year is the replacement engine?
The reason I ask is roughly two years ago I had an engine from a 95 model with approximately 75,000 miles swapped in to replace the original. I had the water pump replaced during the swap because I knew the replacement had been setting without coolant for many months before the swap. It had also been sitting without oil and fuel for months that contributed to issues with dried out seals.
I seriously REGRET not doing the following items during the swap.
1) Refurbishing the injectors with a $34 refurb kit to replace screens, o-rings and pintle caps or I could have sent the injectors out for service. Leaking injector o-rings came back bite me soon after the engine swap. I was out hundreds of dollars after the swap trying to figure out a fuel flooding problem. The money I spent on trying to find the flooding problem would have paid for a NEW set of injectors.
2) Replacing the timing chain tensioner and guides while the engine was out of the car. Long story but the timing chain tensioner design changed a few years ago. While there is an access door for changing the tensioner, the new tensioner design requires the guides to also be changed. It is so much easier to replace the tensioner and guides when the engine is out of the car. BTW - if you remove the timing cover you might as well replace the water pump.
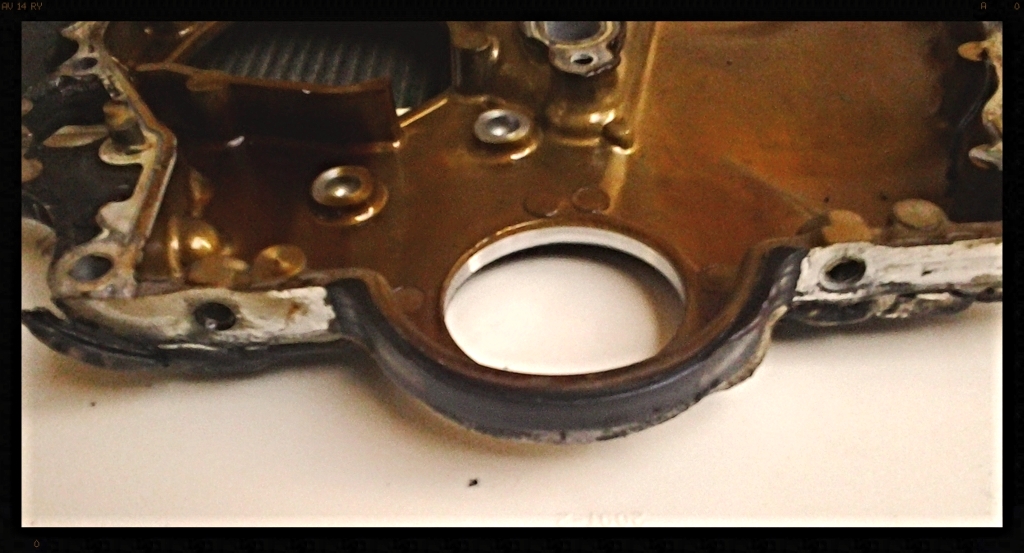
BEFORE I FORGET - While you have the engine out, you can easily remove the upper oil pan and replace the "half moon" seals like the one in this picture.
The reason I ask is roughly two years ago I had an engine from a 95 model with approximately 75,000 miles swapped in to replace the original. I had the water pump replaced during the swap because I knew the replacement had been setting without coolant for many months before the swap. It had also been sitting without oil and fuel for months that contributed to issues with dried out seals.
I seriously REGRET not doing the following items during the swap.
1) Refurbishing the injectors with a $34 refurb kit to replace screens, o-rings and pintle caps or I could have sent the injectors out for service. Leaking injector o-rings came back bite me soon after the engine swap. I was out hundreds of dollars after the swap trying to figure out a fuel flooding problem. The money I spent on trying to find the flooding problem would have paid for a NEW set of injectors.
2) Replacing the timing chain tensioner and guides while the engine was out of the car. Long story but the timing chain tensioner design changed a few years ago. While there is an access door for changing the tensioner, the new tensioner design requires the guides to also be changed. It is so much easier to replace the tensioner and guides when the engine is out of the car. BTW - if you remove the timing cover you might as well replace the water pump.
BEFORE I FORGET - While you have the engine out, you can easily remove the upper oil pan and replace the "half moon" seals like the one in this picture.
Last edited by CS_AR; Dec 9, 2015 at 08:17 PM.
Senior Member
Joined: Oct 2012
Posts: 2,974
From: Portland, Oregon
CS_AR, I could not agree with you more.
my signature is really about doing all the While you are there.....
The rear heater hoses, service all the injectors, I have mine cleaned by a good company. then replace all the gas hose..... clean throttle body and the IACv valve.
Especially the knock sensor. it is easy to get at then.
blkmax1, have fun painting the uim. If you take it off, and don't do the repairs, you will have the not so fun task of removing the uim again.
For anyone reading this in the future, do your self a favor. service anything under there.

Yes.
Mr. Craig did a wonderful and very tasteful job restoring that engine.
His attention to detail is only rivaled by my own.
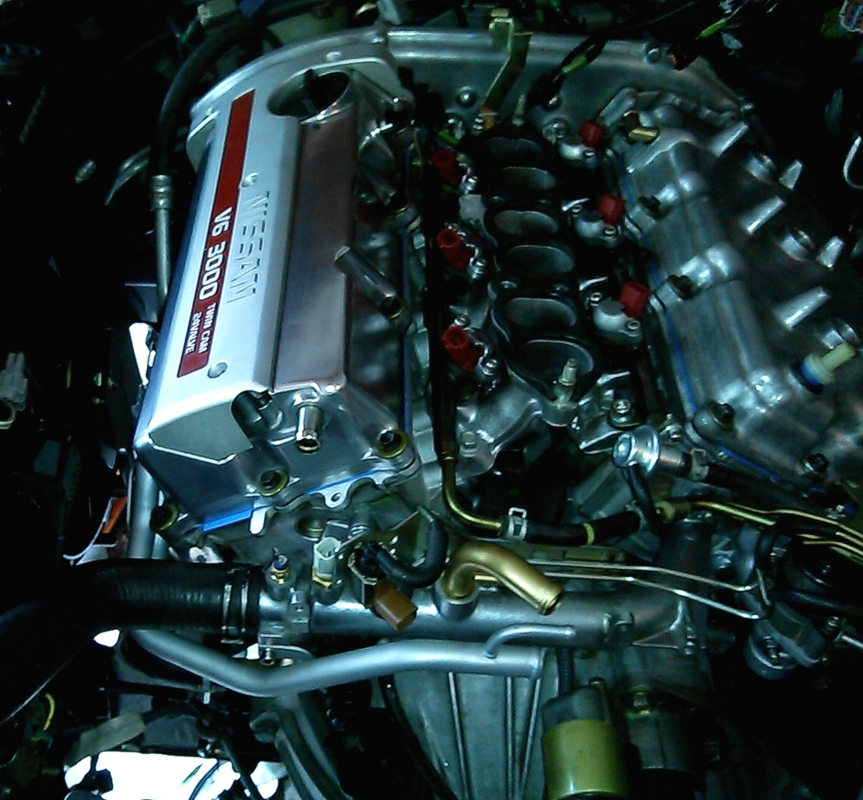
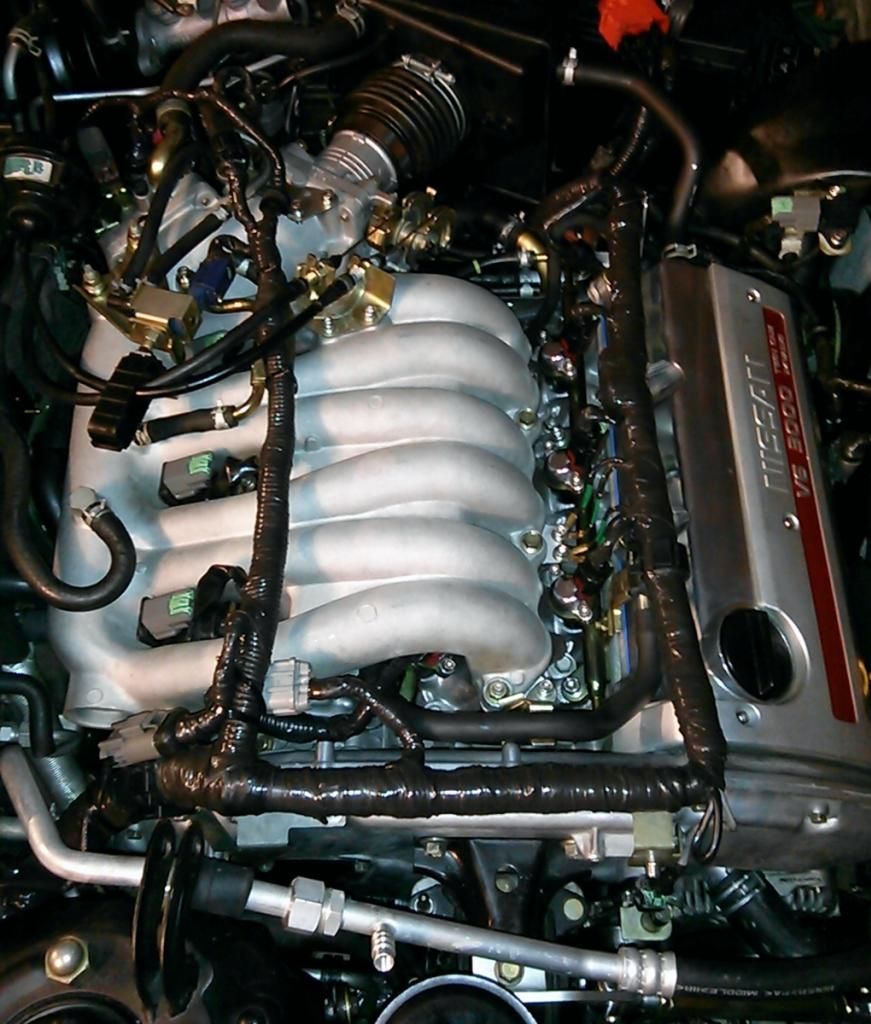
... and to the OP ... please note of the beautiful finish on the UIM .......... bare metal.
Mr. Craig did a wonderful and very tasteful job restoring that engine.
His attention to detail is only rivaled by my own.
... and to the OP ... please note of the beautiful finish on the UIM .......... bare metal.
Last edited by Turbobink; Dec 10, 2015 at 01:54 PM.
Thread Starter
Senior Member
Joined: Sep 2015
Posts: 366
Thanks guys... I have about two more months to get everything together. I've done the valve covers, water pump, rear heater hoses, tbody, iacv. I.dont have a stand so what's the best way to do the rear main seal, being that I have to remove the oil pans?


dAYUM.
turbonink... I'm coming for you boys.

I'm powder coating my uim and valve covers. This is off a replacement engine that I got with 65k miles.

All that the gentlemen above have mentioned with maintenance, with the exception of the half moon seals... is a must on an engine that has been sitting. Plus if you don't replace stuff that is staring you in the face when it is sitting on a pallet and you wait for it to be in a car up against the firewall... well you're a putz.
^^^ not a thing wrong with powder coating. Way more maintenance free than a bare finish.
I guess the point I was trying to make or more the opinion I was trying to impose was to not refinish the the UIM in a color that's too far off from a metal color/finish.
I guess the point I was trying to make or more the opinion I was trying to impose was to not refinish the the UIM in a color that's too far off from a metal color/finish.


Thread Starter
Senior Member
Joined: Sep 2015
Posts: 366
Oh definitely right. Im changing any hose or seal I can get to. IT'LL BE my first time doing the rear main seal but I'm more than confident I can. I have 4 new injectors also but will buy 2 more and replace all 6. Any other ideas? Done the following:
1. Water pump
2. Valve cover gaskets
3. Manifold gasket
4. Iacv
5. Egr valve gasket
6. Rear hoses on rear of manifold
7. Crank seal
1. Water pump
2. Valve cover gaskets
3. Manifold gasket
4. Iacv
5. Egr valve gasket
6. Rear hoses on rear of manifold
7. Crank seal

Thread
Thread Starter
Forum
Replies
Last Post
maxiiiboy
5th Generation Maxima (2000-2003)
11
Aug 4, 2016 12:55 PM
maximillion98
4th Generation Maxima (1995-1999)
12
Dec 5, 2015 12:58 PM
GNCMaxima
7th Generation Maxima (2009-2015)
2
Nov 26, 2015 07:49 AM
NeoBlitz
5th Generation Maxima (2000-2003)
2
Nov 24, 2015 06:55 PM