
"Overkill" Big 3 Upgrade Pics/Semi-Writeup


"Overkill" Big 3 Upgrade Pics/Semi-Writeup
Wow it's been a while since I've contributed a mod/install so I thought I'd do my 1 good deed for the year. Maybe more, but I won't disclose. :yaimgrinning:
There's been a few questions lately asking for MetalMaxima's Writeup on the Big 3 Upgrade that he's done. I'm not going to take anything away from his writeup, but I know the pics that once were there are now missing. So I did this upgrade myself and took the liberty of sharing my pictures with you. Mine should be around for a while unless Cardomain blows up from a Nuclear Explosion.
MetalMaxima Big 3 Upgrade Threads:
http://forums.maxima.org/showthread.php?t=366445
http://forums.maxima.org/showthread.php?t=366520
http://forums.maxima.org/showthread.php?t=366524
Now on to my install......
Yes 0 Gauge wire is overkill. You will be fine with 2 Gauge or even 4 Gauge. I chose to go this route because I don't go "half-***" on my car, and if I'm going to spend money on anything for it, I prefer the best.
Here is a list of materials purchased. Total cost from piecing everything out to get the best deal was approximately $420.00 shipped and that includes my Optima Yellow Top. Anyway, on with the list.
Optima Yellow Top D75/25
11 ft of Stinger Expert Series Oval 0 Gauge Clear Power Wire (Used about 9 ft)
7 ft of Stinger Expert Series Oval 0 Gauge Gray Power Wire (Used about 6 ft)
Stinger HPM Series Inline ANL Fuseholder SHD201
Stinger ANL Platinum Fuse 300 Amp
5 - Sound Quest By Stinger 0 Gauge Power Wire Ring Terminal (Used 4 of 5)
Stinger HPM Series LED Digital Battery Terminal SHT301
Stinger HPM Series Negative Battery Terminal SHT302
Now on with the pictures taken with a Sony Cybershot. Some reason the camera was playing tricks with the digital readout in the pictures, but it was fluctuating around 14.9v to 15.5v with the car on.
The only thing I don't like right now is my OEM battery tie down. I'm currently searching for a nice clean/simple aluminum billet one to replace it. The cardboard is there to protect the Optima from getting corrosion and rust marks from the OEM fugly tie down.
If you'd like to see additional descriptions/install info then you can view my cardomain: www.cardomain.com/id/deckdout2

Sorry a little blurry, borrowed my sis's camera and just copied to my flash drive before I looked at it and only took 1 of this shot.


There's been a few questions lately asking for MetalMaxima's Writeup on the Big 3 Upgrade that he's done. I'm not going to take anything away from his writeup, but I know the pics that once were there are now missing. So I did this upgrade myself and took the liberty of sharing my pictures with you. Mine should be around for a while unless Cardomain blows up from a Nuclear Explosion.
MetalMaxima Big 3 Upgrade Threads:
http://forums.maxima.org/showthread.php?t=366445
http://forums.maxima.org/showthread.php?t=366520
http://forums.maxima.org/showthread.php?t=366524
Now on to my install......
Yes 0 Gauge wire is overkill. You will be fine with 2 Gauge or even 4 Gauge. I chose to go this route because I don't go "half-***" on my car, and if I'm going to spend money on anything for it, I prefer the best.
Here is a list of materials purchased. Total cost from piecing everything out to get the best deal was approximately $420.00 shipped and that includes my Optima Yellow Top. Anyway, on with the list.
Optima Yellow Top D75/25
11 ft of Stinger Expert Series Oval 0 Gauge Clear Power Wire (Used about 9 ft)
7 ft of Stinger Expert Series Oval 0 Gauge Gray Power Wire (Used about 6 ft)
Stinger HPM Series Inline ANL Fuseholder SHD201
Stinger ANL Platinum Fuse 300 Amp
5 - Sound Quest By Stinger 0 Gauge Power Wire Ring Terminal (Used 4 of 5)
Stinger HPM Series LED Digital Battery Terminal SHT301
Stinger HPM Series Negative Battery Terminal SHT302
Now on with the pictures taken with a Sony Cybershot. Some reason the camera was playing tricks with the digital readout in the pictures, but it was fluctuating around 14.9v to 15.5v with the car on.
The only thing I don't like right now is my OEM battery tie down. I'm currently searching for a nice clean/simple aluminum billet one to replace it. The cardboard is there to protect the Optima from getting corrosion and rust marks from the OEM fugly tie down.
If you'd like to see additional descriptions/install info then you can view my cardomain: www.cardomain.com/id/deckdout2
Sorry a little blurry, borrowed my sis's camera and just copied to my flash drive before I looked at it and only took 1 of this shot.
Last edited by Deckdout2; Jan 28, 2008 at 06:15 AM.


I've got my girlfriend's sister's camera tonight, so I might snap some more pics before I get my new tie down.
As far as cosmetically, I love it. Definately cleans up the engine bay. My interior lights and gauges are alot brighter. The car seems to start a little quicker. My car seems to run very smoothly. I guess the grounding completes the current or at least improves the current. So far after only having it for a couple of days, I give it an A++ mod.
You forgot to add, "Batman".


I'm going to give it a detailed cleaning when I put in my new modded engine cover. It should look better as you can see it's still a little dirty, just not as.
Last edited by Deckdout2; Jan 27, 2008 at 06:47 PM.


Yours looks CLEAN!!
It's not a 5th gen, but here's my big three (utilizing 2/0)


My battery is underneath my unfinished amp rack...


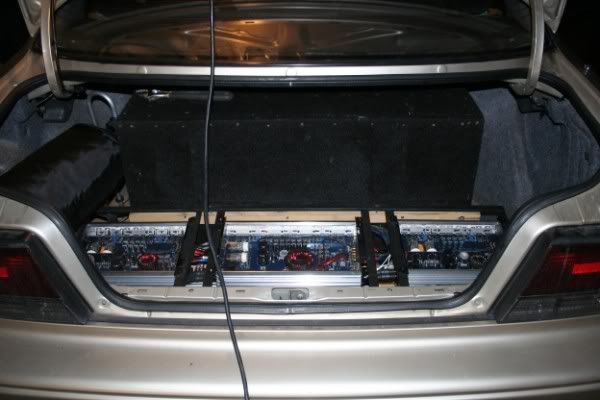
Just thought I'd share.
It's not a 5th gen, but here's my big three (utilizing 2/0)
My battery is underneath my unfinished amp rack...
Just thought I'd share.
Last edited by 505max94se; Jan 28, 2008 at 12:52 AM.

Better for the fuse to blow then to fry the whole electrical system in your car. Depending on the gauge wire, I would put one in. Just make sure to put a big enough fuse for the wire rating.


The fuse is supposed to match the maximum current that would go through the wire (alt rating) not the wire size.
My wording might have been a little off, my apologies but same meaning. When performing this upgrade, the fuse should be rated for the capacitance of the wire...not the alternator. Reason you rate the fuse for the wire in this case is because you are going from the alternator to the battery.
Last edited by Deckdout2; Jan 29, 2008 at 06:53 AM.
My wording might have been a little off, my apologies but same meaning. When performing this upgrade, the fuse should be rated for the capacitance of the wire...not the alternator. Reason you rate the fuse for the wire in this case is because you are going from the alternator to the battery.
The maximum amount of current that should be going through that wire is the maximum current put out by the alternator. If you get anything more than that there is something wrong (a short) otherwise there is no point of the fuse. The point of the fuse is to protect the battery not the wire.
EDIT: Actually, if you read the threads you linked you would've seen my reply over a year ago.
Last edited by Batxel; Jan 29, 2008 at 11:16 AM.
The factory alt obviously doesn't give out 300A. I think you and metal maxima are confused at that the typical wire just so happens to match the fuse. Typically the wire matches the current demand where here it is "overkill". In this situation you picked out a larger gauge wire but didn't increase the current that's going through it. Since you didn't increase the current going through it you DON'T upgrade the fuse. Just because someone wrote up a HOW TO it doesn't mean it's automatically the right way to do it.
http://www.bcae1.com/fuses.htm
Suggested Fuse Sizes:
Wire Gauge Recommended Maximum Fuse Size
00 awg 400 amps
0 awg 325 amps
1 awg 250 amps
2 awg 200 amps
4 awg 125 amps
6 awg 80 amps
8 awg 50 amps
10 awg 30 amps
12 awg 20 amps
14 awg 15 amps
16 awg 7.5 amps
These are the recommended maximum fuse ratings for the corresponding wire size. Using a smaller fuse than what's recommended here will be perfectly safe.
I guess everybody that does the Big 3 from every site I've sourced so far is completely wrong, because everything I have found has been said to be exactly that.
http://forums.wigm-tuners.org/index.php?showtopic=2273
Run the wire either through your fuse box if applicable or through a fuse. The fuse should be sized to match the max ampacity of your wire, not the output capability of your alternator. 150A fuse for 4awg wire..and 300A fuse for 1/0awg wire.
Any wire leaving the positve battery terminal, which is not of sufficient gauge to be protected by the main battery fuse, should be separately fused as appropriate for the current capacity of the wire being protected.
On the other hand, you are correct if you are fusing for a specific equipment other than the alternator, ie....remote start, headunit, amplifier, and such. Then again, it's usually going to house it's own fuse source within the harness of the equipment for that particular application. That's the only time I am aware of that you would fuse for the capacity of a certain equipment.
And you are also right, just because someone makes a how-to, does not mean that all the information is correct. I however, stand by the information provided here and from all the sources that I have found.
My "OEM Power Wire" is still intact, with the same OEM Fuse at 120 Amps in it that runs to the Fusebox, starter, and amp. This is an upgrade for the positive side running to the alternator, not a replacement of the positive cable. It is still there under the battery tray. I made a connection from the OEM terminal to the 0 Gauge Wire, then to the new terminal. That is why you see 2 positive cables on the positive terminal.
Wire Gauge Recommended Maximum Fuse Size
00 awg 400 amps
0 awg 325 amps
1 awg 250 amps
2 awg 200 amps
4 awg 125 amps
6 awg 80 amps
8 awg 50 amps
10 awg 30 amps
12 awg 20 amps
14 awg 15 amps
16 awg 7.5 amps
These are the recommended maximum fuse ratings for the corresponding wire size. Using a smaller fuse than what's recommended here will be perfectly safe.
I guess everybody that does the Big 3 from every site I've sourced so far is completely wrong, because everything I have found has been said to be exactly that.
http://forums.wigm-tuners.org/index.php?showtopic=2273
http://www.amplepower.com/faq/index.html
Many many more out there, just not going to list all of them.......
http://forums.wigm-tuners.org/index.php?showtopic=2273
http://www.amplepower.com/faq/index.html
Many many more out there, just not going to list all of them.......
On the other hand, you are correct if you are fusing for a specific equipment other than the alternator, ie....remote start, headunit, amplifier, and such. Then again, it's usually going to house it's own fuse source within the harness of the equipment for that particular application. That's the only time I am aware of that you would fuse for the capacity of a certain equipment.
Now that I look through your sources amplepower is actually right but it doesn't describe your setup
You missinterpreted the part that is in bold. Your wire is plenty sufficient. If you were to use a 10 gauge wire for this upgrade than you would match the fuse with the wire (30A) but you are not.
And your other source is just retarded not to mention the crappy knukonceptz battery terminals.
Any wire leaving the positve battery terminal, which is not of sufficient gauge to be protected by the main battery fuse, should be separately fused as appropriate for the current capacity of the wire being protected.
And your other source is just retarded not to mention the crappy knukonceptz battery terminals.
My "OEM Power Wire" is still intact, with the same OEM Fuse at 120 Amps in it that runs to the Fusebox, starter, and amp. This is an upgrade for the positive side running to the alternator, not a replacement of the positive cable. It is still there under the battery tray. I made a connection from the OEM terminal to the 0 Gauge Wire, then to the new terminal. That is why you see 2 positive cables on the positive terminal.
http://www.bcae1.com/fuses.htm
I guess everybody that does the Big 3 from every site I've sourced so far is completely wrong, because everything I have found has been said to be exactly that.
http://forums.wigm-tuners.org/index.php?showtopic=2273
http://www.amplepower.com/faq/index.html
Many many more out there, just not going to list all of them.......
On the other hand, you are correct if you are fusing for a specific equipment other than the alternator, ie....remote start, headunit, amplifier, and such. Then again, it's usually going to house it's own fuse source within the harness of the equipment for that particular application. That's the only time I am aware of that you would fuse for the capacity of a certain equipment.
And you are also right, just because someone makes a how-to, does not mean that all the information is correct. I however, stand by the information provided here and from all the sources that I have found.
i mean, you yourself stated that the 0 gauge was overkill, so that would mean that the chart your refer to don't relate to your case.


Thread
Thread Starter
Forum
Replies
Last Post