
INTERIOR OVERHAUL WORKLOG (V1.2): Corrections & Upgrades


AWRIGHT, I had some repair work done to the max (exhaust related) and I do believe it served as the catalyst to get my motivation up and running again, sooooo here we go!
Rear deck...let this serve as a lesson to those whom are looking to install suede in their car and the longevity (or lack thereof) you can expect!

So, whatever, I've got to keep this in suede because there's a ton of spray glue underneath. Not a big deal, the rear deck is easy enough to remove anyway.

We've got some more deadening to do. I am going to be putting a layer of Second Skin Luxury Liner Pro on the doors since, well, I'm stupid like that. I am going to be using an industrial caulk used for vinyl as well as some gorilla tape.

THIS STUFF RULES!!! Well, the gorilla tape namely. I am going to be making much more use of this in the future. Before and afters


Rear deck...let this serve as a lesson to those whom are looking to install suede in their car and the longevity (or lack thereof) you can expect!
So, whatever, I've got to keep this in suede because there's a ton of spray glue underneath. Not a big deal, the rear deck is easy enough to remove anyway.
We've got some more deadening to do. I am going to be putting a layer of Second Skin Luxury Liner Pro on the doors since, well, I'm stupid like that. I am going to be using an industrial caulk used for vinyl as well as some gorilla tape.
THIS STUFF RULES!!! Well, the gorilla tape namely. I am going to be making much more use of this in the future. Before and afters
Last edited by Metal Maxima; Mar 20, 2009 at 09:02 PM.
Next up is some more painting. Now, what we see here are two normal door panels, but of course, upon closer investigation...

...yeah, tape only does you so good. So, we're going to have to do it over around the sides. The OTHER problem is that when I went to sand after clearcoat the paint was a little thin, so I had to add a few more coats to the panel.

In order to get a really nice fit, I used my itty-bitty standard driver to tuck the tape in.

...yeah, tape only does you so good. So, we're going to have to do it over around the sides. The OTHER problem is that when I went to sand after clearcoat the paint was a little thin, so I had to add a few more coats to the panel.
In order to get a really nice fit, I used my itty-bitty standard driver to tuck the tape in.
I SHOULD HAVE FRIGGIN DONE THIS YEARS AGO!!!! But time being the greatest of teacher has taught me many things. The main problem I have had in keeping everything in good condition has been the susceptibility of the paint to scratches. BUT NO MORE. SO, this time around, order of operations is: PREP, PAINT, CLEAR, CURE, SAND, BUFF!!!

I WILL LET THE RESULTS SPEAK FOR THEMSELVES...I CANNOT WAIT TO SEE HOW THE REST IS GOING TO TURN OUT!!!


I WILL LET THE RESULTS SPEAK FOR THEMSELVES...I CANNOT WAIT TO SEE HOW THE REST IS GOING TO TURN OUT!!!


Now what have we here? Time to unclutter the absolute rats nest I made of the wiring, ja? First things first, we've got a nice set of fasteners to properly secure all of the wiring we're going to be using.

Next up is this awesomeness. What we have here is a 7-wire cable that will allow us to easily identify and wire all of the LED bars throughout the car. Even that being said, though, we've got some serious work ahead of us.

Using these fasteners I can really get a nice, secure fit.

Here's just an example as to how I am splitting the cabling. This time around I am doing the lighting a bit differently. The seven wires will be split as follows:
(1 - 3) Driverside footwell, rear passenger footwell, door map pocket
(4 - 6) Passenger footwell, rear passenger footwell, door map pocket
(7) Dash vents (6 LED string)


That's all I got for the wiring for now. It took SIX FRIGGIN HOURS to run the cabling. Although this time...it's clean. It's well secured. It's well identified. So I'll consider that a fair trade-off.
Next up is this awesomeness. What we have here is a 7-wire cable that will allow us to easily identify and wire all of the LED bars throughout the car. Even that being said, though, we've got some serious work ahead of us.
Using these fasteners I can really get a nice, secure fit.
Here's just an example as to how I am splitting the cabling. This time around I am doing the lighting a bit differently. The seven wires will be split as follows:
(1 - 3) Driverside footwell, rear passenger footwell, door map pocket
(4 - 6) Passenger footwell, rear passenger footwell, door map pocket
(7) Dash vents (6 LED string)
That's all I got for the wiring for now. It took SIX FRIGGIN HOURS to run the cabling. Although this time...it's clean. It's well secured. It's well identified. So I'll consider that a fair trade-off.
Ok, time for the most nerve-wracking piece I have. Since the a-hole body shop f00ked this piece up so bad, I have to repaint the top and bottom and PRAY my tape job holds well, doesn't peel the paint AND I tape the lines accurately...

*wipes brow* SUCCESS!!!!! Well, let's call it 95%. There are about 4 very small spots that peeled, but we're not going to lose sleep over that.


Now, a nice motivator has been the harassment I have been receiving from my coworkers, and I told them I would have the rear section DONE this weekend...so...I got it done! This was also a good time to clean and condition the leather, and damn, that took much longer than I thought!


*wipes brow* SUCCESS!!!!! Well, let's call it 95%. There are about 4 very small spots that peeled, but we're not going to lose sleep over that.
Now, a nice motivator has been the harassment I have been receiving from my coworkers, and I told them I would have the rear section DONE this weekend...so...I got it done! This was also a good time to clean and condition the leather, and damn, that took much longer than I thought!
Well, that's it for now. I am not going to be able to do much more for the next day or so as I have a buttload of pieces curing. I was evaluating everything and will be doing the driver-side door and dash section next. I am waiting for a glovebox I am getting from a member to proceed with getting everything done. OPTIMISTICALLY, I am hoping to knock this out in three weeks. During the interim, that should give me some time to work on these.


Alright, today f00king SUCKED. It's HUMID AS ALL HELL outside, so as a result, the paint has been taking FOR-EVER and a day to flash off, even in the thinnest coats. AND I have the crappiest camera to use (separate rant) So, as a result, painting went hella slow. Anyway, here's the newest...
Got the new shoes in today, well at least the rubbers. Since our focus is on keeping the car quiet, I elected to get a set of Bridgestone Turanza Serenity's...I included the review from Tire Rack, and in as far as I currently know, there is no quieter tire available on the market. We'll find out soon!

Ok, next up...I did some headlight painting for a Maxima.org member...I will be putting the Audi LED strips in in a few days when the paint has fully cured. Let the crappy imagery stand as testament to the insane humidity I am battling.
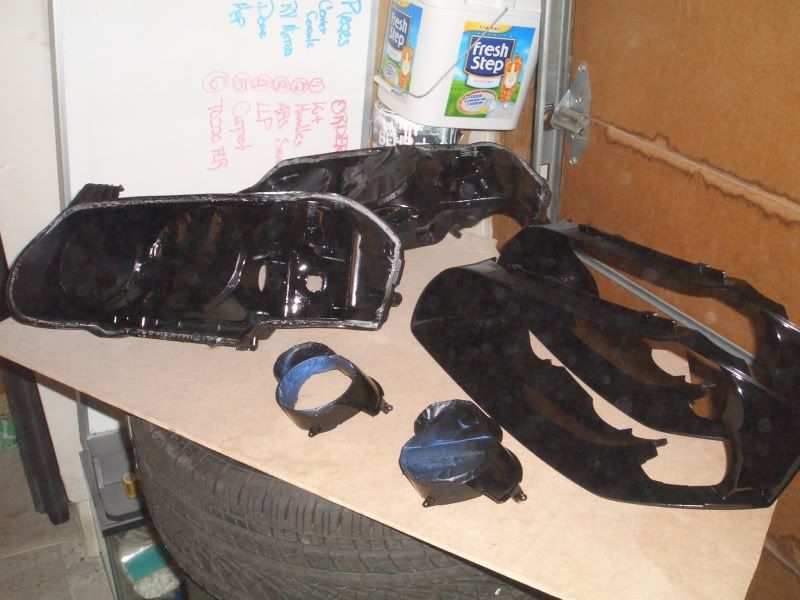
Just finishing up with some other parts...after today, I have only a handful of items left to paint, and thank-god for that.


Got the new shoes in today, well at least the rubbers. Since our focus is on keeping the car quiet, I elected to get a set of Bridgestone Turanza Serenity's...I included the review from Tire Rack, and in as far as I currently know, there is no quieter tire available on the market. We'll find out soon!
Ok, next up...I did some headlight painting for a Maxima.org member...I will be putting the Audi LED strips in in a few days when the paint has fully cured. Let the crappy imagery stand as testament to the insane humidity I am battling.
Just finishing up with some other parts...after today, I have only a handful of items left to paint, and thank-god for that.
Tomorrow I should have some more exciting updates...today was slow...tomorrow I am going to getting some more parts polished and installed, including the dome light with teh neu INSANE 360k MCD LEDs...which I am hella excited for. Just a picture of a pending recess cut for the Maxima logo...that's all for now. 


I noticed you mention your MDF for your driver rings rotted.. mine did as well am Im looking on replacing mine. What are you going to replace your rings with? You mentioned a different type of material you were going with. I have eights as well BTW.
Alright, some quick updates from Sunday. The new LED array is all hooked up and ready to go in. Let's not forget about thermal management!


BOOYAH! It's in, and I could not be happier with it. Even better than the last array. Now, the one problem I now have solved is NO REVERSE VOLTAGE!!! Before, the array would remain lit ever so slightly. Why? Backflow of electricity. But this time, I included diodes in the array and *BOOM*, when it's off, it's oof! Sorry, no pics yet, hopefully tomorrow as I need to borrow the work camera in order to get a good shot.
Alright, now these...took...for...EVER. All of these tiny-azz parts + the trio = ETERNITY. BUT, the one thing I am finding is that the more I am using the buffer, the better the shine I am getting...what do you think?
Ok, more painting tomorrow...

Senior Member
Joined: Oct 2001
Posts: 865
Metal,
Excellent work and documentation of it! I really like the LED's in the dome light. I've been wanting to do this mod (along with my map and courtesy lights), but don't know what LED's and diodes to use. Can you post up some specs when you put up more pics of it? Also, is your dome light significantly brighter than stock? I think stock dome lights and map lights are way too dim.
I've read of people having durability problems with painted dash parts. Seeing your work, you apparently know what you're doing. Any secrets?
For the polishing of the paint, did you let the paint fully cure before waxing (I notice the Meg's Gold Class and Deep Crystal). Meg's #80 (Speed Glaze) is paint shop safe, and allows the paint to "breathe" to finish evaporating the solvents in it. It's a 4 out of 10 on Meg's abrasive scale, and is an excellent all around polish and temporary protection. The abrasives are "diminishing", so it leaves a flawless finish, and is really simple to use with a DA polisher (I use a Porter Cable 7336 with a polishing). It's my "go to" polish for most jobs, removing light to moderate swirls and etching, but isn't aggressive enough for heavy swirls or scratches. Meg's #83 (DACP ) is my go to for heavier corrections. Speed Glaze would be an excellent polish to use in your situation on fresh paint to give it that "pop". Anyways, automotive paint takes a month or two to cure, unless oven-cured for awhile. I don't know about the paint you used. Just something to keep in mind.

I'm curious, is this a show car only or do you actually intend to use this as a daily driver.
Nice work, I assume it would have been much cheaper to buy a quart of paint and reducer to paint all those parts than using all those spray bottles.
Nice work, I assume it would have been much cheaper to buy a quart of paint and reducer to paint all those parts than using all those spray bottles.