
Ebay motor mount opinions


Senior Member
Joined: Oct 2009
Posts: 1,222
From: Atlanta
I was just looking at my mount near the power steering reservoir, it has a huge crack on it! This is where the thump was coming from, every now and then I would hear a clunk-thump.
I gotta get the $100 set of 4 and get going on this!
I gotta get the $100 set of 4 and get going on this!
Senior Member
Joined: Oct 2009
Posts: 1,222
From: Atlanta
Here are the old mount pics.
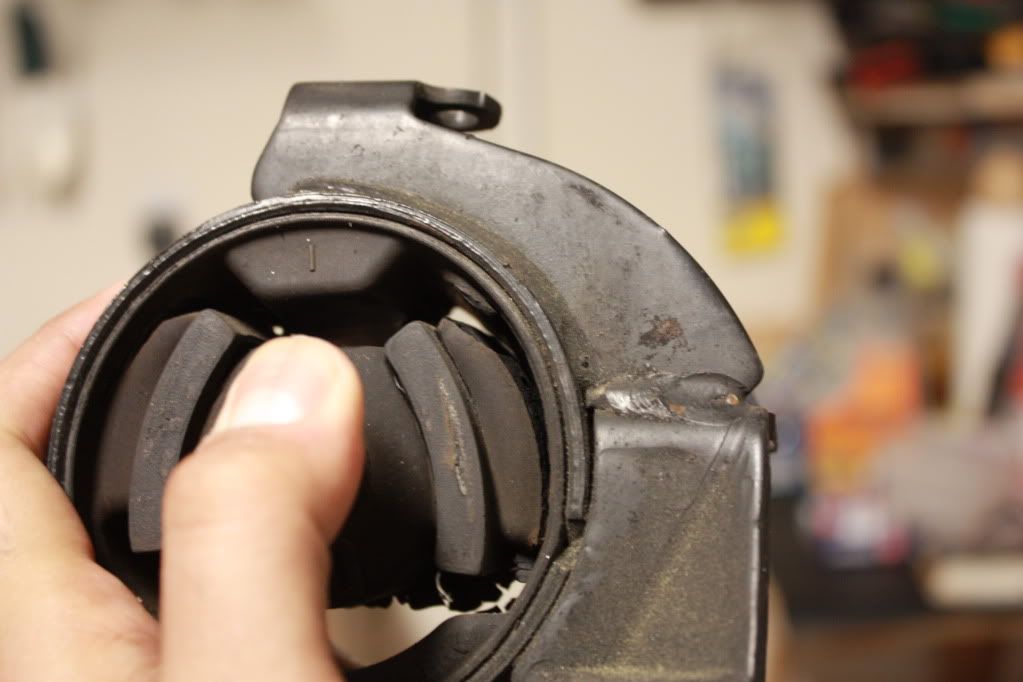
Trans mount: Not super bad, but surface cracks visible. Definately worn out.
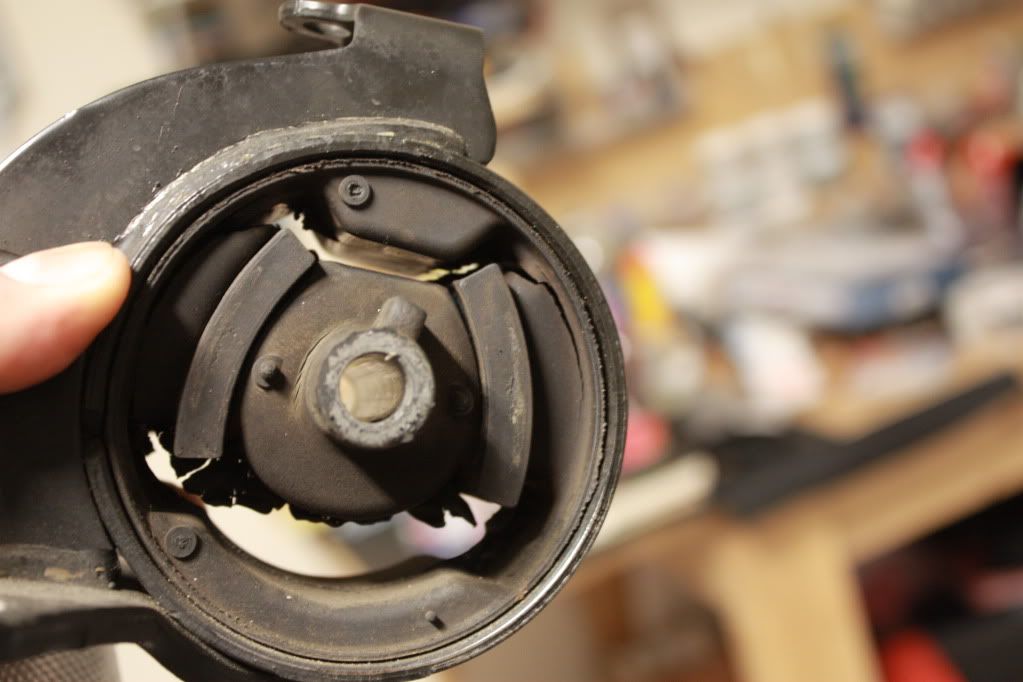
Front engine mount: Minor surface cracks. Could have made some more miles.

Rear Mount: No pics since it really did not have any cracks or sign of wear. What i thought was a leak on the mount is my upper oil pan.
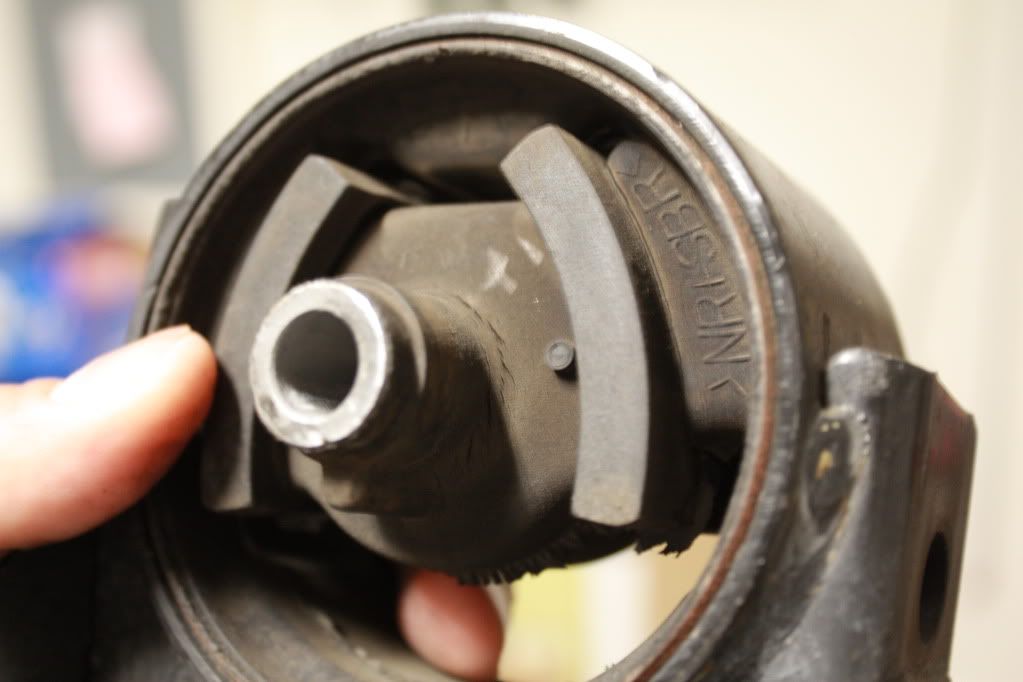
Passenger side mount: The real problem. Completely gone! If I were to keep check on the mounts, I would def keep checking this mount every 5-8K miles.
All in all except for the Passenger side mount, I am amazed by the life of the OEM mounts to last 190K miles.
Trans mount: Not super bad, but surface cracks visible. Definately worn out.
Front engine mount: Minor surface cracks. Could have made some more miles.
Rear Mount: No pics since it really did not have any cracks or sign of wear. What i thought was a leak on the mount is my upper oil pan.
Passenger side mount: The real problem. Completely gone! If I were to keep check on the mounts, I would def keep checking this mount every 5-8K miles.
All in all except for the Passenger side mount, I am amazed by the life of the OEM mounts to last 190K miles.

Senior Member
Joined: Oct 2009
Posts: 1,222
From: Atlanta
The DIY's and pics here, plus their willingness to teach us, can not go wrong. But a good set of tools is always a plus!
If I get them Friday, I will mount them this weekend and will surely take pics to add to this thread.
If I get them Friday, I will mount them this weekend and will surely take pics to add to this thread.


I read your other questions and will get back to you on that  . However.... unplugging them is a gr8 option. Overtime once the mounts wear out the engine rocks back and forth resulting in symptoms that make you feel like something else is wrong.
. However.... unplugging them is a gr8 option. Overtime once the mounts wear out the engine rocks back and forth resulting in symptoms that make you feel like something else is wrong.
kukx30de,
I've been doing some research on motor mounts, IACV and ECUs and how they impact each other. I have a 2001 SE with 185k on the dash, my motor mounts def. need to be replaced and after spending $1145 on a new IACV, rebuilt ECU, all 3 O2 sensors and the three way cat I don't want to spend big money on the motor mounts so all 4 mounts for $100 sounds pretty nice right now.
I've been doing some research on motor mounts, IACV and ECUs and how they impact each other. I have a 2001 SE with 185k on the dash, my motor mounts def. need to be replaced and after spending $1145 on a new IACV, rebuilt ECU, all 3 O2 sensors and the three way cat I don't want to spend big money on the motor mounts so all 4 mounts for $100 sounds pretty nice right now.
My question, and you've answered this I think but not sure I understand it completely, you said "The car is auto but i'm switching over to the regular manual mounts. Not interested in ES."
1. I know that the autos have electric motor mounts and the manuals don't. Is there anything else other than some vibration at idle that I should be concerned about with switching from auto to manual mounts?
1. I know that the autos have electric motor mounts and the manuals don't. Is there anything else other than some vibration at idle that I should be concerned about with switching from auto to manual mounts?
2. What do the electric mounts actually do that the manuals don't? What is the reason for electric mounts? What do they plug into and control/regulate? (Sorry if these are newb questions)
3. What is ES?
Just a quick background on MY car. I knew the IACV and Cat needed to be replaced and I foolishly tried to do the IACV myself. Didn't turn out so well. So after cursing myself for days I finally had a pro do it. No SES light, the car isn't throwing any SES codes, no tranny codes, everything looks good. Yet when I drive the car at low speeds, 15-25 MPH and 1st and 2nd gear, it sometimes feel like the engine is choking and at other times surging.
Could this be the motor mounts? It's the only thing I haven't done yet. Might I see a difference if I disconnect the electric mounts?
Thanks in advance. Very informative thread!
Could this be the motor mounts? It's the only thing I haven't done yet. Might I see a difference if I disconnect the electric mounts?
Thanks in advance. Very informative thread!
With the mileage you have quoted for your maxima are all your other maintenance items already upto date? I would check to make sure your MAF is good. You may even look into cleaning your throttle body.
Day 1: front and rear mounts
Day 2: passenger side mount
Day 3: trans mount
took it easy doing a mount each evening after coming back from work.

you will have to lift different sides of the engine as you go through replacing each mount. So you don't necessarily have to do all 4 in one time. If time is an issue, spread it out over a few days.
Senior Member
Joined: Oct 2009
Posts: 1,222
From: Atlanta
The mounts are here! Holy smokes they are big...just did not realize that they were beefy.
I will cut and paste and print all the suggestions-instructions here and will also take pics to add.
Thanks kukx30de! I might PM you or ask while I am doing the install.
I will take pics of the areas in question and will take my time.
I am relying on your rating of 2 out of 10. The alternator install is a 5_6 to me.
A 2 is more than welcome.
Good Luck Mandyfig.
Just make sure you have enough extensions in both 3/8" or 1/2", pb blaster for the bolts on the cross member and a good breaker bar.
Some tips:
1. I use the aluminum pipe from my jack on top of my break bar for even greater leverage. It helped me bust open the front rear mount bolts on the cross member with ease.
2. When putting things back together, first loosely put in the 4 cross member bolts that hold the cross member to the body then use your jack to lift/lower your engine to line up the front rear mount and bolt them in.
3. If you lift the car from the engine side make sure you use a couple 1X4 on top of the jack head to avoid denting your oil pan. You can do the same 1X4 trick on the transmission side.
If you feel you are good on time, I would do the passenger side mount next.
Good Luck! I will check in during the day to see if you are actively posting... keep that laptop with you in the garage just in case.


I installed the passenger mount in my 02 manual last night. I don't think the trans mount will work on my manual car though. I'll post pics later and you can match up your mount to the kit's mount.
Senior Member
Joined: Oct 2009
Posts: 1,222
From: Atlanta
Good Luck Mandyfig.
Just make sure you have enough extensions in both 3/8" or 1/2", pb blaster for the bolts on the cross member and a good breaker bar.
Some tips:
1. I use the aluminum pipe from my jack on top of my break bar for even greater leverage. It helped me bust open the front rear mount bolts on the cross member with ease.
2. When putting things back together, first loosely put in the 4 cross member bolts that hold the cross member to the body then use your jack to lift/lower your engine to line up the front rear mount and bolt them in.
3. If you lift the car from the engine side make sure you use a couple 1X4 on top of the jack head to avoid denting your oil pan. You can do the same 1X4 trick on the transmission side.
If you feel you are good on time, I would do the passenger side mount next.
Good Luck! I will check in during the day to see if you are actively posting... keep that laptop with you in the garage just in case.
Just make sure you have enough extensions in both 3/8" or 1/2", pb blaster for the bolts on the cross member and a good breaker bar.
Some tips:
1. I use the aluminum pipe from my jack on top of my break bar for even greater leverage. It helped me bust open the front rear mount bolts on the cross member with ease.
2. When putting things back together, first loosely put in the 4 cross member bolts that hold the cross member to the body then use your jack to lift/lower your engine to line up the front rear mount and bolt them in.
3. If you lift the car from the engine side make sure you use a couple 1X4 on top of the jack head to avoid denting your oil pan. You can do the same 1X4 trick on the transmission side.
If you feel you are good on time, I would do the passenger side mount next.
Good Luck! I will check in during the day to see if you are actively posting... keep that laptop with you in the garage just in case.
Back to Max, thanks for the tips. I might get on it tomorrow. Yes, check on the posts, I might run into issues and would appreciate tips and solutions.
Thanks again.


That doesn't look like the original, that's for sure. I used a box end wrench on the nut in question with a second large box end wrench over it for leverage. I accessed it from up top rather than underneath. Took a lot of muscle, but it did eventually loosen. Pull the power steering fluid resevoir off to give you a bit more room.

To get this one, simply use a deep well socket and a long extension and remove from the top.
 [/QUOTE]
This one requires some thought. Jack up the engine (wood block under oil pan of course) then get to it from the bottom using a series of extensions. You will need a breaker bar for both, as well as most of the other nuts/bolts for this job.
The rubber pieces on the sides appear to be "splash" guards to prevent engine/environmental chemicals from degrading the rubber. The front/rear mounts have this rubber on one side only, towards the engine.
Last edited by DOHCtorJT; May 16, 2010 at 06:36 PM.
Alright, let me show you some busted mounts These are from my 2002 Manual with 100k miles. Yes, the ebay mounts fit my 2002 with the exception of the trans mount.
Front:

Rear:

Passenger side:

My trans mount appears OK, which is good because the ebay kit one doesn't match. Something tells me all the drivetrain slop will be gone! The front and rear mounts were trashed!
These are from my 2002 Manual with 100k miles. Yes, the ebay mounts fit my 2002 with the exception of the trans mount.Front:
Rear:
Passenger side:
My trans mount appears OK, which is good because the ebay kit one doesn't match. Something tells me all the drivetrain slop will be gone! The front and rear mounts were trashed!
Man.... you guys had worse mounts than mine too!
Mandyfig,
For the passenger side mount:
- The rubber piece actually goes on the new mount. You will reuse that piece. For some reason its like a cover to protect the mount? I reused the old one. You will see when you have the mount removed. It will have no wear and tear.
- For the bolt that is facing downwards. I think its a 14mm, but as mention you will need a deep socket for it with extensions. To really create more space, I removed the idler pulley and the alternator belt so that I was not rubbing against the belt in anyway. The old and new mounts will look identical when removed.
Let me know if you need more info on this one.
See the nut visible in these 2 pics. You need to remove that. There are also 2 bolts that go into the timing cover. Its like a top cover on the mount. Once you remove that you will see the mounts look identical.
Please dont use a dremel etc, we have southern cars and these bolts easily pop with some elbow grease and a breaker bar.
Please dont use a dremel etc, we have southern cars and these bolts easily pop with some elbow grease and a breaker bar.
Senior Member
Joined: Oct 2009
Posts: 1,222
From: Atlanta
Thanks.
I looked up the rubber thingy on the Nissan parts list and they are called stoppers. I guess they are sort of a washer so the mounts do not wonder off. Thanks for letting me know they are re-usable.
Hey, when you said subframe bushings, are they the bushings onn the cross member mount? Do I need to get them replaced, too?
In all these, I was thinking that maybe all I needed was to replace the pass side mount and my other 3 mounts are OK. But looking at the cost of getting only the pass mount was crazy. It was like $100. That's OEM. The ones we picked up for the 4 @ $100 looks like the OEM and I am sure will give us at least 50K of no worries.
I might do the pass mount today.
Thanks again.
The mounts were the ones on the cross member holding the front and rear mount.
I would say if you were doing the front and rear mounts go ahead and change those out too. They only about $24 at your local dealership if they price match to courtesy parts. Speak with your parts wholesale guys.
good luck again!
I would say if you were doing the front and rear mounts go ahead and change those out too. They only about $24 at your local dealership if they price match to courtesy parts. Speak with your parts wholesale guys.
good luck again!