
Custom LTB with headers mock up


Custom LTB with headers mock up
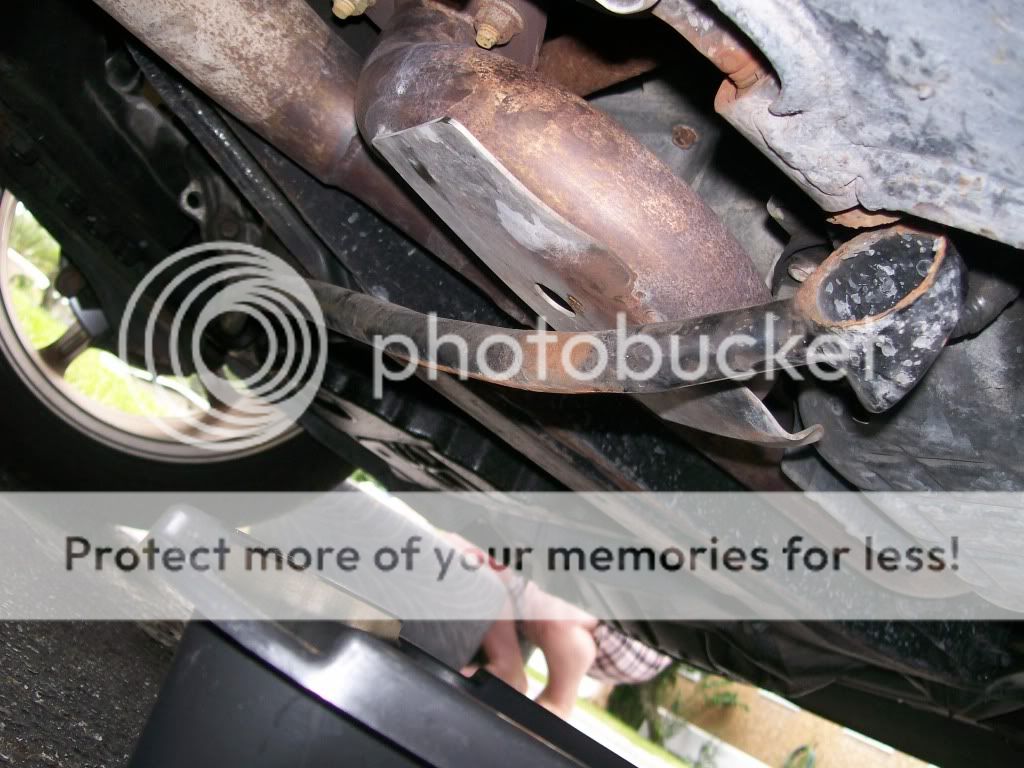
Just some teaser pics for my custom LTB stage 1 to go around my cattman headers. Once this is welded I will follow up and then turn it into a stage 2.


It's not quite there yet. Needs a few tweaks. I made the ends out of one solid piece of mild steel instead of the way the other more popular one was made. Needs to be trimmed and spot welded then I will tig weld it. Then it will be painted with por 15 hardnose paint.
It's not quite there yet. Needs a few tweaks. I made the ends out of one solid piece of mild steel instead of the way the other more popular one was made. Needs to be trimmed and spot welded then I will tig weld it. Then it will be painted with por 15 hardnose paint.

Just some teaser pics for my custom LTB stage 1 to go around my cattman headers. Once this is welded I will follow up and then turn it into a stage 2.
It's not quite there yet. Needs a few tweaks. I made the ends out of one solid piece of mild steel instead of the way the other more popular one was made. Needs to be trimmed and spot welded then I will tig weld it. Then it will be painted with por 15 hardnose paint.
It's not quite there yet. Needs a few tweaks. I made the ends out of one solid piece of mild steel instead of the way the other more popular one was made. Needs to be trimmed and spot welded then I will tig weld it. Then it will be painted with por 15 hardnose paint.
will the 'other' LTB not fit around the cattman headers? what about the OBX headers?
why not get a little crazy and come up with a stage 3?
B

Senior Member
Joined: Dec 2005
Posts: 1,124
From: Leicester, Ma
Knight, could you post the dimensions of the metal used so us DIY may be able to get the material ourselves to do this. What type of tubular mount to the control arms did u use. Did you have to cut a piece of metal into a circle then weld it to the tubular mount and then drill a hole so it would attach to the control arm? What size tube did you use to mount to the control arm..EX...1.5 in diameter by 1 inch deep..? What thickness was the plate used to weld to the back of the tubular mount and what size hole was drilled in it to mount to the control arms...
This has been something on my mind as well to DIY and add to the bottom..
Thanks
This has been something on my mind as well to DIY and add to the bottom..
Thanks
The control arm mounts are one piece machined cups. I did not weld a washer like the other style out there. Mine should be stronger. The bar itself is 3/4 hydraulic tube thick wall.
The original tie bar may fit the OBX but I have no idea for sure. It definitely does not fit around the cattman. I already tried and have come up with this design.
The original tie bar may fit the OBX but I have no idea for sure. It definitely does not fit around the cattman. I already tried and have come up with this design.
Senior Member
Joined: Dec 2005
Posts: 1,124
From: Leicester, Ma
^^^^ knight for the machined cups how/where did you get them from...wait you said you are a machinist so did you do them yourself? Also to get the bar bent in the ways needed how did you go about that.
Ive been thinking of doing the same thing for a while now. Wondering since i dont have machine shop connections would getting say 2 pieces of tubing and then welding a thick enough plate on the back be strong enough for just Daily driving... thoughts..?
Ive been thinking of doing the same thing for a while now. Wondering since i dont have machine shop connections would getting say 2 pieces of tubing and then welding a thick enough plate on the back be strong enough for just Daily driving... thoughts..?
Yes, I am a tool and die maker so I machined the cups to just fit the 27mm socket that you need to remove the bolt for the ID then made the OD a nice even number. Then I drilled the hole clearance hole per specs for a 20mm thread.
For the bar I used a hydraulic bender that we have at work that can bend up to 1.5 in diameter tube.
For the bar I used a hydraulic bender that we have at work that can bend up to 1.5 in diameter tube.

Rodriguez77 has a stg 2 or 3 with OBX headers and a really beautiful clean fit....Knight, I glad you're thinking cause those infamous Blehmco LTB weren't thought out to well. The cups are too small so a socket can't fit on the Lower control nut and the socket...
I'm not sure if there was a 3 either now that you mentioned it...but Rod77 had some nice shots under his car and I was really impressed that the OBX cleared the Blehmco LTB stg 2.....I can't do that with my Cattman headers installed! I would love to see how tying the suspension to the crossmember front and rear locations would work as well.....?


I took a Craftsman and a Kobalt 27mm socket to the steel yard and fund tube that fit over both sockets, then made the rest of the bar fit around that.
They don't fit the Cattman headers since my design was done before the headers were out. Once they were out, nobody with the headers ever volunteered to come by my place for a test fit or I would have made a bar to fit them. Can't fix something like that if nobody helps. :shrug:
more teaser pics....
No offense to Matt, his tie bar is loved by lots of guys. And if I was going to mass produce them his design is satisfactory. But mine is going to be a one off, so I decided to make mine a little stronger. Here's some teaser pics of the 2nd bar for the stage 2. This will not get welded up until I install the subframe collars as I'm not sure if they will change the fit up. The stage one is ready for welding. Now to make it stronger I decided against welding the pipe to the side of the cups. I reamed a 3/4" hole in the side of the cups so I can press the bar into the holes in the cups and then weld around the bar.
 .
.
Here is a purely speculative rear section of the stage 2. I'm sure it will have to be modified, I don't think this will give me too much ground clearance, but I needed somewhere to start. You can see in this photo that the bar is pressed into the holes in the cups...

I'm hoping my one piece cup design, with the reamed holes will prevent this from happening...
No offense to Matt, his tie bar is loved by lots of guys. And if I was going to mass produce them his design is satisfactory. But mine is going to be a one off, so I decided to make mine a little stronger. Here's some teaser pics of the 2nd bar for the stage 2. This will not get welded up until I install the subframe collars as I'm not sure if they will change the fit up. The stage one is ready for welding. Now to make it stronger I decided against welding the pipe to the side of the cups. I reamed a 3/4" hole in the side of the cups so I can press the bar into the holes in the cups and then weld around the bar.
. Here is a purely speculative rear section of the stage 2. I'm sure it will have to be modified, I don't think this will give me too much ground clearance, but I needed somewhere to start. You can see in this photo that the bar is pressed into the holes in the cups...
I'm hoping my one piece cup design, with the reamed holes will prevent this from happening...
Last edited by knight_yyz; Sep 11, 2010 at 06:27 PM.


more teaser pics....
No offense to Matt, his tie bar is loved by lots of guys. And if I was going to mass produce them his design is satisfactory. But mine is going to be a one off, so I decided to make mine a little stronger. Here's some teaser pics of the 2nd bar for the stage 2. This will not get welded up until I install the subframe collars as I'm not sure if they will change the fit up. The stage one is ready for welding. Now to make it stronger I decided against welding the pipe to the side of the cups. I reamed a 3/4" hole in the side of the cups so I can press the bar into the holes in the cups and then weld around the bar.
.
Here is a purely speculative rear section of the stage 2. I'm sure it will have to be modified, I don't think this will give me too much ground clearance, but I needed somewhere to start. You can see in this photo that the bar is pressed into the holes in the cups...
I'm hoping my one piece cup design, with the reamed holes will prevent this from happening...
No offense to Matt, his tie bar is loved by lots of guys. And if I was going to mass produce them his design is satisfactory. But mine is going to be a one off, so I decided to make mine a little stronger. Here's some teaser pics of the 2nd bar for the stage 2. This will not get welded up until I install the subframe collars as I'm not sure if they will change the fit up. The stage one is ready for welding. Now to make it stronger I decided against welding the pipe to the side of the cups. I reamed a 3/4" hole in the side of the cups so I can press the bar into the holes in the cups and then weld around the bar.
. Here is a purely speculative rear section of the stage 2. I'm sure it will have to be modified, I don't think this will give me too much ground clearance, but I needed somewhere to start. You can see in this photo that the bar is pressed into the holes in the cups...
I'm hoping my one piece cup design, with the reamed holes will prevent this from happening...
Mine broke because I hit a manhole cover that sat about 4" above the ground level
Please explain how it wasn't thought out too well.
I took a Craftsman and a Kobalt 27mm socket to the steel yard and fund tube that fit over both sockets, then made the rest of the bar fit around that.
They don't fit the Cattman headers since my design was done before the headers were out. Once they were out, nobody with the headers ever volunteered to come by my place for a test fit or I would have made a bar to fit them. Can't fix something like that if nobody helps. :shrug:

Senior Member
Joined: Feb 2010
Posts: 685
From: Altamonte Springs, FL
Some more teaser pics. Turns out I wasn't too far off on my wild guess as to how to bend the rear of the stage 2. As you can see from the photos I can reduce the angle of the bends from 30 to about 15 or 20. This will reduce the gap and add ground clearance.


Once I get this part figured out the other 4 bars will be a piece of cake since there should not be any bends involved.
Once I get this part figured out the other 4 bars will be a piece of cake since there should not be any bends involved.
Ok, more teaser pics. It turns out I have to modify the front bar a little. It doesn't fit the way I would like it. It's not parallel to the ground. But the rear is dead nuts on and I will be welding it in a day or so...


Thanks Guys, I tack welded the rear section to the cups. I will re-test fit in a day or so. I redesigned the shape of the front bar, hopefully it is pretty close to what I am looking for. I got home too late tonight to do anything.
That brace has been missing since the cattman exhaust was installed a few years ago. The installer didn't even tell me they took it off. I really should try to find another one. Maybe I'll make one. LOL
Front bar to test fit then the 4 cross braces to go.
Front bar to test fit then the 4 cross braces to go.


In for updates
The question I'm wondering is, what will be the cost since this would get shipped from Canada if mass produced. And being that it is shipping from Canada, I'm gonna assume the price is gonna be a bit high.
The question I'm wondering is, what will be the cost since this would get shipped from Canada if mass produced. And being that it is shipping from Canada, I'm gonna assume the price is gonna be a bit high.
I won't be mass producing this. It's taking forever to this one done. I won't be building a jig. I'm actually going to weld this while it is on the car. That way I know it will fit. I know some of you guys with cattman headers will want to do this as well. After it's all said and done we'll figure out something...

So just 4 more....you're not gonna do 2 longitudal?
the rear bar is done, it's only tack welded because I want to double check fitment. Things like to move and bend when you weld them. I'm going out in a few minutes to do my front brakes and end links so I will do another test fit with both bars. Then I will measure for the other 4 bars. I'll cut those up during the week. A buddy of mine from work is lending me a portable welder so I can tack weld all the pieces on the car. Then I will remove the entire assy and tig weld it at work.