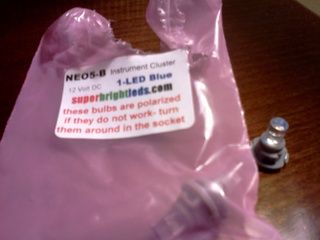
Drop-in LED instrument cluster lighting for 5.5 owners. Finally found one that works!


 01-28-2012, 05:34 PM
#683
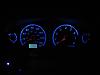
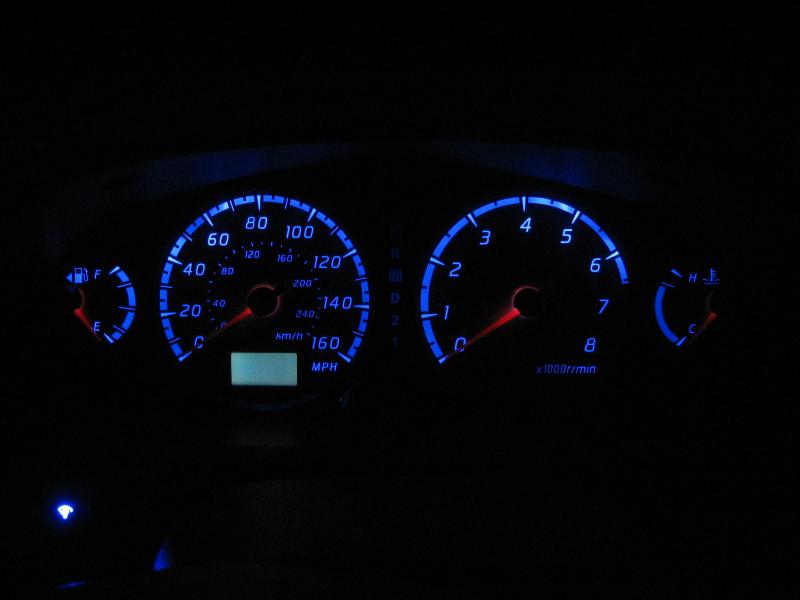
an update to my search for a cluster since i snapped my needles off, i got lucky on ebay and got a low mileage cluster with already installed reverse white face indiglo gauges. 60 bucks and 5 days later they got here. just got em put on and wanted to share pics. the led factory gauges were my first pic, but im really happy about this recent purchase. theyre bad azz from the real "drivers view" : ) : ) : )
after!!! u can see the needles better in person, theyre just not bright for some reason.


after!!! u can see the needles better in person, theyre just not bright for some reason.
How's the calibration? have you checked it to see if it's acurate and all gauges are working? Buying a second hand cluster for only $60 would have me nervous personally but seems it's all good for you?
Should just pull the bulb out for the TCS seeing as it's clearly not connected on those gauges
 01-29-2012, 04:07 AM
#687
 $5.00 shipped?
 01-30-2012, 08:38 AM
#690
 02-02-2012, 06:45 PM
#691
Newbie - Just Registered

Join Date: Mar 2010
Posts: 15
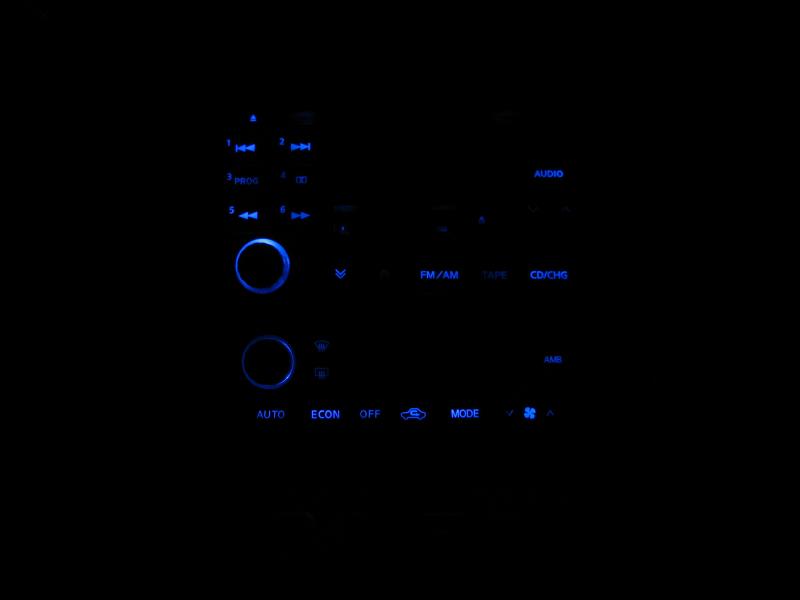
LED Mod Finally Done!
Cluster done with Superbright LED 74-BHP3's.
Bose Radio & Climate Control also done with 74-BHPs's!(challenging )
)

Driver door switch(individual blue LED's w/resistors)
Click on the Pic to enlarge. The Bose Radio is very bright. I had trouble getting a good pic with my Canon Power Shot. It was either blurry or way bright.
I did all the door switches as well as the shifter & key ring. Those look like all the other pics on this thread but if others want to see I will post them. The Bose radio & climate control took alot of time but I really wanted to attempt using the 74's in those locations. I thought I might be able to get a great blue LED look without all the hotspots that accompany most of the linear LED's that folks tried. What do you guys think?
Bose Radio & Climate Control also done with 74-BHPs's!(challenging
)
Driver door switch(individual blue LED's w/resistors)
Click on the Pic to enlarge. The Bose Radio is very bright. I had trouble getting a good pic with my Canon Power Shot. It was either blurry or way bright.
I did all the door switches as well as the shifter & key ring. Those look like all the other pics on this thread but if others want to see I will post them. The Bose radio & climate control took alot of time but I really wanted to attempt using the 74's in those locations. I thought I might be able to get a great blue LED look without all the hotspots that accompany most of the linear LED's that folks tried. What do you guys think?
Last edited by vman1; 02-04-2012 at 09:38 AM.
02-04-2012, 09:50 AM
#692
Newbie - Just Registered
Join Date: Mar 2010
Posts: 15
Bose Radio & Cilmate Control close-ups
Bose Radio

Climate Control
I hope these pics are better...In person the Bose Radio & Climate Control are much brighter but as I said I could only get one camera setting to take an adequate representation of the blue LED. If you click on the pic...it opens to a good size. Thank you all that helped me along the way!
02-04-2012, 11:17 AM
#693
Cluster done with Superbright LED 74-BHP3's.
Attachment 2412
Bose Radio & Climate Control also done with 74-BHPs's!(challenging)
Attachment 2415
Driver door switch(individual blue LED's w/resistors)
Attachment 2414
Click on the Pic to enlarge. The Bose Radio is very bright. I had trouble getting a good pic with my Canon Power Shot. It was either blurry or way bright.
I did all the door switches as well as the shifter & key ring. Those look like all the other pics on this thread but if others want to see I will post them. The Bose radio & climate control took alot of time but I really wanted to attempt using the 74's in those locations. I thought I might be able to get a great blue LED look without all the hotspots that accompany most of the linear LED's that folks tried. What do you guys think?
Attachment 2412
Bose Radio & Climate Control also done with 74-BHPs's!(challenging
)Attachment 2415
Driver door switch(individual blue LED's w/resistors)
Attachment 2414
Click on the Pic to enlarge. The Bose Radio is very bright. I had trouble getting a good pic with my Canon Power Shot. It was either blurry or way bright.
I did all the door switches as well as the shifter & key ring. Those look like all the other pics on this thread but if others want to see I will post them. The Bose radio & climate control took alot of time but I really wanted to attempt using the 74's in those locations. I thought I might be able to get a great blue LED look without all the hotspots that accompany most of the linear LED's that folks tried. What do you guys think?
Why did you put resistors on the Master window switch? You know those have resistors already built into the circuit board, so if they seem dimmer, that's why. Pop the resistors out and they'll be brighter (if you want)
02-04-2012, 12:20 PM
#694
Newbie - Just Registered
Join Date: Mar 2010
Posts: 15
The climate control has no hotspots. On my 2001 Maxima CC, there are only three incandescents that twist N lock into place. I got creatvive and completely drilled out the back of the housing. I then took the superbright 74's and soldered 2" of Bus wire to each + & - of the LED. I then slid the 74 Led into that housing. You need to get that LED as far into that housing as you can(up to the built in resistor) and then wrap the bus wire around the housing just as the old incandescent was. I twisted the LED into the board and made sure that the side LEDs pointed horizontal(with the CC buttons) to maximize all the LEDs! I then had to Dremmel the acrylic inside almost all the way through to the front. I reassembled & checked for clearance issues until I got it right. It really looks amazing! The master switch I decided to just do individual LEDs that are not connected to the board...I tapped into the hotwire outside the switch and grounded it to a screw in the door. It came out great although I realize I could have just put some LEDs into the existing spots on the board but chose the other route. The Bose radio has no hotspots but a couple of the buttons are just a bit dimmer but in person it is not very noticeable.
Last edited by vman1; 02-04-2012 at 01:26 PM.
02-04-2012, 02:28 PM
#697
I don't mean to seem like I am raining on anyones parade out there because I have seen some great work on this thread however, it seems like people are going well out of their way to modify their parts to use something they were not intended for. The light diffusers in our gauges were intended for a 360 light distribution and there are LEDs out there that do that. In fact I see alot of people going to superbright LEDs to get multidirection LEDs and forcing them to work in application that they are ill suited instead of getting the 360 component LEDs. Here is a pic of what 360 LEDs can do:


and that is with my crappy 3.2 MP camera highlighing the light sources creating the illusion of hotspots but in person you will not see any hotspotting as the LEDs are bright enough to obsure the light sources across the diffuser.
and that is with my crappy 3.2 MP camera highlighing the light sources creating the illusion of hotspots but in person you will not see any hotspotting as the LEDs are bright enough to obsure the light sources across the diffuser.
Last edited by Shinjiduo; 02-06-2012 at 12:15 PM.
02-04-2012, 03:13 PM
#698
^ Care to share a link to these 360 degree leds? I only found this:
http://wdq913.en.made-in-china.com/p...Angle-LED.html
I was tinkering in the basement last night and popped a acc apart for pics. seems a 5050 SMD will fit quite well and eliminate hotspots as well. Though after the post above it seems you guys might have a better option? Dunno, we'll see if he shares more info and pictures for us either in this thread or in my feeler thread I'm putting together >HERE<
I'll repost a few snaps I took:
A 5050 SMD in the center of each cutout will work perfectly with no hotspotting. One for each button. Only one for the Fan also, in the center. Only downfall to this is you DO have to remove the circuit board/fully disassemble. Not hard, just be careful. This pic shows how perfect a 5050 fits:
Last edited by TunerMaxima3000; 02-04-2012 at 03:16 PM.
02-06-2012, 09:56 AM
#699
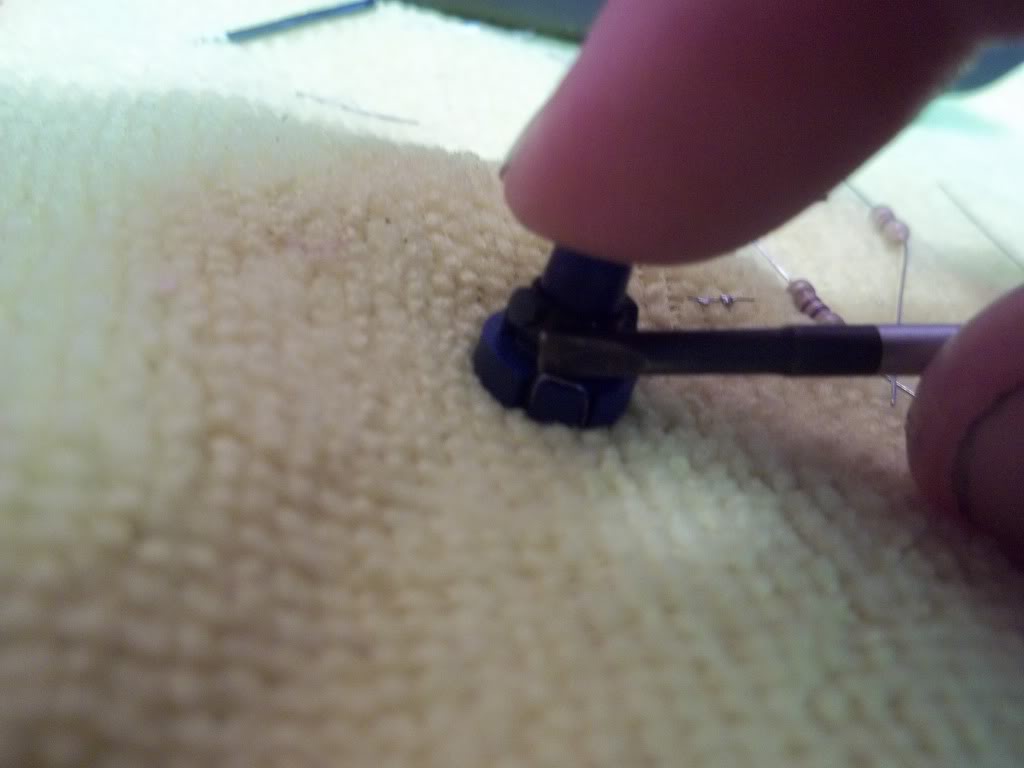
The link for the 360 LEDs from superbright LEDs is:http://www.superbrightleds.com/cat/c...le,181,39,360: and as for execution on how to use them. Just get some 5mm 360 LEDs use a 620 OHM 1/8 Watt resistor and a 1N4148 fast switching diode and use you stock neo wedge bases for your climate control.
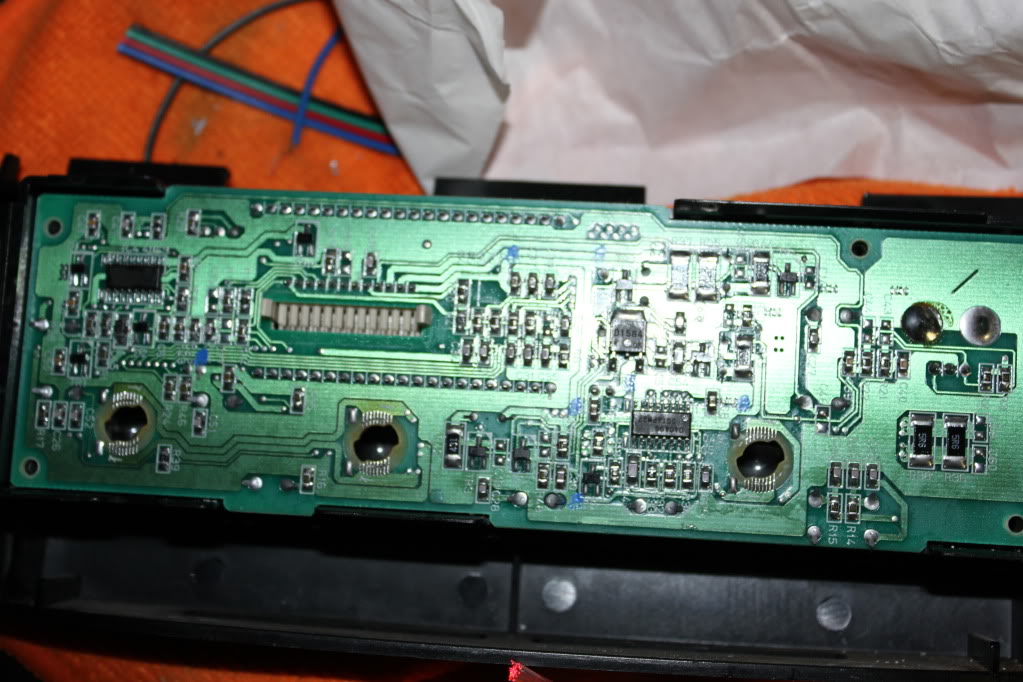
As for your Radio you will have to remove your stock bulbs using desoldering braid or a suction style desolderer. then just solder the LEDs with resistors directly to the board like so: (Was my first time so I had to repair some damage I did to the board so that is why you see some grey strips at certain points)


Just remember on the back of the circuit board the anode (+) is below each bulb and the cathode (-) is above the bulb. On the volume **** the anode is on the right and the catode is on the left. Also, when attaching diode and resistor to the LED the long lead is the anode and that is where you attach the resistor and the cathode is the short lead and that is where you attach the switching diode.
As for your Radio you will have to remove your stock bulbs using desoldering braid or a suction style desolderer. then just solder the LEDs with resistors directly to the board like so: (Was my first time so I had to repair some damage I did to the board so that is why you see some grey strips at certain points)
Just remember on the back of the circuit board the anode (+) is below each bulb and the cathode (-) is above the bulb. On the volume **** the anode is on the right and the catode is on the left. Also, when attaching diode and resistor to the LED the long lead is the anode and that is where you attach the resistor and the cathode is the short lead and that is where you attach the switching diode.
02-11-2012, 12:56 PM
#700
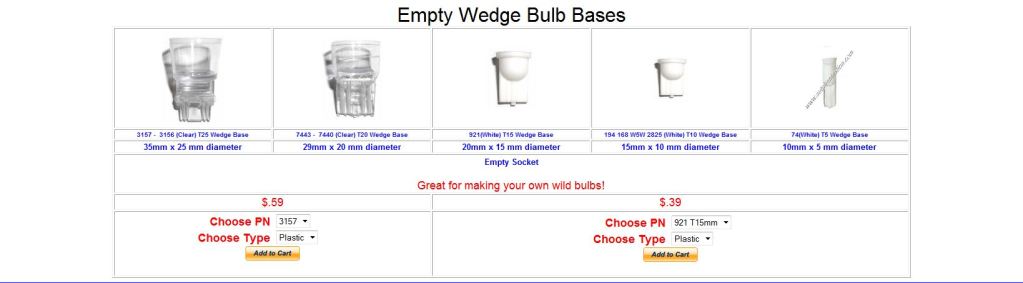
For any one having problems removing the OE bulbs from the holders try this trick it worked for me 6/7 times.
take the bulb and holder out do not touch the bulb with your fingers take some clear packing tape the 2" wide type and wrap it 3-4 times around the exposed bilb section all the way down to the holder.then grab the end of the tape and give it a sharp tug and hopefully the bulb comes right out like mine did.ill post a pic if nesassary.
take the bulb and holder out do not touch the bulb with your fingers take some clear packing tape the 2" wide type and wrap it 3-4 times around the exposed bilb section all the way down to the holder.then grab the end of the tape and give it a sharp tug and hopefully the bulb comes right out like mine did.ill post a pic if nesassary.
02-13-2012, 05:31 AM
#702
Member


Join Date: May 2011
Location: Suffolk, Long Island
Posts: 72
Tuner, I saw you previously asked for pictures of the sockets and incorrect ones.
On the first socket I was doing, I broke the copper off trying to get the bulb out.")
In these pics, the socket on the left is the one the dealership said matches to my vin/year and such. The socket on the right is one out of another spot on the cluster and matches the one that I broke. After going through this whole thread, and doing plenty of research, I can not find the correct one anywhere.
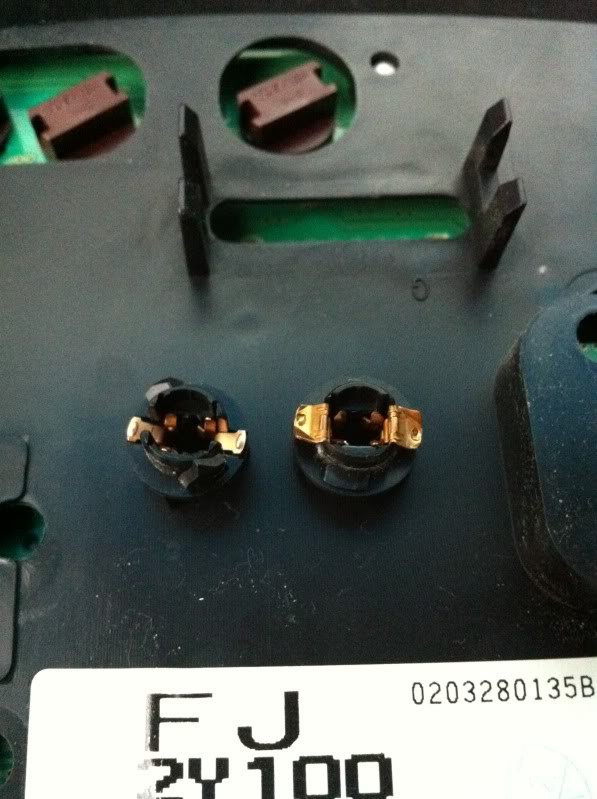
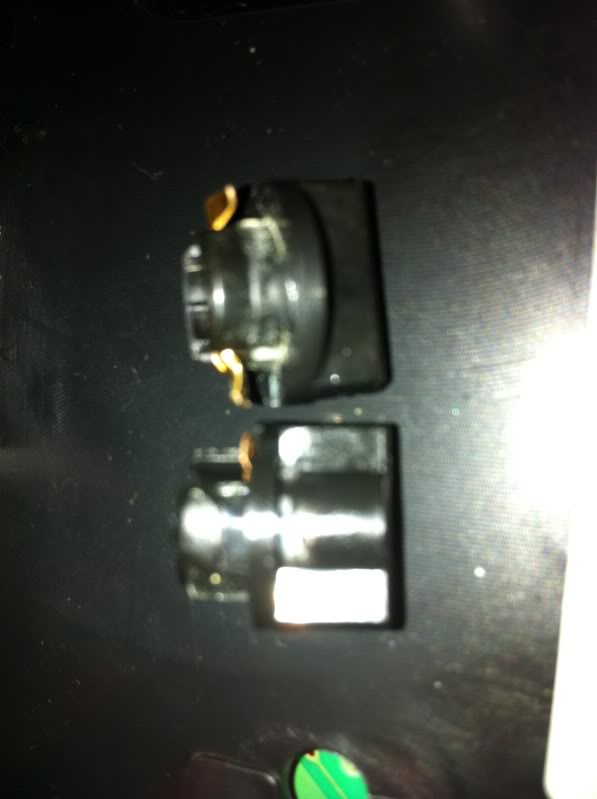
On the first socket I was doing, I broke the copper off trying to get the bulb out.
In these pics, the socket on the left is the one the dealership said matches to my vin/year and such. The socket on the right is one out of another spot on the cluster and matches the one that I broke. After going through this whole thread, and doing plenty of research, I can not find the correct one anywhere.
02-13-2012, 06:04 AM
#703
^Thanks for posting!
It seems from everything I've seen so far, that there are only 2 types. Both are shown in your pictures.
One has contacts that go INSIDE the circuit board to make contact(gauge side)
One has contacts that go AGAINST the circuit board to make contact (bulb housing entry side)
They are also different in the 'keyed' area that goes in and turns. But I would be surprised to find the circuit board itself is different. The one on the LEFT you pictured is the most common. So I'd love if you could take some pictures of where the bulb goes in on the circuit board, with the bulb/housing out of the way. Also if you could give us your Manufacture date (month/year), you'll find it on the door jamb. \
Thanks so much for all your help man!
I will have a closer look at what I have downstairs and see if one or the other is interchangable in any regard.
02-13-2012, 06:13 AM
#704
Member
Join Date: May 2011
Location: Suffolk, Long Island
Posts: 72
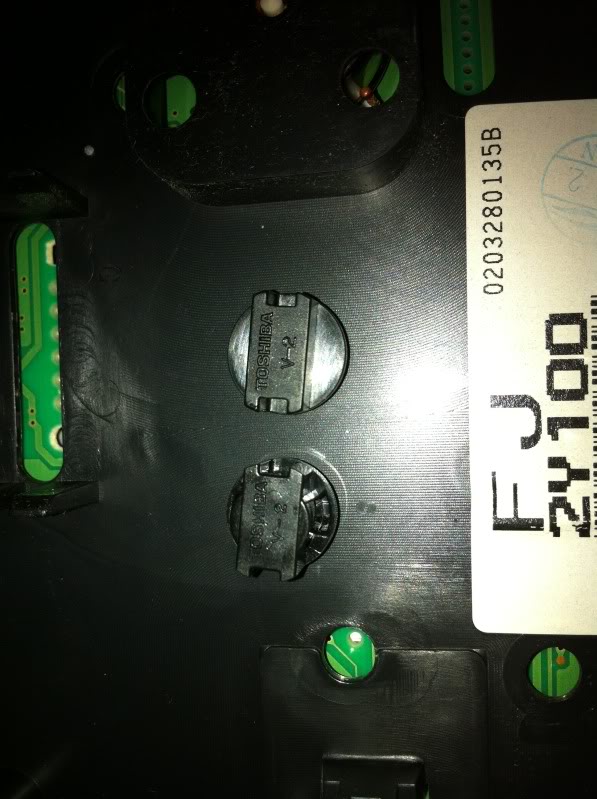
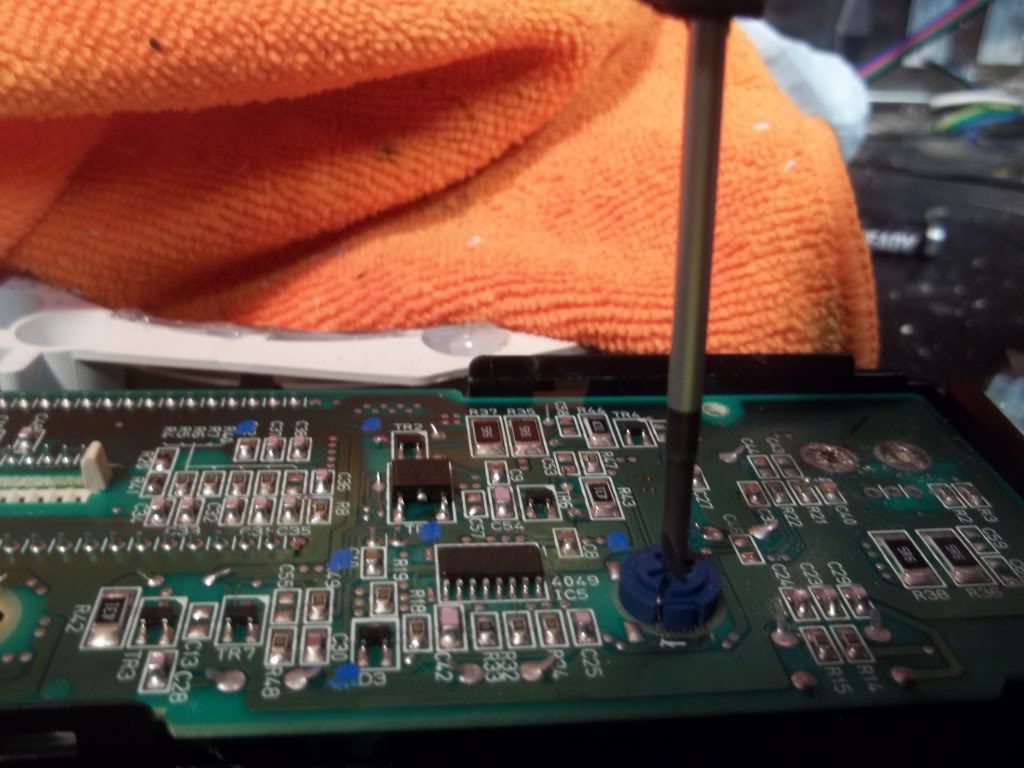
I will pull it apart after I get out of work and take some more pics. I even tried bending the copper up on the new one to make it go inside the board to make contact. The problem is the opening on the board has 2 "slots" that the old copper pieces were aloud to go in so you can turn it and lock it. As you can see on the new socket, the plastic "locks" need to go into those slots so it will not allow the bent up copper pieces to also go in, it just flattened them back down.
The MFG date is April, 02.
The MFG date is April, 02.
 02-13-2012, 07:01 AM
#707
I have the bases on the left, MY03, Mfg date 10/02.
I'm still looking for one since I need to replace my lower output LED in my ODO light to the items originally mentioned in the first post in this thread.
I'm still looking for one since I need to replace my lower output LED in my ODO light to the items originally mentioned in the first post in this thread.
02-13-2012, 02:32 PM
#708
Member
Join Date: May 2011
Location: Suffolk, Long Island
Posts: 72

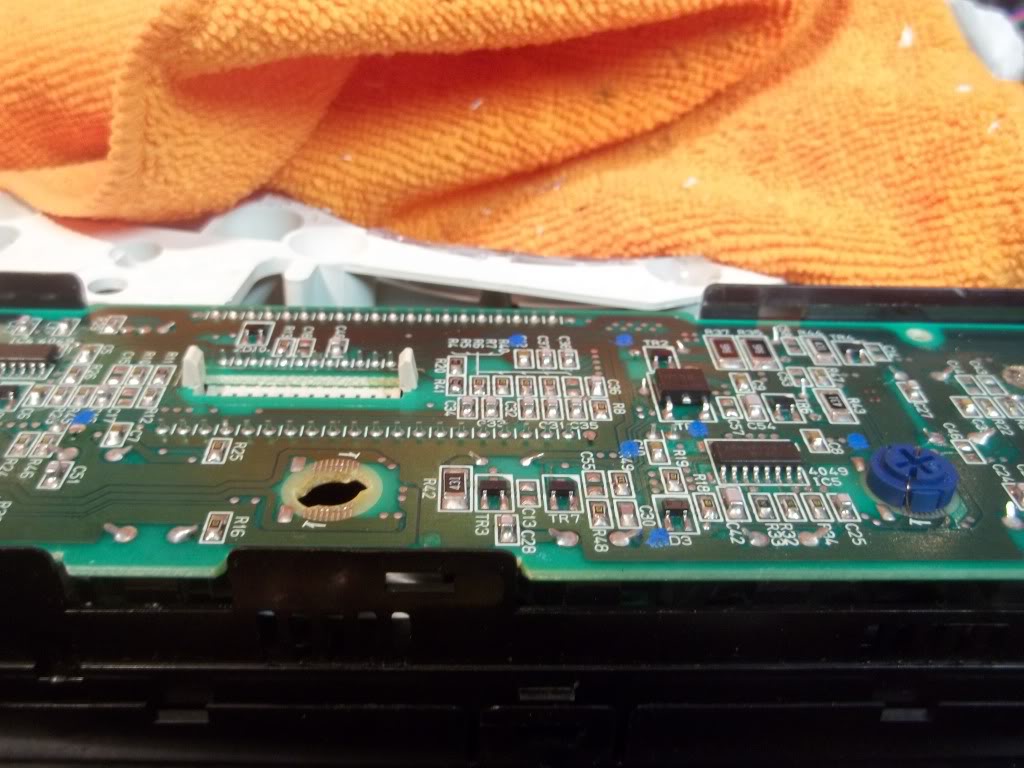
My correct socket fitting into the board (Not all the way in of course):

The incorrect socket not being able to allow the copper to go under the board due to the black plastic "locks" in the way:

Also, I took the socket from the"Brights" light, and put the LED in and put it where I broke the other one, and it worked fine..not sure if there is any difference but the socket is a dark brownish color instead of the black. The light actually looks a little brighter then the other now.
02-13-2012, 04:57 PM
#710
Member
Join Date: May 2011
Location: Suffolk, Long Island
Posts: 72
Seems to be that way, unless the previous owners did a full cluster swap, but im not sure if wiring would be the same...
Which means...maybe 136k on my car is just an illusion? Oh no...
Which means...maybe 136k on my car is just an illusion? Oh no...
Last edited by guarj17; 02-13-2012 at 04:59 PM.
02-18-2012, 09:14 PM
#711
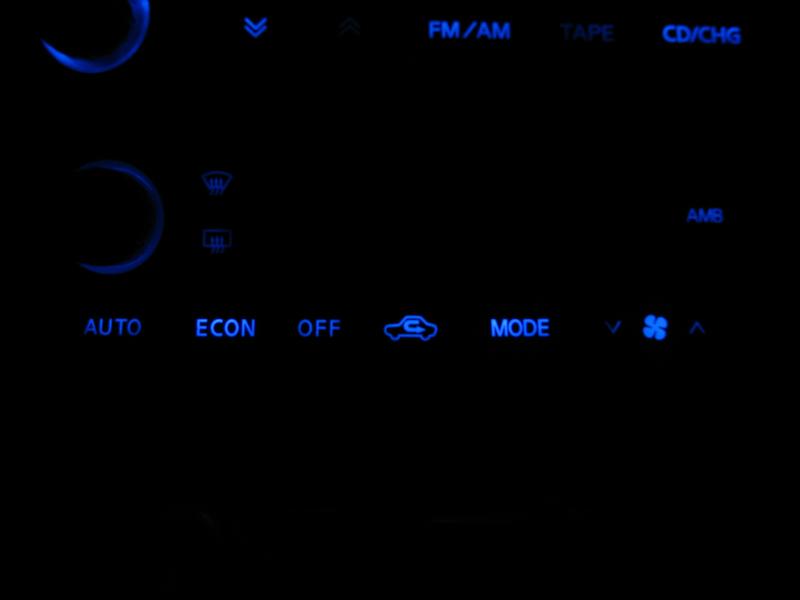
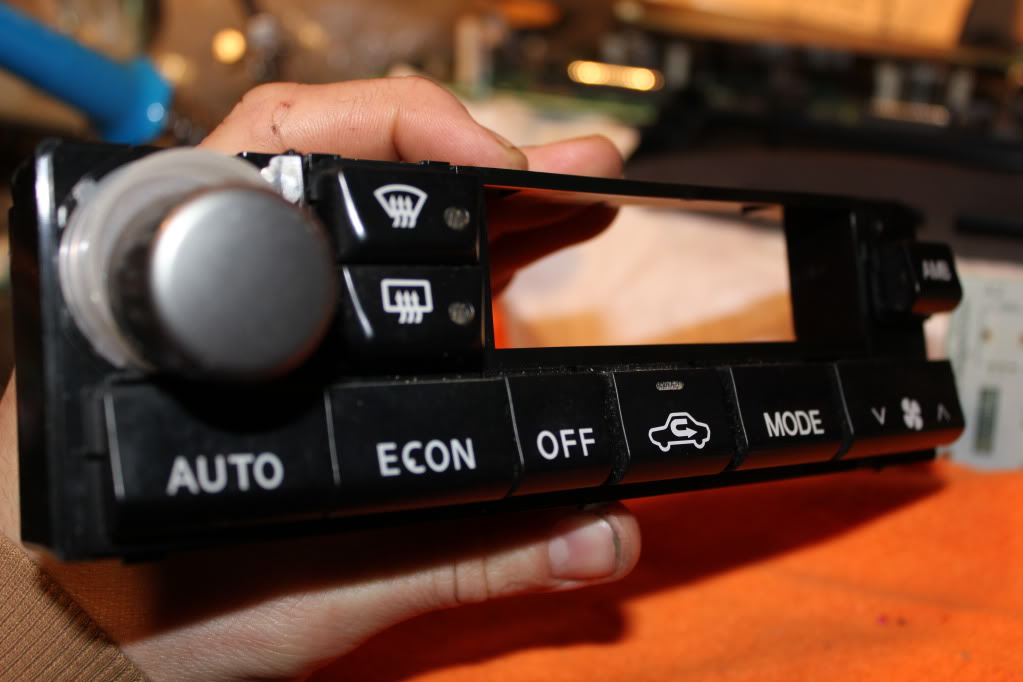
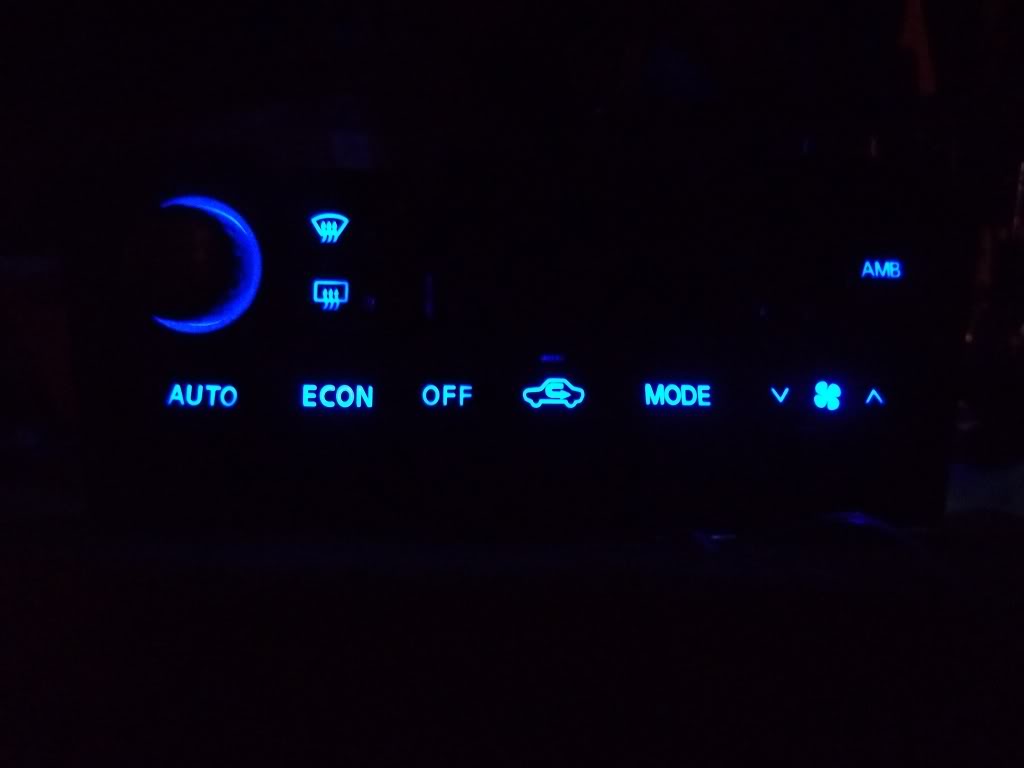
~ALMOST~ Drop in NO HOTSPOT Climate Control :)
Posting this here as well for you fine people:
Very large shout out to Shinjiduo, he is the one you all want to thank for this. His suggestion to use the 360 degree LED's from SuperBrightLEDs.com is what brought this to fruition. I had no idea these little beauties were out on the market, let alone so bloody awesome.
Enough chatter, here we go:
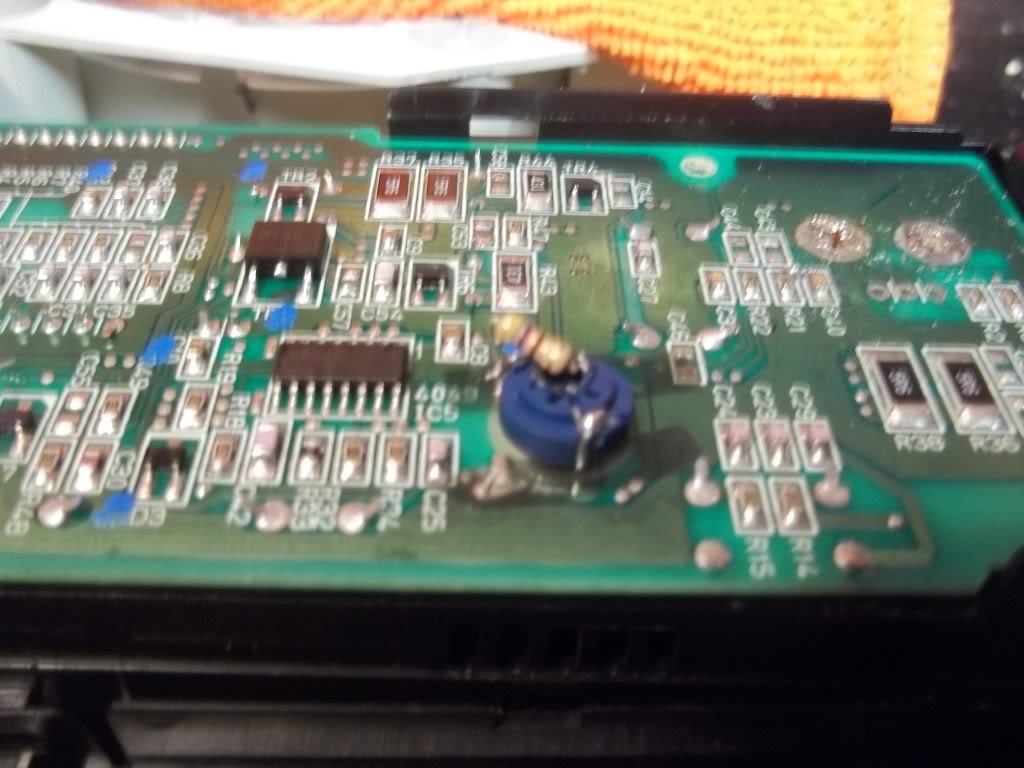
Your Climate Control unit ready for bulb removal:
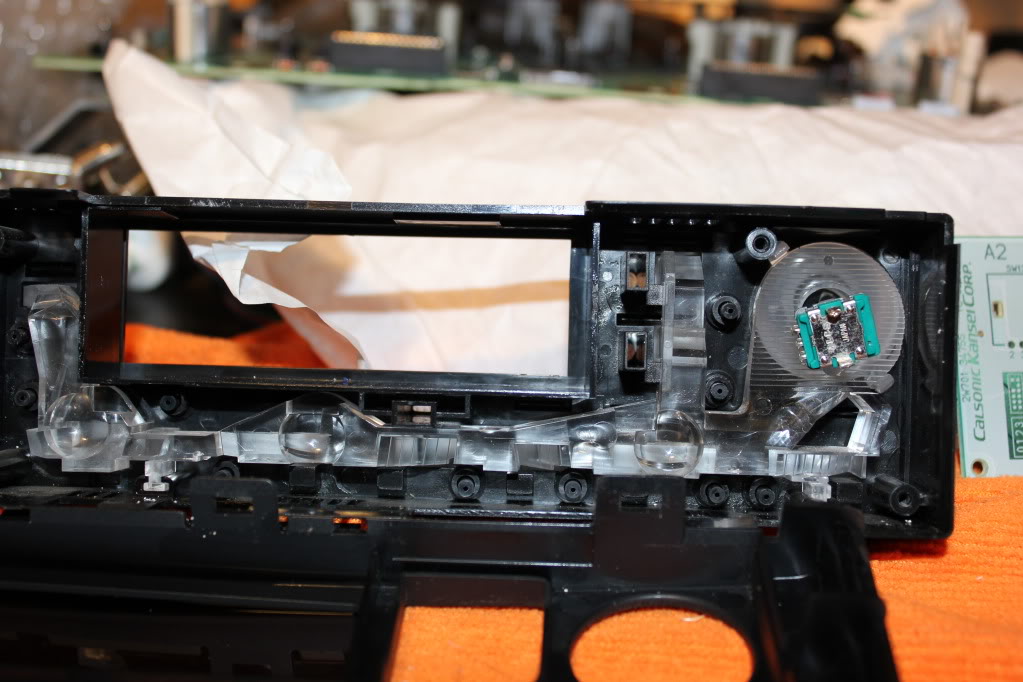
Removing stock bulbs:
Now use a small screwdriver to slide the contact wires off their 'hooks' on the base:
Contacts off 'hooks/mounts' and bulb ready for removal:
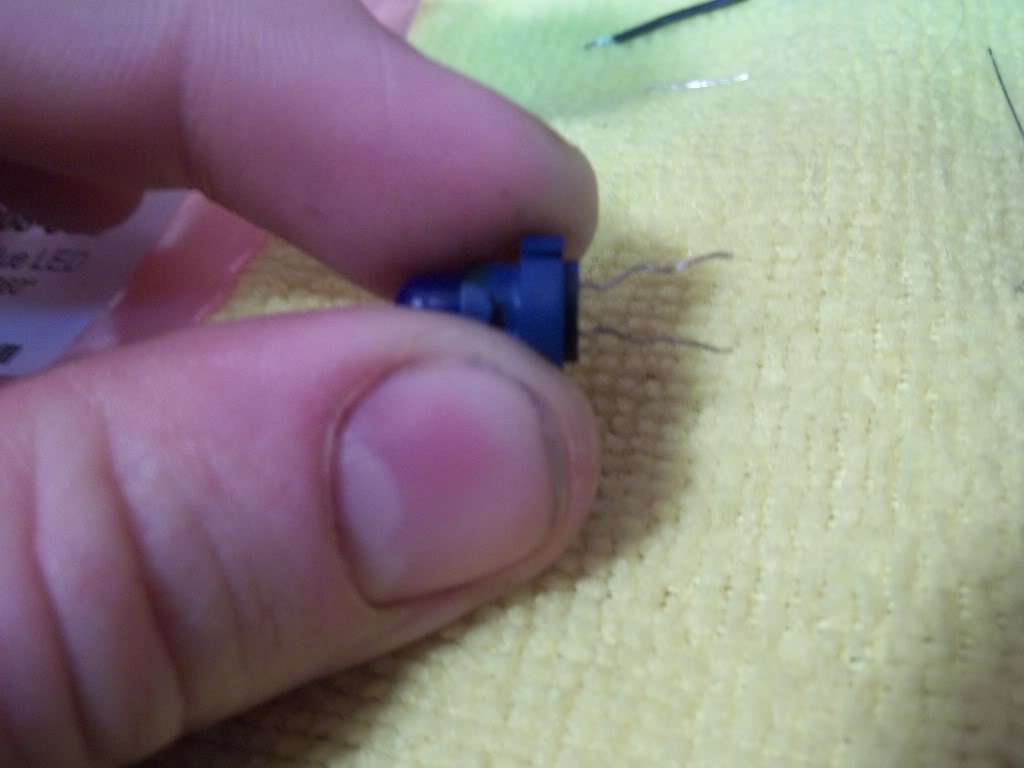

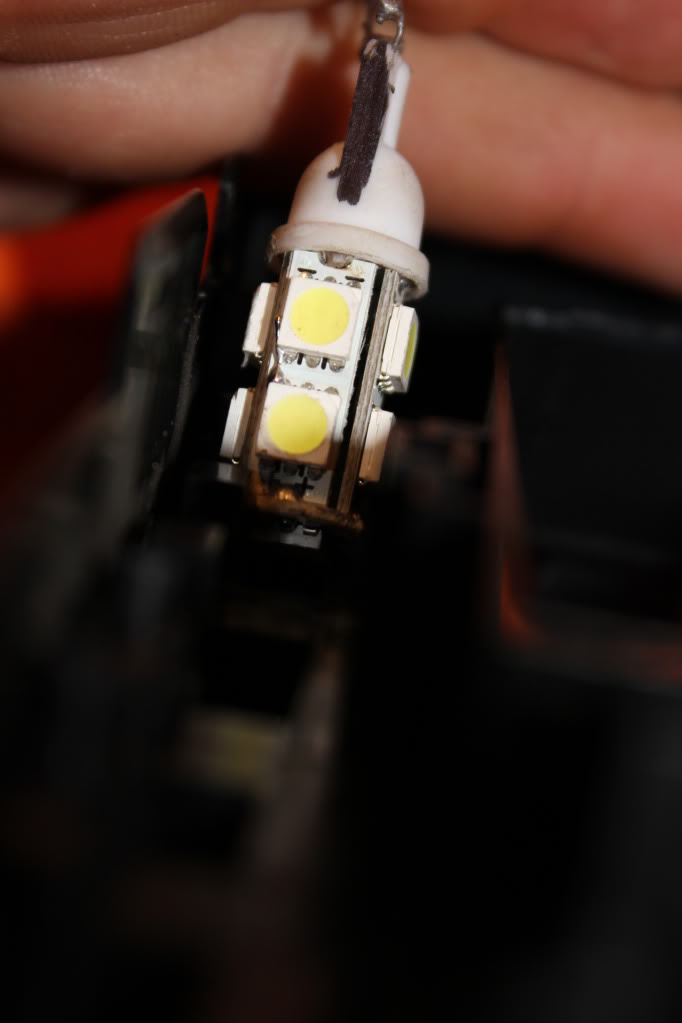
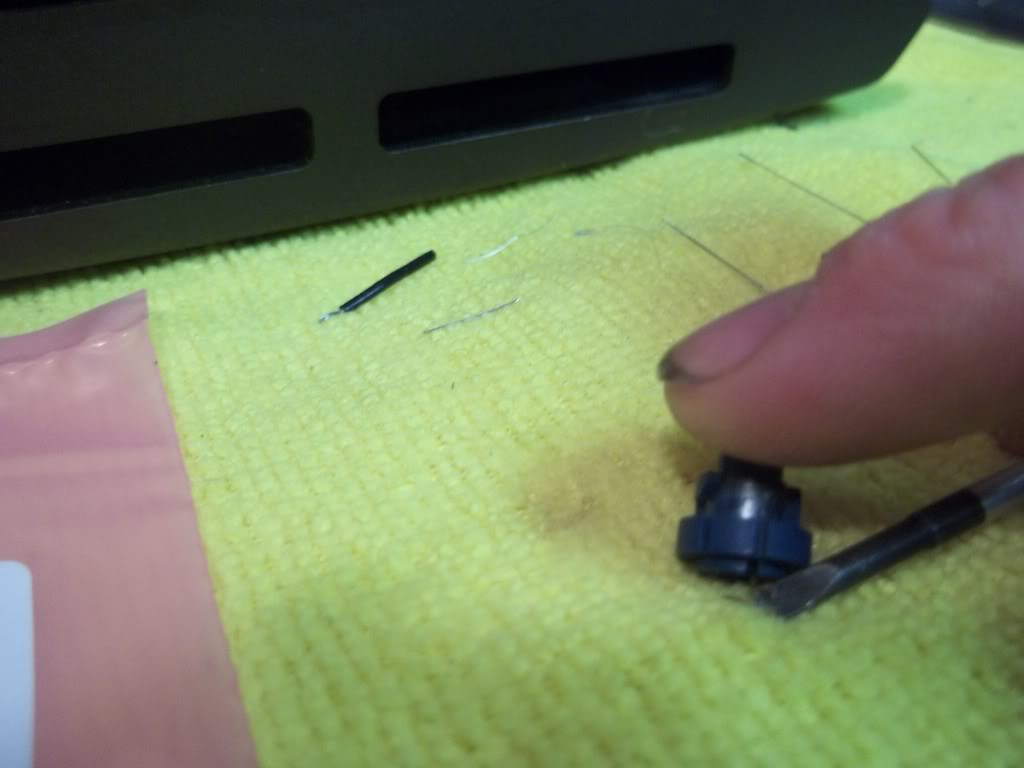
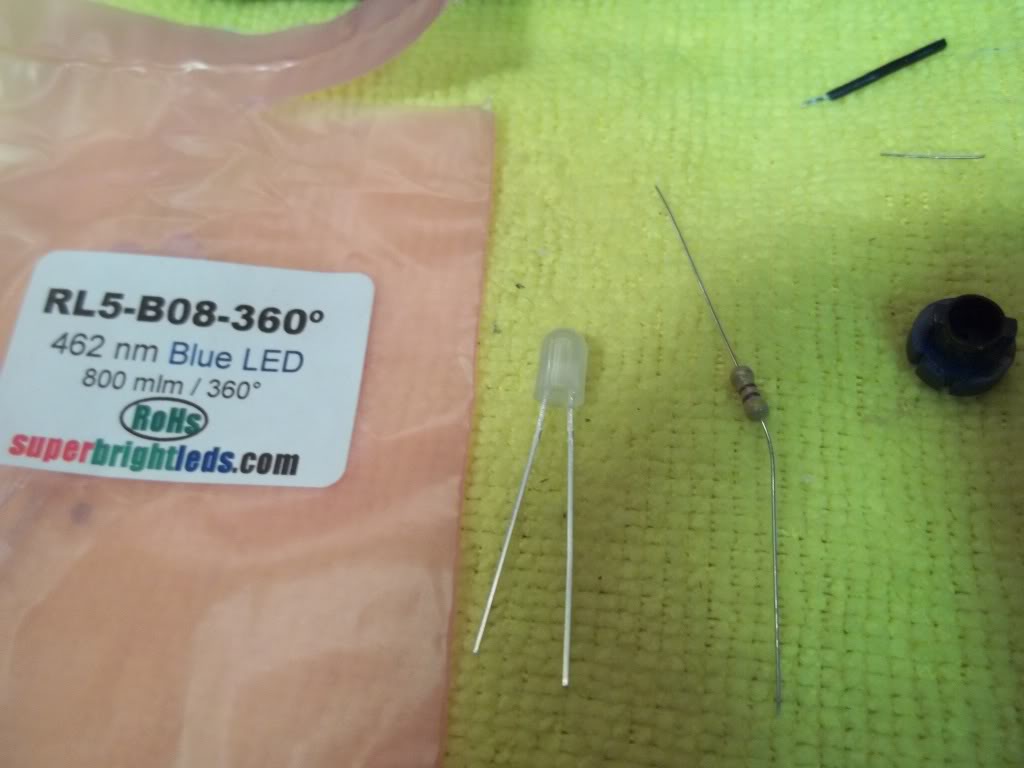
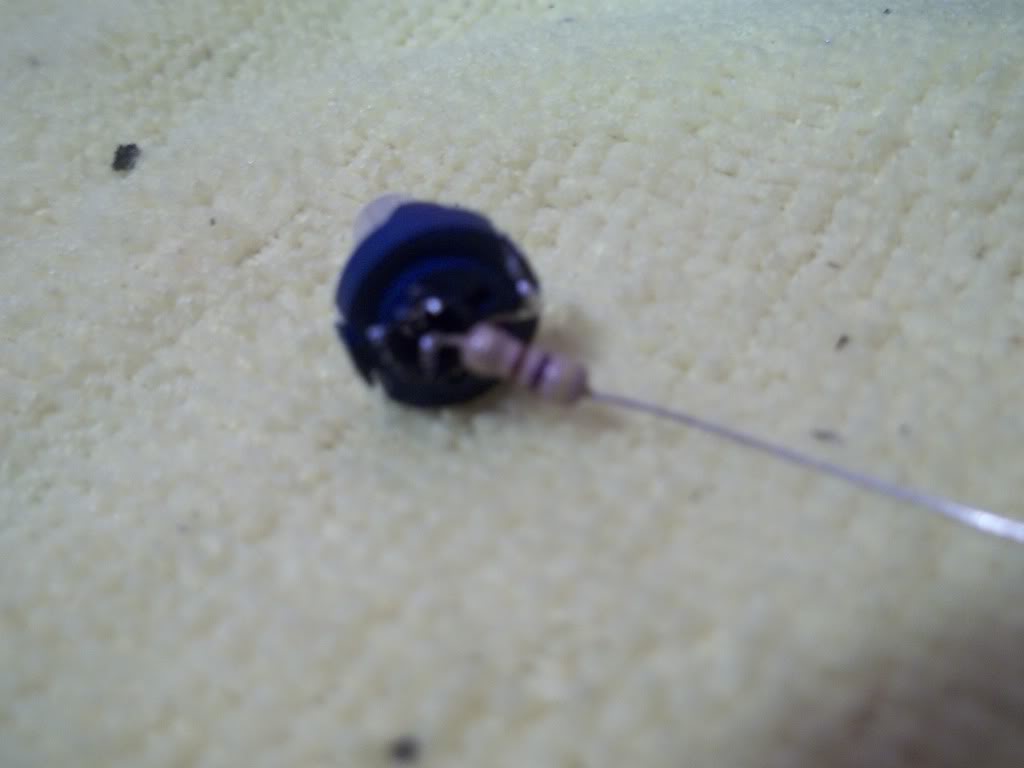
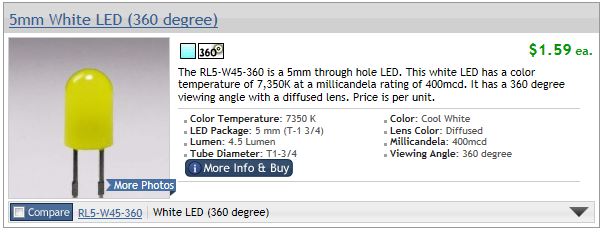
Prepping your LED for install. You'll need 3 of these 5mm 360 Degree LED's, in whatever colour you want to do. Mine are blue. And 3 resistors, either 470 or 560 ohm, 1/4 watt.
It doesn't matter which end you put the diode on, you don't even need to worry about positive/negative leads for this application.
Just stuff the LED in there and wrap one lead around the 'hook' just like the stock one was.
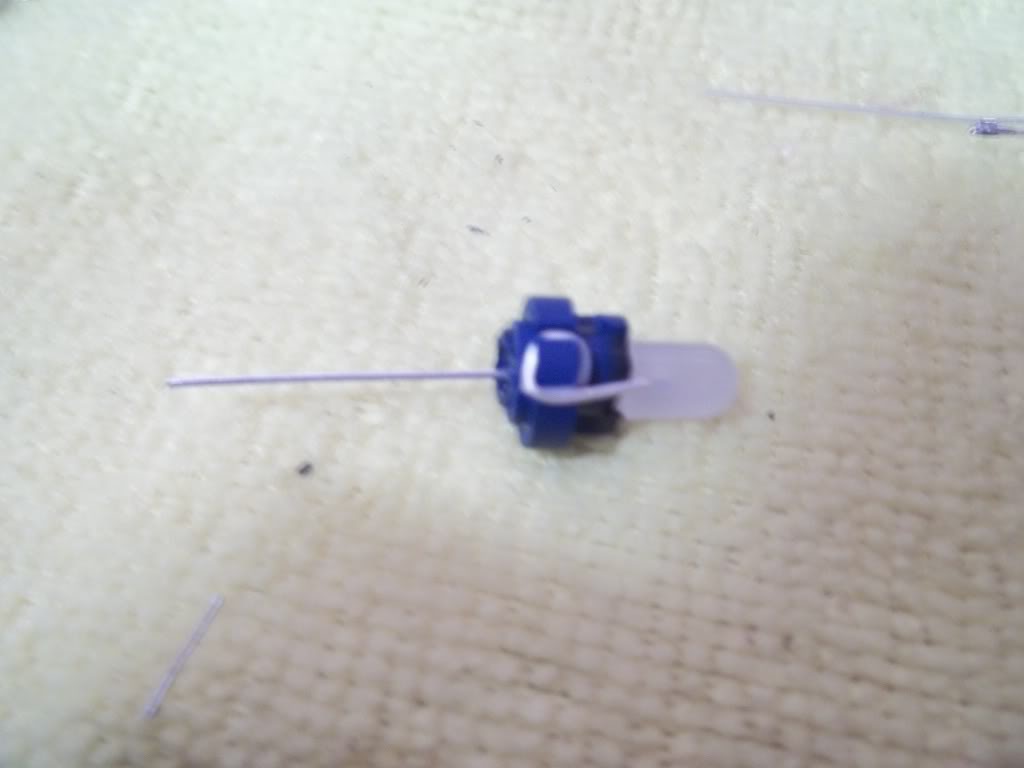
I put a little dab of solder to hold it indefinately, just make sure you do it on the back side (opposite the LED), or it will interfere with the mounting. Then cut off the excess contact.
Now pre-tin your resistor lead on one end and solder it to the other lead on the LED you just installed:
Cut off excess wire:
Very large shout out to Shinjiduo, he is the one you all want to thank for this. His suggestion to use the 360 degree LED's from SuperBrightLEDs.com is what brought this to fruition. I had no idea these little beauties were out on the market, let alone so bloody awesome.
Enough chatter, here we go:
Your Climate Control unit ready for bulb removal:
Removing stock bulbs:
Now use a small screwdriver to slide the contact wires off their 'hooks' on the base:
Contacts off 'hooks/mounts' and bulb ready for removal:
Prepping your LED for install. You'll need 3 of these 5mm 360 Degree LED's, in whatever colour you want to do. Mine are blue. And 3 resistors, either 470 or 560 ohm, 1/4 watt.
It doesn't matter which end you put the diode on, you don't even need to worry about positive/negative leads for this application.
Just stuff the LED in there and wrap one lead around the 'hook' just like the stock one was.
I put a little dab of solder to hold it indefinately, just make sure you do it on the back side (opposite the LED), or it will interfere with the mounting. Then cut off the excess contact.
Now pre-tin your resistor lead on one end and solder it to the other lead on the LED you just installed:
Cut off excess wire:
Last edited by TunerMaxima3000; 03-01-2012 at 05:19 AM.
02-18-2012, 09:15 PM
#712
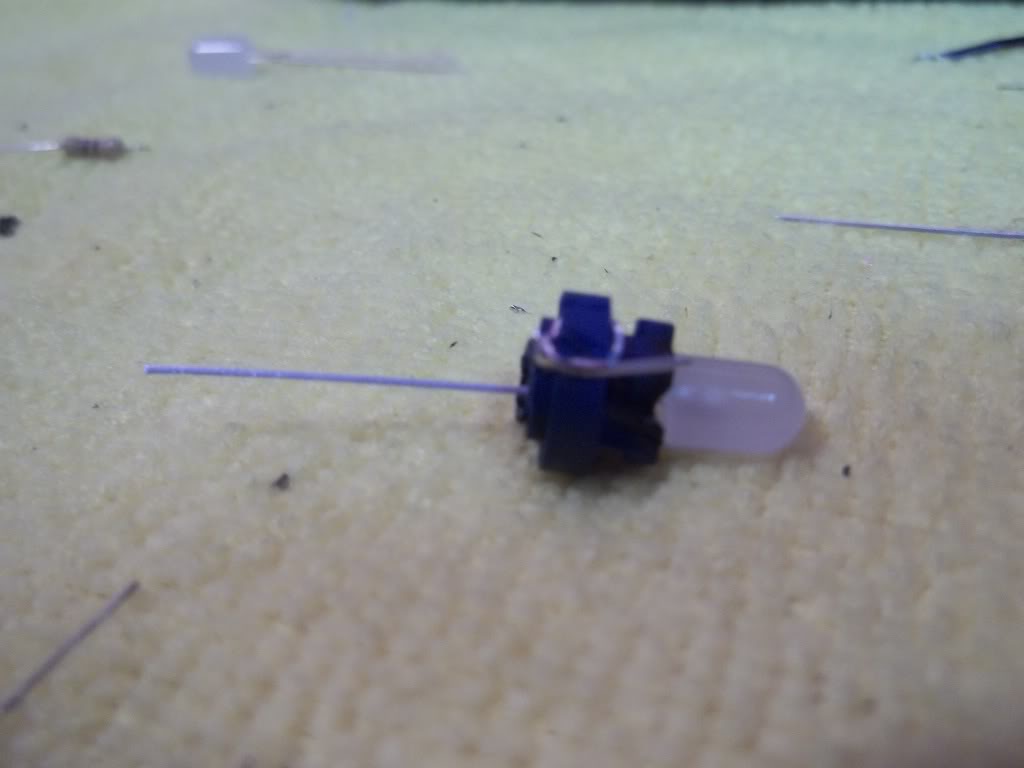
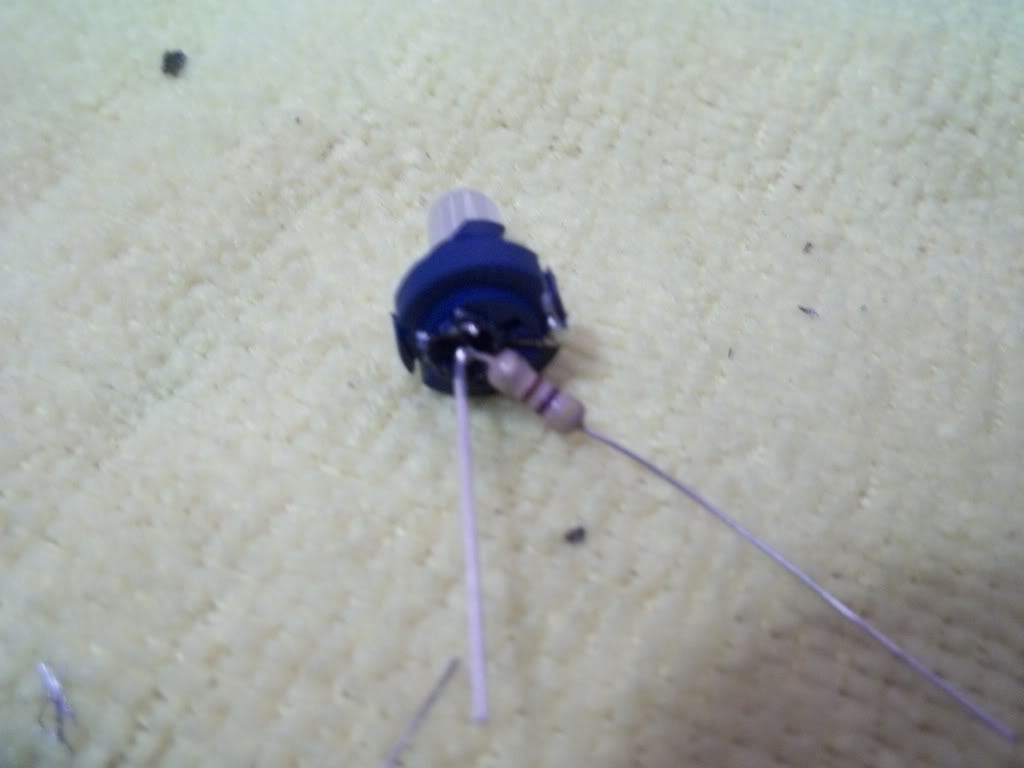
Wrap this lead around the other 'hook' on the base. Same deal.
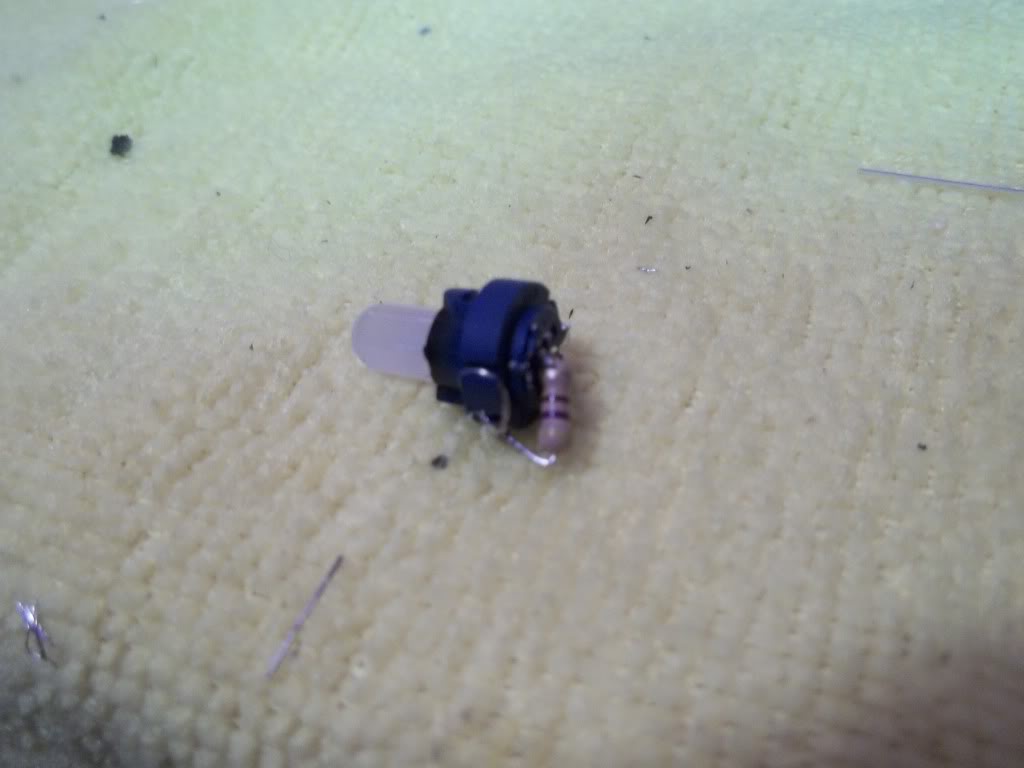
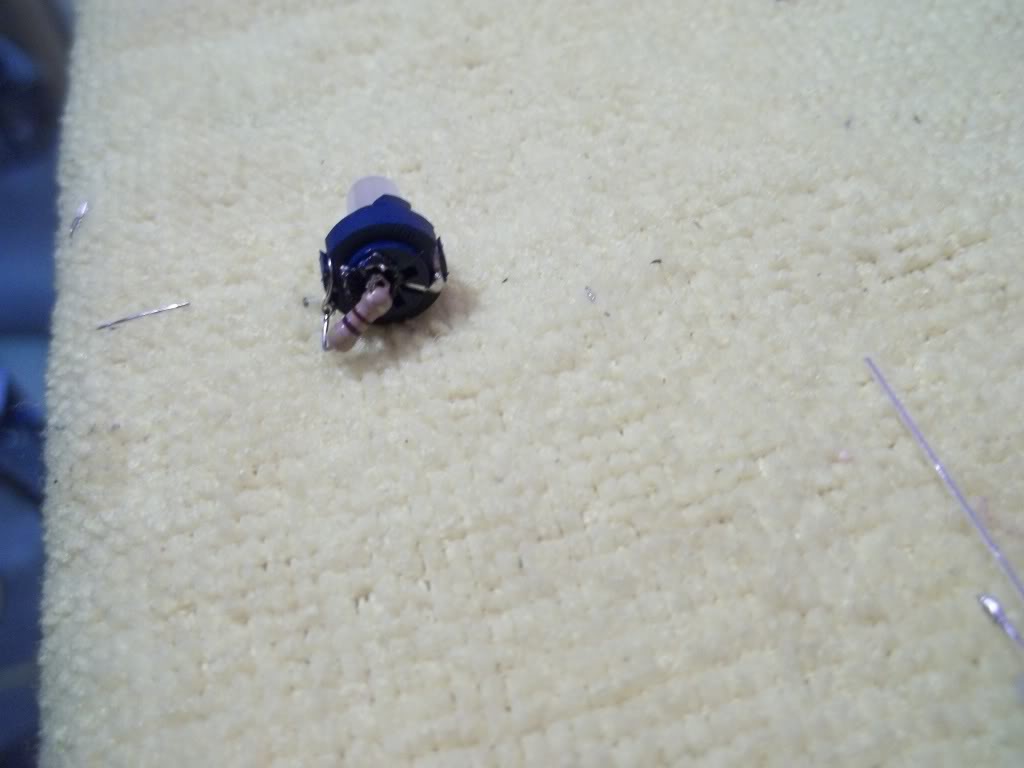
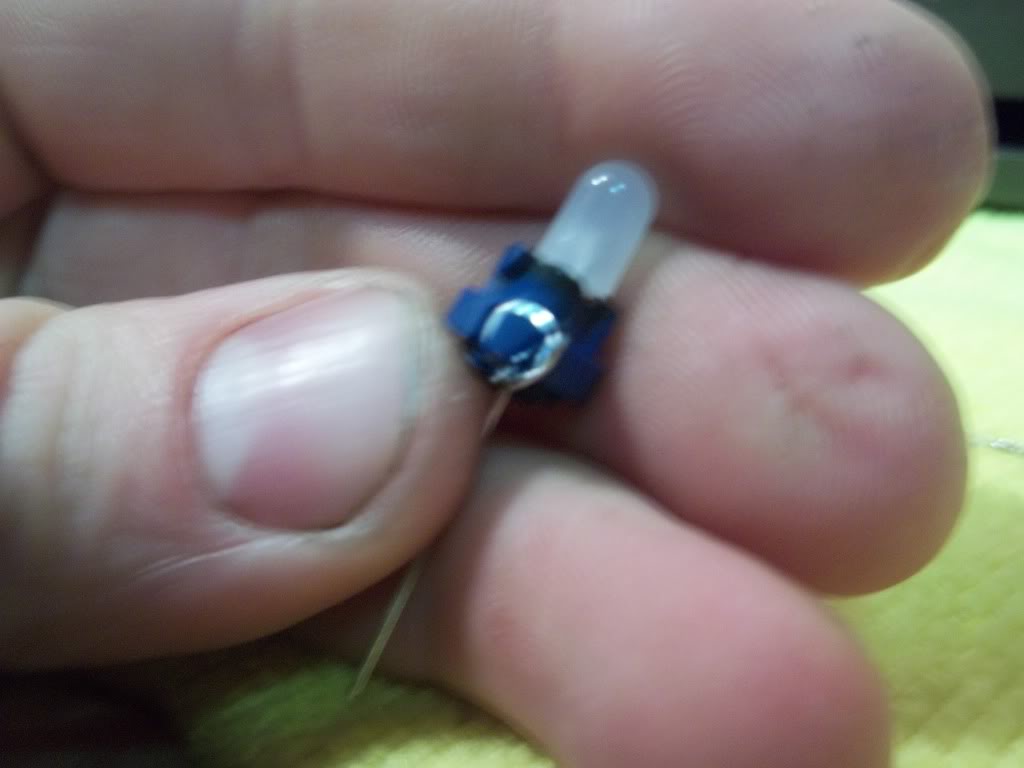
Install
Now for the beauty part, I was VERY surprised that there was actually no hotspots, I NEVER expected this level of even distribution.
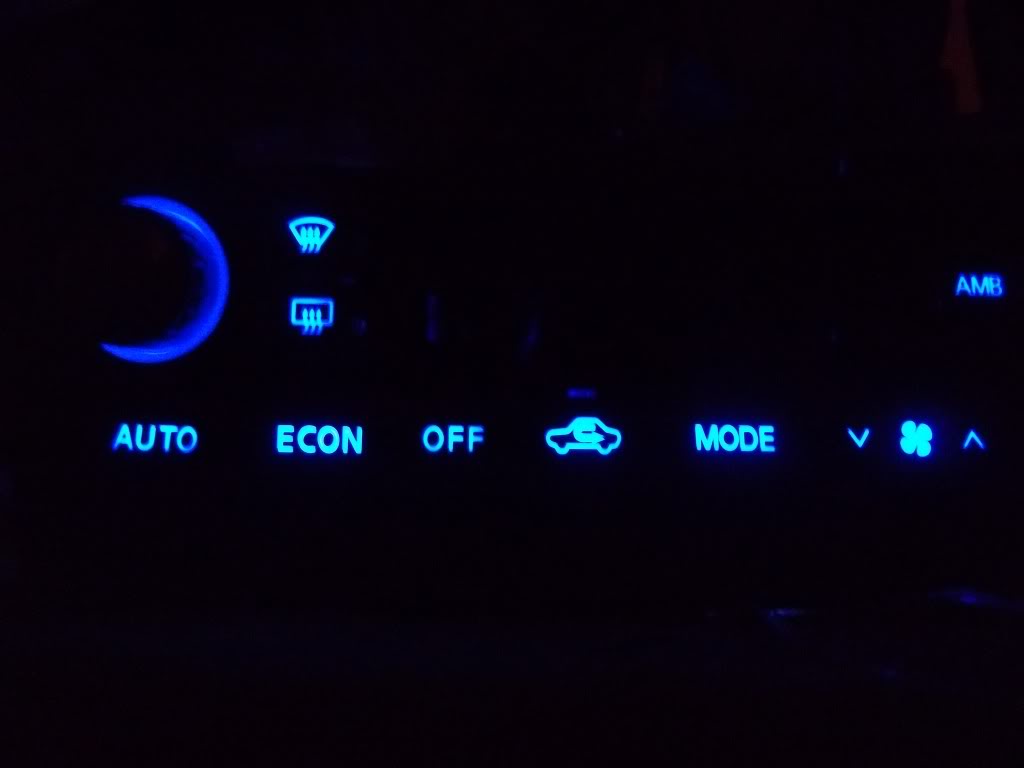
If there's enough interest, Either Shinjiduo or I could make a batch of these up and sell them as "DROP IN" units. Price would be a little high from me, Feel free to PM Shinjiduo he loves to make money and may do it cheaper
-Matt
Install
Now for the beauty part, I was VERY surprised that there was actually no hotspots, I NEVER expected this level of even distribution.
If there's enough interest, Either Shinjiduo or I could make a batch of these up and sell them as "DROP IN" units. Price would be a little high from me, Feel free to PM Shinjiduo he loves to make money and may do it cheaper
-Matt
02-18-2012, 09:26 PM
#713
Posting this here as well for you fine people:
[B]Very large shout out to Shinjiduo, he is the one you all want to thank for this. His suggestion to use the 360 degree LED's from SuperBrightLEDs.com is what brought this to fruition. I had no idea these little beauties were out on the market, let alone so bloody awesome.
Enough chatter, here we go:
[IMG]fantasticccinstructionalphotoswithbeautifulresults .jpg[/IMG]
Your Climate Control unit ready for bulb removal:
Removing stock bulbs:
Now use a small screwdriver to slide the contact wires off their 'hooks' on the base:
Contacts off 'hooks/mounts' and bulb ready for removal:
Prepping your LED for install. You'll need 3 of these 5mm 360 Degree LED's, in whatever colour you want to do. Mine are blue. And 3 resistors, either 470k or 560k ohm, 1/4 watt.
It doesn't matter which end you put the diode on, you don't even need to worry about positive/negative leads for this application.
Just stuff the LED in there and wrap one lead around the 'hook' just like the stock one was.
I put a little dab of solder to hold it indefinately, just make sure you do it on the back side (opposite the LED), or it will interfere with the mounting. Then cut off the excess contact.
Now pre-tin your resistor lead on one end and solder it to the other lead on the LED you just installed:
Cut off excess wire:
Wrap this lead around the other 'hook' on the base. Same deal.
Install
If there's enough interest, Either Shinjiduo or I could make a batch of these up and sell them as "DROP IN" units. Price would be a little high from me, Feel free to PM Shinjiduo he loves to make money and may do it cheaper
-Matt
 02-18-2012, 10:10 PM
#715
Dude! Where'd youfind this? I was looking for these for the longest time back when I was doing this on the side!! Link please.
And yes, everyone should be ordering those 360 LED's right now. It's incredible.
I thought about doing a 'group buy' type thing. Run production of these pre-made every half-dozen guys or whatever. Through me it'd be like $50 for 3 premade though, so Shinjiduo may be your best bet if you guys aren't feeling up to doing this yourself.
But trust me, you need this in your life.
02-18-2012, 10:24 PM
#716
Dude! Where'd youfind this? I was looking for these for the longest time back when I was doing this on the side!! Link please.
And yes, everyone should be ordering those 360 LED's right now. It's incredible.
I thought about doing a 'group buy' type thing. Run production of these pre-made every half-dozen guys or whatever. Through me it'd be like $50 for 3 premade though, so Shinjiduo may be your best bet if you guys aren't feeling up to doing this yourself.
But trust me, you need this in your life.
And yes, everyone should be ordering those 360 LED's right now. It's incredible.
I thought about doing a 'group buy' type thing. Run production of these pre-made every half-dozen guys or whatever. Through me it'd be like $50 for 3 premade though, so Shinjiduo may be your best bet if you guys aren't feeling up to doing this yourself.
But trust me, you need this in your life.
http://autolumination.com/connectors.htm
02-19-2012, 05:01 AM
#717
Tuner, that was hugely inventive! The hot-spotting is almost entirely gone. Are you considering trying out these 360 bulbs in the dashboard gauges as well?
Hat's off to you, Sir!
OAN, for some reason it's funny to see cjandura get pulled into these lighting mods. But it's nice to have an apprentice, eh?
Hat's off to you, Sir!
OAN, for some reason it's funny to see cjandura get pulled into these lighting mods. But it's nice to have an apprentice, eh?
02-19-2012, 05:42 AM
#718
My gauge work has gone far beyond popping bulbs in. If I was still doing it for others I'd use these ritualisitcally. I wouldn't be surprised if they do a better job on the 5.5 gauges also, with a probably loss in overall brightness. If applicable, a fair trade off for the hotspotting that you get with the HPx3 used in this thread. But that defeats the 'drop in' nature of the beast.
I know Shinjiduo makes these for the gauge clusters and from what I've seen so far, for good reason. I can't get over how well these little buggers work, they just look like diffused lenses on a normal 5mm LED.
These are almost a direct replica of a normal incandecent of the same size, only brighter, available in different colours, cheaper, and with all the benefits of an LED with none of the downfalls of an incandecent.