
Maxima HID Retrofit Build


Not bad! We all have to start somewhere! Look how far you're retros have come, haha. Although, the black putty/epoxy/tar/adhesive stuff looks like a mess. On that note, I've never actually understood those who use epoxy or some other contact substance to mount their projectors instead of using bolts and/or brackets. At least with brackets and/or bolts you are able to adjust and aim the projectors during the initial stages AND later down the road, unlike with epoxy, you are SOL if you mess up the first time.
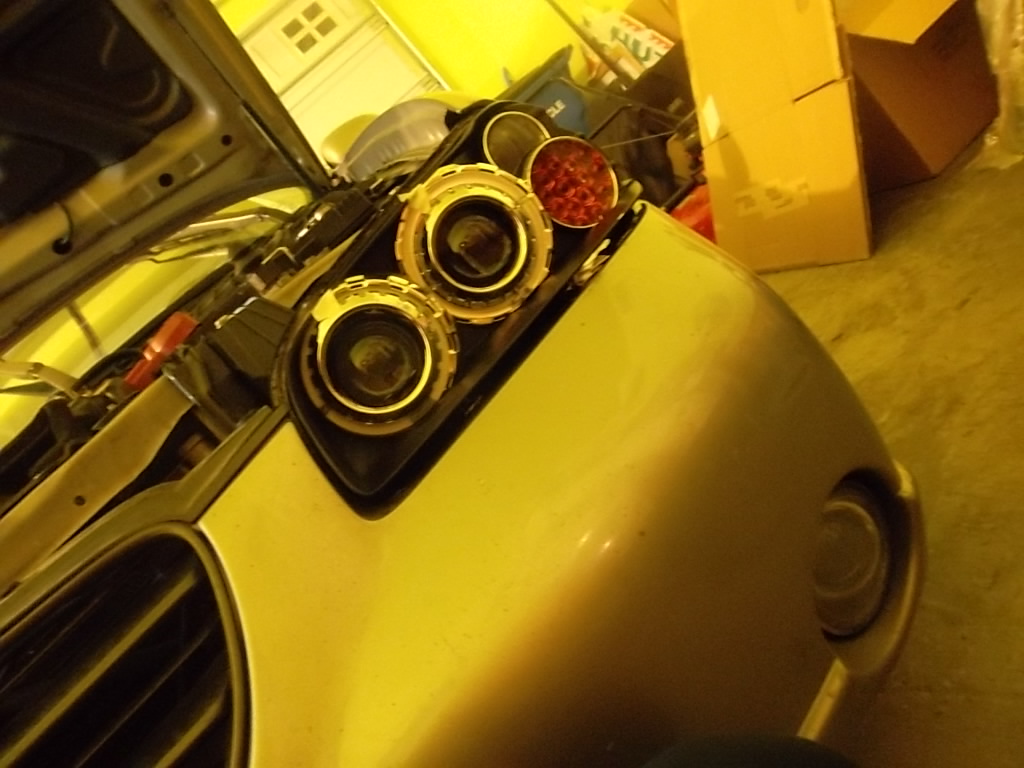
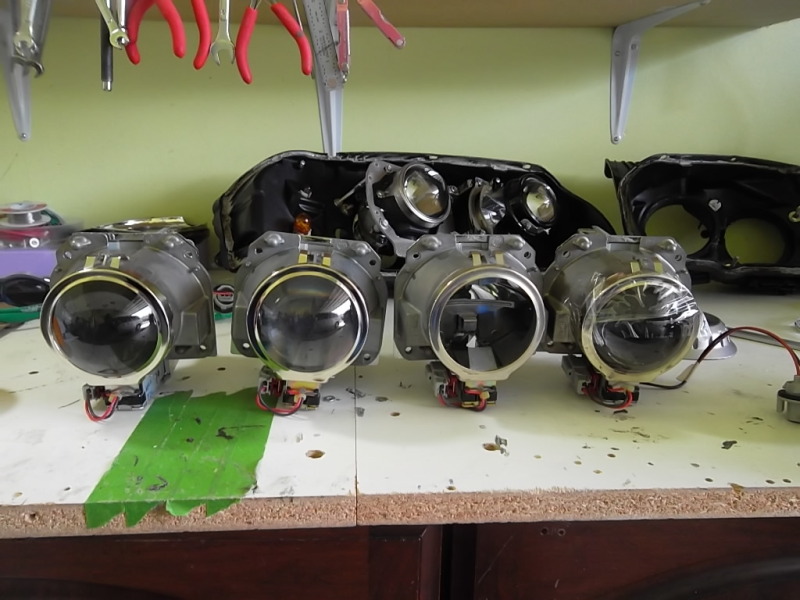
Quad retro, epoxy. And that's a combination of slope and step projectors.


Understandable point but considering how easy it is to do an epoxy retro without fabbing up brackets and the like, its much easier. In some scenarios making a bracket setup is quite difficult. Epoxy setups really just need the rotation to be on point. Horizontal and vertical adjustments can still be made.
Quad retro, epoxy. And that's a combination of slope and step projectors.
Quad retro, epoxy. And that's a combination of slope and step projectors.
 .
. I've done it once in the summer time. It took very little time and you can get very good allignment. Nice flat ground, wide wall, and good weather make this approach an easy route. The pro retrofitter used is all the time. For me, summer time is very short and winter is not only cold but very wet too. I hate working in a cold garage, so I spent more time measuring and designing bracket inside on my kitchen island
. Once I have my design, either I fab it my self ( hack saw, dremmel, and lots of filing ) or pay someone to machine/laser/water jet it. When it comes to allignment, it is a little quicker with bracket (the bracket has to work off course) and I like the way it looks. I usually have one pivot point and one adjustment point, tighthen the nut good, a dab of locktite and done.Building bracket, especially in my current retro, takes alot of time and planning and several iteration to get it right, so I agree it is costly and could take too much time in some cases. I did it because I'm investing it for the future. Once I dial in the design, the next retro would be repetable in no time, since there is no cutting involve. There are times when I almost gave up and wanted to just slab JB weld and call it good, but I'm having so much fun doing this current retro. If all goes well, I'm getting a good used vertical mill this summer, so I can do more custom bracket with ease. It'll get there and it's going to be the most difficult retro I've done, but oh well.
Last edited by Genes1s; Mar 17, 2012 at 10:01 PM.

Oh man, i get it now. Haha. I thought about the epoxy process in the wrong way. The process sounds easy enough actually! Nobody has actually explained it for me, nor have I ever looked into using such method. I guess I like the challenge of hacking up the housing and building brackets. IDK, I just feel more secure customizing brackets and such. I agree, it's very time consuming, but I just like the final fit and finish compared to epoxy. I may try an epoxy method sometime in the future though just to experience the "easyness" of it.
Last edited by tcaughey; Mar 17, 2012 at 11:12 PM.
My car is Sterling Mist. I wish it was pearl white

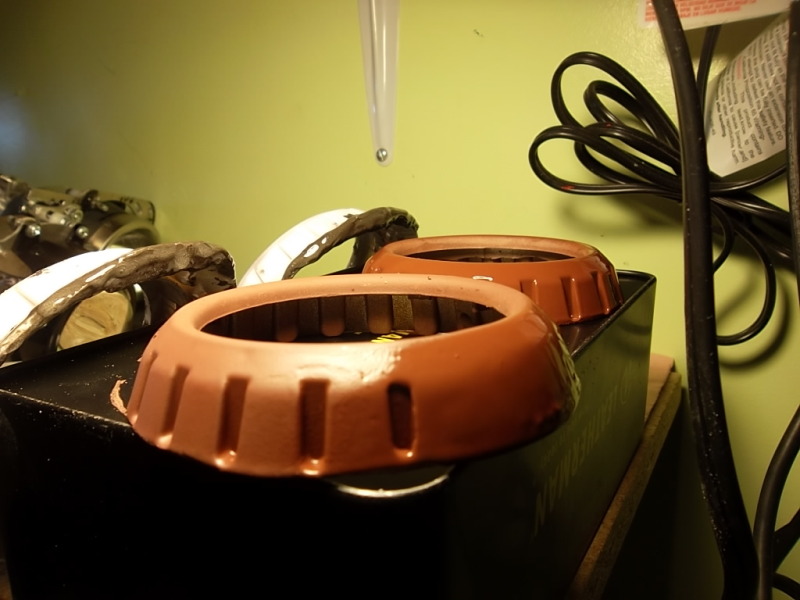
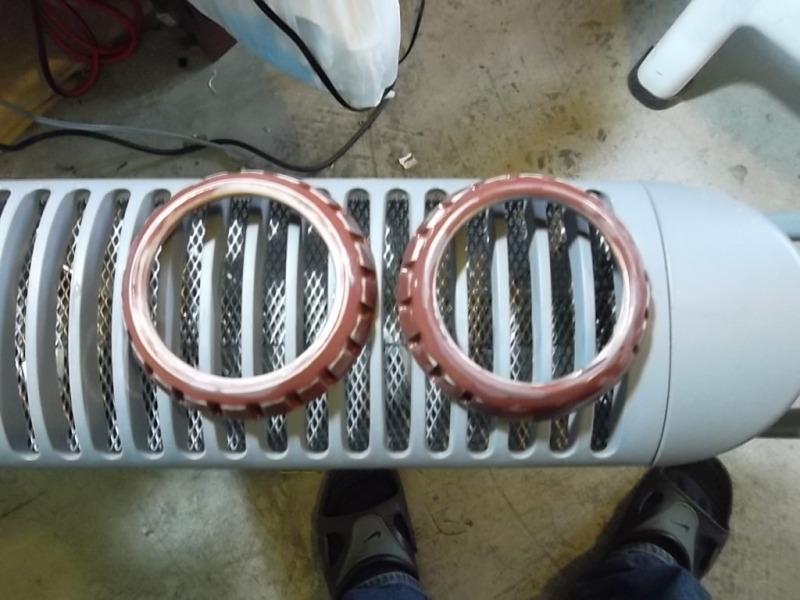
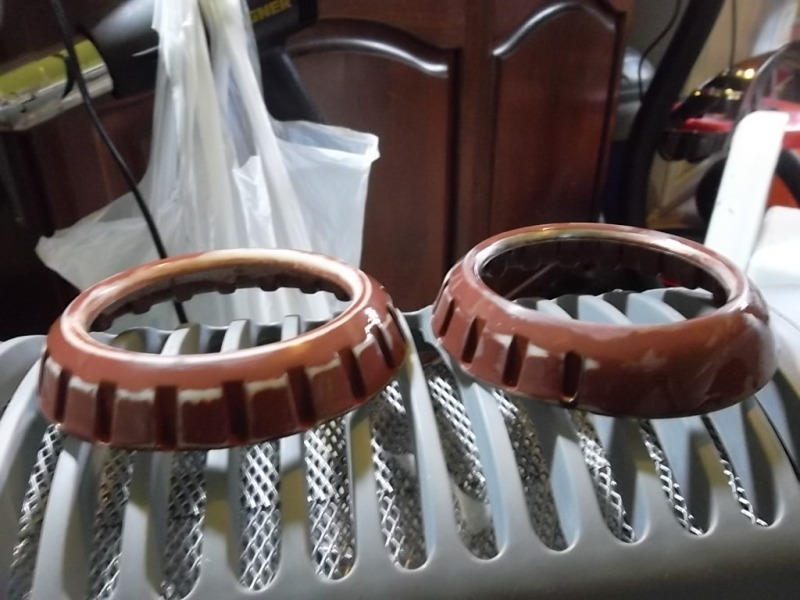
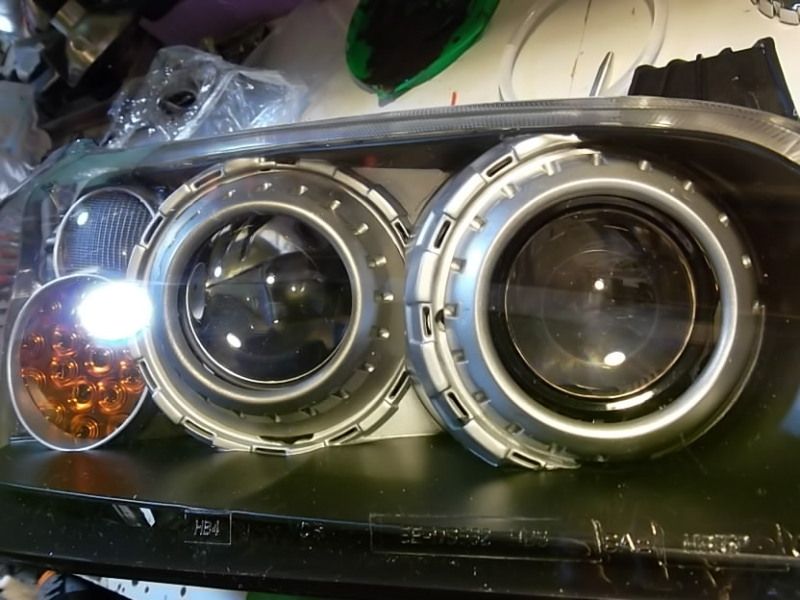
Worked on the shroud extensions. I wasn't going to use the angle eyes that came with the lights, but after few tries it was kinda kool to have it sandwhiched bettern the shroud and shourd extension. It's not that bright now, but probably need to upgrade to brigther one and "warm white" color instead of bluish white, or run SMD rings like the Bimmner/CCFL...still debating.

Would you happen to know the size for the halo rings by chance? I'm going to upgrade my LED halos but I haven't baked open my headlights yet and I want to get the rings ordered before hand. I've done some searching but the best I could come up with was 120mm and 130mm but those measurements were for the OEM 02-03 headlights.
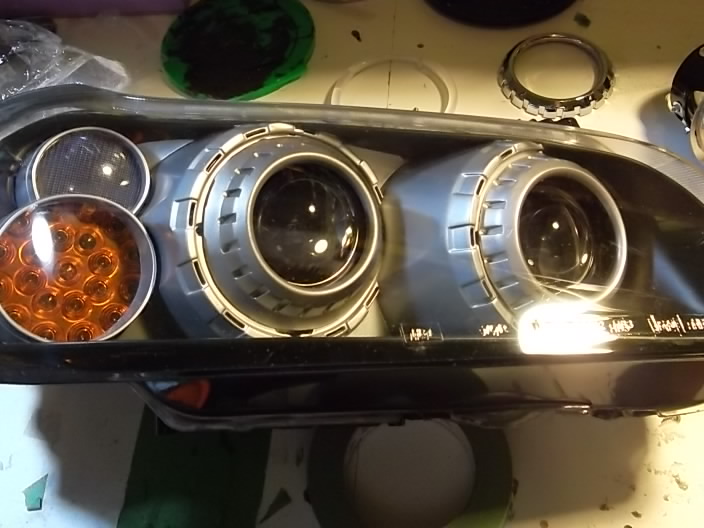
Low beam: 100mm ID, 116mm OD

Newbie - Just Registered
Joined: Mar 2012
Posts: 12
I did the mini but I cut away a little at the bumper behind the fog area. Well done, sharp/perfect cutoff isn't necessary for fogs anyway. I've used the matchboxes but I really don't think they're that wonderful.
Newbie - Just Registered
Joined: Mar 2012
Posts: 12
Great job! They do look nice. Get some daytime pics of the headlights on the car. I'd live to see how the CF looks in there. It's an idea I've played with for a while but I was only going to use it in small sections of the R34's.
00-03 Quads 03/24/12
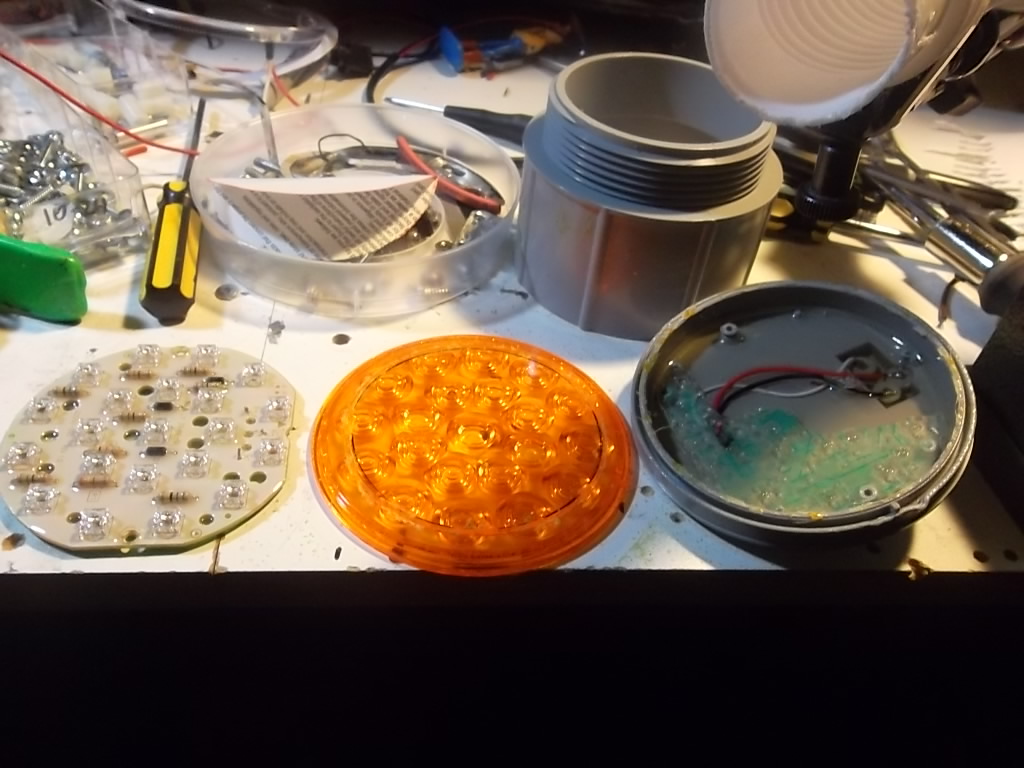
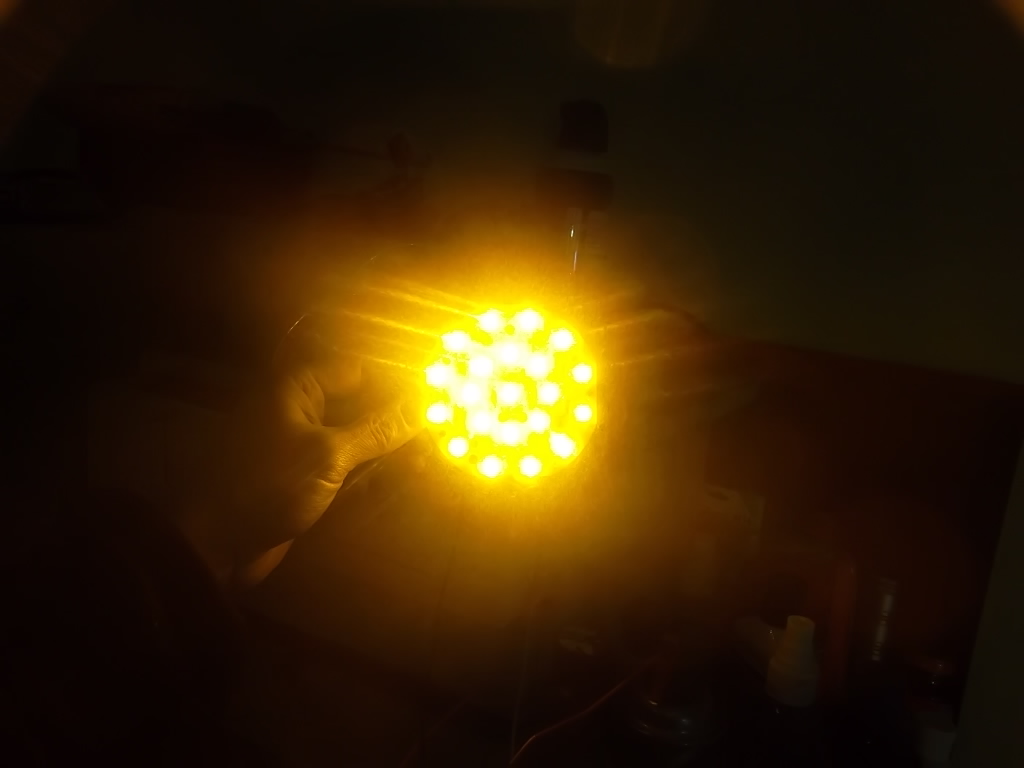
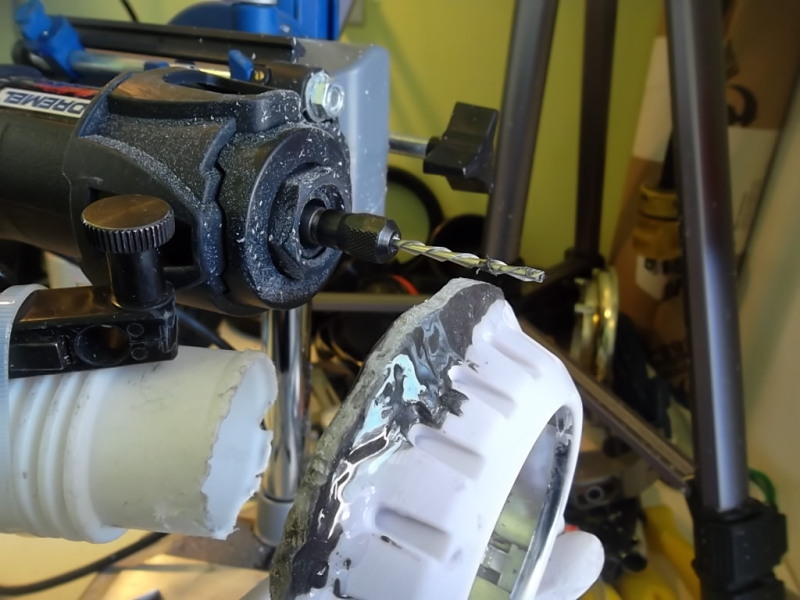
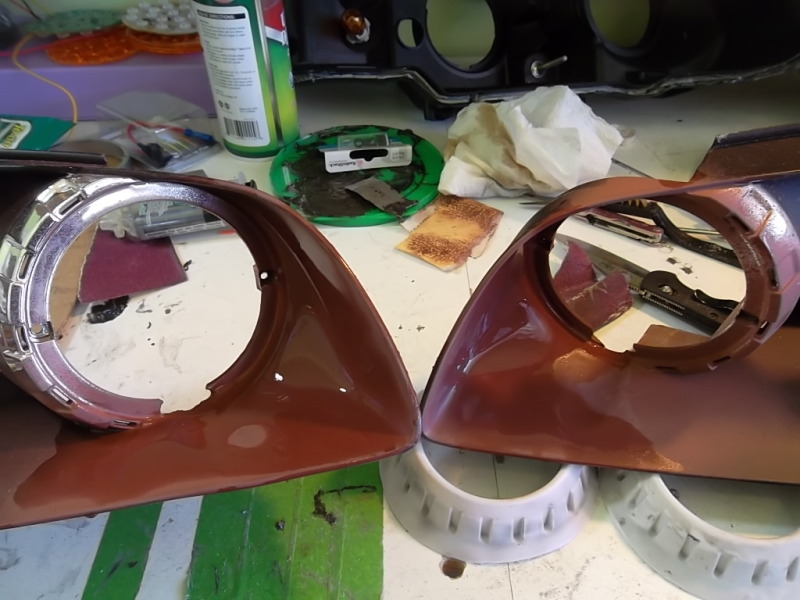
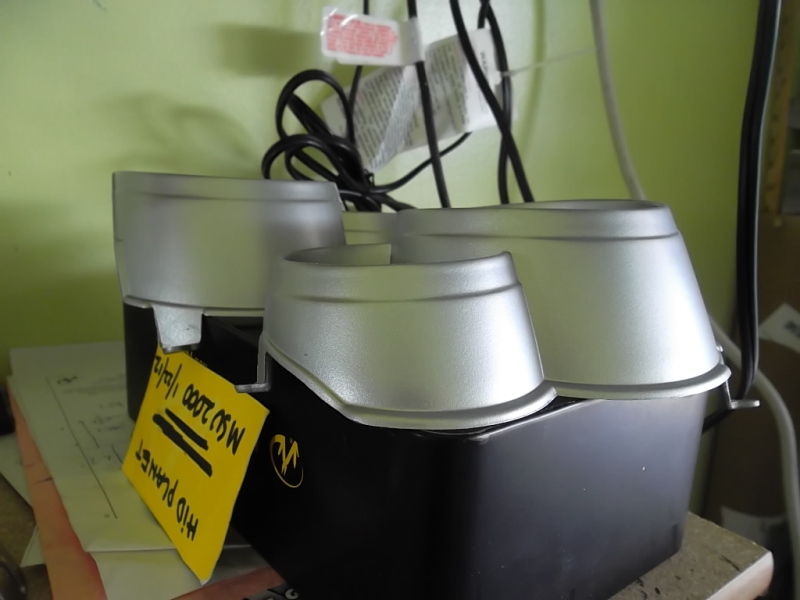
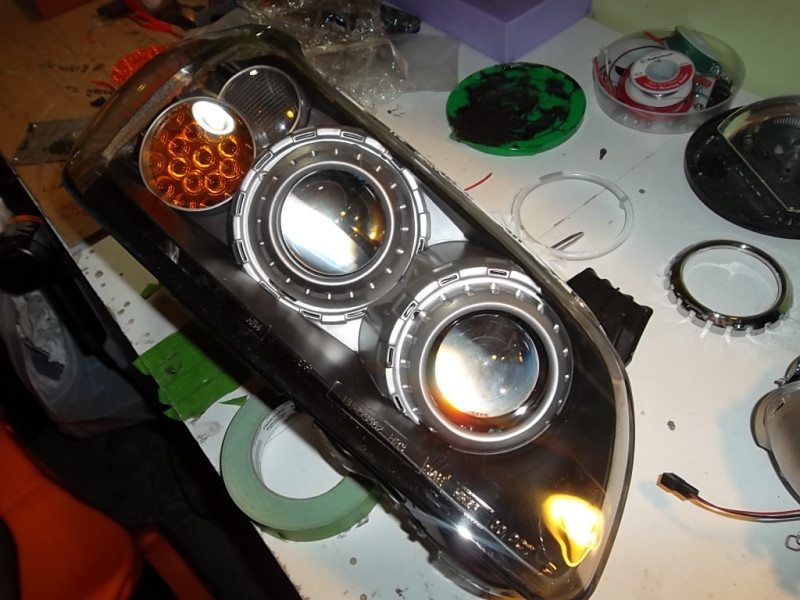
Had a few hours this evening to work on the LED turn signal. I didn't make my own LED board this time since this is my very first time to do anything with LED. I bought trucker trailer LED turn signals from Ebay for $40 shipped. They are 4" outside opening. The turn signal assy is assembled with epoxy, so it was a little tricky to seperate the amber lens and the led board from the housing.
 .
.
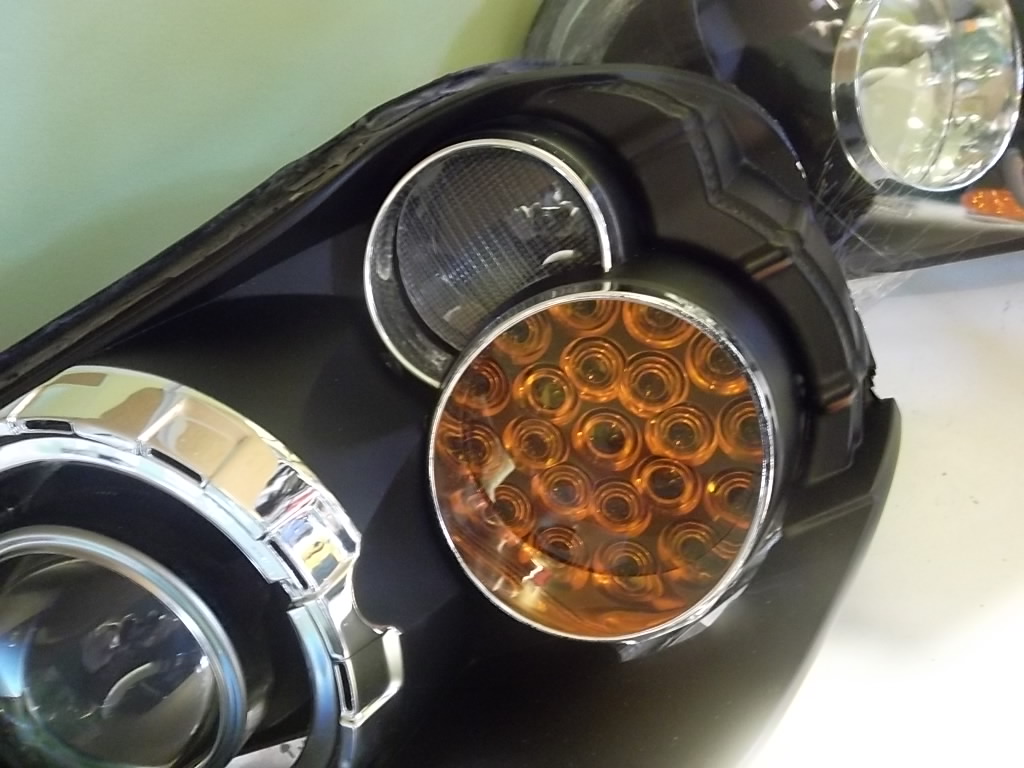
Took the amber lens and cut it to fit the clear lens turn signal of the headlight. It was pressed fit assy, with the intent of putting few dabs of epoxy once everything is ready to go.

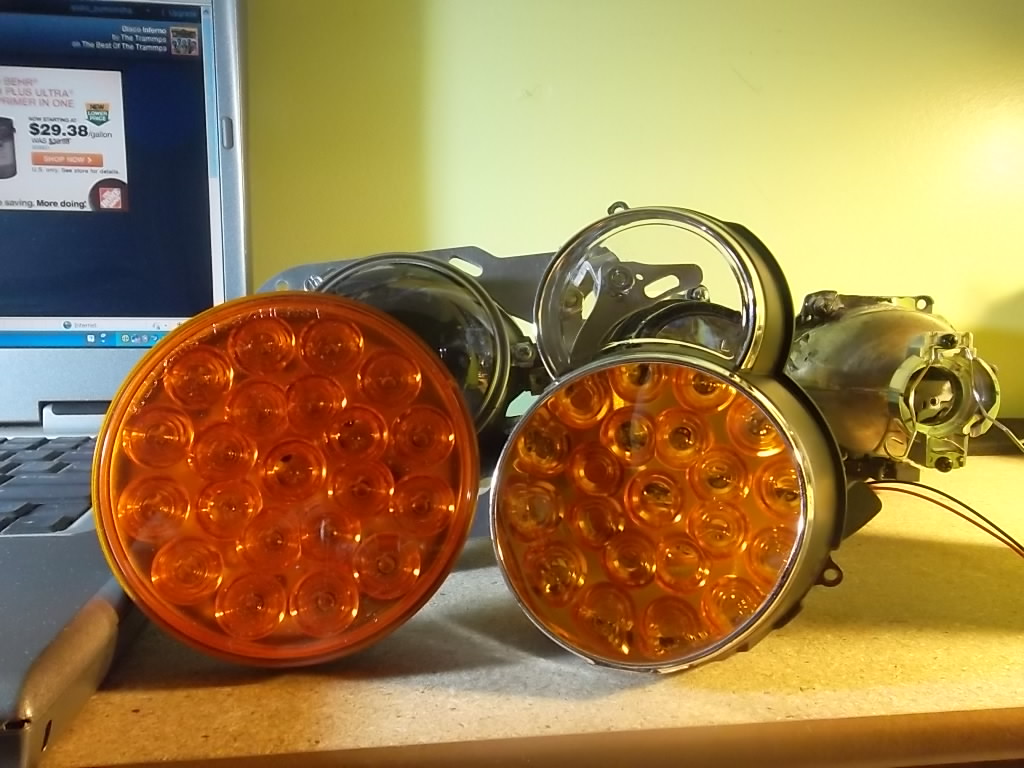
Before and after
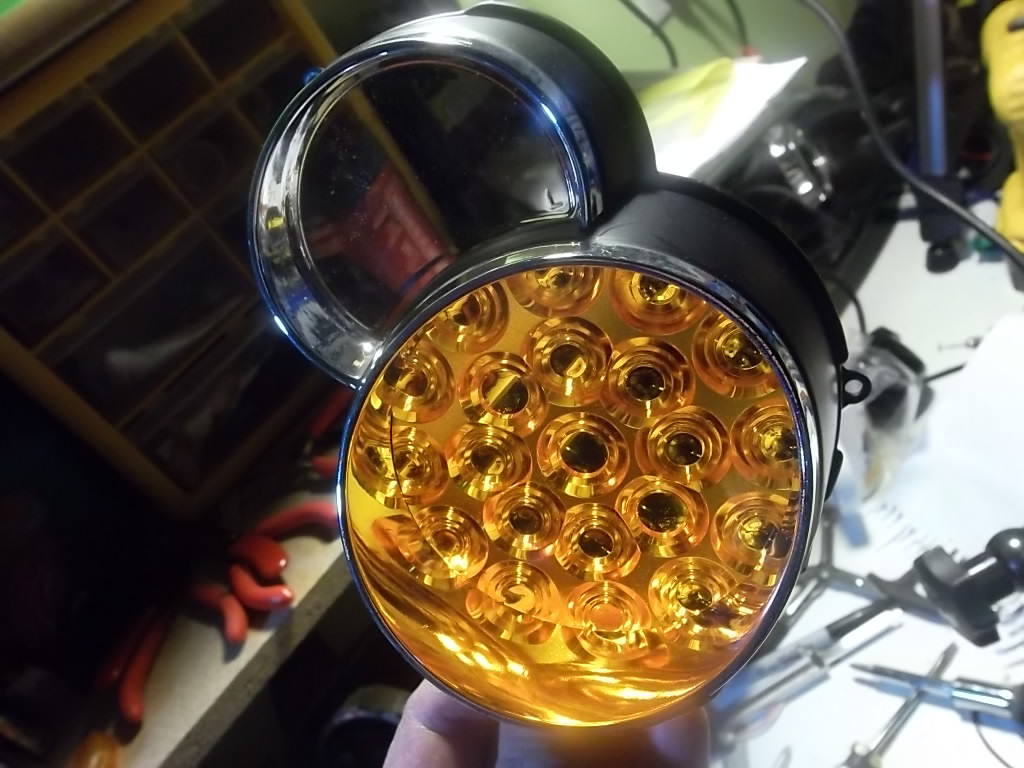
This thing is crazy bright, almost too bright I feel.
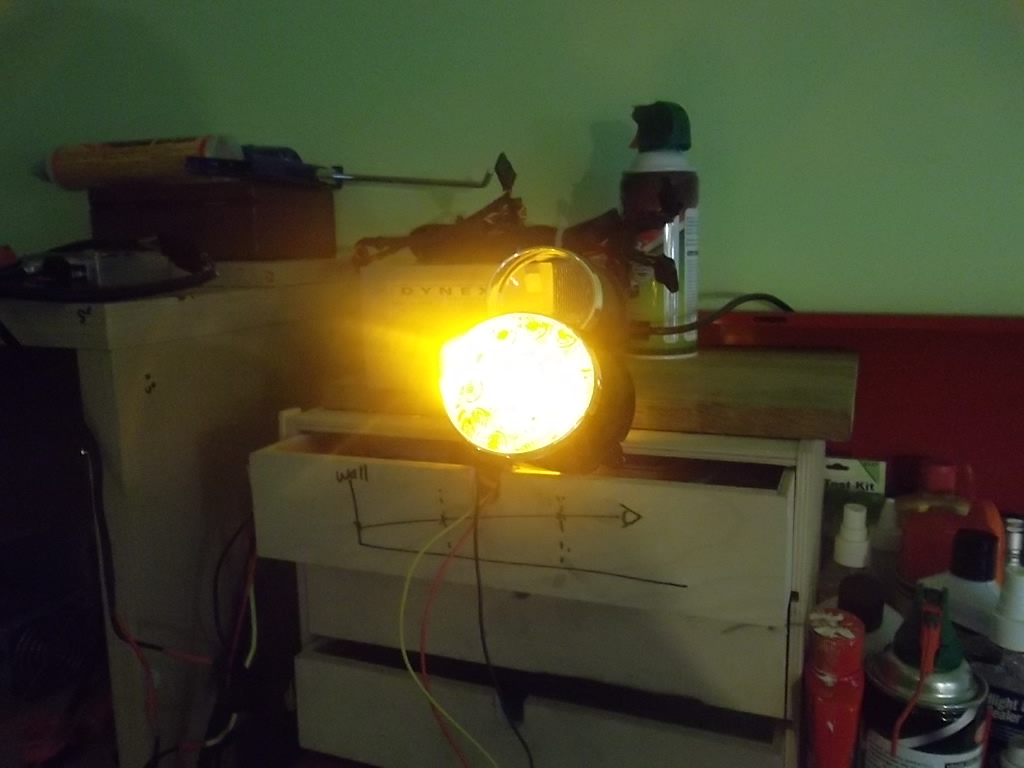
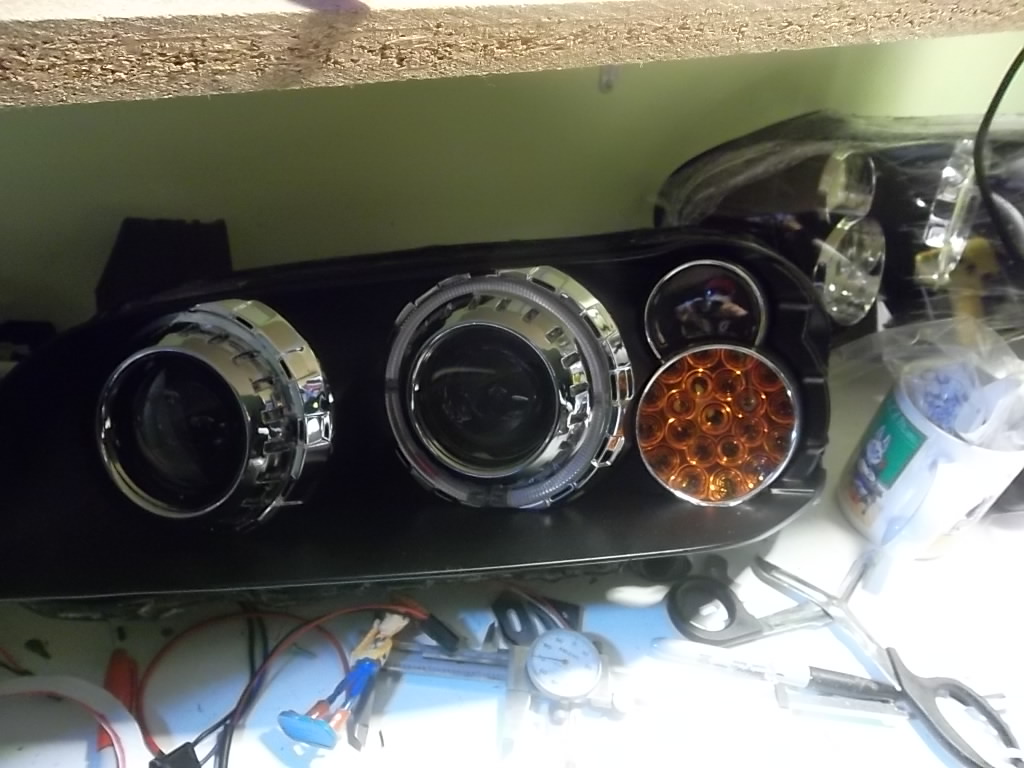
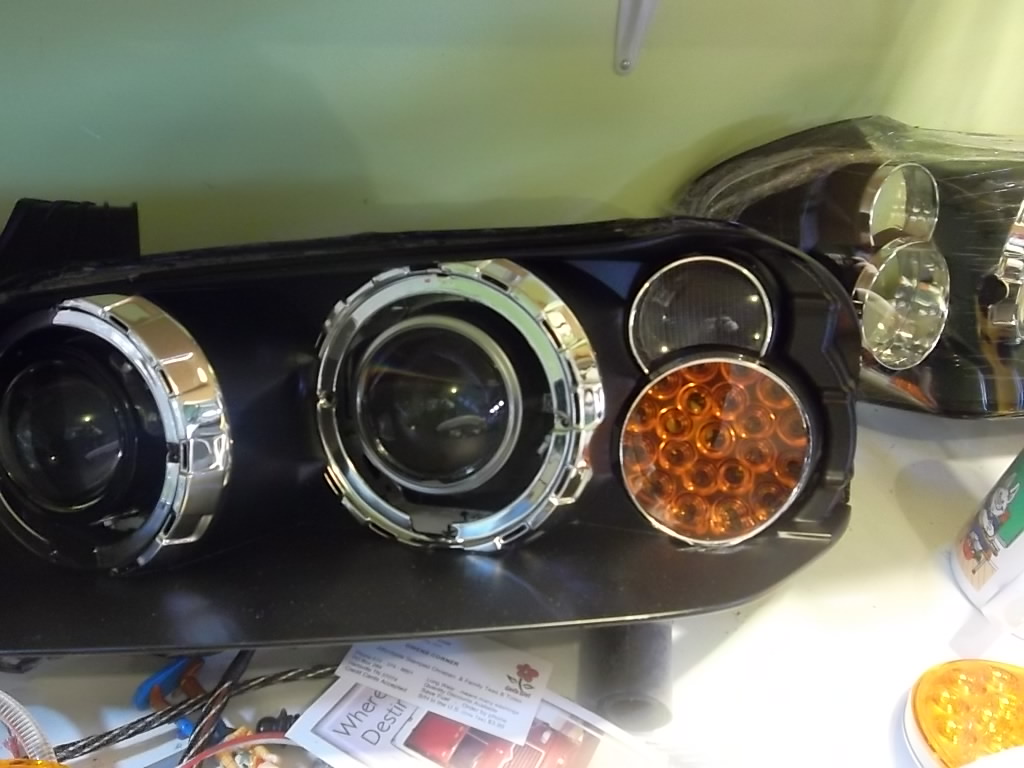
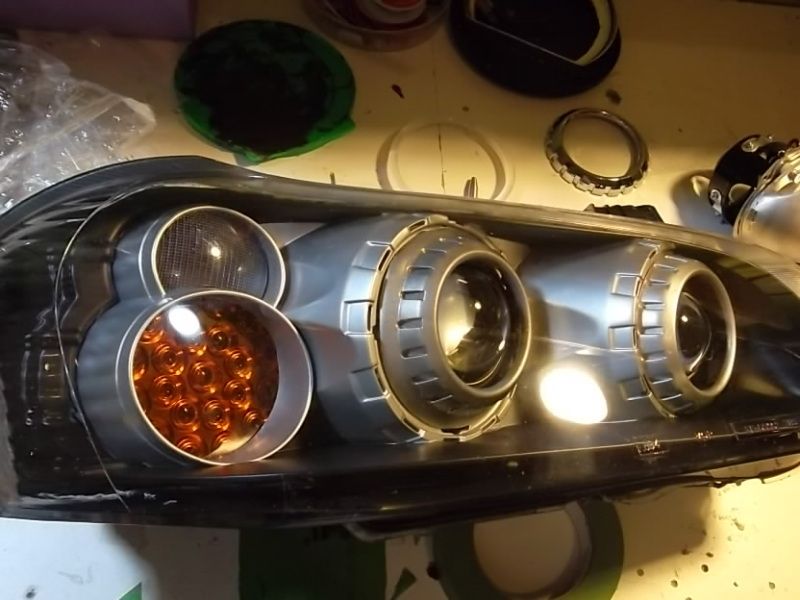
Test fit in the headlight. I really like it
Thanks to TunerMaxima3000 who recommended me the 4" trucker trailer turn signal.
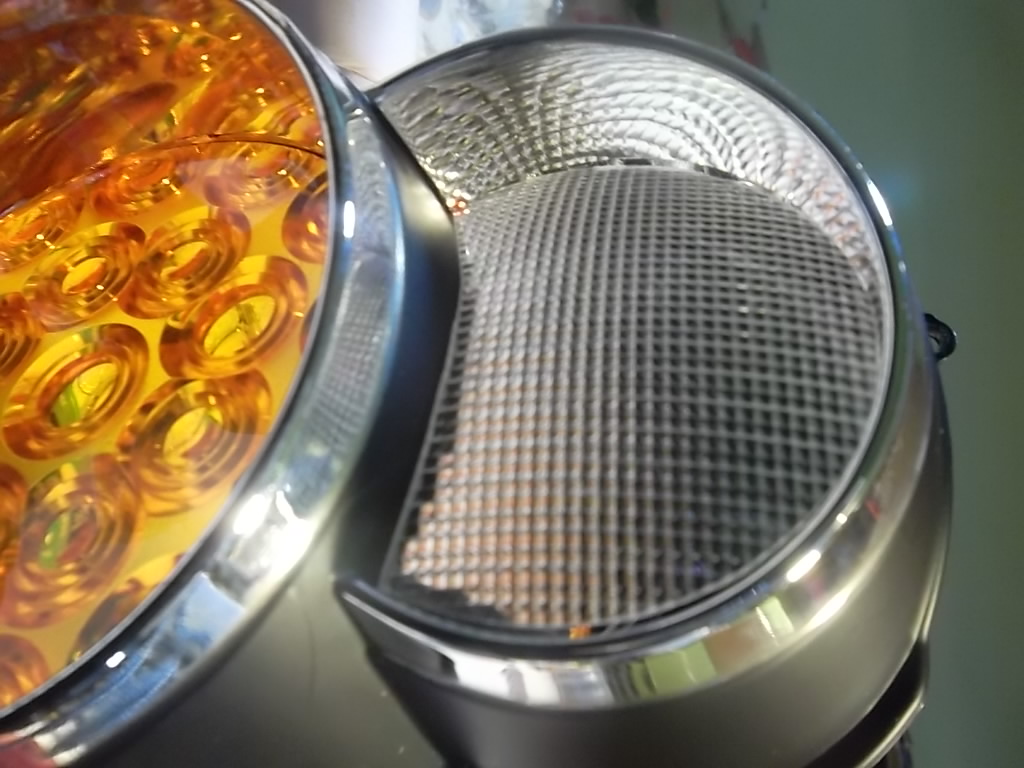
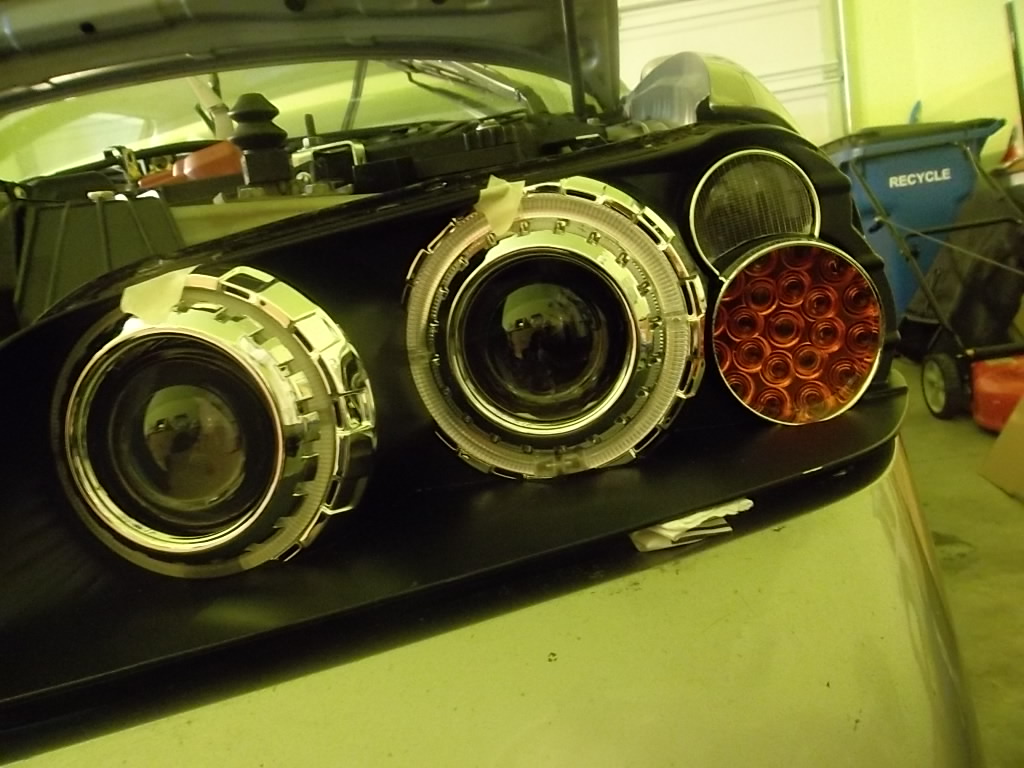
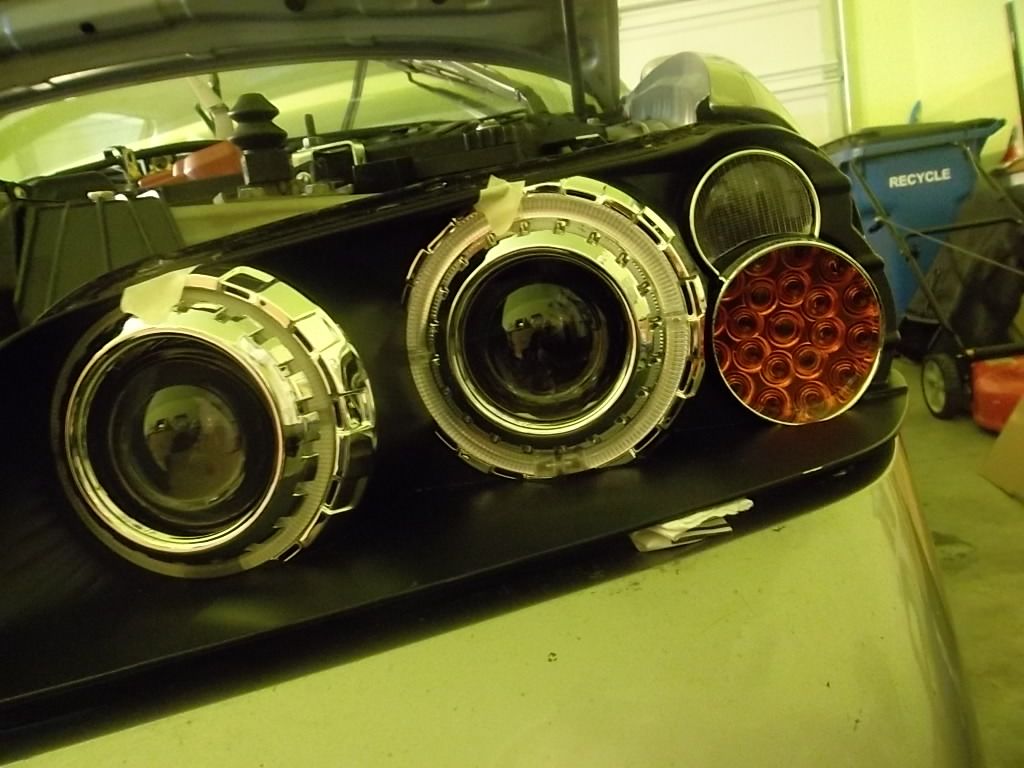
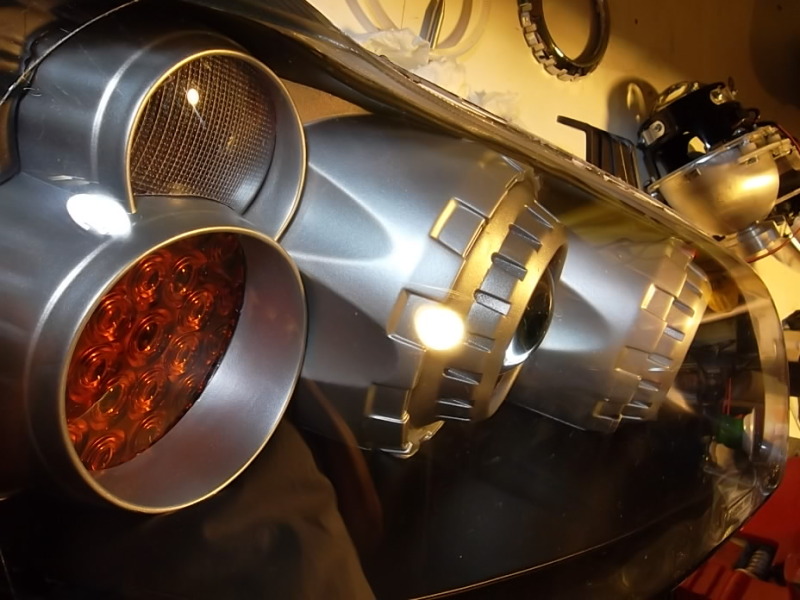
I have spare E90 BMW turn signal lens from way back when I did my E46 retrofit ( sold to someone here). I just don't like the clear parking light lens in there, so after few runs of dremmel, file, and sand paper, I have it fitted to the housing. I like this alot, not only it will diffuse more light it also look good IMO

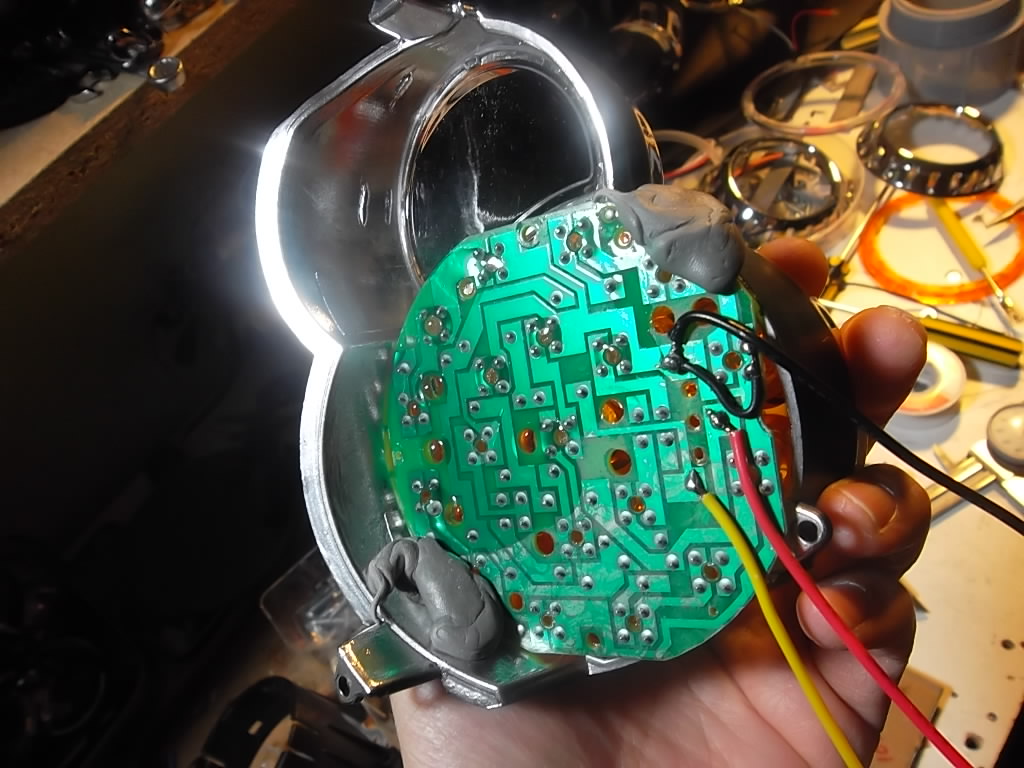
The back
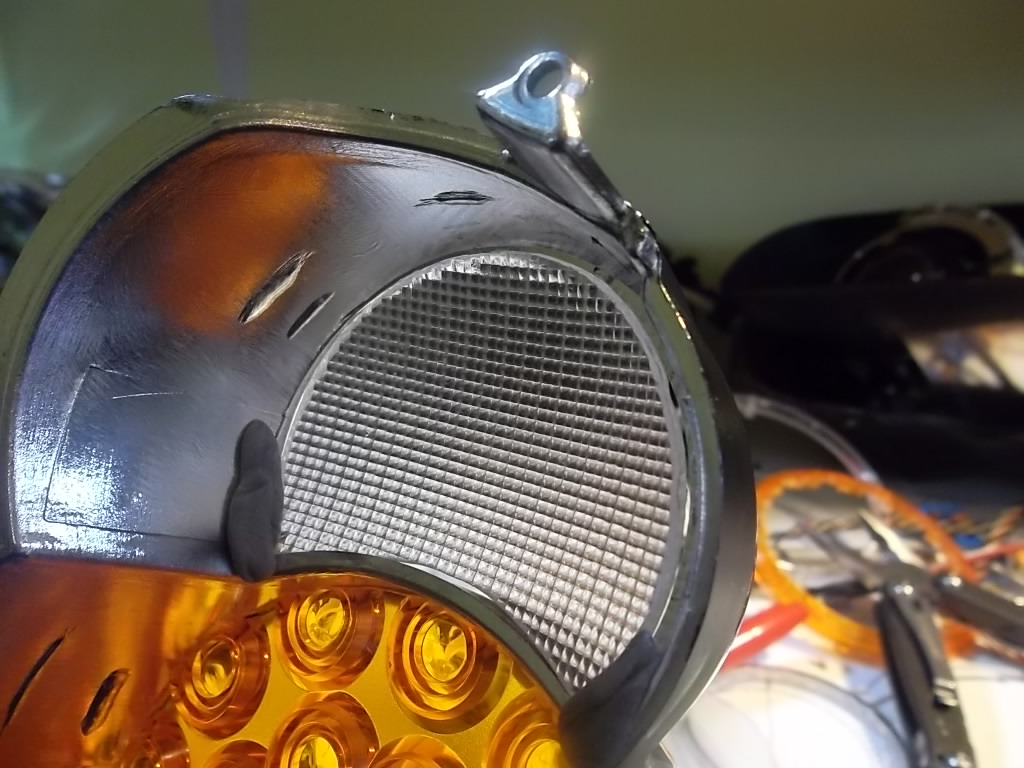
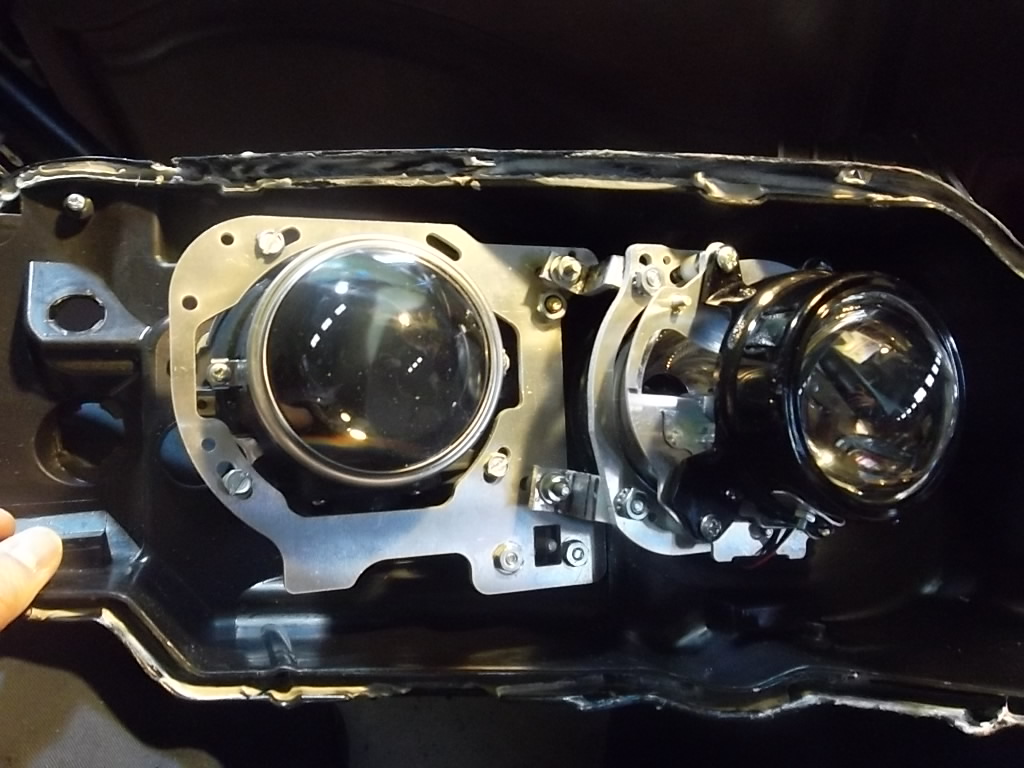
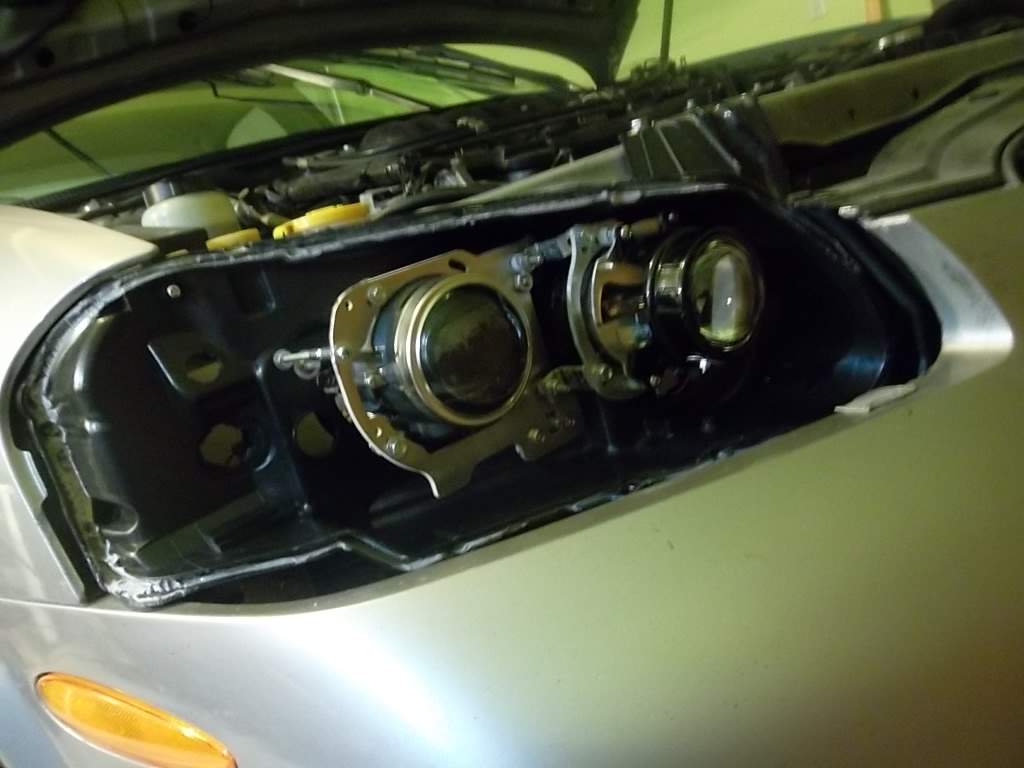
Passenger side headlight getting ready for allignment
.Took the amber lens and cut it to fit the clear lens turn signal of the headlight. It was pressed fit assy, with the intent of putting few dabs of epoxy once everything is ready to go.
Before and after
This thing is crazy bright, almost too bright I feel.
Test fit in the headlight. I really like it
Thanks to TunerMaxima3000 who recommended me the 4" trucker trailer turn signal.
I have spare E90 BMW turn signal lens from way back when I did my E46 retrofit ( sold to someone here). I just don't like the clear parking light lens in there, so after few runs of dremmel, file, and sand paper, I have it fitted to the housing. I like this alot, not only it will diffuse more light it also look good IMO
The back
Passenger side headlight getting ready for allignment
Last edited by Genes1s; Mar 25, 2012 at 07:13 PM.
It's been raining for 3 weeks straight here in Vancouver,WA, next week is the same .
.
Spent few hours tonight aiming the high and low projectors in the garage, not doing so good. I really need to go outside to see the whole spread. at 15' the cut off still pretty blurry since I had them focused at 50' or so and this made it difficult to see the straight lines. I love the RX330 beam pattern, I think it is arguably one of the best single xenon projectors out there when modded with curved shield and clear lens.
.Spent few hours tonight aiming the high and low projectors in the garage, not doing so good. I really need to go outside to see the whole spread. at 15' the cut off still pretty blurry since I had them focused at 50' or so and this made it difficult to see the straight lines. I love the RX330 beam pattern, I think it is arguably one of the best single xenon projectors out there when modded with curved shield and clear lens.
Last edited by Genes1s; Mar 31, 2012 at 11:13 PM.

Looking SUPER-unique MSU, I love it.
I was curious why you changed the upper Marker light lens though? Why not keep the stock one, methinks it my match the lens theme a little better.
Either way it looks very good dude!!! I'm very impressed with how well this is coming together, youve got yourself quite a talent there!
Are you going to run the 4" light dual-filament style or JUST signal?
I just didn't like the clear lens upper marker light, it looks kinda naked and since I'm planning to put LED board for the upper marker light, I'd like to have it little more diffuse so I don't see the LED dots. Not sure if this make sense to you.
I'm only going to run just signal for the 4" LED, thanks to you Sir.
Tuner,
I just didn't like the clear lens upper marker light, it looks kinda naked and since I'm planning to put LED board for the upper marker light, I'd like to have it little more diffuse so I don't see the LED dots. Not sure if this make sense to you.
I'm only going to run just signal for the 4" LED, thanks to you Sir.
If so, remember the colour will not be the same as the signal. As long as you're aware. But because you're not running the Signal low-intensity that isn't really a big deal at all.
Also, if you don't want the LED's to appear with dots, have you considered just using the stock reflector and an Amber LED 'bulb' in there? That way the LED's don't point out they point sideways, so you only see a fairly consistant light.
Not using the reflector will result in 'dots' even with that denser diffused lens. Unless you do'nt point them at the lens, or you somehow mount them further back (1/2" or more away)
Maybe I just do this now, instead of making custom board and get fancy.....
You won't notice this at all as long as you don't run the signal as a "marker" light also. ( I ran mine this way and just don't use the upper bulb spot anymore)
I'll snap some photos of how it looks with the headlight on, I don't actually have any up since I put the lights in. Looks great as a running light.
If you just want a nice even light up top, pop one of those LED bulb style's in there. "Tyutunnik" has pretty decent Amber coloured ones IIRC, hit him up for a great price he's a good guy to deal with on PnP LED bulbs/boards.

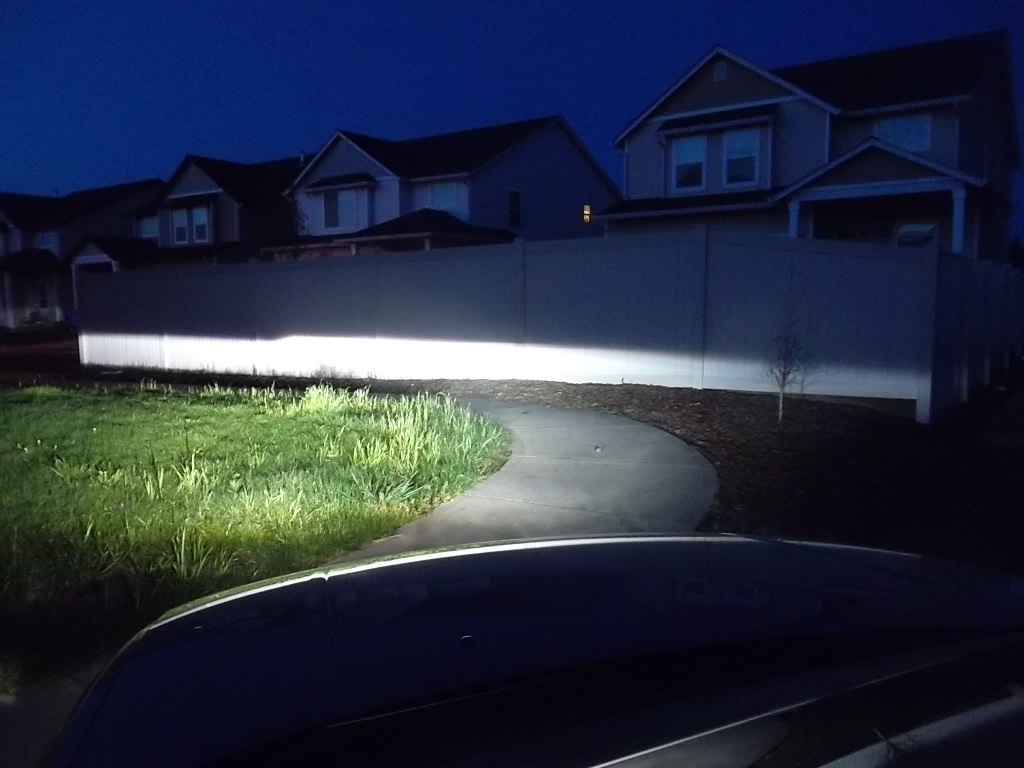
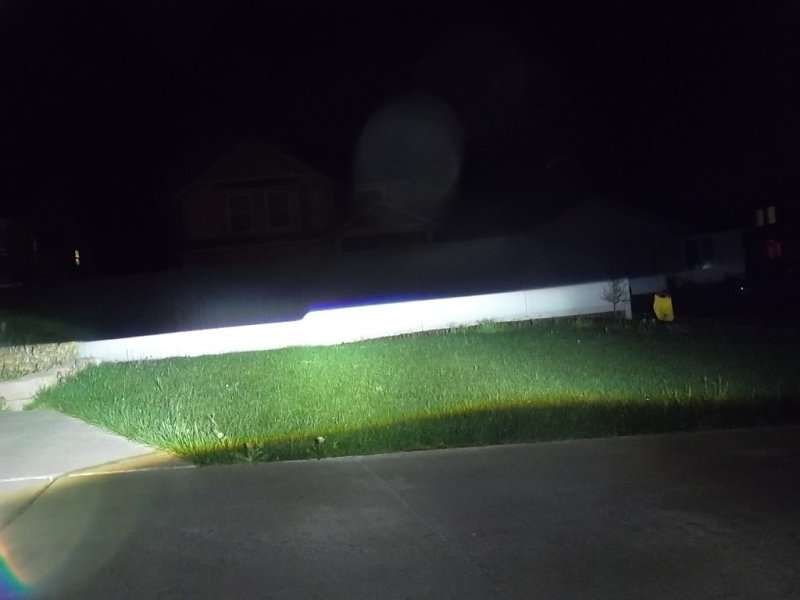
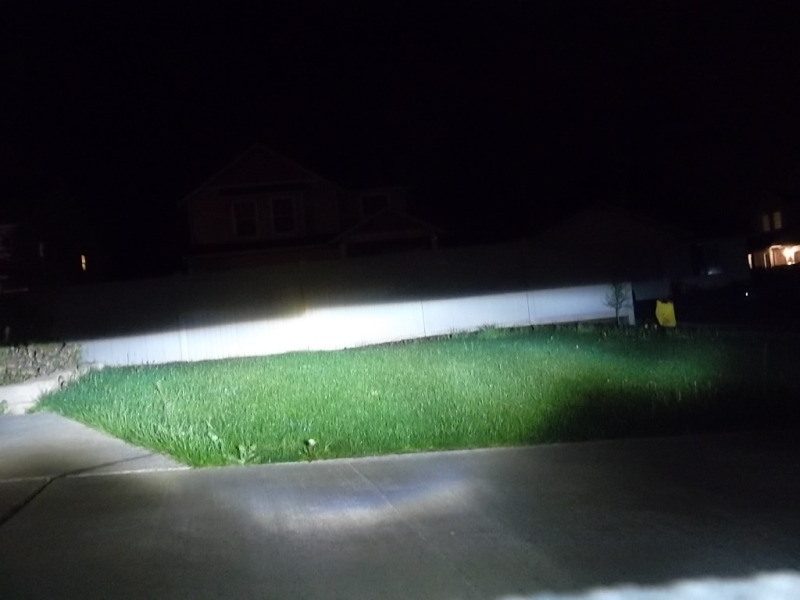
First time to fire up the RX330s mouted in the car tonight. Pretty sweet I think. Get both alligned also. The flare on the side is actually both side and it was on purpose. These flares helps to see the side of the road better without blinding the incoming traffic.


All high and low beam projectors rotational adjustment are done, but the vertical adjustment are a bit tricky. It's a pain in the butt to allign these 4 cut offs at the same height at 50' ( a distance that I prefer). Had a chance to drive around with both headlights on tonight. Man, the G37 was really nice IMO, the cut off wasn't that appealing, but the light distribution and the throw were spot on. The RX330 had a little shorter throw but wider than G37 which was a nice combination between the two.
All high and low beam projectors rotational adjustment are done, but the vertical adjustment are a bit tricky. It's a pain in the butt to allign these 4 cut offs at the same height at 50' ( a distance that I prefer). Had a chance to drive around with both headlights on tonight. Man, the G37 was really nice IMO, the cut off wasn't that appealing, but the light distribution and the throw were spot on. The RX330 had a little shorter throw but wider than G37 which was a nice combination between the two.
Last edited by Genes1s; Apr 13, 2012 at 11:20 PM.

More pictures:
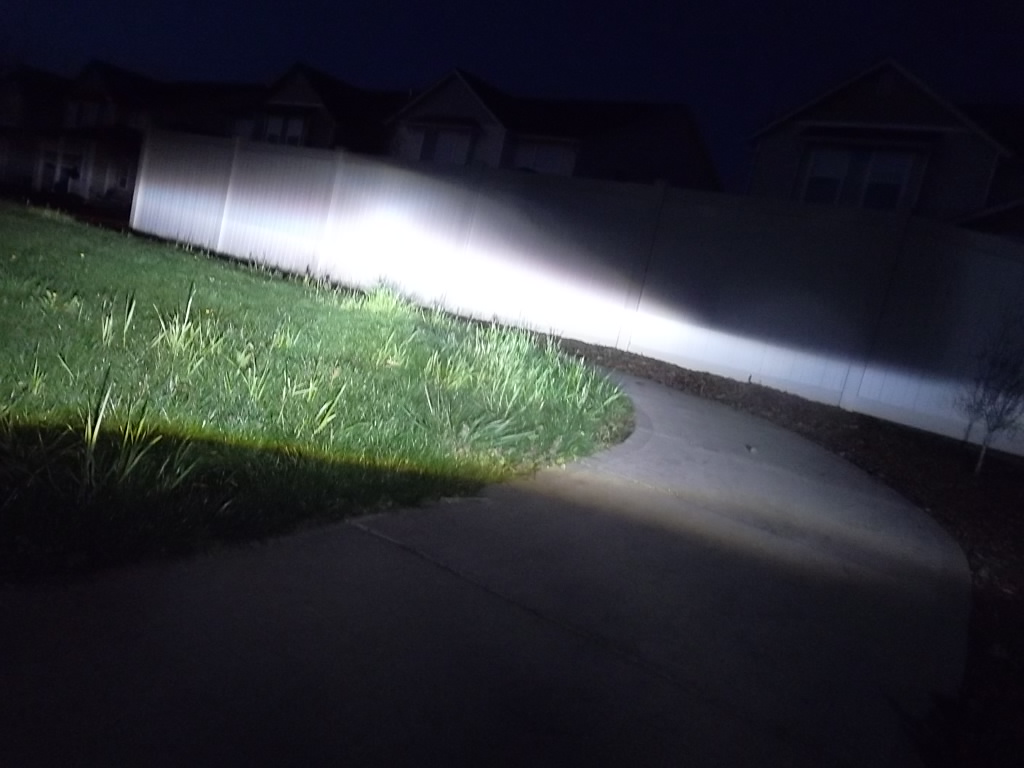
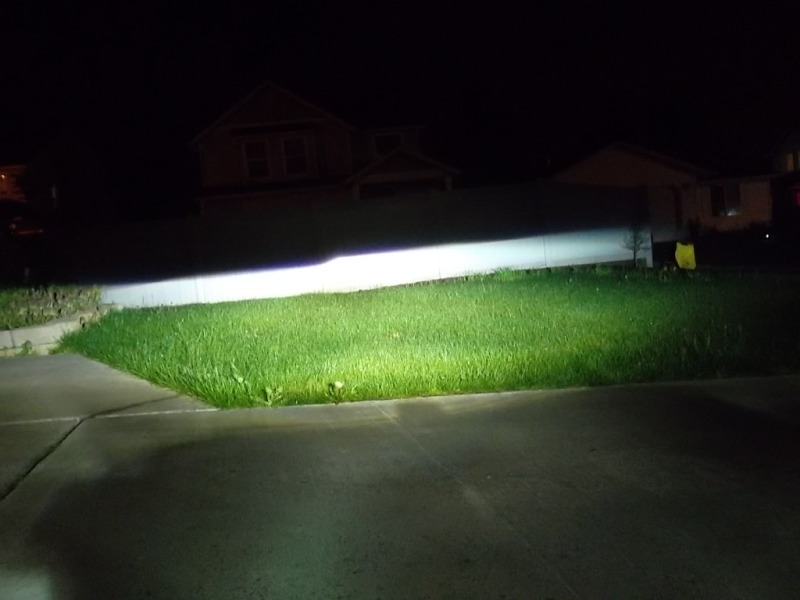
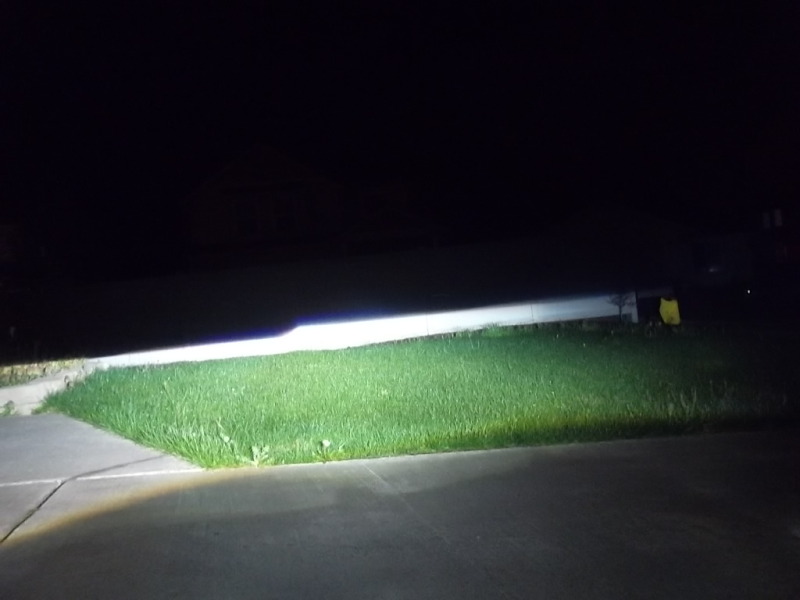
RX330 Low beam both sides. I let more color at the cut off this time.
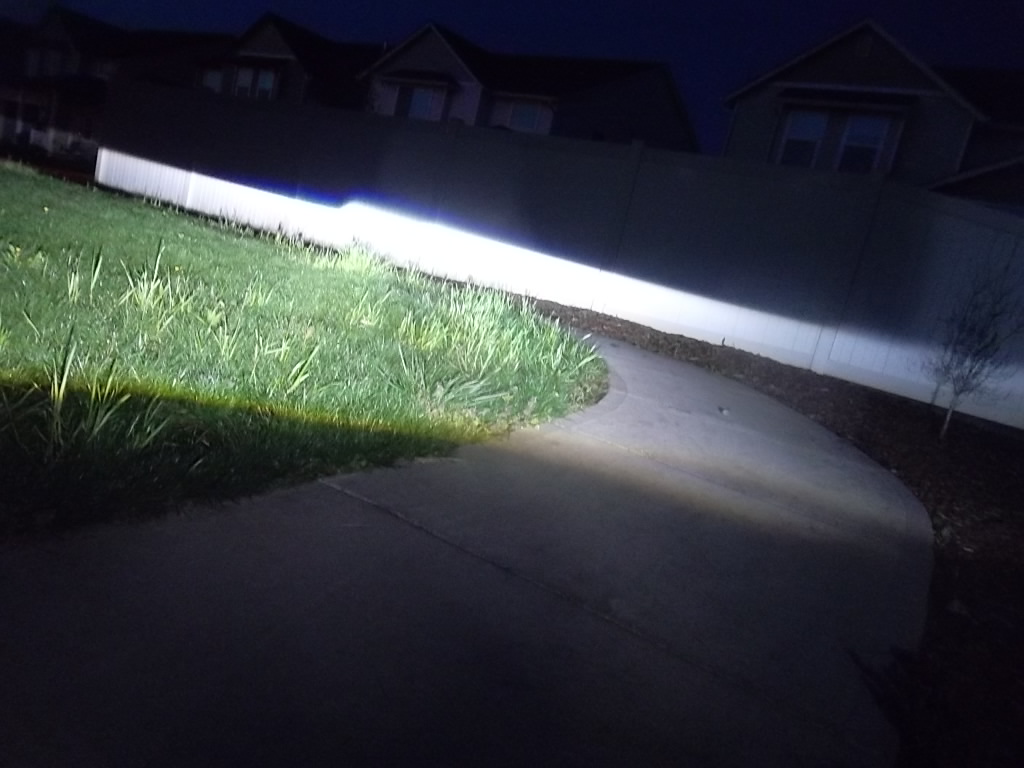


Driver side high beam only ( flicked it manually)....I think this will be usable actually. It might actually light up the road better,we'll see. The height is not much compared to other bi-xenon high beam, but then again I'm tired of ligthing up top of the tree with stock bi-x.
G37s.
I didn't have relay harness and ballast mounted on the car yet, so didn't have both beam wall shot, but my vertical aiming is off a little. It was dead on about 15-20 feet, but about 1" apart at 60' that equals about 1 degree, that's about .040" thick washer.
Garage shots:
Quad low beams

RX330s Low Beam

G37s Low Beam

RX330 Low beam both sides. I let more color at the cut off this time.
Driver side high beam only ( flicked it manually)....I think this will be usable actually. It might actually light up the road better,we'll see. The height is not much compared to other bi-xenon high beam, but then again I'm tired of ligthing up top of the tree with stock bi-x.
G37s.
I didn't have relay harness and ballast mounted on the car yet, so didn't have both beam wall shot, but my vertical aiming is off a little. It was dead on about 15-20 feet, but about 1" apart at 60' that equals about 1 degree, that's about .040" thick washer.
Garage shots:
Quad low beams
RX330s Low Beam
G37s Low Beam
Last edited by Genes1s; Apr 14, 2012 at 09:55 PM.
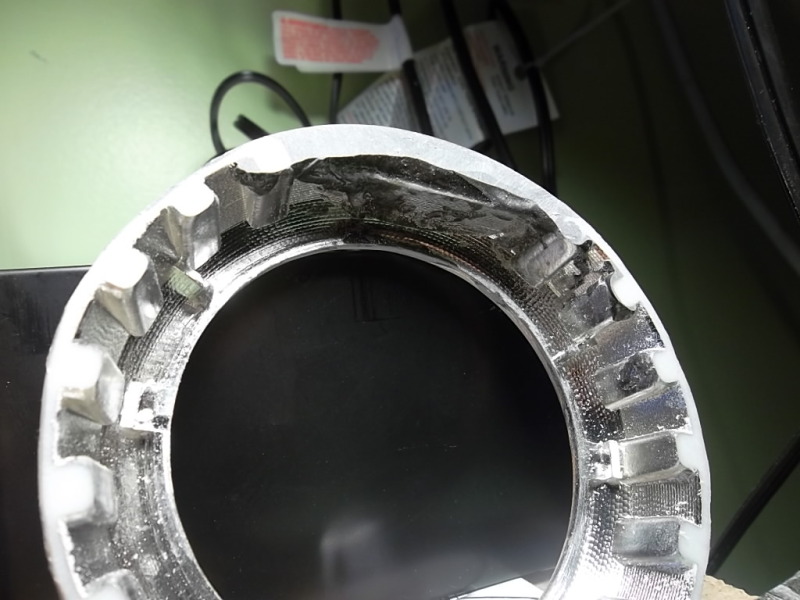
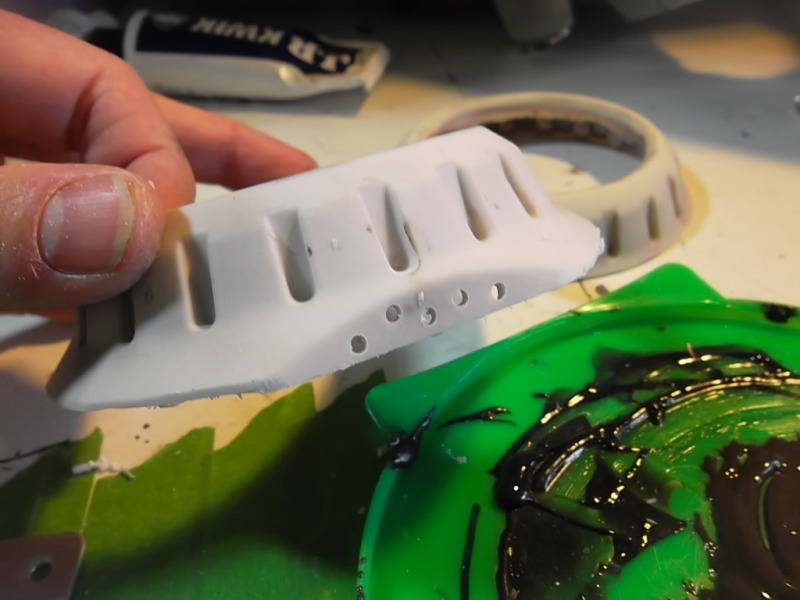
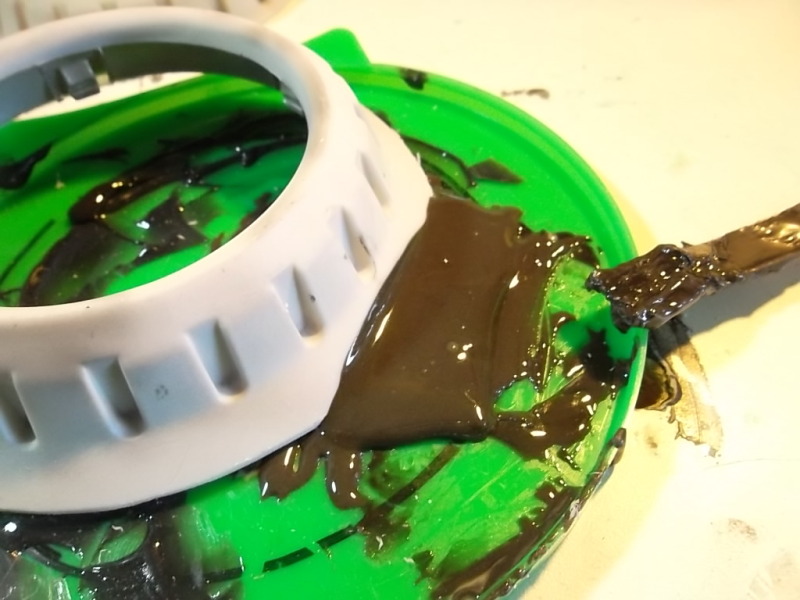
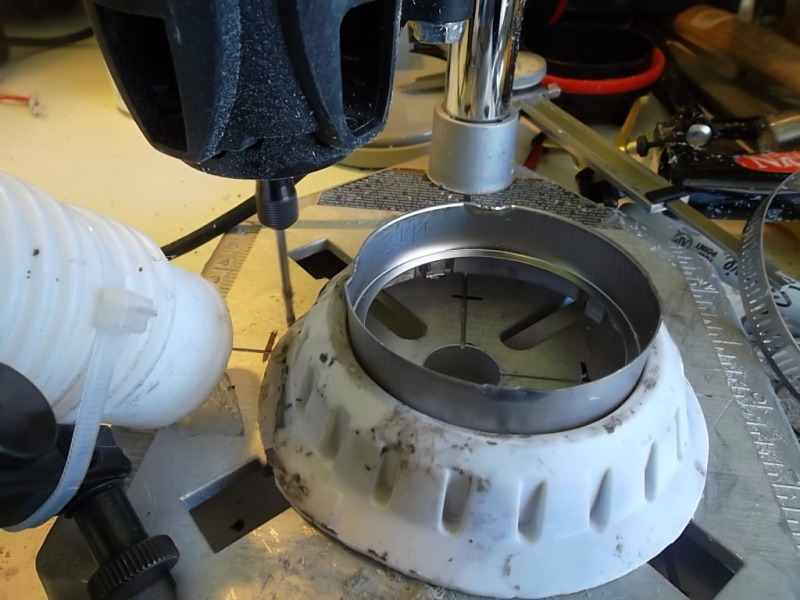
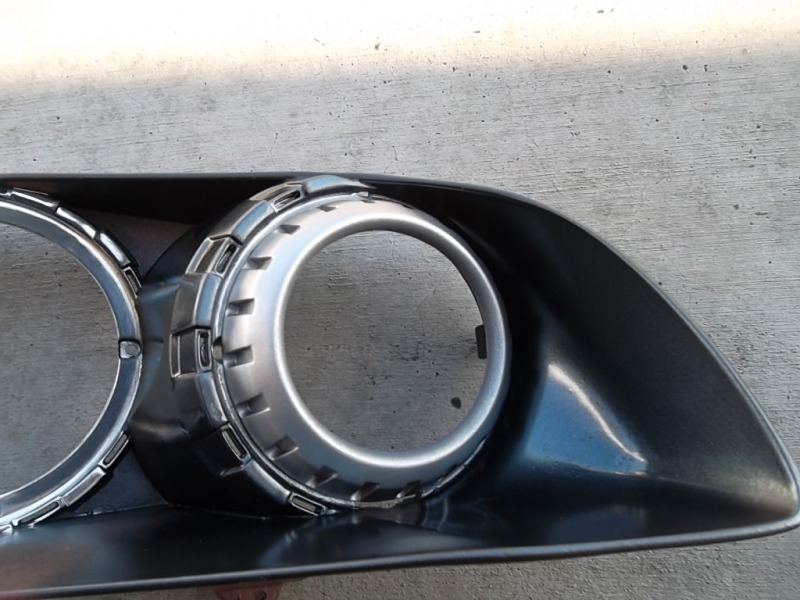
Started working on the shroud yesterday. The E46 shroud has flat section that makes is ugly and looking unfinished when fittied to the headlight bezel. After researching other alternative, I've decided to not use the Angey Eyes all together. To make the shroud has compelete circumference, I've added filller aka JB kwik and epoxy on top.
Here is the big glob of JB Kwik covering the flat section area.

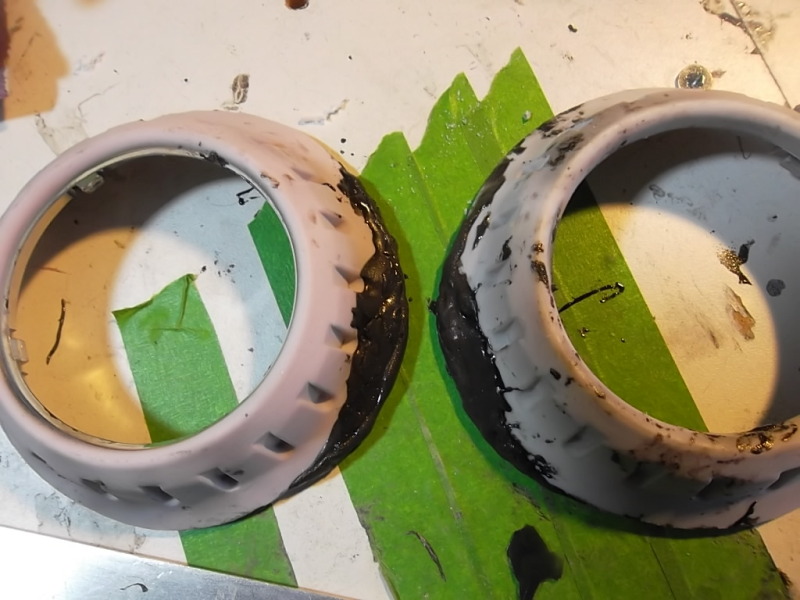
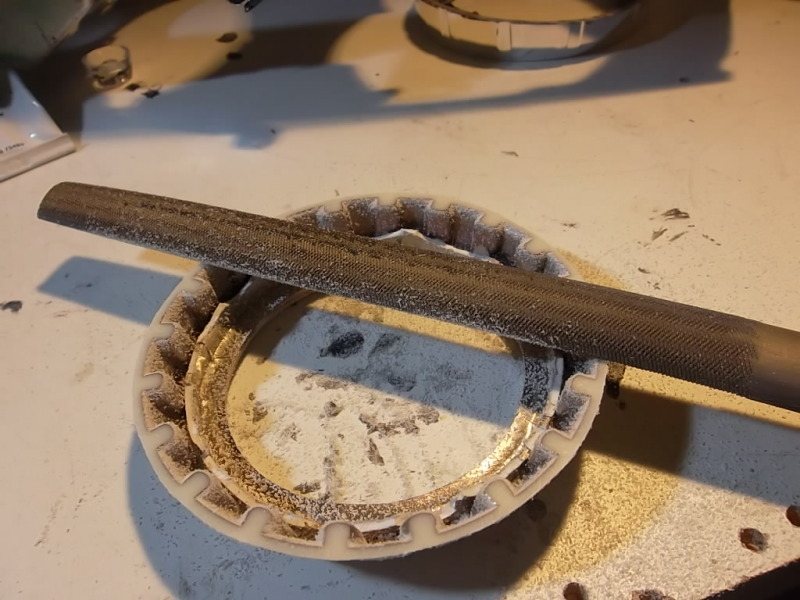
Woody was waiting patently for 24 hours...
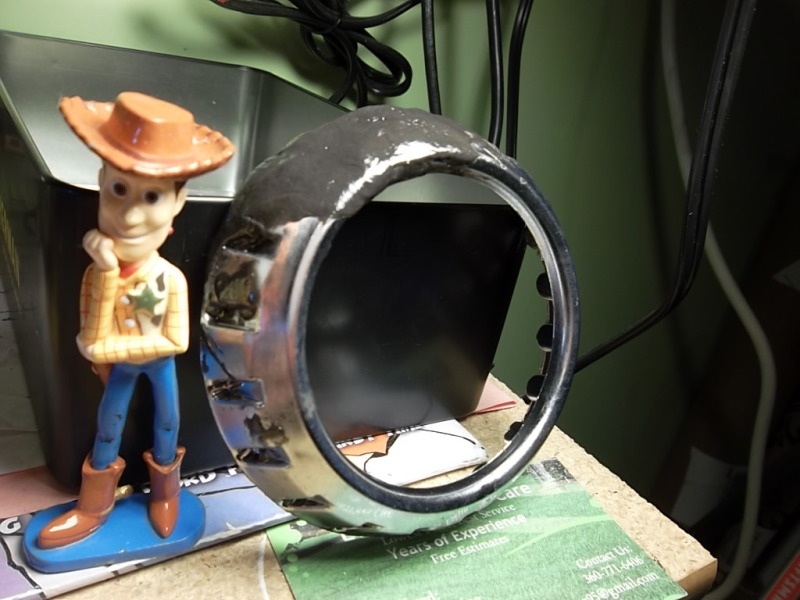
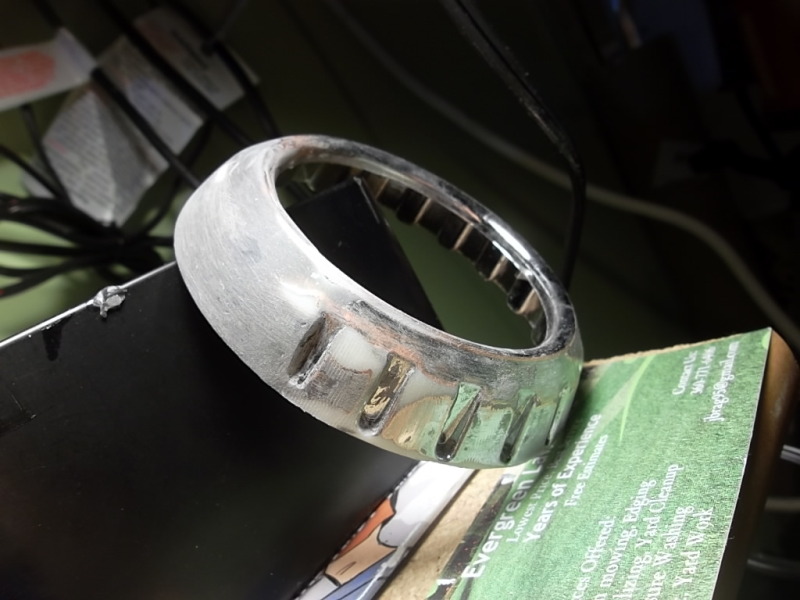
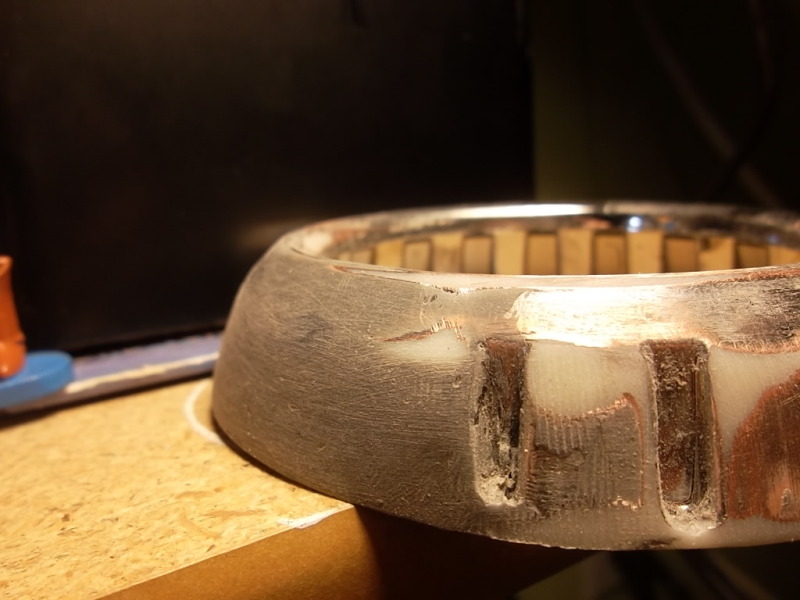
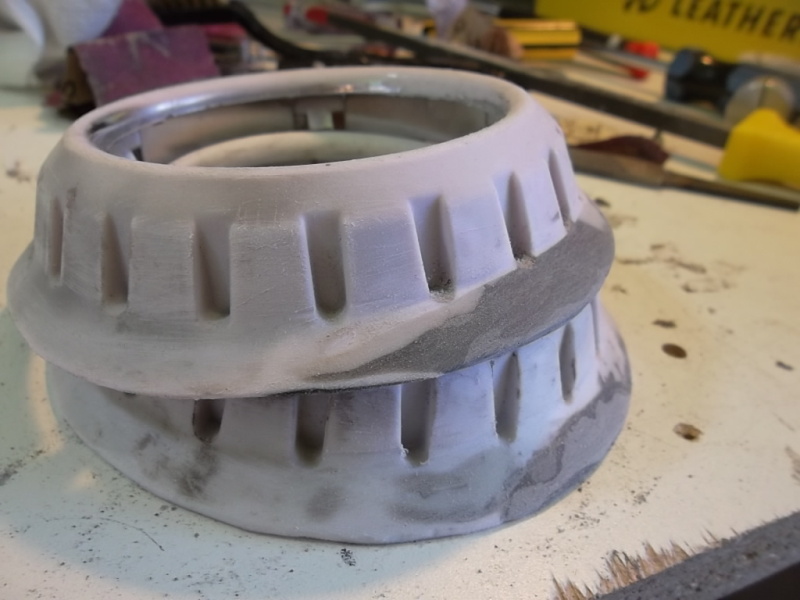
Tonight, after it fully cured, I started to file the high spot follow with 120 grit and 200 grit to smooth and feather edge the edge. I'll spray few layer of high heat primer when the weather is nice and wet sand them before paint. Well...maybe not so fast...I have 3 more to do....
Double check the allignement again tonight and I think I'm done finally and happy.
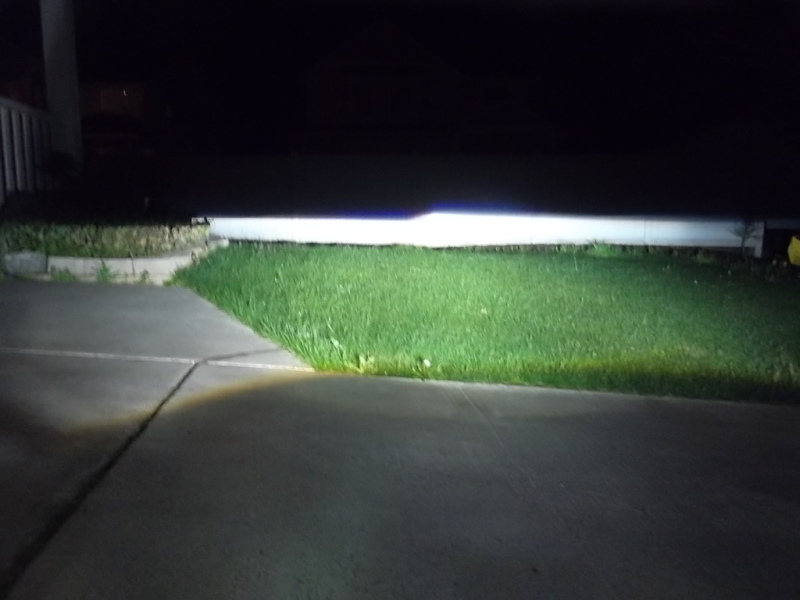
Driver side RX330 only
Driver side G37 only
Both
Passenger side RX330 only
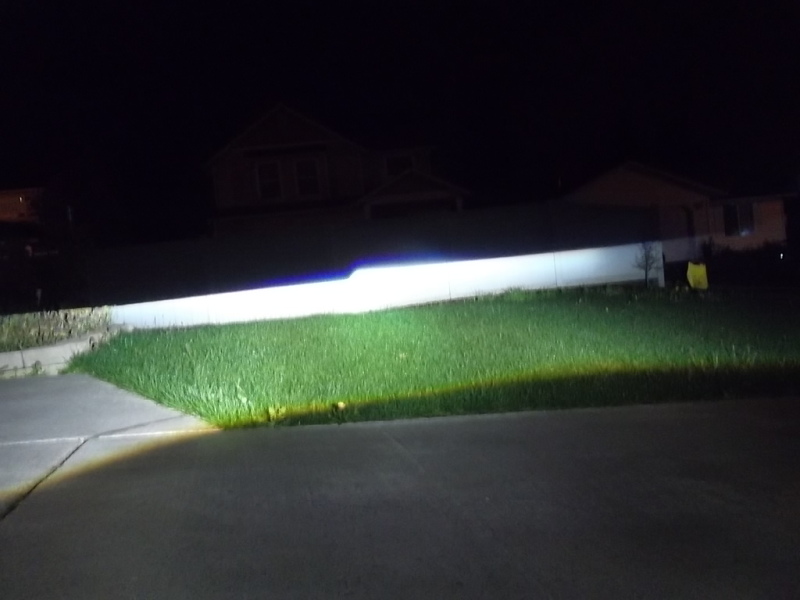
Both
Untouched OEM FX45 projector.
Man..I'm hooked on that RX330 beam pattern.....sexy...
Here is the big glob of JB Kwik covering the flat section area.
Woody was waiting patently for 24 hours...
Tonight, after it fully cured, I started to file the high spot follow with 120 grit and 200 grit to smooth and feather edge the edge. I'll spray few layer of high heat primer when the weather is nice and wet sand them before paint. Well...maybe not so fast...I have 3 more to do....
Double check the allignement again tonight and I think I'm done finally and happy.
Driver side RX330 only
Driver side G37 only
Both
Passenger side RX330 only
Both
Untouched OEM FX45 projector.
Man..I'm hooked on that RX330 beam pattern.....sexy...
Last edited by Genes1s; Apr 18, 2012 at 10:44 PM.
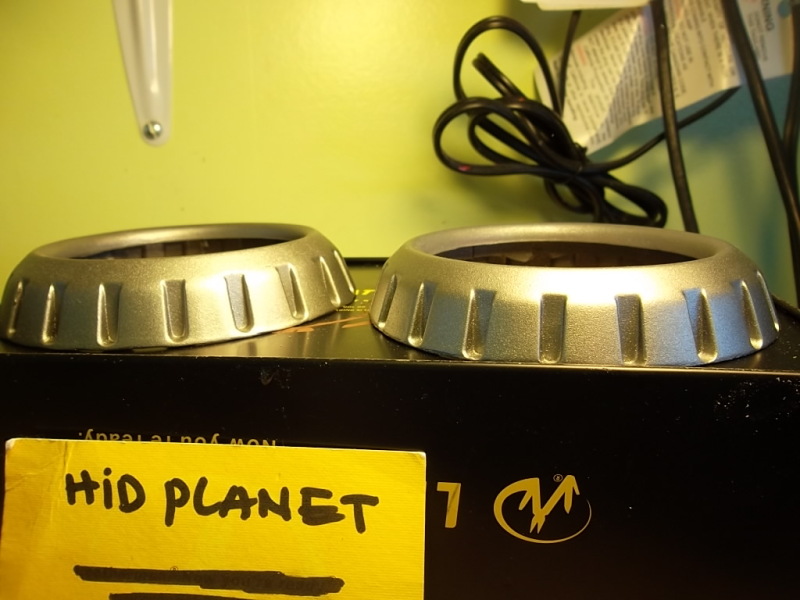
00-01 Quad: Shourds & Bezel mod
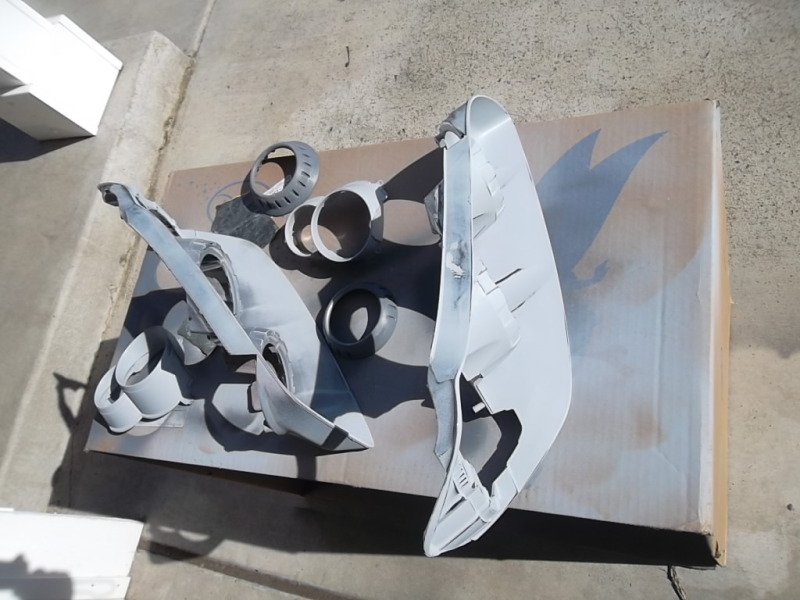
It's 70 degree outside, perfect time for paint job.
High beam shrouds getting primer sealer and wet sand.
Low beam shroud getting filler added, shaping, more sanding, shaping, more filler, sanding, ready for sealer primer and wet sand.
Headlight bezel gets primer sealer and wet sand ready for paint. No more ribs/wave corner! like it!
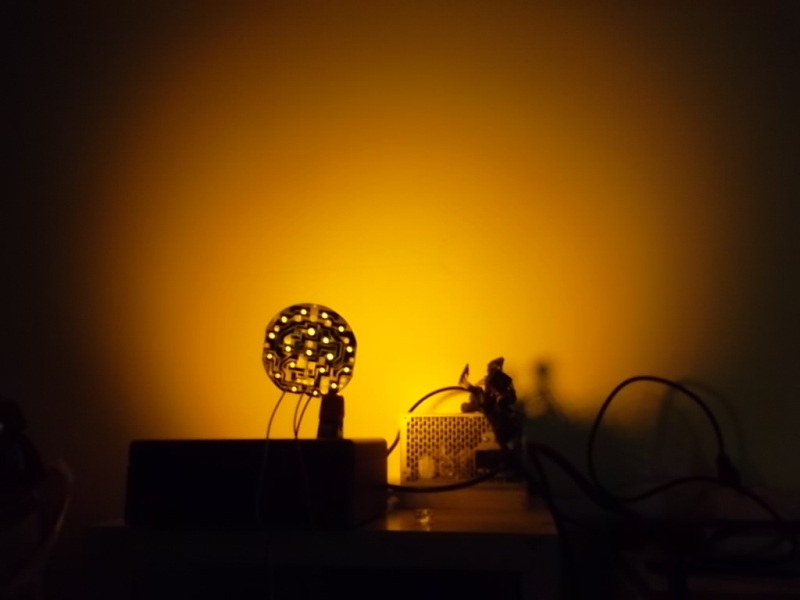
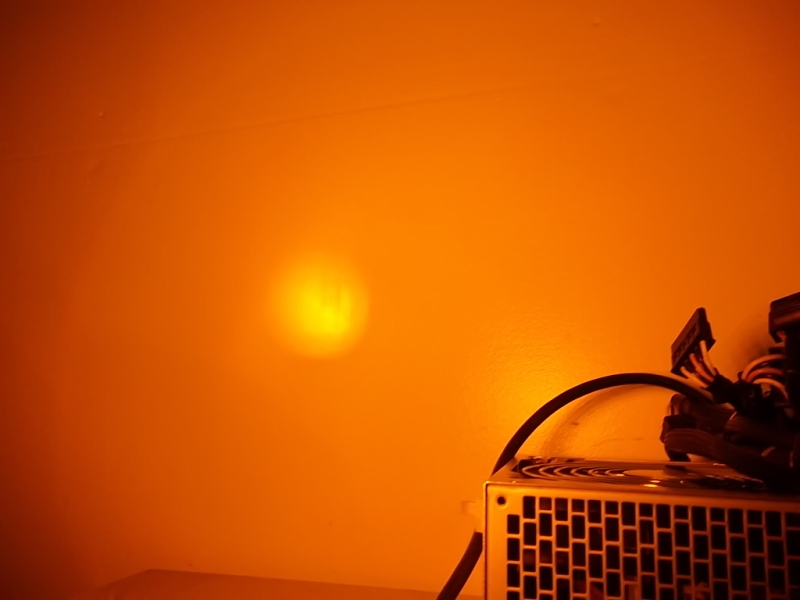
Played around with the LED turn signal with LED LENSER AFS lens, it is more focus and distance.
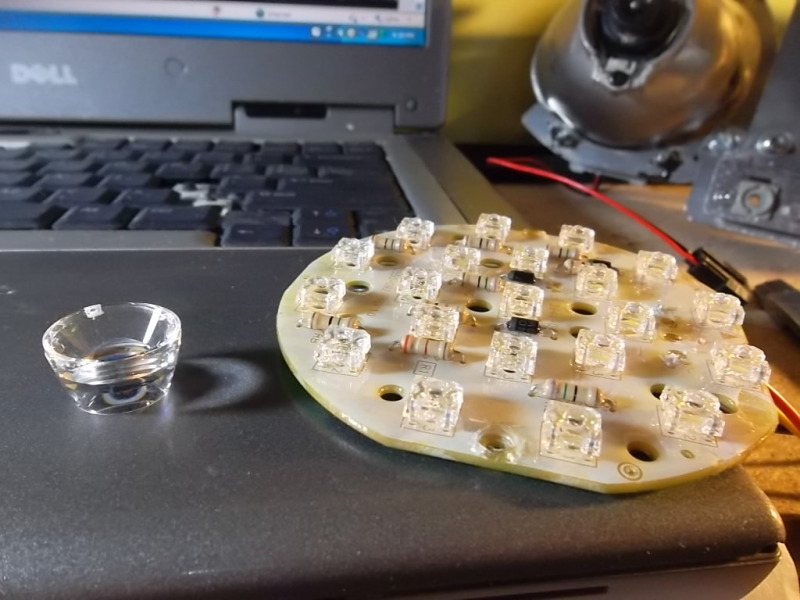
left is no lens, right is with one lens infront of one lit up LED. This lens would be make a bad *** LED brake/turn signal IMO.
High beam shrouds getting primer sealer and wet sand.
Low beam shroud getting filler added, shaping, more sanding, shaping, more filler, sanding, ready for sealer primer and wet sand.
Headlight bezel gets primer sealer and wet sand ready for paint. No more ribs/wave corner! like it!
Played around with the LED turn signal with LED LENSER AFS lens, it is more focus and distance.
left is no lens, right is with one lens infront of one lit up LED. This lens would be make a bad *** LED brake/turn signal IMO.
Last edited by Genes1s; Apr 21, 2012 at 01:34 PM.
sick so where did you get this lens? I was looking for small reflectors for custom projects for a while but couldnt find them.
Mine have refelectors on them still (my signals), but I'd still like to have some diy individual ones around.
Mine have refelectors on them still (my signals), but I'd still like to have some diy individual ones around.
From Led Lenser Flashlight assy I have.
Trying out different color combo.
When it comes to painting, I get very nervous and always mess up. Flat black paint are pretty easy to do but these duplicolor auto paints are hard to apply I think. I think I should do light coat multiple times next time. I tried a little section on the headlight bezel with Graphite Pearl and Silver Metalic on the shroud. I wish I could find a sliver that is more brighter. I tried Duplicolor Stainless Steel color and they are very much the same as Silver Metalic.
Last edited by Genes1s; Apr 21, 2012 at 09:27 PM.
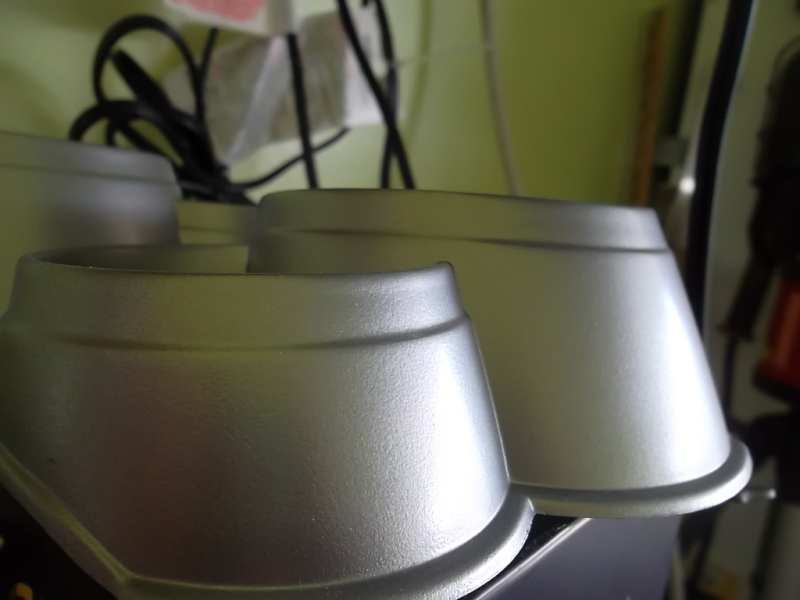
I think I'm going with Graphite and Silver Metalic. Re-scuffed the headlights, bezels, shrouds, and 3 coats of primer before wet sand.
Turn signal and parking light bezel are top coated with Silver Metalic, probably wait till tomorrow before clear coat. I wish I have paint booth....
Turn signal and parking light bezel are top coated with Silver Metalic, probably wait till tomorrow before clear coat. I wish I have paint booth....
Next project preview.....
Hopefully thie quad retro will be done in the next few weeks. Now what.....hmmm I've been thinking about The Ultimate 00-03 Maxima Headlight Retrofit. Putting 4 TL projectors in the 02-03 style headligths coupled with DL50 "Fatboys" bulbs and boosted 70W Denso Ballasts would be it IMO


Looks great! Although, something looks "toy-ish" about the lights, and I'm pretty sure it's just the finish on the shrouds that makes them look that way. Still, awesome work!
BTW, I CANNOT wait for the quad TL retro. Oh man. You are making me jealous over here.
BTW, I CANNOT wait for the quad TL retro. Oh man. You are making me jealous over here.


Funny you said that, I actually felt the same way too. Maybe it the shroud is chrome would make it look more "grown up"
. Anyway, it's not set in stone yet. I've got few Shrouds I'm going to give it a try.Yeah, Quad TL would be it I think. I need to move these lights first before I go to TL probably in the fall.
I can't do straight swap for sure, but if trade + cash is do-able. Eventually I'm going to retro OEM housing in the future.PM me if you are seriously interested.


Thanks guys for the kind words and encouragements. I'm glad I found a hobby that I truly enjoy. It makes you smile to see the final product after the long planning, troublehshooting, and execution. I have more confident now to retro the 5.5 OEM headlights for sure.