Spray Can Paint Job
 11-30-2011, 11:23 PM
#41

Damn! That is impressive. Got to admit like some other people here that when i saw the post, i thought, this should be good, i was expecting a total screw up but it looks like a professional job, congrats man! Now have a beer dude! 
Update us with pics of it on the car, very curious.
Btw, did you have some decent exerience with painting prior to this job? Something tells me you knew what you were doing much more than most of us...
Update us with pics of it on the car, very curious.
Btw, did you have some decent exerience with painting prior to this job? Something tells me you knew what you were doing much more than most of us...

 12-01-2011, 04:56 AM
#43
Supporting Maxima.org Member

Thread Starter

Join Date: Feb 2007
Location: Montr�al, Qc, Canada
Posts: 157
Damn! That is impressive. Got to admit like some other people here that when i saw the post, i thought, this should be good, i was expecting a total screw up but it looks like a professional job, congrats man! Now have a beer dude!
Update us with pics of it on the car, very curious.
Btw, did you have some decent exerience with painting prior to this job? Something tells me you knew what you were doing much more than most of us...
Update us with pics of it on the car, very curious.
Btw, did you have some decent exerience with painting prior to this job? Something tells me you knew what you were doing much more than most of us...
No secret, read the can and execute as written: 8 inch away from part, constant speed, 25% overlapping, thin coats, 5-10 minutes flash time cure between layers.
Ill go and heat the garage this morning to start reassembly. Will keep you posted!
12-01-2011, 05:01 AM
#44
Supporting Maxima.org Member
Thread Starter
Join Date: Feb 2007
Location: Montr�al, Qc, Canada
Posts: 157
As mentioned earlier, this is the clear i used.

http://www.proformproducts.com/en/pr...=94&category=8
http://www.proformproducts.com/en/pr...=94&category=8

 12-01-2011, 06:56 AM
#46
Supporting Maxima.org Member
Thread Starter
Join Date: Feb 2007
Location: Montr�al, Qc, Canada
Posts: 157
As mentionned to mrjasonlyrics in privates, The secret is really in the wet sanding of your primer coating. Primer is usually thick and will buld up into imperfections, this characteristic has a tendency of orange peel. so this is why you need to we sand it. Look at videos on youtube.
For the coating, thin layers, and dont worry if it looks dull at first. dont shoot from too far. 8 to 10 inches is ideal. By putting many thin layers you wil ensure an even coating and acrylic clear will melt a bit te previous coat, so it will tend to flatten out any imperfection on its own. In the end, since you have put many even layers wet sanding the clear will not be a problem and you will get a deep and profesionnal finish.
For the coating, thin layers, and dont worry if it looks dull at first. dont shoot from too far. 8 to 10 inches is ideal. By putting many thin layers you wil ensure an even coating and acrylic clear will melt a bit te previous coat, so it will tend to flatten out any imperfection on its own. In the end, since you have put many even layers wet sanding the clear will not be a problem and you will get a deep and profesionnal finish.
12-01-2011, 07:35 AM
#47
As mentionned to mrjasonlyrics in privates, The secret is really in the wet sanding of your primer coating. Primer is usually thick and will buld up into imperfections, this characteristic has a tendency of orange peel. so this is why you need to we sand it. Look at videos on youtube.
For the coating, thin layers, and dont worry if it looks dull at first. dont shoot from too far. 8 to 10 inches is ideal. By putting many thin layers you wil ensure an even coating and acrylic clear will melt a bit te previous coat, so it will tend to flatten out any imperfection on its own. In the end, since you have put many even layers wet sanding the clear will not be a problem and you will get a deep and profesionnal finish.
For the coating, thin layers, and dont worry if it looks dull at first. dont shoot from too far. 8 to 10 inches is ideal. By putting many thin layers you wil ensure an even coating and acrylic clear will melt a bit te previous coat, so it will tend to flatten out any imperfection on its own. In the end, since you have put many even layers wet sanding the clear will not be a problem and you will get a deep and profesionnal finish.
It helps to paint match your primer as much as possible too, that way if you do get a scratch in the main paint, it's not as noticable later. Helps with overall richness of the colour and blending as well.


 12-02-2011, 03:23 PM
#50
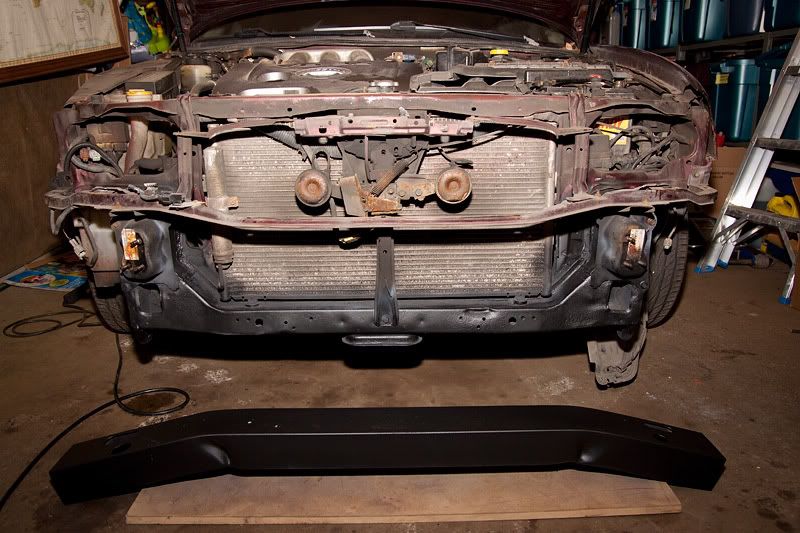
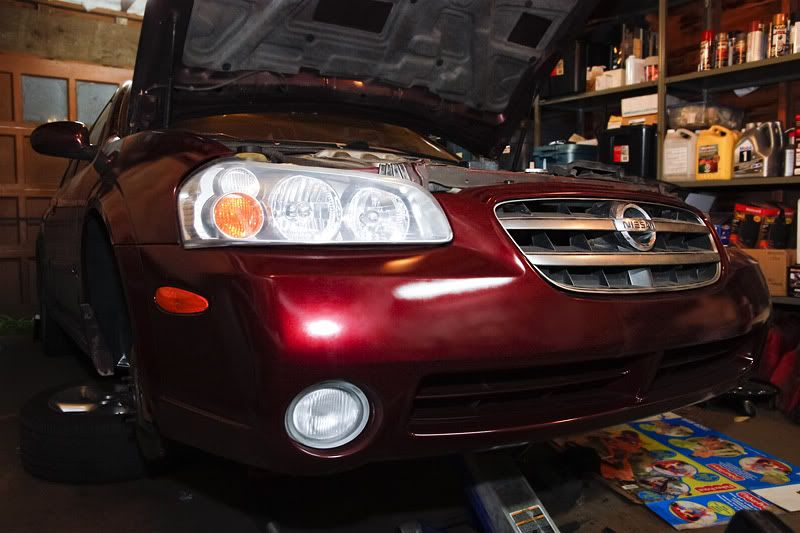
Well the Max had this rust spot on the right fender forever. Because I have not repaired it in time, it got to a point that no repair was possible. I called Napa and a new fender was only 75$.... Since I was going to do a bit of body work, I thought it was a good time fix the broken and scratched bumper as well.
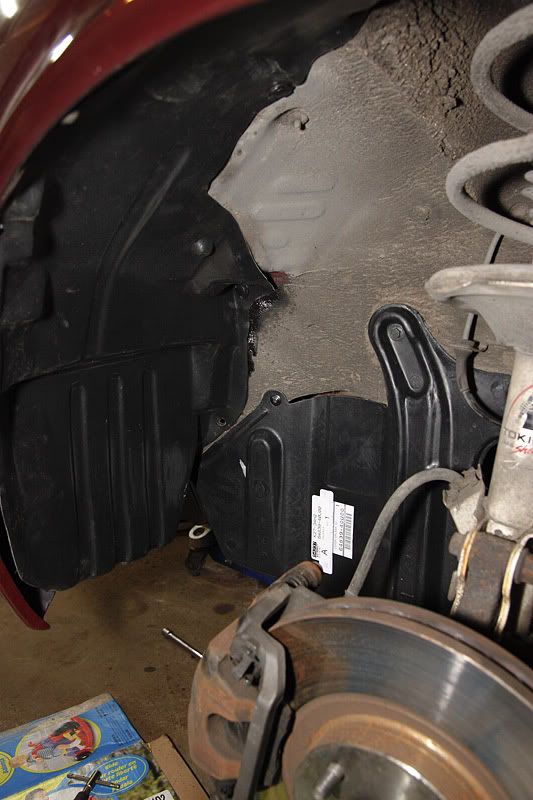
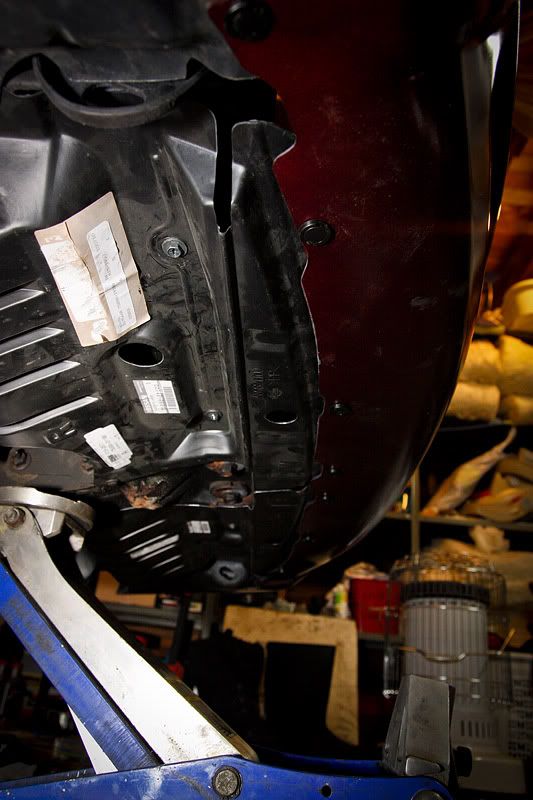
As I cant do nothing half way, I ordered new fender liners, new engine splash guards, (some were missing). All bolts, clips, and brackets to do the job were also ordered from Nissan.
I dont have access to a reliable compressor for shooting paint properly so I decided to follow the advices from the paint rep of the auto parts where I usualluy go to. He suggested to use spray can, Well the result is impressive! The primer coat was wet sanded and 3 coats of clear were applied.
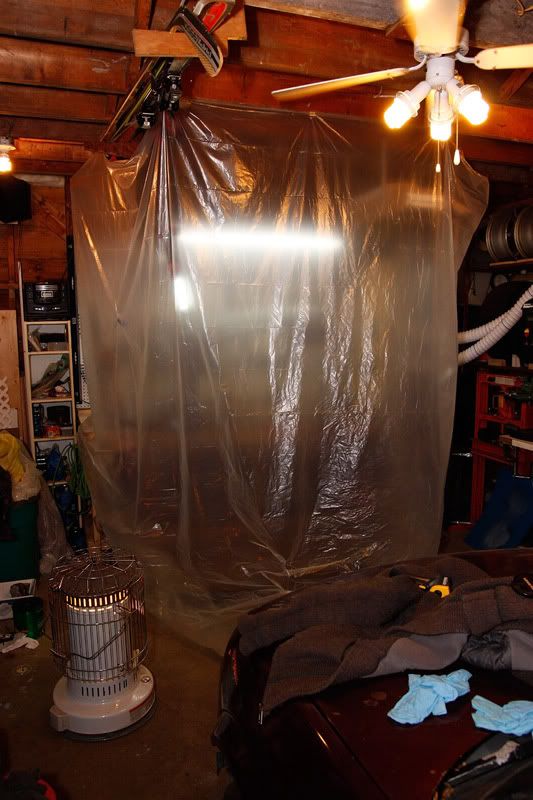
I also built a semi-paint booth with a ventilation panel made of two bathroom fans blowing into 3inches flexible tubes in order to withdraw gases outside of the garage.
Here are some pics:
As I cant do nothing half way, I ordered new fender liners, new engine splash guards, (some were missing). All bolts, clips, and brackets to do the job were also ordered from Nissan.
I dont have access to a reliable compressor for shooting paint properly so I decided to follow the advices from the paint rep of the auto parts where I usualluy go to. He suggested to use spray can, Well the result is impressive! The primer coat was wet sanded and 3 coats of clear were applied.
I also built a semi-paint booth with a ventilation panel made of two bathroom fans blowing into 3inches flexible tubes in order to withdraw gases outside of the garage.
Here are some pics:
How good does that heater in your garage work?? Nice work btw

 01-22-2012, 04:38 PM
#53
Supporting Maxima.org Member
Thread Starter
Join Date: Feb 2007
Location: Montr�al, Qc, Canada
Posts: 157
That heater works fairly good. In a -10 celcius weather it heats up the garage to about 65 farenheight in 1.5hour. My garage is not so well insulated.
As far as the body work goes, I managed to complete the job! Finally! Looks great! Color matches perfectly and finish is not so bad. after a wet sanding and a compoud it will be very good. I have been riding in cold weather and salt for the past 2 weeks. No sign of crack, dent, chip or peeling.
As far as the body work goes, I managed to complete the job! Finally! Looks great! Color matches perfectly and finish is not so bad. after a wet sanding and a compoud it will be very good. I have been riding in cold weather and salt for the past 2 weeks. No sign of crack, dent, chip or peeling.


 01-22-2012, 06:27 PM
#57
I'll be a hater for a minute. That looks aweful in that pic. I do hope it's just the glare or a great deal of dirt, but it looks faded, sunbleached and uneven on the bumper.
Originally this looked incredible so I'll assume it's a bad picture, well, hopefully.
oh, and just to put the bug in your brain, if you plan on selling this car anytime (I'd do it regardless), you might want to consider sandblasting and painting the rest of the trim and cowlings. It seriously looks like the front of the car was crunched and someone threw new parts at it. No one would believe you if you said you replaced them cause they were worn looking or something. Sorry if I seem critical it's just the first thing I though when I saw it.
OAN: Have you ever thought about painting your headlight housings Merlot?
01-22-2012, 09:18 PM
#58

I'll be a hater for a minute. That looks aweful in that pic. I do hope it's just the glare or a great deal of dirt, but it looks faded, sunbleached and uneven on the bumper.
Originally this looked incredible so I'll assume it's a bad picture, well, hopefully.
oh, and just to put the bug in your brain, if you plan on selling this car anytime (I'd do it regardless), you might want to consider sandblasting and painting the rest of the trim and cowlings. It seriously looks like the front of the car was crunched and someone threw new parts at it. No one would believe you if you said you replaced them cause they were worn looking or something. Sorry if I seem critical it's just the first thing I though when I saw it.
OAN: Have you ever thought about painting your headlight housings Merlot?
Originally this looked incredible so I'll assume it's a bad picture, well, hopefully.
oh, and just to put the bug in your brain, if you plan on selling this car anytime (I'd do it regardless), you might want to consider sandblasting and painting the rest of the trim and cowlings. It seriously looks like the front of the car was crunched and someone threw new parts at it. No one would believe you if you said you replaced them cause they were worn looking or something. Sorry if I seem critical it's just the first thing I though when I saw it.
OAN: Have you ever thought about painting your headlight housings Merlot?

Thread
Thread Starter
Forum
Replies
Last Post
litch
4th Generation Maxima (1995-1999)
123
01-04-2024 07:01 PM
BPuff57
Advanced Suspension, Chassis, and Braking
33
04-16-2020 05:15 AM
My Coffee
New Member Introductions
15
06-06-2017 02:01 PM
REDinLV
7th Generation Maxima (2009-2015)
4
10-18-2015 05:31 AM