Genes1s LTB DIY


 10-17-2013, 12:51 PM
#42
 10-17-2013, 01:25 PM
#44

") 10-17-2013, 02:34 PM
10-17-2013, 02:34 PM
#45

A 1" dia solid bar maybe, but even then I don't think we need 1" solid bar. This is not an F1 car when you are pulling 4 Gs around the corner that would try to tip those two strut tower apart. A 1" dia tube X .095" wall thickness is plenty strong IMO.
Last edited by Genes1s; 10-17-2013 at 02:39 PM.
10-17-2013, 08:24 PM
#47
Not exactly sure, but Steel density is .28 lbm/in^3. If you have 1" Steel Solid X 48" long, that means = 3.14*(1/2^2) X 48 X .28 = 10.5 lbm. That's pretty heavy for a piece of FTSB if you ask me . 10.5 lbm for sub frame connector make sense though.
You could make it out of 1" solid aluminum, then it would raoughly weight half of that.
. 10.5 lbm for sub frame connector make sense though.You could make it out of 1" solid aluminum, then it would raoughly weight half of that.
10-17-2013, 08:41 PM
#48
^
would aluminum cost more $$?
what if you made lower tie bar like thing for the engine bay - you would have to take it off everytime you work on the car but having that on top and then a lower tie bar on the bottom would be a good combo or would that be too much?
would aluminum cost more $$?
what if you made lower tie bar like thing for the engine bay - you would have to take it off everytime you work on the car but having that on top and then a lower tie bar on the bottom would be a good combo or would that be too much?
10-17-2013, 09:28 PM
#49
Aluminum cost more not worth it IMO, again weight isn't an issue but we don't want to make it overkill either. I already have FTSB which I re-enforced it with another bar also. You could tie the "pickle fork" engine cradles frame together, but that's what the engine is for already, so no need for that. You could extend the FTSB to tie them up front by the radiator but I don't see that would help much. If anything it makes it more dangerous than stock since your car will have no crumple zone anymore, meaning when you get hit the force will be transfer directly to cabin.
10-19-2013, 07:27 PM
#50
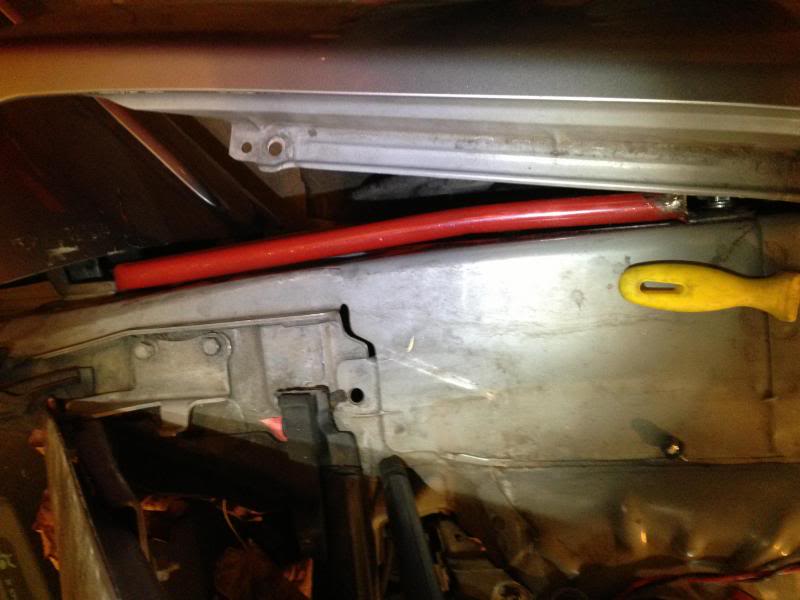
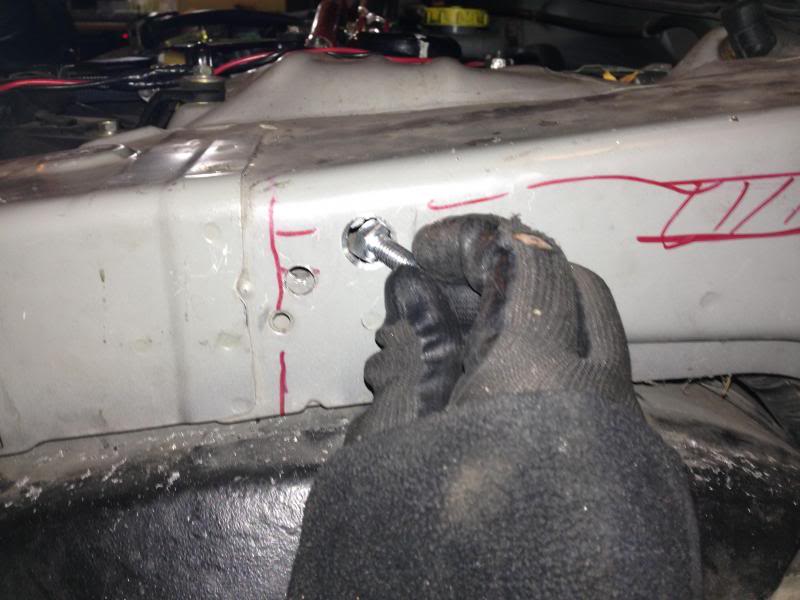
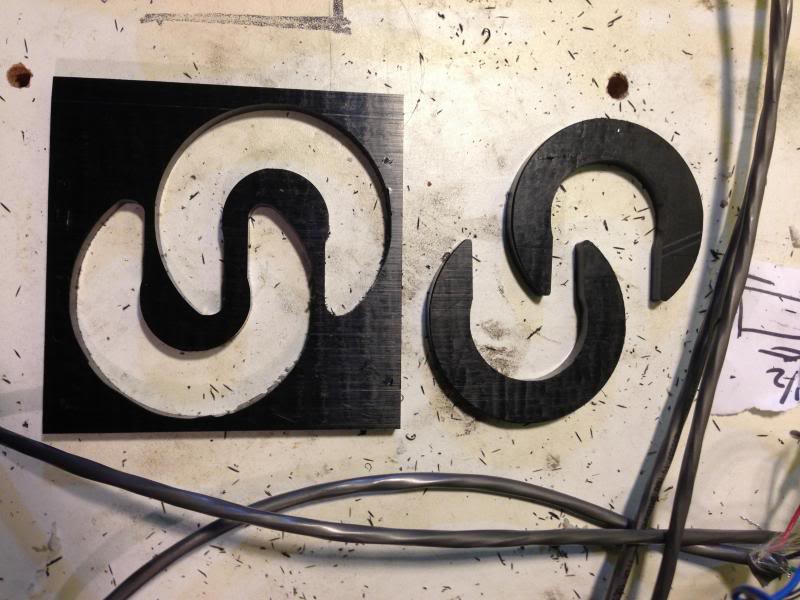
Got the Fender Brace driver side done. Had to improvised a little from the original design. The passenger side should be a lot easier since I have a working template now. Not sure if I want to weld the front end of the brace to the body yet. I think I'm just going to bolt it in for now and see how it does.
Had to trim the inside flare of the fender since it was interfering with the brace. Looked at it for an 1/2 hour and couldn't figure out a good way to not cut anything, so cut away it was.
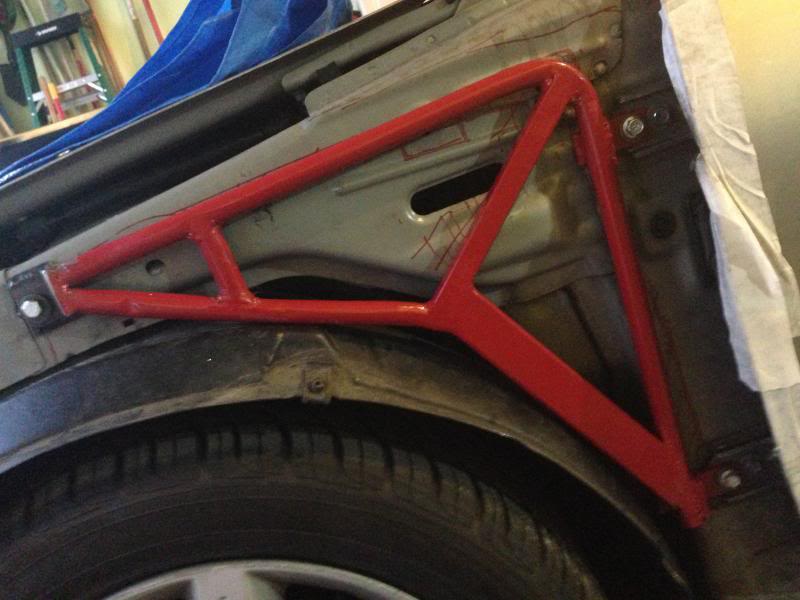
Had to trim the inside flare of the fender since it was interfering with the brace. Looked at it for an 1/2 hour and couldn't figure out a good way to not cut anything, so cut away it was.

 10-22-2013, 05:45 PM
#55
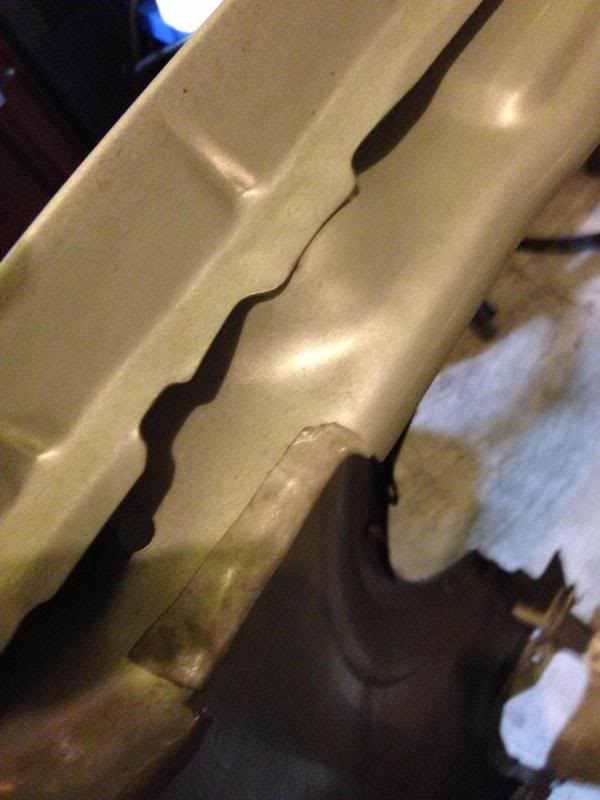
I ran out of material and used whatever I have left. Once the design is finalized after road rest, I probably make them out of square tubing since I don't have tubing notcher yet.

 10-26-2013, 12:24 AM
#58
10/26/13 Installed and Road Test Update
Finally got the passanger side done tonight. I made this out of square tubing since that is what I have left, should be as good as the round tubing on the driver side though.
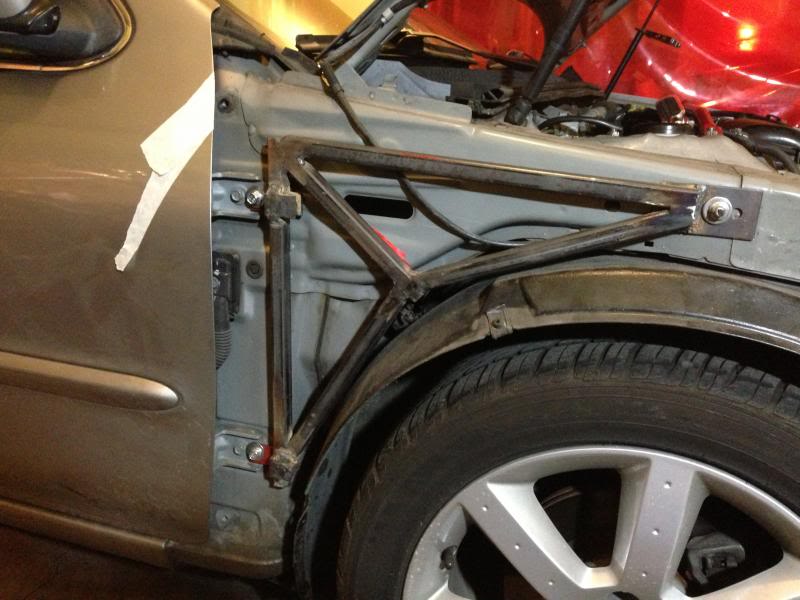
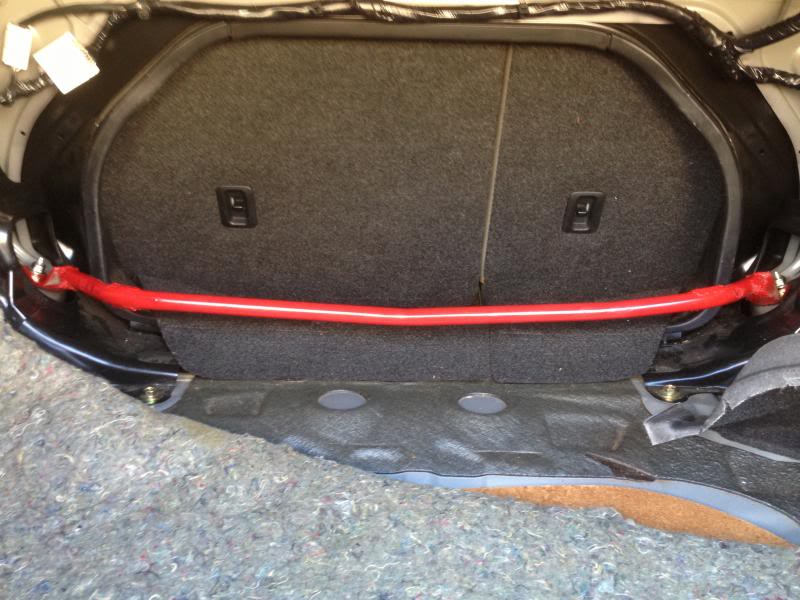
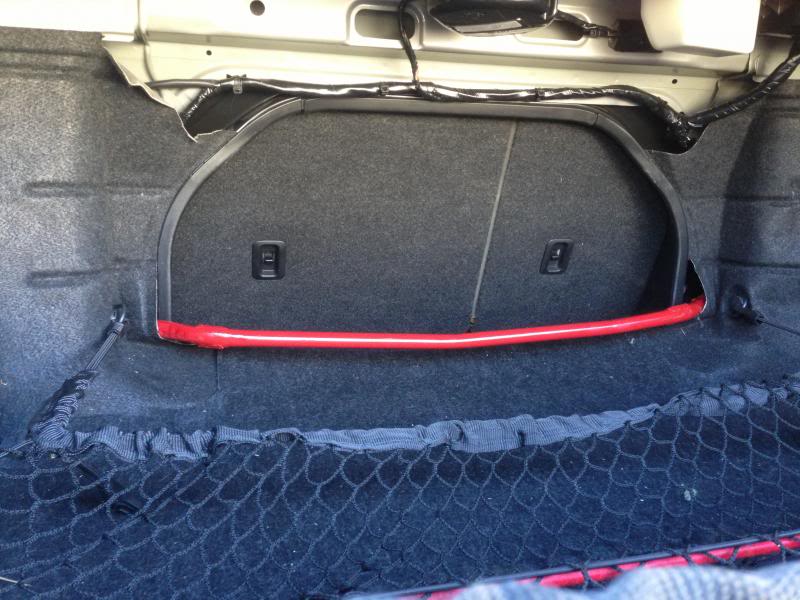
Pic of the top view, looking down...
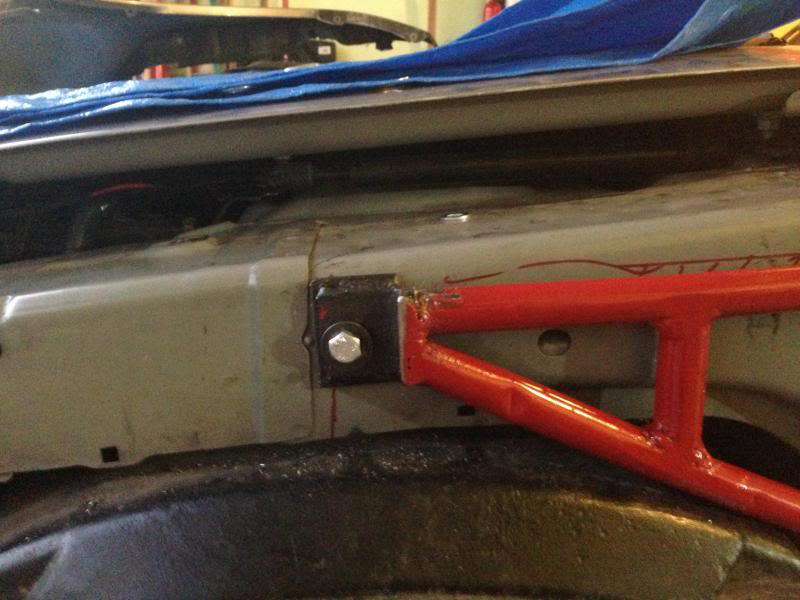
The fender inside lip that cover the door hinge bolts need to be modfied since it was hitting the brace. No way around it since the brace mounting plate is there. The only way to not do this is to install the brace mounting plate to the door then mount the door hinge, but then the door won't close. I put double sticky tape to prevent any rattling.
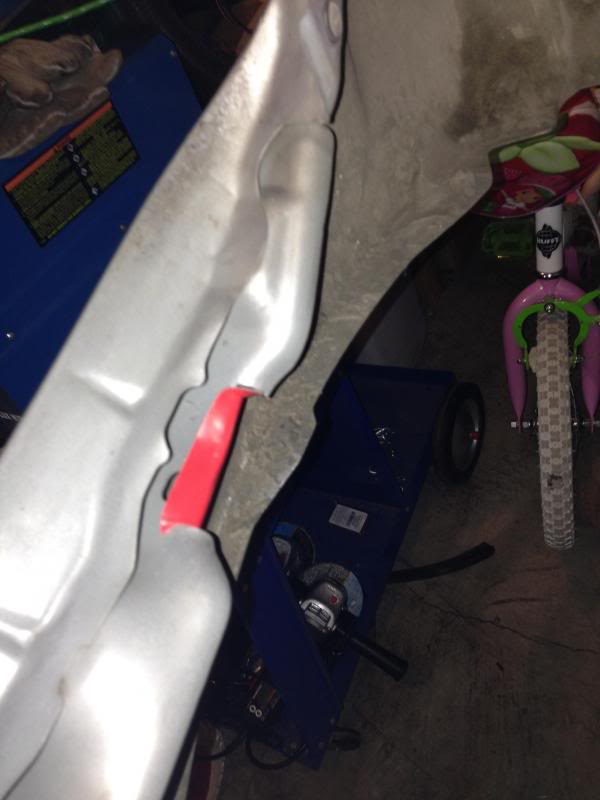
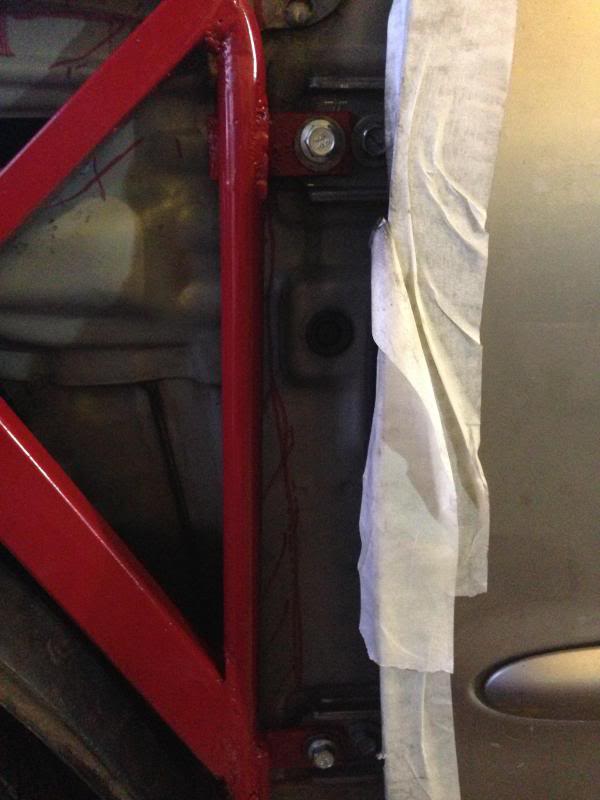
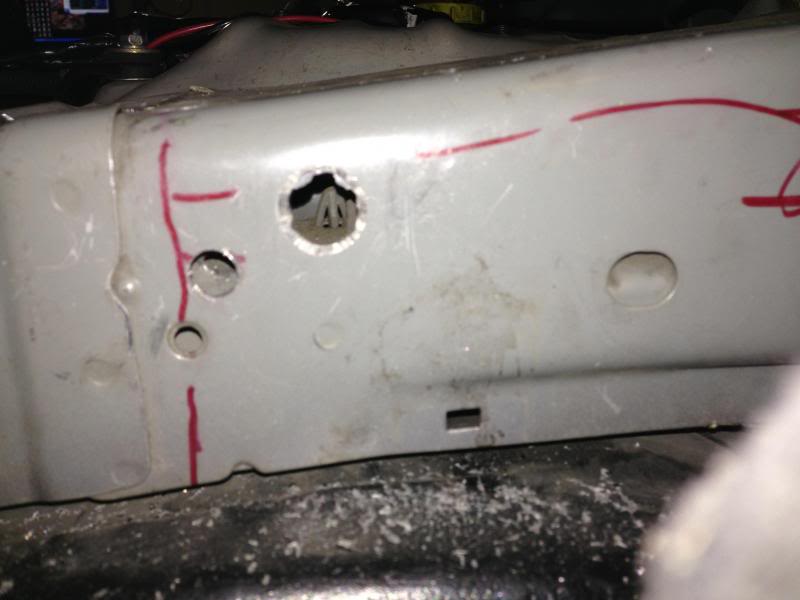
The existing hole that is on the fender was enlarged for the 8mm bolt access to mount the front end of the brace to the body.
Driving Impression
I can really tell that the front end is defenetly stiffer, a little bumpier than before. Steering feels a little heavier and the respond is almost instant, which I really like. Cornering is slightly better but it's mostly placebo affect IMO. I can also tell that the car is accelerating better. Before there is a little bit of lag when you floor it, now it is almost instant. The LTB really helps tracking the car straigth too. Nose dive during hard braking is also very mininum now. I feel the car is stopping but I don't lean forward as much as I used to. I need to go at freeway speed and go on/off ramp and see how it does. Maybe I'll permanently weld the brace later on.
Is this worth it? To me it is, but I can see that some people might not see the benefit of fender brace. You really have to throw your car around hard to really feel the benefit. It's not like when you add your RSB and feel a huge improvement.
So far I'm having a blast with the car. I have LTB, Sway Bar ES Bushings,RSB, Moog End Links, ES Sub Frame, ES RTA, FTSB, Fender Brace, H-Tech, and KYB GR2.
Next is B Pillar brace and Sub Frame Connectors.
Pic of the top view, looking down...
The fender inside lip that cover the door hinge bolts need to be modfied since it was hitting the brace. No way around it since the brace mounting plate is there. The only way to not do this is to install the brace mounting plate to the door then mount the door hinge, but then the door won't close. I put double sticky tape to prevent any rattling.
The existing hole that is on the fender was enlarged for the 8mm bolt access to mount the front end of the brace to the body.
Driving Impression
I can really tell that the front end is defenetly stiffer, a little bumpier than before. Steering feels a little heavier and the respond is almost instant, which I really like. Cornering is slightly better but it's mostly placebo affect IMO. I can also tell that the car is accelerating better. Before there is a little bit of lag when you floor it, now it is almost instant. The LTB really helps tracking the car straigth too. Nose dive during hard braking is also very mininum now. I feel the car is stopping but I don't lean forward as much as I used to. I need to go at freeway speed and go on/off ramp and see how it does. Maybe I'll permanently weld the brace later on.
Is this worth it? To me it is, but I can see that some people might not see the benefit of fender brace. You really have to throw your car around hard to really feel the benefit. It's not like when you add your RSB and feel a huge improvement.
So far I'm having a blast with the car. I have LTB, Sway Bar ES Bushings,RSB, Moog End Links, ES Sub Frame, ES RTA, FTSB, Fender Brace, H-Tech, and KYB GR2.
Next is B Pillar brace and Sub Frame Connectors.
Last edited by Genes1s; 10-26-2013 at 12:54 AM.
10-26-2013, 11:16 AM
#59
10/26/13 Driving impression.
This morning was foggy and I took the car on the back road by my house, this is the road that I'm familiar with. Every suspension upgrade I've done, I've always used this road to benchmark the result. When I said the cornering only helps slightly, well, I was wrong. On a flat curve, I didn't feel much different but on an S downhill curve, man the front end was absolutely well behaved. It felt like the weight of the car wasn't shifting around too much. I also noticed, lane changing at high speed was effortless, the car just took off.
This morning was foggy and I took the car on the back road by my house, this is the road that I'm familiar with. Every suspension upgrade I've done, I've always used this road to benchmark the result. When I said the cornering only helps slightly, well, I was wrong. On a flat curve, I didn't feel much different but on an S downhill curve, man the front end was absolutely well behaved. It felt like the weight of the car wasn't shifting around too much. I also noticed, lane changing at high speed was effortless, the car just took off.
10-27-2013, 06:18 PM
#60
10/27/13
RTSB.
Made Rear Tower Strut Brace. The design has few bent, which is undiserable but its low profile which is good for maximizing trunk space when you need to fold the rear seats down. I saw the Ultra Racing RSTB and they are mounted on the OEM gussets, basically tieing the left and right gusset together. Didn't really like that much and decided to mount it straight to one of the Strut mouting bolt, much like FTSB. Eventually I'll probably pick up those two bottom mounting screws and triangulate the bar for better stiffness. Not sure it it does anything though, if it does it's very subtle.
I must admit, It's been a lot of fun to do these chassis improvements. I think with some works, this Maxima can be a decent handling car after all.
Last edited by Genes1s; 10-27-2013 at 06:24 PM.
10-28-2013, 09:03 AM
#66
I'll take the car to the back road on winding S curve and see what it this does anything...
 10-28-2013, 07:17 PM
#68
I might do this to optimize the design.....
 12-24-2013, 11:49 PM
#71
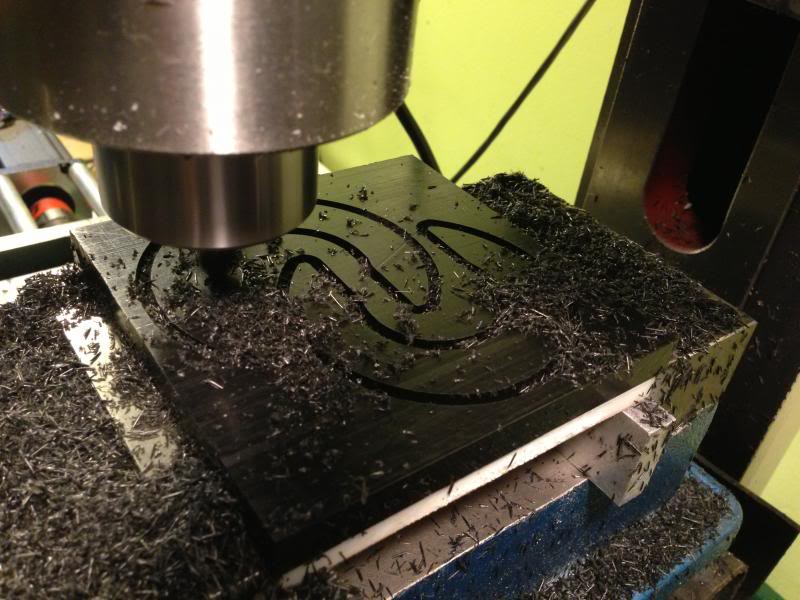
Got done machining Sub Frame Collar made out of Delrin. I really think you only need the spacer between the sub frame and the body since these are the ones that transmits the load the most. I left out the spacers between the bolt and the sub frame.
Last edited by Genes1s; 12-24-2013 at 11:57 PM.
08-03-2014, 06:18 PM
#73
I have been having this clunks on low speed turning sharp left. I checked the ball joints, and control arms, and they were good ( even when the tires were off, the ball joints were flopping around too easy that indicates loose joint). My end links, and sway bushings are relatively new and tight. Tie rods looked good with no play. I know it wasn't wheel bearing since it was only happening at low speed turning left.
So, I suspected it was the strut mounts. When I changed the struts and spring awhile back, I didn't do the strut mounts. I bought Moog Struts mounts complete with new bearings, OEM Nissan strut base, OEM Nissan dust boots, and OEM Nissan paper spacers. I replaced both sides with these.

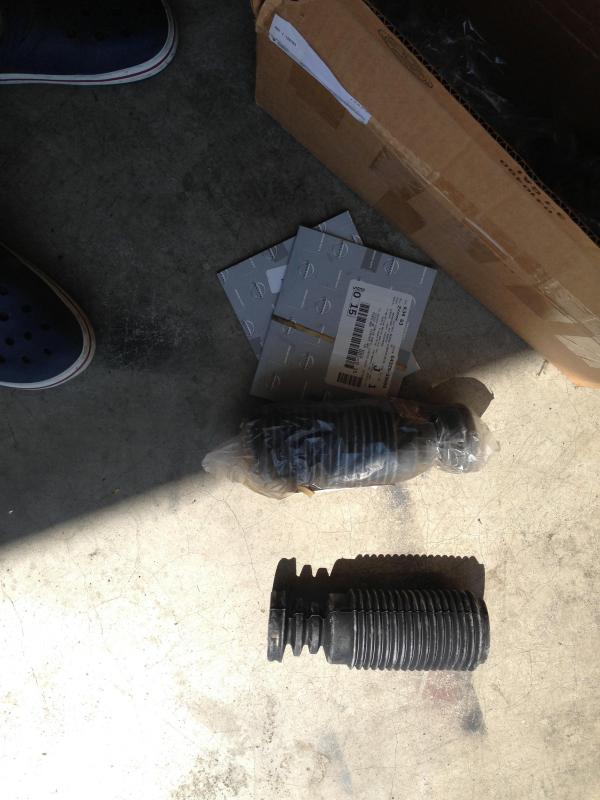
Old Assembly.


New Assembly. The Moog mounts has thicker rubber, I suspected that this is what the original OEM when new looked like, these 2 flat plates will be flushed went torqued. The old bearing was loose and had play on it. New ones are tight. Still though, I can't believe the bearing is made out of plastic. This should have been either bronze or ball bearing.

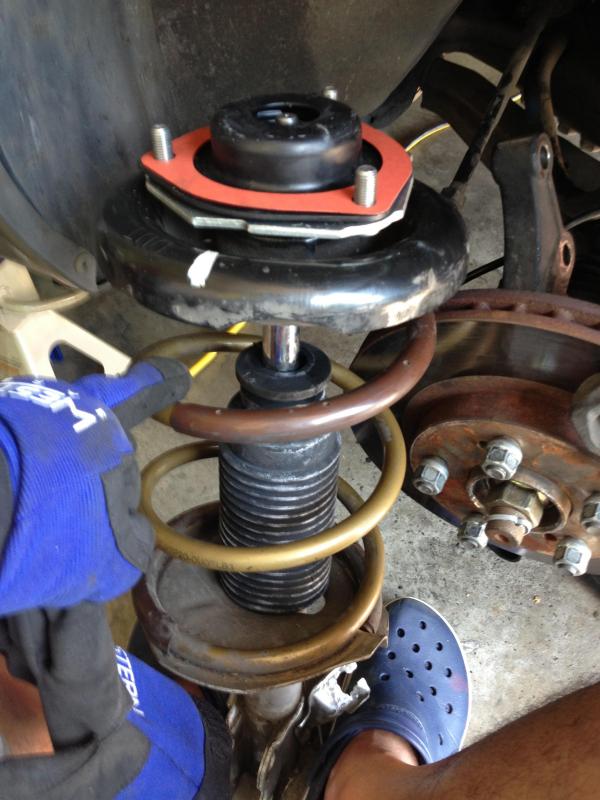
When I was done, I took the time to grease the Moog sway end link, still plenty of grease in there, but what the heck. I wish every ball joints have grease fitting on them!
Took it for 10 minutes drive to local O'Reilly store to return the spring compressor tool and no more clunk!
So, I suspected it was the strut mounts. When I changed the struts and spring awhile back, I didn't do the strut mounts. I bought Moog Struts mounts complete with new bearings, OEM Nissan strut base, OEM Nissan dust boots, and OEM Nissan paper spacers. I replaced both sides with these.
Old Assembly.
New Assembly. The Moog mounts has thicker rubber, I suspected that this is what the original OEM when new looked like, these 2 flat plates will be flushed went torqued. The old bearing was loose and had play on it. New ones are tight. Still though, I can't believe the bearing is made out of plastic. This should have been either bronze or ball bearing.
When I was done, I took the time to grease the Moog sway end link, still plenty of grease in there, but what the heck. I wish every ball joints have grease fitting on them!
Took it for 10 minutes drive to local O'Reilly store to return the spring compressor tool and no more clunk!
Last edited by Genes1s; 08-03-2014 at 06:50 PM.
08-03-2014, 06:45 PM
#75
 08-03-2014, 06:48 PM
#77
08-05-2014, 06:07 PM
#78
08/05/14 Update:
It's been 2 days now and my steering is smoother, more like heavier, have a little more resistant than before. Not sure if this is placebo effect, but I'm glad I changed the strut mount with good quality ones.
I looked at the new and old assembly pictures again and I think, the thing that makes the difference is the rubber protrution on the new Moog Strut mount. Pic below is the rubber on the old strut mount to give you guys an idea of what they look like. The new one is similar but a lot more pronounce that it creates a gap between the 2 parts.
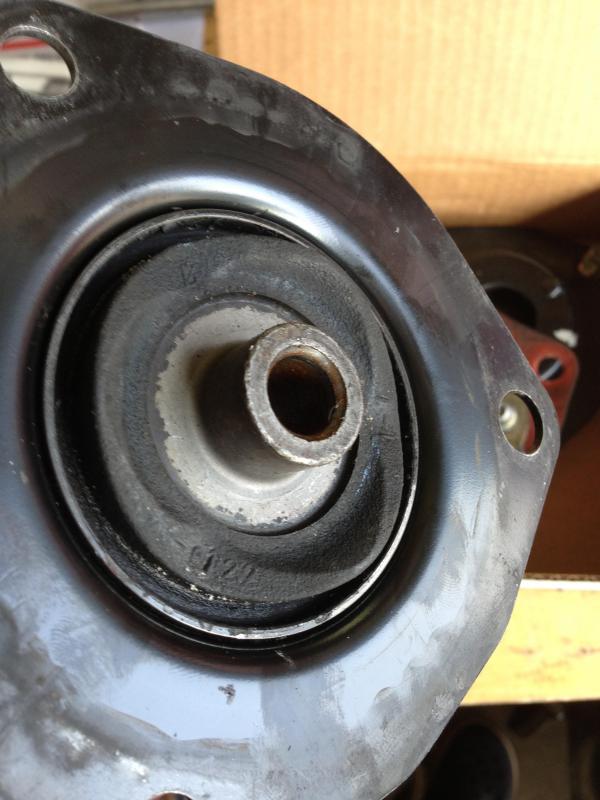
You can see below that there is a gap between the silver mount base and the black strut mount. The rubber on the black strut mount acts like a spacer that when you tighten the bolt, it takes up any uneven surface between the black strunt mount flange and the base. This makes sure that the two parts doesn't move to each other.
In the case of the old one, the rubber on the black strut mount is gone. You can see that there is no gap between the black strount mount and the silver mount base.
So, when you tighten the nuts, due to uneven surface between the 2 plates, they move to each other even when you torque the heck out of it ( I know I did this). This couples with loose plastic bearing would make the 2 plates to move even worse thus causing the clunk. The clunk is actually happening between the studs and the clearance holes on the black strut mount. Here is the deformation on one of the strount mount mounting holes. This is due to the stud keeps banging the edge of the hole.

Anyway, moral of the story, don't just change the plastic bearing, replace the top strut mount (the black piece) if there is no rubber left. The other side of the strut mount had similar condition, but the plastic bearing didn't have too much play thus the strut didn't move around too much with respect to the strut mount---no clunk.
It's been 2 days now and my steering is smoother, more like heavier, have a little more resistant than before. Not sure if this is placebo effect, but I'm glad I changed the strut mount with good quality ones.
I looked at the new and old assembly pictures again and I think, the thing that makes the difference is the rubber protrution on the new Moog Strut mount. Pic below is the rubber on the old strut mount to give you guys an idea of what they look like. The new one is similar but a lot more pronounce that it creates a gap between the 2 parts.
You can see below that there is a gap between the silver mount base and the black strut mount. The rubber on the black strut mount acts like a spacer that when you tighten the bolt, it takes up any uneven surface between the black strunt mount flange and the base. This makes sure that the two parts doesn't move to each other.
In the case of the old one, the rubber on the black strut mount is gone. You can see that there is no gap between the black strount mount and the silver mount base.
So, when you tighten the nuts, due to uneven surface between the 2 plates, they move to each other even when you torque the heck out of it ( I know I did this). This couples with loose plastic bearing would make the 2 plates to move even worse thus causing the clunk. The clunk is actually happening between the studs and the clearance holes on the black strut mount. Here is the deformation on one of the strount mount mounting holes. This is due to the stud keeps banging the edge of the hole.
Anyway, moral of the story, don't just change the plastic bearing, replace the top strut mount (the black piece) if there is no rubber left. The other side of the strut mount had similar condition, but the plastic bearing didn't have too much play thus the strut didn't move around too much with respect to the strut mount---no clunk.
Last edited by Genes1s; 08-05-2014 at 06:22 PM.
08-30-2021, 09:03 PM
#79
Newbie - Just Registered

Join Date: Aug 2021
Posts: 2
I feel this will come out great. You are really doing a great job. About the tube bending you said you will be needing, you can get one here https://hinesbending.com/

Thread
Thread Starter
Forum
Replies
Last Post
umnitza
Group Deals / Sponsors Forum
0
09-01-2015 01:03 PM