When you click on links to various merchants on this site and make a purchase, this can result in this site earning a commission. Affiliate programs and affiliations include, but are not limited to, the eBay Partner Network.
Steps for Replacing the Lower Control Arm and CV Axle
It would be a big help if someone could review this and let me know if you see anything wrong. I need to replace the left side arm and the axle at the same time. Here are the steps as I understand them.
1. Remove the axle nut, tap the axle free and spin the nut back on a few turns. (I know this is a high torque nut. I have a 3/4" breaker bar about three feet long that works.)
2. Remove the stabilizer link.
3. Remove the 27mm nut on the front of the control arm.
4. Remove the two 22mm nuts holding the saddle clamp to the chassis at the rear of the control arm.
5. All the videos I've found show the four 22mm bolts through the control arm bracket being removed at this point. I don't understand why that's necessary. Can't the arm simply be forced back, off the bracket? If not, then this step consists of removing the four bolts that hold the bracket to the chassis.
6. With everything loose, the control arm now falls down, attached only at the ball joint. This allows the knuckle to be pushed forward and out, providing enough room to remove the CV axle from the knuckle. The axle can be completely removed from the vehicle at this point or just moved out and away from the knuckle.
7. With the axle out of the way, remove the cotter pin and the nut from the ball joint. I think this might require temporarily reattaching the control arm to the chassis with a couple bolts to prevent the entire knuckle from twisting around.
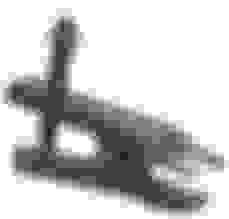
8. Remove the ball joint from the knuckle. I have a separator like the one in the pic, as well as a pickle fork.
9. Install the new ball joint (attached to the new control arm) through the knuckle and torque the nut to spec. Install a cotter pin.
10. Install the new axle in the transmission and insert the outer end through the knuckle.
11. Reattach the control arm to the chassis, reinstall the stabilizer link and reinstall the axle nut/cotter pin.
I did it without removing the lower control arm completely to get the axle out. I was able to undo the strut so that I had enough clearance to pull the axle out. I chose this way so that I did not need to get an alignment afterwards. There is no built in adjustment of the lower control arms but if you replace the whole arm then you definitely need an alignment. Either way works. Have fun!
Well, I got this done, but crawling around under the car working on so many bolts torqued well over 100 ft-lbs really beat me up. Also, there's no room for a socket on the 27mm nut in the automatic trans version of this car, and the 27mm box end I bought for the job wouldn't break it loose. I was only able to remove it after the control arm was out of the car, using a socket and 3 foot breaker bar. The box wrench was sufficient for re-torquing the nut after installing the new control arm.
Contrary to every video on YouTube, the axle wouldn't clear the knuckle just by removing the stabilizer link and unbolting the control arm. The tie rod end also had to be removed. Not a big deal, but I struggled with it for a while before doing that.
For anyone contemplating this work, the 3 foot breaker bar was absolutely essential for breaking the control arm bolts loose. My smallish impact gun wouldn't do the job, so I only used it to remove the bolts after they were broken free.
I still need to replace the control arm and axle on the passenger side. I'm going to let my mechanic do that. This is just too much of a PITA without a rack, and the passenger side is even worse, due to the axle mount.
Incidentally, I used the "Import Direct" axle #NI8095 from O'reilly's. I'll post again if there are any problems with this.
I just put in my CV axles earlier, along with my transmission. for the axles, I just unbolt the struts from the knuckle along with the brake line and ABS sensor wire, that was it. turning the steering helps with clearance as well.
when I did my control arm I use my Kobalt electric corded impact gun. it claims to have 350 ft-lbs of torque in forward and reverse. it's a must-have for doing suspension work, especially when it's time to use a spring compressor when installing struts...
Replacing only the axle is much easier than doing the axle AND the control arm. I did the axle on this same side of the car about four years ago. Like you say, it's not necessary to drop the control arm. I removed the caliper and rotor to get the weight off the knuckle and avoid opening the brake line (hung the caliper from the upper end of the strut with some coat hanger wire). I think I also removed the ABS sensor wire. Then I unbolted the knuckle from the strut. The only part of this that's really high torque is the axle nut. I already had the 3-foot breaker bar from working on my truck axles, so that's what I used. I'm not going to replace the other axle/control arm myself, but I'll probably replace the struts. If I remember correctly, the only special thing is to support the bottom of the knuckle with a scissors jack while the strut is unbolted. That will be a job for next spring.
I would have just changed the axle than moved on to changing out the lower control arm, no need to remove the brake caliper for either job.
when it comes to the lower ball joint nuts on these cars I just tighten them until the stud is nice and snug on the knuckle than tighten until the cotter pin lines up. the way the nut is so close to the CV axle you want to be able to get it loose with an open end wrench if you ever have to work on it again. I also lube the threads as well as the ball joint stud.
That's not safe. The ball joint nut must be properly torqued. And on mine, it's not even a castle nut. The cotter pin rides above the nut - like the axle nut - not through it. Greasing the nut and snugging it would have left me open to the likelihood of a damaged knuckle, or maybe even a broken stud and a serious accident. It might be easier, but I won't do it.
I've had my maxima since December of 2012 and within the first month I pulled the steering knuckles off to install wheel bearings. I only tighten the ball joint nut with an open-end wrench. I've had this car for 8 years and have put 110,000 miles on it without any issues, and I drive it hard.
I highly recommend getting the propper castle nut......
I prefer castle nuts when it comes to ball joints..
Me too, but as I posted in a different thread, I don't have one. It was missing from the new control arm. Luckily, the threads were the same, so I was able to reuse the factory nut. Honestly though, even with a castle nut, I would never consider greasing the threads. If i used anything at all, it would be Loctite Blue.