
Anybody know how to take apart driver info screen on 07?


Anybody know how to take apart driver info screen on 07?
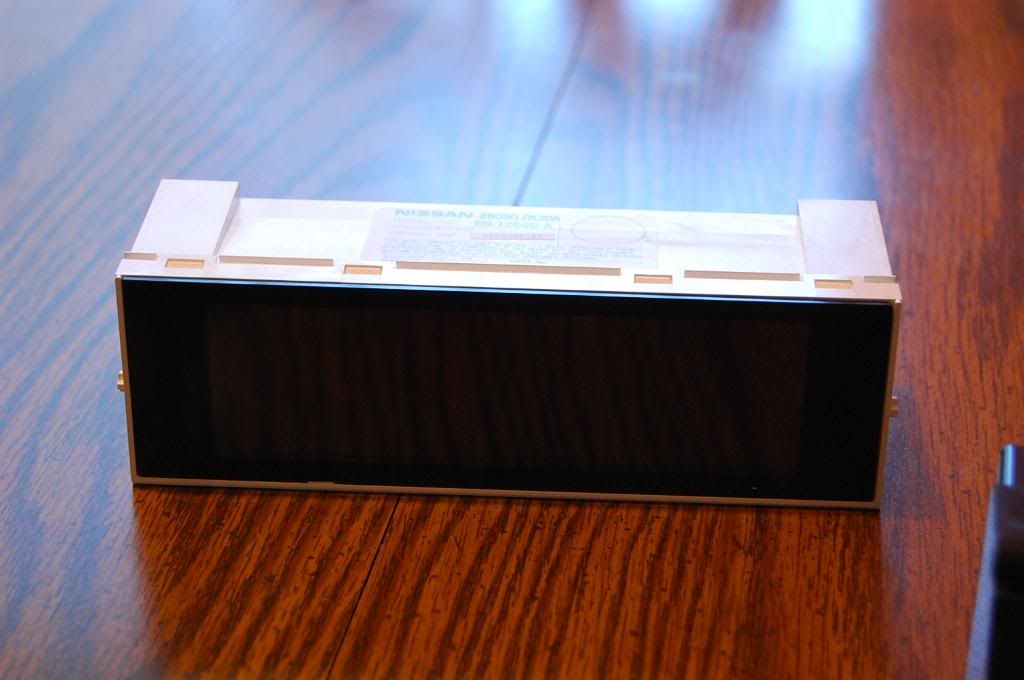
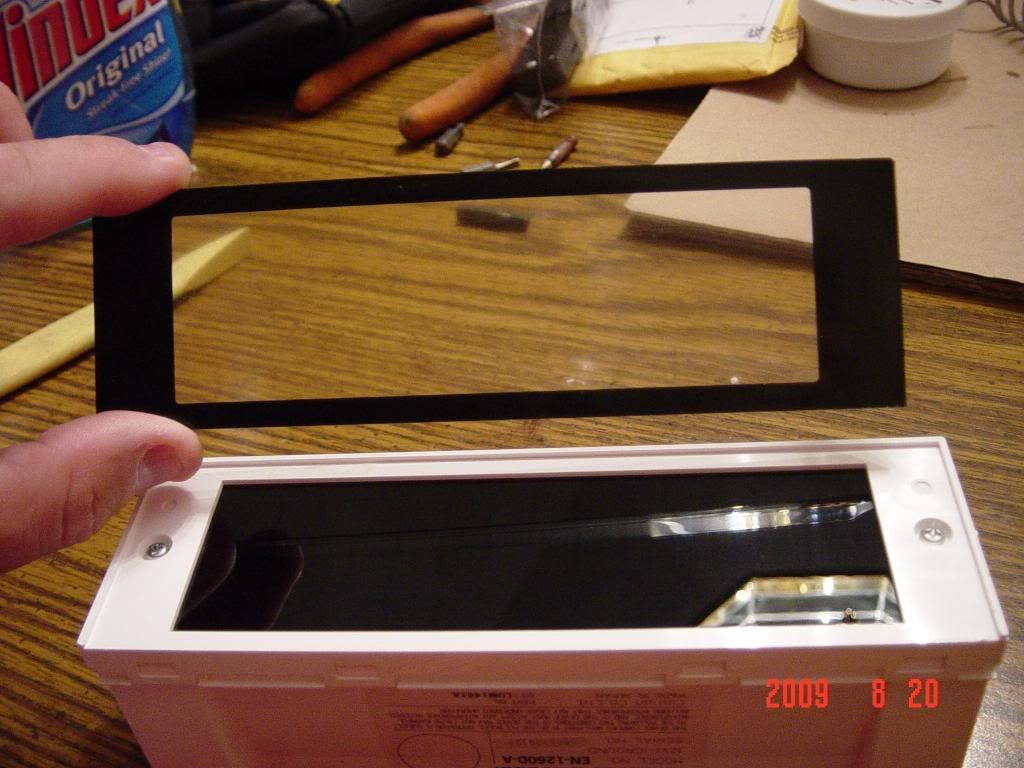
I am trying to do the LED swap in my 07 SE, and I can't figure out how to take apart the white driver's info screen. In the 07's, there is a driver info screen, and an HVAC control screen. The HVAC screen is encased in black plastic and sits on top of the driver info screen. The driver info screen is slighlty larger than the HVAC screen, and sits just below the HVAC screen, and just above the radio. I got the info screen out of the car, and there are no screws holding it together, just clips. I got the clips popped, but the 2 halves will not seperate. If anybody has taken apart an 07-08 screen, I'd greatly appreciate some help. Here are some pics...
This is the screen I'm asking about:
It seems to be stuck at the seam right near the brass thread, right at the corner where the raised white "T" is here:
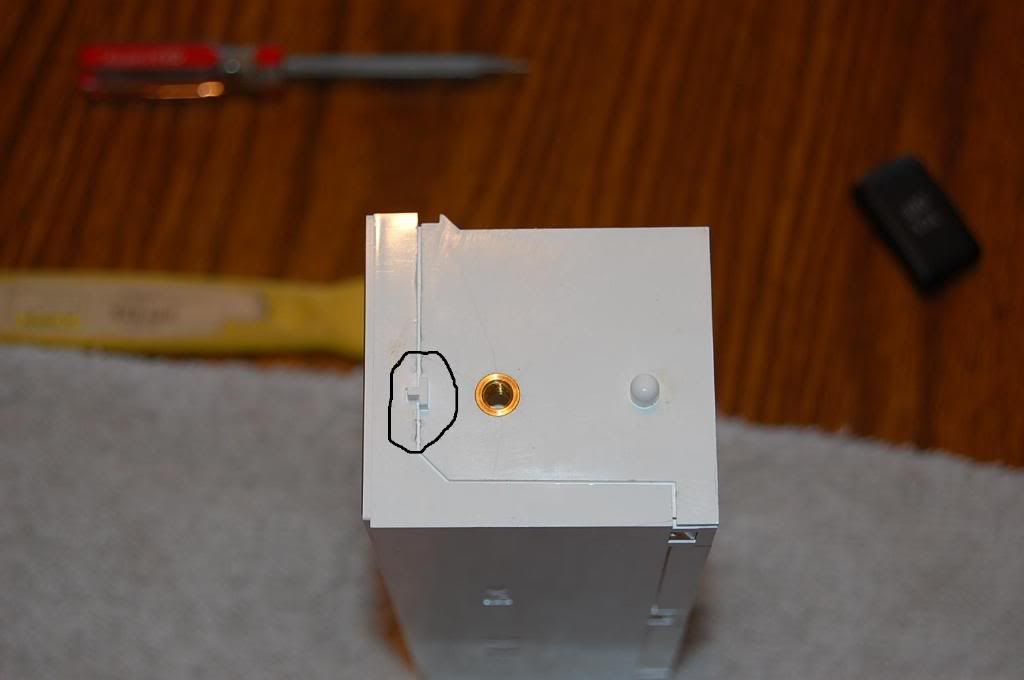
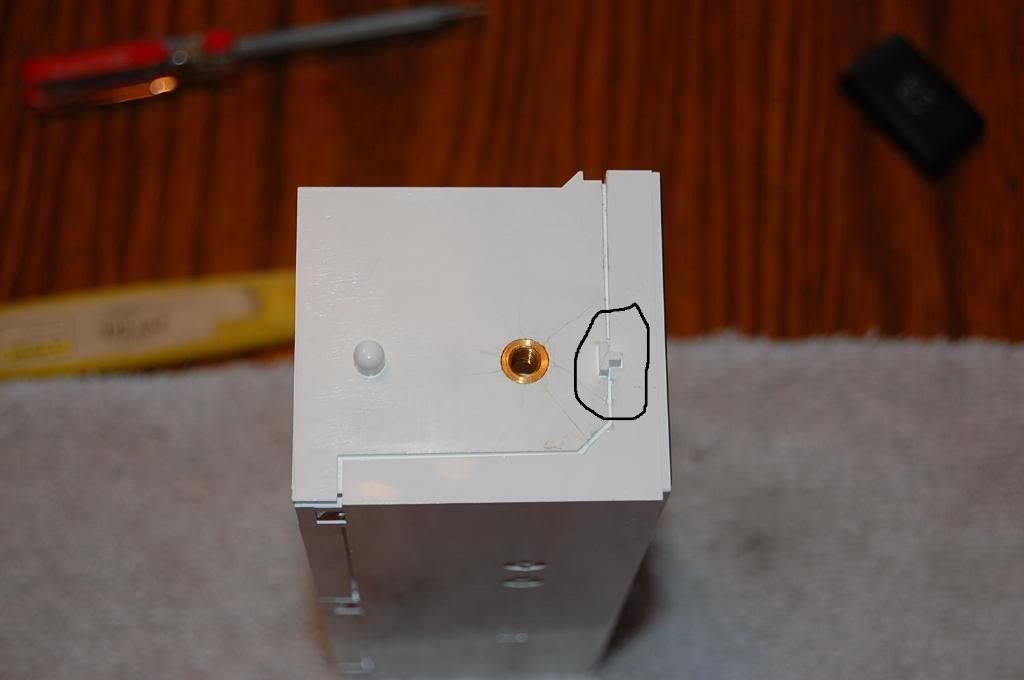
There are some stress cracks in the plastic around the brass threaded insert, so I don't want to be putting to much pressure on it.
This is the screen I'm asking about:
It seems to be stuck at the seam right near the brass thread, right at the corner where the raised white "T" is here:
There are some stress cracks in the plastic around the brass threaded insert, so I don't want to be putting to much pressure on it.
Last edited by 1hawaii50; Aug 14, 2009 at 02:44 AM.
Shouldn't need to glue it back together, the only sticking points seem to be on either end, right near the brass threaded insert. If I can just cut the seam there, you should still be able to snap it back together with the tabs. Probably use a little silicon sealer on the cut area just as a precaution. My only concern is cutting through something important, as I have no way of knowing what is behind that area. I'll give it a couple days to see if somebody wants to pony up an answer.

Member
Joined: Jan 2003
Posts: 160
From: Boston
In your first picture of the front it looks to me like there may be a tab on the bottom left side about 2 inches in that would take the black screen cover off. If that can be removed, maybe the electronics inside can slide out the front.
OK, I've been told that it is glued together. It was suggested that I head it with a heat gun/blow dryer, but due to the stress cracks in the plastic, I may just dremel it open.
I didn't need to. If you slide a razor blade CAREFULLY under a corner of the screen (on the side with the 4 tabs, the side facing up in the first pic), then you can CAREFULLY pull the plastic cover off of the unit. I used a heat gun on the low setting to make it a little easier to get off. There is a double-sided tape holding the plastic screen on. Once the screen is off, you will find 2 small screws holding the white halves together. Once you unscrew them, the case will open easily. I took some photos, just haven't had a chance to upload them yet.
Yes, that's pretty much it. I took a heat gun to the corners of the box...lucky for me I didn't destroy it. I took some pics, and I'll try to get them uploaded tonight for you.

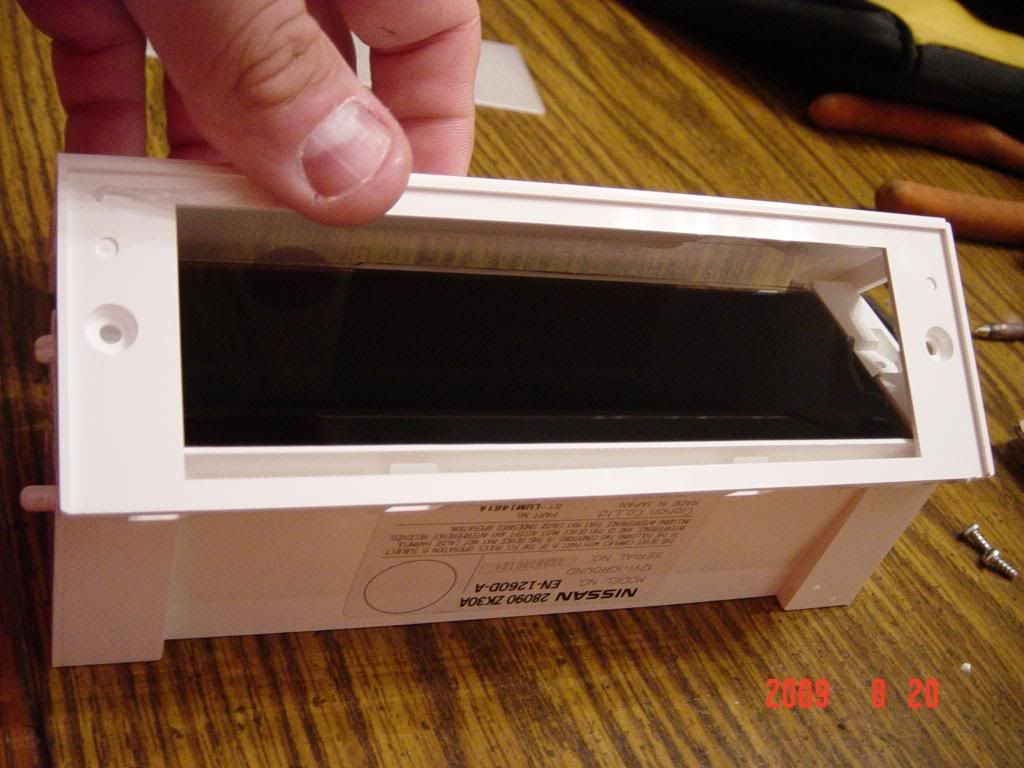
OK, here are some pics. On the original pics, where I circled...DO NOT PRY THERE, YOU WILL BREAK THE CASE. You need to lift the plastic screen off of the case, it's held on by some double sided tape...a little hot air will help, but if you use a heat gun, use it on the lowest setting, and DON'T MELT THE SCREEN.
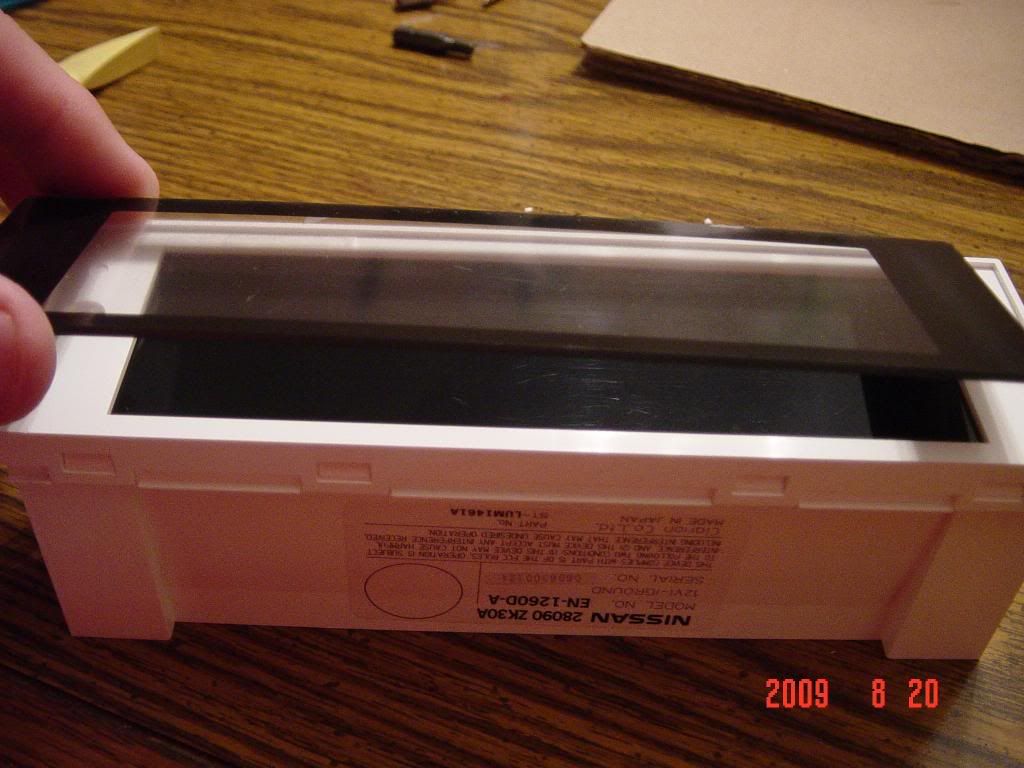
Then you can see the two screws on either side that the plastic screen was covering.
Take the screws out, release the tabs on one side of the case, and you can then open the case.
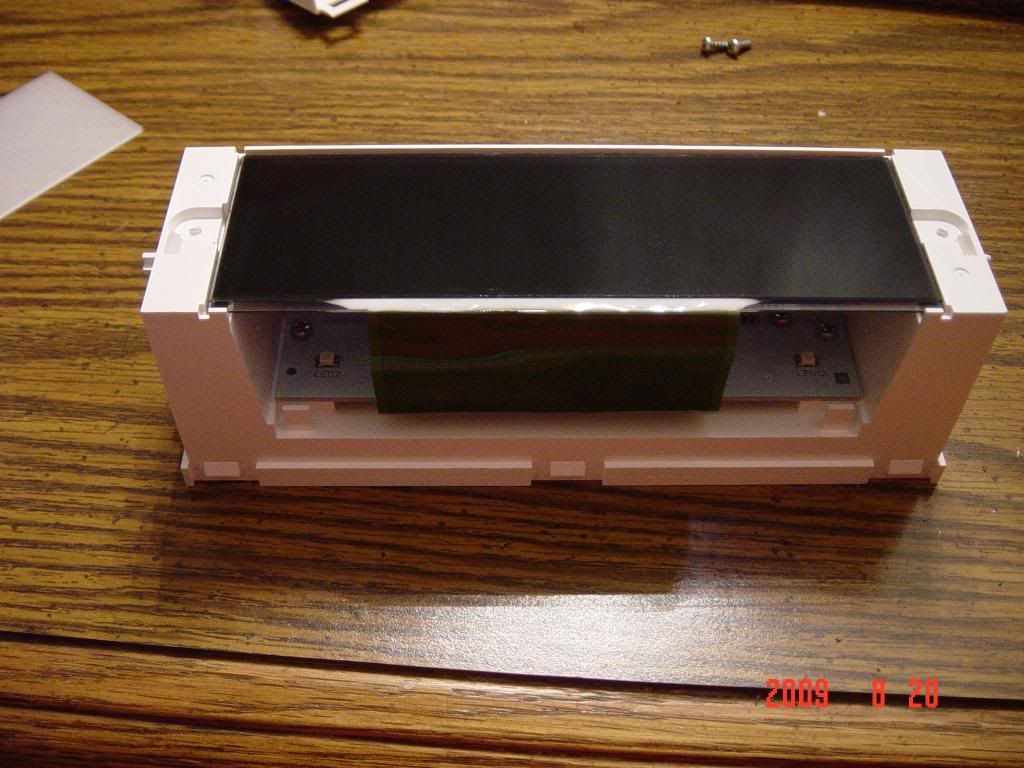
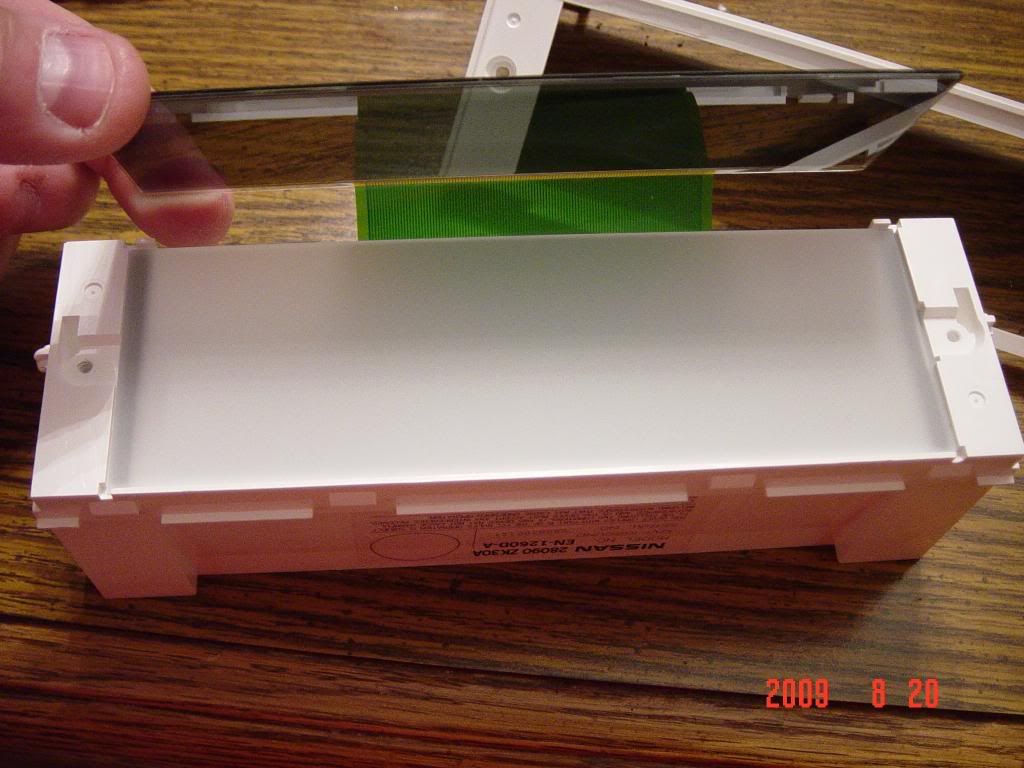
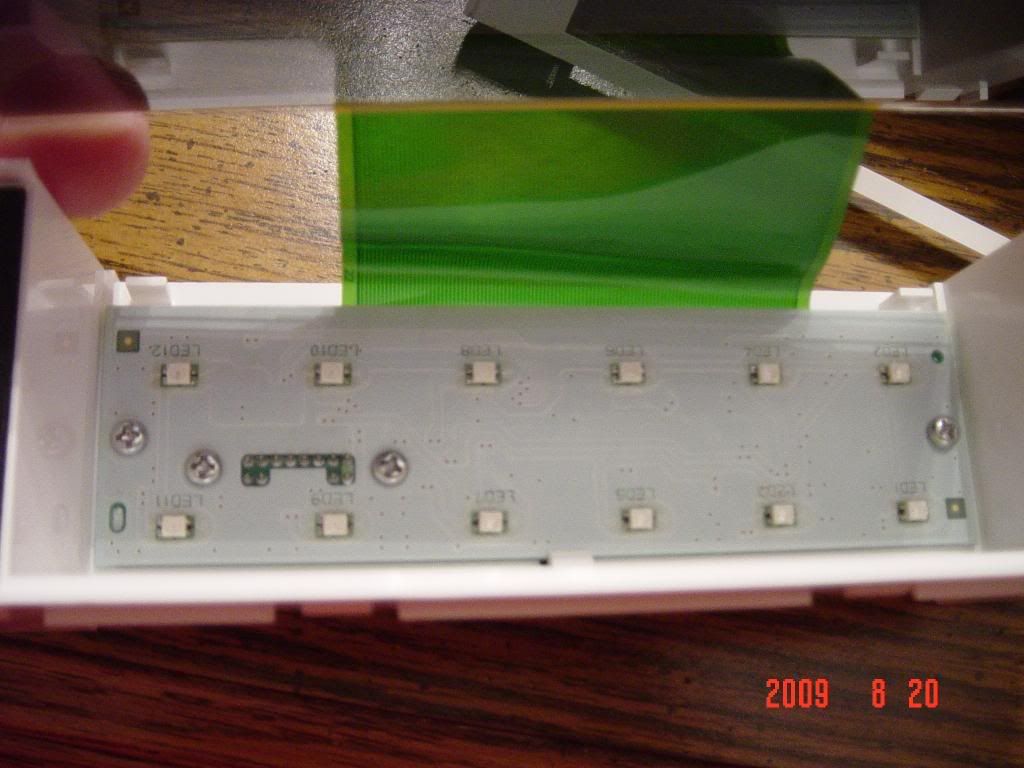
You then lift the glass panel out of the case, and it will expose the circuit board. The glass panel is attached to the circuit board via a ribbon cable. The ribbon cable is PERMANENTLY attached to the circuit board, so be very careful when handling it. You DO NOT want to damage the cable. Once the glass panel is out of the way, you will have 2 screws holding the circuit board to the case. If anybody has any other questions, let me know.
Then you can see the two screws on either side that the plastic screen was covering.
Take the screws out, release the tabs on one side of the case, and you can then open the case.
You then lift the glass panel out of the case, and it will expose the circuit board. The glass panel is attached to the circuit board via a ribbon cable. The ribbon cable is PERMANENTLY attached to the circuit board, so be very careful when handling it. You DO NOT want to damage the cable. Once the glass panel is out of the way, you will have 2 screws holding the circuit board to the case. If anybody has any other questions, let me know.
Last edited by 1hawaii50; Aug 23, 2009 at 02:53 AM.
The two screws at either end are the ones you remove, the two "middle" screws are for the plug, you DO NOT have to take them out, only the two screws at either end.
Last edited by 1hawaii50; Aug 23, 2009 at 02:50 AM.

Senior Member
Joined: Feb 2009
Posts: 1,264
From: DA Bronx, NY
Nice Job Hawaii, i cant wait to see the finished job, what color led's are you going to put in there. you might wanna offer up the service for changing the led's for the other members, I'd be interested for sure.
I've got everything swapped out except for the NIRD-01 display, the steering wheel controls, and the speedo cluster. I've finished the HVAC display, HVAC controls, Radio/Driver info display, all door switches, and the rear sonar/power mirror/traction control/dimmer switches. I'm going to try to work on the speedo cluster today, and I didn't have the right sized LED's for the NIRD display. I just got some new LED's in, so I have to see if they fit the display. I'll post pics this week as soon as I have the whole thing done.

Senior Member
Joined: Jun 2007
Posts: 370
From: Boston
I've got everything swapped out except for the NIRD-01 display, the steering wheel controls, and the speedo cluster. I've finished the HVAC display, HVAC controls, Radio/Driver info display, all door switches, and the rear sonar/power mirror/traction control/dimmer switches. I'm going to try to work on the speedo cluster today, and I didn't have the right sized LED's for the NIRD display. I just got some new LED's in, so I have to see if they fit the display. I'll post pics this week as soon as I have the whole thing done.
I've got everything finished and re-installed. It came out GREAT! Pics are here:
http://forums.maxima.org/6th-generat...ml#post7174807
For now, I left the needles red, I'm kinda liking the contrast.
http://forums.maxima.org/6th-generat...ml#post7174807
For now, I left the needles red, I'm kinda liking the contrast.

Thread
Thread Starter
Forum
Replies
Last Post
Omar Abdurrahman Siddiqi
5th Generation Maxima (2000-2003)
33
Aug 26, 2016 05:18 PM
The Wizard
4th Generation Maxima (1995-1999)
24
Oct 1, 2015 08:47 PM